barlowrs
Explorer
Hey Guys, well, I took my truck in for a service yesterday, and while there, the dealership called me to tell my cabin air filter was dirty and they recommended replacing it. I asked how much it would cost…..get this…$79.00!!!!!! I said no way, I can do that myself. If you have ever done this it is LITERALLY (not exaggerating) about a two minute job.
When I went to go pick the truck up, I purchased a new one from the parts dep for $29.99, so if you think about it, the dealer getting one at cost, lets assume $20.00….they would have charged me $60.00 for labor to do a job that takes 2 mins. WOW!
After getting home I got to thinking about my recent purchase though. Why should I spend $30 bucks every time my filter gets bad (with lots of dust and dirt, this is pretty often) so I decided to look into making a reusable one. This would allow me to clean it for free anywhere, even if I am out in the mountains.
So here we go:
Tools:
Good pair of scissors, or knife
Drill (could just use the knife to pike holes)
Materials:
Web Plus Adjustable Electrostatic Washable Furnace/Filter (about 20 bucks at home depot)

So, first off, I used the new filter I bought to get the dimensions, this filter is exactly 8” x 8”. Each square on the mesh is 1” so it is pretty easy. I cut out from the center section because there is a plastic rivet that holds all the layers of filter together.
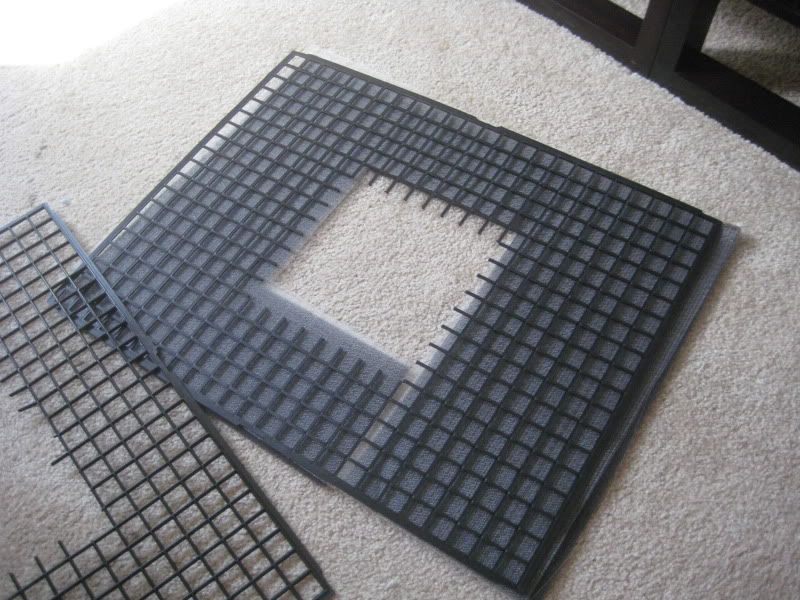
Once you get the filter and plastic mesh all cut out, you take the frame apart. Using the SMALLER (skinnier) sides (that fit inside when adjusting) you cut them down to size. The skinnier sections fit perfectly in the truck.
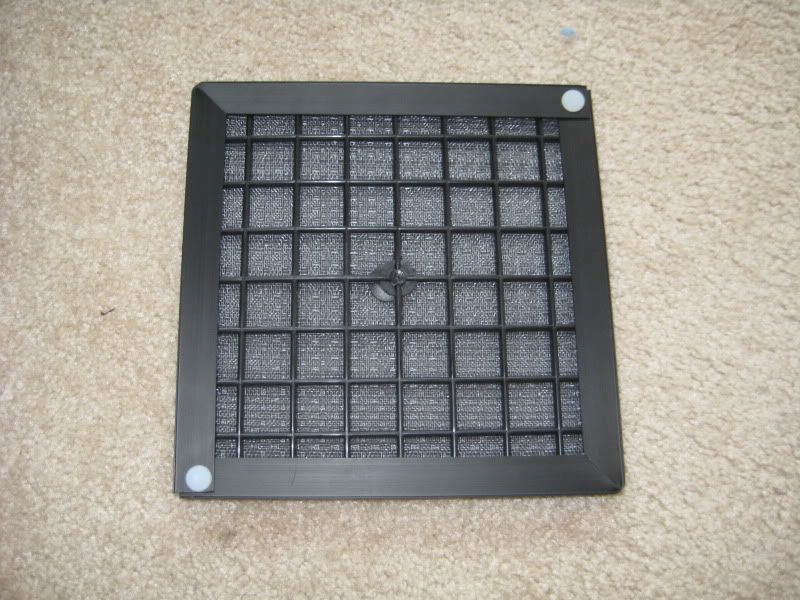
I then drilled a hole in the two corners that needed to be connected and use the white plastic rivets that are included to snap them together.
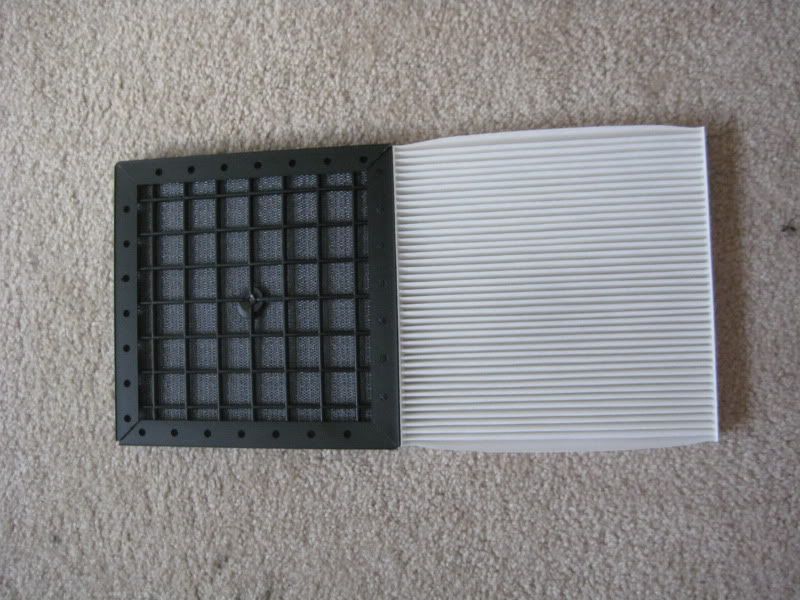
You can see the washable compared ot the new dealer filter. It’s a prefect fit..now you can wash your filter whenever you want!
When I went to go pick the truck up, I purchased a new one from the parts dep for $29.99, so if you think about it, the dealer getting one at cost, lets assume $20.00….they would have charged me $60.00 for labor to do a job that takes 2 mins. WOW!
After getting home I got to thinking about my recent purchase though. Why should I spend $30 bucks every time my filter gets bad (with lots of dust and dirt, this is pretty often) so I decided to look into making a reusable one. This would allow me to clean it for free anywhere, even if I am out in the mountains.
So here we go:
Tools:
Good pair of scissors, or knife
Drill (could just use the knife to pike holes)
Materials:
Web Plus Adjustable Electrostatic Washable Furnace/Filter (about 20 bucks at home depot)
So, first off, I used the new filter I bought to get the dimensions, this filter is exactly 8” x 8”. Each square on the mesh is 1” so it is pretty easy. I cut out from the center section because there is a plastic rivet that holds all the layers of filter together.
Once you get the filter and plastic mesh all cut out, you take the frame apart. Using the SMALLER (skinnier) sides (that fit inside when adjusting) you cut them down to size. The skinnier sections fit perfectly in the truck.
I then drilled a hole in the two corners that needed to be connected and use the white plastic rivets that are included to snap them together.
You can see the washable compared ot the new dealer filter. It’s a prefect fit..now you can wash your filter whenever you want!