You are using an out of date browser. It may not display this or other websites correctly.
You should upgrade or use an alternative browser.
You should upgrade or use an alternative browser.
3rd Gen Toyota Pickup - Budget Expo Build
- Thread starter DeskToGlory
- Start date
DeskToGlory
Adventurer
Update from the road!
Finally time for a quick catchup! We're already on the road heading south (stealing wi-fi in Florence, Oregon) but thought I should work on catching up this build a little bit!
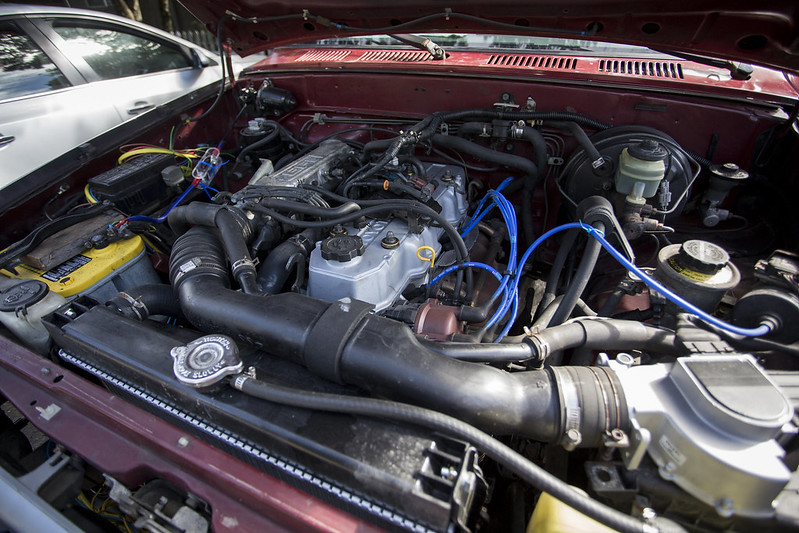
The new engine was dropped in about 5 weeks ago, was broken in, and then dropped off at Disturbed Industries for a valve adjust and oil change. Since we were cutting it really close to our departure date I left Ryan to complete the fluid changes and do a full tuneup on the 22RE. We ended up replacing most of the vital engine sensors since they were all either not working at all or out of spec significantly. The thing runs like a dream! Well... a 100hp dream at least! A new flywheel, clutch, and radiator were installed at the same time as the engine.
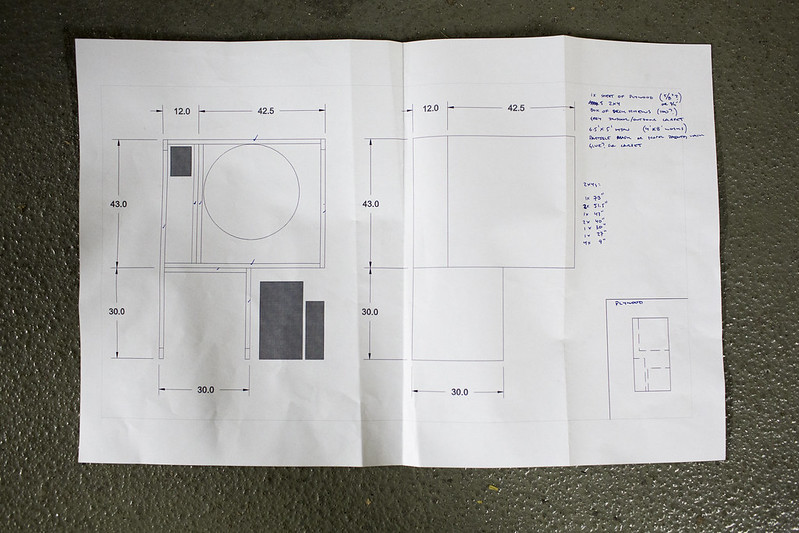
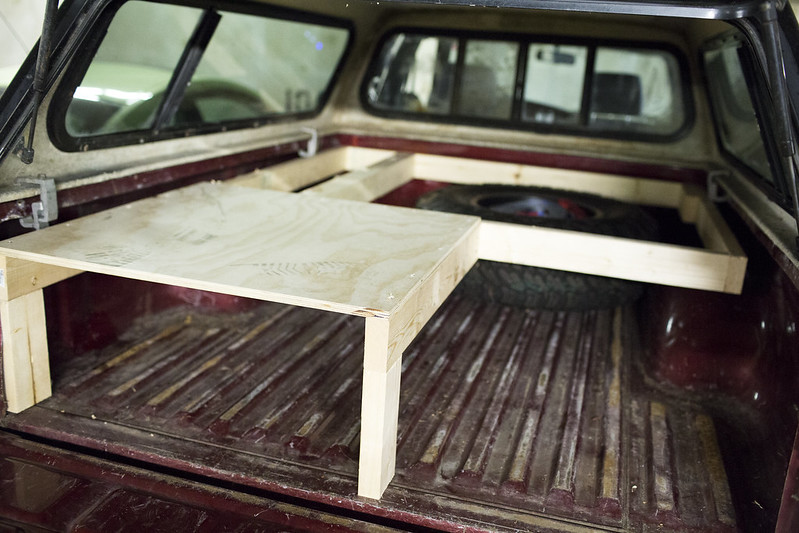
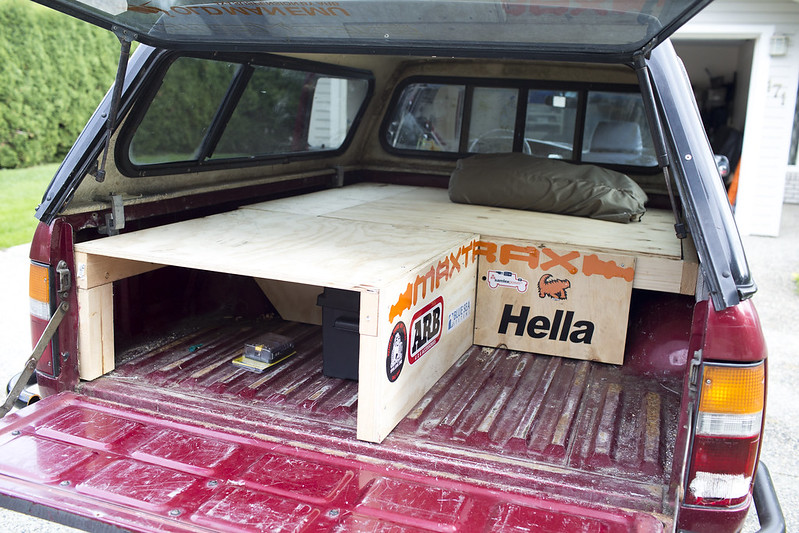
I went to Home Depot armed with a quick sketch of the platform I wanted to build. They cut the 2x4s and plywood for me and I utilized my underground parking space to screw it together. After $70 and 45 minutes of my time I gained a bunch of space for storage. Nice. My grandiose plans for a sliding drawer and hinged/locked platform wasn't in the cards this time.

A set of Trail Gear rock sliders and a rear bumper were bolted on as well. Looks like they shipped me the wrong bumper since it was too narrow to open the tailgate without hitting... nothing a sawzall couldn't fix! Whoops!
Since I didn't have access to a welder the week before departure so I ended up bolting together a roof rack out of angle iron and unistrut. It's fine for now, but I expect I'll be happier when I eventually weld it up.
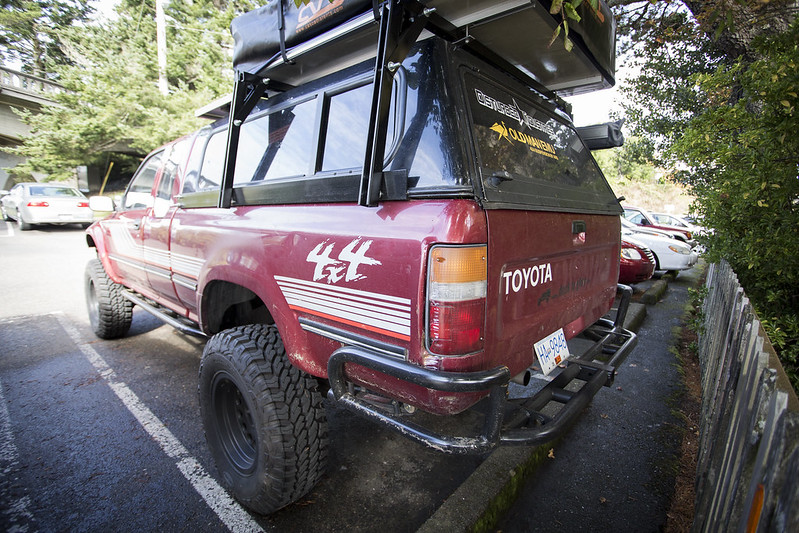
Our Cascadia Vehicle Tent looks pretty good up there! Our ARB awning is bolted on the other side.

I'll detail our Samlex inverter and solar install in a future post, but for now we've been on the road for about 5 days and are quickly chasing the sun! Check out our current location here: http://desktoglory.com/current-location/
Finally time for a quick catchup! We're already on the road heading south (stealing wi-fi in Florence, Oregon) but thought I should work on catching up this build a little bit!
The new engine was dropped in about 5 weeks ago, was broken in, and then dropped off at Disturbed Industries for a valve adjust and oil change. Since we were cutting it really close to our departure date I left Ryan to complete the fluid changes and do a full tuneup on the 22RE. We ended up replacing most of the vital engine sensors since they were all either not working at all or out of spec significantly. The thing runs like a dream! Well... a 100hp dream at least! A new flywheel, clutch, and radiator were installed at the same time as the engine.
I went to Home Depot armed with a quick sketch of the platform I wanted to build. They cut the 2x4s and plywood for me and I utilized my underground parking space to screw it together. After $70 and 45 minutes of my time I gained a bunch of space for storage. Nice. My grandiose plans for a sliding drawer and hinged/locked platform wasn't in the cards this time.
A set of Trail Gear rock sliders and a rear bumper were bolted on as well. Looks like they shipped me the wrong bumper since it was too narrow to open the tailgate without hitting... nothing a sawzall couldn't fix! Whoops!
Since I didn't have access to a welder the week before departure so I ended up bolting together a roof rack out of angle iron and unistrut. It's fine for now, but I expect I'll be happier when I eventually weld it up.
Our Cascadia Vehicle Tent looks pretty good up there! Our ARB awning is bolted on the other side.
I'll detail our Samlex inverter and solar install in a future post, but for now we've been on the road for about 5 days and are quickly chasing the sun! Check out our current location here: http://desktoglory.com/current-location/
Ruined Adventures
Brenton Cooper
Lookin' good. The battery hold-down looks a lot like ours :sombrero:
DeskToGlory
Adventurer
Lookin' good. The battery hold-down looks a lot like ours :sombrero:
It definitely does the job!
")
Arktikos
Explorer
I think the 22RE trucks had about the right amount of power---everything else these days just has too much! How are you supposed to see anything if you go up mountain passes at 75 mph?
I agree. Like this build.
DeskToGlory
Adventurer
I agree. Like this build.
Yeah, it's a lot easier to stop for a lookout when you're only in second gear on some of these mountain passes! Still knocking down 18-20mpg though, so not too bad!
4Rescue
Expedition Leader
Lovely looking truck... I'm a big OME suporter (I've run their stuff on lots of trucks) but I'd highly suggest getting some SDRI Ball-Joint sacers to correct the rake. Those springs WILL NOT come down that much under load. Over time... some, but not as much as you'd think. I haul a LOT of weight in my 1st gen 4Runner (same suspension/springs) and after 7 years the springs have MAYBE sagged 1/4". WMMV, but the BJ spacers work great and you can leave the T-bars alone instead of ruining the ride quality to get the truck level.
Again, lovely truck, it's kinda got me wishing I'd have found a 3rd gen P/U for my diesel swap instead of a 95 4Runner (esp. considering I'm swapping it over to leaves in back anyway), but there are pro's and cons to both IMO. Still, those X-Cab's just looks sweet all built up and they can haul a LOT of stuff (even my 1st Gen is called "the black hole" cause people are amazed at how that small a truck can swallow gear and stuff so easily. it's like Dr. Who's Tardis, "it's bigger on the inside" hahahaaha).
Happy building, I'll be watching this thread for sure.
Cheers
Dave
DeskToGlory
Adventurer
Lovely looking truck... I'm a big OME suporter (I've run their stuff on lots of trucks) but I'd highly suggest getting some SDRI Ball-Joint sacers to correct the rake. Those springs WILL NOT come down that much under load. Over time... some, but not as much as you'd think. I haul a LOT of weight in my 1st gen 4Runner (same suspension/springs) and after 7 years the springs have MAYBE sagged 1/4". WMMV, but the BJ spacers work great and you can leave the T-bars alone instead of ruining the ride quality to get the truck level.
Again, lovely truck, it's kinda got me wishing I'd have found a 3rd gen P/U for my diesel swap instead of a 95 4Runner (esp. considering I'm swapping it over to leaves in back anyway), but there are pro's and cons to both IMO. Still, those X-Cab's just looks sweet all built up and they can haul a LOT of stuff (even my 1st Gen is called "the black hole" cause people are amazed at how that small a truck can swallow gear and stuff so easily. it's like Dr. Who's Tardis, "it's bigger on the inside" hahahaaha).
Happy building, I'll be watching this thread for sure.
Cheers
Dave
Yeah Dave, we ended up with a very slight rake fully loaded (not including extra water or fuel yet). Definitely happy with where it ended up and how it handles the weight. The choice to go with the Old Man Emu HD rear springs was a good one. We've hammered on it a bit getting to some decent boondocking spots and the suspension had definitely handled it well. Even with the RTT adding to the brutal COG we've pushed it in the corners as well with good results (we're still on the road!)
On another note, the ARB fridge is the greatest thing in the world! Cold beer, fresh produce, and fresh cheese/eggs are what I look forward to at the end of long driving day. I'll never understand a negative comment said about having a fridge.
All of the truck scales have been closed so I haven't been able to get a weight of the rig fully loaded. The 4.10s are killing me on certain roads, but 90% of the time they're okay. 4.56s would have been perfect and 4.88s would haven been a little steep I think. Over 5000km of driving we're averaging about 19mpg on a mix of 87-91 octane depending on where we are and how much fuel costs (we've seen a range of $3.40/gal in OR and $5.99/gal in Big Sur for 87 octane...).
DeskToGlory
Adventurer
We finally started an In-Progress Adventures Thread!
DeskToGlory
Adventurer
Dual Battery Install
Our dual battery and solar installation is finally a blog post! The photos and text are here: http://desktoglory.com/dual-battery-installation/
We opted to install a second battery after we purchased our ARB 12V 37qt Fridge/Freezer and Samlex 1000W inverter. After some consideration we also decided to install an 85W Samlex Solar panel. We hoped (and have been) spending up to a week on secluded beaches with no amenities except for what we bring in the truck. The solar panel has provided enough energy (up to 50W midday so far) to keep the fridge powered, run the Magic Bullet blender for morning smoothies and occasionally charge our laptops and camera batteries with the inverter.
Installation
Optima Batteries Yellowtop Deep Cycle Battery 34/78
Blue Sea Systems 120A SI ACR (Auto Charging Relay/Isolator)
Blue Sea Systems 6 Circuit Fuse Block
Samlex America 1000W Inverter SSW-1000-12A
Samlex America 1000W Inverter Installation Kit DC-1000-Kit
Samlex America Solar Charging Kit SRV-85-KIT
4ga Electrical Cables throughout with 100A fuses. From local stereo installation shop.
I initially thought the installation of the components may be time consuming (and it would have been for a really clean installation) but we threw this together the day before we left on our trip. It has been working flawlessly since then. Make sure to follow the manufacturers instructions for exact installation details.
1. Select a Mounting Location
We chose to install Delta aluminum tool box where our rear seats used to reside. We installed a battery box to house our Optima Battery. The rest of our components were screwed or bolted to the inside of the tool box. Don’t forget to install a good quality ground cable from the battery to your truck frame. We used a couple of marine style battery terminals to attach all of the components to the battery posts. A couple of terminal strips would make for a cleaner install, but this way works and was really quick.
2. Connect Blue Sea ACR Isolator
We used 4ga cable and a 100A fuse to connect our two Optima Yellowtops together. Once one of the batteries reaches 13.5V the ACR closes and connects the two batteries in parallel. The truck alternator charges the ‘house’ battery when running, but the solar can also charge the truck battery when it's not.
3. Connect Blue Sea 6 Circuit Fuse Block
We used a couple of short lengths of 4ga cable to connect the fuse block to the battery. 10ga Cable was installed from one of the connections to the fridge.
4. Install Samlex America 1000W Pure Sine Wave Inverter
We took the really easy route here and used one of the Samlex inverter installation kits to connect this to the battery. Four screws attached the inverter to the outside of the tool box and then a couple of 4ga cables connect the inverter to the battery. Easy.
The inverter remote was installed in our aluminum lock box. The supplied template was used to mark the box where it needed to be cut and have holes drilled.
5. Install Samlex America 85W Solar Charging Kit
Once again, the Samlex kit came with everything needed to do the job. We mounted the 85W solar panel on the front half of our fiberglass canopy. The panel would be more efficient if we could angle it perpendicular to the sun, but this definitely works well and doesn’t require any effort once installed. All it took to install the panel was to mark four holes on the canopy, drill the holes, insert the supplied anchors, and bolt it down. We kept the panel covered to avoid having it create any voltage before connecting it to the charge controller.
The solar charge controller was installed in our aluminum lock box. The supplied template was used to mark the box where it needed to be cut and have holes drilled.
We used the 10ga cables from the kit to connect the battery to the charge controller. Then another set of cables were used to connect the solar panel to the battery. Once the cover was removed from the panel we were charging the battery. Done!
washington taco
Explorer
Great build thread! Makes me want to quit working and hit the road!
DeskToGlory
Adventurer
Following your blog often. What a great trip! What would you change about your setup so far?
Good question. I've been going back and forth on different rig setups since we've been on the road for just over three months.
For what we want to do and what our budget was this is the best setup for us. It was fairly inexpensive, it's super small/light and capable, so because of this we never have to worry about fitting down tight alleys or making it out of the middle of nowhere. Because it's inexpensive it means we can spend more nights renting (cheap) hotel rooms in big cities without feeling guilty that we spent too much money on a rig and that we should be using it. Our CVT tent is built really well with no sign of wear after 100 nights camping, our ARB suspension is perfect for the backroads/topes/potholes, and the truck has been really really reliable.
A few things that would be on the wish list are:
1) ARB Outback drawers or similar to improve security and organization.
2) LED lights on the inside of the canopy and on the outside as flood lights.
3) Regear to 4.56s and a locker of some flavor in the rearend.
Saying that, having indoor living space when the weather sucks would be amazing. Something like a small Four Wheel Camper would be awesome, but it would have cost $14,000 vs the $1000 tent. I feel like this would be a great lightweight option that would still be super capable off road if it was in the budget.
Also... I've been looking at lot at Ford E Series vans. Having the option to build a custom interior, throw on a U Joint Off Road 4x4 conversion on it, and have it be capable/comfortable with the ability to stealth camp would be awesome.
Last edited:
Forum statistics
Members online
- BajaSurfRig
- rdrop
- pwal13
- velonut
- sabjku
- CORunner
- Diamond Jim
- zip
- Series1Rangie
- Rolo1738
- mark5280
- jnr4095
- Savagenut
- Jonnyo
- campertramper
- yabodie
- matttahoe53
- YukonMontanaTannerTrapper
- khulk
- D0Z3R
- bcats4life
- syn0s
- Dans12
- 79bj40
- twowheeladdict
- SkiWill
- lunchwagon
- Jibby
- Ozarker
- CMARJEEP
- bigsam
- TommyG
- mowgli1313
- kmacafee
- marcantoine77
- madtownmaxx
- Skinhyfish
- MrGrodskyi
- Dirtriding4life
- TexasD-90
- sdwhip
- hawlinoates
- MotoDave
- honkonbobo
- 1965 Land Cruiser
- shoesnews95
- dizzydom
- jboerneke
- Switch
- robertmspeakout
Total: 978 (members: 56, guests: 922)