You are using an out of date browser. It may not display this or other websites correctly.
You should upgrade or use an alternative browser.
You should upgrade or use an alternative browser.
Trailblazer Build Daily Driver & Overlanding
- Thread starter karo
- Start date
karo
Observer
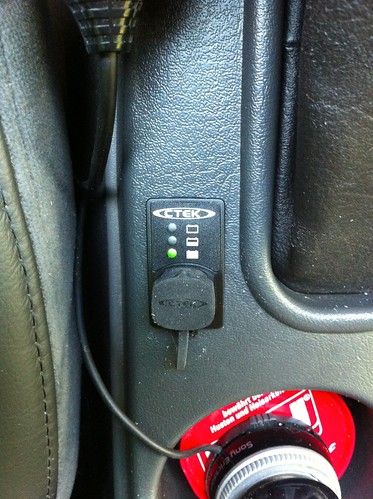
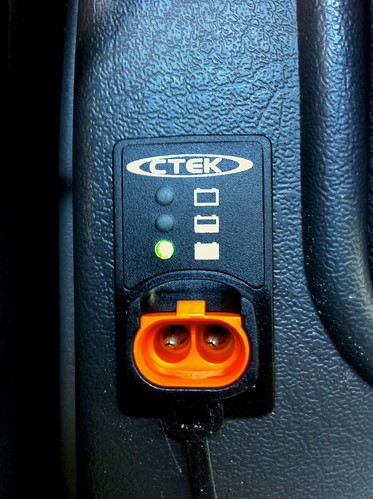
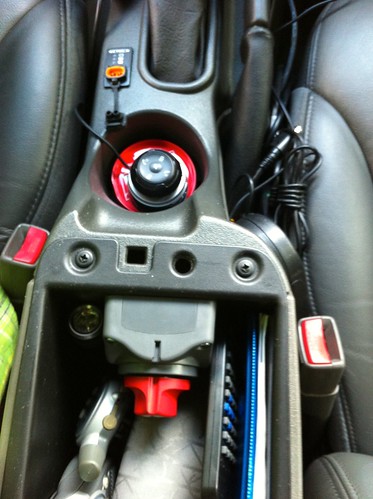
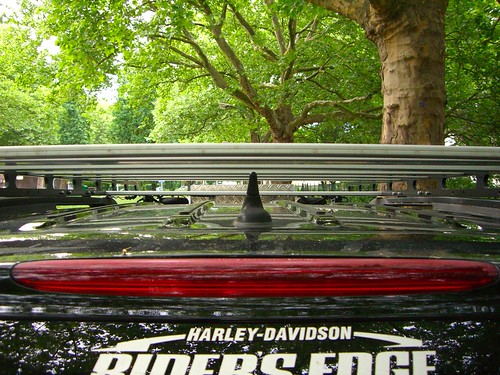
Installed today the CTEK Comfort Indicator Panel i have bought long ago. I have wired it to my battery selector switch in the center console, so i can choose what battery i want to monitor and charge. It has a socket for plugging the charger to the panel and it makes it practical and straightforward to charge the batteries.
karo
Observer
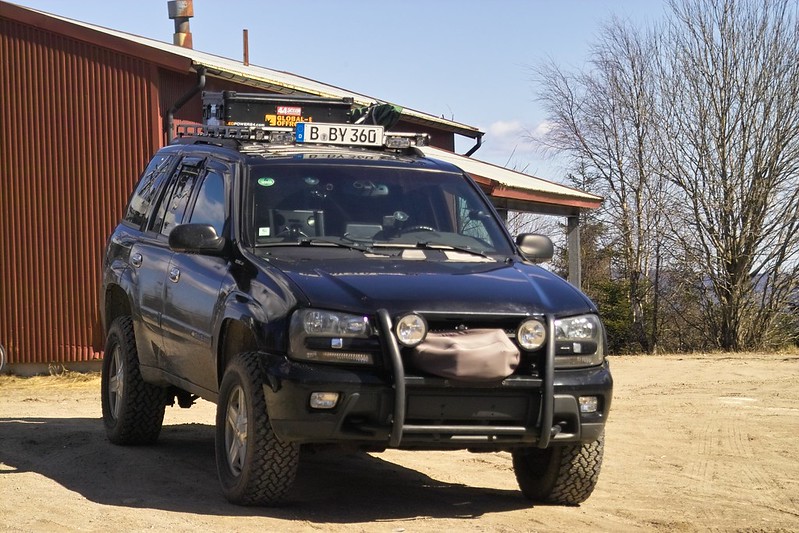
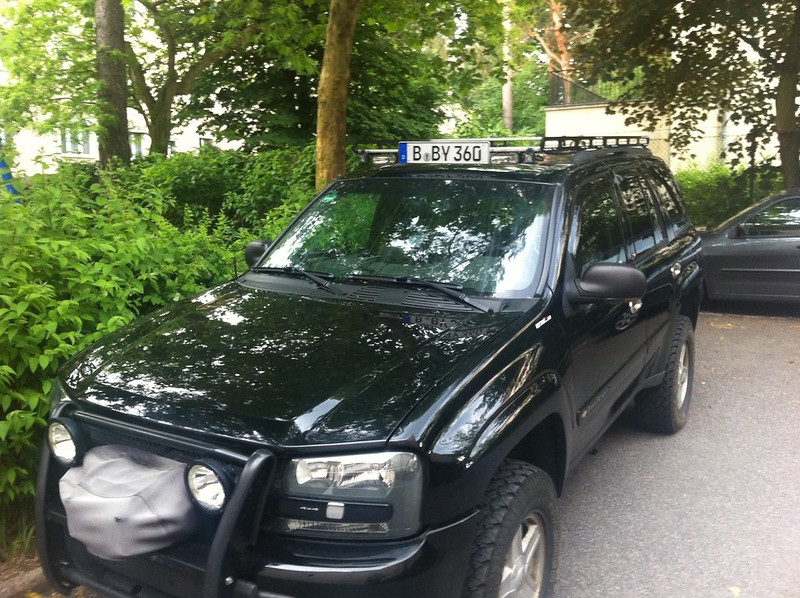
The idea was to have more energy for all the camping stuff like the Engel fridge, Notebook, TV and so on. As i have already a dual battery setup with a ctek dual 250s i would like to add a solar panel to charge the optima battery. But where to mount? Hm only place would be the roof, but i would like to have a roof tent too! So i have to redesign the roof rack. Drawings were done in Solid Edge V17 for the side rails. Here is a picture:

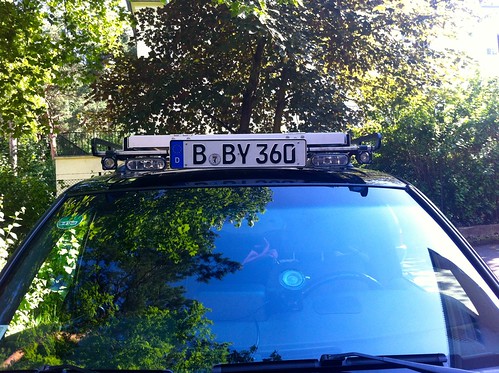
The side rails are now 210 cm long and the crossbar with the license plate and the lights on it go more in the direction to the upper edge of the windshield.
This is a older picture showing what i mean:

Hopefully get the side rails done next week, they will be laser cutting them and therefore they needed a drawing made (that was the reason i have tried that in Solid Edge)")
Thats the panel i want to use:
Here in the upper position:
There is a redesign for the folding in my mind as in the actual version the panel with the actuator is too high (would like to make it as flat as possible).
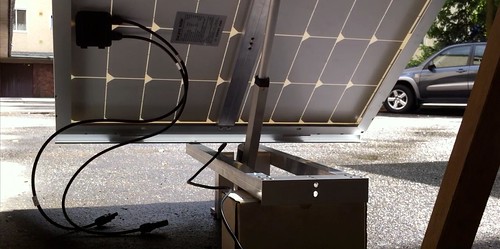
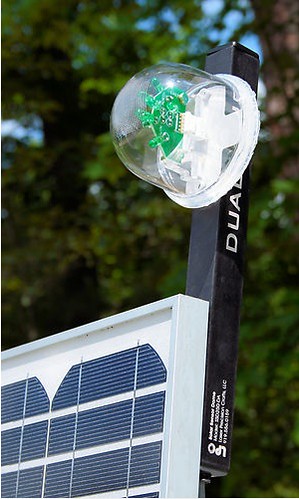
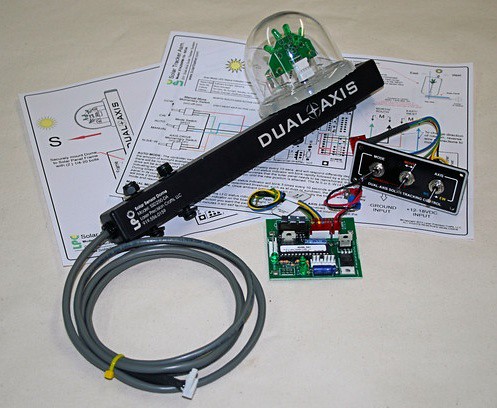
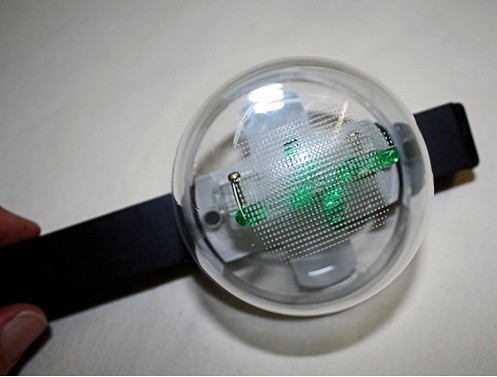
When it is ready, there is a solar tracking installed (which follows the sun when parking or camping) with these components:
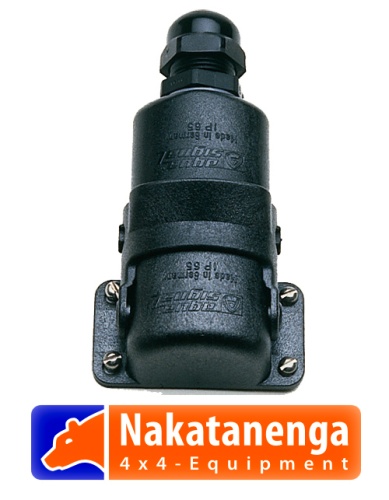
For going with all the cables trough the roof i go with this connector. It is sealed and it has 5 poles. Two of them are needed for the panel cables and the actuator cables.
SO THIS IS IN PROGRESS AND NOT READY
The side rails are now 210 cm long and the crossbar with the license plate and the lights on it go more in the direction to the upper edge of the windshield.
This is a older picture showing what i mean:
Hopefully get the side rails done next week, they will be laser cutting them and therefore they needed a drawing made (that was the reason i have tried that in Solid Edge)
Thats the panel i want to use:
Here in the upper position:
There is a redesign for the folding in my mind as in the actual version the panel with the actuator is too high (would like to make it as flat as possible).
When it is ready, there is a solar tracking installed (which follows the sun when parking or camping) with these components:
For going with all the cables trough the roof i go with this connector. It is sealed and it has 5 poles. Two of them are needed for the panel cables and the actuator cables.
SO THIS IS IN PROGRESS AND NOT READY
karo
Observer
Wow time is running from from my plans a long time ago. So i had to push this a little forward, right? :cheers:
Sometimes I wish I had some helpful hands on my side , but you guys are a little too far away.. So one of my sons (he is 4 years old) had to help me
As i have posted above i found a company that has produced the side rails with a water cutting machine. After that, the side rails have been powder coated. I had to cut on each side of the crossbar bosch profiles 0.75mm and after that i had to cut some new M6 screw thread in the bosch profiles because the side rails are much stronger (thicker) now. The holder for the roof rack had to be modified too. All have been done on friday and saturday.
Before shot:
and after shot:
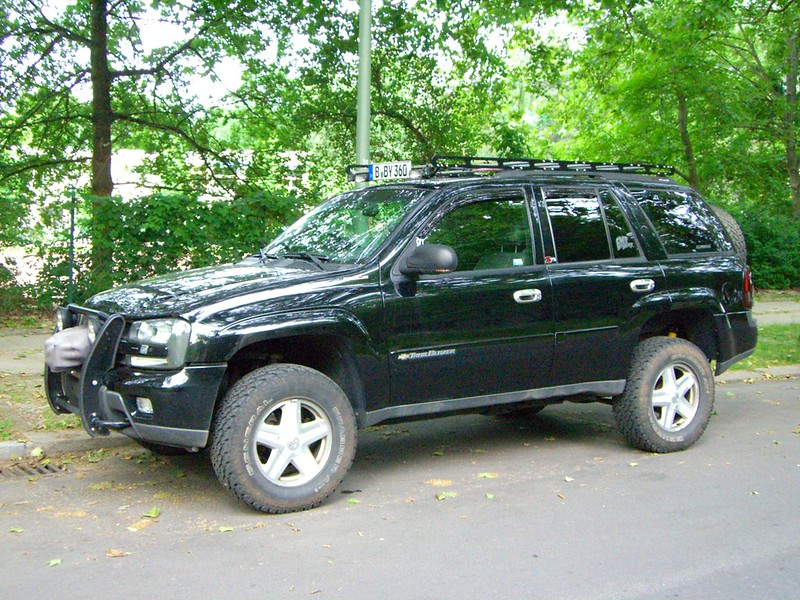
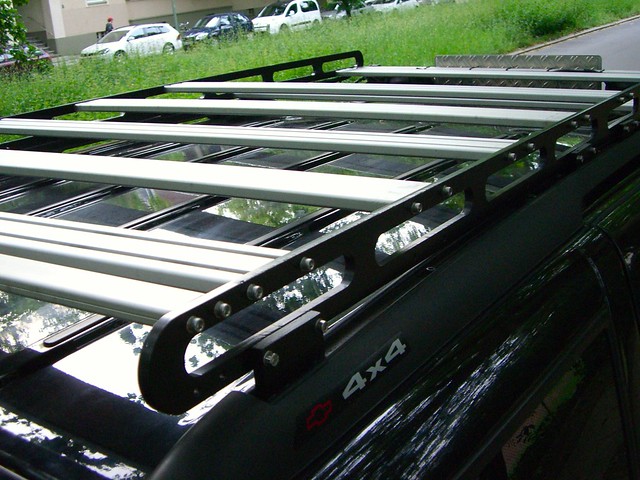
The side rails are now much longer and for the lights on top it is better to have them more towards the windshield positioned.
This are some detail shots from the passenger side front:
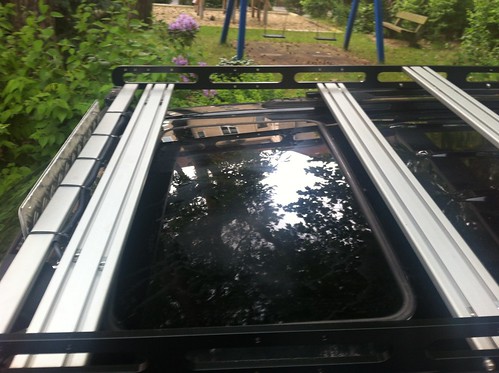
One of the best parts of this design is to have the window in the roof free for opening and cleaning.
I had the problem with this design in the past:

Now it is completely free accessible and i could clean the gasket or climb on the roof:
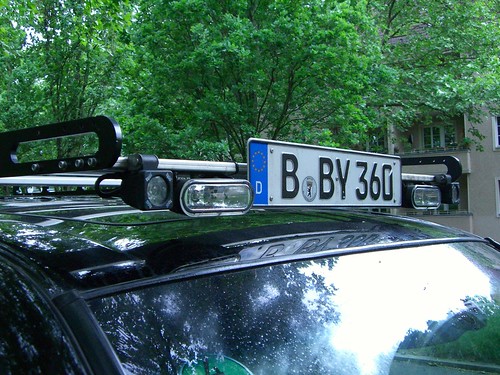
The crossbars are mounted in two different highs, for the front they are mounted lower on the side rails. This has the reason to mount the solar panel above the roof window on the crossbars on some slide rails. So when using the solar panel it slides out and stays above the windshield. Therefore the number license plate had to be mounted on the solar panel holder frame (that part comes later..). A little difficult to explain, but you could see it later. The rear part of the crossbars are mounted in the upper position and they will hold the roof top tent (that part comes later too). The RTT could be mounted over the side rails to get the RTT as close to the rear cargo door. These pictures explain what i mean:

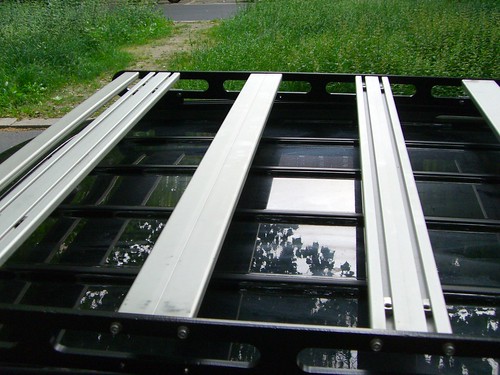
The space left under the crossbars will be used for holding my camping table. Of course i have to remove my antenna. The reason why i have mounted the crossbars on the back upside and downside is that i could mount the holder for the camping table under the crossbars.

That´s all for the moment. Next steps are drilling holes to the roof for the complete electrical connections and maybe some additional holder on the front of the roof to extend the frame rail function. And after that building the frame for the solar panel holder. Any ideas how to do things better?
Karsten
Sometimes I wish I had some helpful hands on my side , but you guys are a little too far away.. So one of my sons (he is 4 years old) had to help me
As i have posted above i found a company that has produced the side rails with a water cutting machine. After that, the side rails have been powder coated. I had to cut on each side of the crossbar bosch profiles 0.75mm and after that i had to cut some new M6 screw thread in the bosch profiles because the side rails are much stronger (thicker) now. The holder for the roof rack had to be modified too. All have been done on friday and saturday.
Before shot:
and after shot:
The side rails are now much longer and for the lights on top it is better to have them more towards the windshield positioned.
This are some detail shots from the passenger side front:
One of the best parts of this design is to have the window in the roof free for opening and cleaning.
I had the problem with this design in the past:
Now it is completely free accessible and i could clean the gasket or climb on the roof:
The crossbars are mounted in two different highs, for the front they are mounted lower on the side rails. This has the reason to mount the solar panel above the roof window on the crossbars on some slide rails. So when using the solar panel it slides out and stays above the windshield. Therefore the number license plate had to be mounted on the solar panel holder frame (that part comes later..). A little difficult to explain, but you could see it later. The rear part of the crossbars are mounted in the upper position and they will hold the roof top tent (that part comes later too)
. The RTT could be mounted over the side rails to get the RTT as close to the rear cargo door. These pictures explain what i mean:
The space left under the crossbars will be used for holding my camping table. Of course i have to remove my antenna. The reason why i have mounted the crossbars on the back upside and downside is that i could mount the holder for the camping table under the crossbars.
That´s all for the moment. Next steps are drilling holes to the roof for the complete electrical connections and maybe some additional holder on the front of the roof to extend the frame rail function. And after that building the frame for the solar panel holder. Any ideas how to do things better?
Karsten
02TahoeMD
Explorer
Any ideas how to do things better?
Karsten
You do not need to do things any better, you do great work! I am quite impressed at the mods you have done to this Trailblazer. Nice job. Thanks for sharing the pics from Sweden, it is nice to see photos from overseas. Happy wheeling.
02TahoeMD
Explorer
Thank you for your comment. I have watched the Thread from your Tahoe some years ago and liked it. It was you who drove with James Downing correct?
Yes sir. We have taken a couple of trail runs together. He has a superb Trailblazer, very well done.
karo
Observer
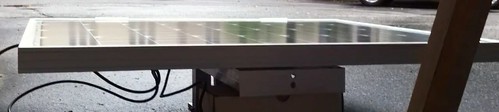
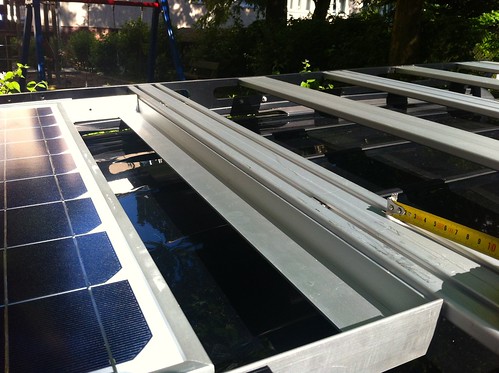
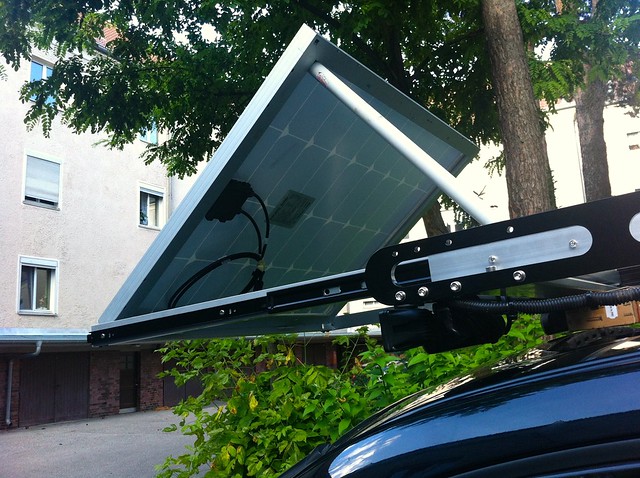
Next step was building a solar panel frame that could be mounted to the roof carrier. The panel isn´t connected so far.
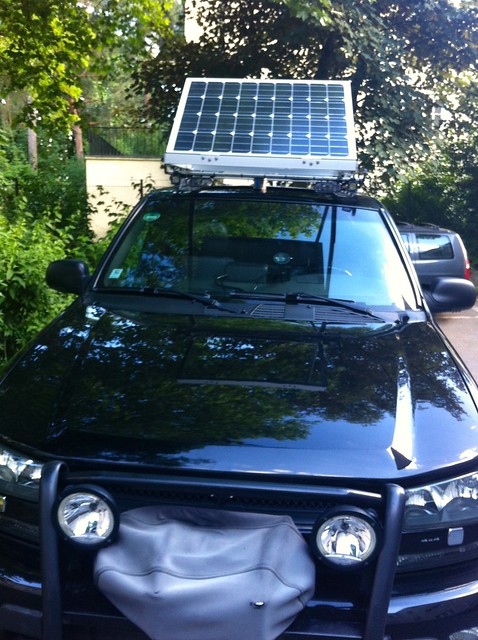
I have kept the frame and the panel as low as possible.
Detail shot from the side.

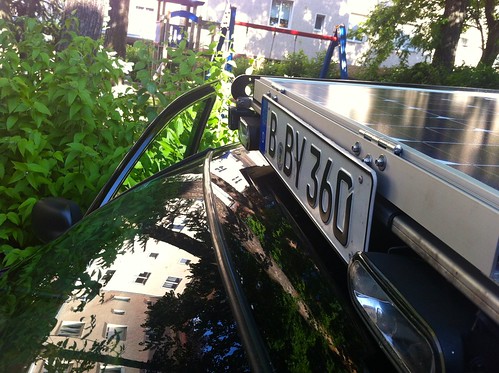
The rear part of the panel frame is extend to hold the tracker module and the actuator for folding the panel up and down.
View from above in the closed position.

Front closed shot detail view.
View from inside looking to the sunroof window.
Extended position, panel is above the windshield. That way i could open the roof window and climb on the roof carrier.

Side shot from the extended position.
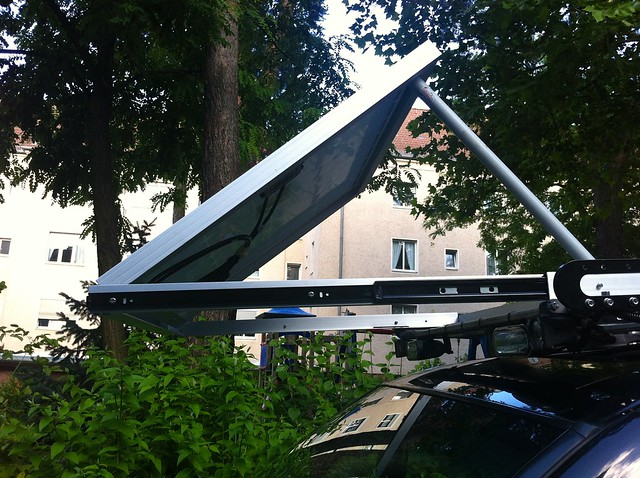
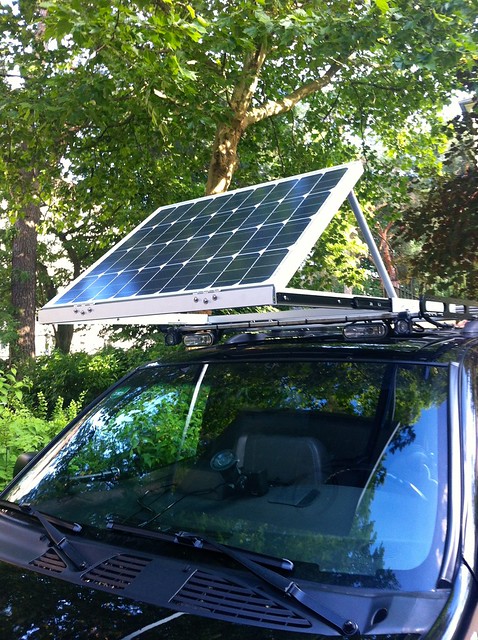
View from above

Panel could be easily removed from the side slide out in the extended position. it has some levers to pull up and remove the last slides out.
Hope you enjoy it like me. :cheers:
I have kept the frame and the panel as low as possible.
Detail shot from the side.
The rear part of the panel frame is extend to hold the tracker module and the actuator for folding the panel up and down.
View from above in the closed position.
Front closed shot detail view.
View from inside looking to the sunroof window.
Extended position, panel is above the windshield. That way i could open the roof window and climb on the roof carrier.
Side shot from the extended position.
View from above
Panel could be easily removed from the side slide out in the extended position. it has some levers to pull up and remove the last slides out.
Hope you enjoy it like me. :cheers:
HARDTRAILZ
Certified
Definitely a nice truck. Like the solar addition.
karo
Observer
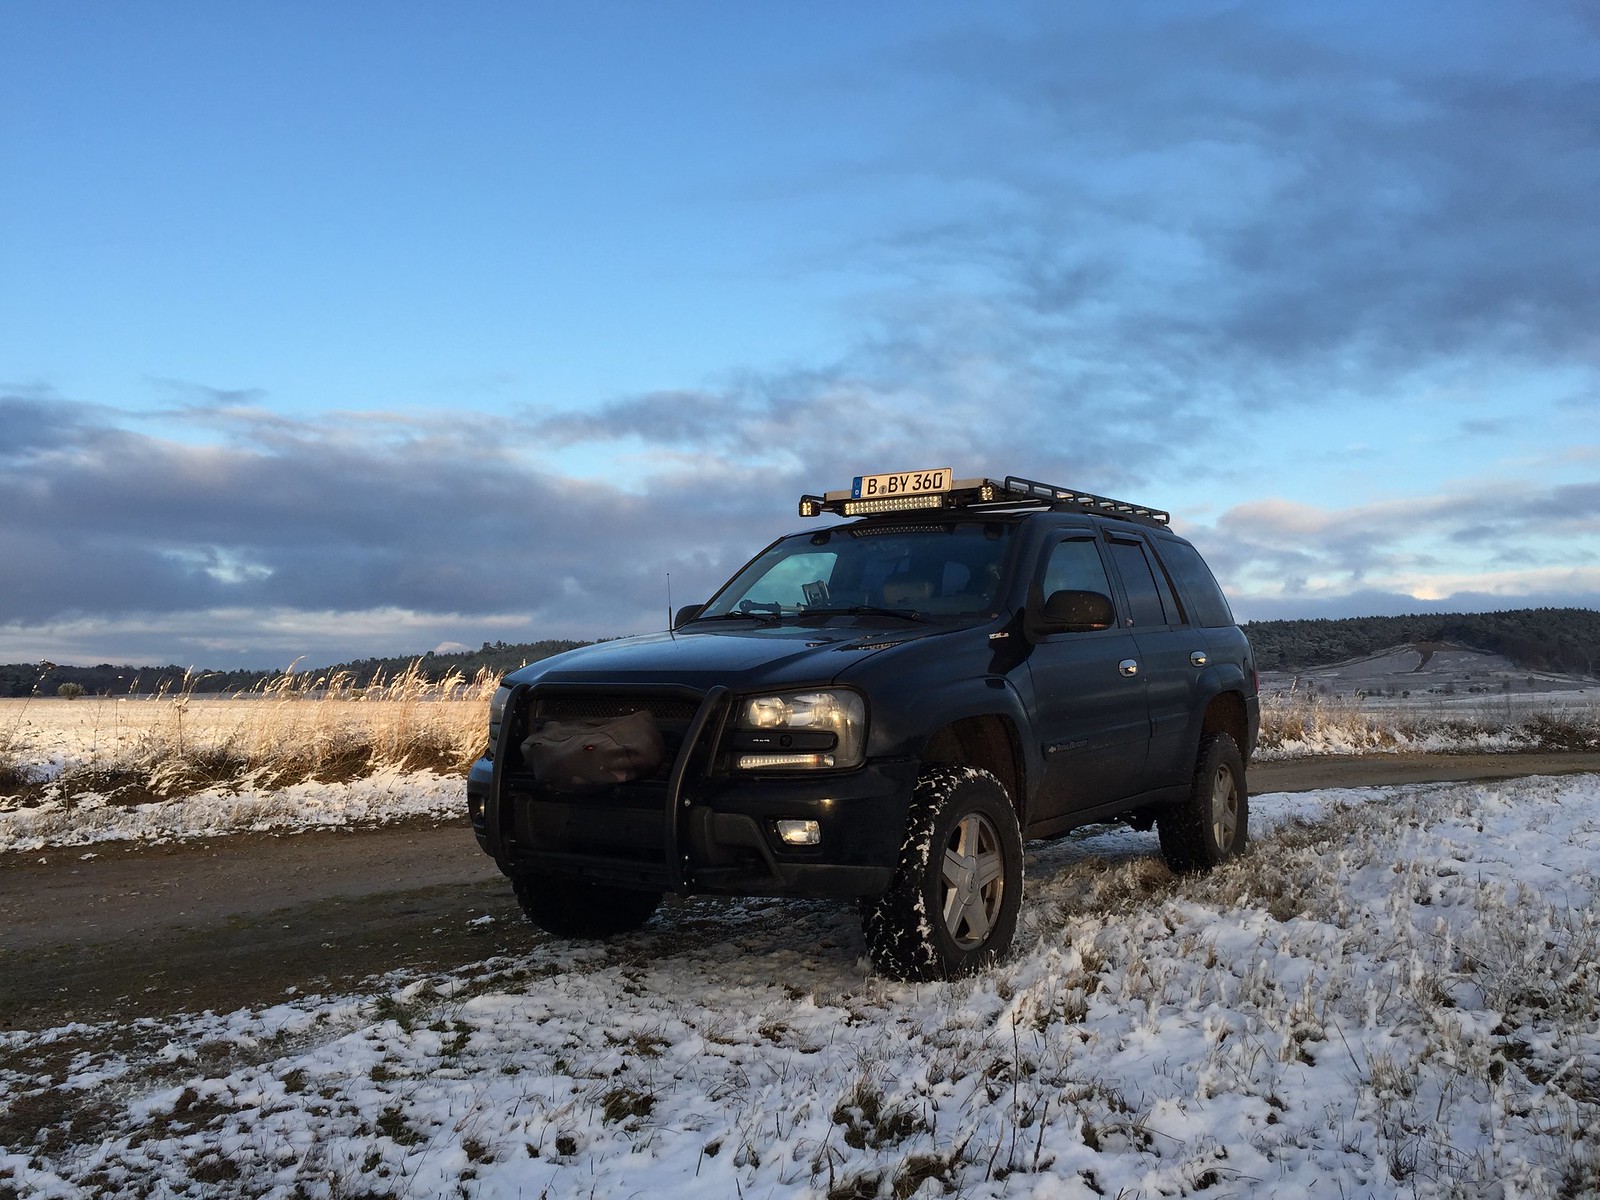
So today I have installed my Led Light Bar and replaced the visionX with the dual row work lights.
I have plastidipped the strut bar, looks much better now. License plate went to the solar panel frame.


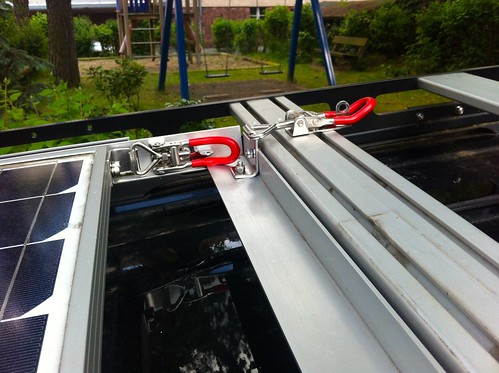
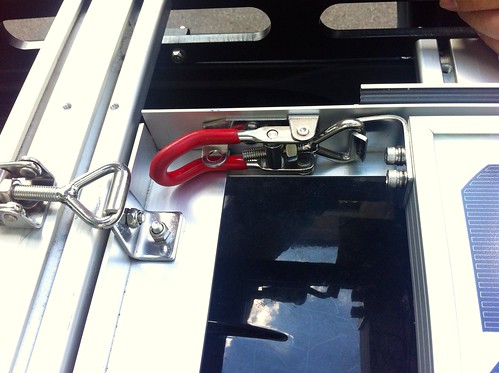
Yes had to update this thread. I have secured the solar panel with some fastener. 2 fastener for securing the panel in the horizontal position when in "drive mode". And another 2 fastener for securing the frame of the solar panel when the panel is not in the extended position. Pictures explain that better than words can do.
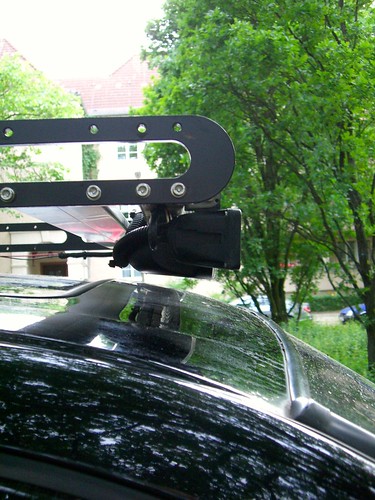
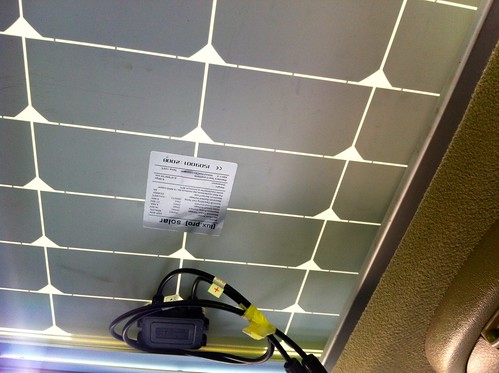
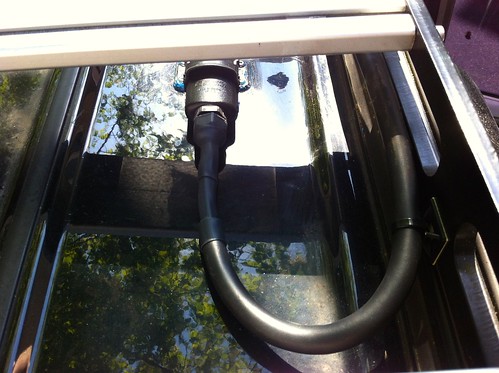
I have installed the sealed connector on the roof behind the passenger side rear door (there was enough room to get my hand between the headliner and the roof). Don´t want to destroy something from the cables or the mechanic from the roof sun glass. Drilled 5 holes for this connector. Thought that there are easier ways to get a cable to the roof, but overall needed the 5 poles. So I went this way. The connector was for applications on motorboats.
Connected on the inside to my ctek dual 250s.
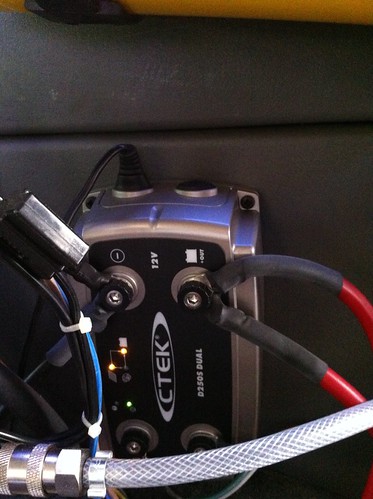
The leds are showing that the solar panel is connected and loading my secondary battery. So for now I´m using green electricity
The panel delivers 3,6 Ampere to my setup. So the next step ist to install the actuator for the electronic folding up and down.
I have plastidipped the strut bar, looks much better now. License plate went to the solar panel frame.
Yes had to update this thread. I have secured the solar panel with some fastener. 2 fastener for securing the panel in the horizontal position when in "drive mode". And another 2 fastener for securing the frame of the solar panel when the panel is not in the extended position. Pictures explain that better than words can do.
I have installed the sealed connector on the roof behind the passenger side rear door (there was enough room to get my hand between the headliner and the roof). Don´t want to destroy something from the cables or the mechanic from the roof sun glass. Drilled 5 holes for this connector. Thought that there are easier ways to get a cable to the roof, but overall needed the 5 poles. So I went this way. The connector was for applications on motorboats.
Connected on the inside to my ctek dual 250s.
The leds are showing that the solar panel is connected and loading my secondary battery. So for now I´m using green electricity
The panel delivers 3,6 Ampere to my setup. So the next step ist to install the actuator for the electronic folding up and down.
TommyMahoni
New member
wow, really nice TB. especially the swap to the 8.6 rear axle is very cool. i thought about the same swap to fit a reasonable, eaton e locker or detroit, locker. greetz from hanover