Rusty762's Project Overlander TJ 8

Rusty762

Adventurer
My goal with this project is to build a reliable rig (Overlander/Expedition style) I can drive long distances to a trail or to explore new areas and get back again comfortably in one piece with no breakage, I want to try to keep the vehicle as light as possible. I have had some trailer queens (2 FJ 40's, 69 Bronco) and non trailer queens, two Toyota trucks (84 xCab, 84 4 Runner) that I drove to regularly to Moab, high Sierras and Panamint/Johnson Valley but want a capable rig that can tackle the trails and get me home safely without the need of a tow vehicle and trailer. This is not a DD and is only going to be used for exploring and wheeling. The Jeep is the four-wheeled backpack of my life!

A little background on myself, I grew up in the Sierras and graduated college with a degree in forestry and recreation. I was a wildland firefighter for the US Forest Service for 12 years and spent another 7 years as a backcountry LE officer, my job was to manage the OHV trails on the Sierra National Forest. My patrol rig was a 1993 Jeep Wrangler, it started off stock and slowly I was able to add air lockers, atlas case, 33's, 4" lift, etc.. My job (in addition to trail maintenance and LE) was to drive the network of OHV trails on our forest which includes Swamp lake, Red lake, Coyote lake, mirror lake and the famous Dusy-Ershim trail to name a few. Every week for 7 years I drove one of the many trails on our two forest (Sierra and Kings River districts), it was a cool job and I miss the Clubs, trails and people I met but like any job there came a day I decided to do something different. I sold my trail rig and got involved in a new sport technical diving, that was 12 years ago and the last time I was wheeling...

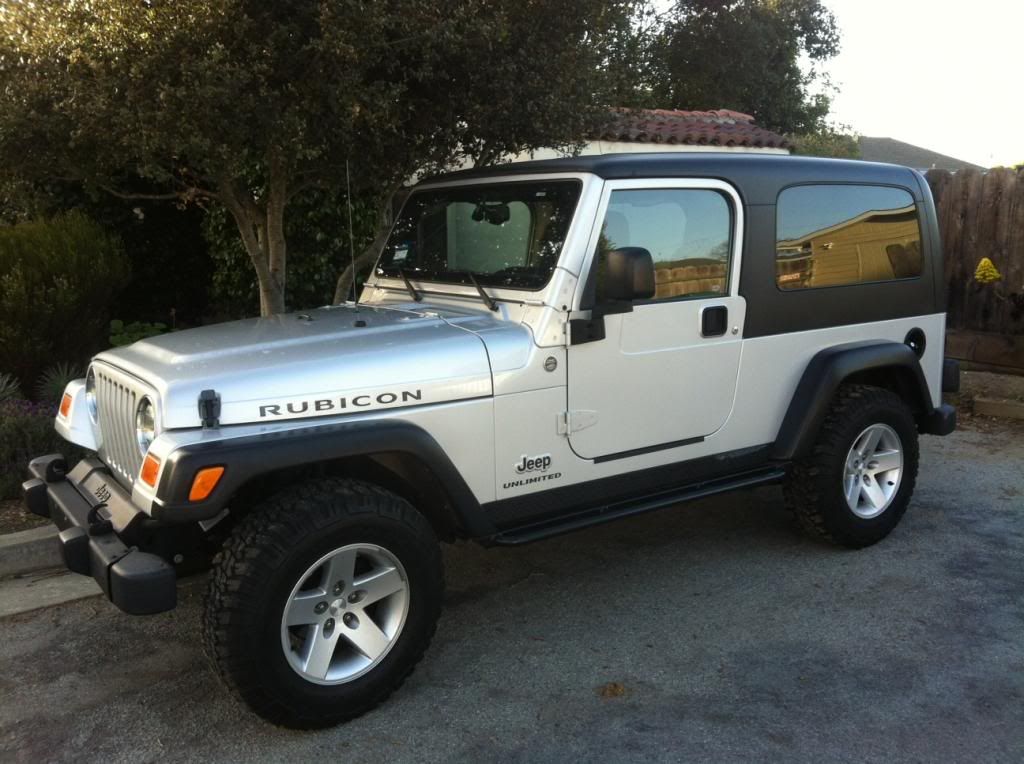
Monterey is a small town, I usually commute on a bicycle and have not needed a vehicle other than my Harley since I have lived here. Last year I started looking for a trail rig and narrowed the search down to an 05-06 Unlimited or Rubicon Unlimited. After 3 months of searching Cali, I found one 4 hours north of me with only 10,000 miles so I hitched a ride to the dealer for an inspection and ended up driving home my new project.

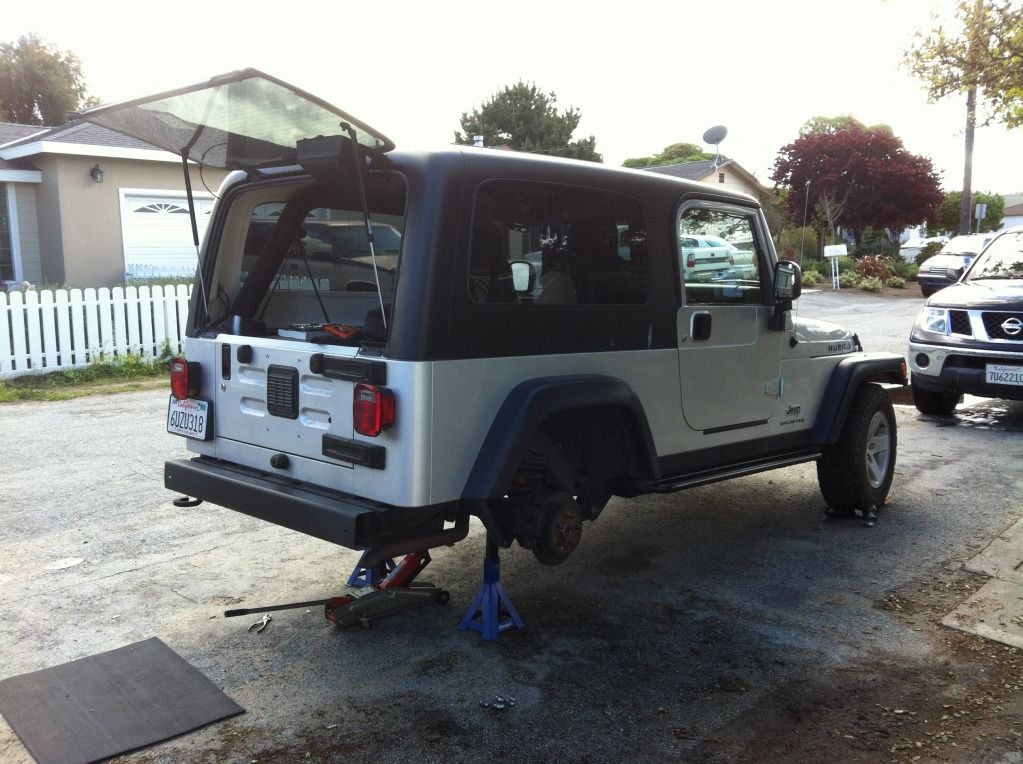
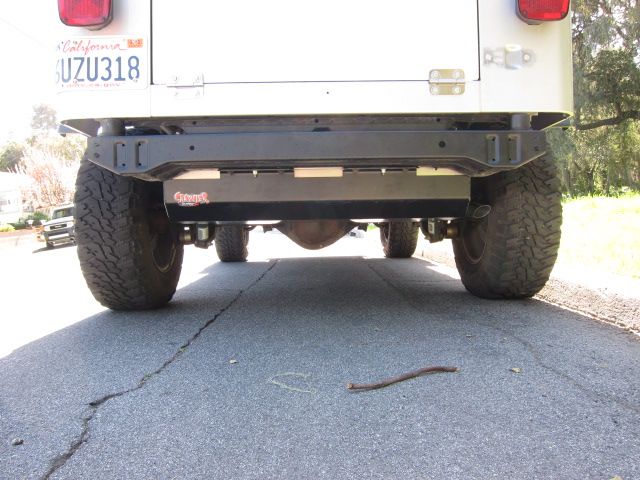
Here she is in all her stockness, no idea of whats about to happen.


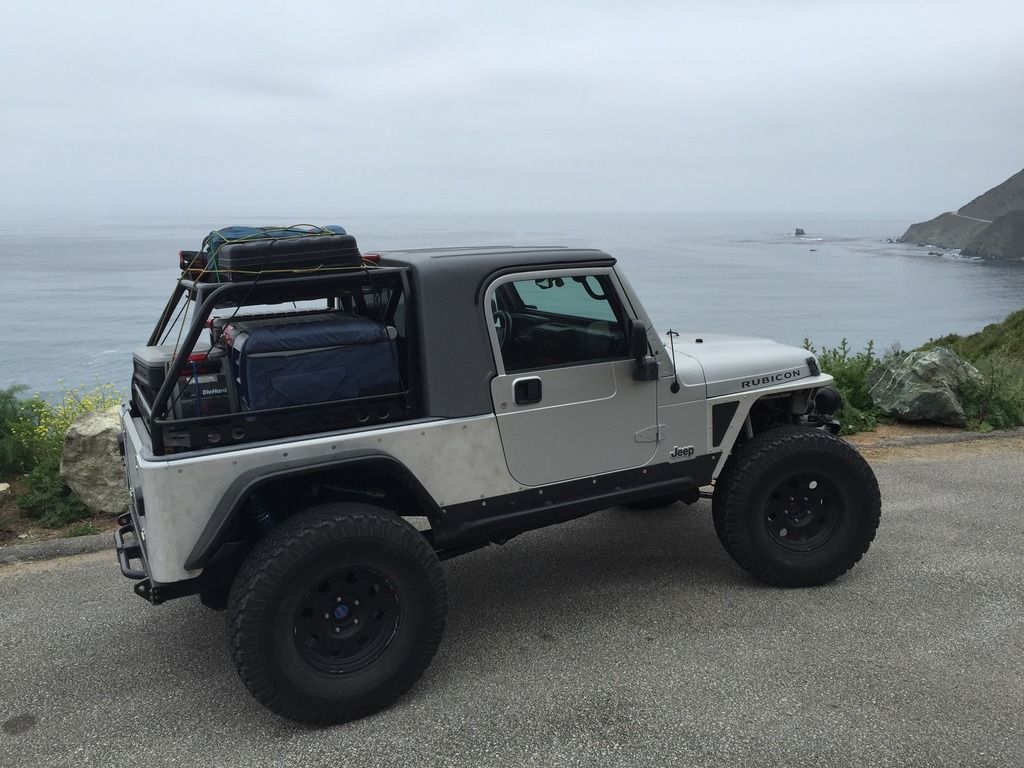
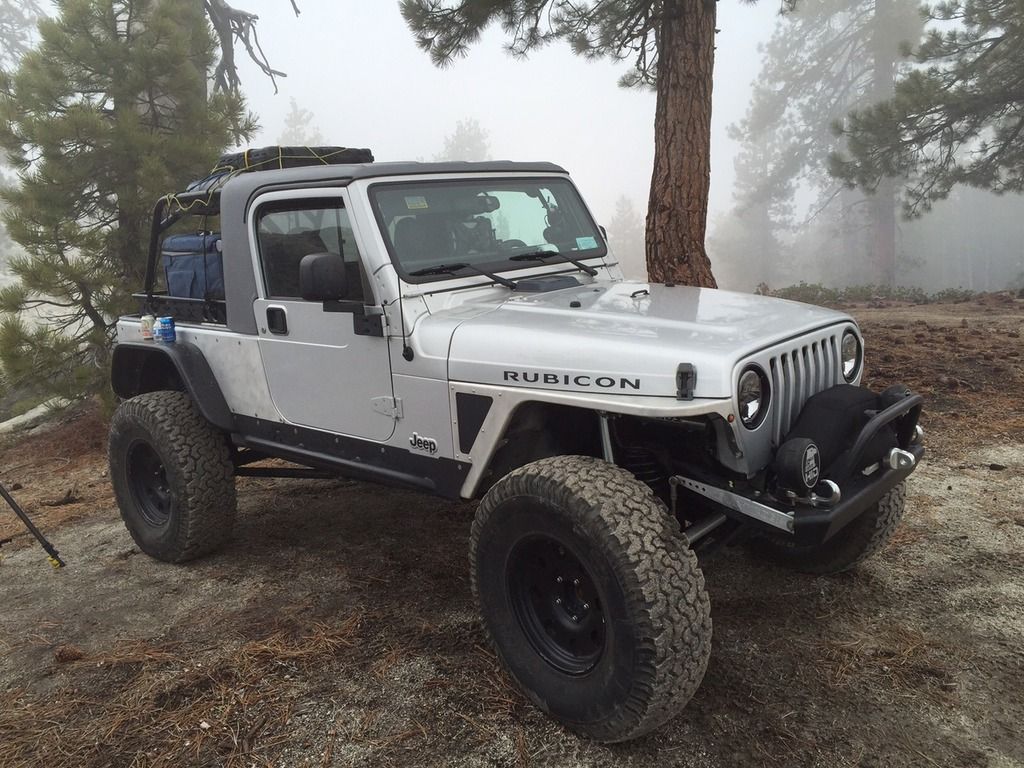
Update: Current Picture and video https://vimeo.com/76492538
4 Link in rear, Rock Jock 60, 4" Stretch, 14" King Coil overs and 37" BFG's


Last edited:

Rusty762

Adventurer
This box just arrived from Brown Santa, complete 4 inch Savvy/Currie kit with Al U Minium arms! Also bought a bumper and winch mount from Gerald, going to mount that next weekend and my Superwinch is on the way found one on Amazon with Syn line for crazy cheap.

c73cae6d.jpg


My current residence has no driveway or garage so all work has to be done in the street, really sucks but hey. Have not decided on shocks yet so the lift is on hold until I can get the 12" travel shocks I want with the proper mounts/outboarding to allow 6" of up/down travel. Decided to pull the wheels and paint them black, Satin Black you my favorite color. Like the Stones say "Paint it Black!" Also installed BL and MML that I bought from Gerald, next on my list is the Savvy UA so this is one step closer to getting rid of the shovel.

343c28eb.jpg


While I had the tires off decided to install some Bling from Mr Wizard, going to need the rotor clearance for when I outboard the rear shocks.

f93f85a8.jpg


74c5af2d.jpg


Was out of the country for a while and was itching to work on the Jeep, I haul scuba equipment from my house to work a couple of days a week and bought the LJ with the intent of building a Brute style bed for it but did not want a longer wheelbase than I already had. I needed the ability to throw my Rebreather, scooters and stage bottles into the back of the Jeep and not worry about saltwater and corrosion. The GR8Tops seemed like a decent product and would work for what I had planned, so called them up and the top was waiting when I got back to the states. My buddy Jay works for soft drinks so we got to work cutting and grinding...

View attachment 472338
 
Last edited:

Rusty762

Adventurer
Installed my Savvy modular under armor last weekend, was pretty straightforward I had to make a couple of modifications to some of the brackets. Threw a couple coats of Krylon Satin black on everything first.

IMG_000232.jpg


IMG_00032.jpg


First step was to support the Tranny/transfer case and remove the old shovel. I had already installed my Savvy BL and MML couple of months ago, loosened the body bolts up and jacked each side up so I could slip the C channel around the frame, then slid the crossmember in to check fit. I also dropped the front driveshaft to install my Novak kit I have had sitting here, If your doing a TT this is the perfect time to install a Novak. Everything went in pretty easy, I ended up bending my bracket to fit the tub. Novak is now welding the nuts to the bracket and my bracket was slightly off, It was simple to bend the tabs so that everything lay flat on the tub and all of the bolts went in straight.

Next step was to install the crossmember which slid right into place, my tranny mount when bolted up was skewed to the passenger side so I ran both of the holes over about half an inch so I could install the main crossmember bolts.

IMG_0006.jpg


IMG_00042.jpg


IMG_0005.jpg


After the crossmember was bolted in, I ran some fuel line around the brake/fuel lines on the drivers side C Channel to protect them from the exposed threads there and any chance of rubbing. Took it for a test drive and no vibrations but there was a rattle at idle, turned out to be the exhaust rubbing the front passenger side CA mount so readjusted the exhaust and bolted up the skid plates. The front exhaust on the drivers side was also close to rubbing so while I had the engine skid out I made an additional cut to make sure there was no rubbing.

IMG_0007.jpg


After staring at the skids and all the clearance I had just gained I took it out for another test drive, as soon as I started it there was a loud rattling reverberating through the cab. It sounded like a cage of monkeys had Britney Spears under there and were giving her hell. There was one place on the drivers side of my 241 case that was very close to rubbing the tub, well it is contacting the tub and once the Skids were bolted up everything became so rigid that the sound from the case was being transmitted through the cab.

[Edited to remove inappropriate photo]

I dropped the skids took some pictures where it was contacting the tub, going to try lowering the case this weekend and hammering the area up a 1/4-1/2 inch then I should be good to go!

IMG_00021.jpg


IMG_0003.jpg
 
Last edited:

Rusty762

Adventurer
Have some updates, Installed my Genright crawler tank last weekend.

Install was pretty straightforward, After carefully unplugging the stock fuel lines and Evap lines you can lower the stock fuel tank.

IMG_0009-1_zps3306e15d.jpg


Next you need to remove the stock fuel pump, there is a steel lock ring that can be removed with a hammer and punch, then the fuel pump can be removed, be very careful with the float when removing the fuel pump you will need to angle the pump quite a bit to get it out of the tank without bending the rod.

IMG_0011-1_zps4bc5eb04.jpg


Once the stock fuel pump is removed, you will be reusing the Oring from the stock GT in the new Genright. I used some white lithium grease after cleaning the oring to reinstall it in the new tank.

IMG_0012_zps8d782cb3.jpg


There is a small tab on the fuel pump that has to be removed, I used my dremel and zipped it off. The Genright tank uses a threaded aluminum ring instead of the steel lockring that the stock tank had, I had to sand the perimeter on the top of the fuel pump so the threaded ring would not bind and twist the fuel pump. There is an arrow on the fuel pump that needs to line up with the sharpie mark on the Genright tank.

IMG_0018_zpsce08be82.jpg


The Genright tank has a simplified Evap setup, all of your stock tank connections attach no problem, the quality of the tank is outstanding. Here is a picture of the tank with stock lines reattached and ready to slide it into place and mark holes on the frame where the new tank will mount. The Genright EXT tank gives you 4-5" of additional room, I am hoping to be able to move my Rock Jock 4 inches back.

IMG_0017_zps58ac6a7b.jpg


Once I had the tank in place, I marked the frame where two holes will need to be drilled. One for each of the forward ears on the skid plate, the Genright tank does not use the stock forward gas tanks mounting position since it is located farther back. I found it easier to remove the upper rear shock as the holes were very close to the shock body, once you drill the frame there are supplied spacers that go inside the frame to keep the frame from crushing once everything is tightened down.

IMG_0016_zps49ecef3c.jpg


If you have any questions please feel free to PM me, I did not take as many pictures as I should have and when I do my 4 link/stretch in the next couple months I am going to take as many pictures as possible. Gained an inch in ground clearance and 4 inches for the stretch. I did get some codes after the install, P0455, P0456 and P0457. I was able to clear two of the codes, small Evap leak and loose gas cap but still have P0455 which is Gross Evap leak. After I installed the Genright tank I used a buddies 5 gallon gas tank and the nozzle had a funky tip and when I removed it from the Fuel neck filler it was stuck behind the little trap door that seals after you fill up at the gas station. I bent the hell out of it and now it does not seal, not sure if this is why I am getting a code as all of the stock Evap lines are hooked up properly.

Here are some pics of the new tank installed.

IMG_0019_zps19a56519.jpg


IMG_0045_zps3759337b.jpg
 
Last edited:

Rusty762

Adventurer
Yesterday I decided to install my sPOD, figure out where I am going to mount my ARB compressor for the front/rear ARB's, raise my drivers seat up an inch with the spacers that Garza so kindly donated and mount a pair of HID's lights I have had sitting in the garage.

I pulled the trigger on an sPOD last week, it's a pricey bit of kit but I like the clean look and ease of installation for future accessories and where the switches are located.

IMG_0041_zps63a2f763.jpg


Installing the sPOD was very simple and requires no tools other than a screwdriver, some wrenches and a 1" hole saw, you will need to drill a hole in the passenger side firewall to route the harness cable through. The stock plastic windshield header is replace with the metal one from sPOD.

IMG_0062_zpscdc2113d.jpg


The sPOD bracket is aluminum and mounts on the firewall using existing ground holes, I will be using my sPOD for ARB compressor, Front and Rear lockers, Auxillary HID lights, ARB fridge and Rock lights.

IMG_0051_zps966d82e3.jpg


IMG_0057_zpsaa46954a.jpg
 
Last edited:

Rusty762

Adventurer
Thanks very much. And that is a very clean underneath. :highfive:

No Worries, yes she is still a virgin. Looking forward to dragging her through some rocks this summer!

When I installed my sPOD figured I might as well replace the stock POS battery, bought one of these.

IMG_0056_zpsd7c9b5b6.jpg
 
Last edited:

Rusty762

Adventurer
Spent the Easter weekend with my folks at their house in Yosemite. My dad has a couple or ranges on his property, took my Barrett M98 out there to take some shots out to 1200 meters. Other than Cholame which is about 4 hours from where I live it is the only place I can get the distance. My local range (Lagunaseca) only goes out to 500..

M98_zps6fdb02bd.jpg


My dads business is Buy, Sell, Trade pretty much anything but mostly guns and automobiles. His property is full of parts, I started rummaging through some wheels he had and found a set of four American Racing 17x8 aluminum wheels, 5x5.5 which are perfect for my new axles. The BS is 4.5 but should be fine with the 65" axle Currie is building. Going to wire wheel them and paint em black, cost was free as long as I do not bring them back.

IMG_0005-1_zps23f272d9.jpg


Also these showed up today for my front Rubi D44, 5x4.5 to 5x5.5 spacers and they were blems so got em cheap.

IMG_0001_zpsa13226ab.jpg
 
Last edited:

Rusty762

Adventurer
What the hell is this and why is it important to my build?

IMG_0031_zps763477c3.jpg


IMG_0026_zpsdab1dd8c.jpg


After much deliberation I decided to sell my MK28 Closed Circuit Rebreather. I am currently not doing a lot of cave/wreck diving and the Meg is at the top of the food chain for CCR's, sold it to someone in Australia for $10,000 and that is going towards my Rig! Ordered 37" tires yesterday, next purchase is metal cloak joints and some DOM.
 
Last edited:

Rusty762

Adventurer
After chasing around some codes for an EVAP leak I decided to bypass the canister to make room for my stretch and to install the lite dots I have had sitting in the garage. If your not familiar with the location of the EVAP, it is inside the passenger rear wheel well.

First remove the 3 bolts that hold the debris cover, then 2 more bolts for the bracket and the entire assembly will slide out. Before you try to slide it out, make sure to disconnect these two items. There is a white plastic fitting for the EVAP line that comes off the gas tank, if you look closely you will see a pressure spot on the white part, push down on this and the black male fitting will pull out. The electrical connection has a red clip that needs to be pulled out to the side (I use a std screwdriver) and then push in the center and it will come apart. Be careful with both of these parts, it is worth taking your time and not forcing anything. You can see the two connections in the second picture that are in my hands.


Remove these hoses from the top of the charcoal canister, and then the 4 nuts and you can separate the canister from the bracket.


You should then have something that looks like this


Loosen these two bolts and remove the other part of the EVAP system with hoses attached from the bracket.


And you should have this


This is one of the two hoses we disconnected from the canister at the beginning, we are going to plug this back into the other part of the EVAP system and bypass the canister.


It should look like this

 
Last edited:

Rusty762

Adventurer
I ended up cutting the hose with white plastic fitting to take up the least amount of space possible and keep all of the hose routing clean.


I then mounted it up in this position, two of my CEL went away. Only code I have left is a PO455 and I think it is the Fuel filler neck, have one on order and will test out my theory friday.


With the EVAP out of the way, installing the lights was a piece of cake. Her *** looks nice and clean with the toasters removed...


Last edited:

Rusty762

Adventurer
Memorial Day weekend I started the install of my suspension, first order was to pull out the front and rear axles. I will be doing a bunch of upgrades to make the front Rubi 44 better able to handle the 37" BFG's I will be running, the rear axle is getting replaced with a RJ 60, The rear Rubi 44 is in mint condition and will be listed for sale shortly let me know if you are interested, I will be selling the factory air compressor for the front and rear lockers also with the rear axle and will have a 4:10 R&P and front air locker for sale also.


With the axles out of the way, I started removing all of the factory suspension mounts from the frame, I used a plasma cutter for most of the mounts and a 4" cutting wheel, the frames are very thin so you need to take care when cutting the mounts off to not gouge the frame.


Last edited:

Rusty762

Adventurer
Removing the stock mounts takes time, I will be installing coilovers in the rear and was not concerned with reusing the stock coil buckets so I cut them up with the plasma to make removal quicker and finished the frame with a grinder, before I install the Poly 4 link mounts and Gen Right rear sway bar I will remove all of the paint from those areas.


Once all of the mounts on the rear were removed I started to work on the front axle, I had some new shock mounts to weld in place of the stock shock mounting locations that would let me run a 12" Fox reservoir with eyes on both ends. Also had some of Blaines Raised Swaybar links and gussets which a great piece of kit http://blackmagicbrakes.com/Jeep_Co-Op_Canada.html


With my dad helping welding, I am getting twice the amount of work done!


It was not until I finished welding the drivers side that I noticed something not normal, can anyone spot what it is? I am hoping it is not what I think it is but will not know until I remove the axles to check the tubes!

 
Last edited:

Rusty762

Adventurer
Next up was installing the Poly front coilover kit that I bought last year, it requires cutting the stock front shock mount and uses part of that to reinforce the Poly coil over mount. Getting it to fit correctly was a chore and hindsight I would go a different route knowing what I do now. My thought at the time I bought this kit last year was it would allow me to install Fox 12" shocks in the front with my Currie 4" coils and in the future run coil overs if I wanted to. I ended up cutting the front Poly mount quite a bit to get it to fit correctly and even then its not a great fit but will work for now and the last thing I need to do is spend more money right now!

Here is a picture of the front mount cut to accept the Poly tower, I used my plasma for the cuts.


Here the mount is fitting better, test fit it with some clamps. There is an over engine cross bar that ties into the top of both towers, once I had both towers fit to the stock mounts I check fit the cross bar. It was under a little tension when bolted up. I am going to burn in the towers and then will heat the tube slightly to relieve tension.


Cross bar installed

 
Last edited:

Rusty762

Adventurer
These showed up yesterday and were the final parts I was waiting on for my 4 link, Metalcloak joints and Poly budget bumpstops with some old school urethane bump pads. Heading back up tonight after work to start installing the front axle and suspension.


Last edited:

Forum statistics

Threads
185,828
Messages
2,878,635
Members
225,393
Latest member
jgrillz94

Members online

Top