Lexus GX470 Expedition build

boo471

Adventurer
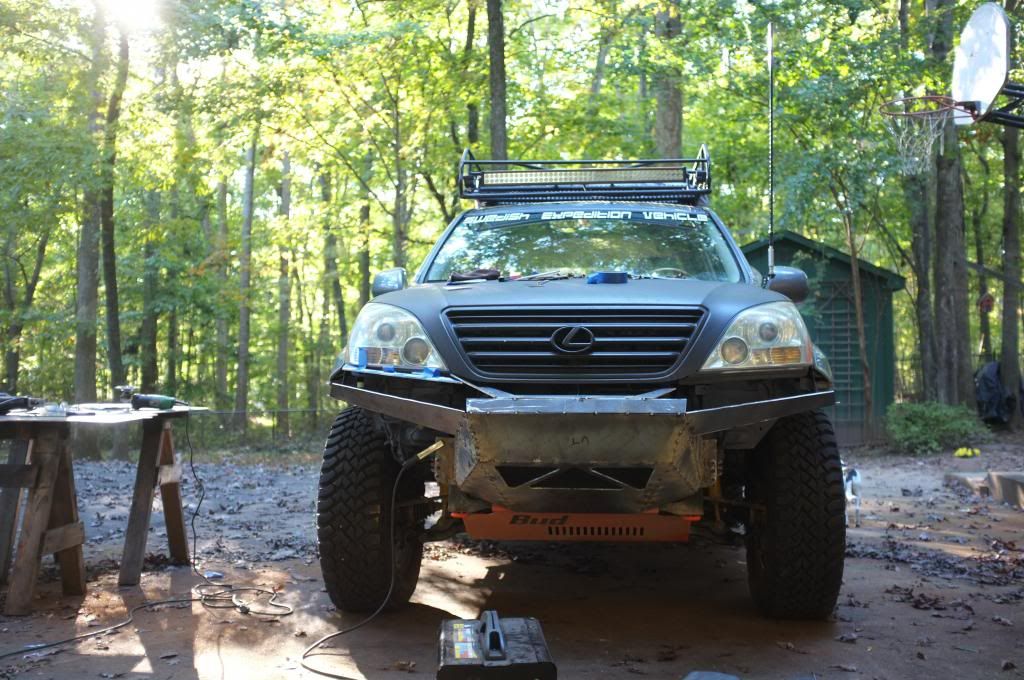
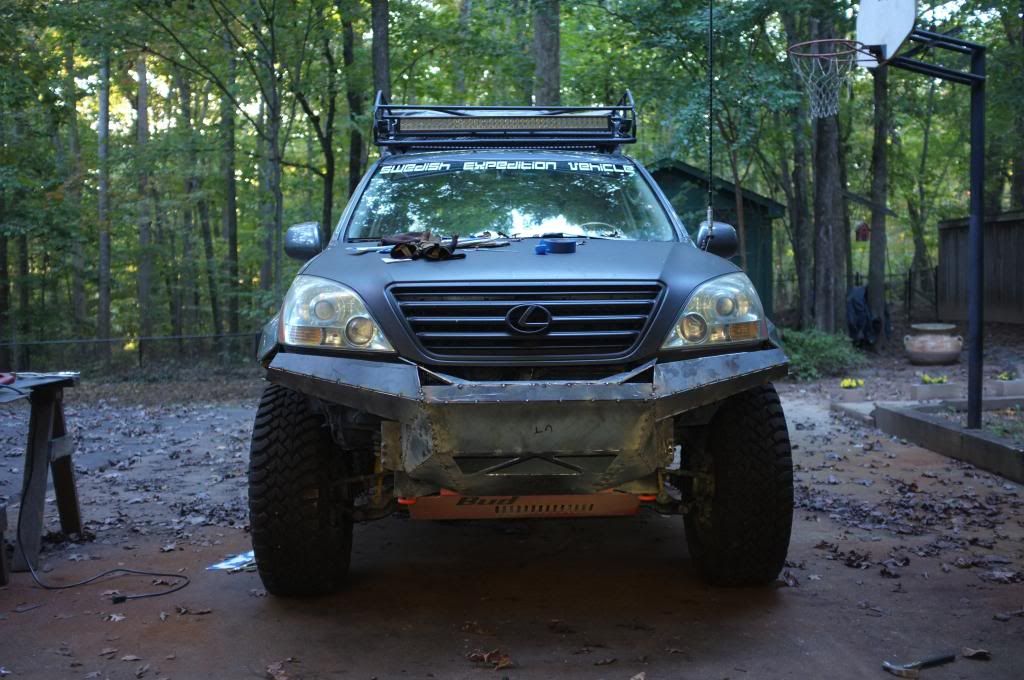
Front bumper build progress

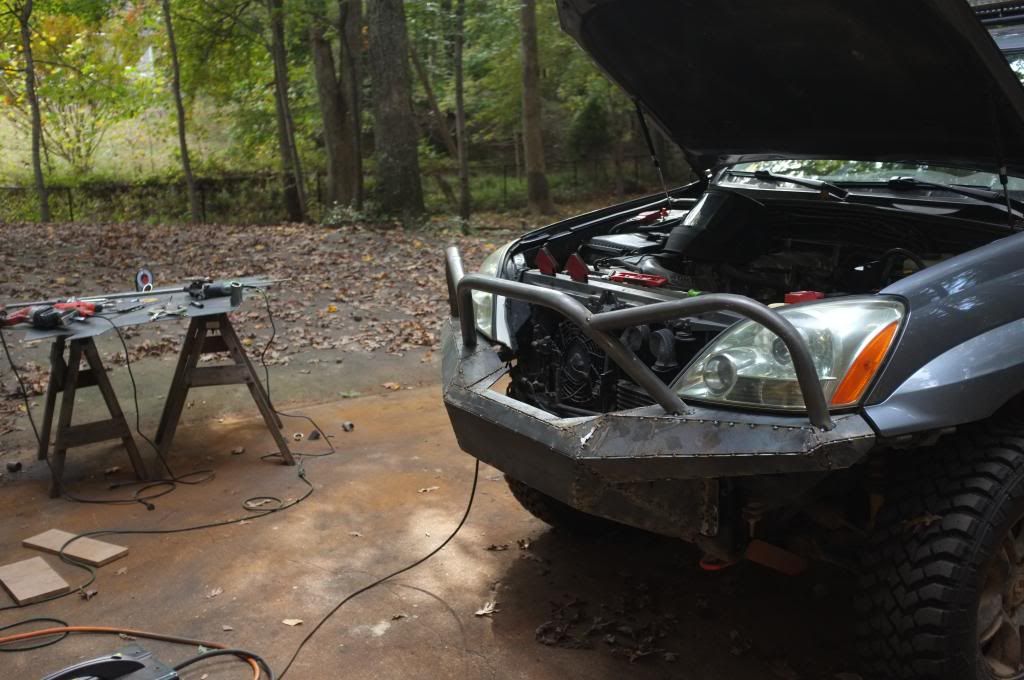
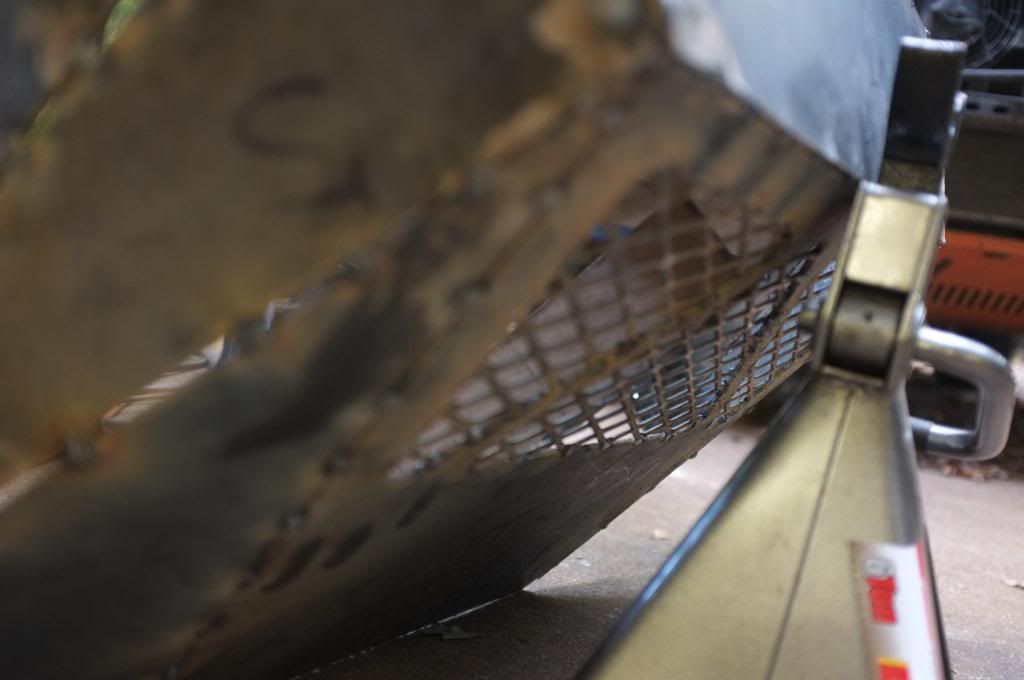
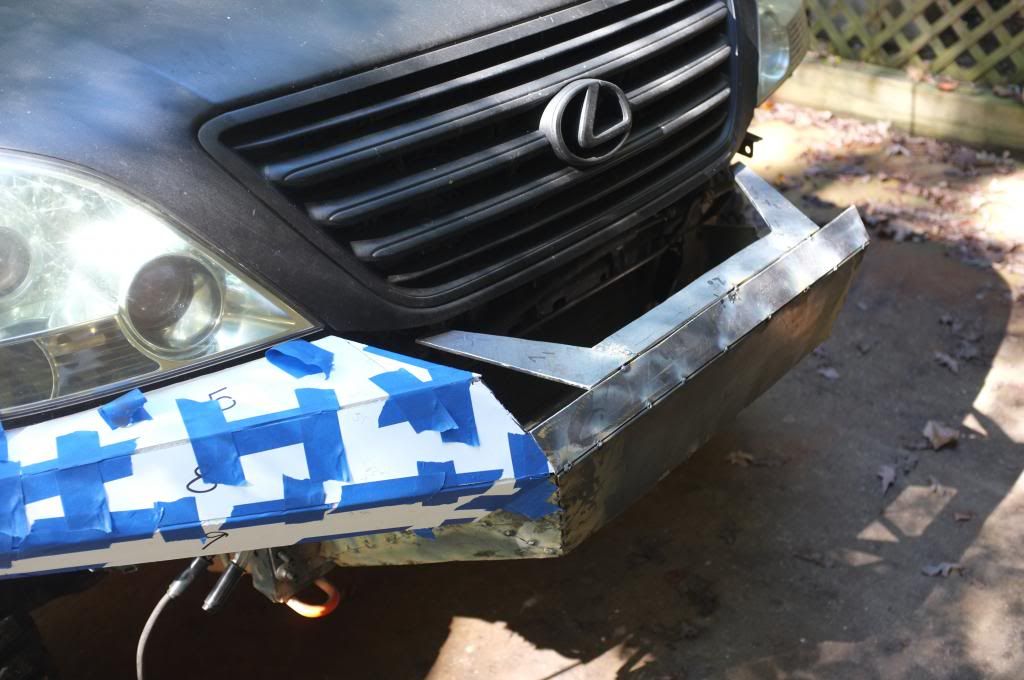
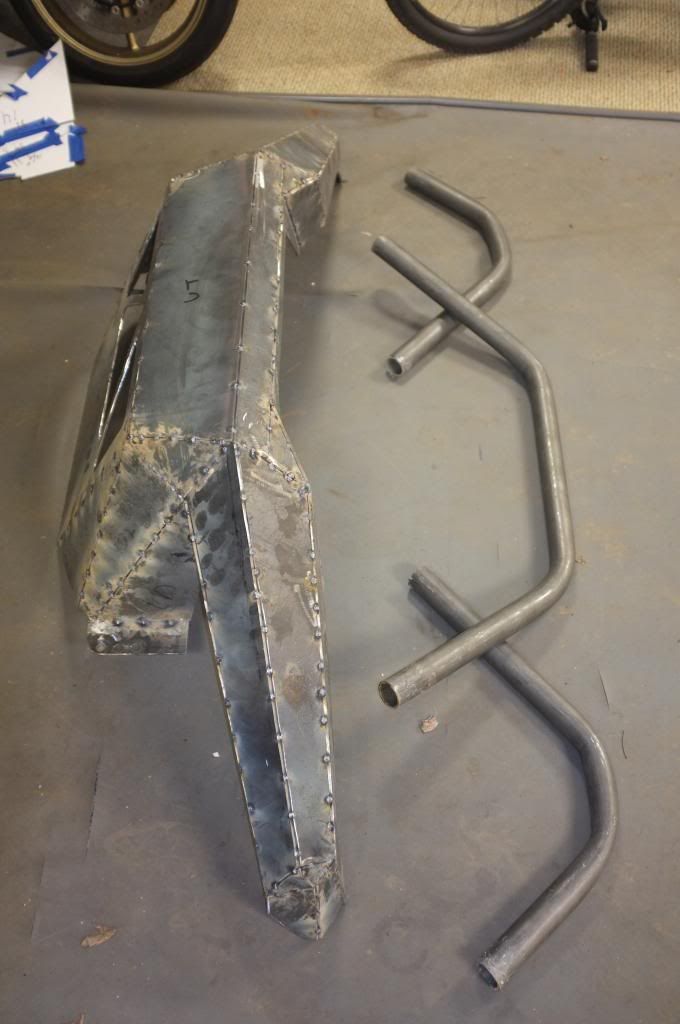
My Sunday was spent on the drive way (go figure). I decided to finish up the plating before I start boxing process. This way its easier to see where I need to add more strength to the design.

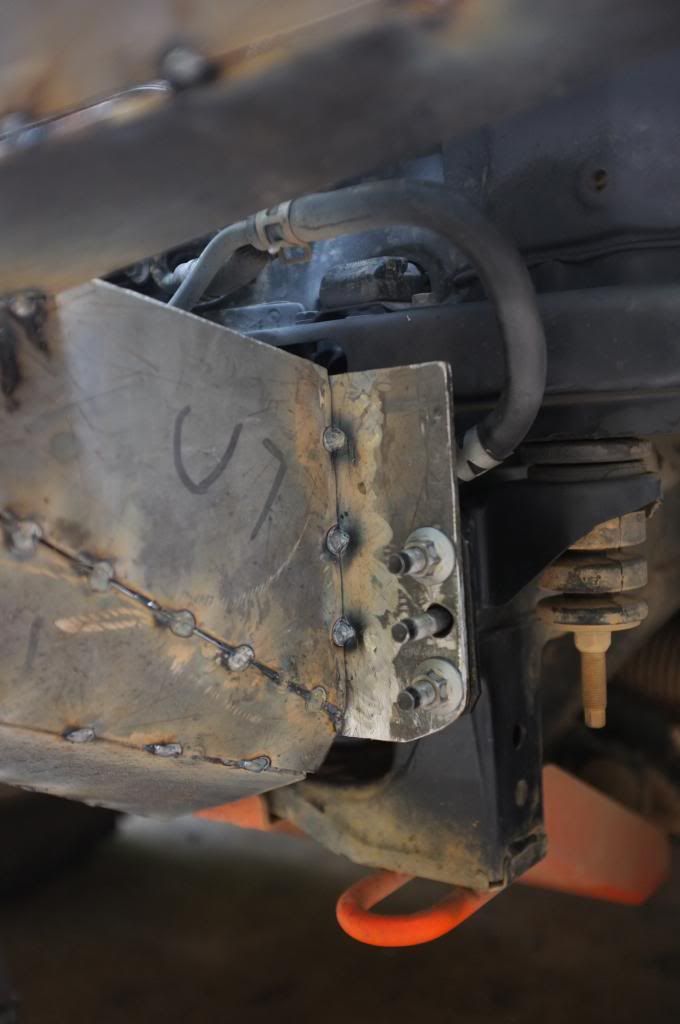
Progress is a lot quicker now when I have a straight bottom "box" to work from. I did notice that the body is not perfectly lined up with the frame. If I make both side with perfect symmetry there will be a deviation and wont look to good if you compare the left and right sides. So some tweaking is necessary to get it to look good. I also need to do some fine tuning on where the bumper mounts to the mounting plate. These side plates don't have a perfect symmetry so I will look in to this shortly as well.

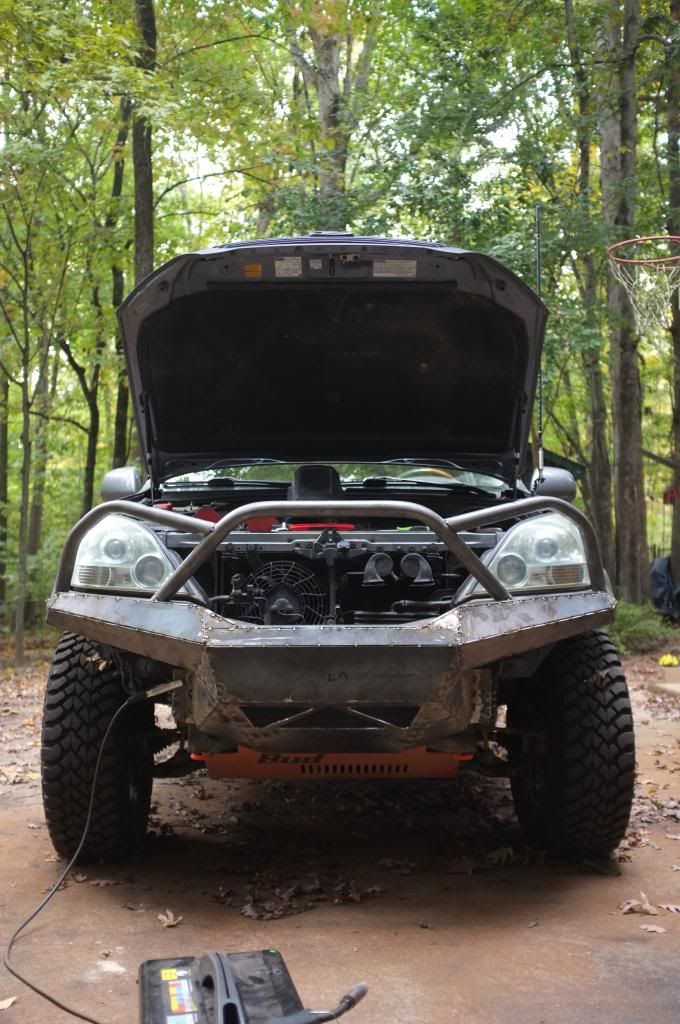
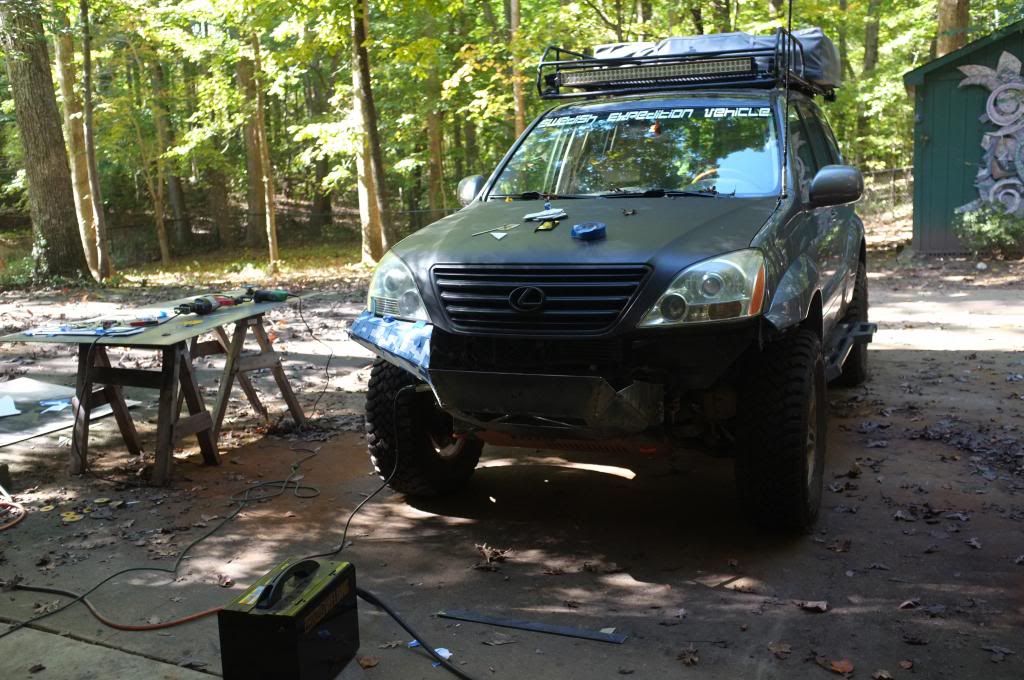
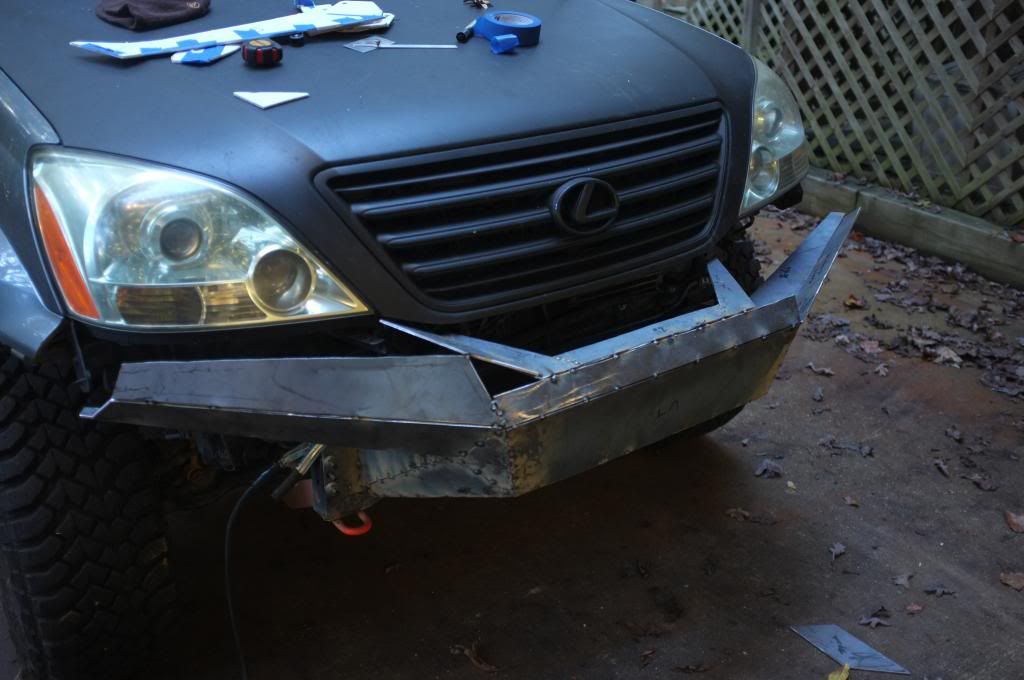
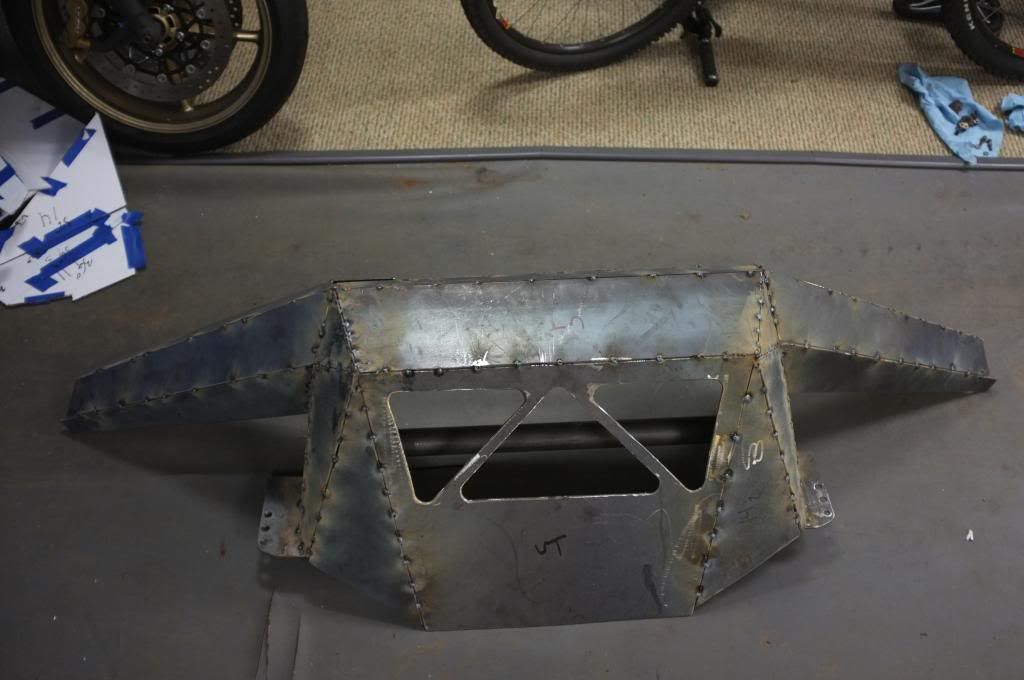
Here is the progress so far.

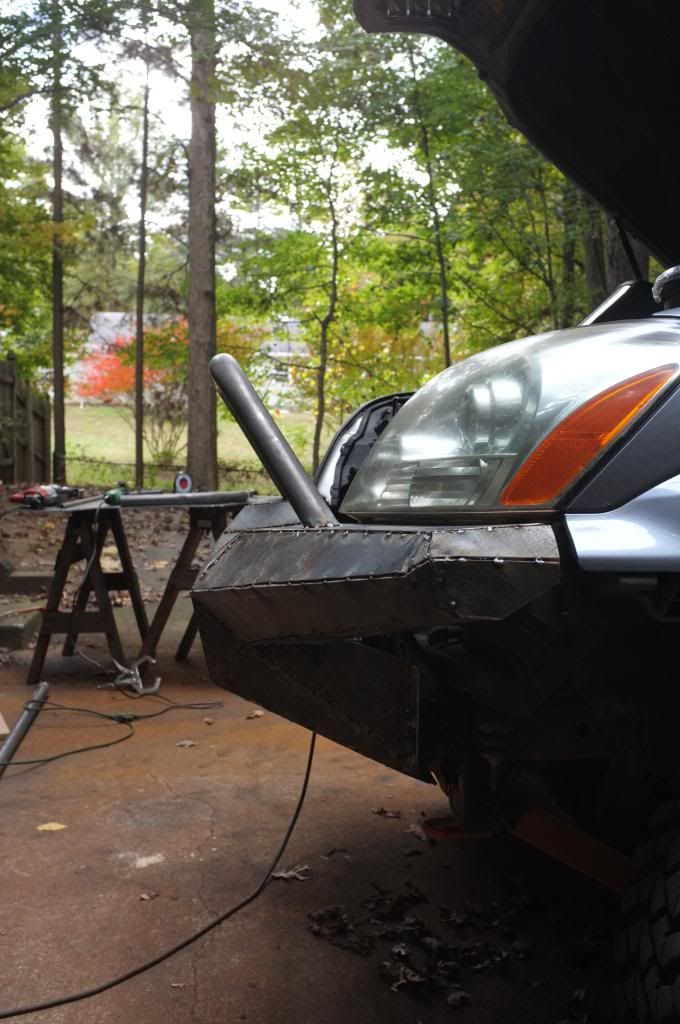
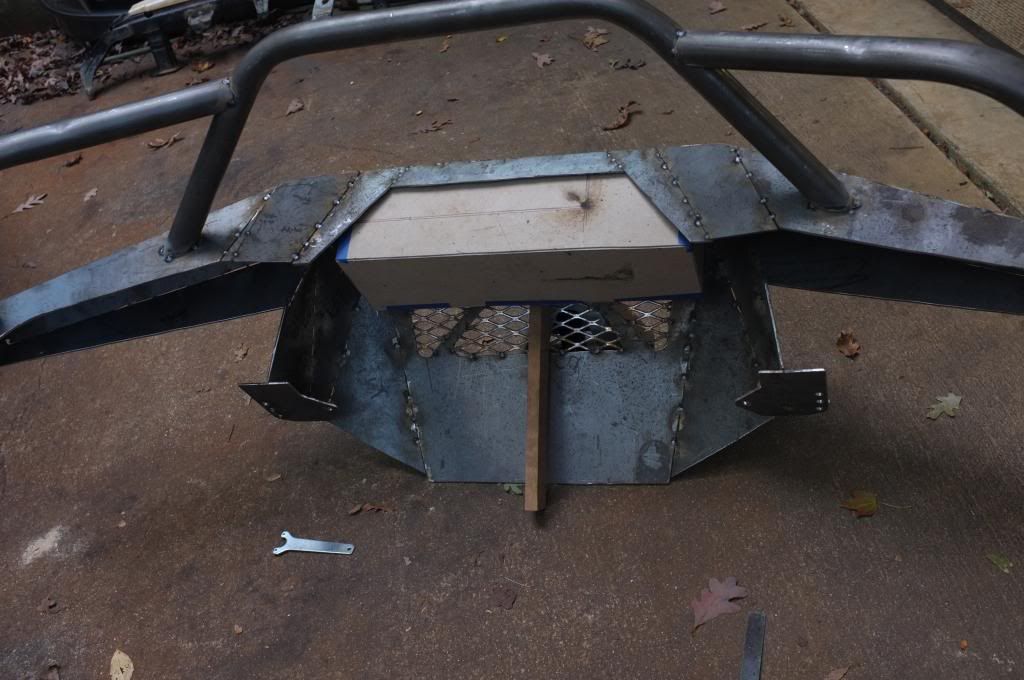
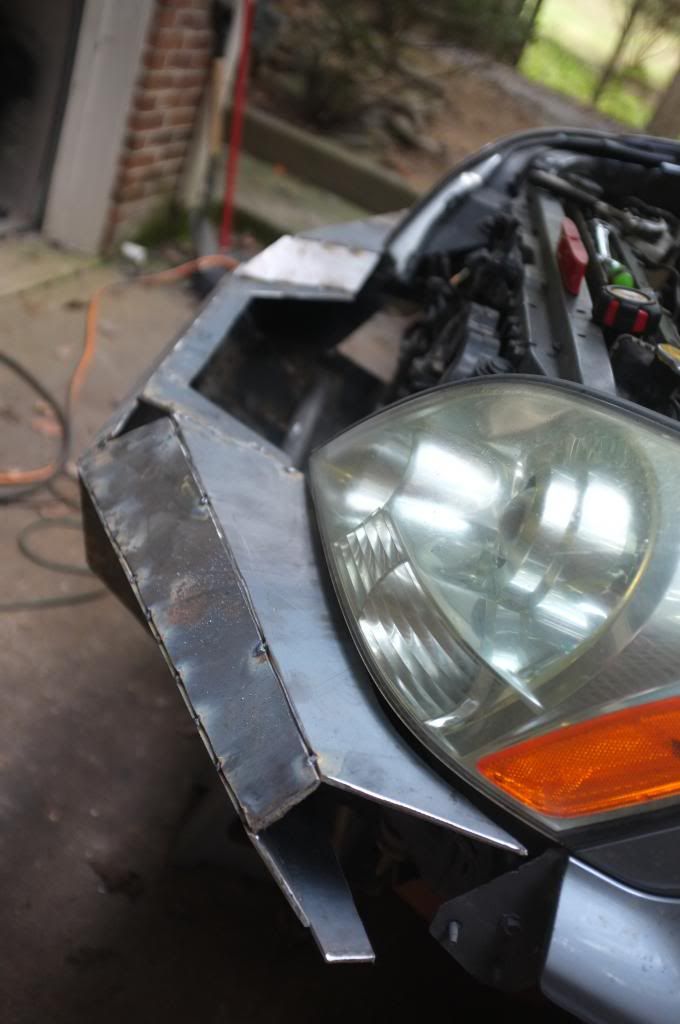
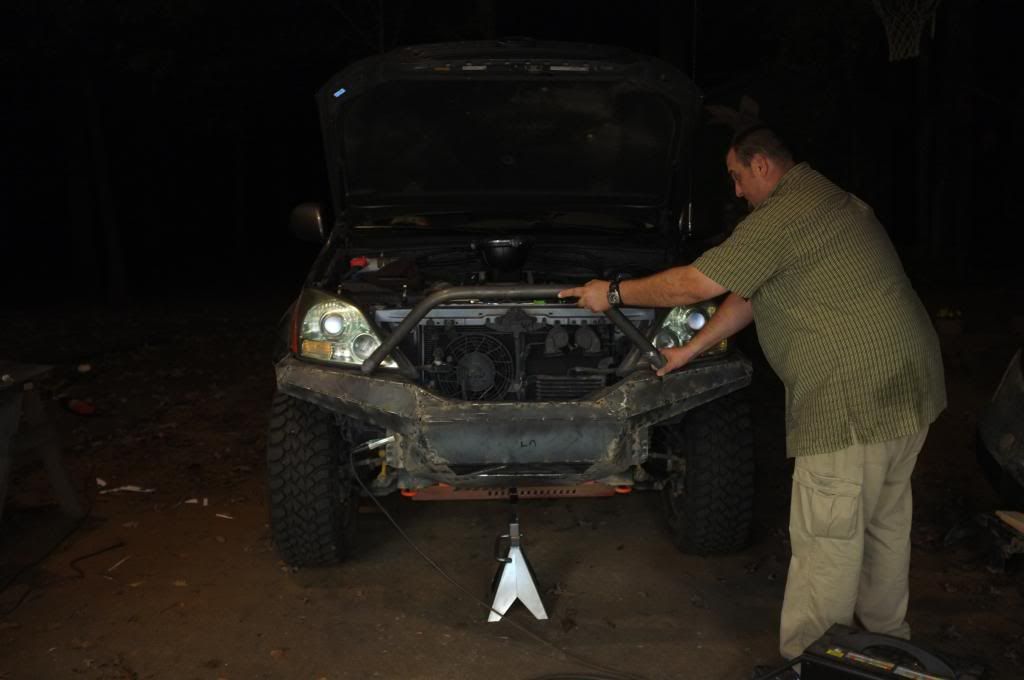
I added the mock up back on to use as a template
DSCF2735_zps3eeb60fa.jpg

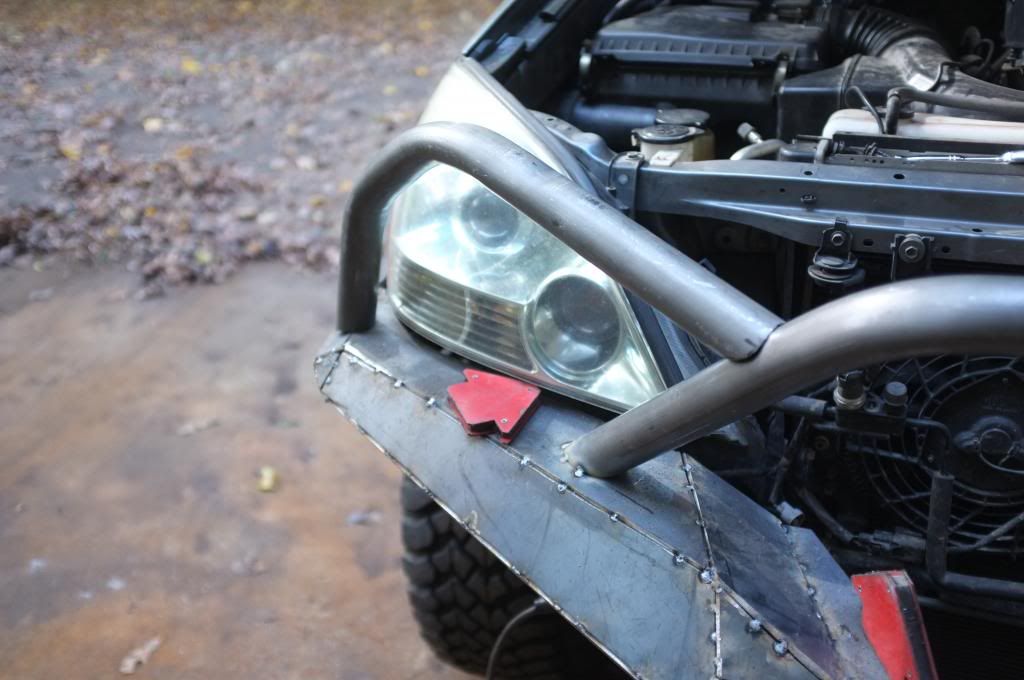
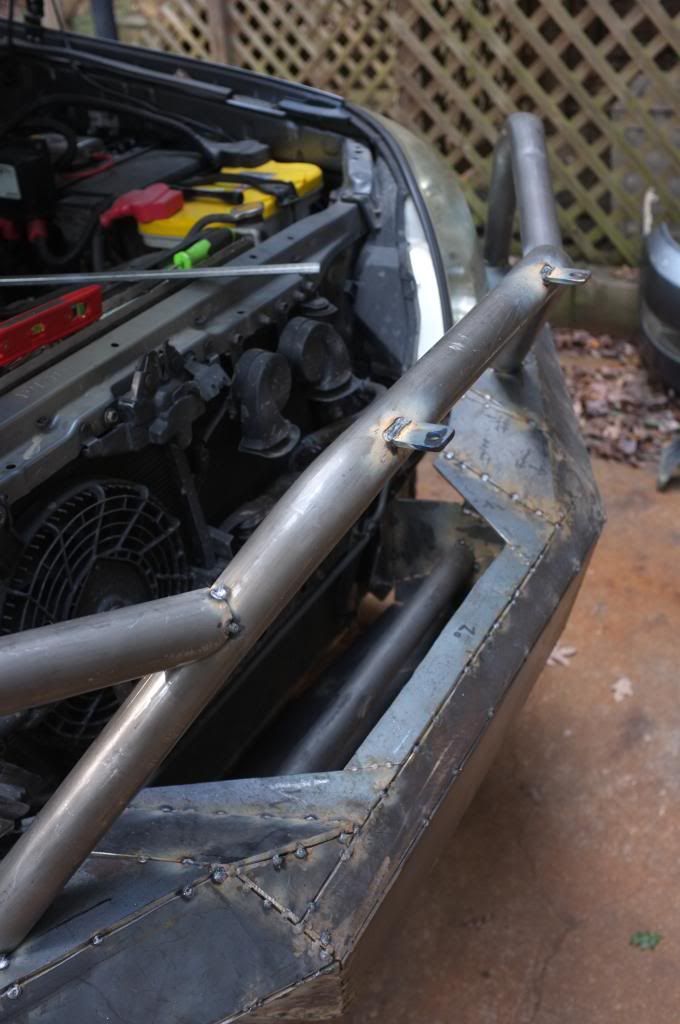
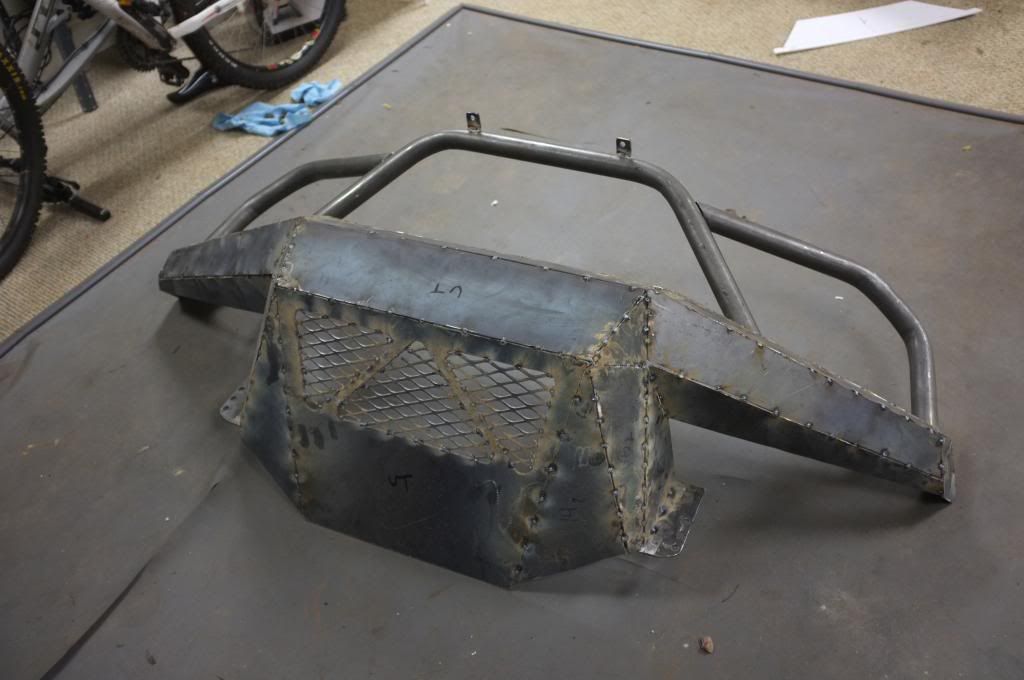
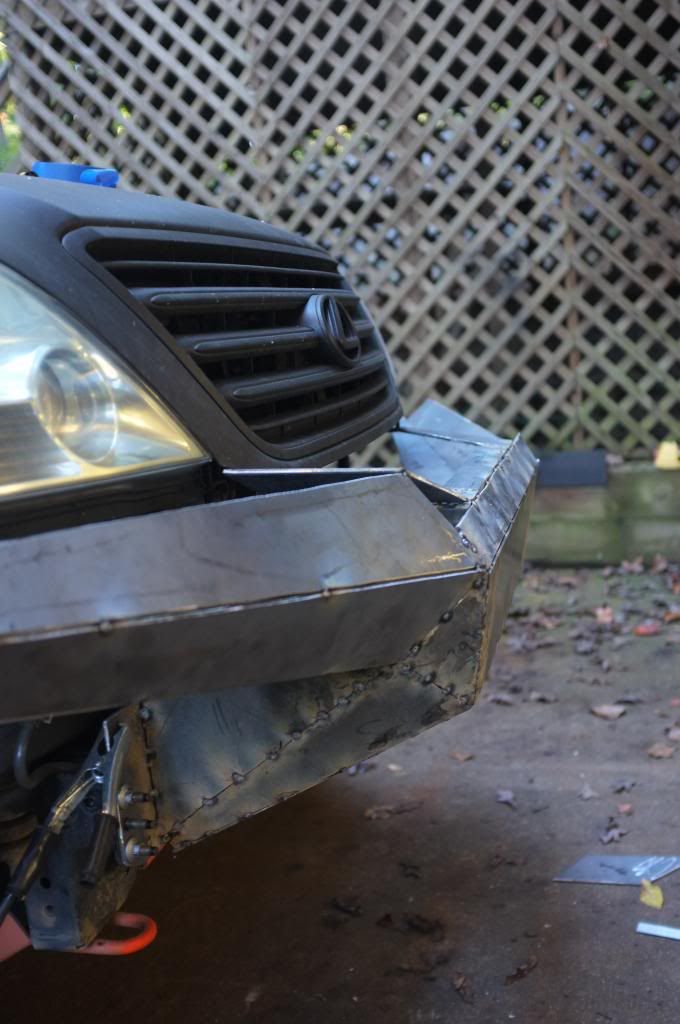
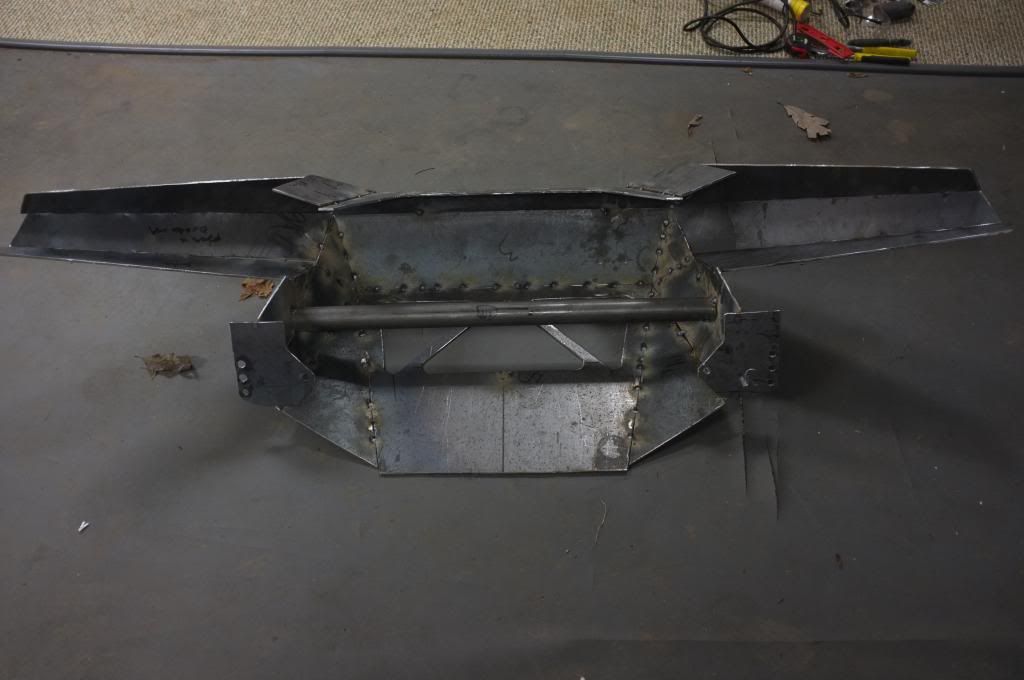
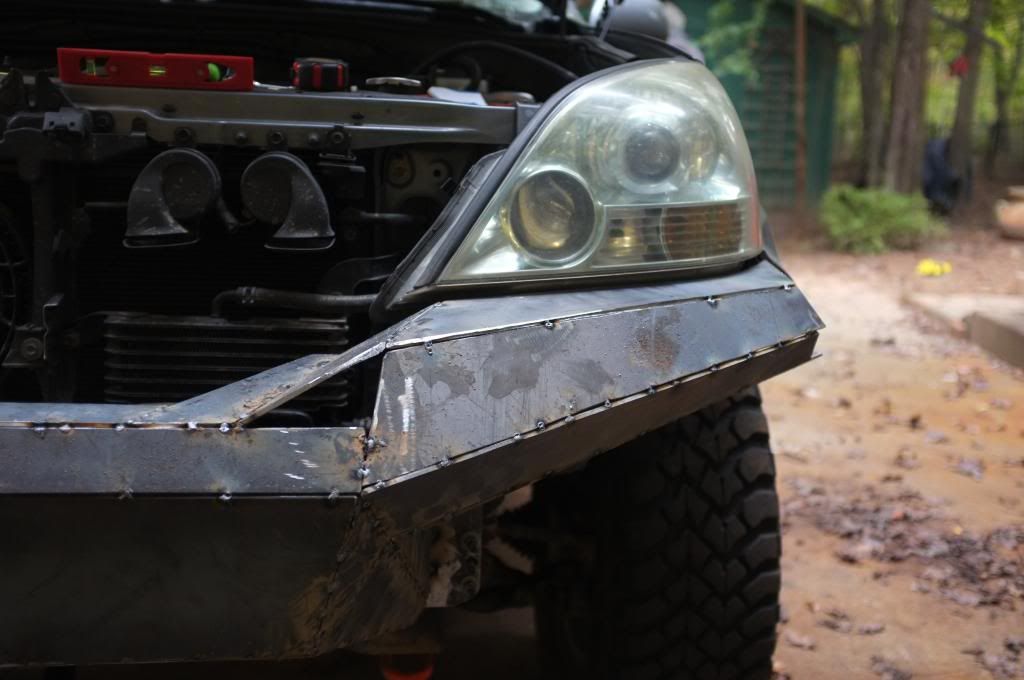
Then I continued to add pieces to the bumper
DSCF2736_zpscf9c849d.jpg

DSCF2737_zpsb2855d92.jpg

DSCF2739_zps450a6253.jpg

DSCF2738_zps76e349d9.jpg

DSCF2740_zpsd8108e00.jpg


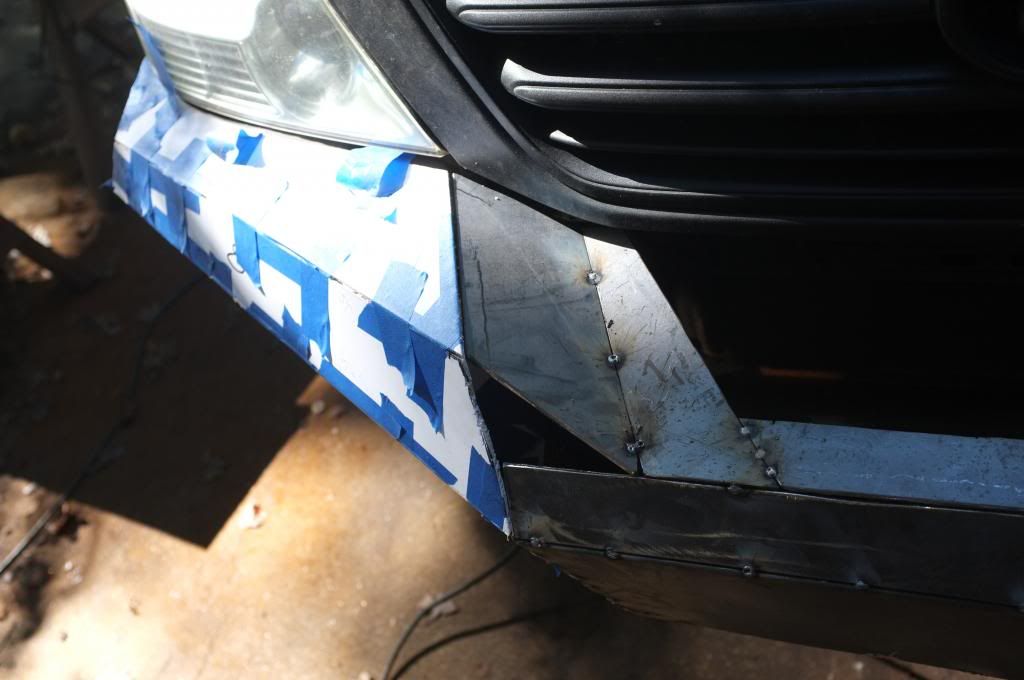
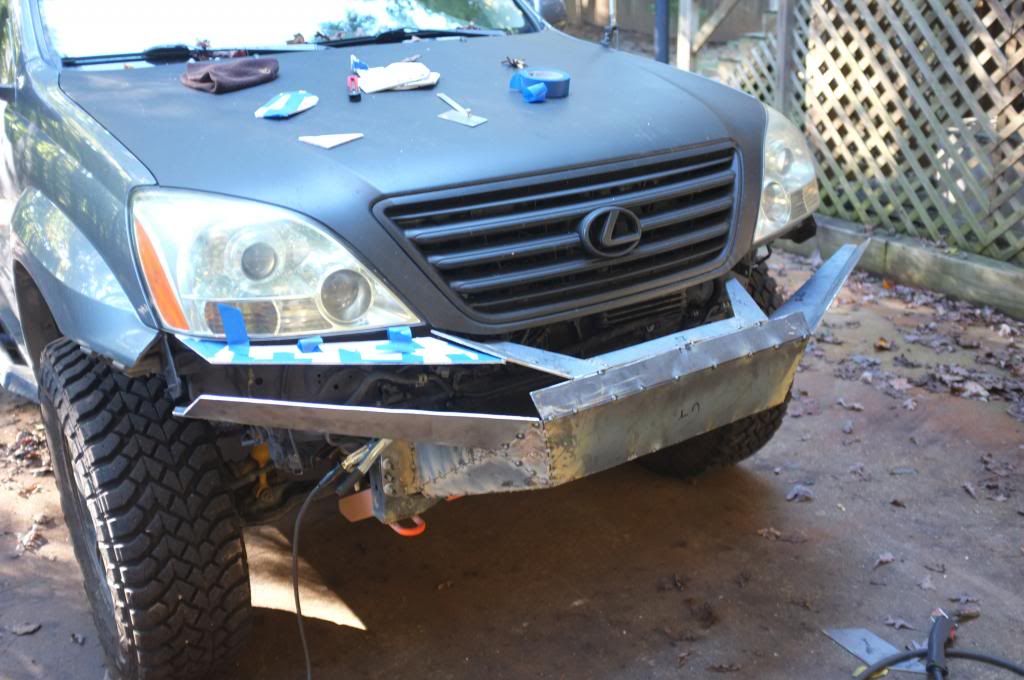
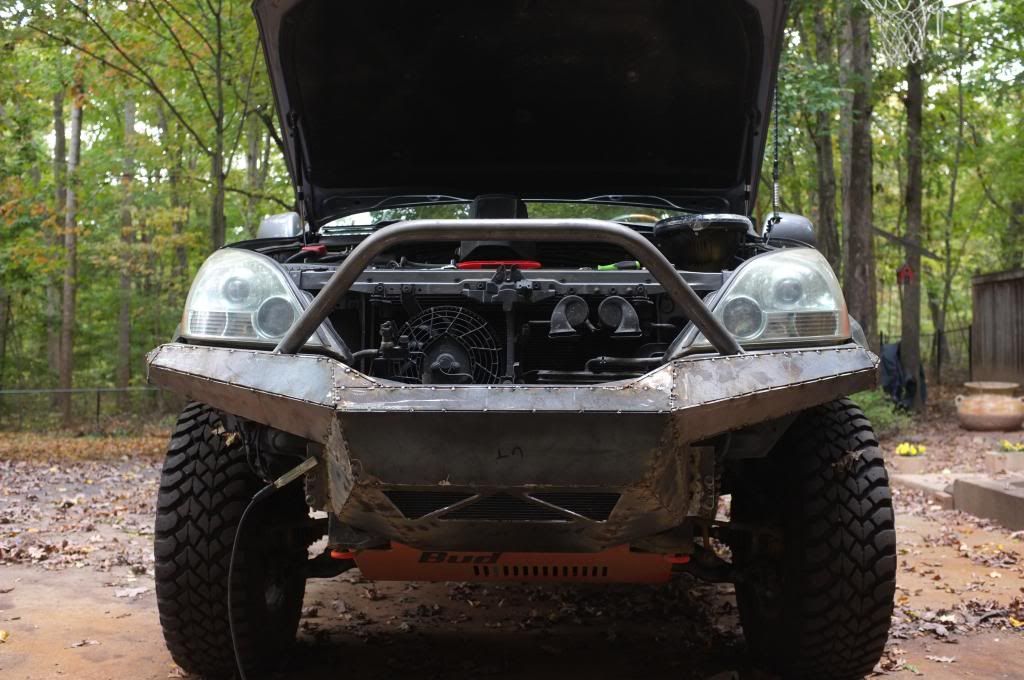
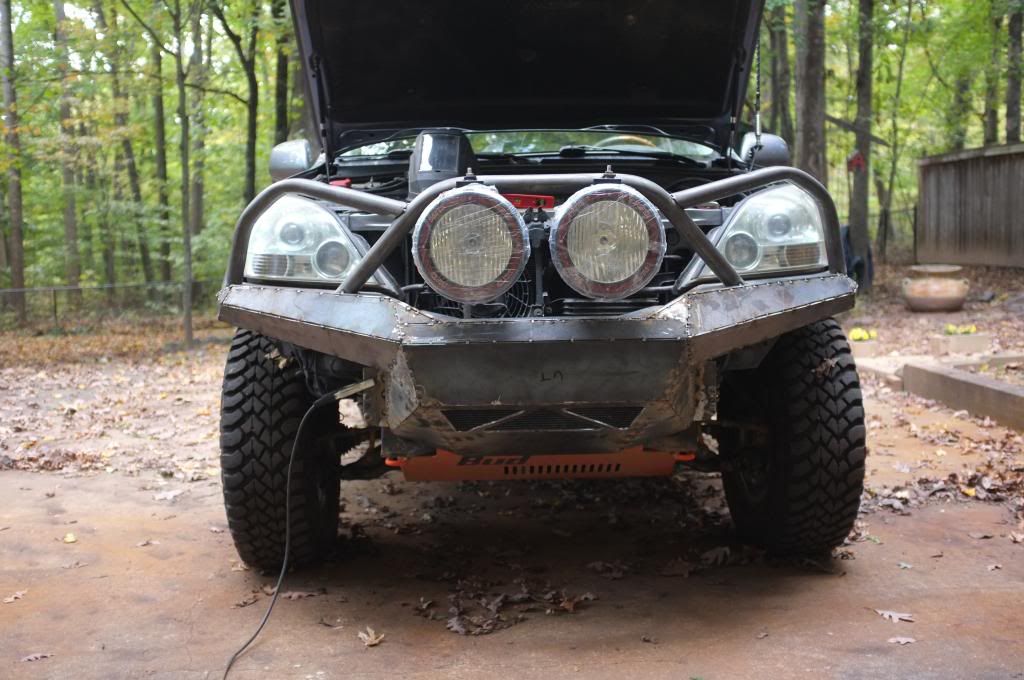
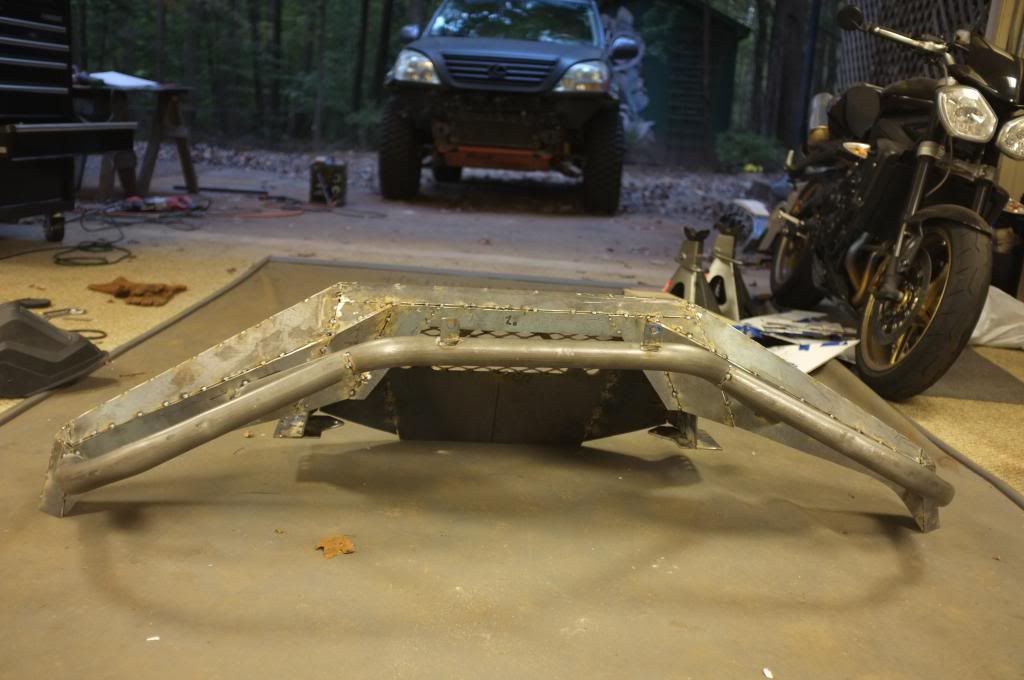
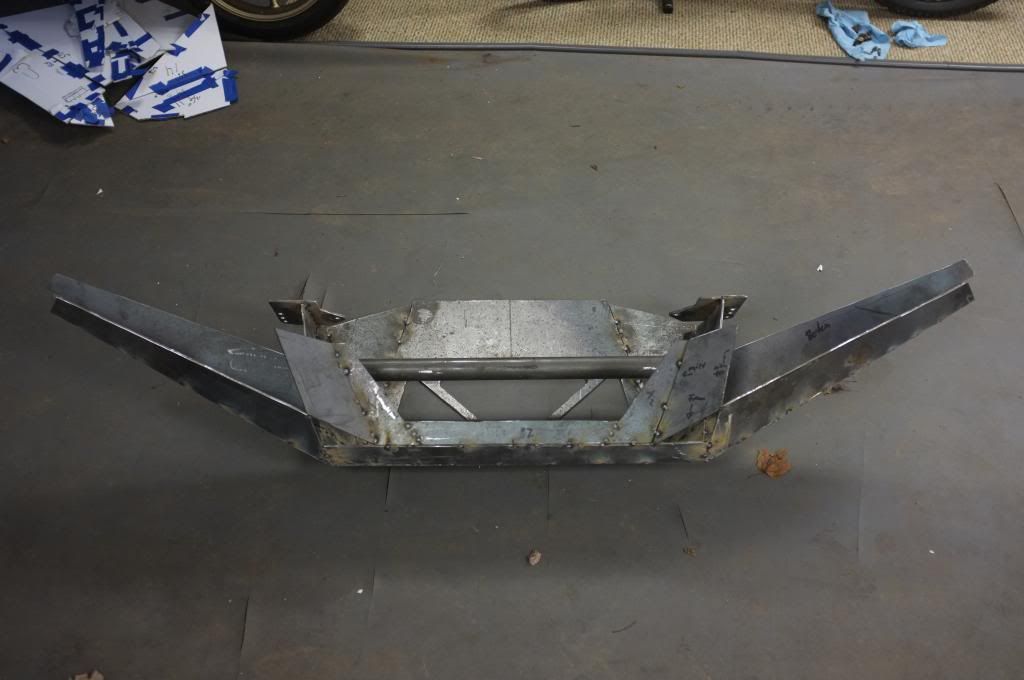
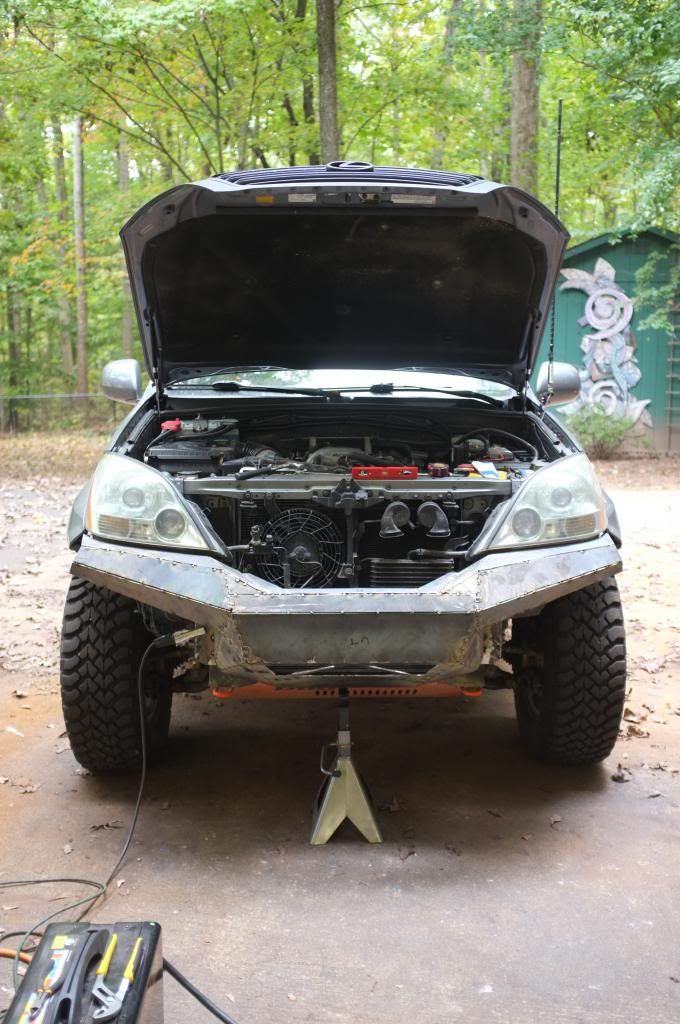
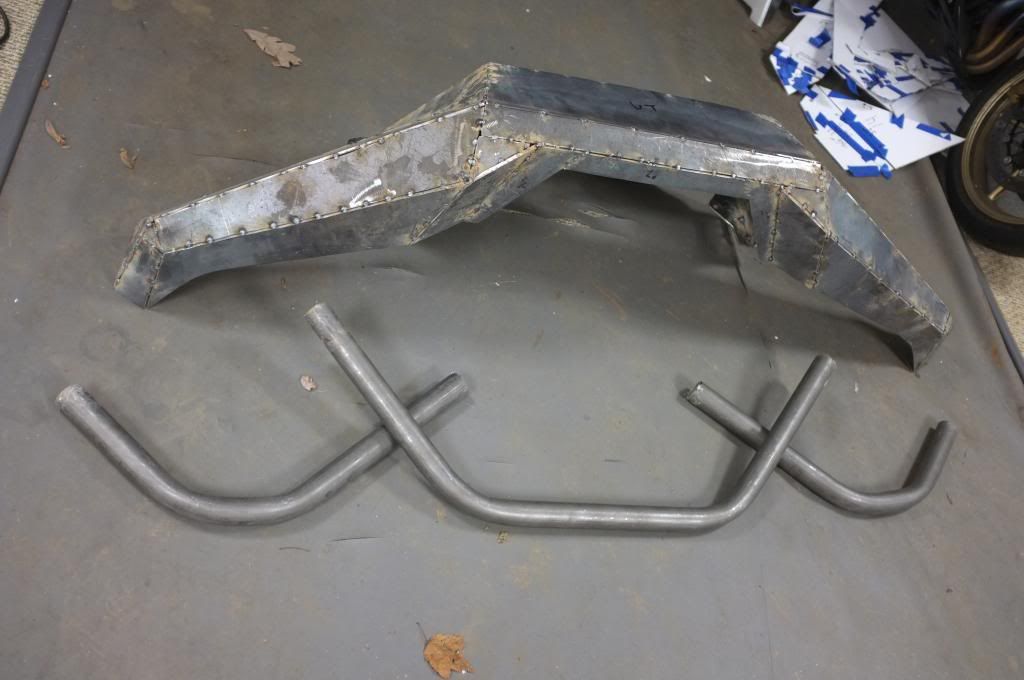
This is what it looked like after a hard days work.
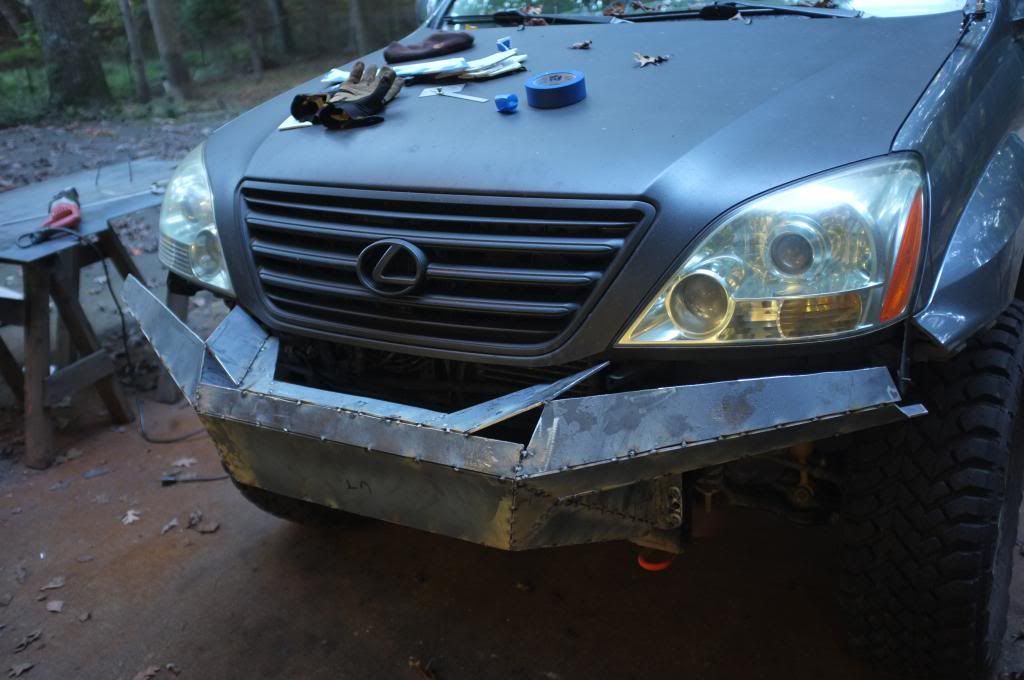
DSCF2742_zps203cb275.jpg

DSCF2745_zps28d214db.jpg

DSCF2744_zps1114f573.jpg

DSCF2746_zpsd1244c0c.jpg

DSCF2747_zps35955cb5.jpg

DSCF2748_zps101778db.jpg


To be continued....

//Marten
 

Reata Rover

Adventurer
Thrilled to see your awesome build, I by no means am ready to give up my 2010 4Runner, but I am always thinking of what I will build next when the 4Runner is retired or I need some more luxurious digs. Love that build !!!!
 

boo471

Adventurer
Looking forward to seeing the bumper completed. This has been a fun build to follow

Thrilled to see your awesome build, I by no means am ready to give up my 2010 4Runner, but I am always thinking of what I will build next when the 4Runner is retired or I need some more luxurious digs. Love that build !!!!

That front bumper just looks mean and trail ready. Great build and fabrication. I can barely make a paper airplane for the kids.

Thanks for the kind words! Always nice to get some good feedback on a build.
 

boo471

Adventurer
Front bumper build update.

I continued to work on the front bumper last night. I got some much appreciated help from my friend Dorton . But that also meant I forgot to take pictures. So there is not many pictures for this post.

What I did yesterday was to Cut away the bumper from the mounting plates to line it up properly. Then I finish all the the metal plating for the bumper. So now it actually looks like a bumper. It was easier and easier the further you got on the build. The hardest part with this build was creating a square straight box to use as a base.

I also bent the hoop and the tubes going around the head lights. I wanted this done so I know where the tubes will fit on the bumper before I start doing reinforcements on the bumper.

Bending the tubes was done with a simple Harbor Freight Tools pipe bender. I took a 1.75"x.120 DOM tube. Taped one end with duck tape. Then filled it with water. After that I filled it up with sand and taped the other end. This is done to minimize have the tube flatten out while bending it. Then I just went at it and started bending. Work pretty well. The tube flatten out some anyways But not to bad and no tube's cracked like they have done for me before.

Bumper cut away and refitted to the mounting plate in a centered position.
DSCF2749_zpsc7fbbd92.jpg


Continued with the plating
DSCF2751_zps3fc0dc88.jpg

DSCF2750_zps53f794ab.jpg

DSCF2752_zps437448f9.jpg


Then I bent the tubes. This is the hoop that will hold my 2 9" HIDs.
DSCF2756_zpsdef15f82.jpg


And here is the end result of the day.
DSCF2757_zps405ad9c7.jpg

DSCF2758_zps7117987c.jpg


More to come soon....
 

boo471

Adventurer
Front bumper build

I did some work on the bumper yesterday. I was mainly focusing at getting the hoops mounted and starting to look at the internal reinforcements of the bumper.
I wasn't sure about using hoops at first but once I got them on i was very happy with it and thought it look pretty cool actually. It kind of makes the bumper a lot more aggressive.

Added the main center hoop to the bumper. It has about 30 degrees lean forward and is wide enough to house my 2 9" HIDs.
DSCF2759_zps51f41048.jpg

DSCF2760_zps1e86784f.jpg


After that I started to play around with the head light hoops. Trying to find a good balance of protection and lean inboards/down to get that aggressive look. Once I had them where I wanted then I started doing the notching, by hand of course :)
DSCF2761_zpsedee50b4.jpg

DSCF2762_zps7e2382aa.jpg

DSCF2763_zps09b80093.jpg

DSCF2764_zpsdc3b5189.jpg


I welded on tabs for my lights and test fitted them. Looks like one damn aggressive Baja racer in the front now
DSCF2765_zps7430ddf2.jpg

DSCF2767_zps1c21804c.jpg


I also welded on some grid plating(or what ever you call it in English) to cover the vent holes so no big rock and other crap will fly in and hit my radiator.
DSCF2768_zpsba7ffdae.jpg


Here is my "winch" in its position so I can start looking at a winch mounting plate and where to mount a cross member. I noticed that I wasn't able to move it as far to the side as I want to after I rounded the edges so the fairlead might not get perfectly centered.
DSCF2769_zpsdc880f87.jpg


This Is what it looked like at the end of the evening.
DSCF2770_zps67a42742.jpg

DSCF2771_zps038e5efd.jpg


I hope I will be able to build some this weekend and hopefully get the reinforcements done so I can start welding everything and get this sucker done soon. I have a busted shoulder and spending this many hours every other evening building a heavy bumper like this is not really helping out :)
 

Forum statistics

Threads
185,896
Messages
2,879,317
Members
225,497
Latest member
WonaWarrior
Top