Merkabah: MB 2626 AK 6x6 tipper to expedition truck conversion

biotect

Designer
pairospam,

Thanks for that image of Jago Pickering's 6x6 Tatra.

Was wondering about its subsequent career, after having posted some links to its build description – see http://www.expeditionportal.com/for...xpedition-RV-w-Rigid-Torsion-Free-Frame/page8 and http://www.expeditionportal.com/for...xpedition-RV-w-Rigid-Torsion-Free-Frame/page9 . Your post inspired me to do a bit of follow-up research, which you can see here – http://www.expeditionportal.com/for...pedition-RV-w-Rigid-Torsion-Free-Frame/page24 .

All best wishes,


Biotect
 

Timod110

Observer
Pairo

Just read the whole thread. Fantastic. I love that you just get through it yourself and with friends by fixing and not just bolting on new parts. Looking forward to more updates!!

Cheers

Tim
 

pairospam

Observer
Biotect:


Jago and Lucy fell in love with Chile, as most travellers do, and they are building his house in the south, near a turistic town named Pucón.

The Tatra is still here, waiting eternally for the spares from the Czeck Republic.

Cheers.


Pairoa
 

biotect

Designer
Hi Pairospam,

Yeah, Jago wrote to me that he is building an "eco-house", and right now has a big crew of 20 + people working on it. I wrote him an email filled with questions, and he was really nice about it, wrote back immediately. He's incredibly busy right now, but said he'll respond more at length when the current burst of work on his house subsides.

Interesting, that detail about waiting for spares from Czeck. Isn't Tatra big in Brazil? See http://www.tatratrucks.com/your-tatra-partner/dealer-and-service-network/ . So big, that Tatra might even manufacture trucks there, in a joint venture with Paccar DAF? -- see http://www.automotiveworld.com/analysis/87119-brazil-tatra-to-start-assembly-by-2014/ , http://tatra.com.br , http://www.tatraworld.nl/2011/05/10/tatra-seals-deals-in-brazil-saudi-arabia/ , http://www.paccar.com/newsreleases/article_news.asp?file=2753 . Apparently, via DAF, Paccar owns a large stake in Tatra. So maybe Jago should contact Tatra Brazil instead? But no doubt he's already thought of that.

I recently posted something about the pros and cons of going with a Tatra 815 6x6 chassis instead of a MAN SX 44 6x6, at http://www.expeditionportal.com/for...pedition-RV-w-Rigid-Torsion-Free-Frame/page26 , bottom of the page. Love Tatra's unique backbone-tube drivetrain and split-axle design, and hope that Tatra (and its unique technology) has a future. But one major concern seems to be that Tatra is a small company, and its service network is not nearly as comprehensive as MAN's. As the most recent series of posts in that thread suggest, MAN most definitely does have a future. For instance, MAN just won a huge Australian military contract. Part of the same Australian Army modernization program that's replacing their old Landrovers with 6x6 G-wagens.

All best wishes,


Biotect
 
Last edited:

spencyg

This Space For Rent
Wow....such a remarkable build. Your efforts are astounding sir and your attention to detail is enviable. I look forward to reading more developments as they become available.

Kudos.

SG
 

pairospam

Observer
Guys, many thanks for your words. Sorry for the lack of updates but time have been pretty much scarse.

I will post as soon as I will be able to.

Cheers.


Pairoa
 

pairospam

Observer
Merry Christmas to you, guys!

Well, it's been a while. Too much regular work, little time to work on the truck, less time to work on the updates.

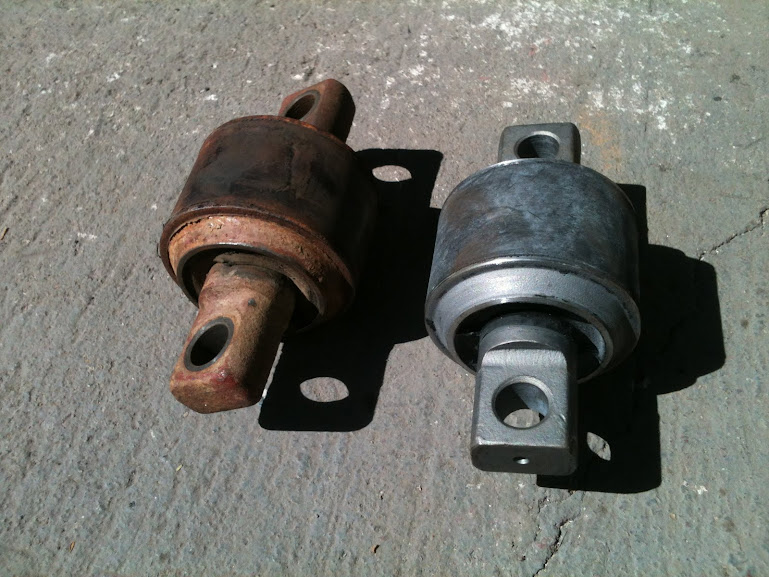
Where were we? Oh, yes… the elements of the bogie. Many of them were ready, except the springs, the shafts and some of the struts. The springs would have to wait until I had the time to do a specialist consultation and do the maths to modify the amount of leaves and, of course, for replacing the broken master leaves.

Made some order, moved the “blast chamber” over the frame and discarded a lot of old and broken boxes and accommodated the parts in new ones to have them clean and ready for assembling.

1529.JPG

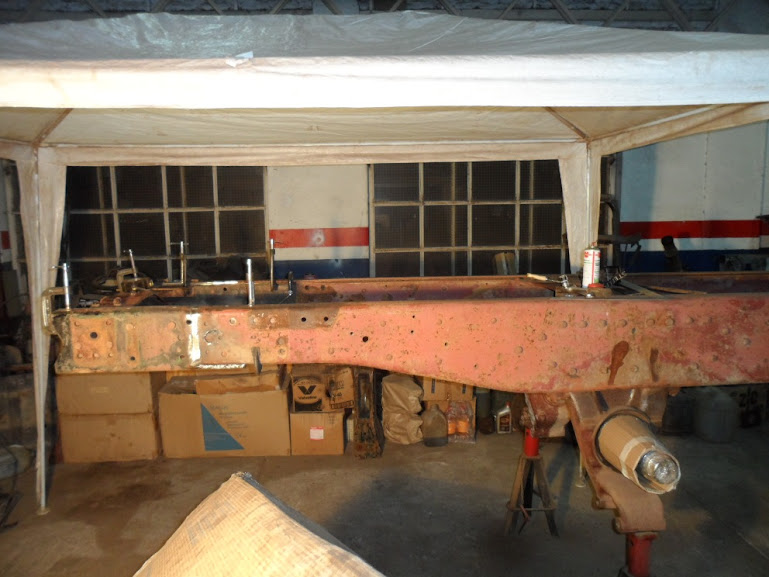
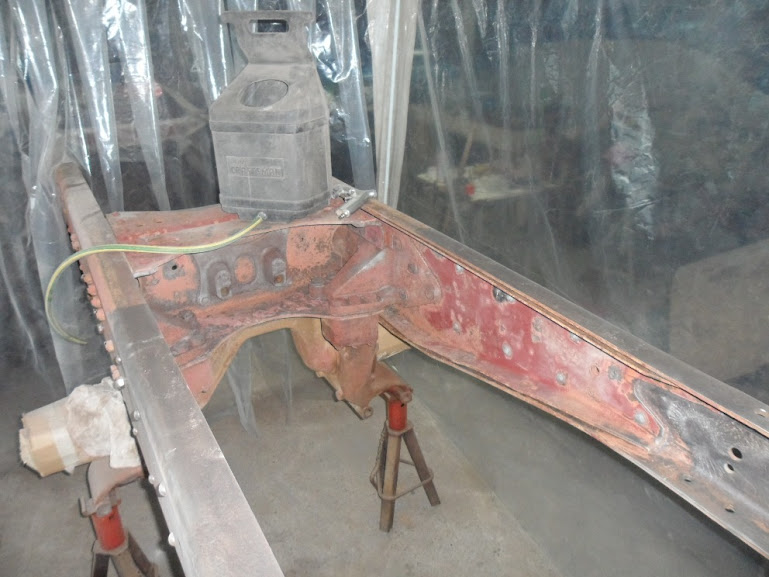
I then started working on the rear part of the frame, at last. For a long time I was busy cleaning the surfaces and the crannies from rust and dry mud with manual tools in order to work the less with the sand blaster, which would do the final touch. In some places, as I stated before, the dirt was hard as a rock and I had to chisel a lot.

1545.JPG

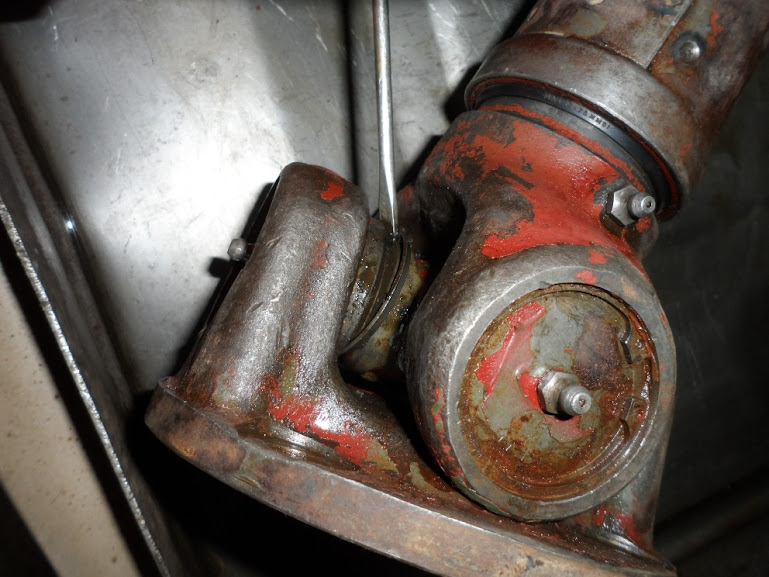
Tired after a lot of chiselling and spreading rust everywhere I stopped and made something different for a change. I buckled down to take out the exhaust muffler. It was in good condition, something pretty rare among the trucks of that age. I took out the left exhaust pipe without much trouble, but when I tried to remove the right side exhaust pipe it did not move a single millimeter. After trying many ways I ended up using the cutting disc. It was not a nice picture but the muffler was going to be replaced anyway.

1552.JPG

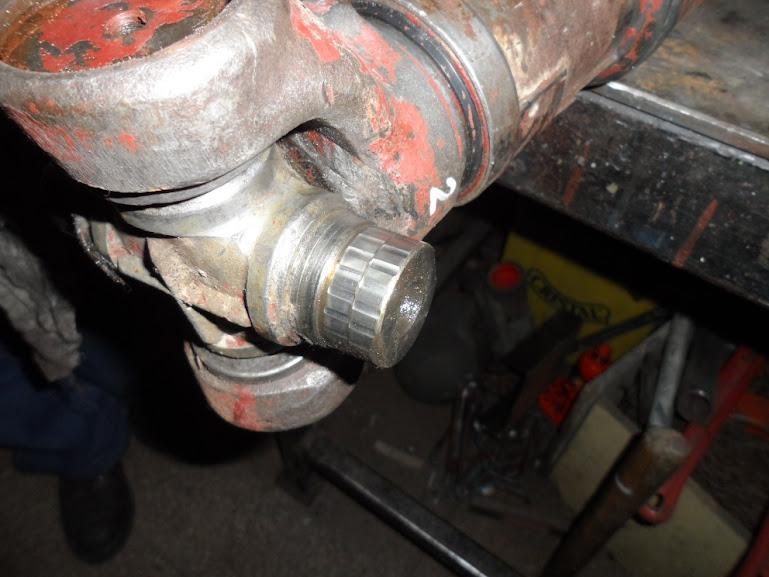
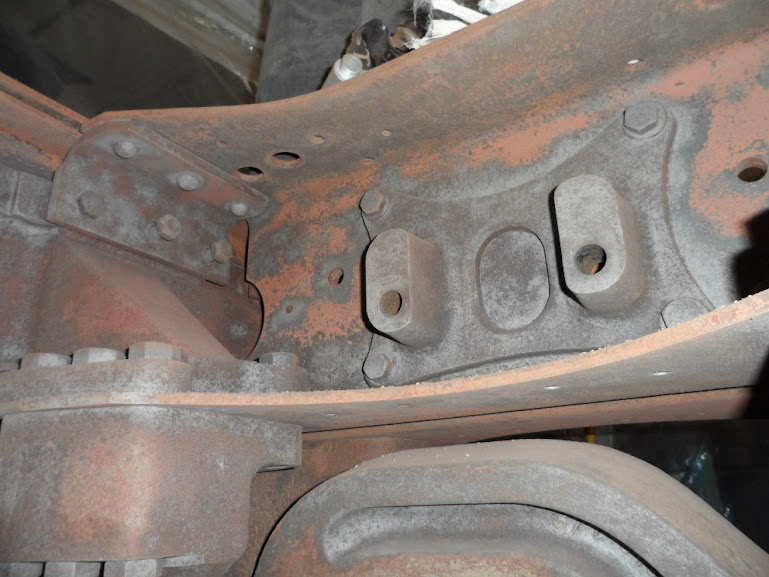
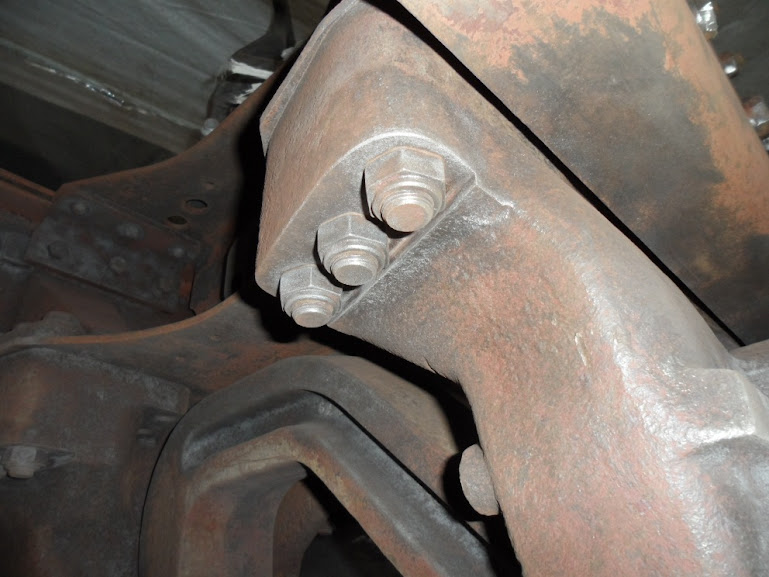
Once the muffler was out the bulky gear box/transfer was totally exposed, and the next job was to clean it and prepare it for painting. It was also necessary, of course, to clean the rest of the frame, the supports and all the corners full of some crusty mix of dirt, grease and rust.

1555.JPG
1556.JPG

Scraping before cleaning and washing was capital as the grease remover was not able to deal with the job by itself, and there were some points where I had to chisel hard to take the dirt off. The electric wires were stuck in this kind of cement as they passed between the cross members and the main rails of the frame.

After many hours there were several kilograms of dirt and pebbles under the gearbox, but it seemed that there was no difference comparing before and after. The cramps at the arms and forearms told differently, though.

The next working sessions I went on cleaning the rest of the surfaces of the gearbox and the frame. I also dedicated some time to lose the wiring from the frame so I could finally remove it completely. That way it would not longer block the cleaning and painting of the frame and I would be able to inspect and repair it carefully. I was only hoping to be able to put every connector and wire back in place as at that time I had been not able to get the wiring diagrams.

1563.JPG

Eduardo and I went to the cattle once again carrying the diesel generator that I had rejected as noisy, and Christ… how I was right! Hanging fiercely the big power grinder I hoped to finish Spare's suffering applying the quietus to the frame. Once cut no one, not even me, could revive Spare. Finally he was free to rest in peace.

1568.JPG

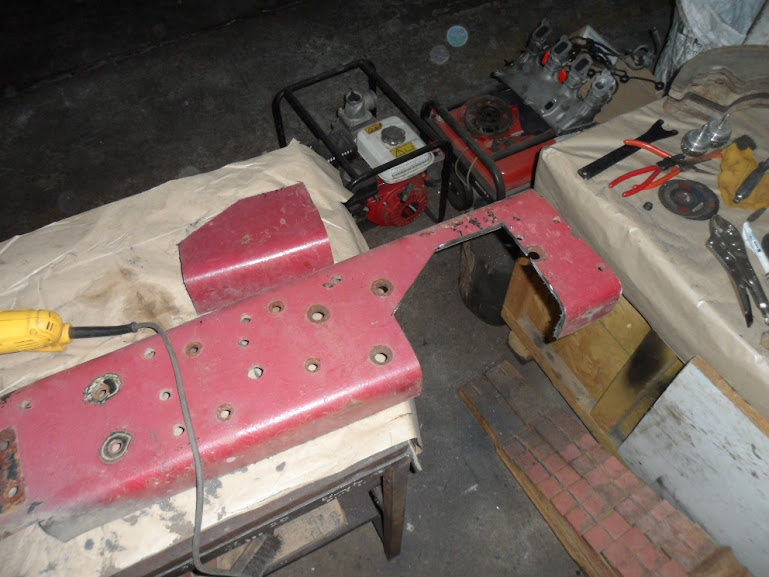
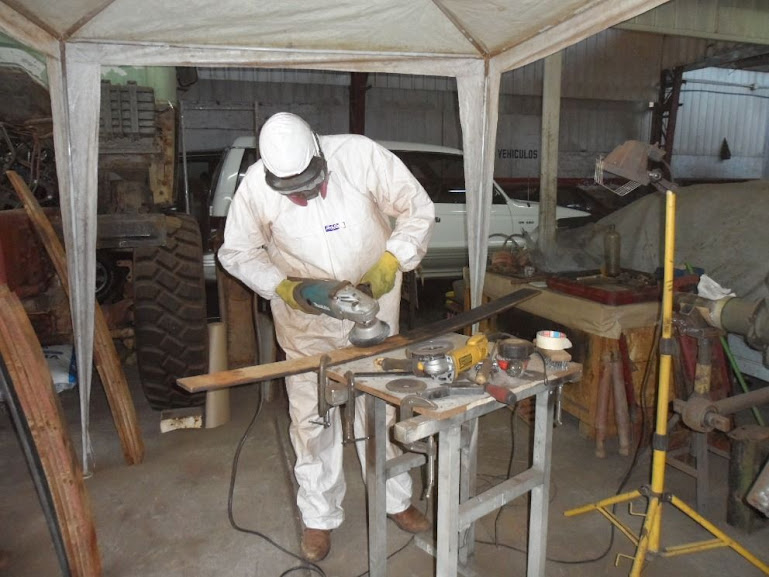
I took a big portion of the front frame including the cross member to have material to work with to fabricate supports or anything that could be necessary. We loaded the piece of steel on the Mitsubishi L200 and took a brief rest and to allow our ears to heal.

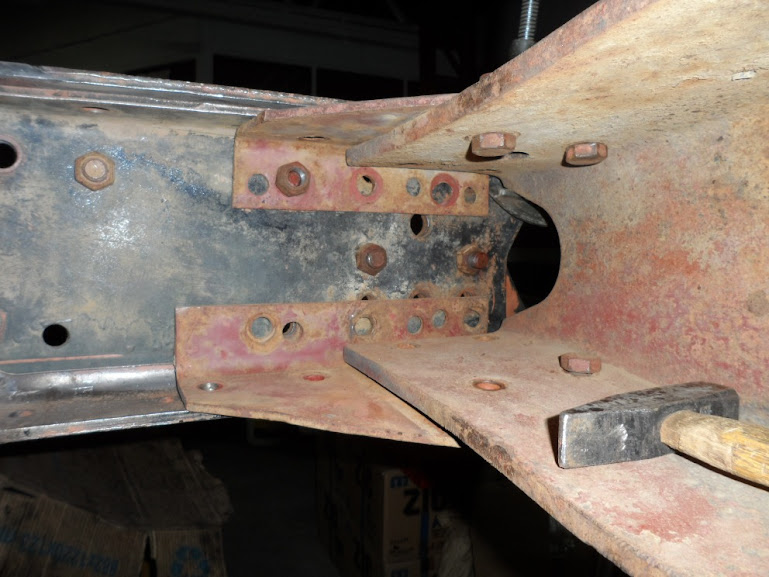
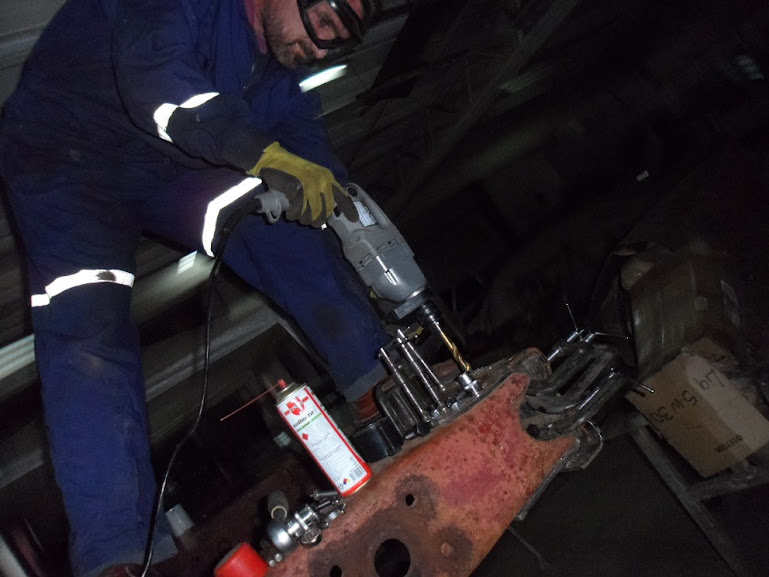
At the shop I disassembled the piece of frame to get the rails. However, what seemed to be a simple task ended up with an almost two hours struggle to take all the bolts and the rivets out. The guys at Mercedes knew what they were doing!

1575.JPG

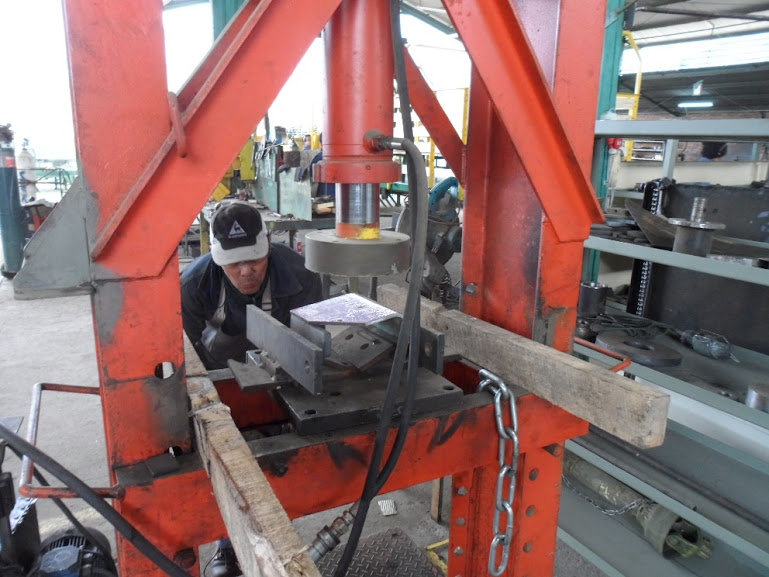
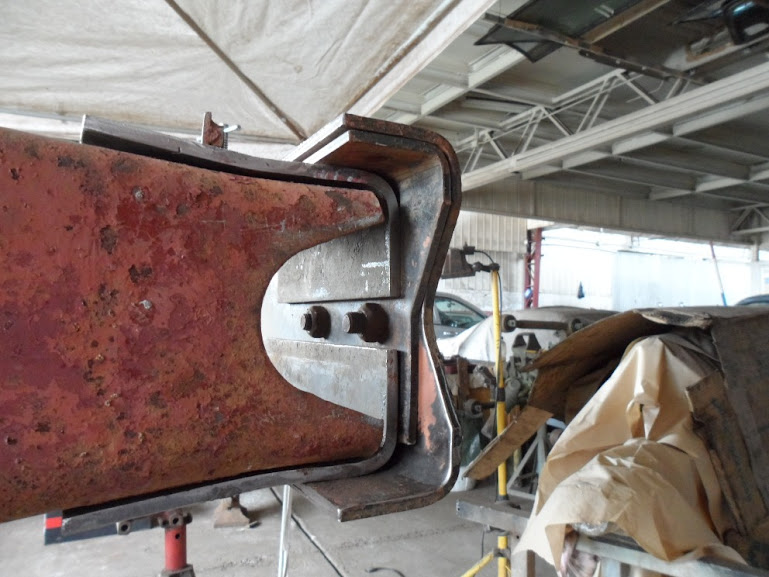
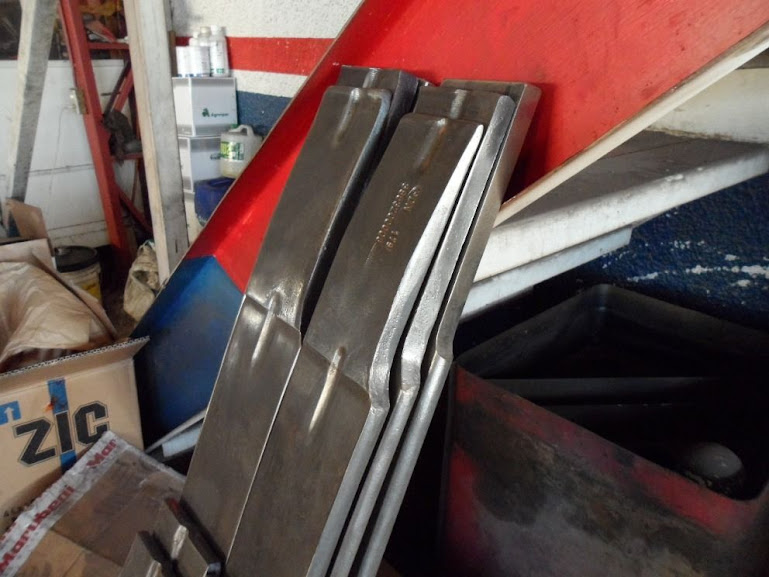
When both rails and the cross member were separated and once the measures were ascertained many times they were marked and cut as required. Put in the right position it looked that there would be no major problems. The graft rails were taller than the original rails but the inferior parts could overlap so it would provide a better surface for welding and better resistance.

1580.JPG

I removed the aft cross member to allow for the auxiliary inner rails to be held in position to test if they fitted and to see if any other manoeuver was of use. They fitted perfectly, not to believe it.

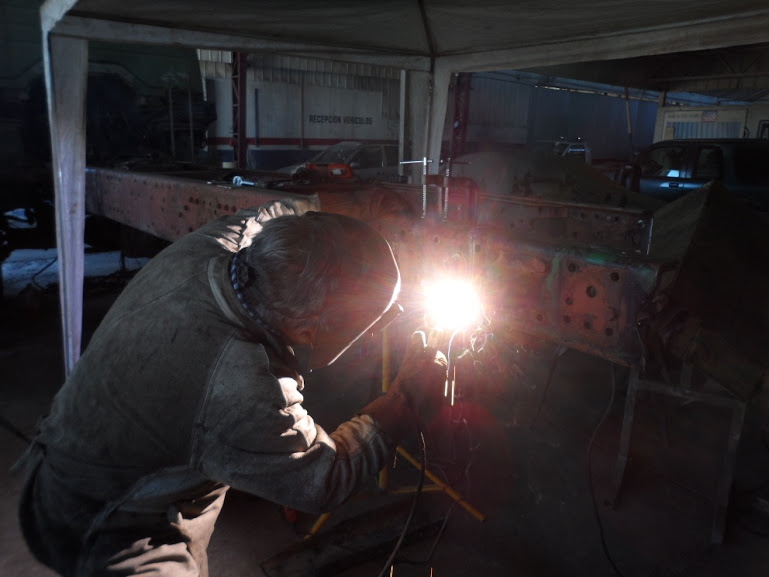
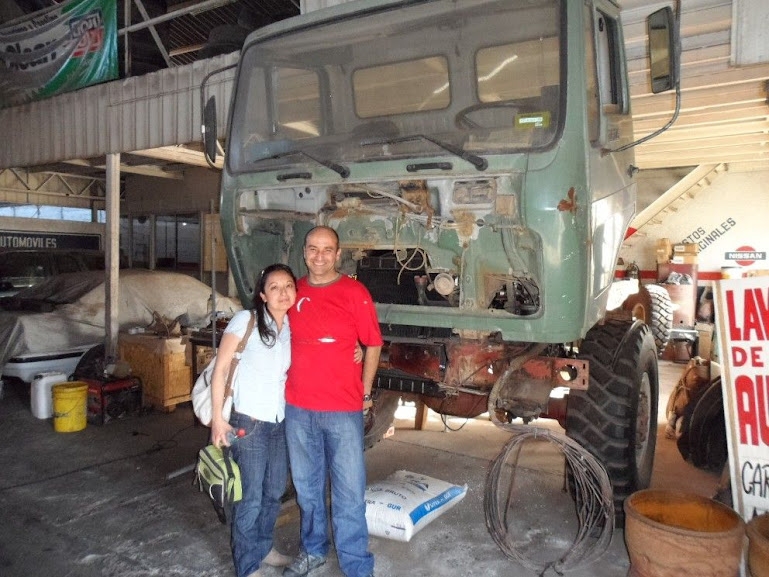
One last look and a shot at the Merkabah with her frame intact for the last time, the grafts ready for welding. I could have welded them myself, but I had still a little common sense left so I preferred to call a professional for that quiet important task.

1590.JPG
 
Last edited:

pairospam

Observer
The next morning Maestro Chaleco arrived pretty early. After a few instructions and tests, some bivelling of the edges and almost one kilogram of 70/18 welding rods, the tail of the frame was finally stretched by the maximum reglamentary 42 centimetres. The inner auxiliary rails and the overlapping would confere extra resistance. Good.

1597.JPG

1599.JPG


The supports of the crossmember needed to be replaced as the holes did not match with the holes of the grafted rails and because the auxiliary rails shortened the distance between both main rails. I cut new supports from the steel pieces left over. I took them later to the machinery shop of my friend Verardo where one of his workers and myself used the 50 ton press to curve the new supports, just as the original ones.

1602.JPG

1607.JPG

1610.JPG


Everything fitted perfectly when the pieces were put together, no supples were necessary. An excess of bending was corrected with the gentle use of the big sledgehammer and voilá!

1612.JPG


It all looked straight ahead then, just mark and drill, but… as always… I was wrong. It was just the beginning of a never ending series of assemble, tighten, mark, disassemble, make sure, drill with caution not to burn the little Bosch, re-assemble, make sure and mark again, tighten from the other side, mark, go on and on, each time more weary as every piece became heavier and heavier with the effort needed to drill the holes in the damn hard steel. Of course I only drilled the new pieces as I wanted not make any extra hole in the main rails.

1623.JPG


Naturelly, the little Bosch died after a little and I bought a new, bigger chinese power drill with which I made a few holes before it coughed and passed out too. I went back to the store and bought the biggest and strongest Bosch power drill at hand and threw them back the chinese thing. The Bosch drill was also made in China, of course.

1627.JPG


In the end, after many efforts and hours of drilling, this is how the tail of the Merkabah looked like.

1635.JPG


I took the cardan shaft and the superior strut of the boggie with me at work. Victor, the all-fixing-guy, helped me to replace the silentblocks of the strut in his little workshop.

1614.jpg

1617.jpg
 

pairospam

Observer
We checked the universal joints as well. There was no possible revival for them. I asked for a quote to the official dealer and, as they were some kind of ultra special joints, the price was unbelievable high. I looked for alternatives and there were none, so I had to think about some kind of machining.

1589.JPG

1620.JPG


I resumed the work on the tail, this time with the big Makita and the big metallic brush, switching between the crossmember and the rails. The rust was not as superficial as I expected so it took me quit a while. I got pretty bored and tired by handling the heavy machine.

1642.JPG


I had to work on the weekends and for many days I was only devoted to the cleaning of the frame and its components, including the gear box, and every time it seemed that there was more and more dirt and grease around.

One of those days the package I had been waiting for the past month arrived. From Tulles Cedex, la campagne française, the central tire inflation system had been finally delivered after been retained 45 days at customs.

Slowly, as opening a Christmas present, I opened up the box and checked its content. It was all there, and actually the system itself was very simple, plug and play, and no aeropacial engineering was needed for the installation. The quality of the materials and finition were quiet impressive; it would be impossible to fabricate myself such a similar system. With a big smile on my face I put the components back in the box and I searched a good place to leave the box until the time came to install the system.

1667.JPG

1668.JPG


I have been asked a few times why to get so many parts and pieces that can even loose the warranty before been installed and used. Well… because I buy as I am able to do it and it forces myself to keep up not withstanding the adversities, the delays and the tiredness.

The last rains had made impossible to go out to look for clean gravel for sandblasting, so I profited to clean and repair some pieces from the axles like the brake drums internal covers. I also disassembled the front brakes, just for a change.

1670.JPG


The repair kit for the front sway bar arrived two weeks later than expected, but it arrived at least. Unwrap, test, wrap again and put the box in storage, as usual.

1678.JPG


I bought the spring leaves to replace both broken leaves of the rear springpacks. The finition of the work was not their most recognizable feature, but that’s what Pairoa was for. I spent quiet a bit of time grinding and powerbrushing each leaf. At that point I strongly hated rust, no matter if it was visible or not, or if it was important or not.

1697.JPG

1699.JPG
 

pairospam

Observer
One day René and Karen Larraguibel stopped by San Felipe and visited us at the workshop. We met some months before because of the local thread on the project, but René wanted to see the Merkabah in person. They had built their own expedition truck on a brand new Mercedes Atego basis, and learned the hardest way that if you want to make serious overlanding you need a serious vehicle, with a serious living cabin, serious tyres and a serious allure. After many, many months they finally finished Terral, the truck with which they would travel the Americas. It was a very pleasant meeting.

1690.JPG

1692.jpg

7BAYeNBsmCGPCj9RpbwuEfLWhrI3AG1669yoeSE2lZk=w769-h577-no


I read about the project of Peter and Margot and their 6x6 MAN wohnmobile, the Mounty, and I asked them if they wanted to share some construction tips with me. Peter sent me lots of pictures and information, happy to be able to help me. He already knew about the work done with the Merkabah. Great guy, Peter.

1719.jpg


Many hours after, a new design for the base-panel-frame for the Merkabah was ready, easier to build, just a little heavier, more stable, thinner than before, with more height available inside the Box, and I would even be able to build it myself.

1720.jpg


After finishing with the spring leaves it was time to get the gravel for sandblasting the frame, but no sand processing plant had the one I needed, Christ! Armed with the shovel and an improvised sifter, I went under the burning November sun to the Aconcagua riverbed and sifted the gravel myself.

While I was sweating heavy sifting the damn gravel, I saw at the distance, far away, a yellow thing that drove my interest. It was the cabin of a truck, and it was pretty familiar. Hmm…

It was in fact an old Mercedes NG tipper, half buried in the riverbed and slowly rusting in time. I inspected the wreck a little and found out that maybe some parts could be of use for the Merkabah. I asked about the truck and the women who ruled the place agreed to sell me some parts.

1705.jpg


A couple of days passed before I could wear the white overall and start sandblasting the frame. The progress was slow, very slow, and the gun jammed constantly, but the end result seemed worth the effort. I cleaned only superficially the most accessible areas to leave the rest of the job to the powergrinder. The consumption rate of the gravel was high, though, and I stopped only when the container was empty and all the gravel was on the ground. I sweeped the floor and recovered the gravel, but it was half gravel and half dust. Seemed that it was not the best of the methods.


1711.JPG

1727.JPG

1728.JPG


When I was powerbrushing I made a mistake, one of those stupid mistakes, and had a pretty intense but brief round with the mighty Makita. Ouch.

It was a clear and plain lesson, and a potentially more severe one. I ended up doing paperwork the rest of the day as the peeling was particularly rough. Please, do not attempt to fight the powergrinder at home and always observe the safety precautions.

1730.JPG
 

Iain_U1250

Explorer
Wow Pairo, hope you are OK, that looks painful. i've taken to wearing full leather welding jackets when using my power wire brush, too many close calls but nothing as bad as that. Glad to see you are back working on your truck. Keep up the good work, everything you do is one less thing to fix.
 

pairospam

Observer
Hi Iain and Noodlesswe:


This is history. From then on I am very carefull with powertools. It did hurt a lot, especially the days after... and the Makita died.

I have never stopped working on the truck but I am going slowly trying to update the thread here.

Thanks for your words.


Pairoa
 

Christian

Adventurer
Hi Pairo

Always inspiring to see your updates!
Be careful when using power tools, especially the wire wheel, although you look a bit worse for wear, I can assure you the wire wheel is a really nasty tooth brush!
Years ago, when cleaning the original rubber coating off of a Landcruiser 60 body, a brief lapse in concentration meant that I hit myself in the face with a 4" wire wheel, going down over the upper lip, touching my front teeth and proceeding down the chin... I looked like a traffic accident for a few weeks, but fortunately I heal weel and got away without scars...
 

Forum statistics

Threads
185,840
Messages
2,878,752
Members
225,393
Latest member
jgrillz94
Top