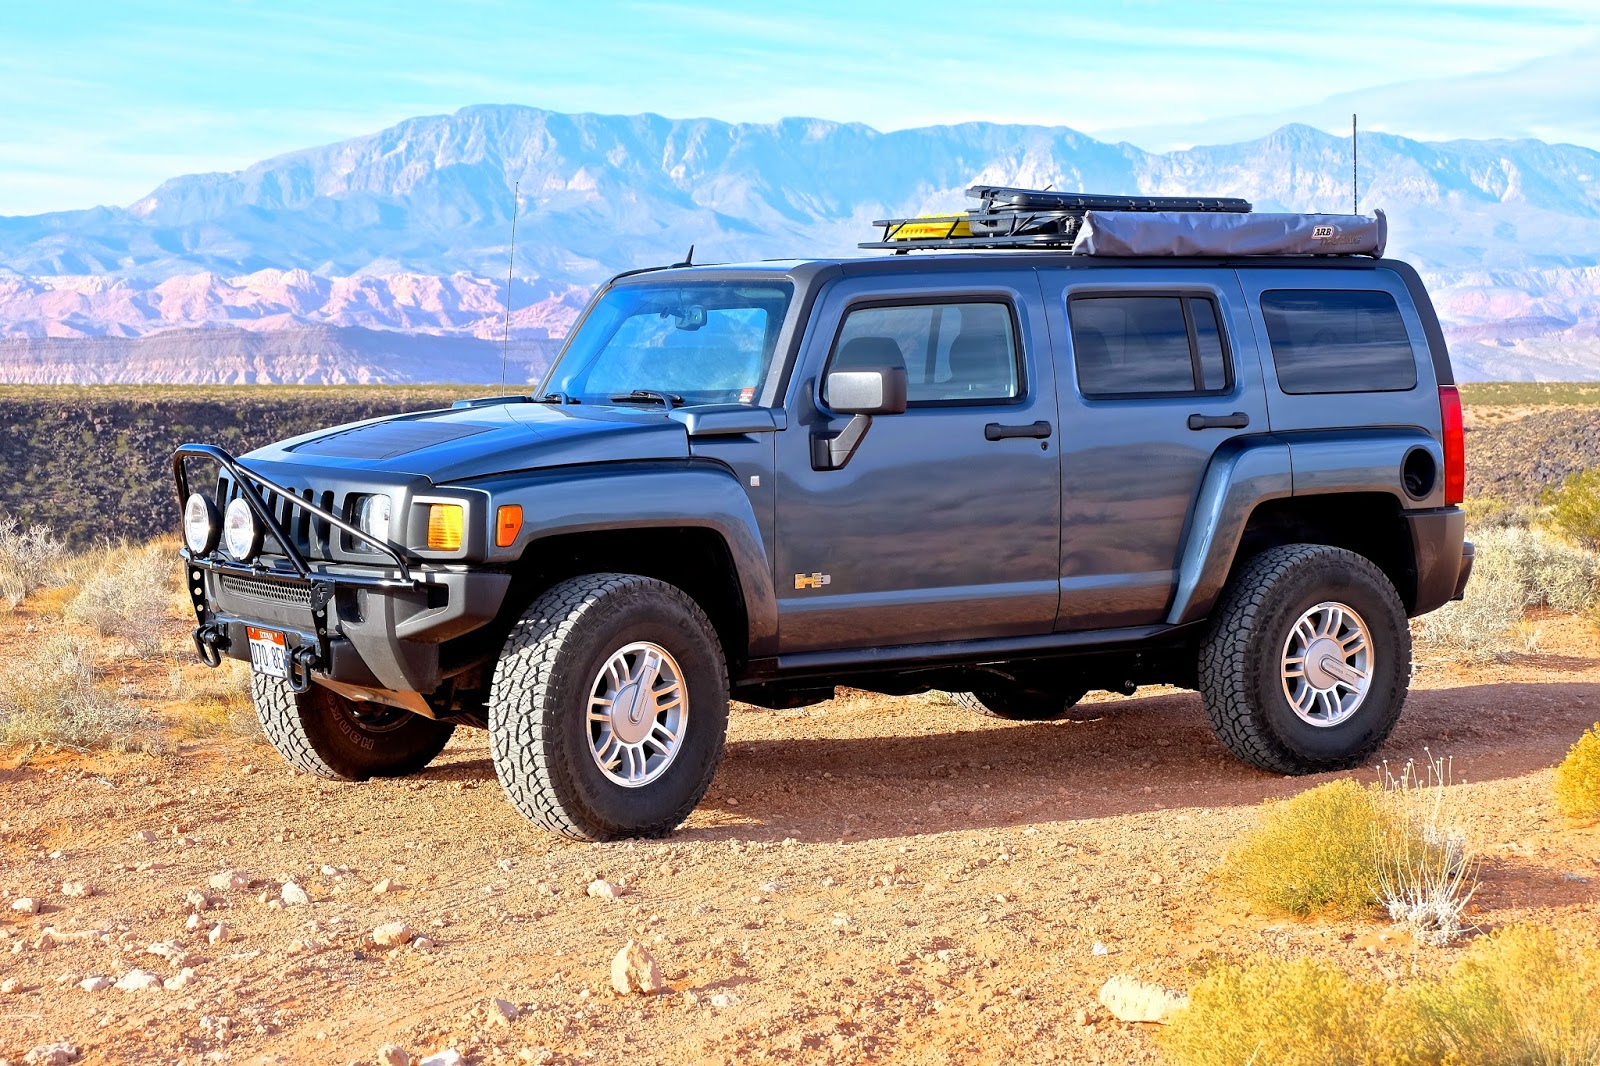
ImNoSaint's H3 Build

Imnosaint

Adventurer
PCM Update

Been a week on the upgraded PCM from PCM of NC and I have to say that the H3 has awakened. All that was promised has been delivered and then some - more torque and pull off the line and up the slope, remarkably better throttle response, better shift points on acceleration both on and off road, better use of low range exploiting the I5's torque. I've yet to get enough data on fuel efficiency, but I have to say for the price, the result is well worth it.

I'm baffled why the I5 H3 didn't leave the factory this way. Would have saved GM considerable grief in mediocre performance evaluations, perhaps even the demise of the marque.
 

Imnosaint

Adventurer
Less 18 Cubic Feet

I mentioned earlier about dealing with almost half the amount of cargo space in the H3 compared to the Montero.

Less 18 cubic feet requires lightening the load. This image below is from our Grand Staircase trek:

NGSFullMonty.jpg


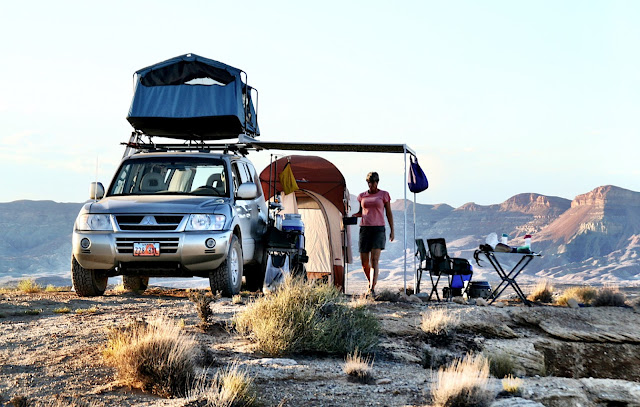
All that gear decompressed looked like this:

LGSCampEstMindy.jpg


And while all this made for a comfortable camp set-up, it all added up to diminishing the Montero's dexterity. And, man, that's a lot of stuff.

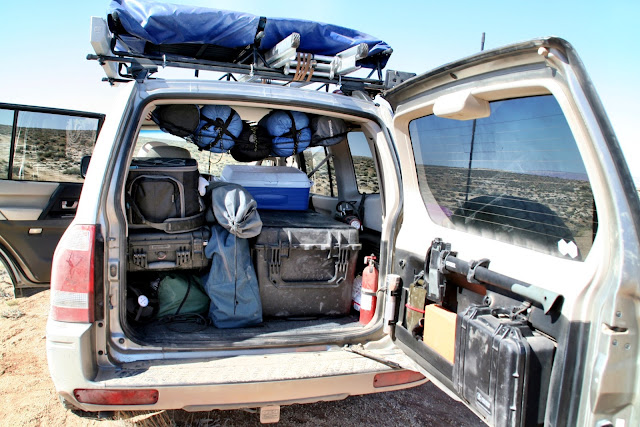
By contrast, here's the loaded cargo area of the H3:

Photo3.jpg


We've pared down some and went back to gear from our moto-camping days and made better use of the roof rack and a Trasharoo.

All recovery gear except the compressor is up top with smaller items in a weather poof tactical case. The Viair 300P compressor is stowed in the cargo area.
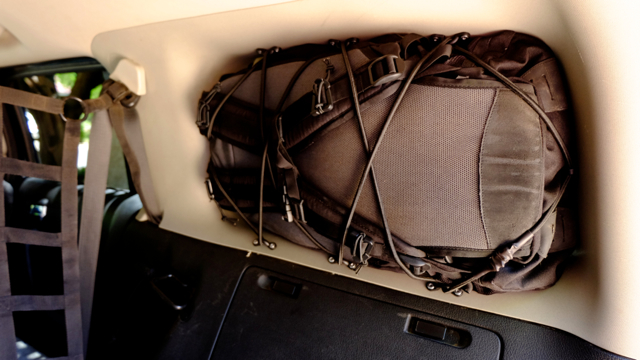
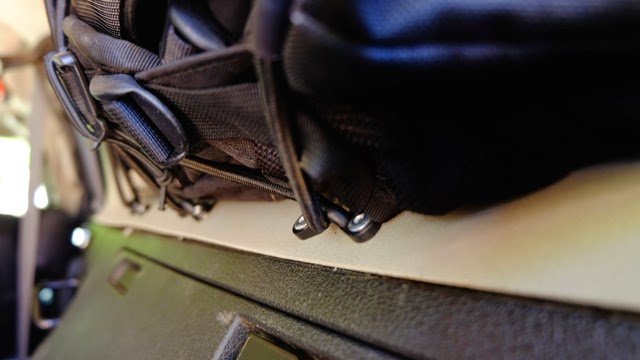
Photo2.jpg


The Trasharoo holds sleeping bags and pads and the lighter weight tent tent.

Photo1.jpg
 

Imnosaint

Adventurer
Cobra CB and ARB Install

Two important tools on the Montero build are now on the H3, a CB and an awning.

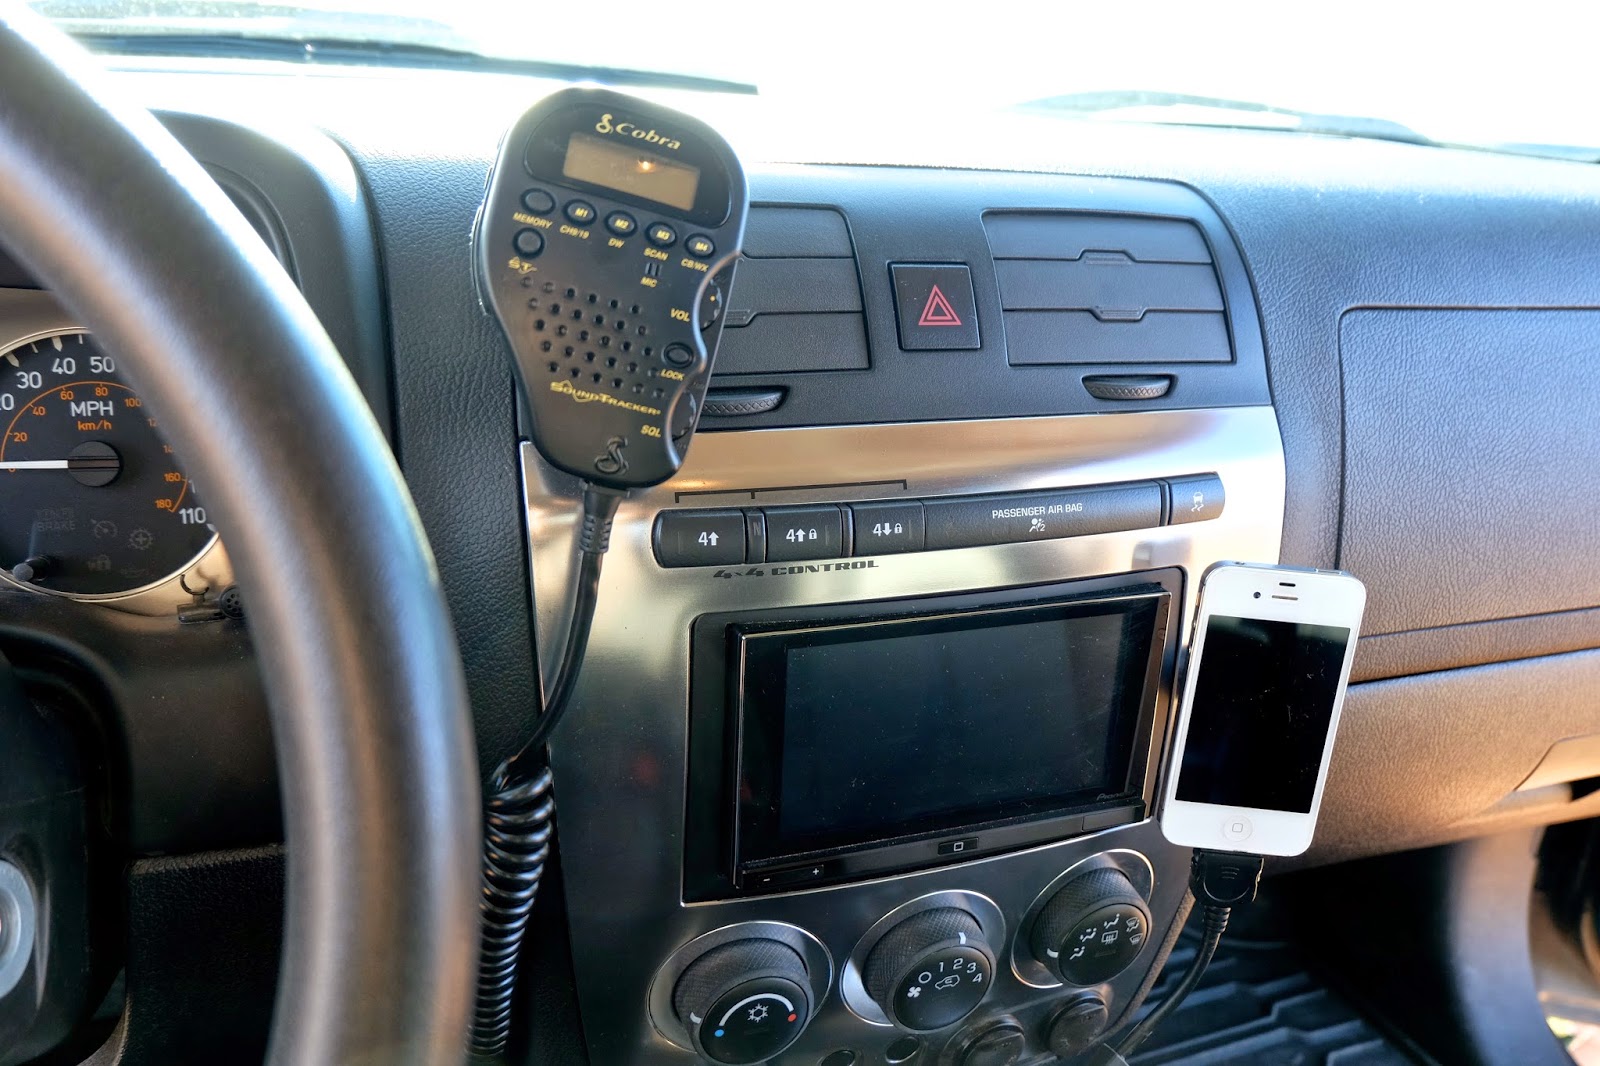
CB - The H3 doesn't have DIN room for an additional component like a CB radio, so I went with a device that has a head unit that mounts under the dash with a compact remote handset that has all the controls. Cobra makes a four-watt CB with a channel scanner and noise reducer, two features I wanted since my last Cobra CB in the Montero. I mounted the small head unit just under the steering column on the firewall, the easiest spot for the install while allowing adequate distance to the handset and accessibility for the antenna connection.

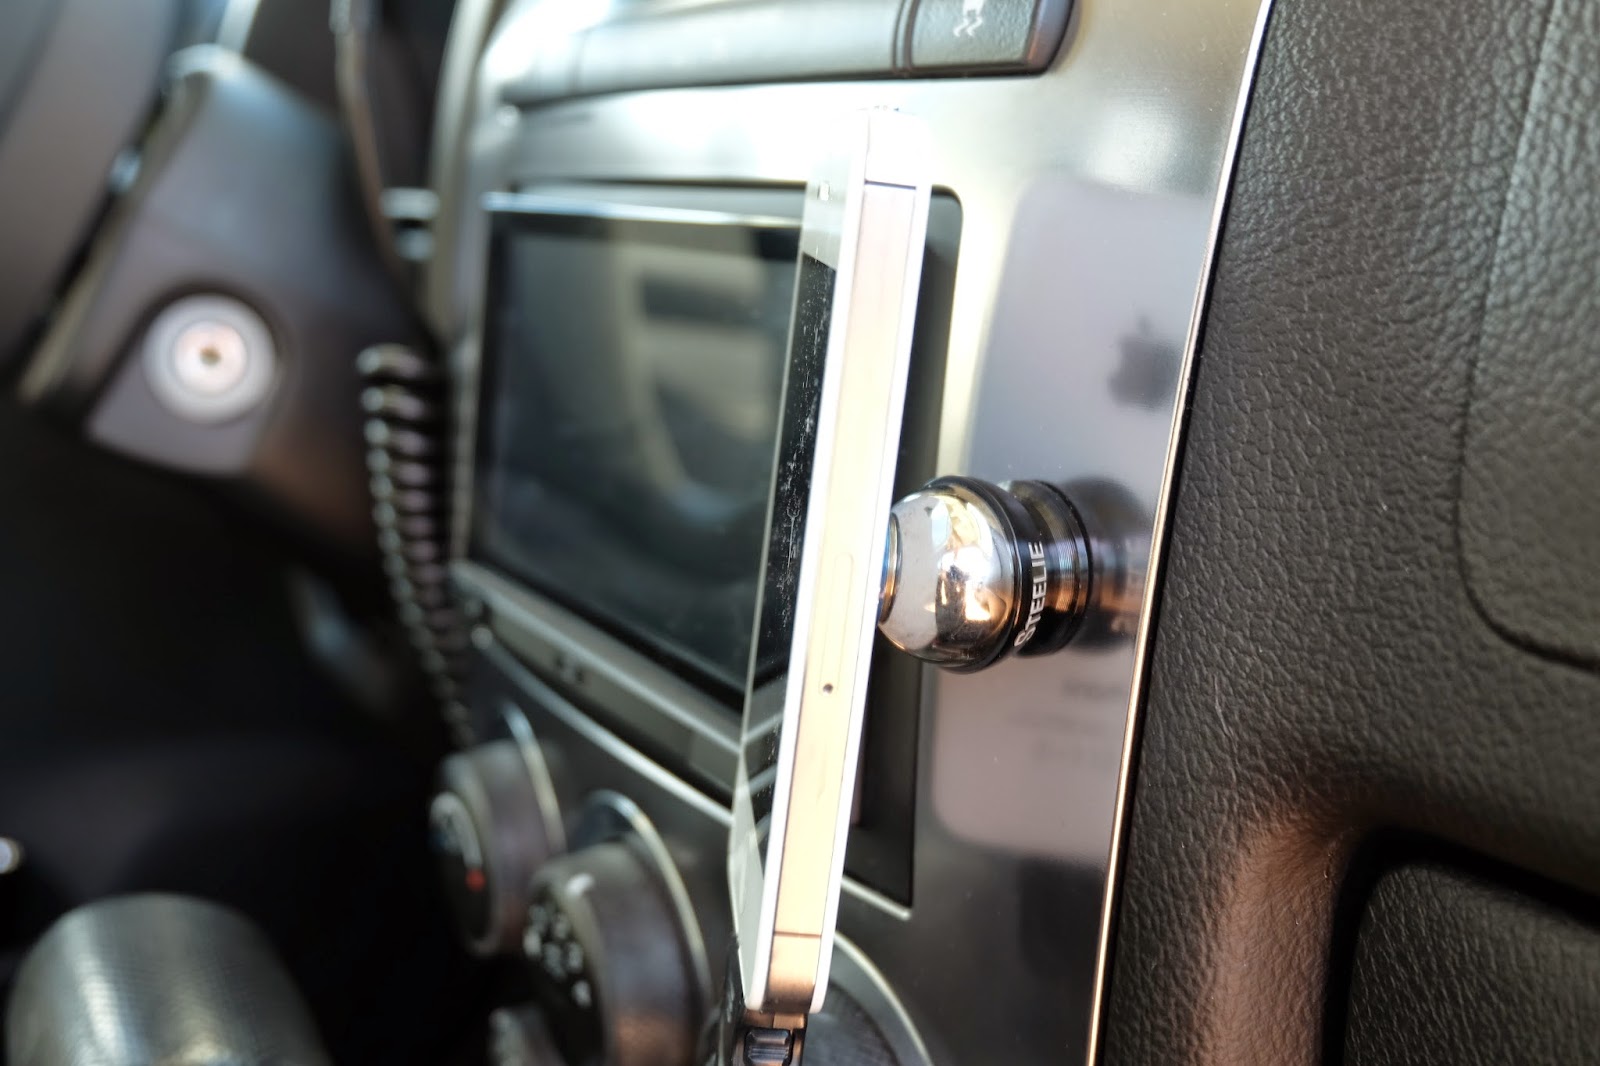
The handset is mounted on the ProClip mount I initially installed for an iPhone. I've relocated the iPhone to the over side of the panel with NiteIze Steelie mount.

DSCF0973.jpg


DSCF0968.jpg


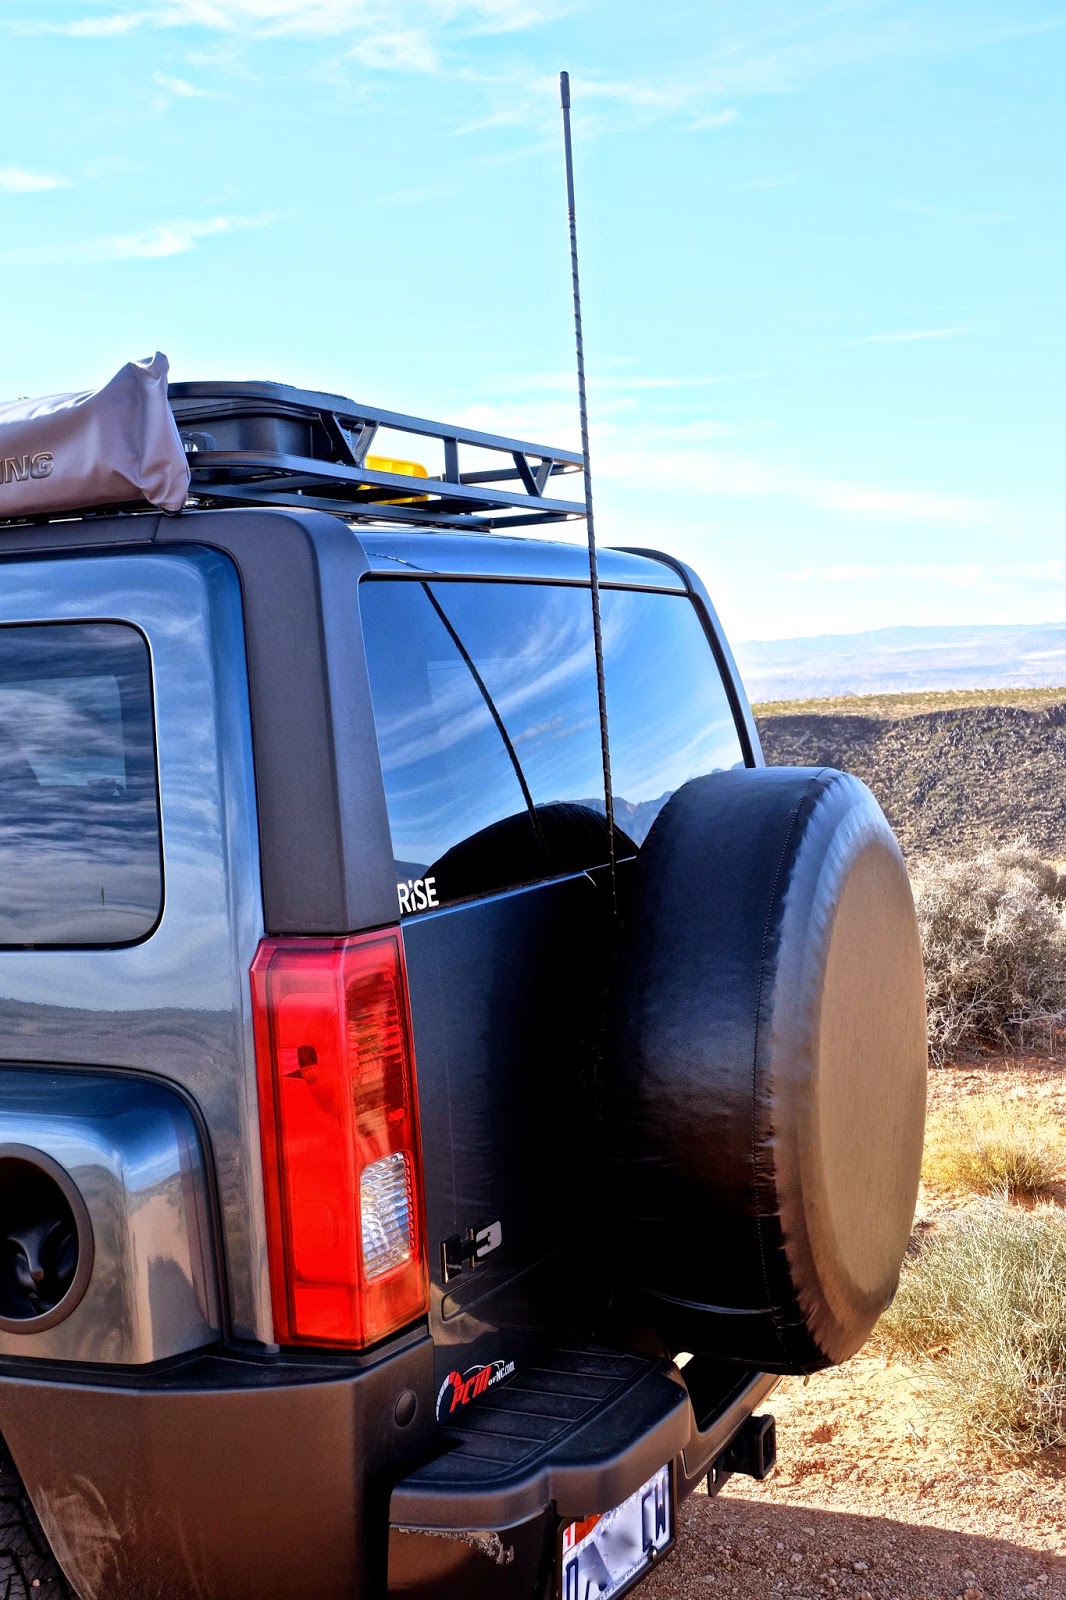
Eighteen feet of coaxial cable with Pl-259 Connectors connect the head to the 4' Firestick tunable antenna mounted behind the spare on the rear of the H3.

DSCF0961.jpg


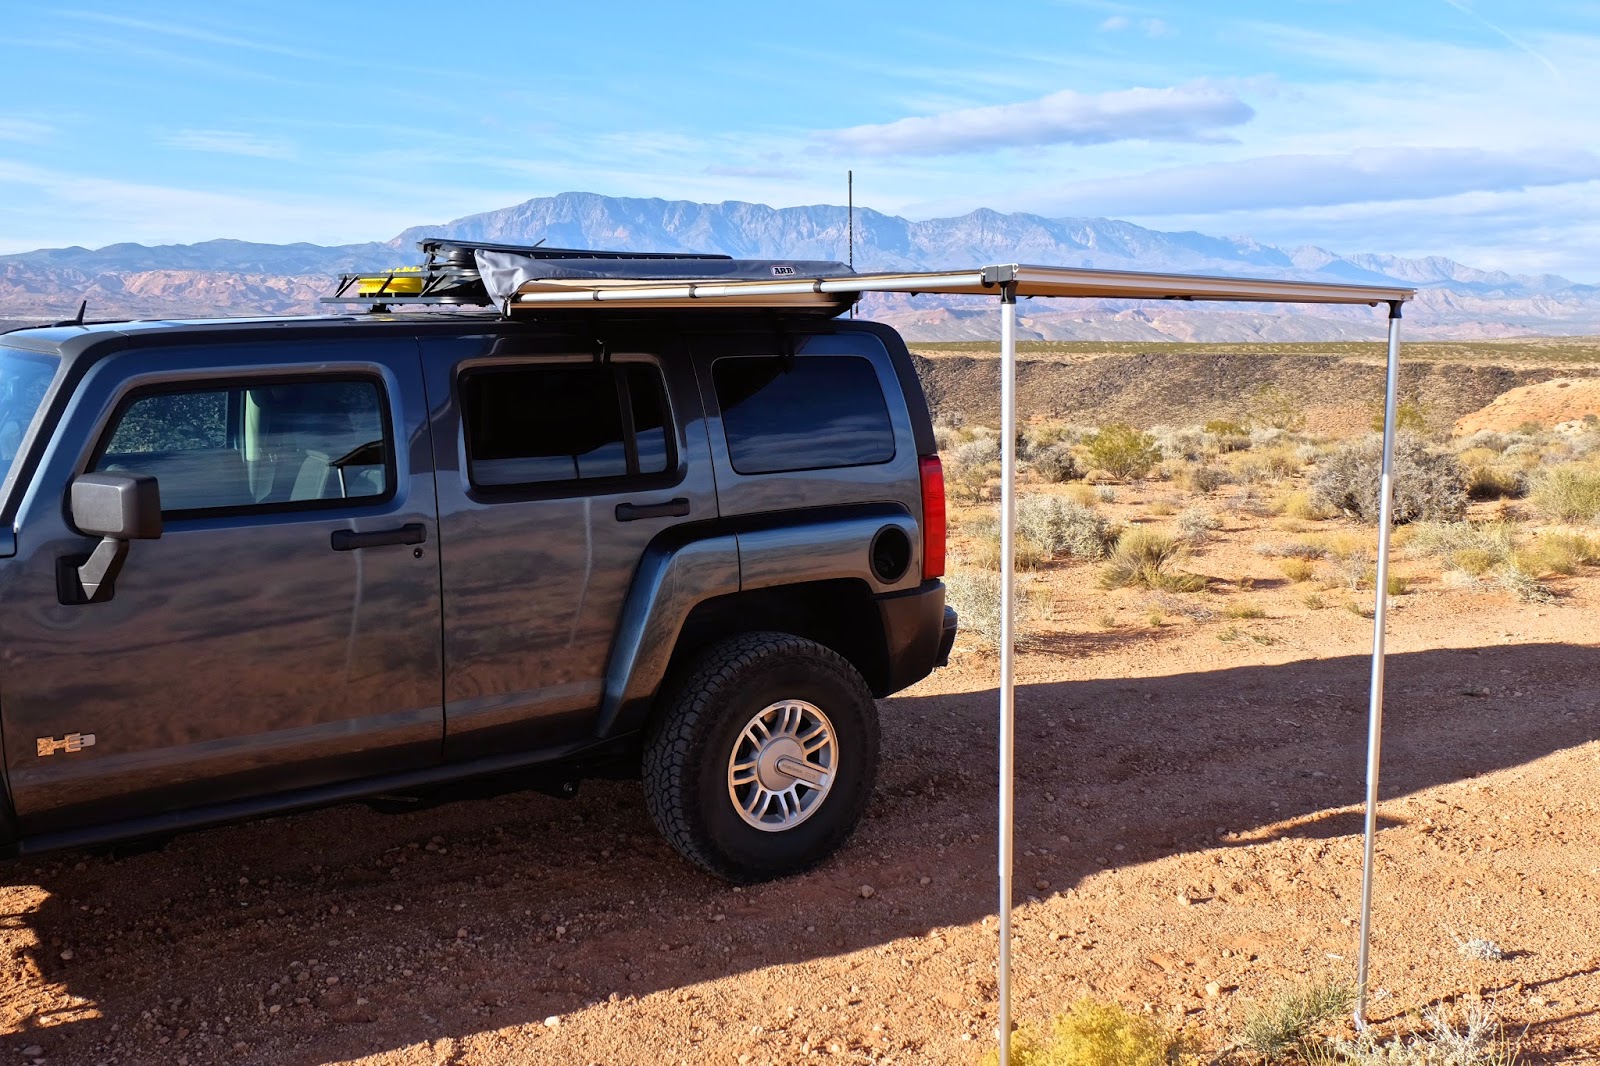
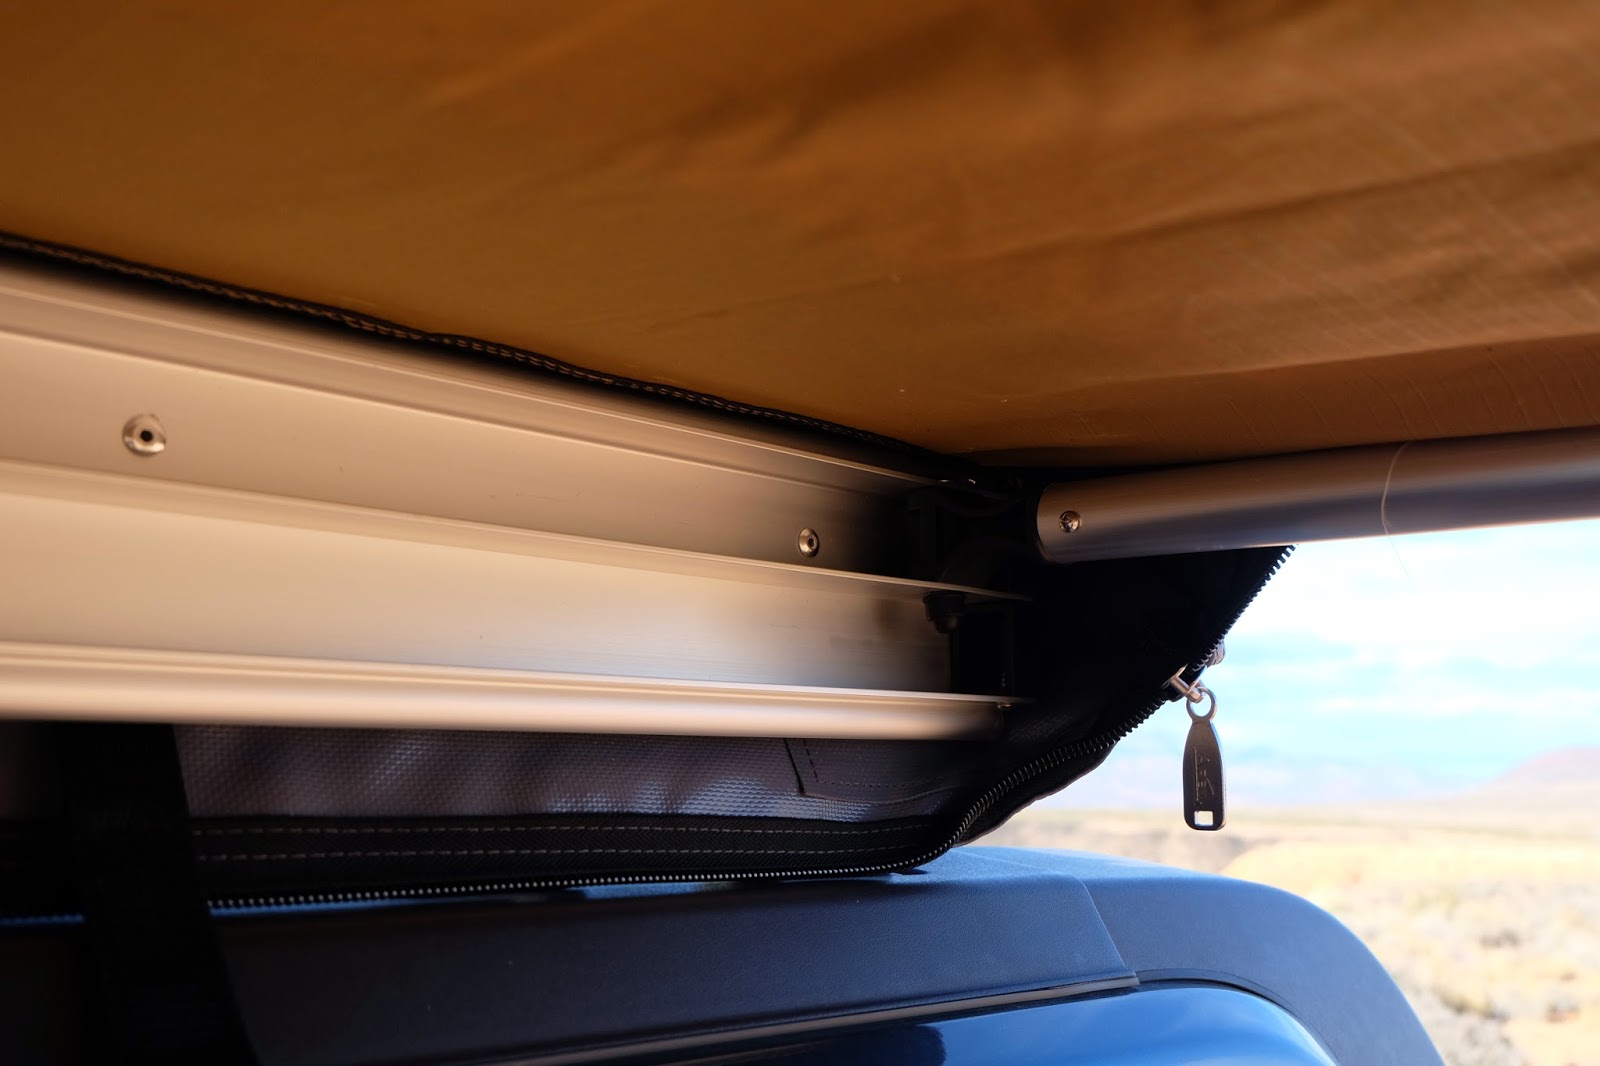
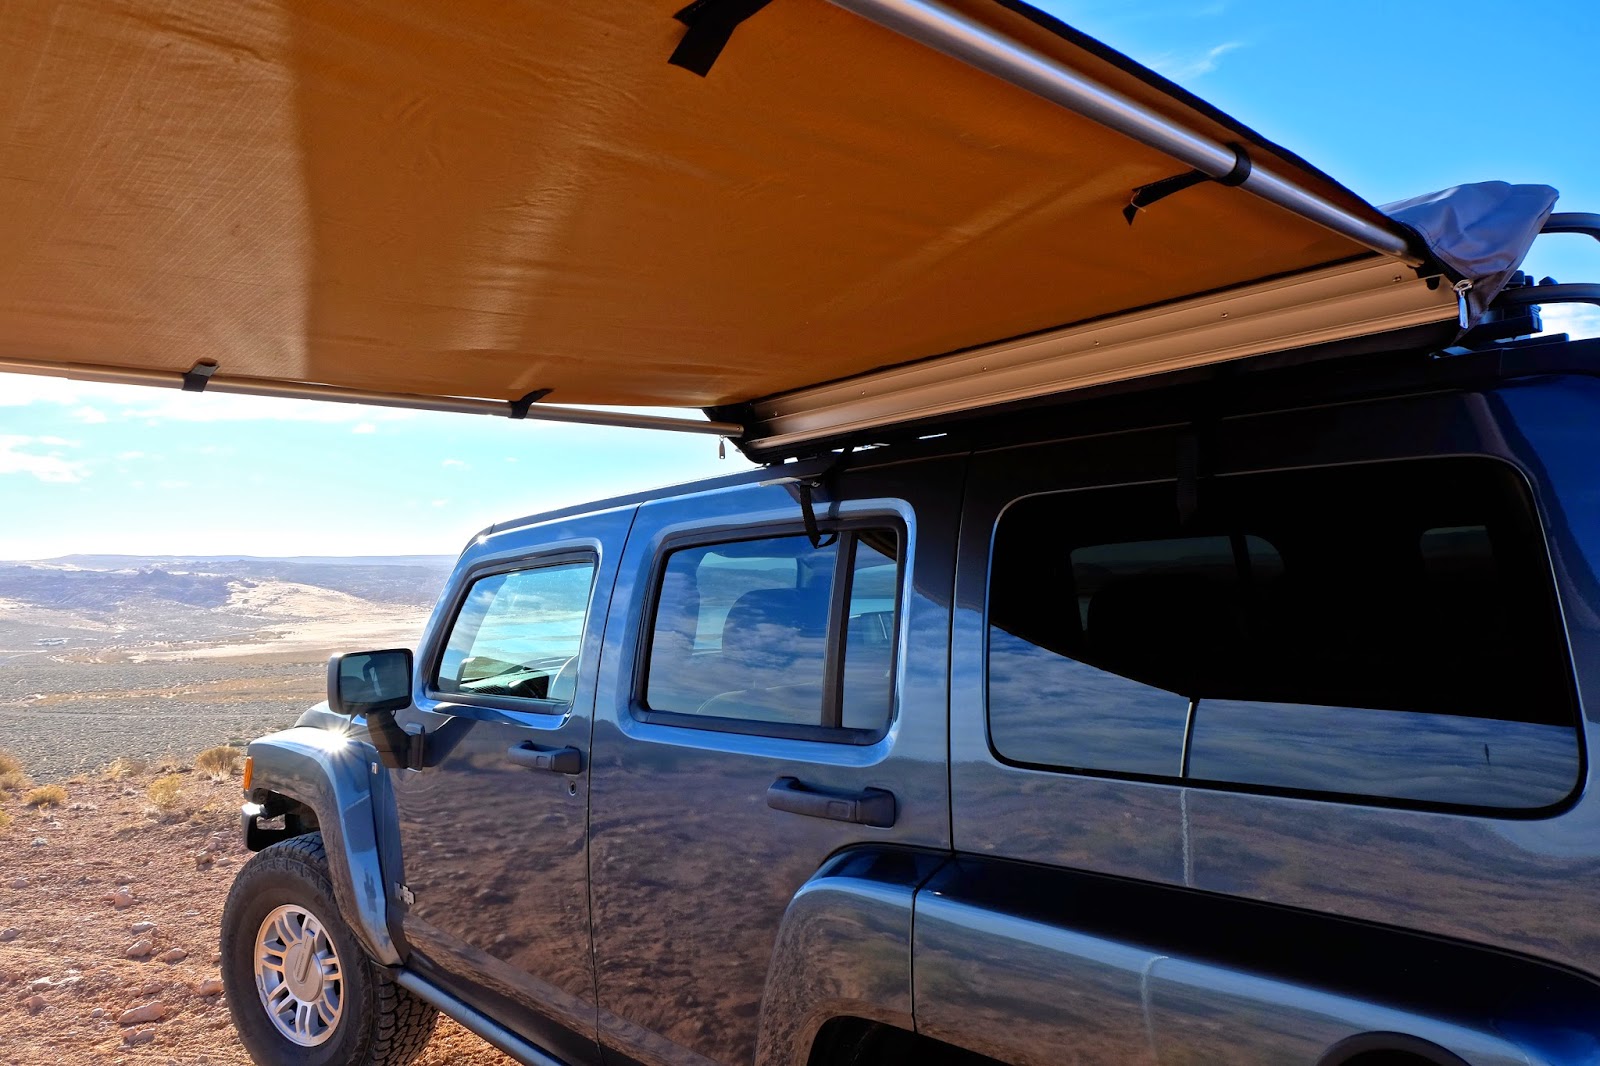
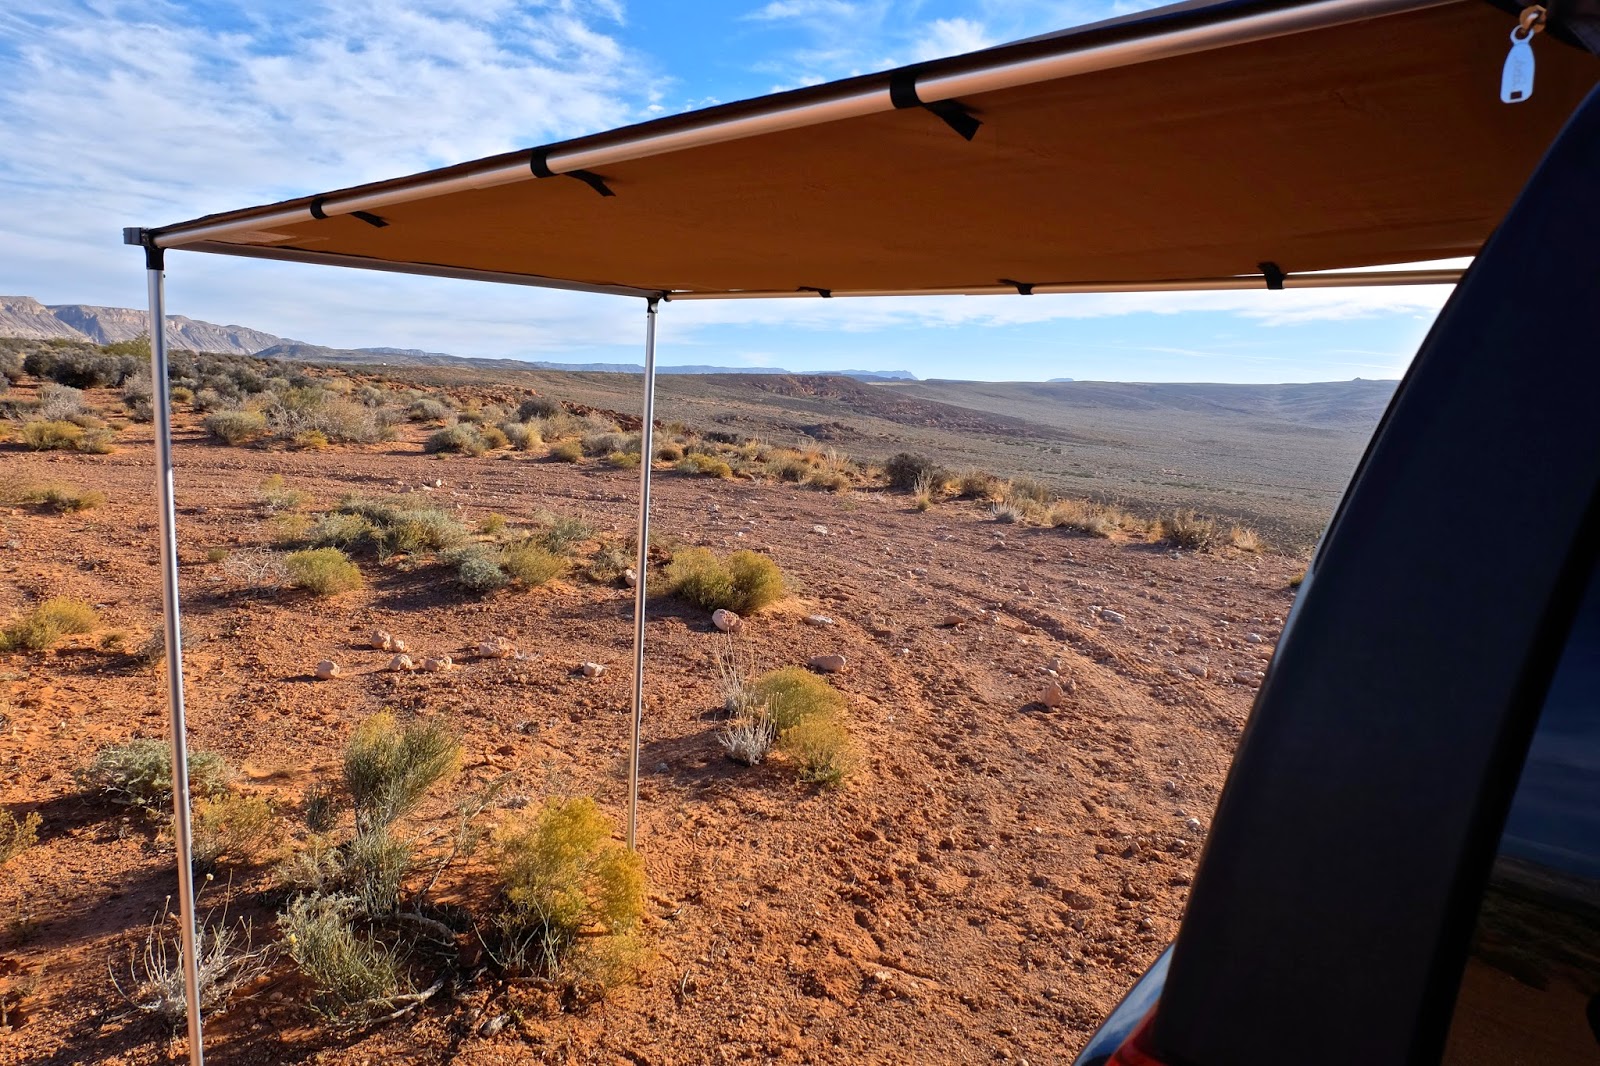
ARB 4' Awning - I had an Australian 60" Eezi Awn awning on the Montero that converted me to the idea, but not to the convenience since the Eezi Awn's cam system in the legs was unstable at best in calm conditions. This ARB awning solves that and other issues.

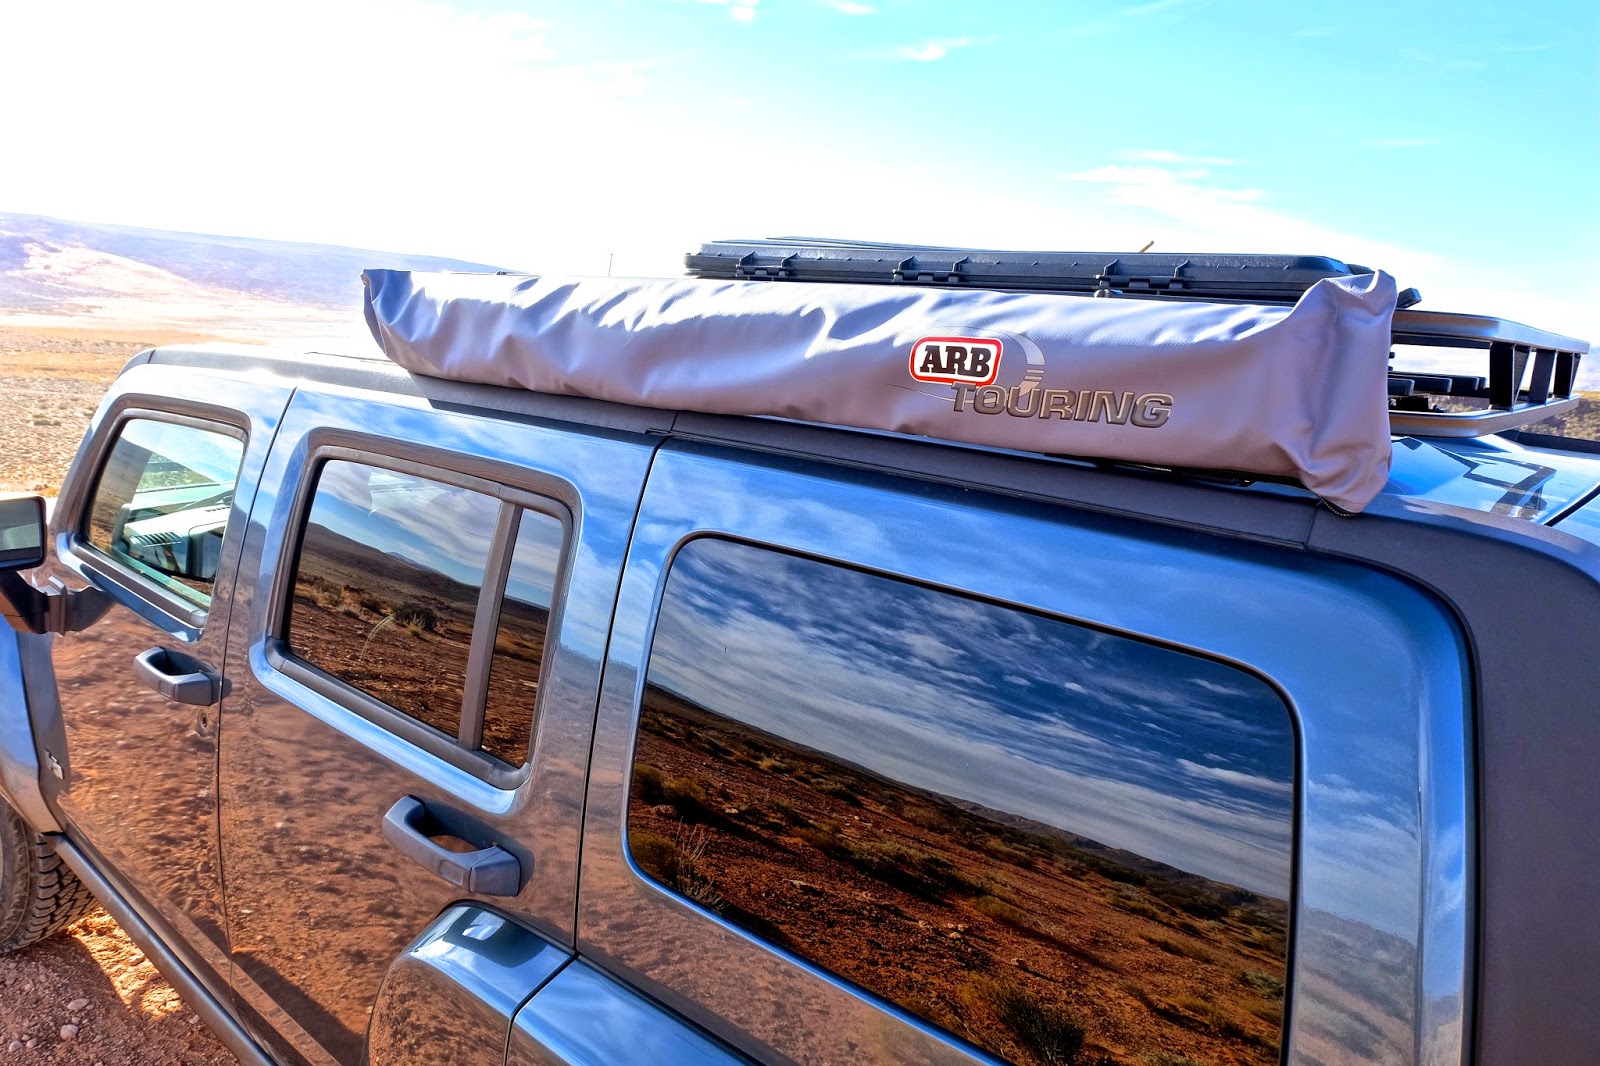
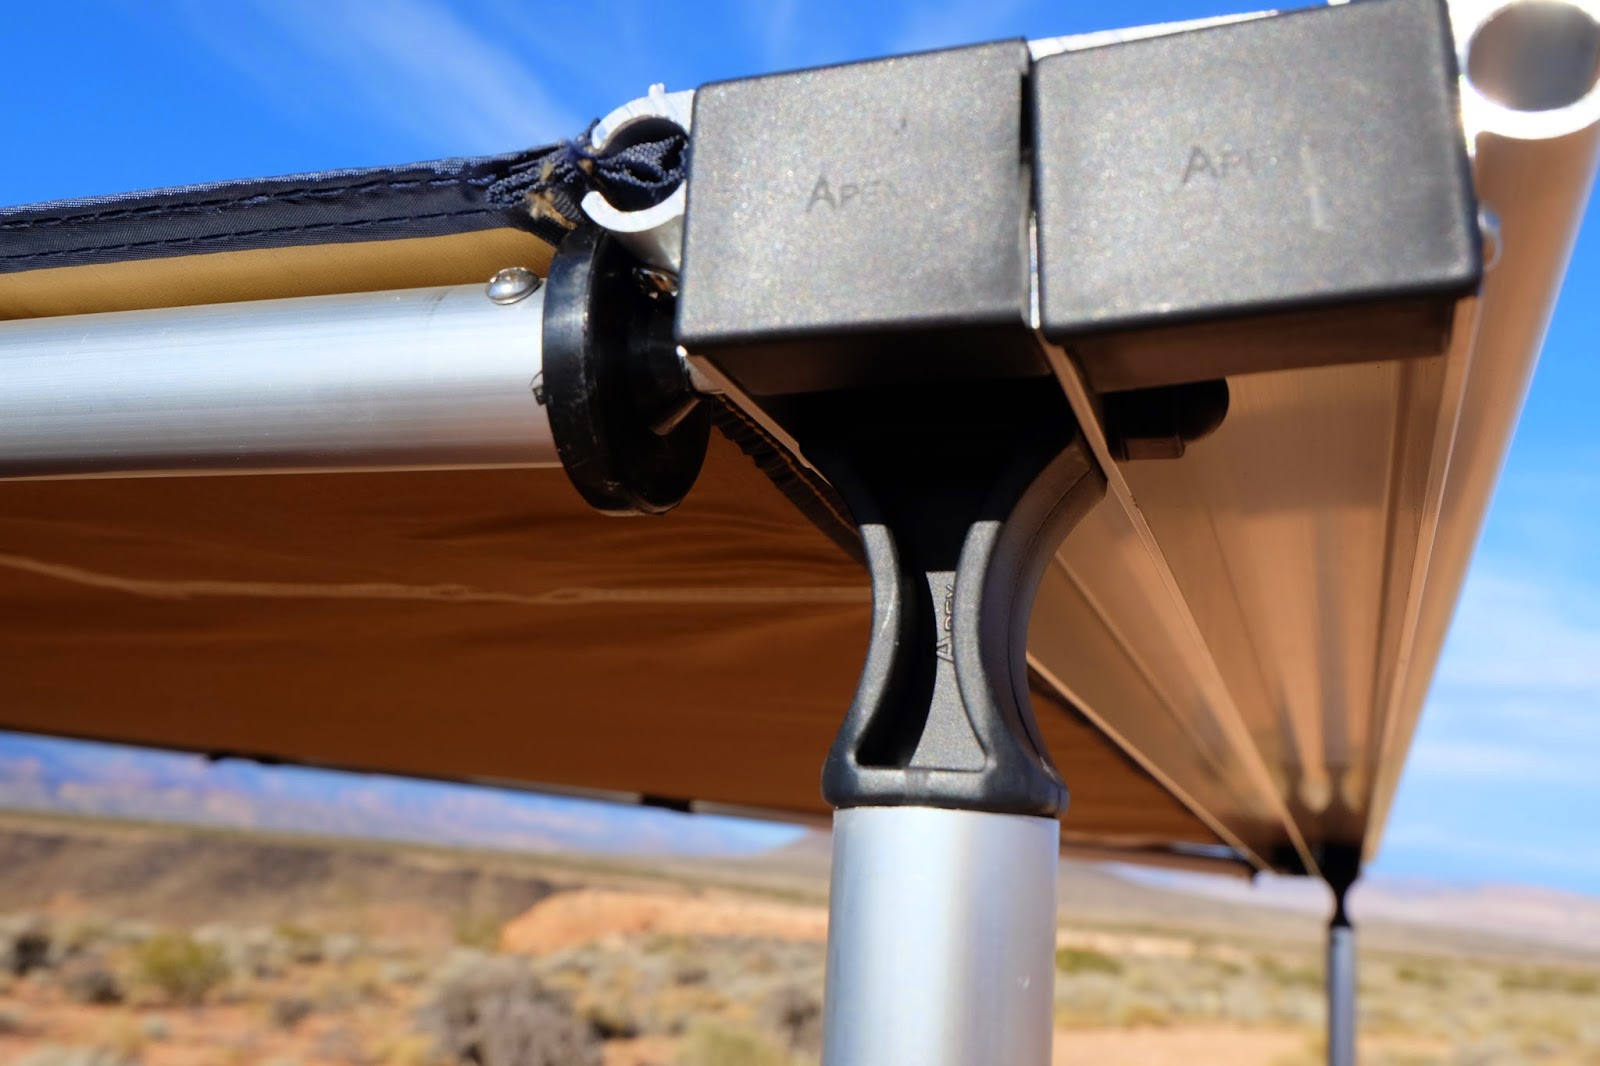
Its engineering makes it easy to deploy by one person. The construction is top notch with reinforced corners on the awning and clever plastic disk stays on the struts and legs that keep all the hardware in place until it's deployed. Stowing is a cinch in its PVC reinforced nylon bag with two d-ring velcro straps and heavy duty weather-proof zippers.

When researching the ARB 3110, or any ARB awning for that matter, I couldn't find detailed images of its build and deployment, so I'm posting these for those searching for the same:

DSCF0963.jpg


DSCF0977.jpg


DSCF0979.jpg


DSCF0981.jpg


DSCF0983.jpg


DSCF0986.jpg
 

Imnosaint

Adventurer
Front Suspension Upgrade and Leveling

From what I can tell by records and wear, the H3 had the OEM shocks at 125k miles. Its handling is lethargic and reminiscent of an old Buick Electra in its floating feel, characteristics no one wants in an adventure vehicle.

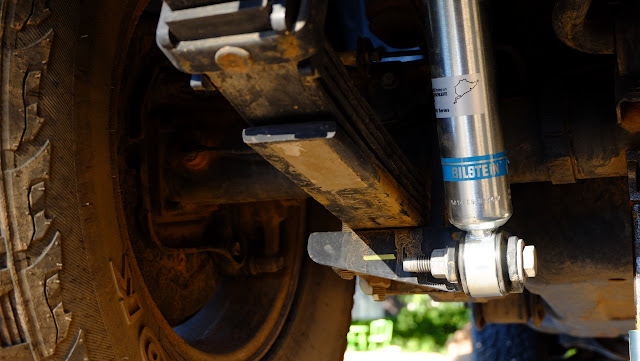
After researching applications and reviews I decided to replace the shocks on all four corners with a pair of Bilstein 5100 Series shock absorbers. The installation is straight forward though one might think it necessary to access the shock tops through the engine bay for the front - it's not. It's all accessible within the wheel well.

IMG_438409363.JPG


The rear install is a snap.

DSCF2150.jpg


After the install I adjusted the torsion bars on both sides while the vehicle was still on jack stands and before I remounted the wheels. The bars terminate just behind the B-pillars where the adjustment points can be found.

IMG_438473022.JPG


I tightened these 27mm bolts two and on half turns, increasing the tension on the torsion bars, and combined with the Bilsteins, lifted the front end, reaching more of a level stance. This adjustment resulted in a 22-inch distance between the wheel center and the bottom of the fender, compare to the rear distance of 23 inches.

DSCF0959.jpg


I modified the Montero with Old Man Emu suspension components and was amazed by the difference in handling and performance. I can say the same for the Bilsteins and the leveling - improved turn-in, firmer suspension, better feedback, less diving, remarkably more responsive. Having been an OME convert, I felt I may be cutting corners with the Bilsteins, but so far, both on and off-road, I'm very satisfied. Time will tell on their durability.
 
Last edited:

superbuickguy

Explorer
what you'll really enjoy is the increased travel the bilsteins will give you. GM put shocks that had 2" of travel - fix that, and the torsion twist, and you'll have nearly 6" of travel.
 

Imnosaint

Adventurer
what you'll really enjoy is the increased travel the bilsteins will give you. GM put shocks that had 2" of travel - fix that, and the torsion twist, and you'll have nearly 6" of travel.

Yes, big difference and improvement in travel. Now it keeps all four patches planted where I've crossed it up before and teetered on only two.
 

Imnosaint

Adventurer
SeatBackPack

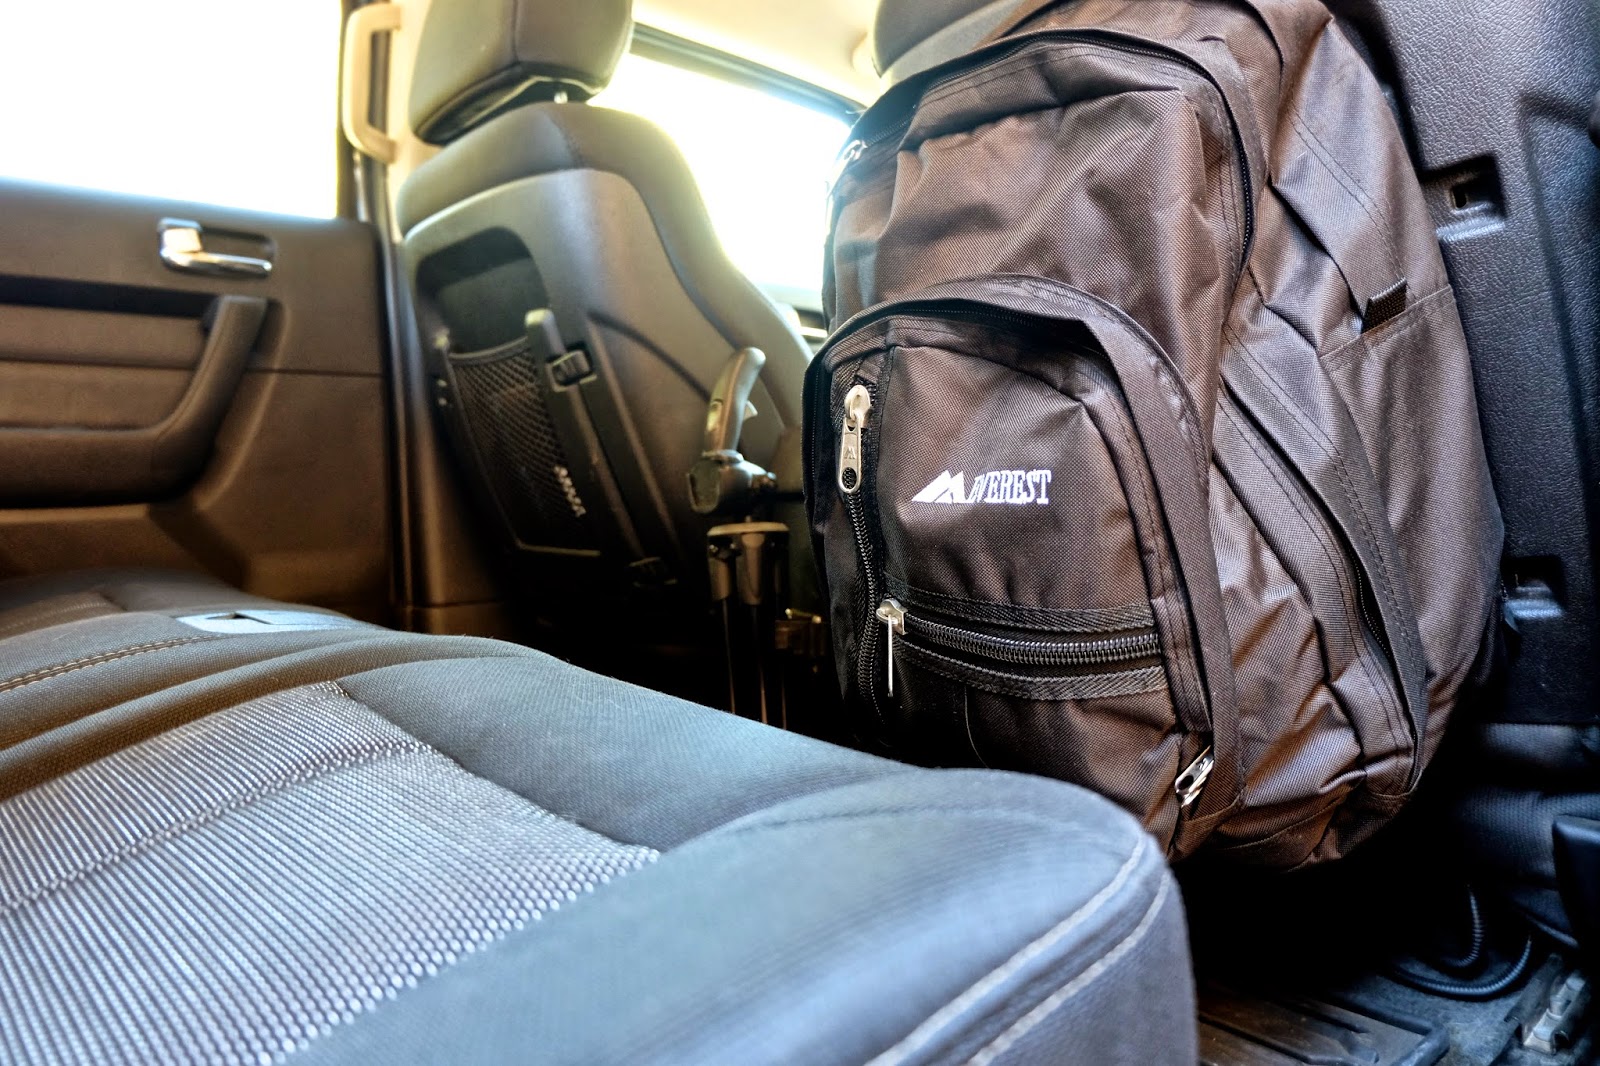
The H3's front seats have a small cargo stowage system on the back of each that serves little practical purpose and when packed just a smidgeon beyond their capacity, detach from the seat back and spill the contents in the rear footwell. It's the worst designed feature of the H3's interior.

I keep a bug-out-bag in the cargo area where it bounces around a bit when it's not restrained and takes up some of what little precious room is back there (the second worst designed feature). So, I thought I'd take care of two issues with one mod.

Using a heavy duty snap fastener kit I designed a T-shape pattern that attaches the BOB to the seat back while allowing the padded pack straps to tuck between the pack and the seat back.

SeatBackPack.jpg


This H3 rarely has rear-seat passengers, but when it does the pack unsnaps easily from its mount and can be stowed in the back.

*UPDATE*
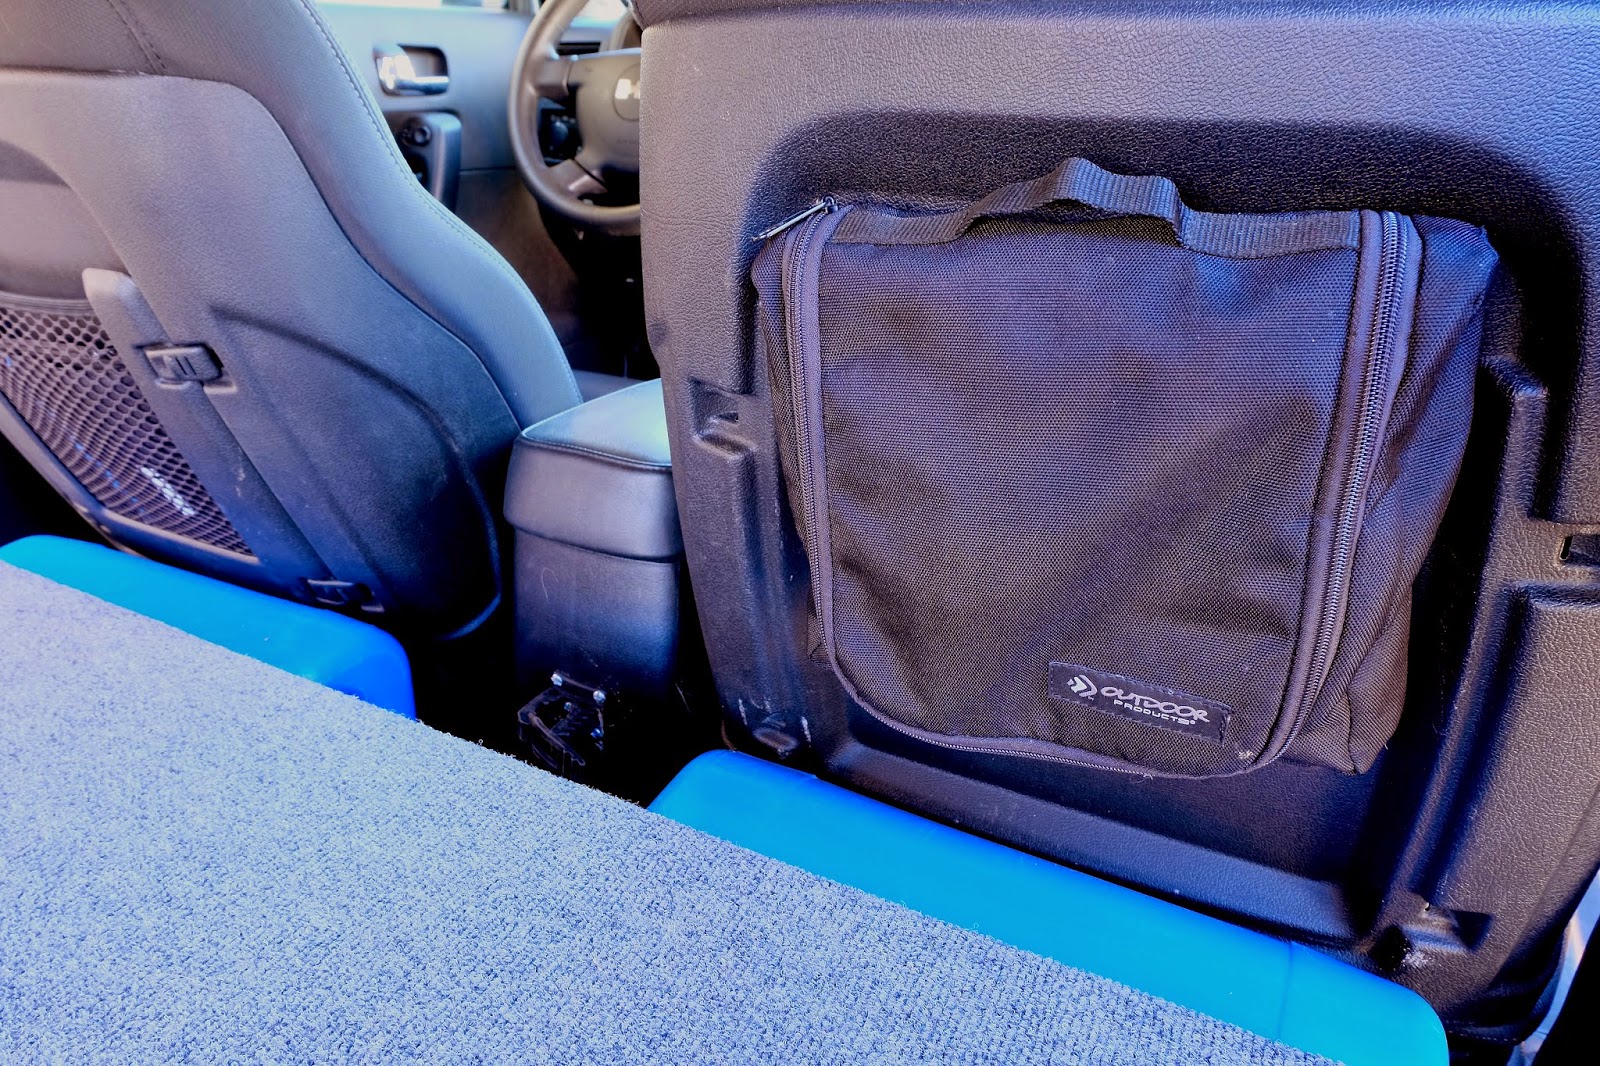
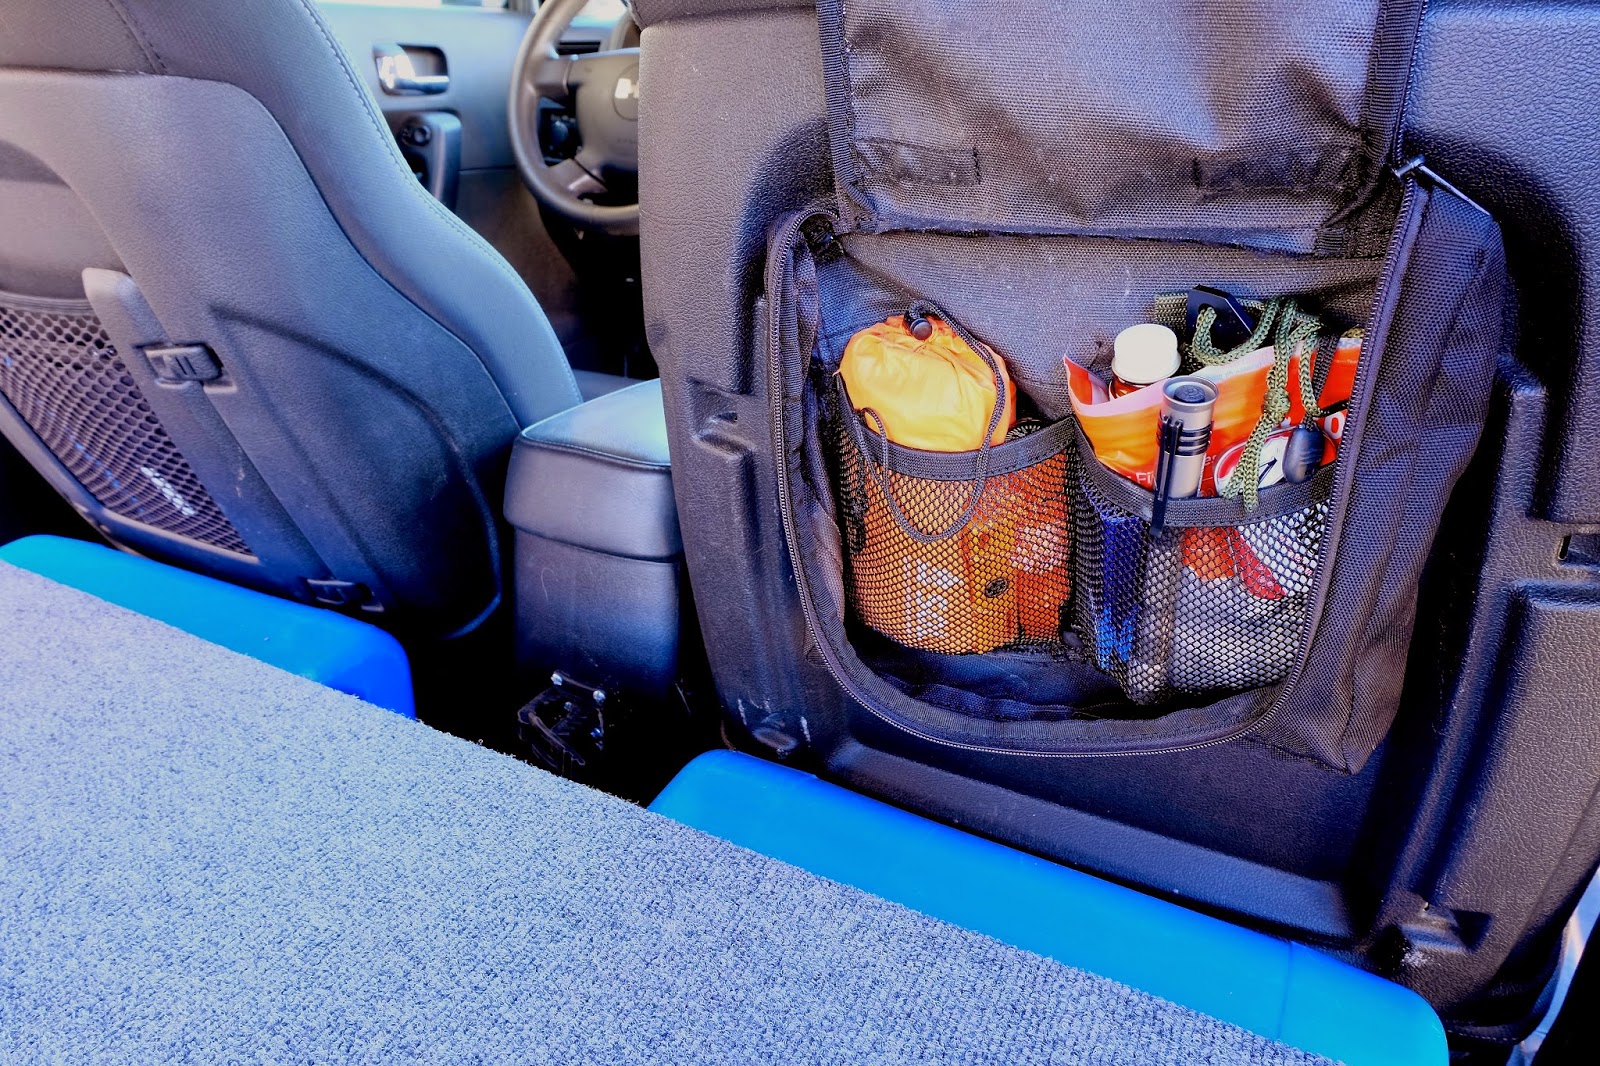
After installing the dog-deck (next post below) I needed to rethink the BOB. The back pack I was using was too big and encroaching, so I repurposed a storage bag for a duffle bag and came up with a more efficient use of space while still having it readily accessible in the truck and still be able to remove and stow it quickly in a larger ditch bag.

DSCF1437.jpg


DSCF1438.jpg
 
Last edited:

superbuickguy

Explorer
Yes, big difference and improvement in travel. Now it keeps all four patches planted where I've crossed it up before and teetered on only two.

I put a different brand shock, but I could believe how much faster and safer I could go on rough roads - with the pos Rancho 9000s, if you hit a speed bump slightly off center - it'd shoot you off to the weeds... I bought Bilsteins for my C3 Corvette, and love them, but I couldn't force myself to pay for 4 shocks what 1 shock costs if I went Bilstein... though, with that said, there wasn't a little bit of fear at chez SBG that he was buying crap and would be buying bilsteins after all... but, only a thousand in, so far so good (knocking on wood)...

The H3's front seats have a small cargo stowage system on the back of each that serves little practical purpose and when packed just a smidgeon beyond their capacity, detach from the seat back and spill the contents in the rear footwell. It's the worst designed feature of the H3's interior.

I keep a bug-out-bag in the cargo area where it bounces around a bit when it's not restrained and takes up some of what little precious room is back there (the second worst designed feature). So, I thought I'd take care of two issues with one mod.

Using a heavy duty snap fastener kit I designed a T-shape pattern that attaches the BOB to the seat back while allowing the padded pack straps to tuck between the pack and the seat back.

SeatBackPack.jpg


This H3 rarely has rear-seat passengers, but when it does the pack unsnaps easily from its mount and can be stowed in the back.

I've thought long and hard about doing something similar, but I need to rear seat to fold down occasionally... still, if I do that, yours would be the model
 

Imnosaint

Adventurer
Dog-Deck Install

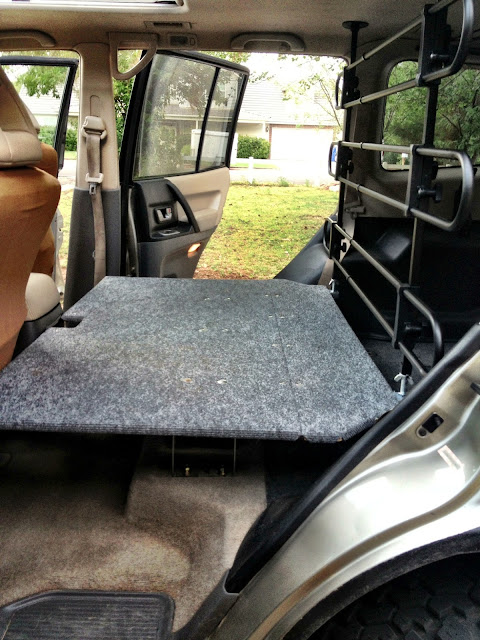
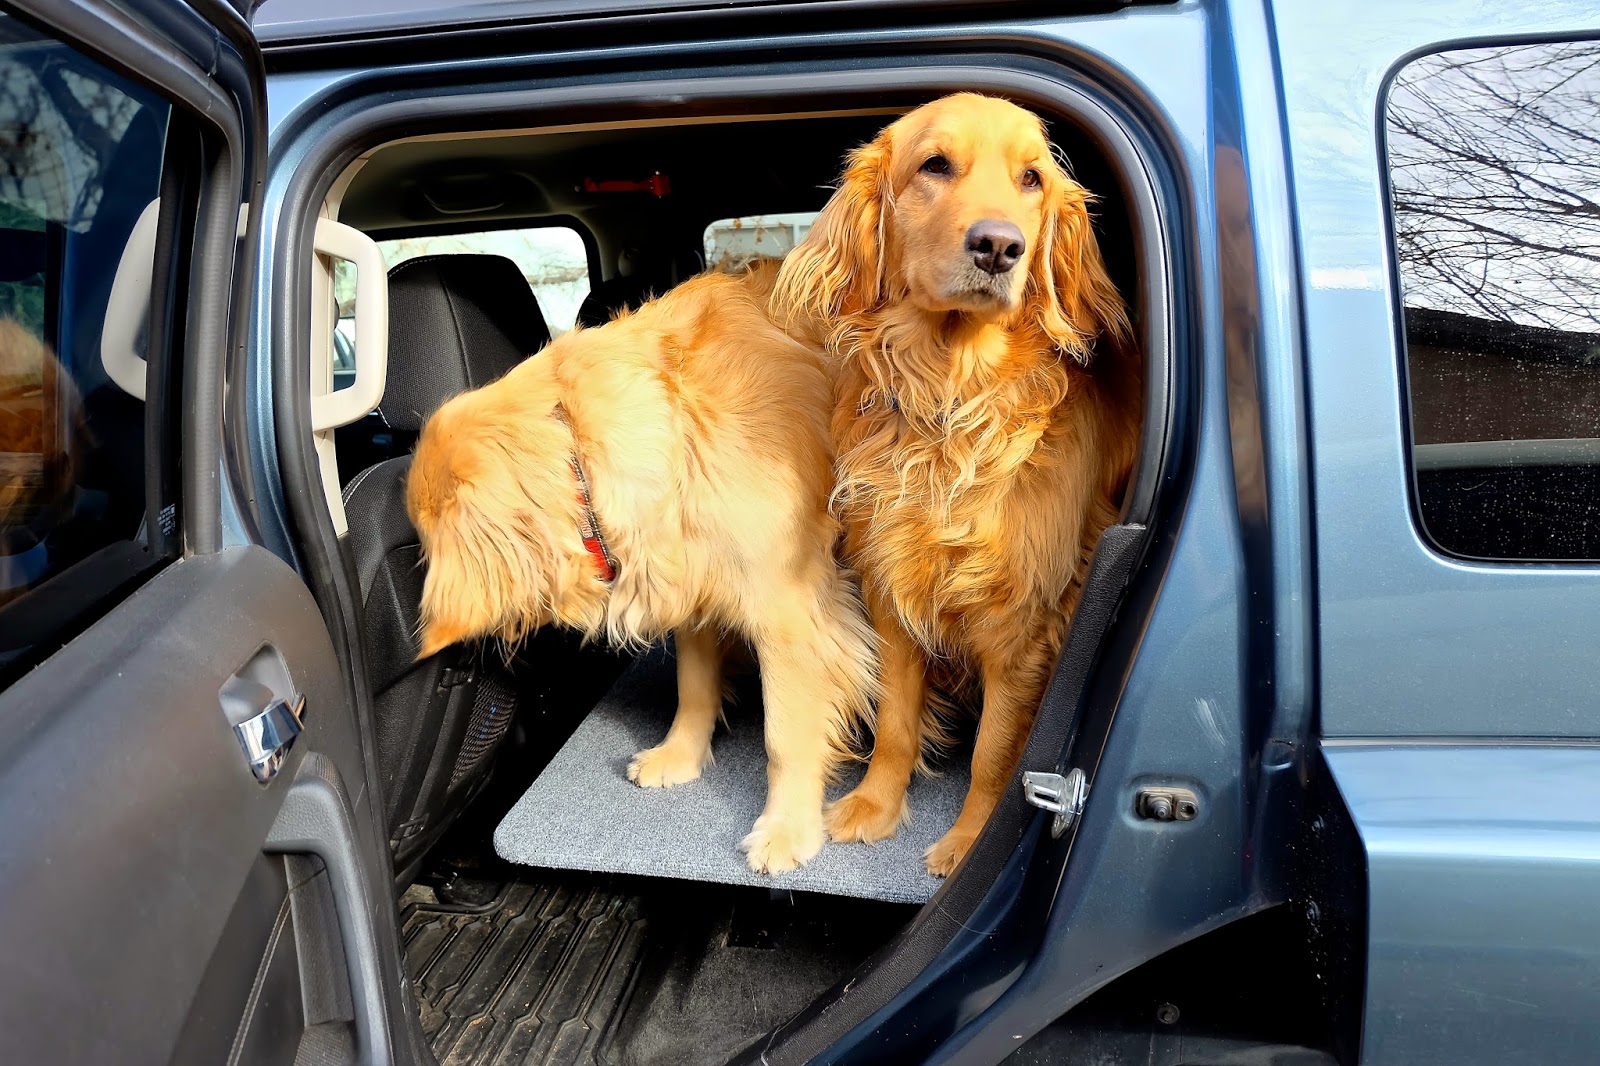
Our dogs spend more time than any backseat passengers in the H3, as they did when we had the Montero. I did a rear-seat mod on it to make dog travel easier on all of us.

ExtendBarrier.jpg


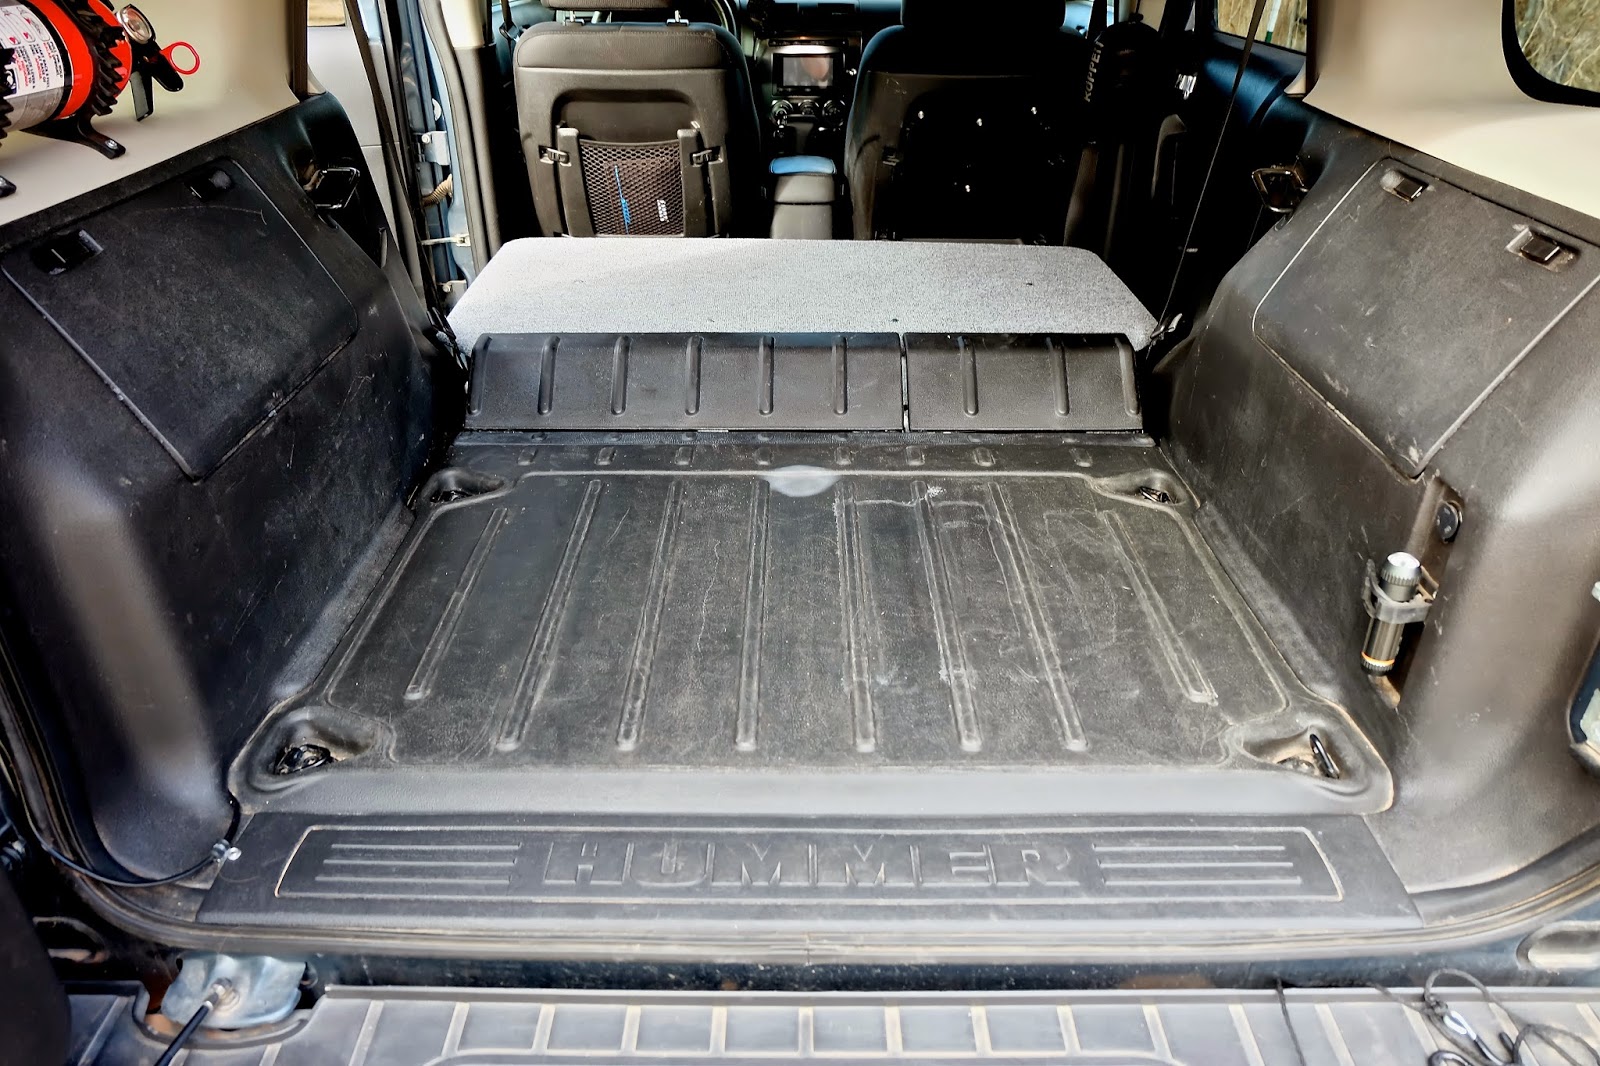
Having made a great improvement in traveling with the Goldens, as well as increasing storage capacity, I decided to do the same on the H3.

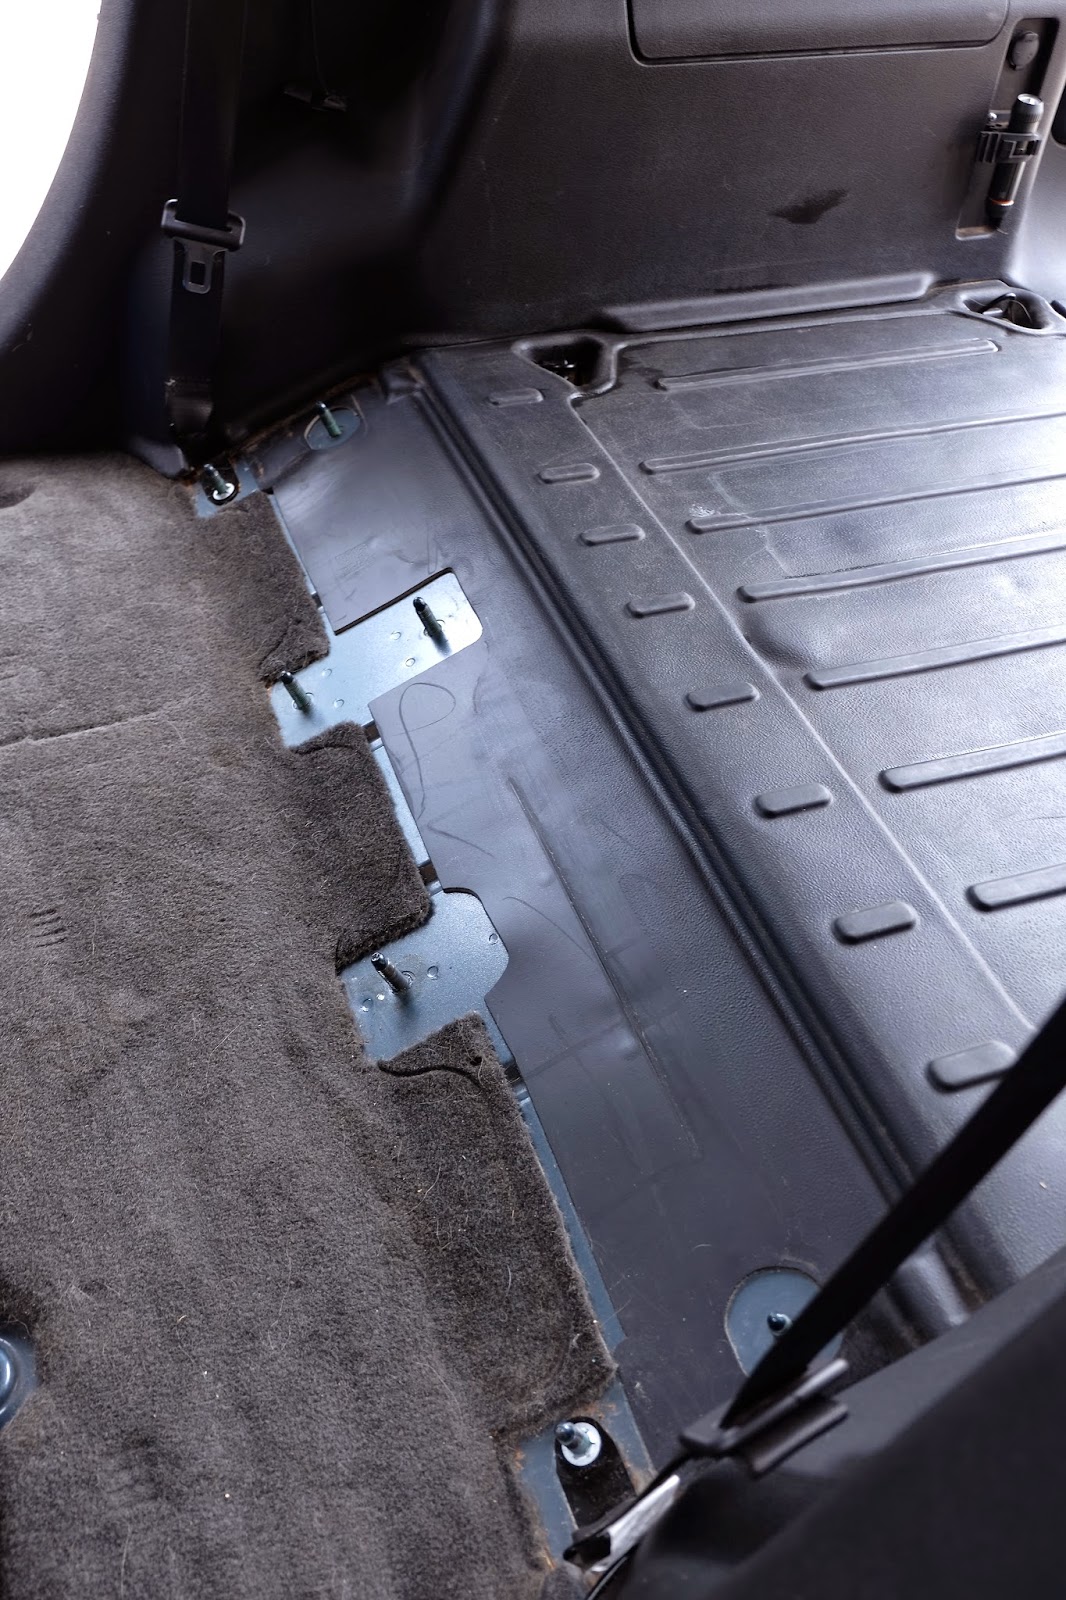
Rear-seat removal is straight forward, remove the bottoms from their easily accessible mounts, and then the backs. The 60/40 seat back is mounted on a sub-frame that keeps the backs aligned and rigid. With everything out, this is what's left.

DogPlatform1.jpg


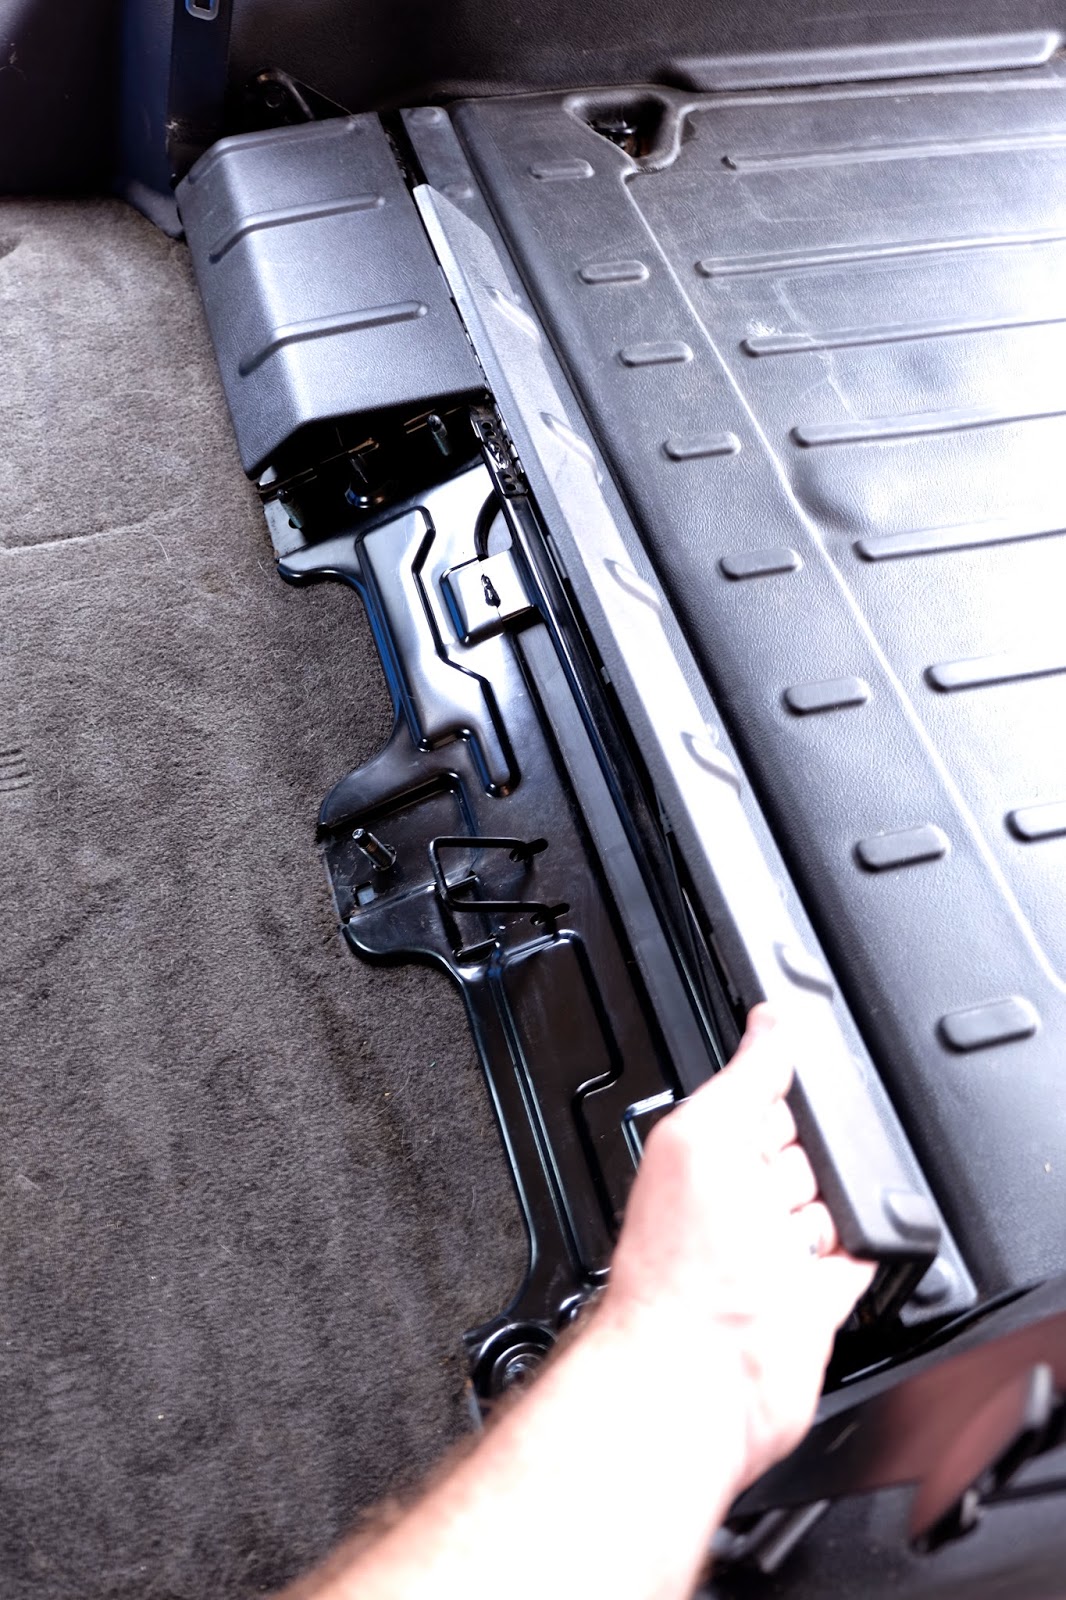
I removed the seat-backs from the sub-frame and reinstalled it. There are two spring loaded doors integrated into the transition that kept debris from falling in between the seats and the cargo area. I though these might be nice to maintain an access to the underside of the platform.

DogPlatform2.jpg


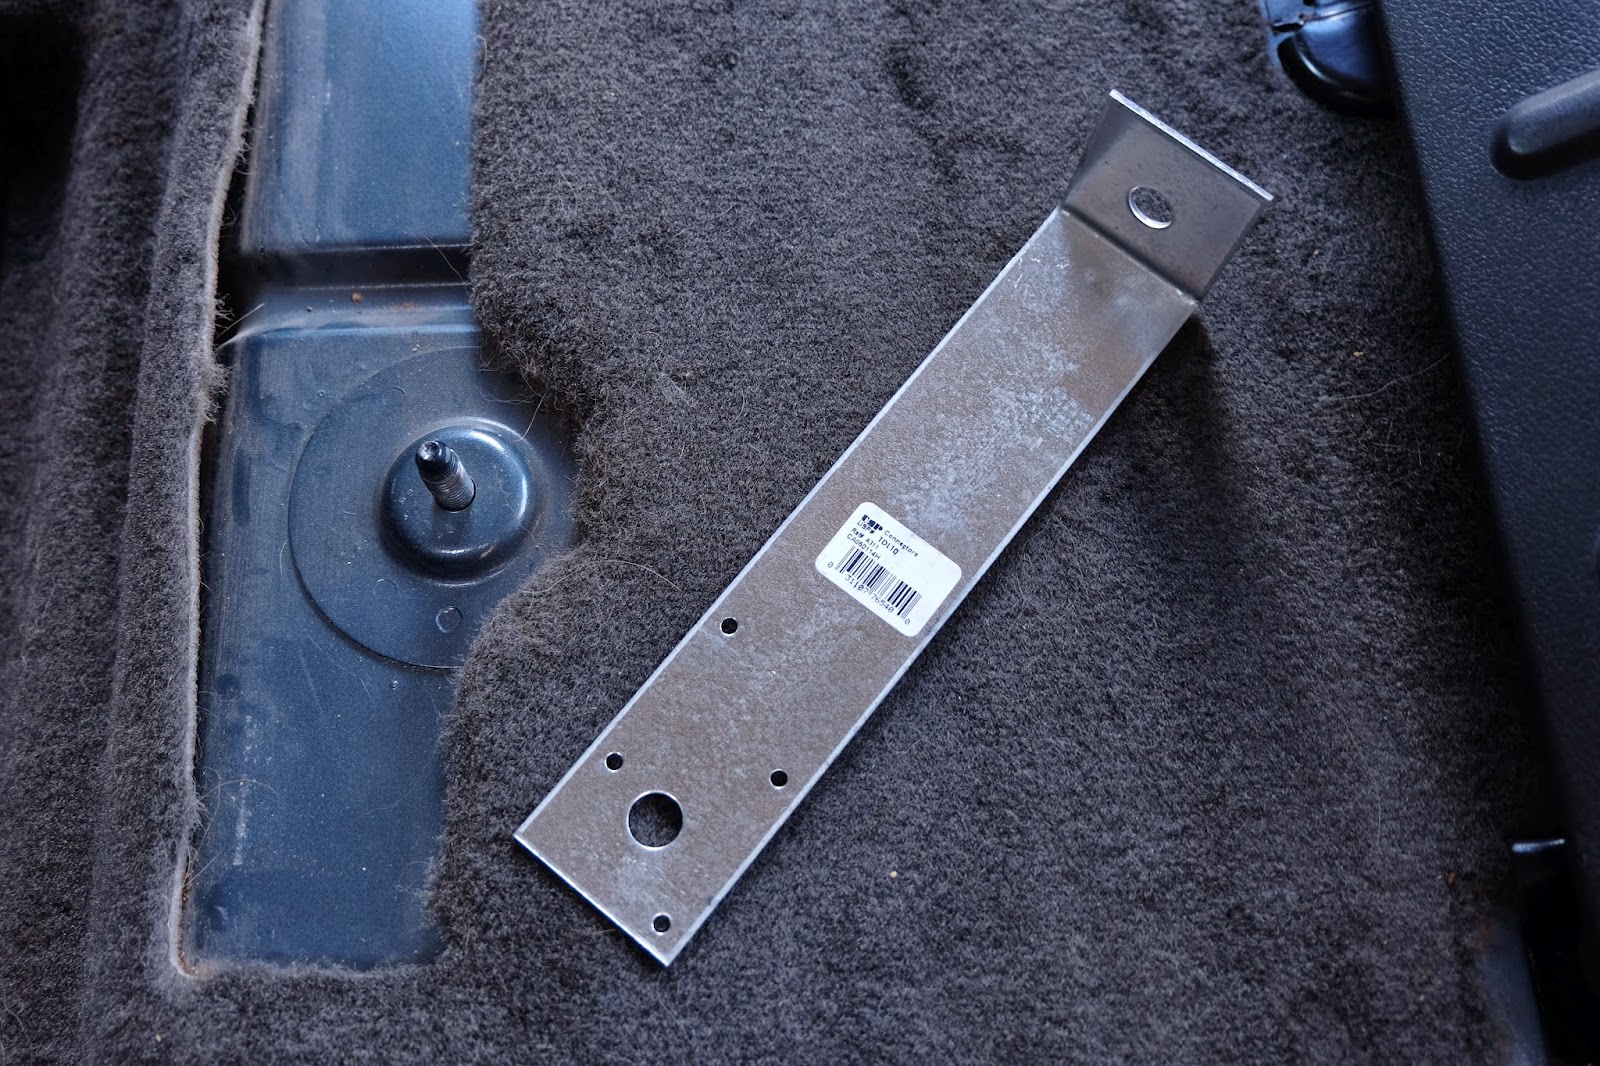
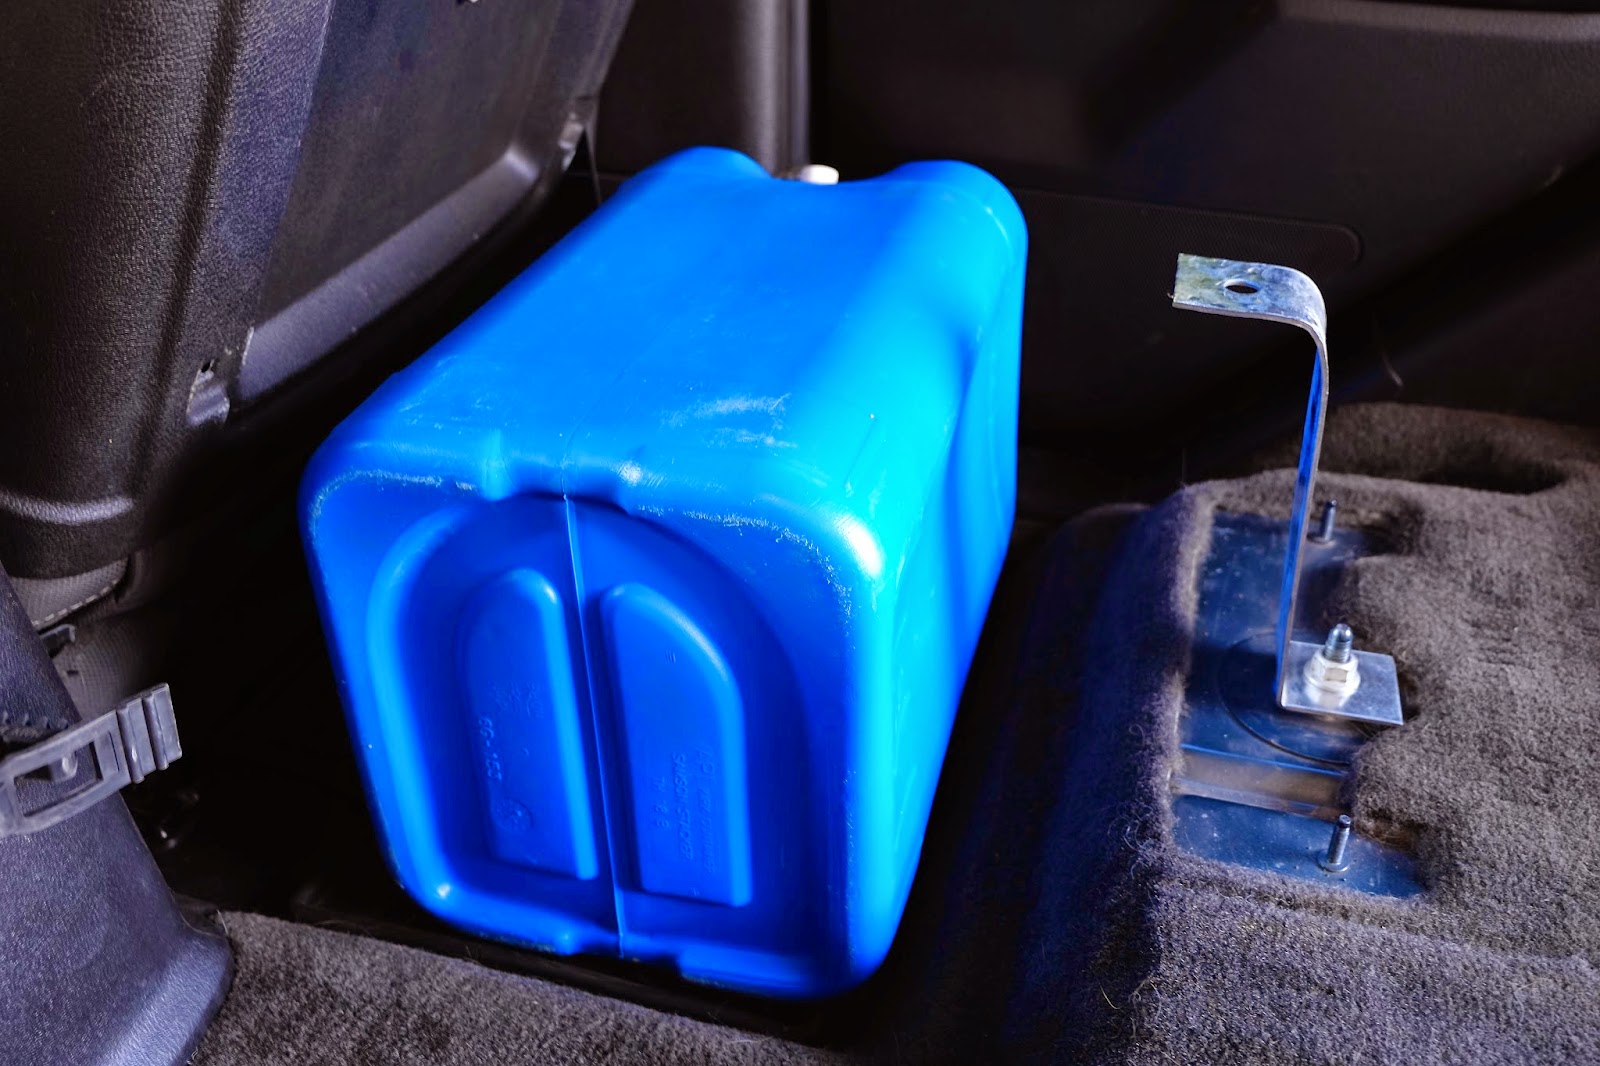
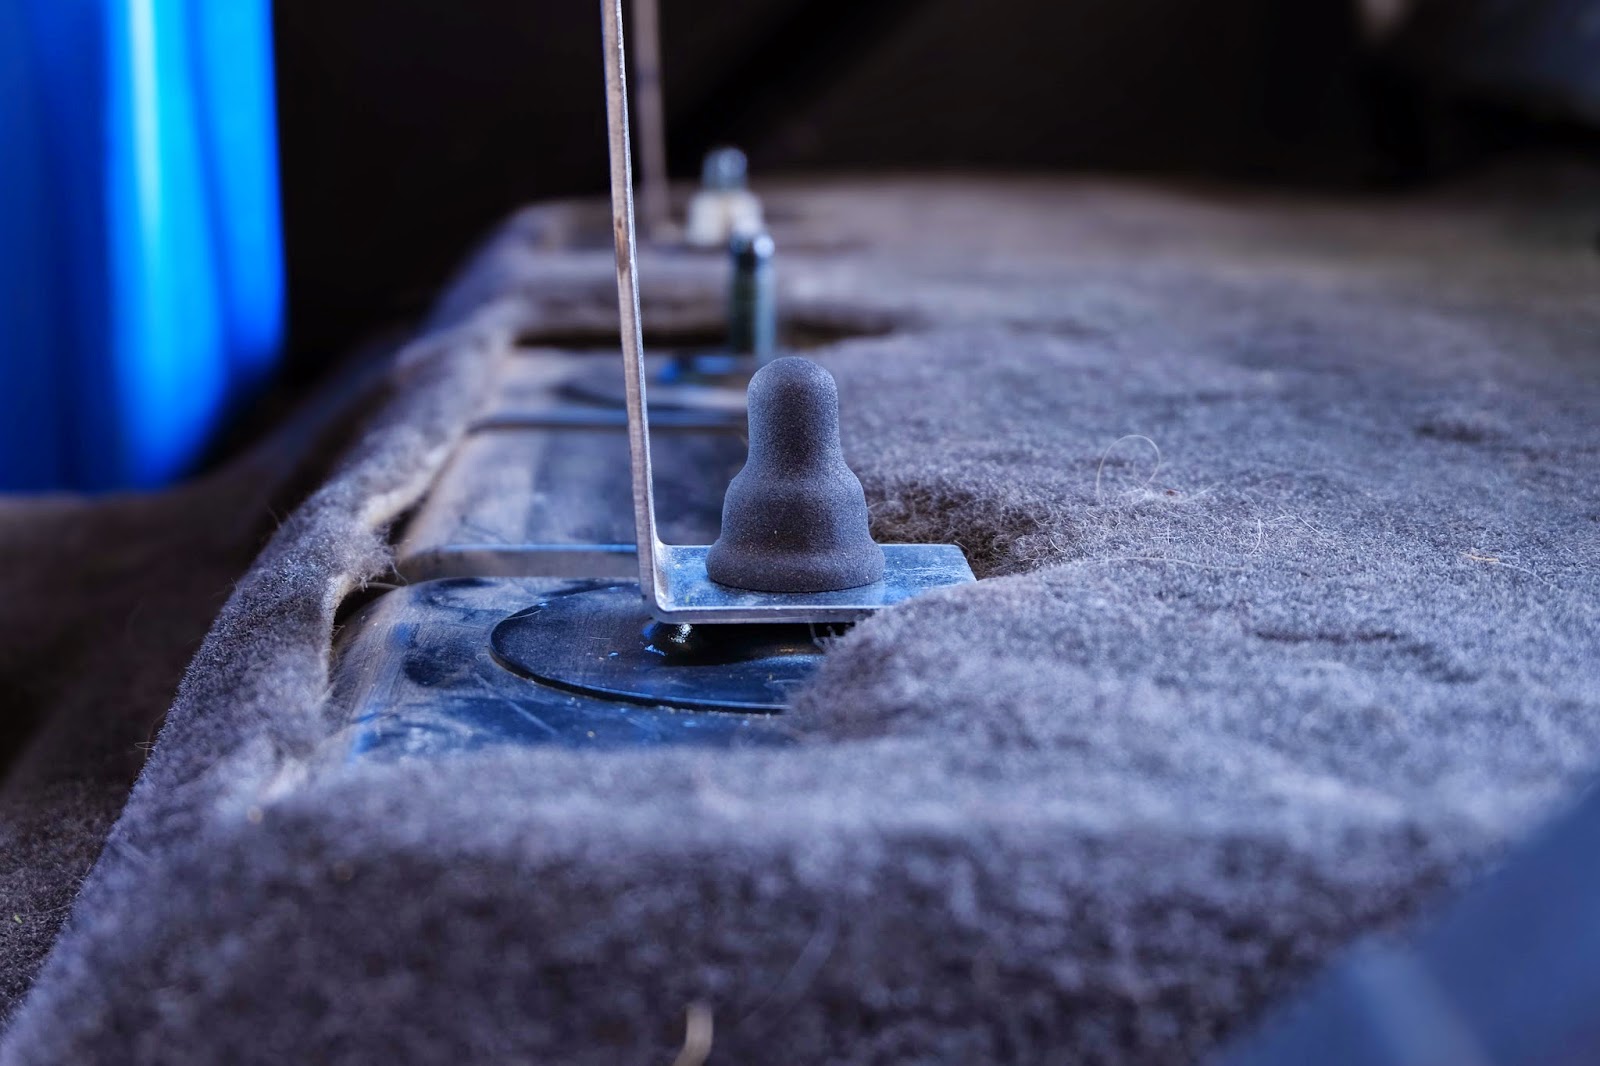
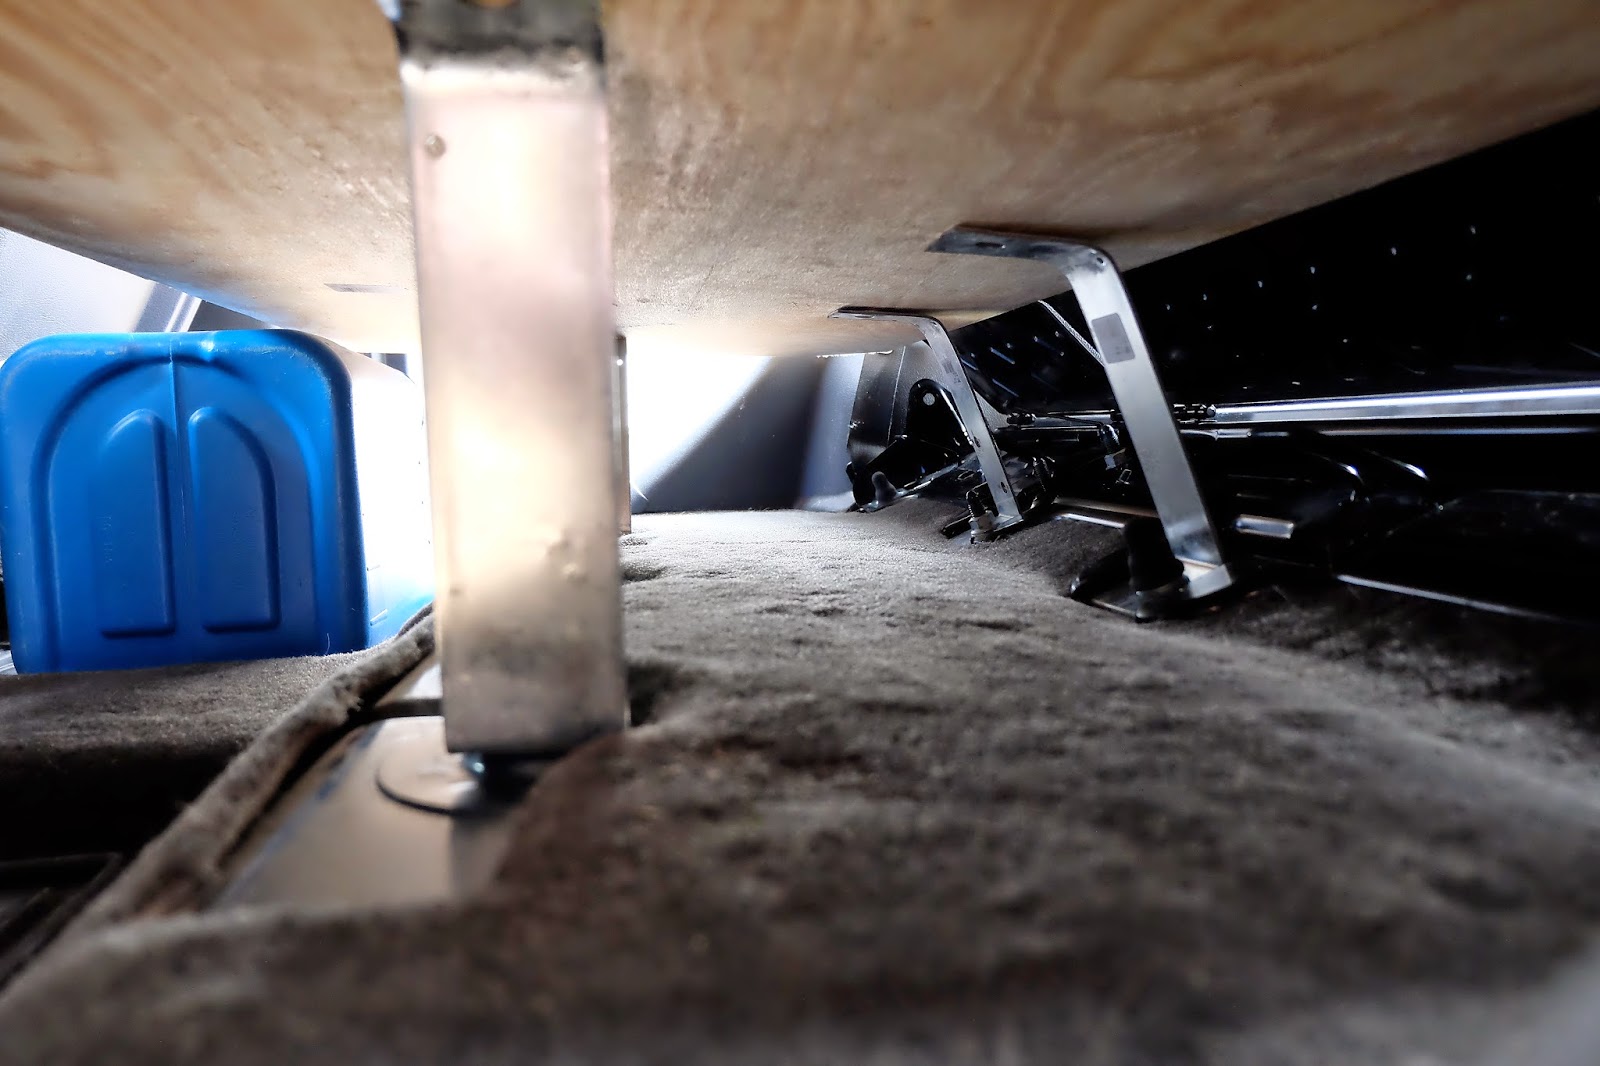
I then made stanchions out of off-the-shelf fencing hardware from Lowe's, four of which were shaped to measure from the floor to just above the six-gallon water tanks that I'll be stowing beneath the deck.

DogPlatform3.jpg


DogPlatform4.jpg


DogPlatform5.jpg


Once I hammered them into the shape and length needed, I fastened them to the floor using the H3 hardware that held the seat-bottoms in place. I also determined to rotate the front stanchions 90 degrees to decrease forward flexing of the brace.

DogPlatform6.jpg


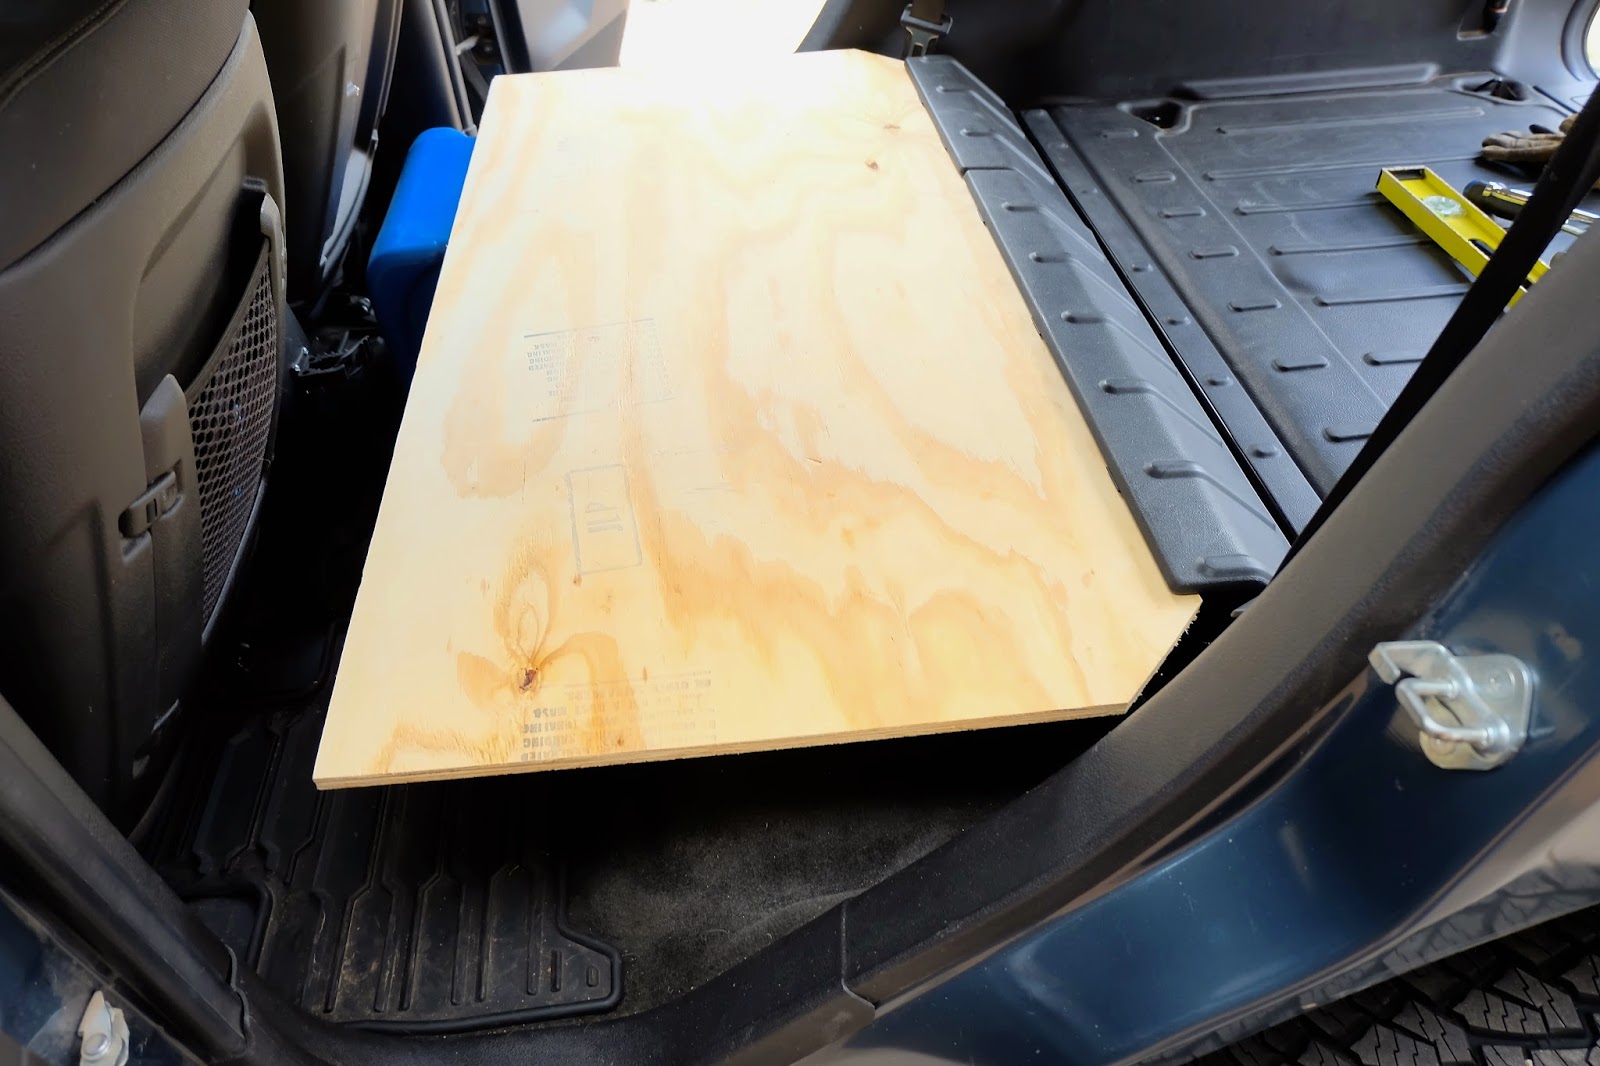
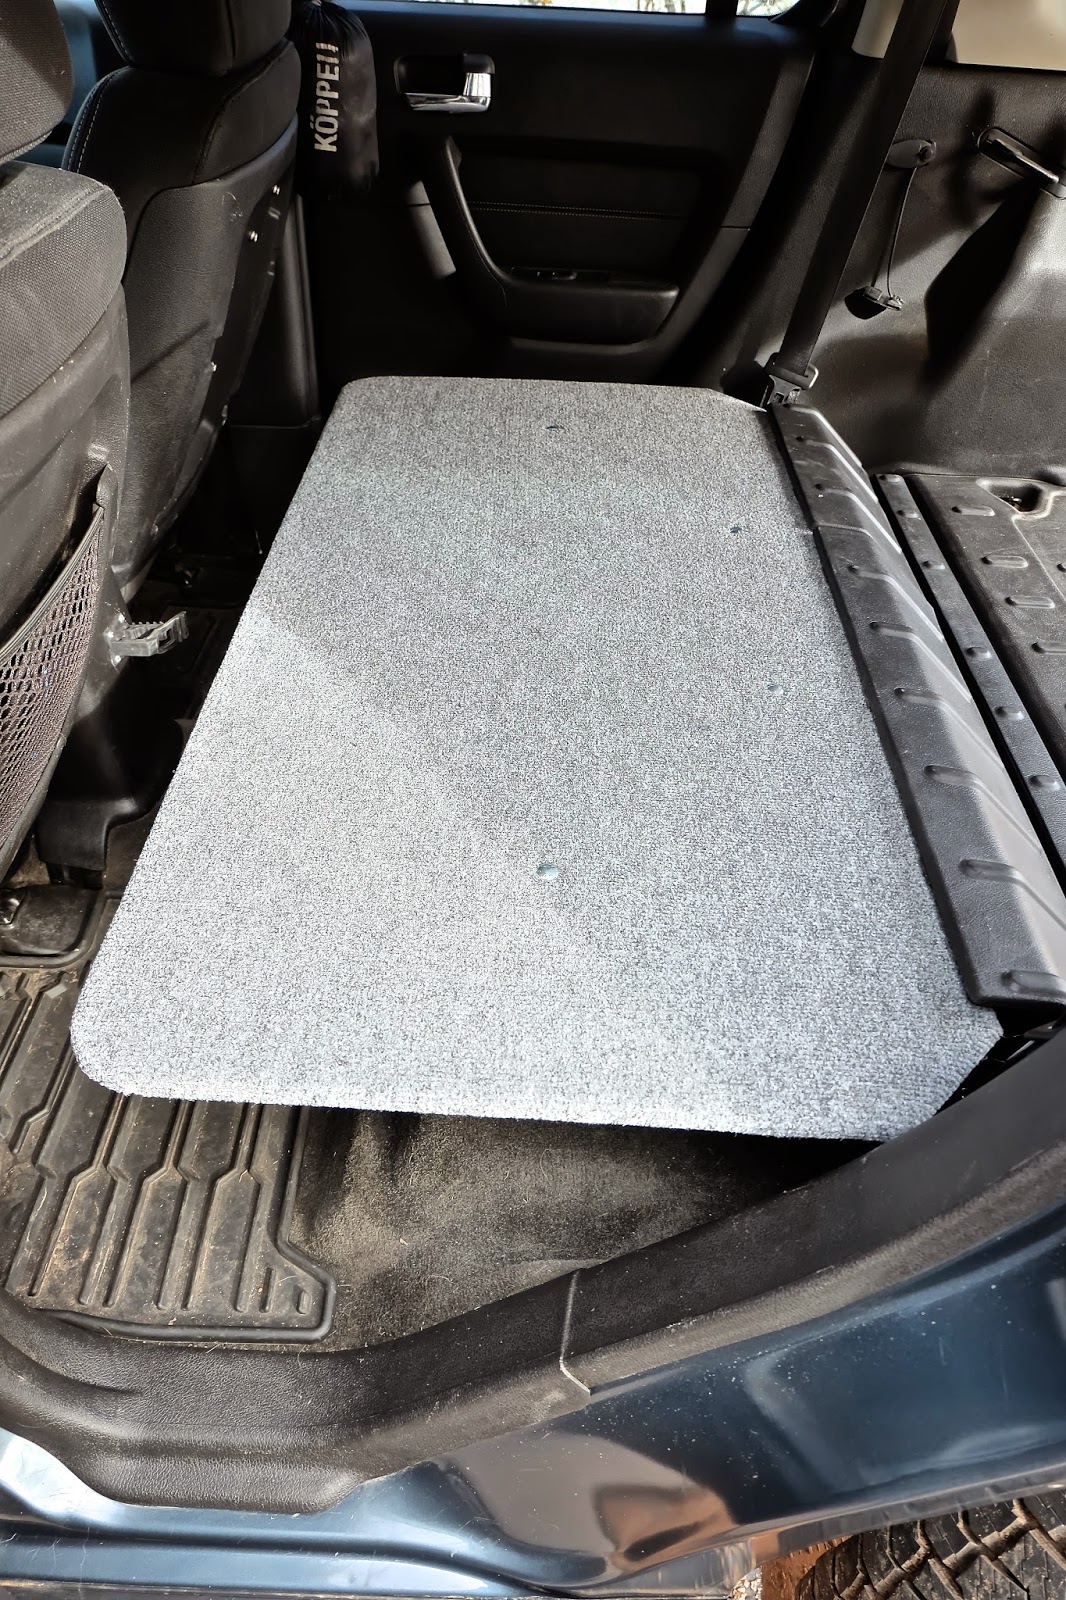
I dog-eared a 2'X4' piece of 3/4 plywood and did a test fit once I had the rear set of stanchions installed.

DogPlatform7.jpg


With everything lined up, I marked the mounting holes on the plywood and drilled them out.

I rounded the opposite edges on the deck and then covered it in gray interior carpeting, using Gorilla glue and a staple gun. I then installed the deck, bolting it onto the stanchions.

DogPlatform8.jpg


We did a test run with the girls, and they appeared to be very happy with the mod. But, they appear to be very happy with just about anything.

DogPlatform10.jpg


I'm going to add one additional stanchion at the front of the deck in the middle for more rigidity.

DogPlatform9.jpg


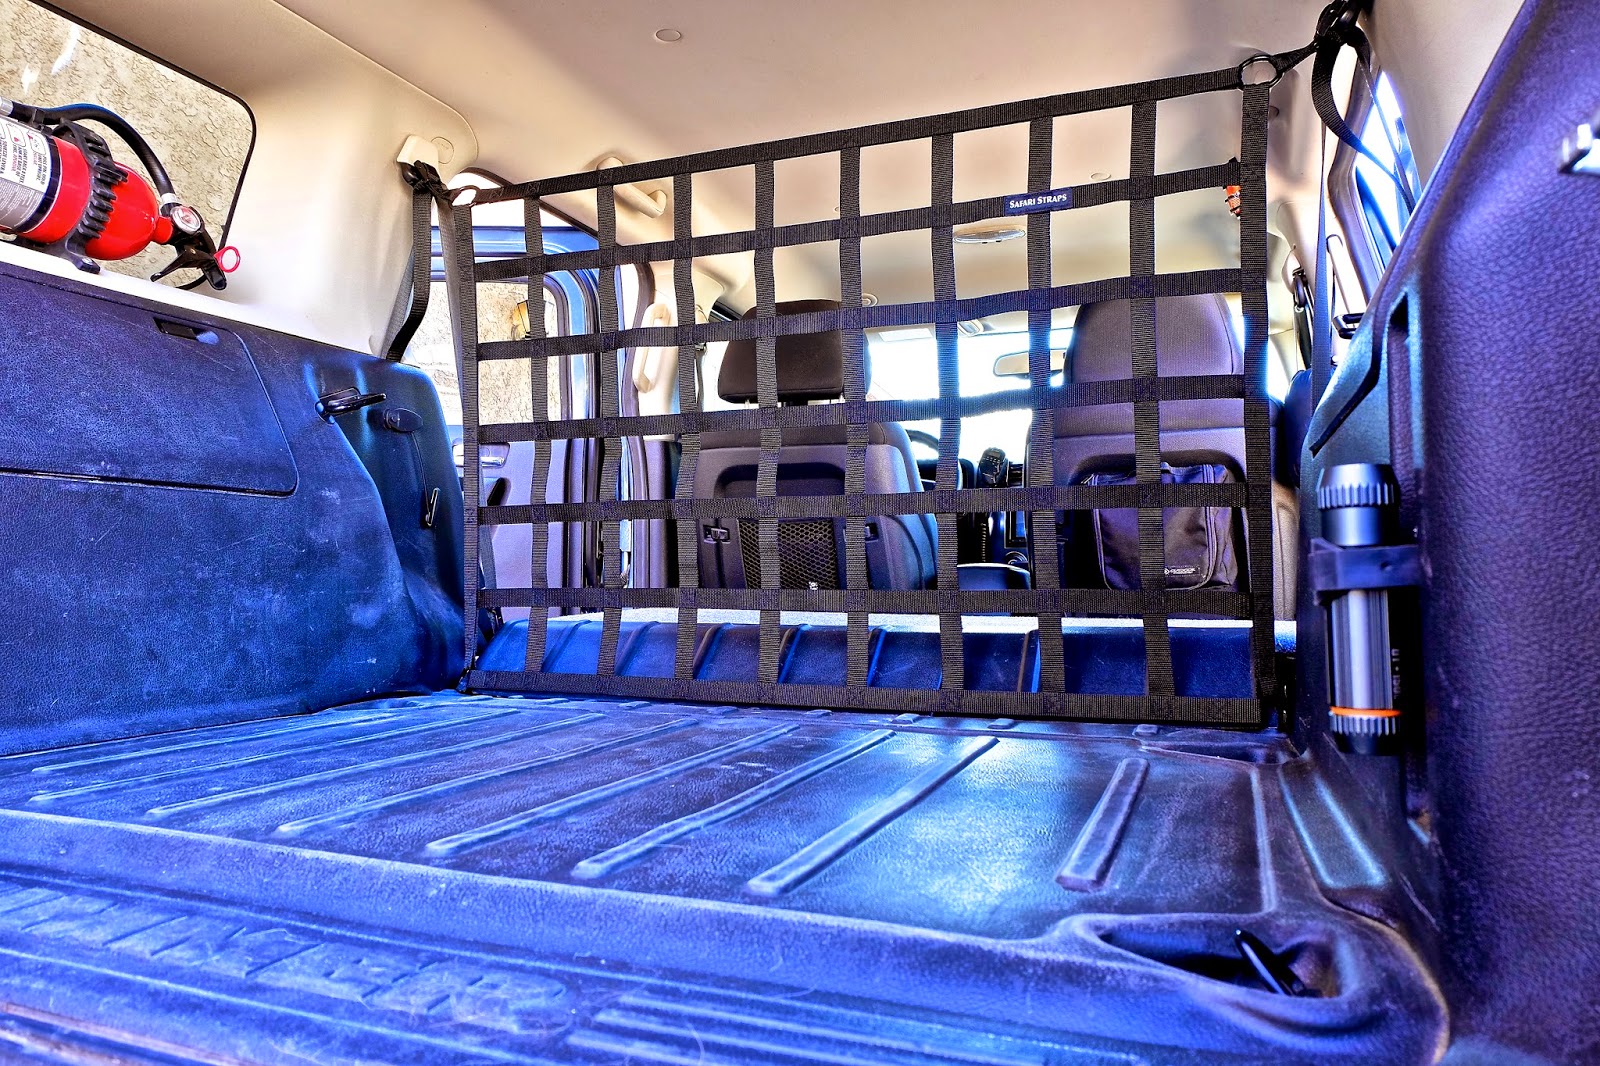
To complete this mod I'll be adding a cargo net from Safari Straps, floor to ceiling, just aft of the cargo area.
 

Imnosaint

Adventurer
Safari Straps Cargo Net Install

I ordered a 41X28 1" Safari Straps Cargo Net from Amazon and installed it. It's dimensions were just about perfect.

DSCF1391.jpg


DSCF1432.jpg


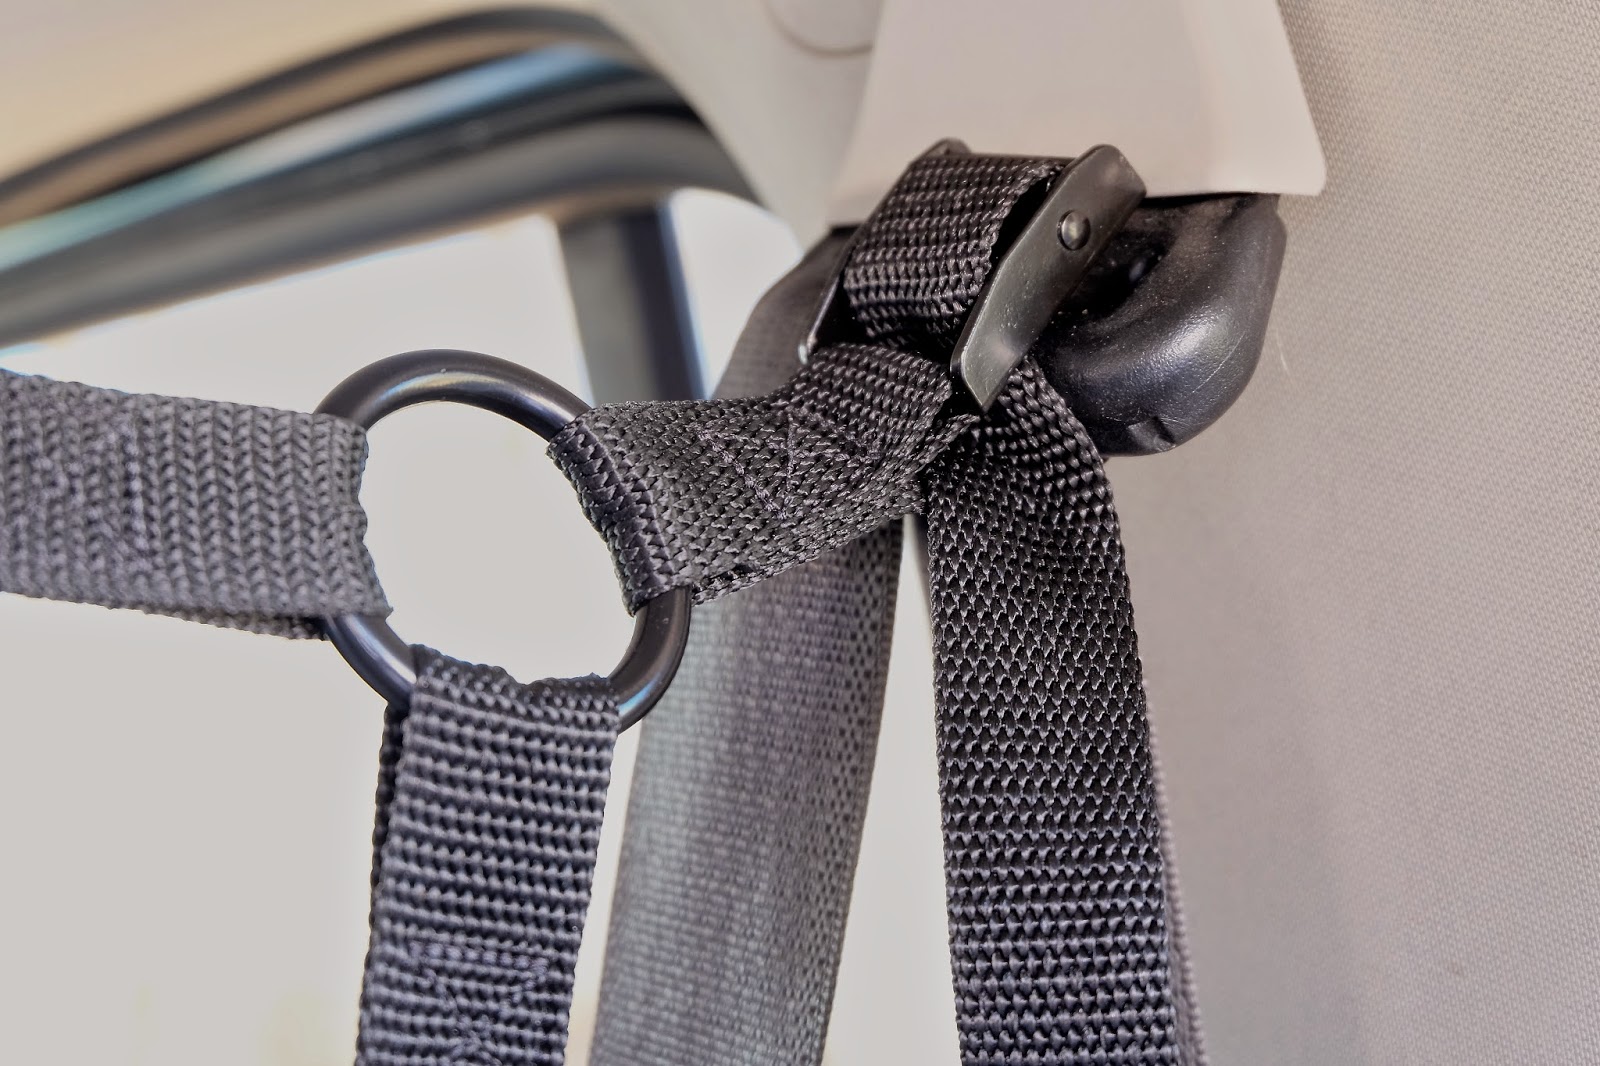
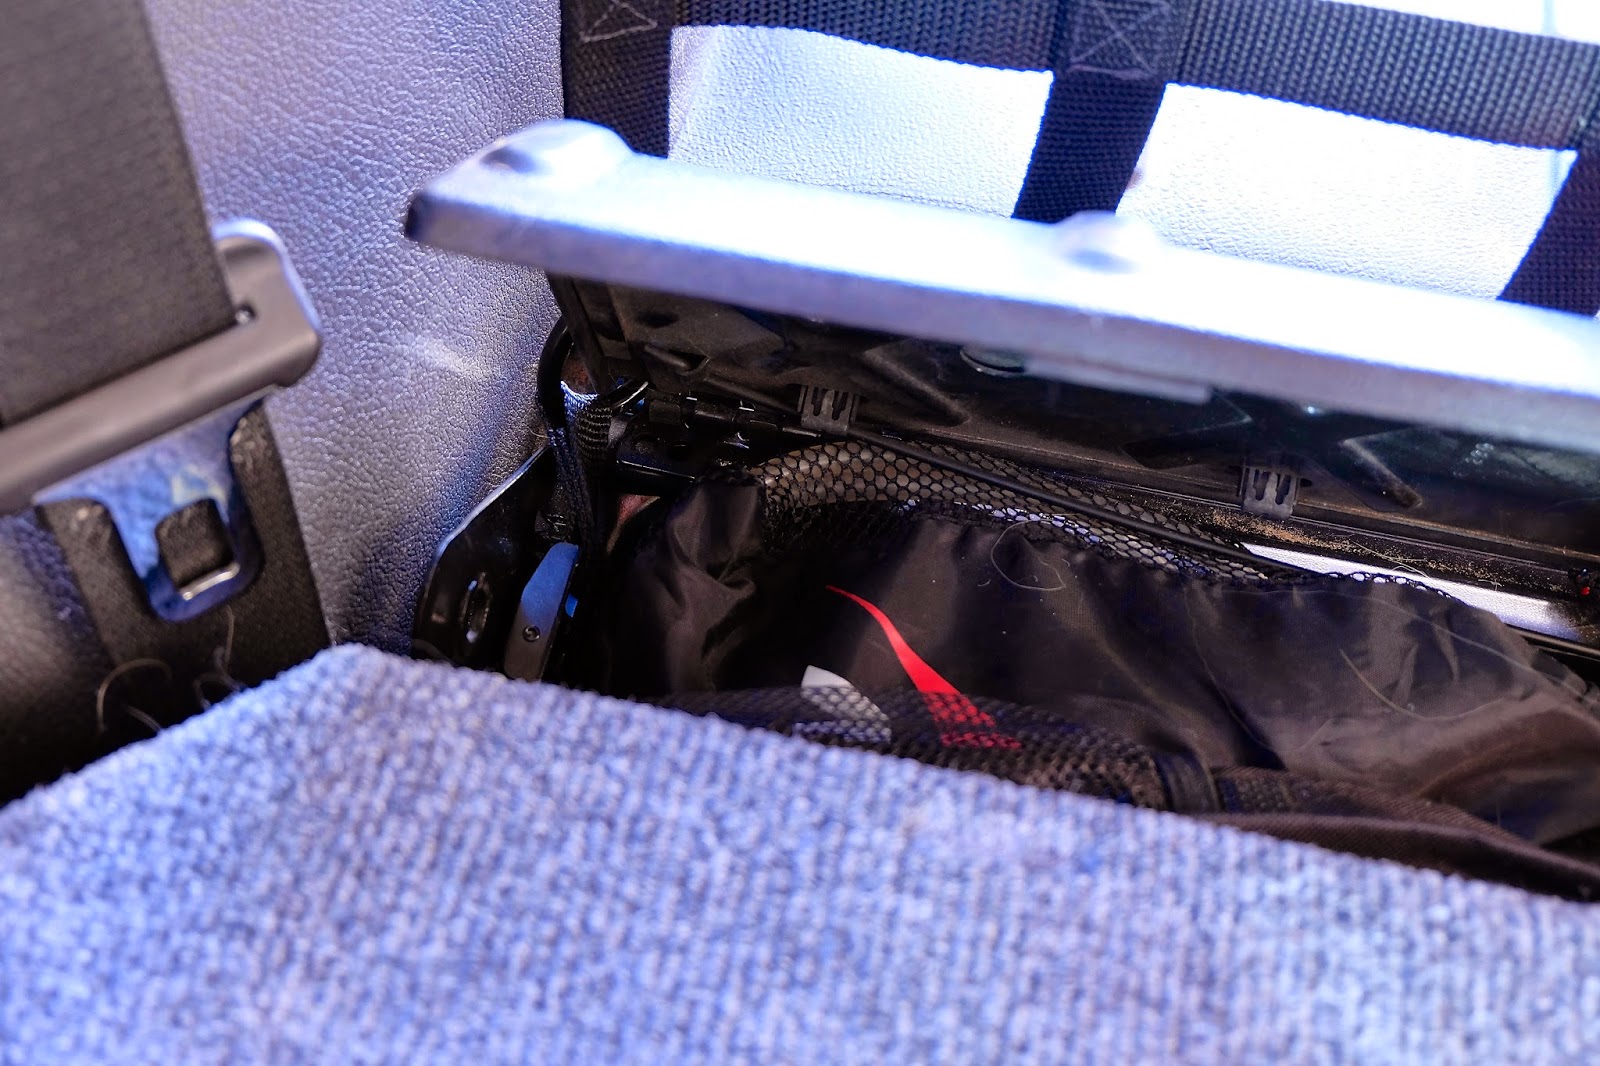
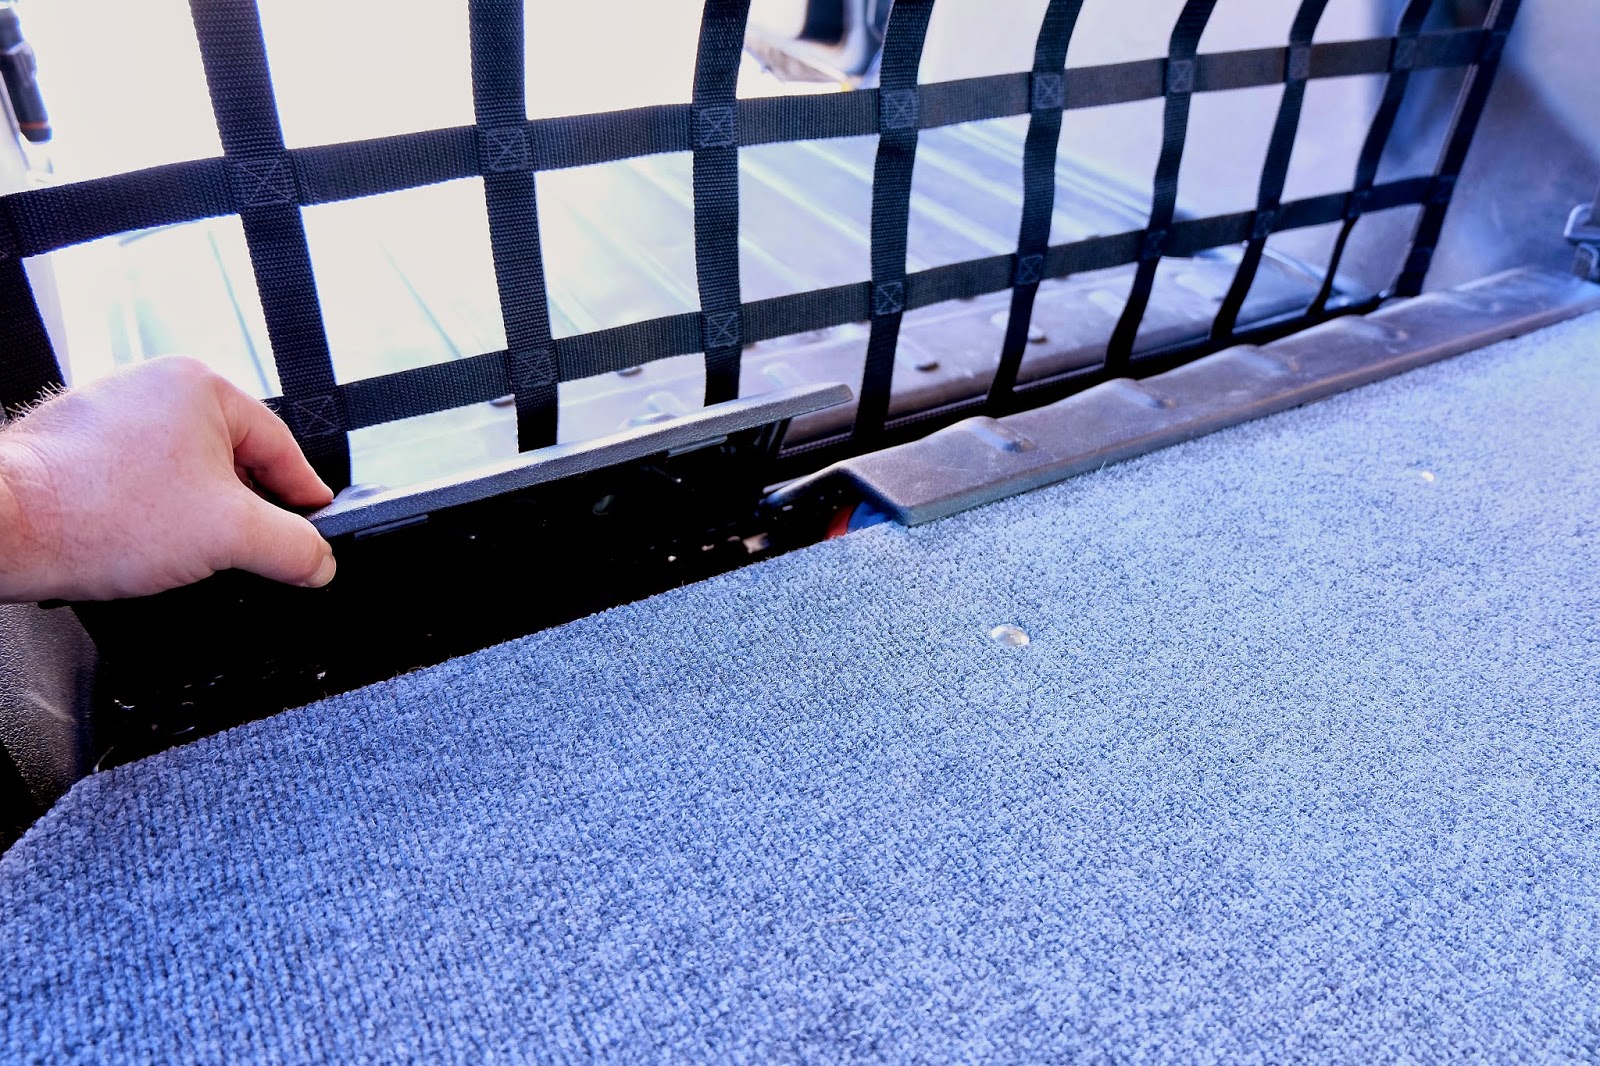
I attached the net to the seatbelt guides that are bolted on the C-pillars. The base of the net is attached to hardware loops that are welded on the sub-structure that I remounted.

DSCF1396.jpg


DSCF1410.jpg


DSCF1415.jpg


The 60/40 split spring-loaded doors are still accessible for stowing smaller items.

The cargo net is stout in its construction and very secure in its mounting providing a safety barrier between the cargo area and the dog-deck.
 
Last edited:

superbuickguy

Explorer
Buick rides with me


I like what you did with the floor, there's a guy on H40 that makes brackets so you have a flat floor front to back - I'm considering it, though having 4 or 5 person capacity is helpful for SAR and when I go skiing... I'm hoping that my h3 goes back to "normal" duty once I get my other 4x4 done (it will be solely SAR).
 

Imnosaint

Adventurer
Bugout-Bag Retainer

DSCF1938.jpg


Stowage is hard to come by in the H3 when it's configured and packed for overlanding, making me evaluate any possible nook as a space to store gear. I keep a bug-out-bag (BOB) on board at all times and have been stuffing it under the dog deck making it difficult to retrieve in a hasty egress.

Enter the passenger-side rear window well, a six inch deep, 11" x 22" (roughly) vertical space, coming close to the dimensions of my BOB. While obscuring this window appears to reduce blind-spot visibility, I found little visual loss from the driver position when checking through the rear passenger door window.

Having kayaked for decades I thought to use a Bungee Deck Kit from Yak-Gear and adapt it to the periphery of the window well. The kit consists of six pad eyes and two J-hooks along with mounting hardware for a kayak deck. I replaced the hardware with 3/16" aluminum rivets with a 1/2 to 5/8 grip range. The kit also include ten feet of 1/4" bungee cord that I measured with the BOB in place, cut to fit and crimped.

DSCF1936.jpg


The BOB is held snug up and out of the way, yet easy to retrieve should the ship ever go down. Heaven forbid.
 
Last edited:

Forum statistics

Threads
185,783
Messages
2,878,182
Members
225,329
Latest member
FranklinDufresne
Top