You are using an out of date browser. It may not display this or other websites correctly.
You should upgrade or use an alternative browser.
You should upgrade or use an alternative browser.
OBS F250 slow adventure build
- Thread starter amgvr4
- Start date
amgvr4
Adventurer
Exactly what I need, except for a roof rack. What is the longest you can do, ie can you make me a |_| 44" wide or would I need to do it in 4 90 degree pieces?
Ill get in touch")
The hoops I made last night were 66" wide at the base. It was one continuous tube so no need to weld two 90* together. Also we matched the angle to the cab on his 4th gen Ram @70*. Looked good enough that I will probably make myself a new rack now that I have a bender.
dieselduckie
New member
Your truck build is awesome. Truly inspiring. I'm new to overlanding, plus I don't have a garage/ shop to do any work on my pickup; which is a 1997 Ford F-250 diesel super cab long bed with 4x4 and an auto Trans. What advice could you offer on making it more off-road/long road trip worthy? I'm hoping to set it up so two of can sleep in the bed. I would I need to switch to a D60? Or can it be done with the TTB D50? Also, how large of tire can you fit on the truck at stock height without any rubbing issues? Any advice you can offer would be much appreciated. Thanks and yet again, amazing work on your pickup.
amgvr4
Adventurer
Your truck build is awesome. Truly inspiring. I'm new to overlanding, plus I don't have a garage/ shop to do any work on my pickup; which is a 1997 Ford F-250 diesel super cab long bed with 4x4 and an auto Trans. What advice could you offer on making it more off-road/long road trip worthy? I'm hoping to set it up so two of can sleep in the bed. I would I need to switch to a D60? Or can it be done with the TTB D50? Also, how large of tire can you fit on the truck at stock height without any rubbing issues? Any advice you can offer would be much appreciated. Thanks and yet again, amazing work on your pickup.
Thanks for your support man, I really appreciate it! As far as keeping the D50 or swapping to a D60 it really depends on your ability to fab and how much you like to work on your truck. Since you don't have a place to work on it the simplest path is probably the best or it gets expensive fast when you are paying other people. The D50 can be made into a very capable and comfortable option but it requires a decent amount of fabrication to do so on an F250 as they are leaf spring instead of coils like the F150. In my opinion you need to ditch the leafs and go with a radius arm and coil spring setup to get good travel and functionality out of a TTB axle whereas the D60 will be pretty good with a simple shackle reversal and super duty springs so it is pretty much a bolt in affair with the correct kit. Also the TTB has more moving parts and can require more maintenance than a straight axle.
I ran my military 37" tires on my truck before the lift and they fit with some trimming on the front bumper pretty good. If the stock front end had more travel it would have rubbed more but since it was so stiff I got away with it. I liked how the bigger tires brought my RPMs down and gave me a much better cruise than with the smaller 32" tires the truck came with, but I have a 5 speed and low gears so I'm not sure how much an auto would like the bigger and heavier tires, probably depends on what gears you have in your axles. The most important thing is just make sure the truck is in good shape and mechanically sound. There is nothing more troubling than having to fix things on the road so go through everything on the truck thoroughly if you have not already. Best of luck with your truck and always feel free to PM me if you have any specific questions about my build.
Seabass
Idiot
I had a F-250 for years. The TTB was horrible in terms of ride and flex. However, I never really worked on it. So I guess it was fairly rugged. I'll second the shackle reverse and a Dana 60 swap. It's all bolt on and could be done in the driveway. I actually have a Dana 60 sitting in my barn that is complete with pan-hard bar and frame bracket, as well as a set of stock F-350 leaves. I thought I might pick up a good obs F-250 and put it under it. Haven't yet....oh the projects I want to do!!!!
pappawheely
Autonomous4X4
I just don't feel right unless I own at least three or four vehicles in various states of disrepair. :wings:
amgvr4
Adventurer
I have a few truck updates and a tool one. In the process of picking up my car trailer from a coworker that was renting it from me I had my front drivers side brake line fail on me. It was pretty crazy as his driveway is about a 30* incline and I had to crank the wheel hard left and hold on the brakes pretty good to get the truck into position. As it was just about there the brake line cut loose and the truck started rolling forward in a hurry. Luckily I was able to jam the e-brake on after only 3' and no one was hurt at all! If the trailer had been hooked up I would have drug it behind me and possibly run my coworker over in the process. At this point I was already on the hook for picking up the VW that was about 60 miles south of my location so I had to make a quick trip to Napa and pick up a factory replacement line and a 6" piece of hard line to get the truck back on the road. It worked out pretty good and even though it looks like the hose is touching the spring it has a couple of inches of clearance lock to lock.
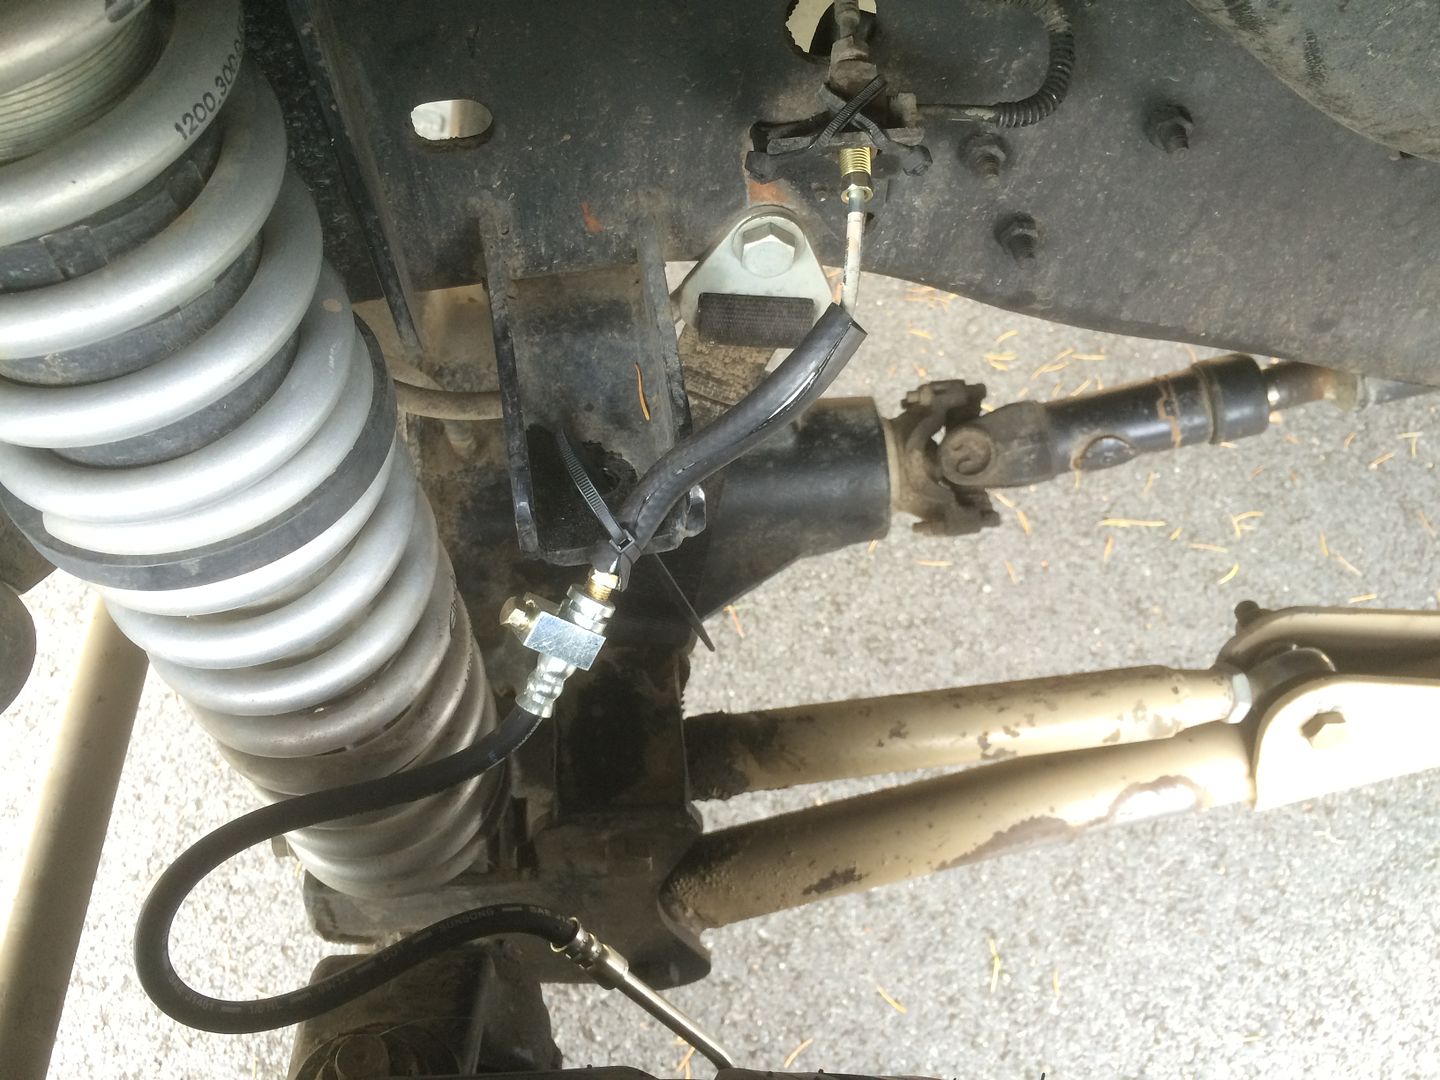
I plan on re-routing my main line back to the drivers side radius arm pivot and then to the axle where it will tee and use short flexible sections at the knuckles. That will eliminate the extreme stretch and possibility for getting caught up in moving bits.
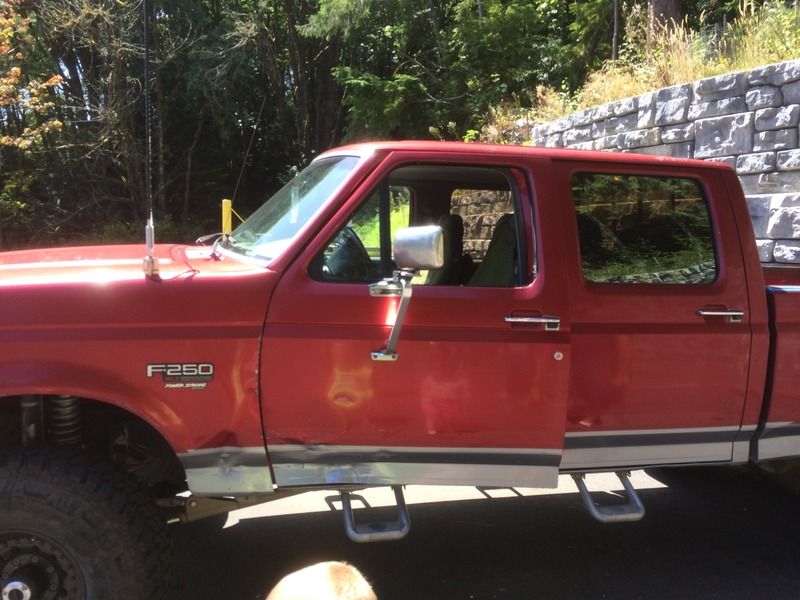
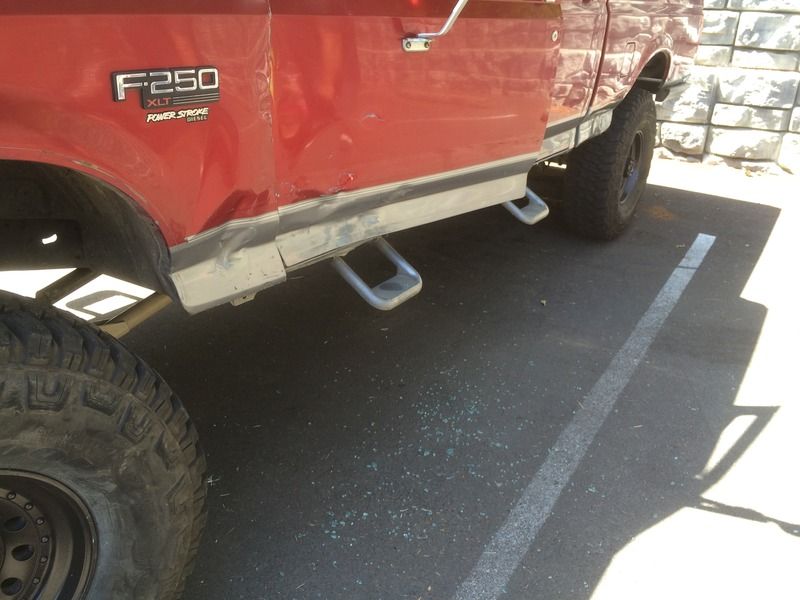
I also replaced the drivers side door with a black one from Pull-a-part. I held off making the truck a multi color eyesore for a long time after getting t-boned, but with the window busted out and the door bent I had to something to get i back to being pleasant to drive. I might just paint it after I make the flat bed and ditch the red altogether. I don't mind it but my wife hates it!
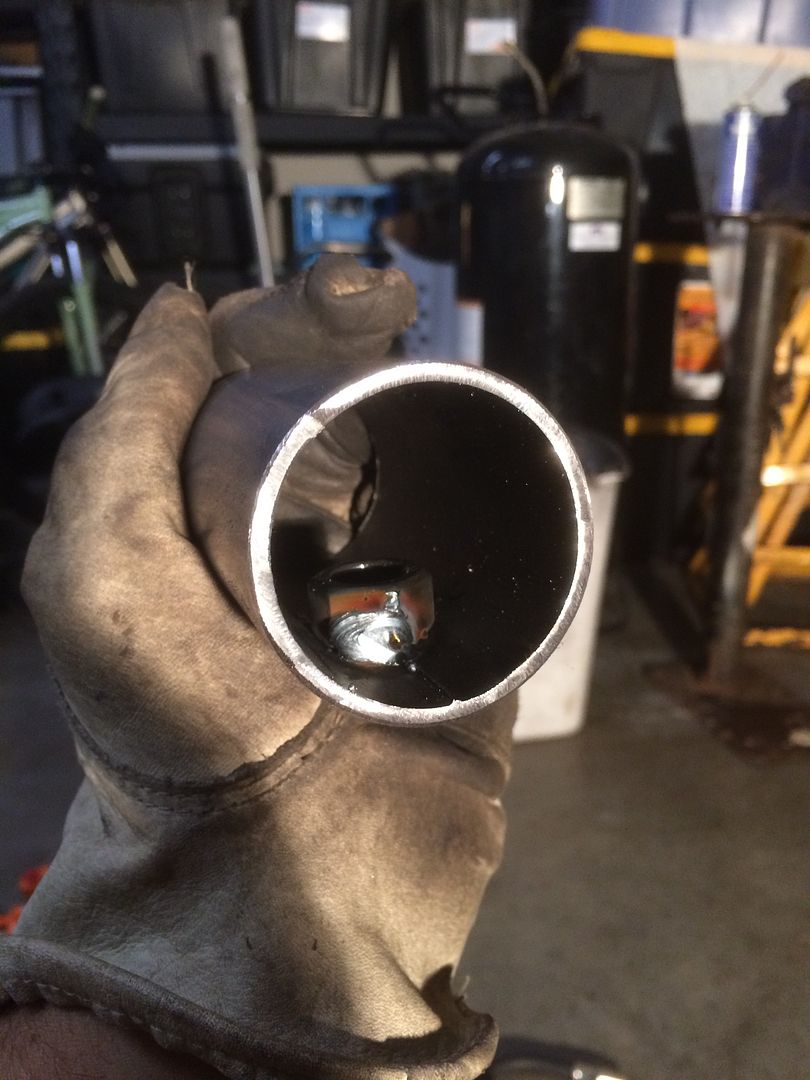
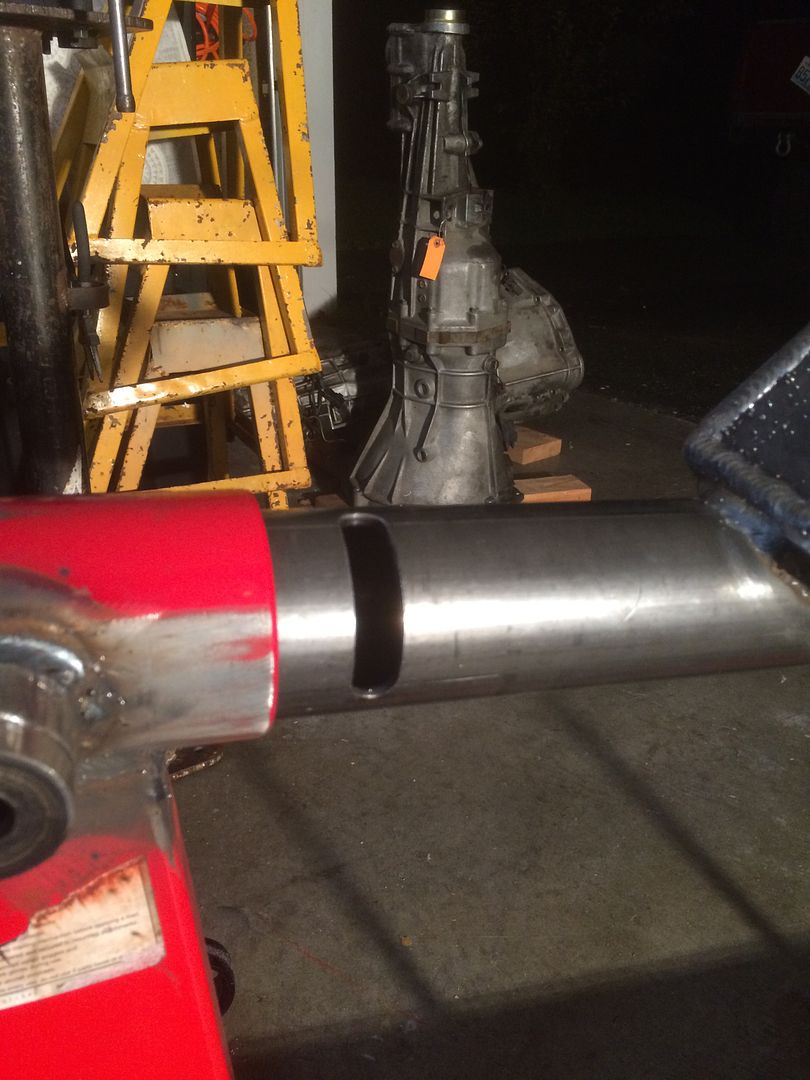
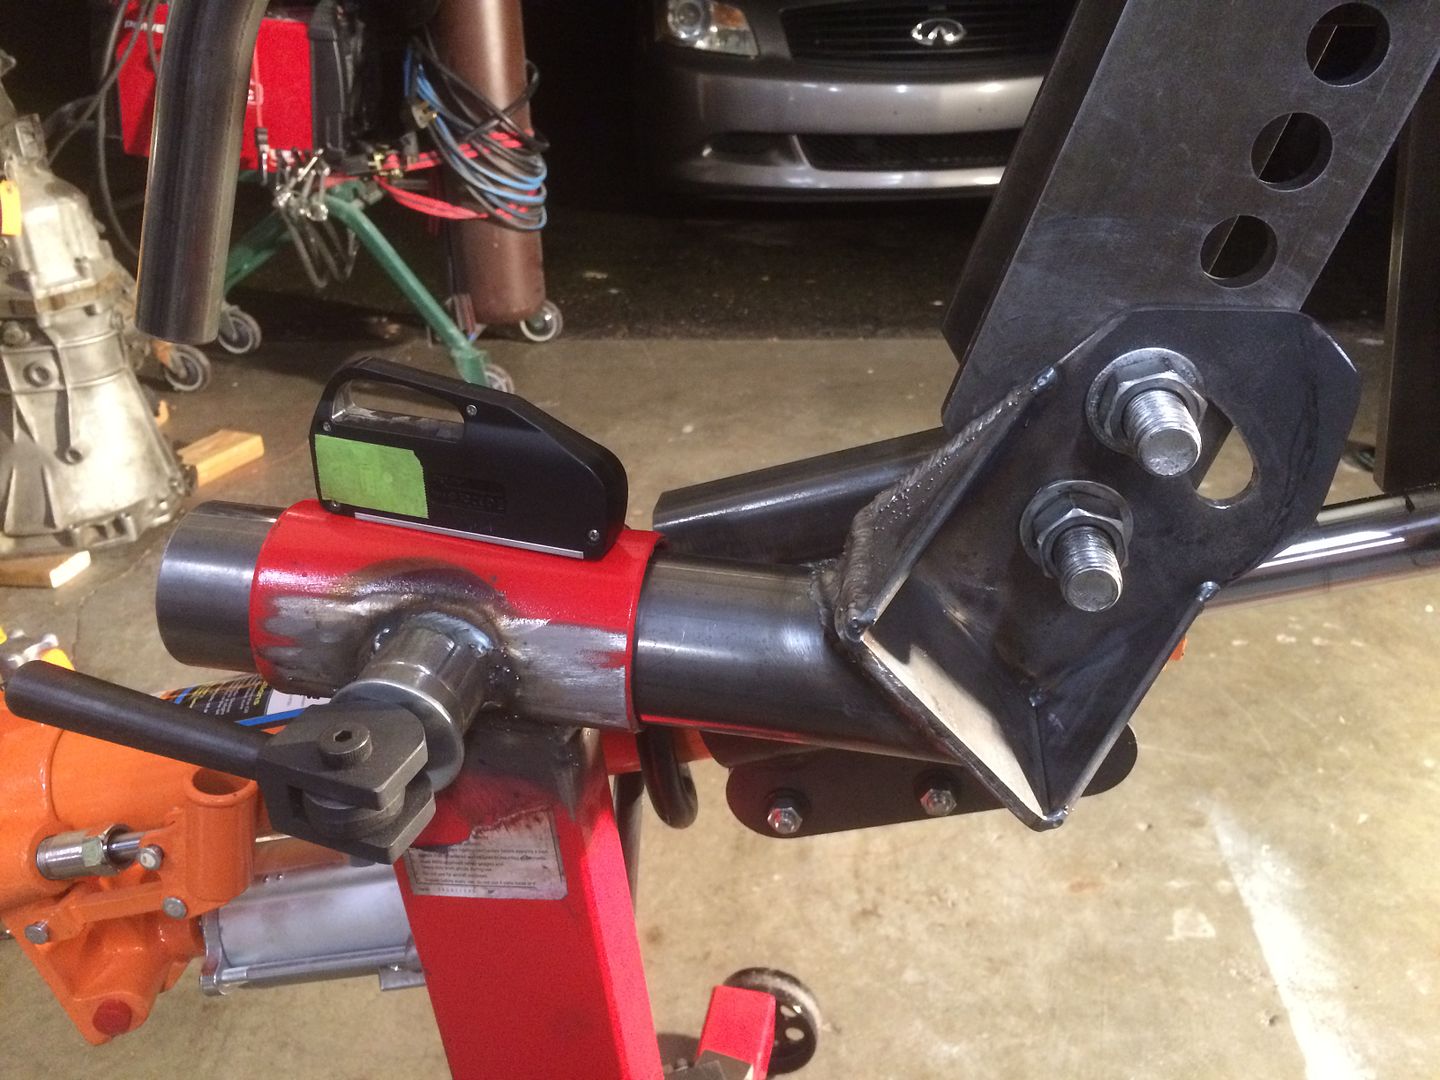
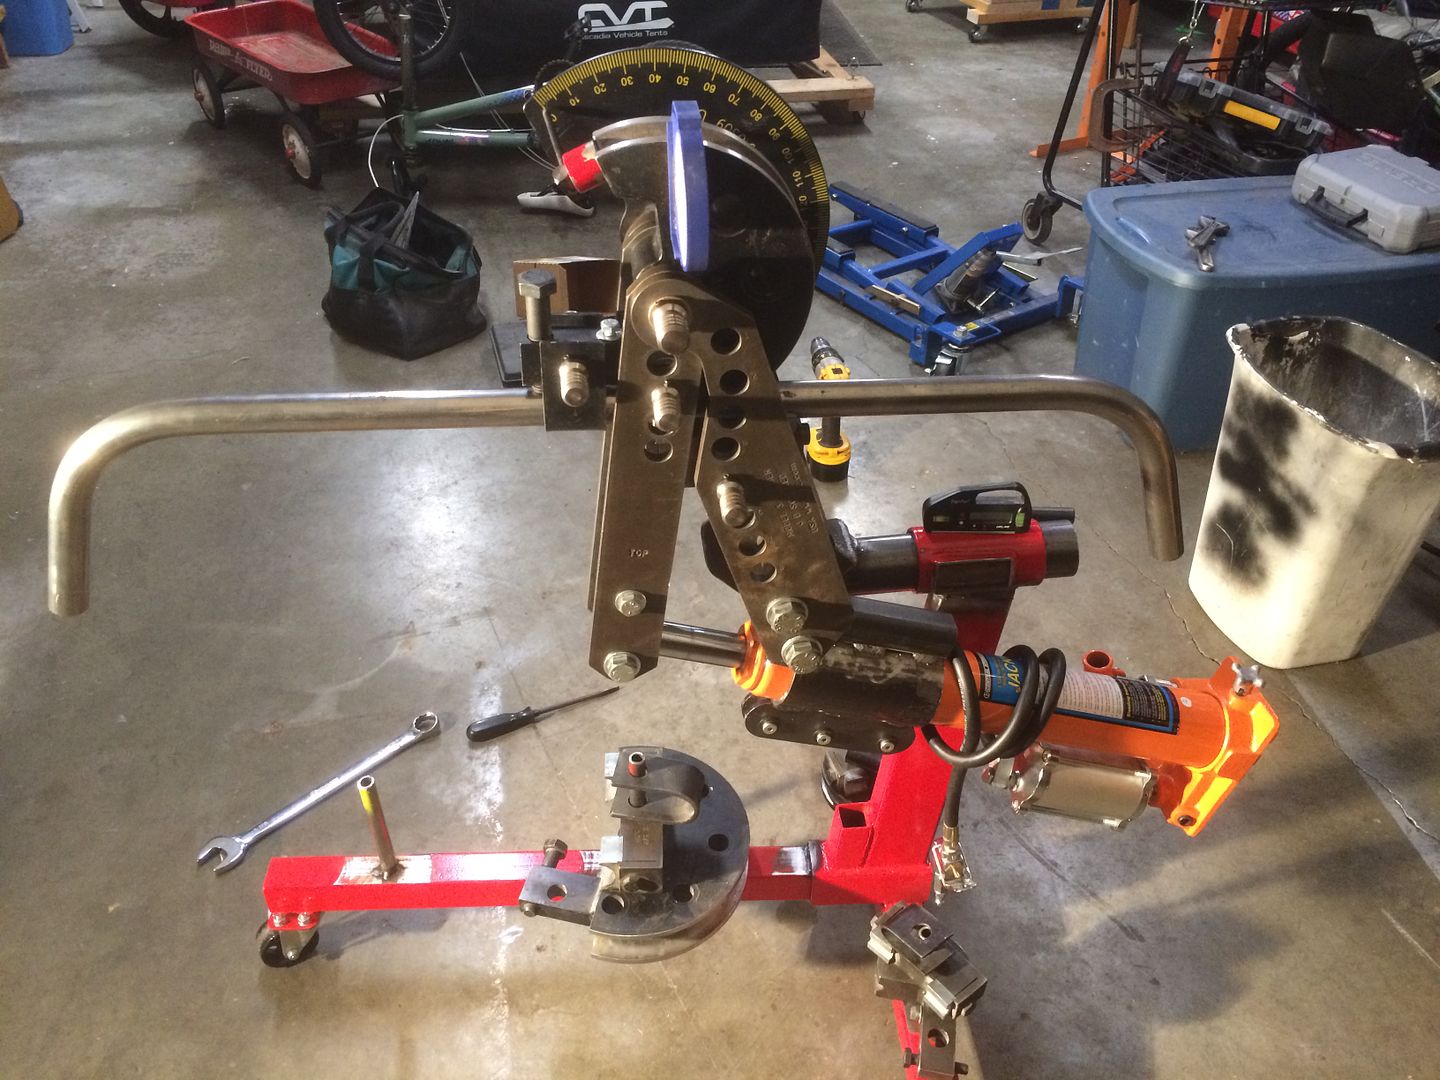
I also spent some time getting the new garage up to snuff with a 220v outlet for the welders and a 20 amp 110v for grinders and air compressor. I needed to be able to fab at home so I am not spending so much time away from the fam staying late after work to make things. I also modified my engine stand to work as my mobile bender station. I wanted to be able to use the bender both vertical and horizontal so that added a little extra challenge to the project. I first found some tube that was pretty close to fit inside the benders rotating head and then cut a .5" slot in it 90* to allow the rotation from H to V but not beyond.

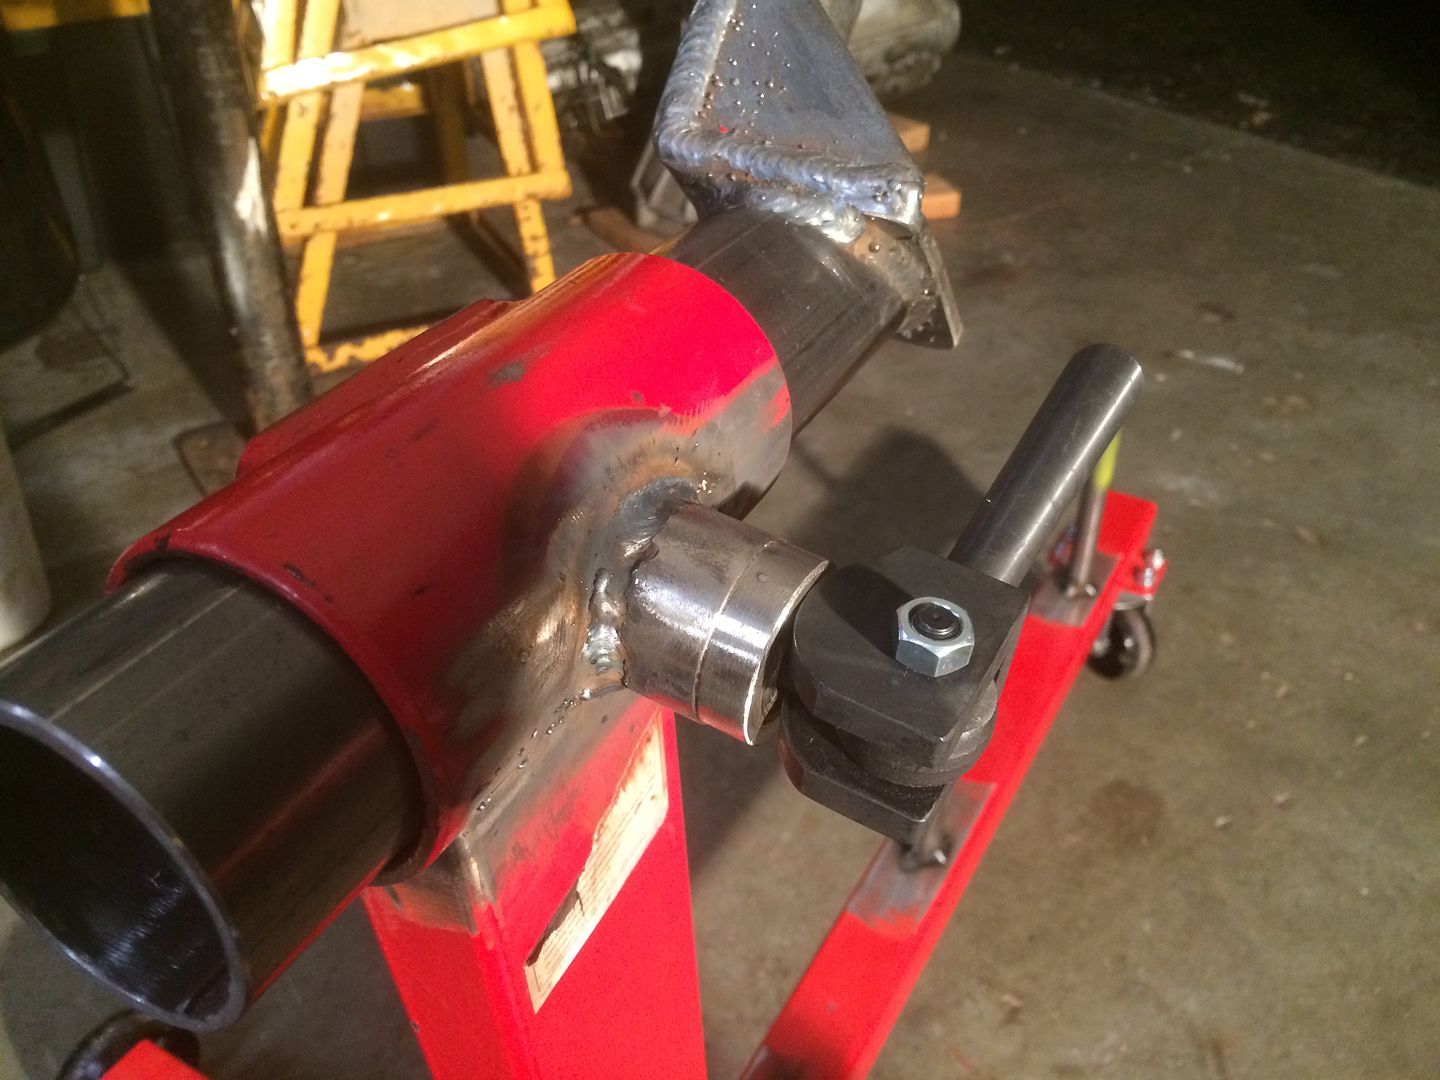
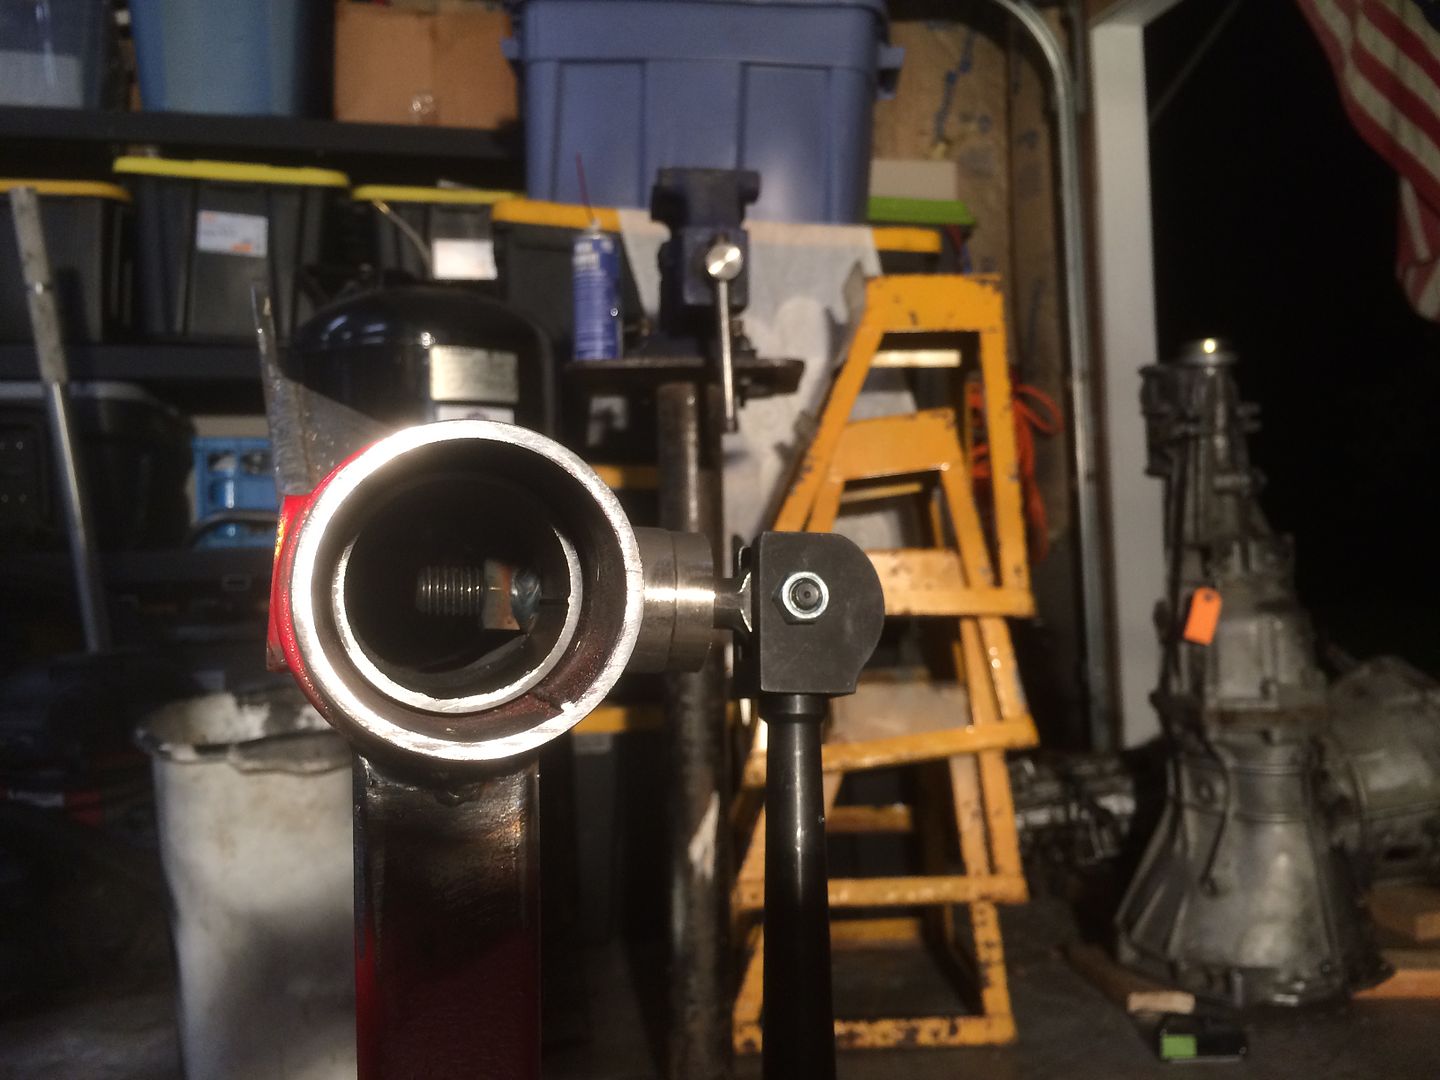
I used some .5" acme thread to pinch it tight on the inside and act as the stopper in the milled slot. It works decent but I think I will switch it to a QR lever that pulls a smaller section of pipe against the insider of the tube for more clamping force and less bending potential of the bolt. I love using random old parts from past cars on projects and it turns out the inner section of a Datsun 510 TC rod was a perfect handle for the acme thread!
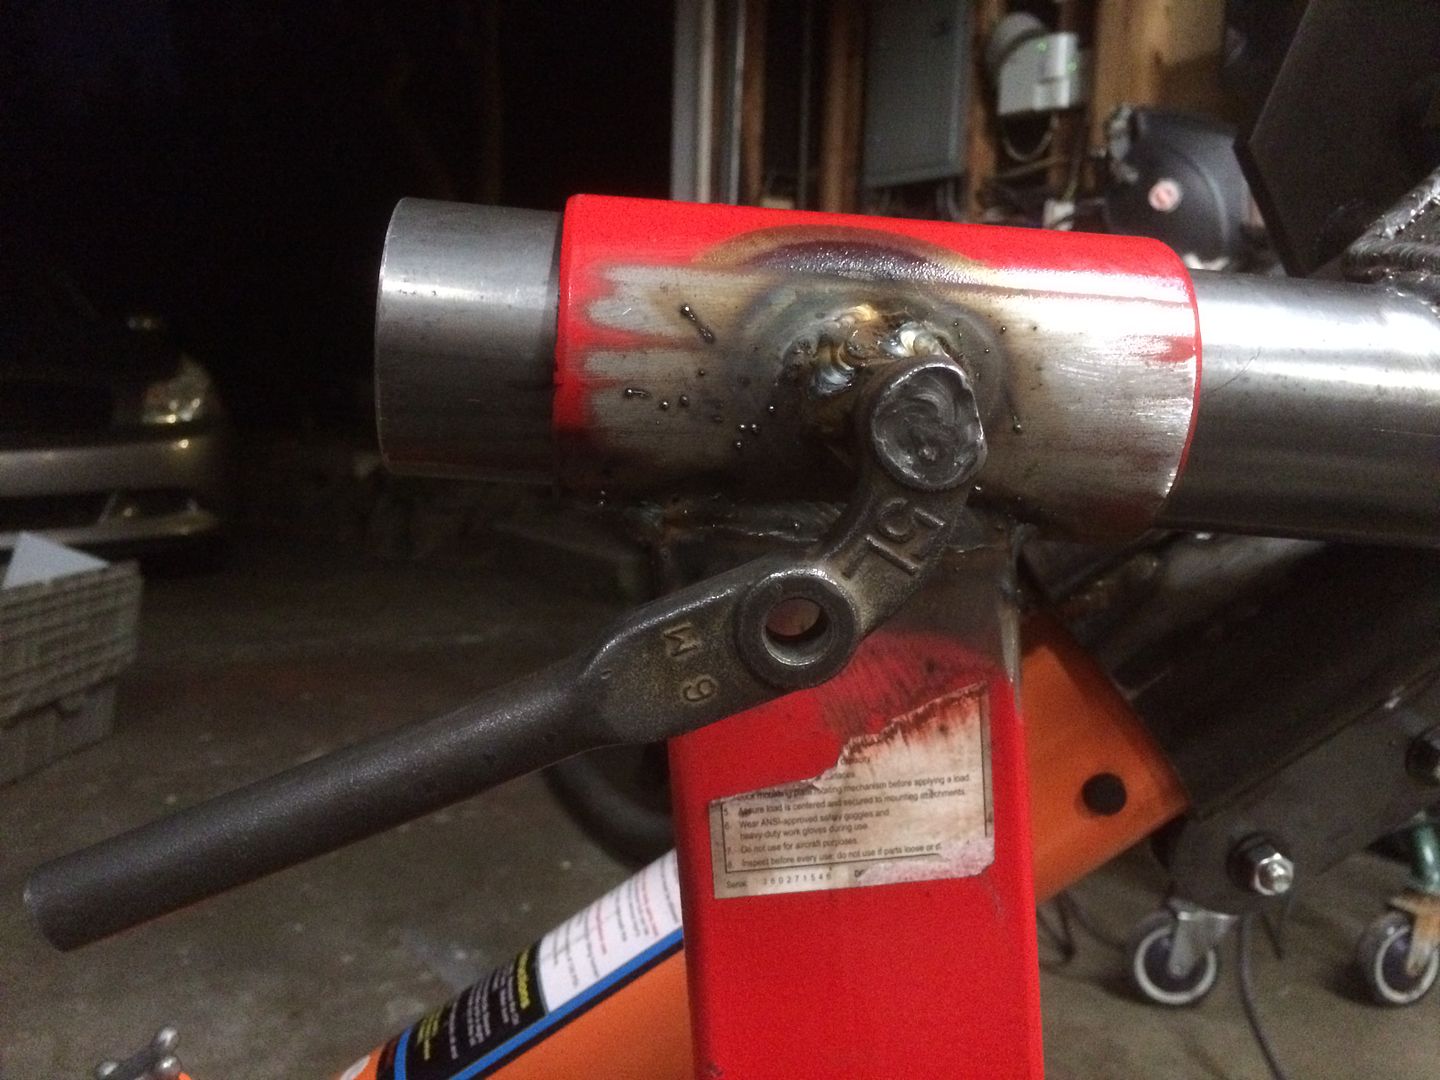
I made a plate to mount the bender to with a slot in it so I can dial in the level of the tube before bending. I had to cut the pipe at a 45* to get the bender upright enough to zero out the tubing even with the built in adjustment
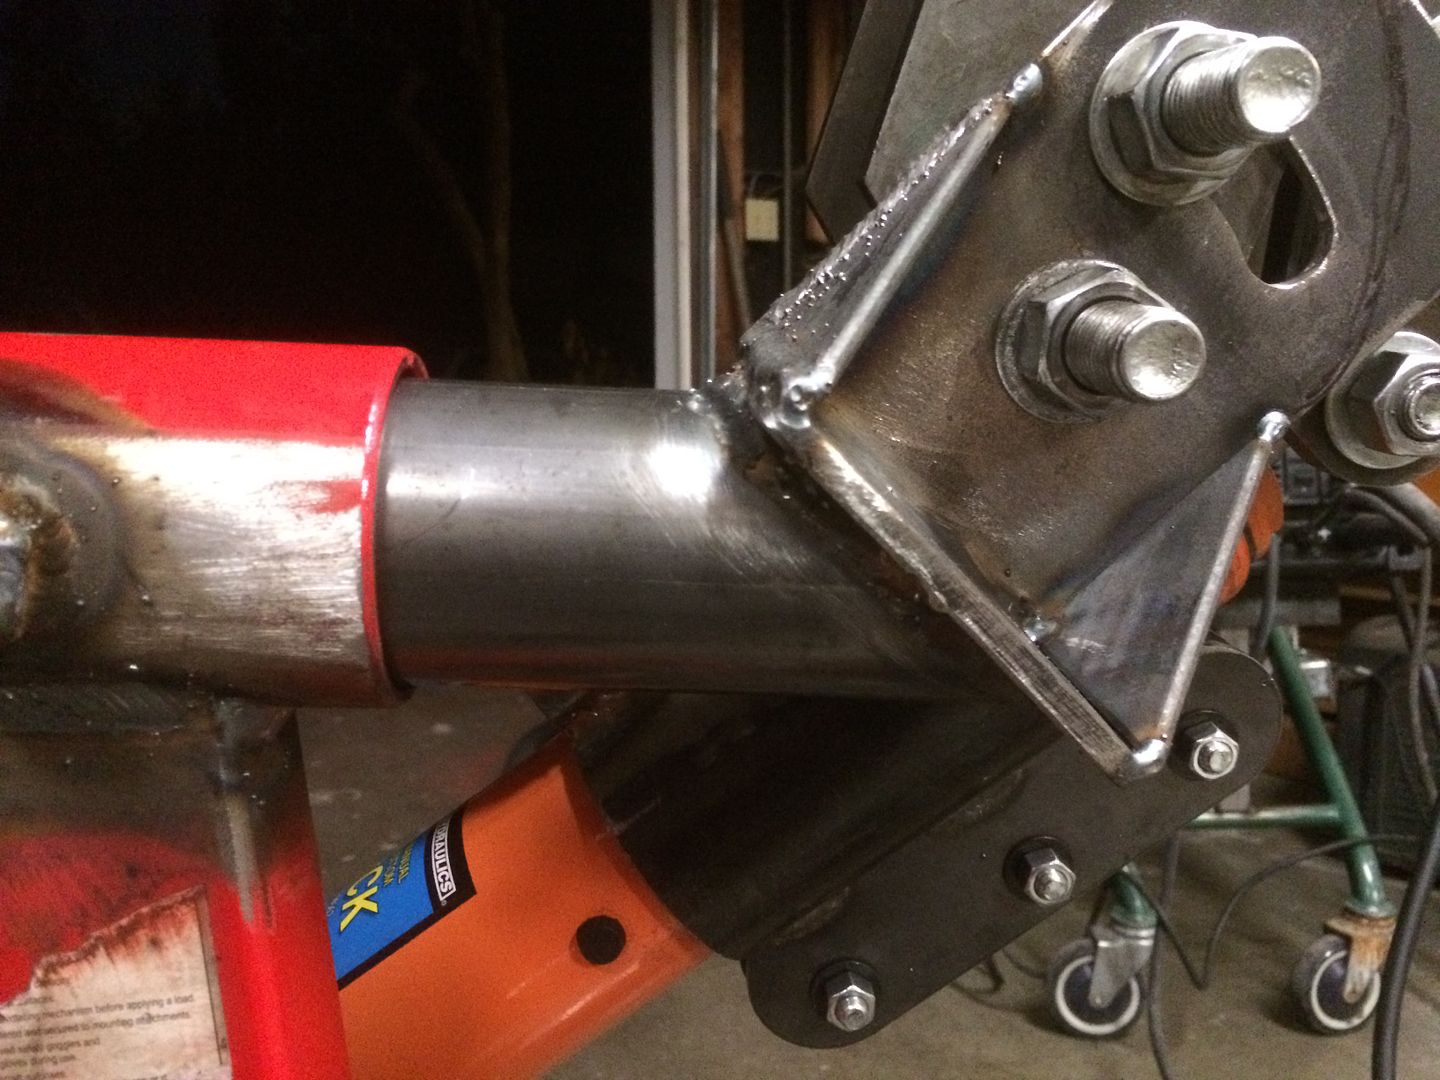
I added the necessary die holders that also serve as ballast
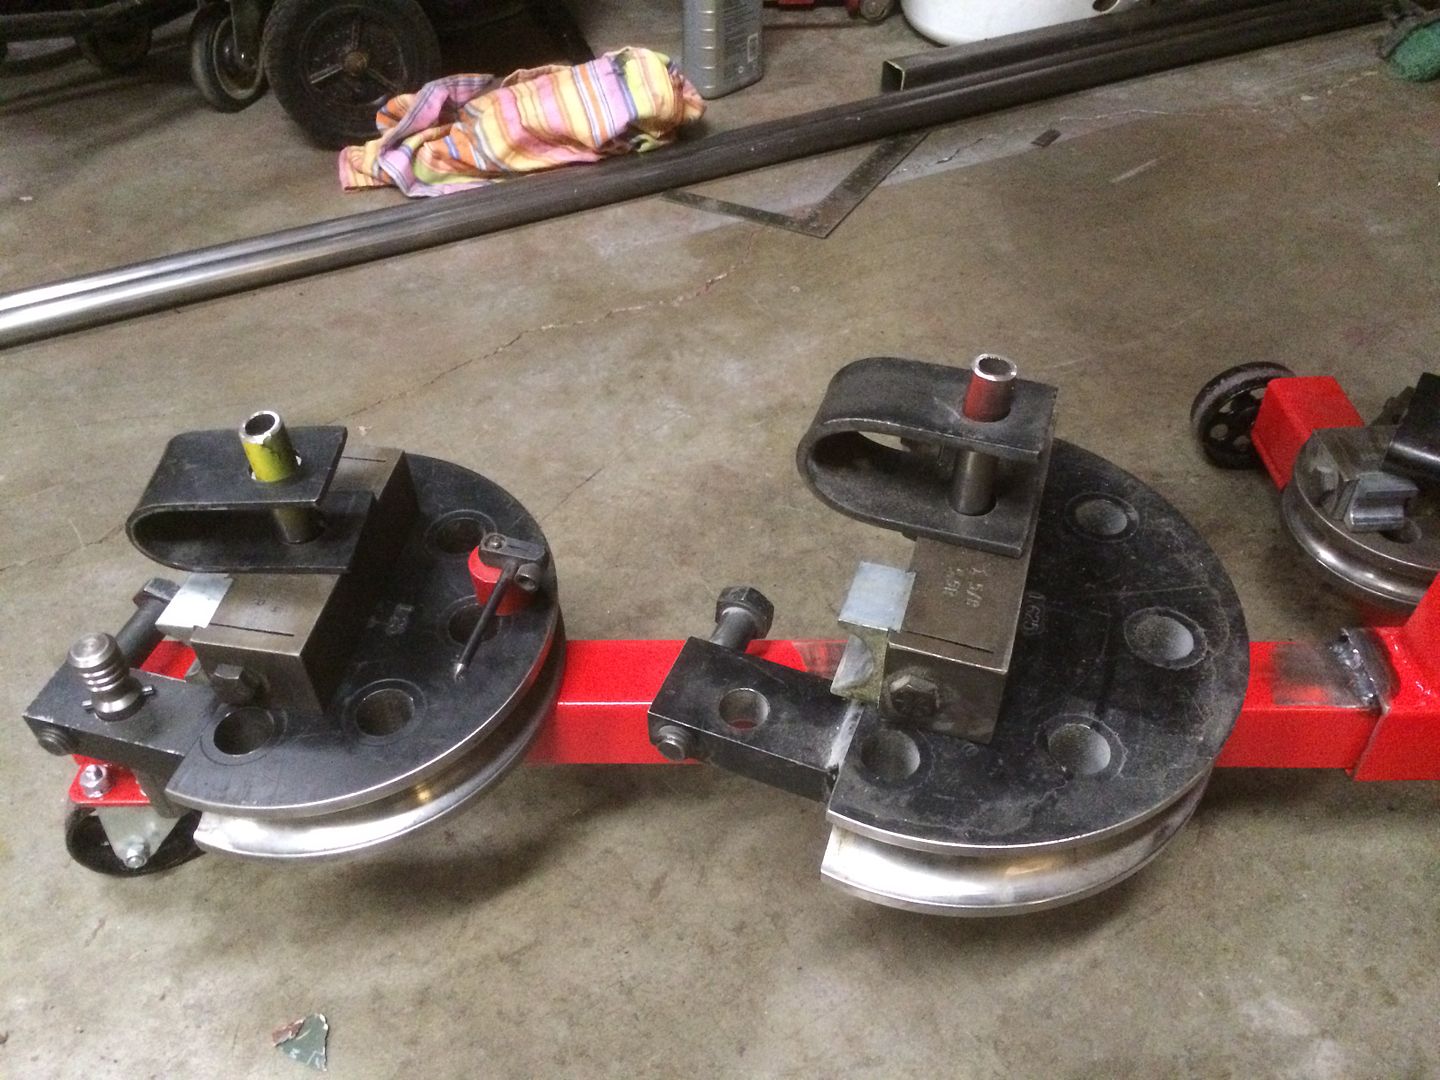
Here is the setup horizontal closed
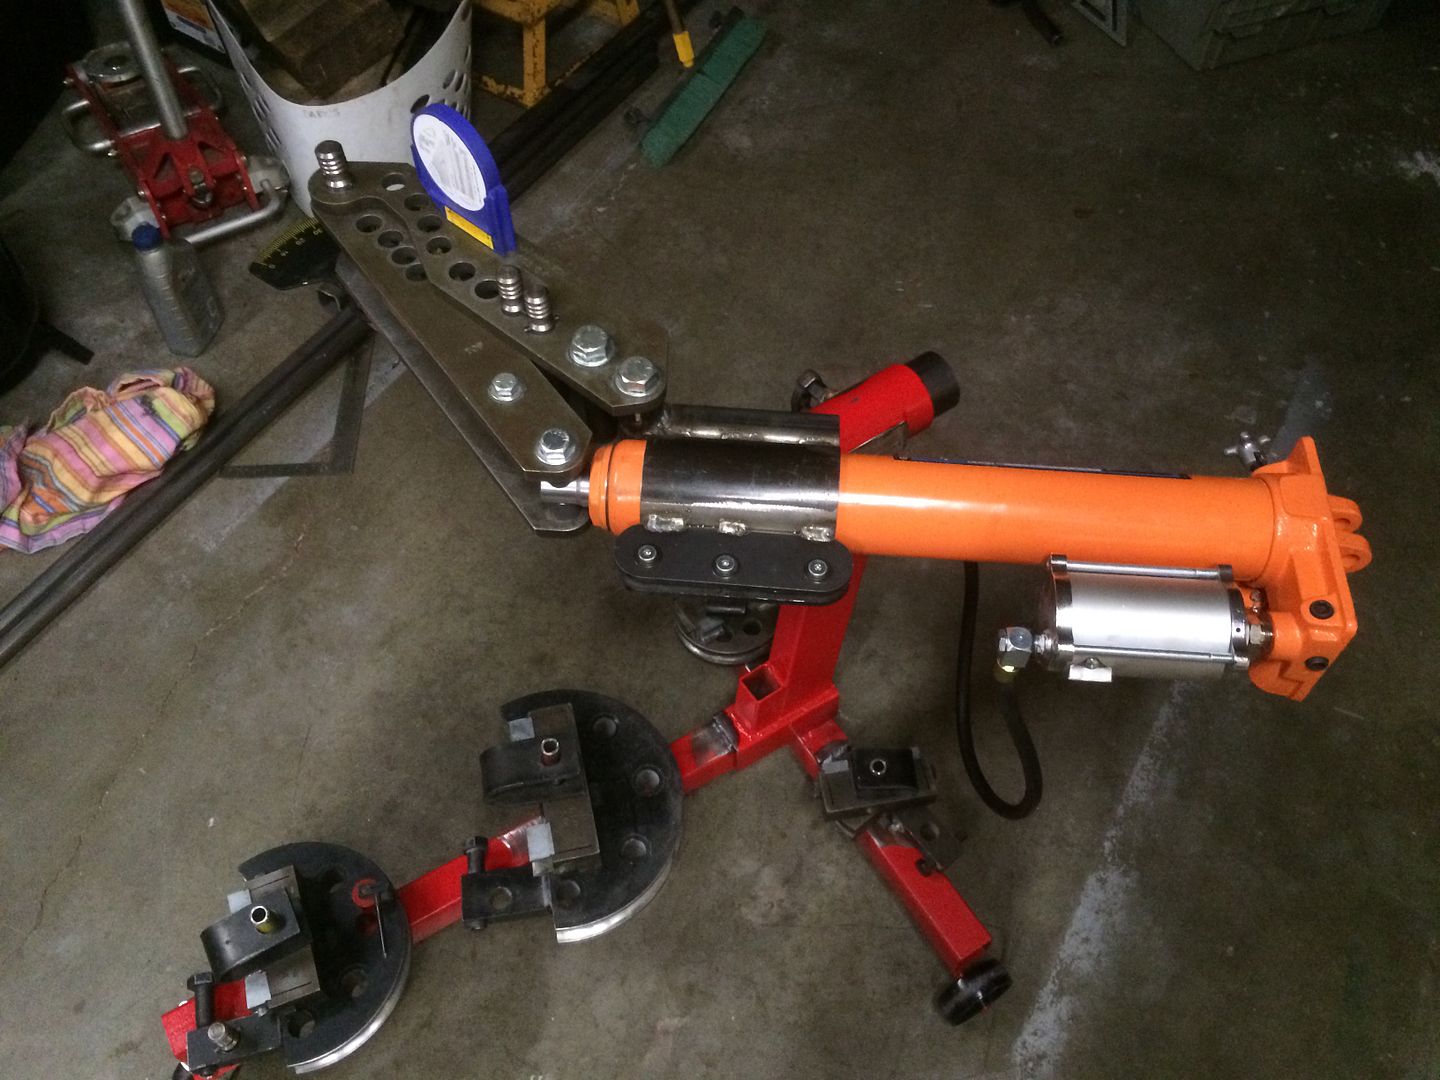
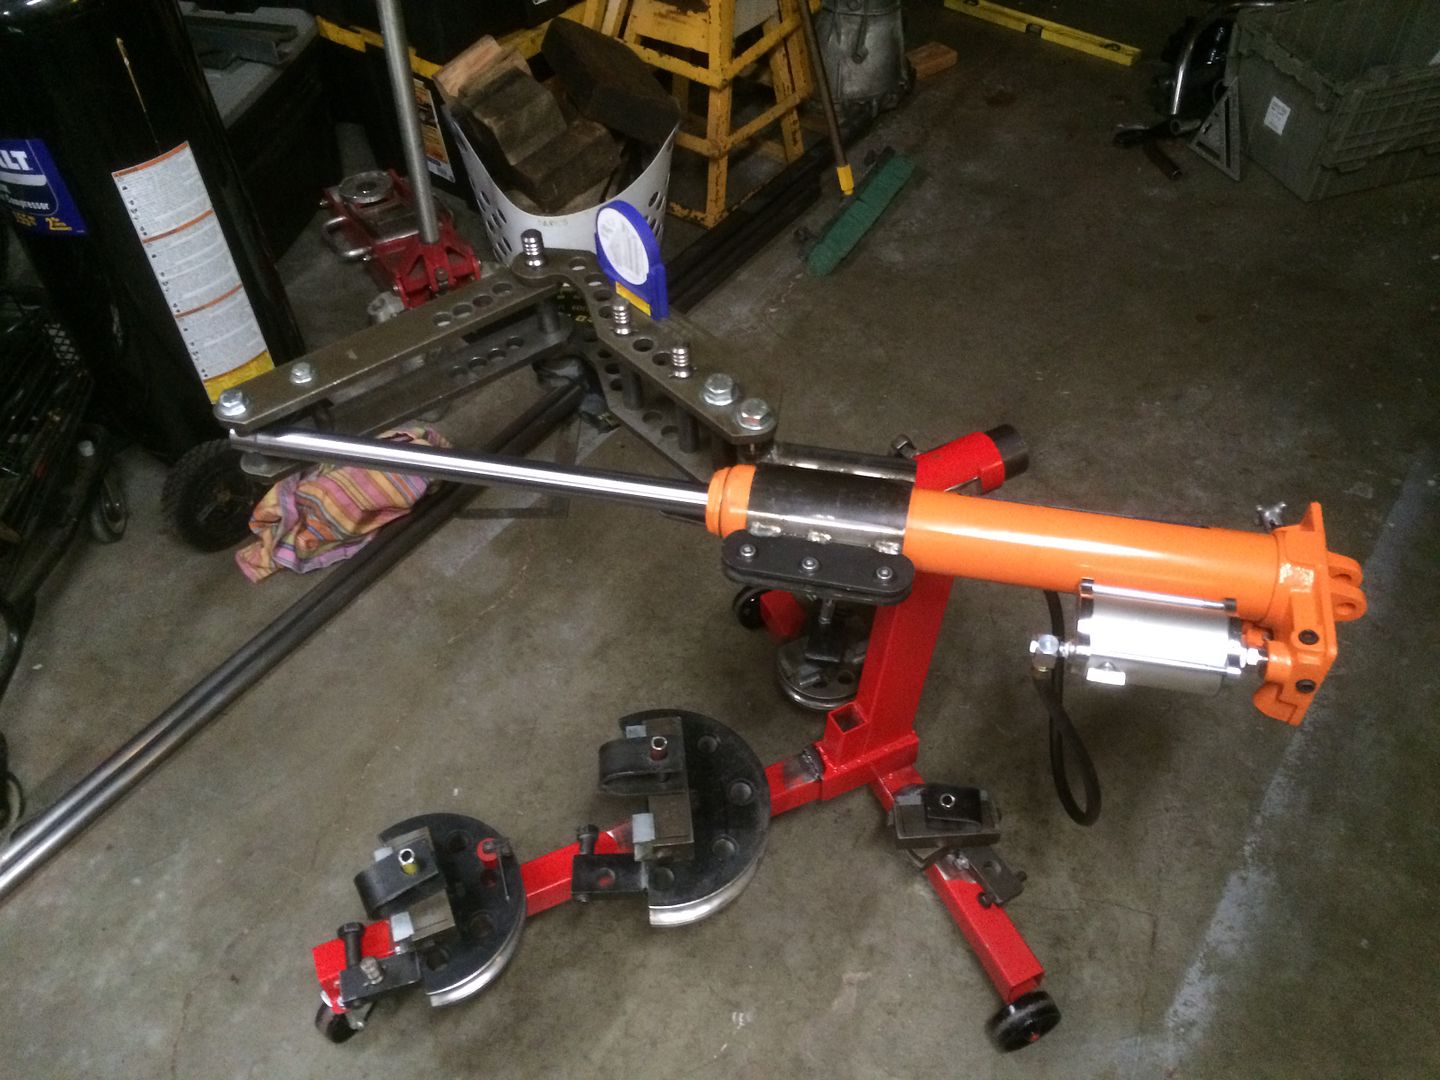
Opened
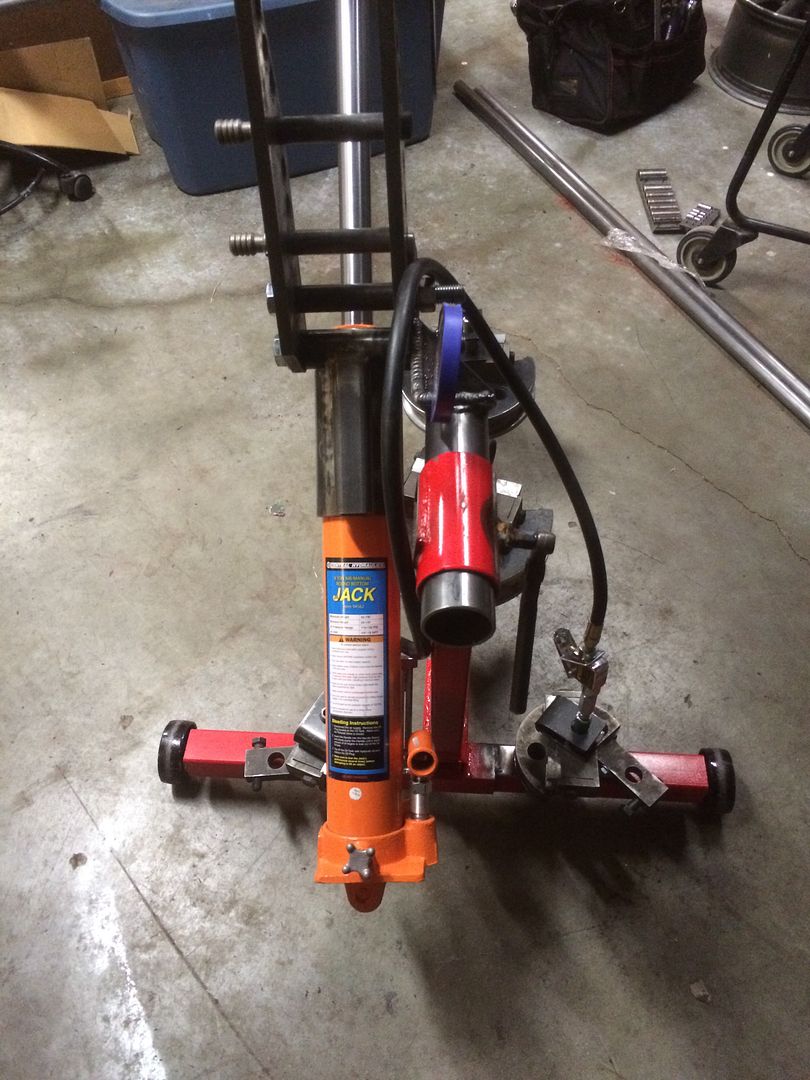
Vertical
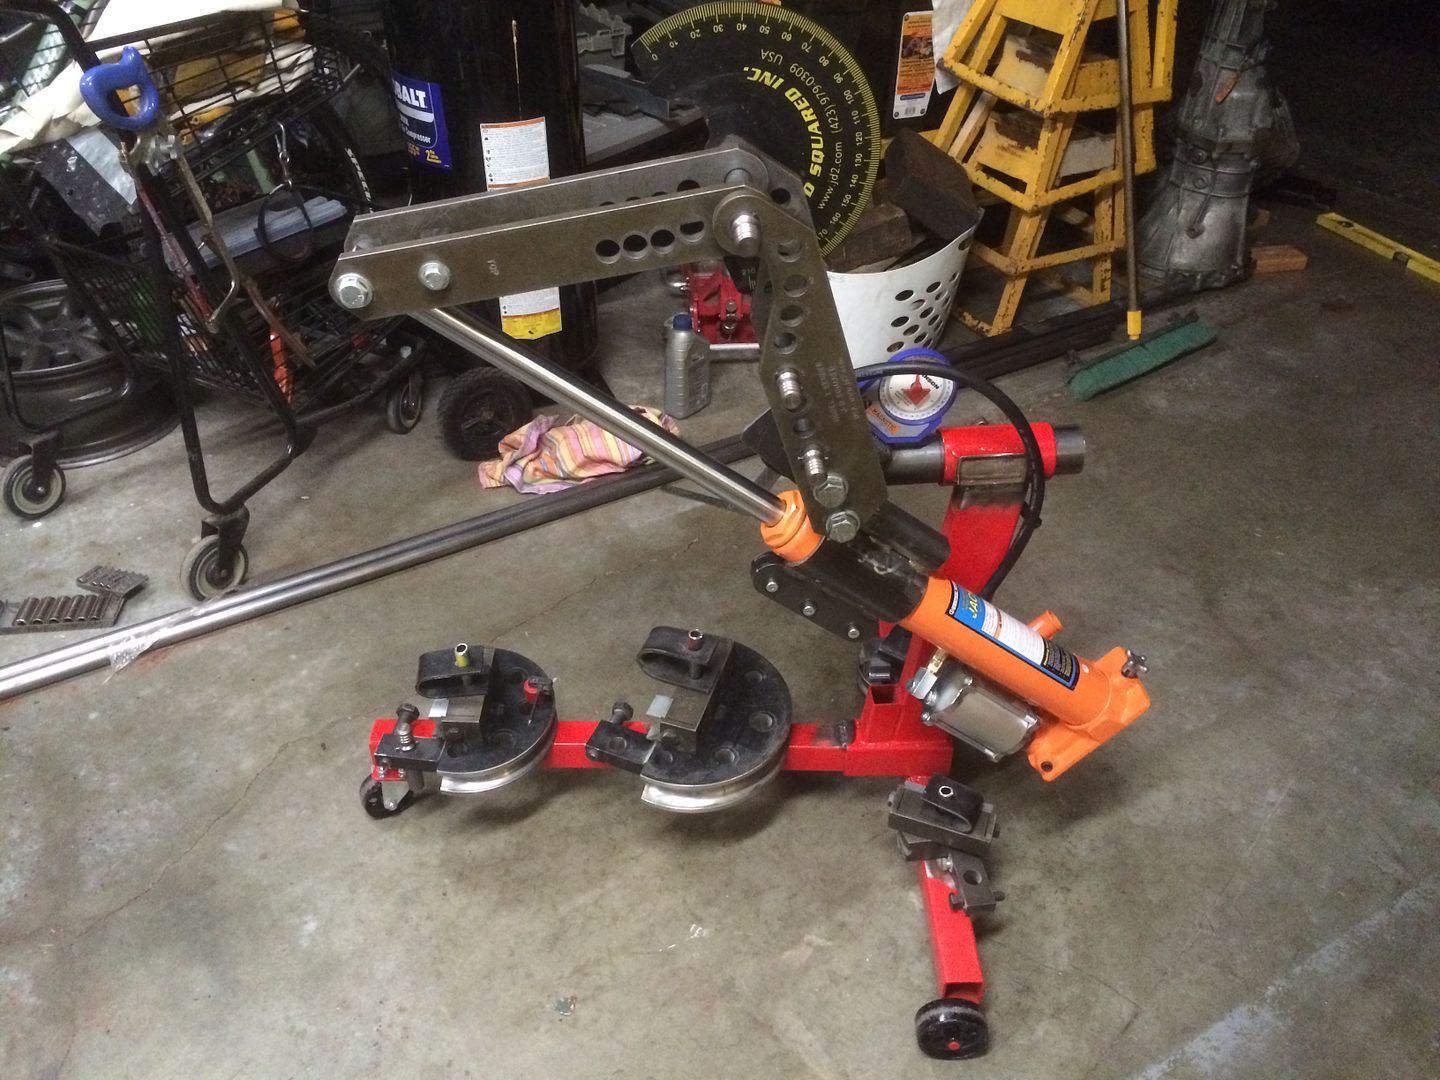
This should work pretty good and now that it is mobile it will allow me to be able to take it to other places and do some side jobs a little easier.

I plan on re-routing my main line back to the drivers side radius arm pivot and then to the axle where it will tee and use short flexible sections at the knuckles. That will eliminate the extreme stretch and possibility for getting caught up in moving bits.
I also replaced the drivers side door with a black one from Pull-a-part. I held off making the truck a multi color eyesore for a long time after getting t-boned, but with the window busted out and the door bent I had to something to get i back to being pleasant to drive. I might just paint it after I make the flat bed and ditch the red altogether. I don't mind it but my wife hates it!
I also spent some time getting the new garage up to snuff with a 220v outlet for the welders and a 20 amp 110v for grinders and air compressor. I needed to be able to fab at home so I am not spending so much time away from the fam staying late after work to make things. I also modified my engine stand to work as my mobile bender station. I wanted to be able to use the bender both vertical and horizontal so that added a little extra challenge to the project. I first found some tube that was pretty close to fit inside the benders rotating head and then cut a .5" slot in it 90* to allow the rotation from H to V but not beyond.

I used some .5" acme thread to pinch it tight on the inside and act as the stopper in the milled slot. It works decent but I think I will switch it to a QR lever that pulls a smaller section of pipe against the insider of the tube for more clamping force and less bending potential of the bolt. I love using random old parts from past cars on projects and it turns out the inner section of a Datsun 510 TC rod was a perfect handle for the acme thread!

I made a plate to mount the bender to with a slot in it so I can dial in the level of the tube before bending. I had to cut the pipe at a 45* to get the bender upright enough to zero out the tubing even with the built in adjustment


I added the necessary die holders that also serve as ballast

Here is the setup horizontal closed

Opened

Vertical


This should work pretty good and now that it is mobile it will allow me to be able to take it to other places and do some side jobs a little easier.
ridethebigone
New member
Thanks guys!
We had a little speed bump in our weekend on Saturday. We went down to Olympia to visit some friends for the day and decided to go for a little family friendly hike. We parked at the Woodard Bay Trailhead and set out on our adventure. When we were walking back I was looking at my truck from about 100 yrds away and kept thinking that the front drivers side window looked like it was open. With the lighting it was hard to tell but as I got closer I started to get that sinking feeling that comes with the realization something bad has happened. Sure enough my front window was busted and my wife's purse was gone. We had it tucked under the center arm rest but there must have been enough of it showing for the scumbags to see. The majority of the blame is mine as I know better than to leave valuables in sight at trailheads, but the DNR had signs all over the parking lot saying it was under 24hr video surveillance so I did not take the time to hide things like I normally would. Turns out those are just to make people feel safe when they are not as there were no cameras at all! I was also pretty close to neighborhoods and civilization so it was not out in the booneys where crackheads normally prowl cars. The good news is that they did not go through my glove box or center console at all and we just moved so the home address the thieves got is wrong. Otherwise I would be freaking out as they got her keys to all our cars and the house. They promptly hit up a gas station and filled up then went to Walmart and loaded up on cheap Chinese crap before we could cancel her card. On the plus side it seems like the idiots hit that trail head up daily and the Thurston county Sheriffs seemed pretty keen to catch them so hopefully they are busted soon. They stole a car from the same parking lot on Sunday so they have no fear of getting caught yet. Here is the damage, now I really have to replace that drivers door that got crunched over a year ago!
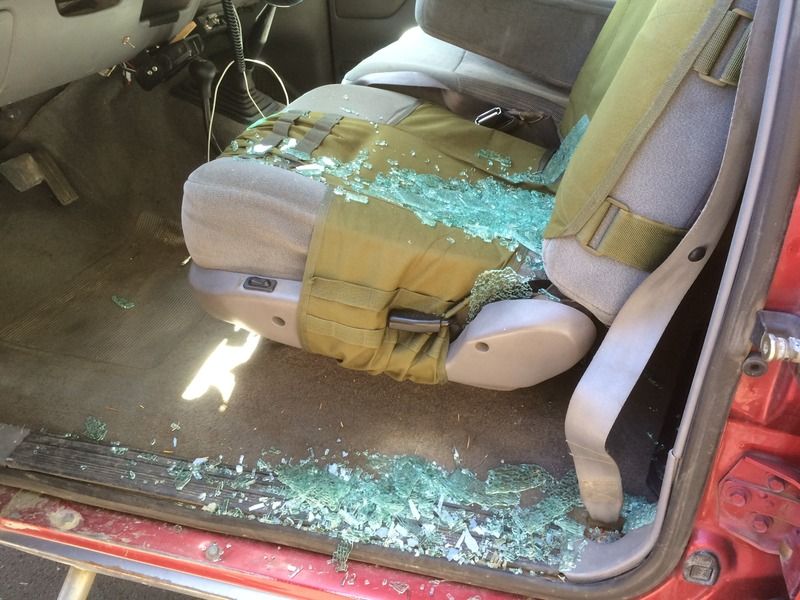


That sucks. Quick question: what are you using as a seat cover (with the MOLLE attachments)? I like that idea.
amgvr4
Adventurer
Ridethebigone;
The seat covers are made by Smittybuilt and they are for a JK Jeep. They fit most seats pretty well but I need to remake the straps that hold them on to keep them in place better.
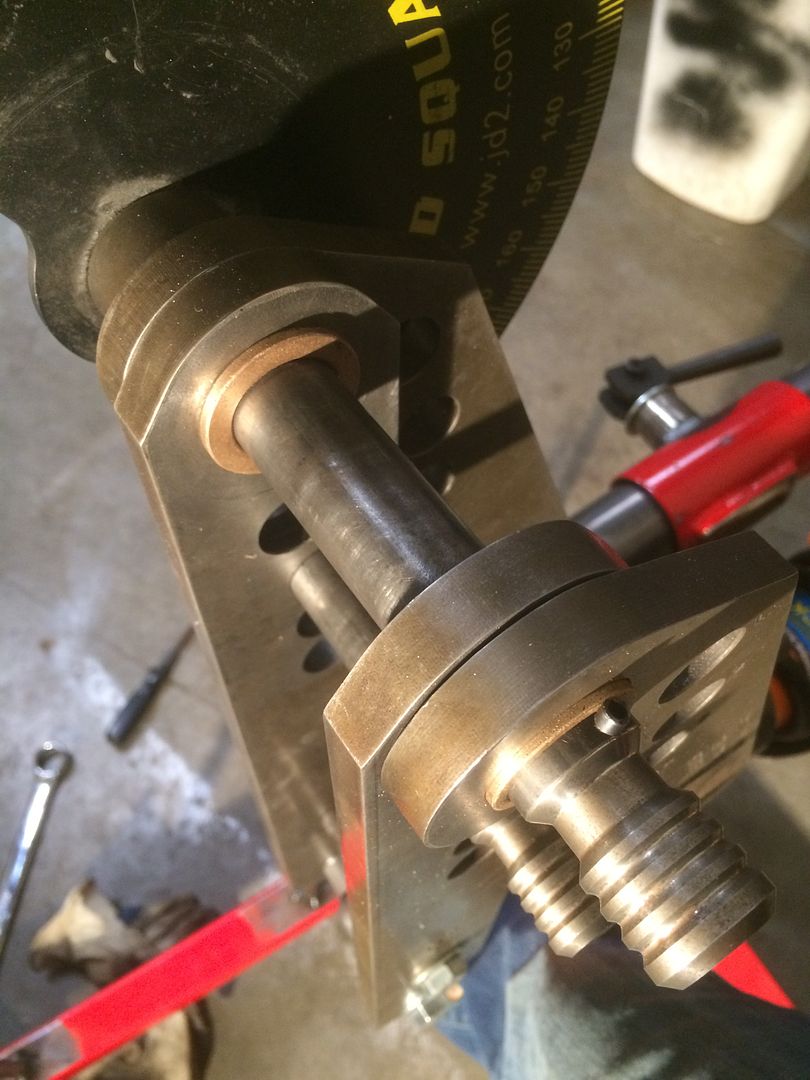
I tweaked the bender stand a little bit o fix some of the things I was not happy about. First off my threaded handle that locked the benders rotation was not up to the task and I had a feeling it wouldn't be. Instead of pushing on it I wanted to pull and clamp the inner tube between two surfaces for better hold and less leverage on the clamping mechanism. I started by cutting a section of tube that was just a little smaller than the one the bender attaches to. Then I drilled a .5" hole and welded a 1/2-13 nut to the inside it
Then a grabbed a chunk of steel I had laying around and drilled a 9/16 hole through it and welded it to the stand where the threaded handle was

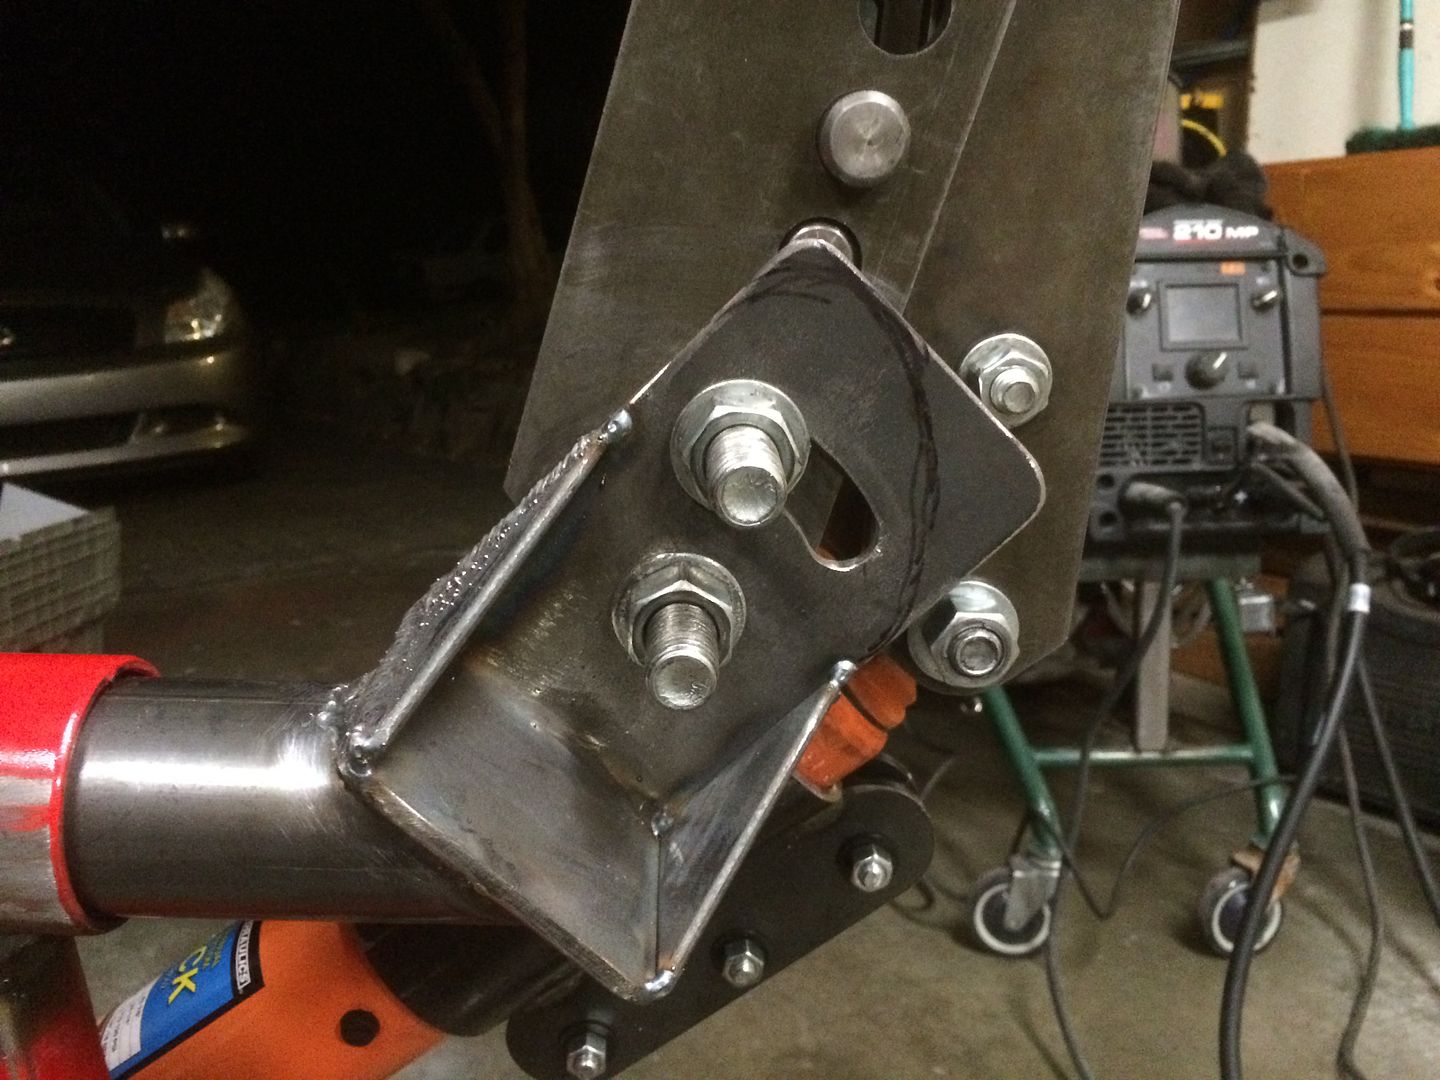
Here is the slot I machined in the bender mount to control the range of motion from vertical to horizontal
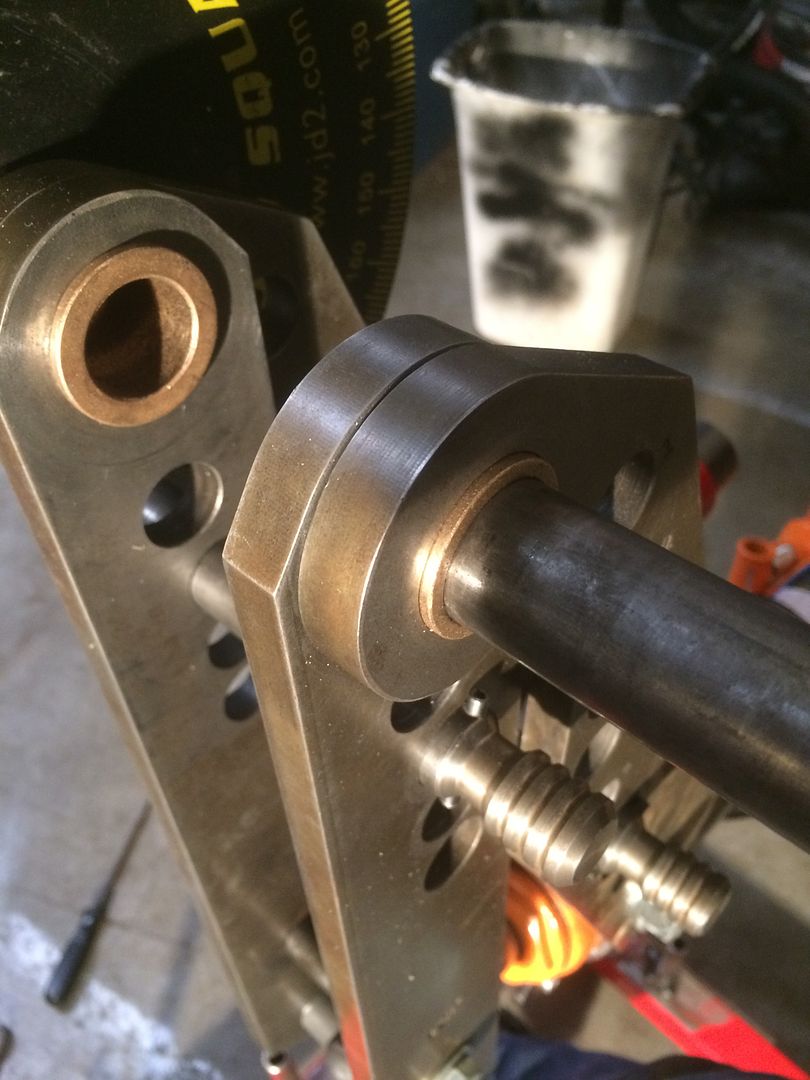
I picked up a locking lever, fixed rod end, and shouldered bolt from McMastercarr to make up the clamping mechanism
Here you can see the way it works. There are three tubes, the inside and outside ones form a clamp for the inner one that rotates the bender. It works much better and holds everything in place really well
The other things that was killing me is when the bender is vertical the arms always fall apart when changing dies. This is a big problem when trying to put in a large, heavy and expensive die for larger tube. You have to try and hold the die in place and keep all the arms aligned at the same time. When I was looking through other peoples bender stand builds I cam across a guy who solved this problem with some bronze bushings from McMaster. I got flanged ones just to make them stay in place easier. In order to get the bushings to fit I had to bore out the holes in the arms from 1" to 1.25". To do this I picked up a 1.25" anular cutter and slowly bored the holes out on the mill. I think those are my new favorite tool! They cut so clean and nice that it makes using twist drills feel like using a crappy dull round file to make holes.
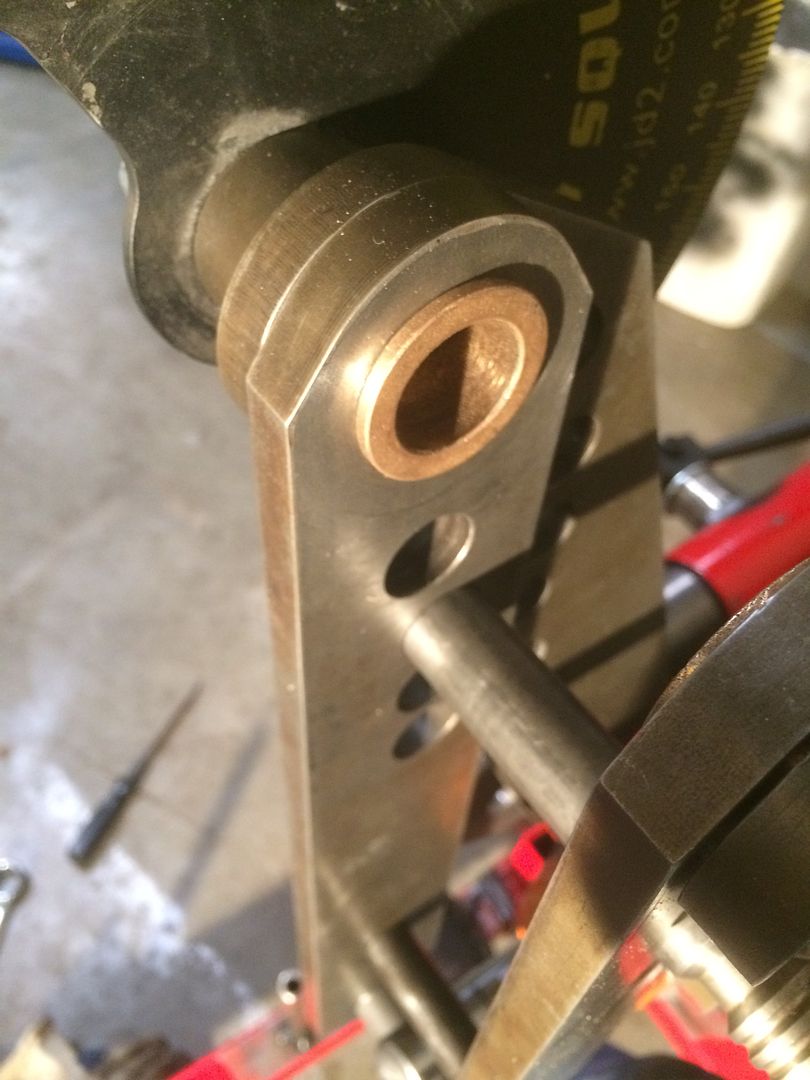
I also cut the corners of the mount plate for more clearance and a cleaner look
At this point it should be ready to get to work
The seat covers are made by Smittybuilt and they are for a JK Jeep. They fit most seats pretty well but I need to remake the straps that hold them on to keep them in place better.
I tweaked the bender stand a little bit o fix some of the things I was not happy about. First off my threaded handle that locked the benders rotation was not up to the task and I had a feeling it wouldn't be. Instead of pushing on it I wanted to pull and clamp the inner tube between two surfaces for better hold and less leverage on the clamping mechanism. I started by cutting a section of tube that was just a little smaller than the one the bender attaches to. Then I drilled a .5" hole and welded a 1/2-13 nut to the inside it

Then a grabbed a chunk of steel I had laying around and drilled a 9/16 hole through it and welded it to the stand where the threaded handle was

Here is the slot I machined in the bender mount to control the range of motion from vertical to horizontal

I picked up a locking lever, fixed rod end, and shouldered bolt from McMastercarr to make up the clamping mechanism

Here you can see the way it works. There are three tubes, the inside and outside ones form a clamp for the inner one that rotates the bender. It works much better and holds everything in place really well

The other things that was killing me is when the bender is vertical the arms always fall apart when changing dies. This is a big problem when trying to put in a large, heavy and expensive die for larger tube. You have to try and hold the die in place and keep all the arms aligned at the same time. When I was looking through other peoples bender stand builds I cam across a guy who solved this problem with some bronze bushings from McMaster. I got flanged ones just to make them stay in place easier. In order to get the bushings to fit I had to bore out the holes in the arms from 1" to 1.25". To do this I picked up a 1.25" anular cutter and slowly bored the holes out on the mill. I think those are my new favorite tool! They cut so clean and nice that it makes using twist drills feel like using a crappy dull round file to make holes.


I also cut the corners of the mount plate for more clearance and a cleaner look

At this point it should be ready to get to work

pappawheely
Autonomous4X4
In order to get the bushings to fit I had to bore out the holes in the arms from 1" to 1.25". To do this I picked up a 1.25" anular cutter and slowly bored the holes out on the mill. I think those are my new favorite tool! They cut so clean and nice that it makes using twist drills feel like using a crappy dull round file to make holes.
Use cutters on the mill to notch tubing and see how nice your welded joints will be! :wings:
amgvr4
Adventurer
Long time no update. I have been super busy with work moving to a new shop so nothing has changed on the truck other than the mileage. I have been using the living day lights out of it though and it is in need of some love so I am replacing the steering shaft, box, PS pump and adding hydro boost. I am also fixing the front brake lines so they don't hang down so bad and aren't so easily trashed. I'll post up pics as soon a I figure out my Photobucket password, lol!
Nosferatu49534
Observer
Can't wait.
snowaddict91
Adventurer
Glad to hear you've been using your rig, can't wait to see your steering upgrades! One of these days I need to post an update in my thread as well.