OBS F250 slow adventure build

java

Expedition Leader
North end around Everett. It would be nice to have a PNW expo portal meetup some time. It is always good to put faces to screen names!
Definitely, check out northwestoverland.com we do a monthly meet up, many of them are on expo also. I'm in Kenmore. I'll honk if I see your truck around.
 

amgvr4

Adventurer
On the ground

I got lots done today. With the CNP (commie neighborhood patrol) on the prowl I had to get the truck off the jack stands and movable to avoid a fine. In order to do that I had to put the bronco coils on just to get it rolling. The first thing I buttoned up was hooking up the hoses from the ps cooler to the pump and steering box. I cut the hard line at the box and flared out the end to keep the hose from leaking. I also used the plasma to cut the bracket for the cooler down.


Fully welded the frame side track bar mount. Also added some gussets


Mounted up the drivers coil bucket temporarily
 

amgvr4

Adventurer
Back on the ground for the first time in a couple months. The bronco coils are very soft and the front is currently only 1.5" taller than when it had the D50. I want it at least 3" taller to have the 5" of up travel I need. I did some testing and it looks like I could easily use all the stroke a set of 12" foxes would give me.


I am very happy with how tucked up and out of the way the steering is now


Plasma trimmed and painted bracket


Radius arms from the side. I still need to remove the drivers spring mount. I don't need it as a reference point any more so it can go now


I picked up two of these little LED work lights at Lowes. They are very bright and as an extra bonus come with a 12v dc plug so you can use them by plugging into your cigarette lighter if you need. I plan on keeping one in my truck as a mobile work light. The cord is long enough to reach any were on the truck.


I still need to finish the frame side track bar mount. I am going to fully plate over the top of the struts I made today. The biggest thing now is to finalize my plans for what coilovers to use and get them ordered. Once I have the coilovers and towers made for them I can pull everything back out, finish all the welding, and paint. I also need to swap the hubs to the D50 manual lock ones and slap on some new rotors. There is still a ton to do but it is good to see it on the ground again.
 

seanpistol

Explorer
Looks so good- Bronco springs definitely aren't tall enough. What are you thinking for a solution? Set of Eibachs in whatever spring rate and height you want?
 

amgvr4

Adventurer
Looks so good- Bronco springs definitely aren't tall enough. What are you thinking for a solution? Set of Eibachs in whatever spring rate and height you want?

Thanks man. The ideal solution is some 2.5" fox coilovers with dual rate spring set. It would solve both the spring rate issue as well as shock packaging. Right now I don't have a good place to fit shocks with enough travel to utilize all the articulation the front end is capable of. I could easily fit a set of 12" coilovers I place of the coil springs and have roughly 16" of wheel travel.
 

amgvr4

Adventurer
Not a ton of progress today. I fully welded the main radius arm brackets to the frame. I also started the removal of the drivers side rear spring mount. I hate these things! I ground the heads off of all but one rivet and then tried to use the air hammer to brake it free from the frame. Unfortunately the air hammer I have is super weak sauce and didn't even budge it. Then I busted out the plasma and started hacking it up to make it easier to bend and pop it free. About all I accomplished was burning the crap out of myself with slag. I will have to get the air hammer from work to finish this battle.


I measured for the front driveline and I was expecting to have to add a custom long slip section to function with all the newfound articulation. As it turns out I inadvertently placed the main pivots at almost the same location as the transfercase output. Amazingly there is only .5" in driveline length change from the axle all the way up touching the crossmember to full droop 14" down from there. I also want to make some bump stops that will hit the flat pads I originally made to mount the shocks to. I hope the weather holds this coming week so I can get some more things checked off the to do list.
 

Sooper Camper

Adventurer
did you try drilling holes through the rivets, 3/16" or so works. worked every time for me and i only had a $20 chisel gun, the key is having a hole through it so it can collapse when you poke it through. I've even seen big guys do it by hand, but i guess i'm not man enough/value my fingers too much to go wailing away with a 3lb sledge and drift punch...

steering looks great! angles look spot on and nice and flat. not sure if you caught it already, but F350's have a much beefier pitman arm that bolts up to the same box. f250 might already have it, can't remember for sure.
 
Last edited:

amgvr4

Adventurer
Humvett;

Thanks, it is getting so close I can taste it!

Sooper camper;

I got tired of trying to drill it with my dull bits so I went to the cut off wheel for most of it. One of the rivets is impossible to reach with anything but a chisel. I also forgot that I turned the regulator on my compressor down to 40 psi for my plasma so the other air hammer was only getting half power! The better speedair from work was much more effective at any rate.

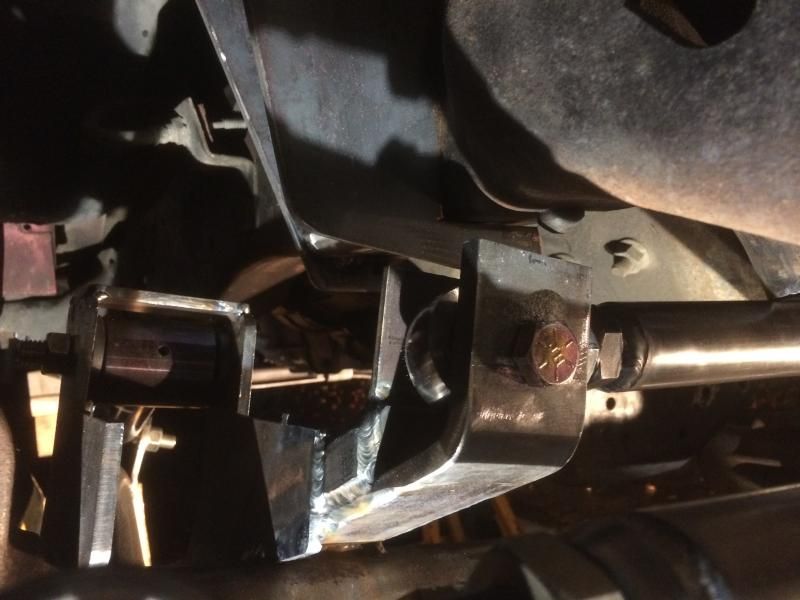
I spent a ton of time on making sure the track bar and drag link were the same length and exactly the same angle throughout the range of articulation and it paid off. At ride hight they are both sitting at 3* of inclination so pretty darn flat. I do have the f350 pitman arm on there. It came with the d60 and like you said it is a much stouter arm so I swapped out the f250 one for it.

I ordered my coilovers today. A huge thank you to sooper camper for helping me figure out what I needed. He is very knowledgable/helpful, and if it wasn't for your gentle nudging in the first place I would still be trying to figure out how to cram some some budget parts in there that would have ended up being a disappointment in the long run. With this much time and effort invested it is worth it to do it once and correctly. UPS tracking shows they will be here on Wednesday so I am super stoked to get the front end all wrapped up.

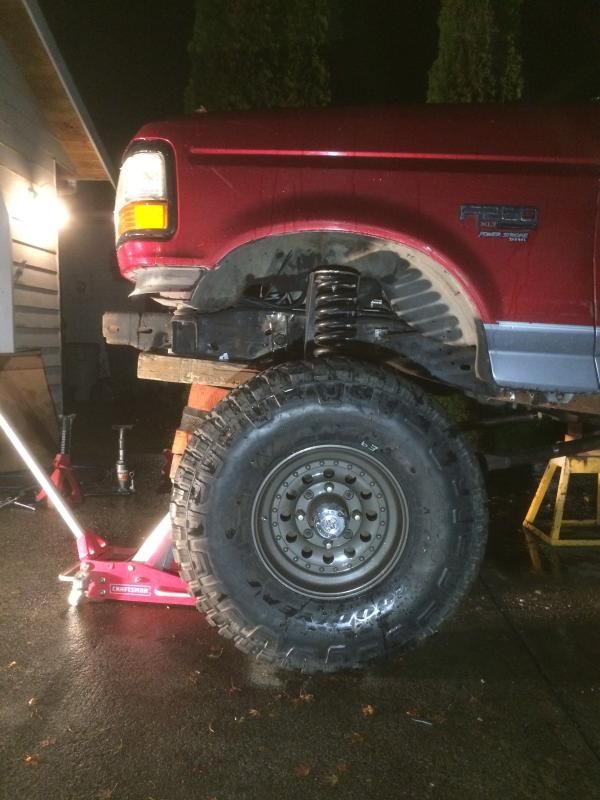
It feels like it is so close even though there are a lot of little things to take care of still. Most of it will have to wait until the coilovers show up. Tonight I trimmed the engine crossmember back enough to clear the track bar at full compression and removed the drivers side rear spring mount. That thing was a beast, but it's gone now!

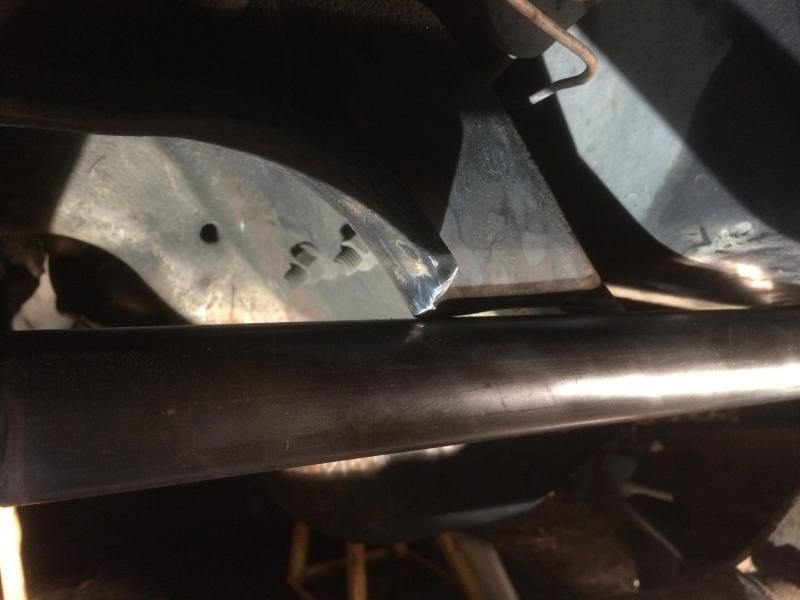
Bye bye spring mount!


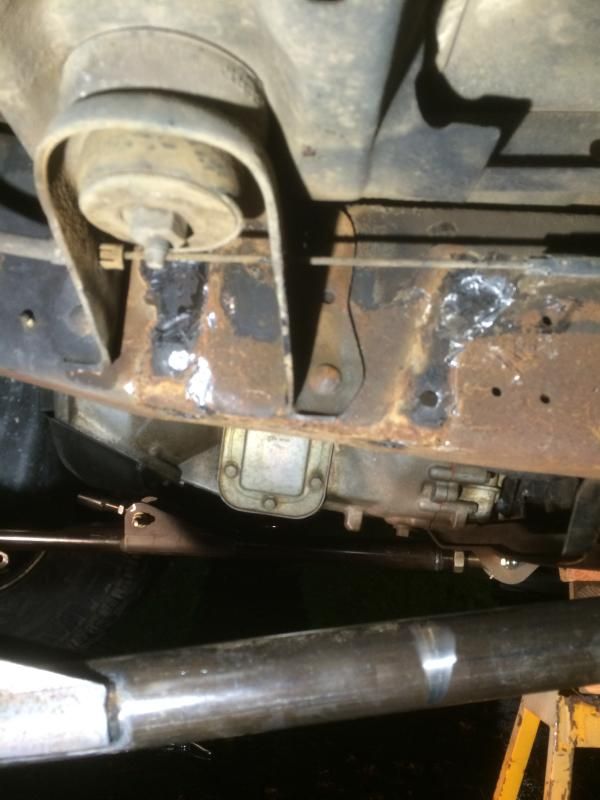
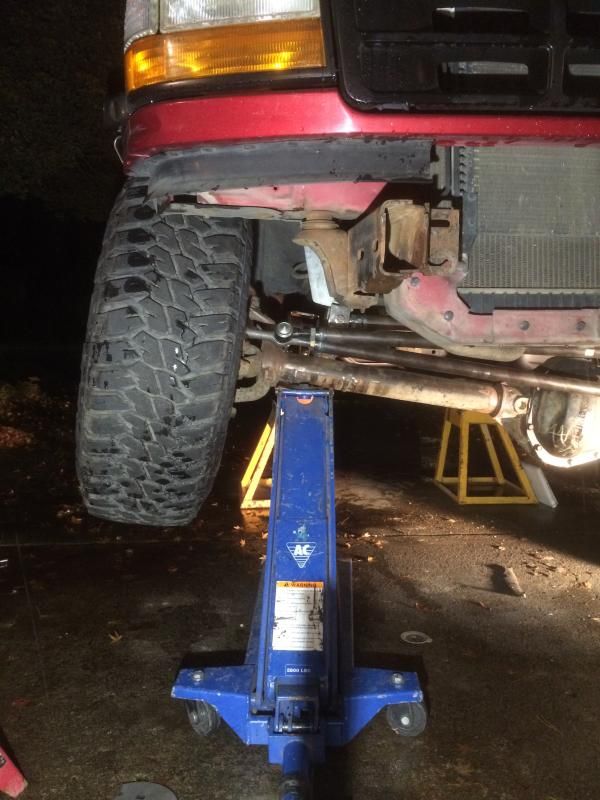
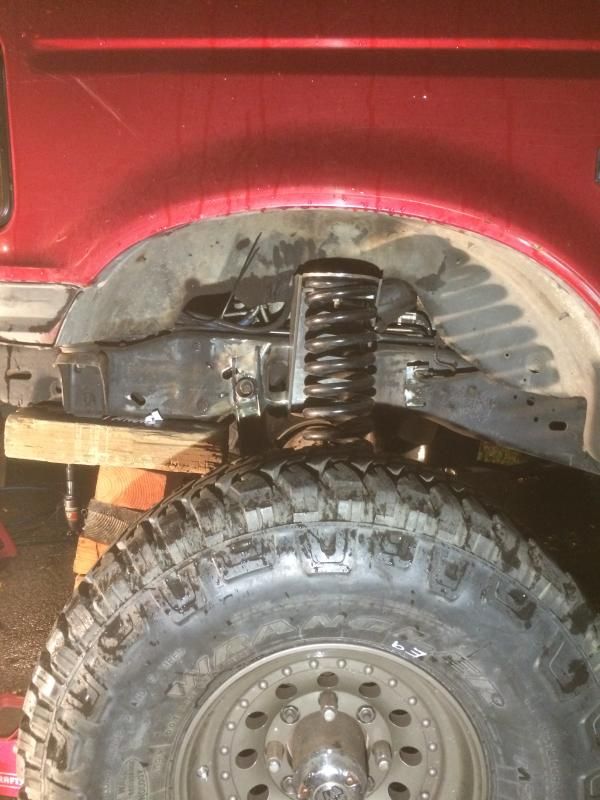
Checking clearances after trimming the crossmember a little more. This is full compression on the passenger side


It is hard to tell here but the bar would hit the crossmember just before the oil pan. I plan on setting the bump stops to give me about .5" of clearance at this juncture


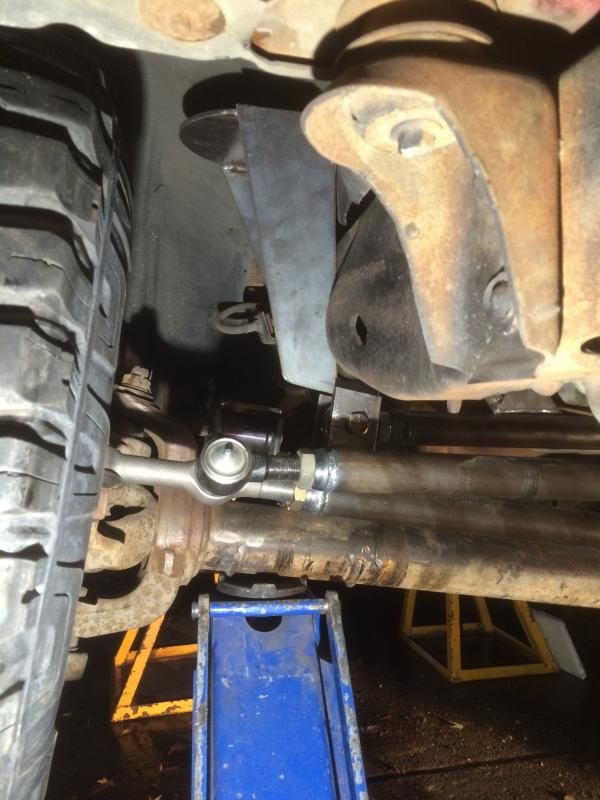
At full compression the tires are perfectly stuffed in the wheel wells


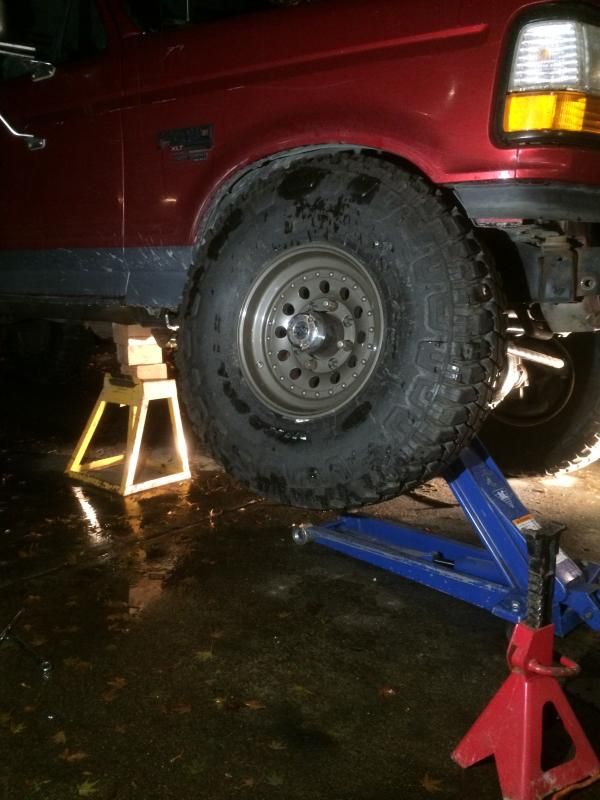
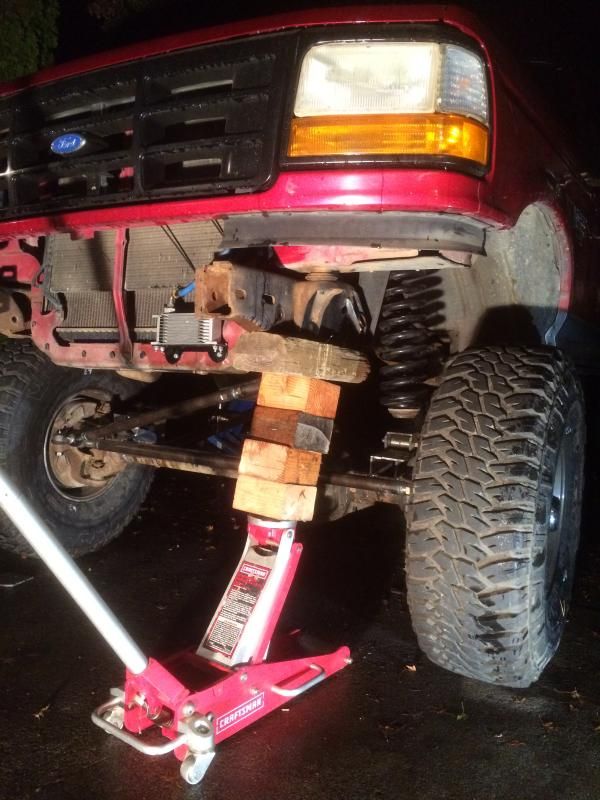
This is at full compression on the passenger side and about 7" from full droop on the drivers side


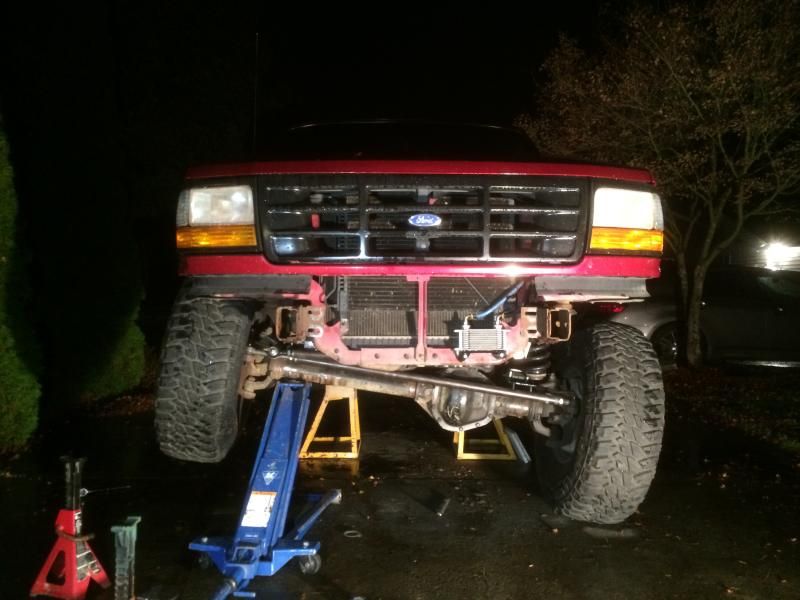
This is about one inch from full droop on both sides


While I am waiting for my coilovers to get here I will take the manual hubs off the d50 and anything else I might need from it so I can take it to the scrap yard and get it out of my garage. I also need to bolt the trans crossmember back together and pick up some extended brake lines for the front. If everything goes well I will have the front pretty close to wrapped up by the end of this holiday weekend.
 

java

Expedition Leader
Looks really good! Making some pretty good progress for driveway work in the rain. That usually turns me off....
 

amgvr4

Adventurer
My coilovers showed up yesterday. I got a chance to do a little bit of test fitting, but no real fab. I spent a bunch of time looking at pictures of coilover towers to figure out how I want to make them. I have all day Friday and some of sat and sun to get the front end as close to done as I can. I hope everything goes well and I can start on the rear next week.

I ended up with 12" travel fox performance series 2.5" remote reservoirs
[/URL
[URL=http://s109.photobucket.com/user/amgvr4/media/Soldier/4FB8270F-6388-4C5C-B2C2-E8977699A428.jpg.html]


The springs are a dual rate setup. 14x3" 400 rate and 12x3" 450 rates


Finding a place for the reservoirs will be tough. They are very large and the hose comes straight out of the shock body instead of a 90* fitting like many I have seen.
 

amgvr4

Adventurer
Redthies;

Thanks! This project has been full of block stacking fun for sure.

So far this weekend has turned out to be almost a bust. I didn't do any work thanksgiving day in anticipation of a full days worth of work on Friday. When Friday came it was pouring rain and I couldn't get the pop up awning to work so I had to spend the first half of the day getting the garage cleared out enough to pull the nose of the truck into the shelter. I pulled the parts I wanted to keep off the d50 like hubs and lug studs and then cleaned and organized enough to get started.

The first order of business was making the spacers for mounting the coilovers. No problem I have a lathe. Well half way into turning the spacers my lathe motor died. I spent the next six hours messing with the wiring trying to get it working again. No such luck! That pretty much killed my motivation and critical thinking skills for the night so I only got the passenger side lower mount started.

Parts cut and tacked together


I had to mount the coilover outset to clear the frame at full droop. This necessitated cutting a notch into the outer plate.


Tacked together


Checking the fit


Fully welded the spacers
[/URL
[URL=http://s109.photobucket.com/user/amgvr4/media/Soldier/A6F1F2D0-A4AF-41FE-B30B-2D3EC2A0E32F.jpg.html]


Honestly I am not super happy with how the lowers are mounted. This highlights why changing gears in the middle of a project is so challenging. The other option was to mount to the flat plate the spring was going to sit on, but this would have added close to three inches in in ride hight I don't want. I will definitely have to add some reinforcements to help distribute the load of the track bar mount and the weight of the truck better. I wish it were simpler and less likely to collect mud, but I can't come up with a better option and I need progress so the truck gets done. I hope I can get started on the towers tomorrow, but we will see.
 

underdrive

jackwagon
Long (and I do mean looong) time lurker here, figured I'd finally register :)

This build is quite impressive, I like it how you can change directions so drastically despite all the work you've put into the setup so far, that takes determination!

Here's a suggestion for you - first maybe open up the notch you cut in your side plates a bit more to make 110% sure the coilover cannot come into contact with it under any situation, then add a pair of gussets between the notched plate and the axle's "C" that carries the wheel knuckle. This will brace the coilover mount and at the same time reinforce the "C" against any possible deflection should your wheel land harder against the terrain than ideally desired (I know you probably don't plan on jumping the truck, but stuff happens). Actually this may be easier to accomplish if you run a whole plate from the trac-bar mount over to the "C" on top of the spacers you just built (obviously drill a hole in said new plate for the spacer "sleeves" to pass thru), this will effectively double the thickness of the plates that carry the weight of the truck so it's a win-win scenario I think.
 

Forum statistics

Threads
185,833
Messages
2,878,704
Members
225,393
Latest member
jgrillz94
Top