You are using an out of date browser. It may not display this or other websites correctly.
You should upgrade or use an alternative browser.
You should upgrade or use an alternative browser.
OBS F250 slow adventure build
- Thread starter amgvr4
- Start date
amgvr4
Adventurer
Thank you guys for the compliments. Honestly I feel like a 7 year old with popsicle sticks and paste compared to many of the true fabricators on here. I could have built this so much stronger and lighter with a plasma table and dimple dies, but we all work with what we have.
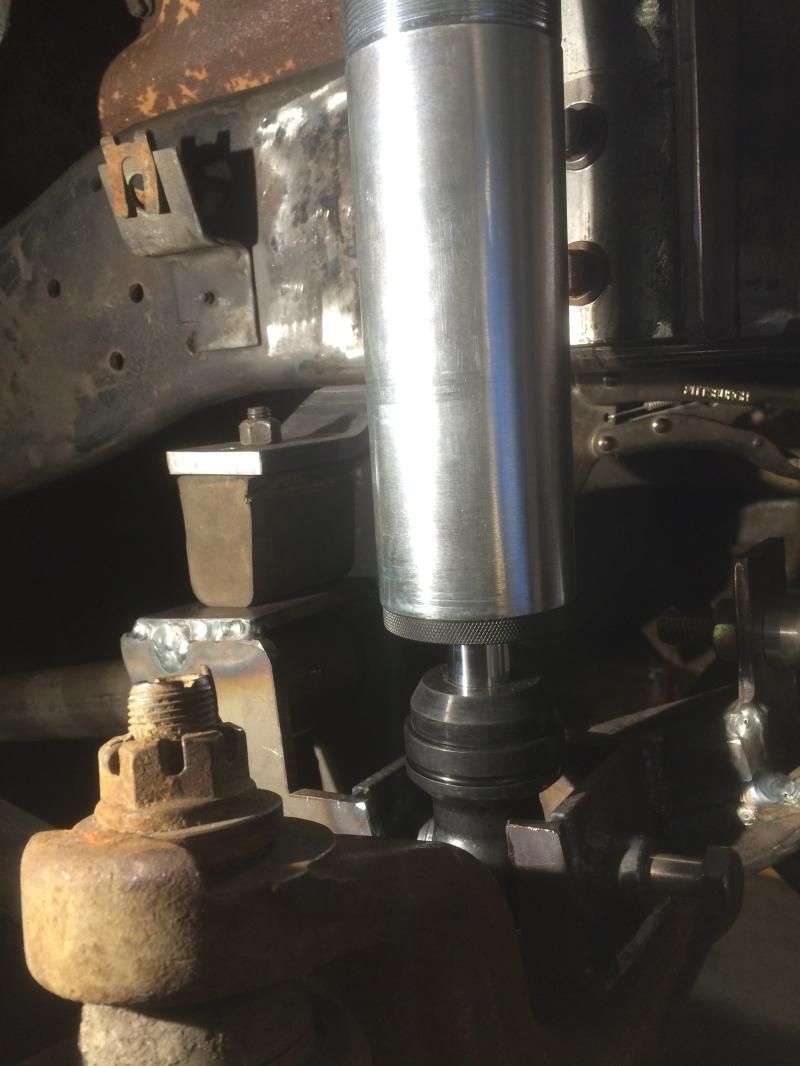
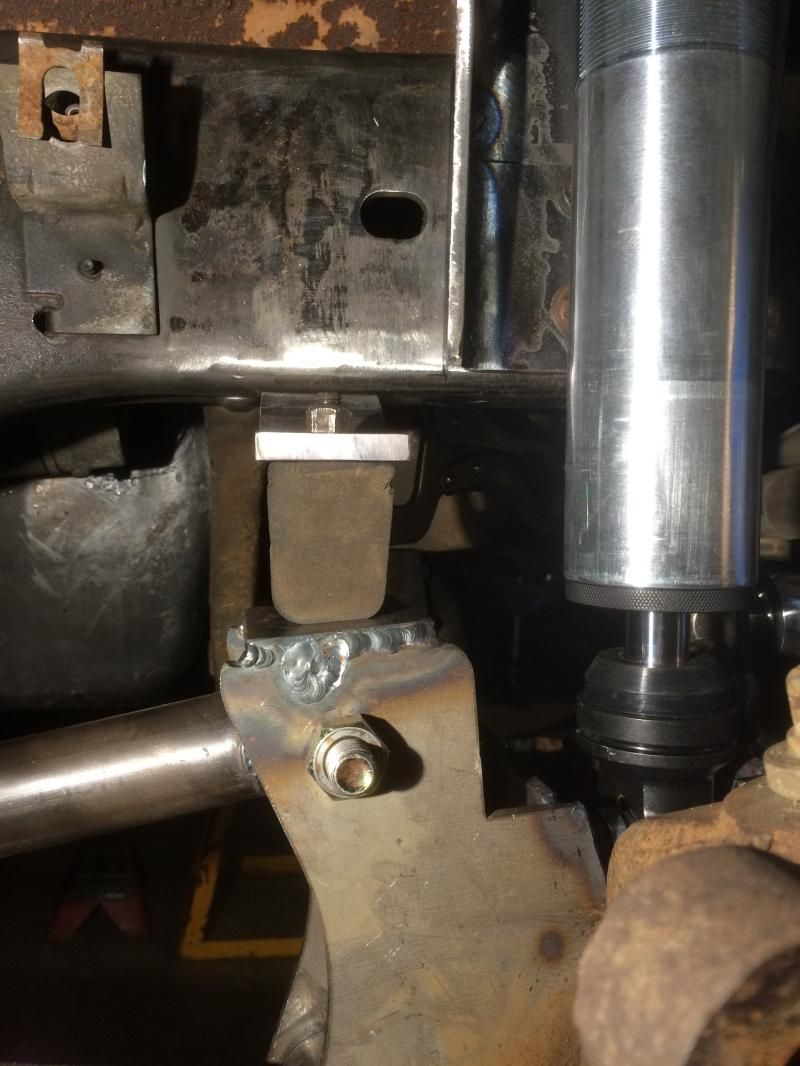
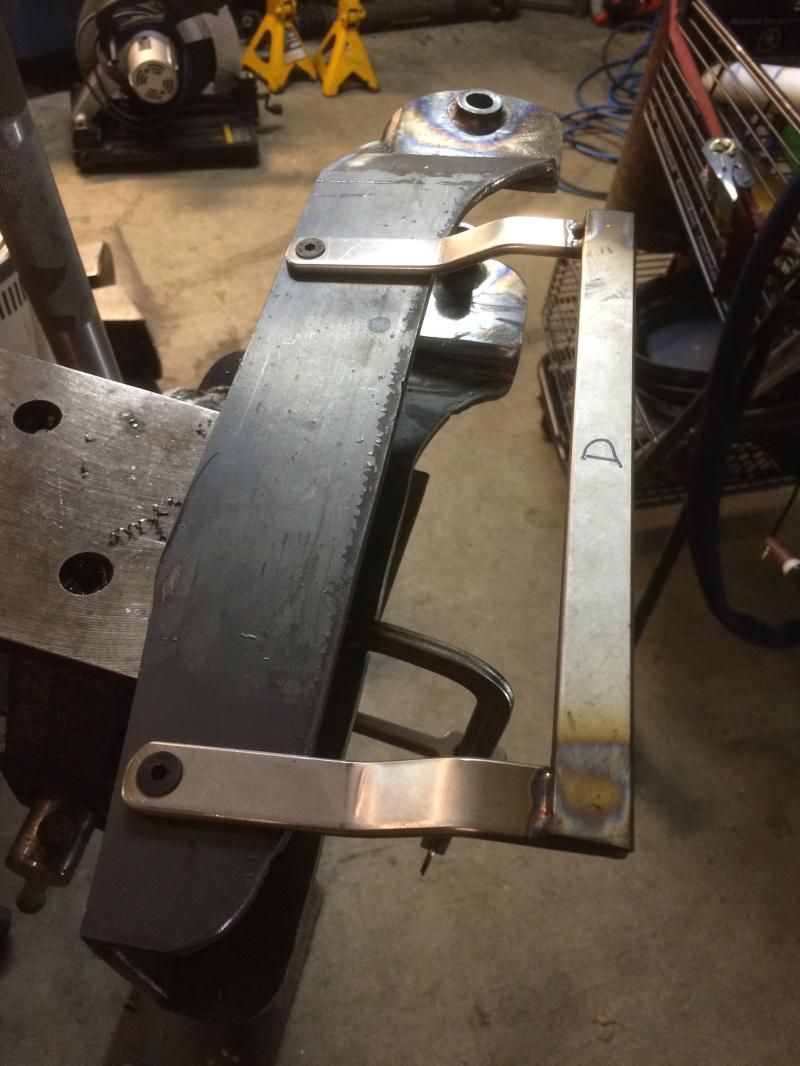
I got a ton of progress the last two days. Tuesday I stayed home from work and hammered out all the remaining fabrication for the front. First were the bump stop mounts. After playing around with a few concepts, I decided to use .375x2" plate as the base and box it in with .250"
.375" plate cut 7" long ready for bending

First bend
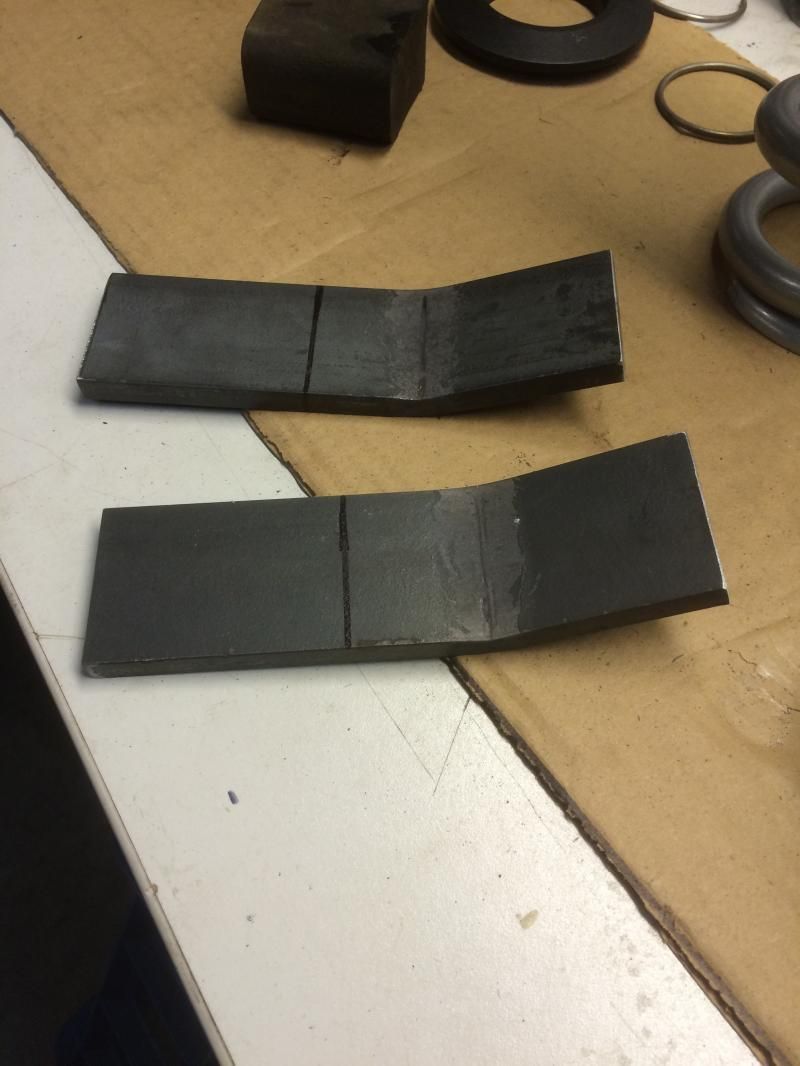
Second bend

Holes drilled for the bump stop
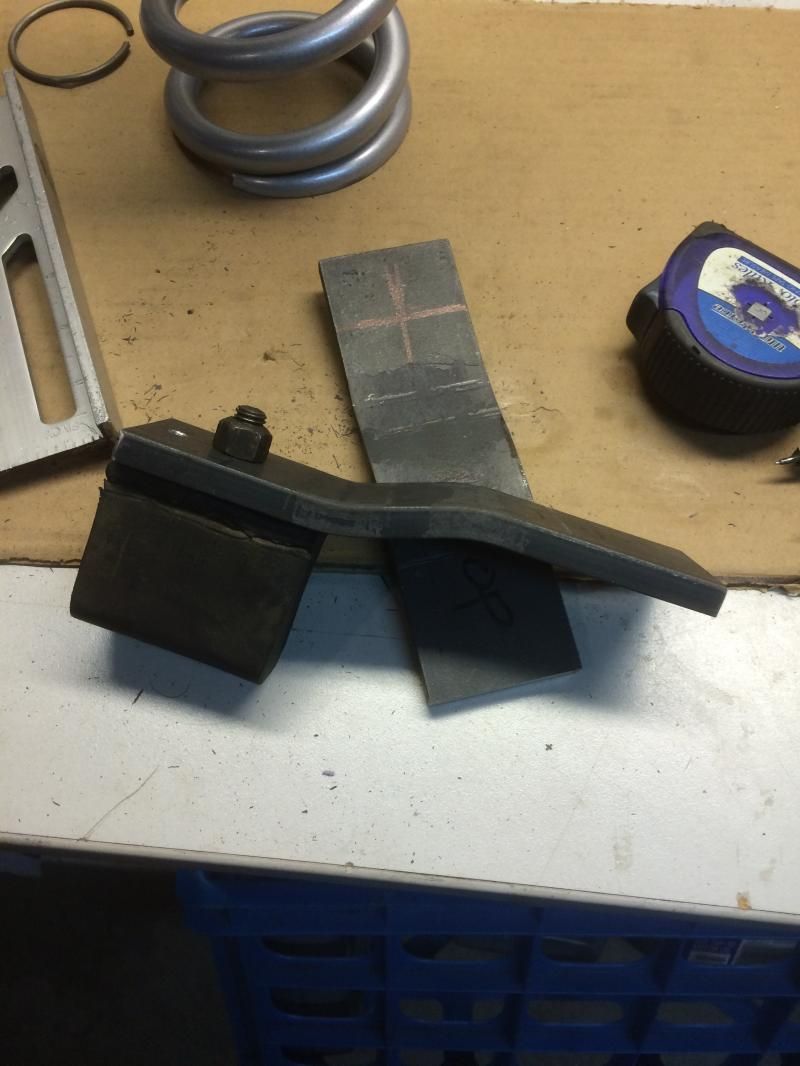
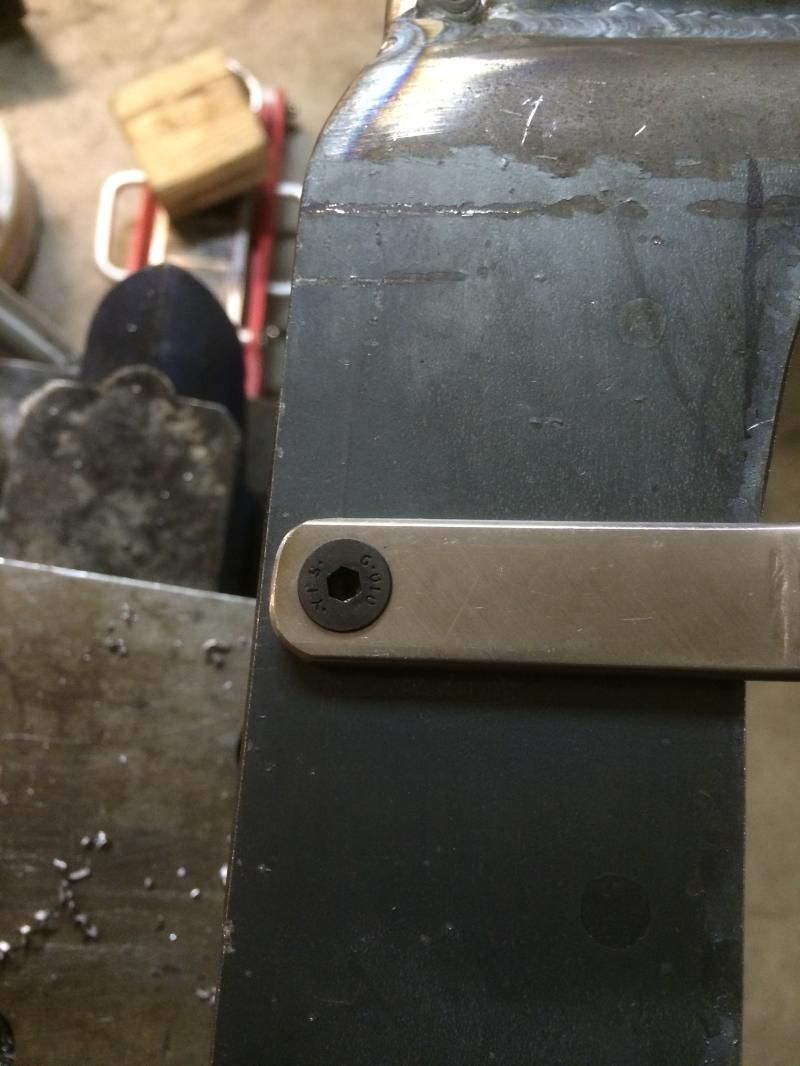
Clamped in place to check fit
Unfortunately I did not add enough bend to it the first go around and had to adjust it to fit
Welded the side plates on
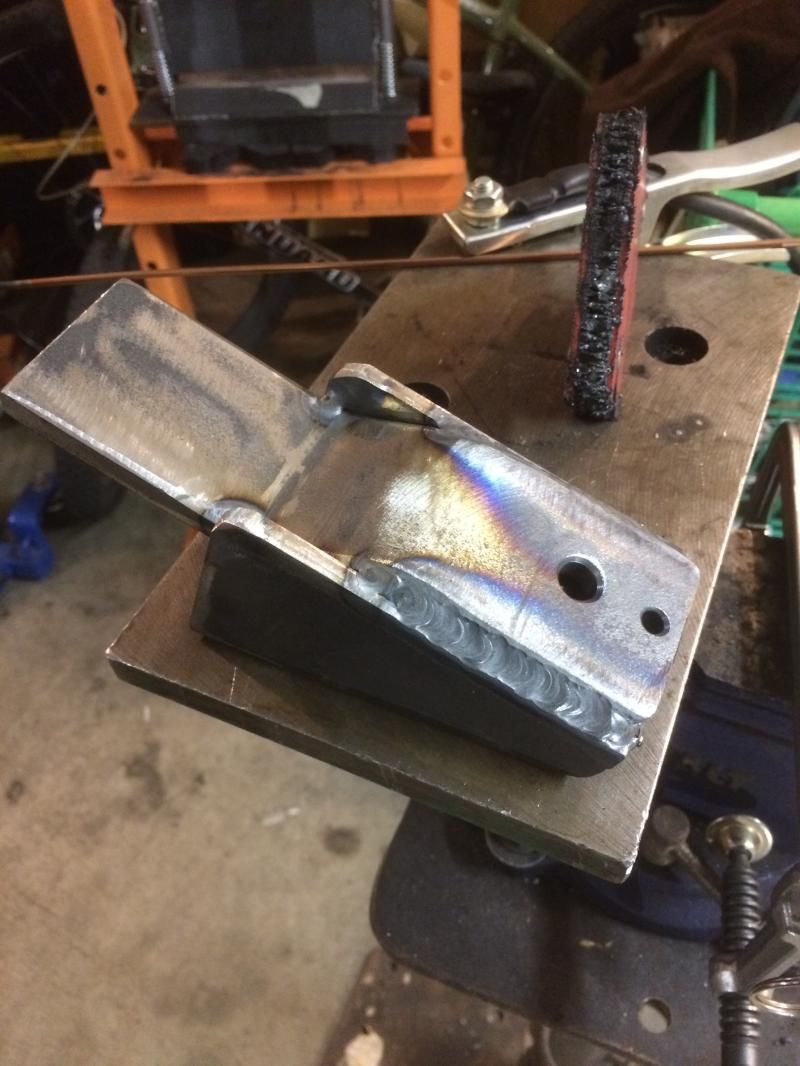
Double checked the fit
Tacked on
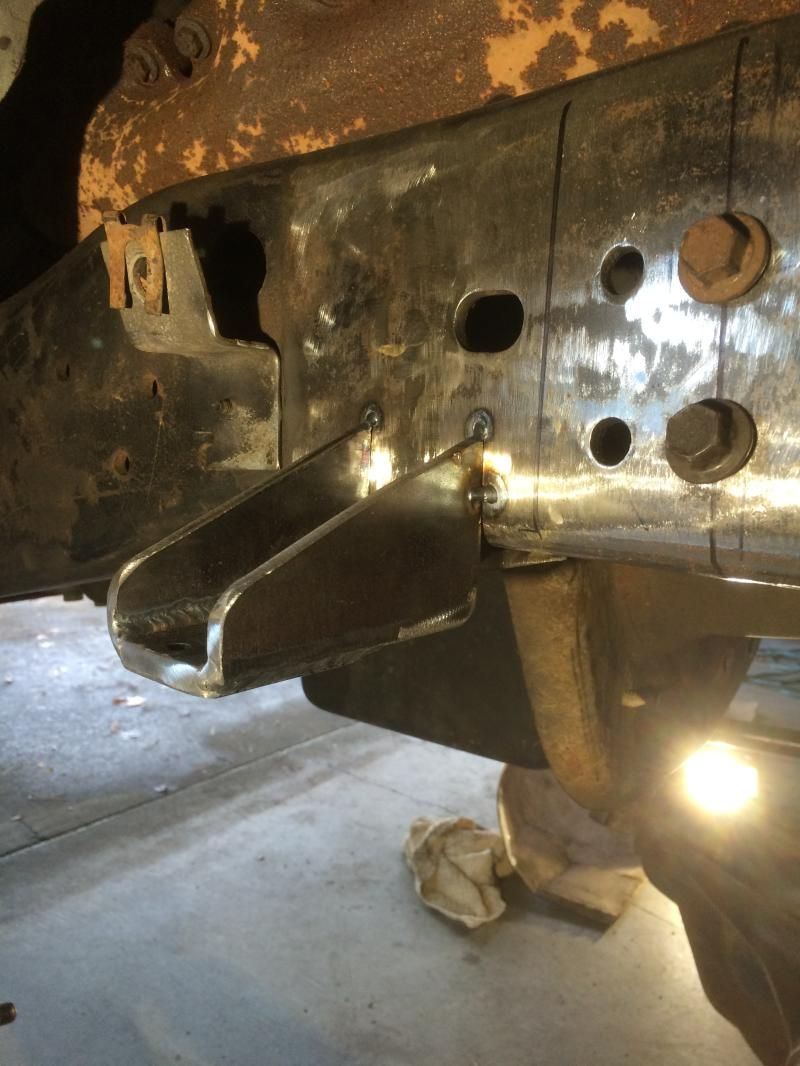
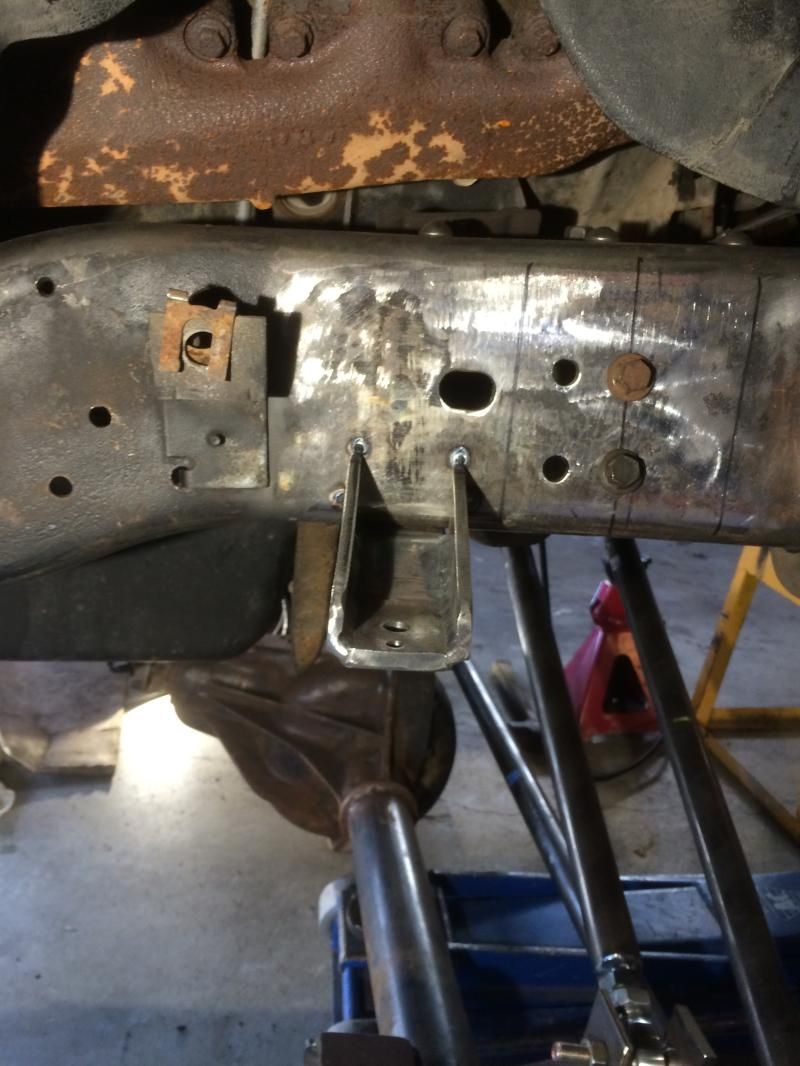
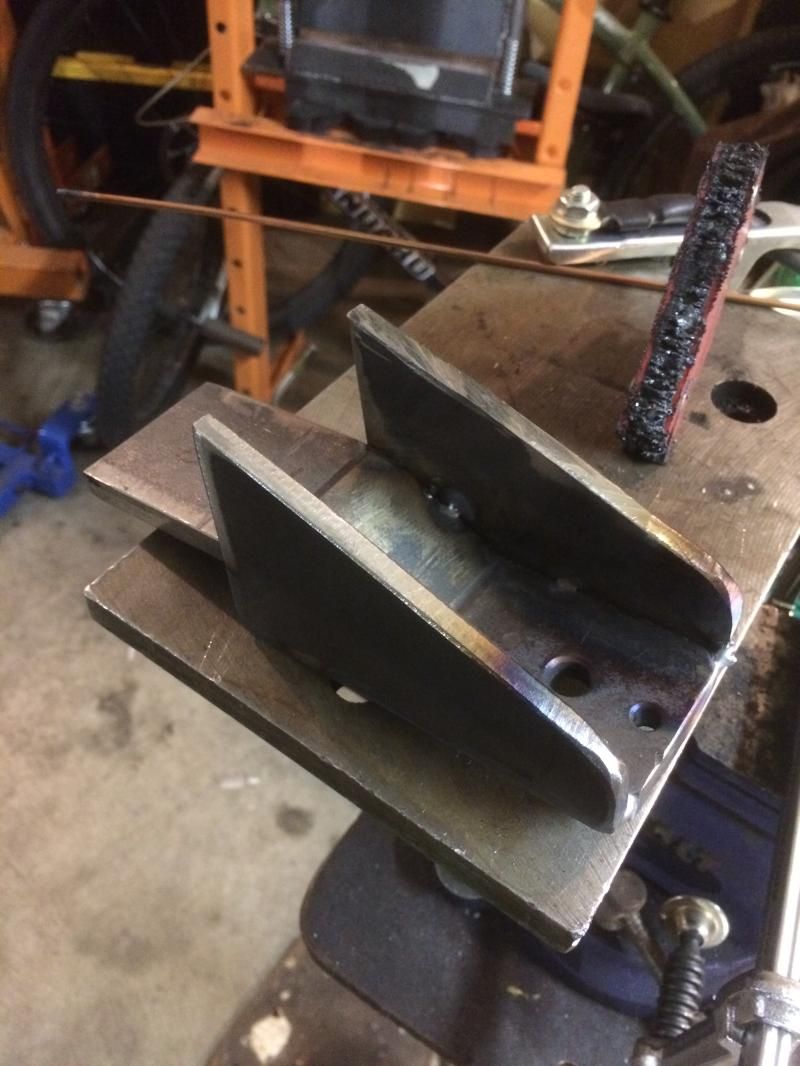
Fully welded
I got a ton of progress the last two days. Tuesday I stayed home from work and hammered out all the remaining fabrication for the front. First were the bump stop mounts. After playing around with a few concepts, I decided to use .375x2" plate as the base and box it in with .250"
.375" plate cut 7" long ready for bending

First bend

Second bend

Holes drilled for the bump stop

Clamped in place to check fit


Unfortunately I did not add enough bend to it the first go around and had to adjust it to fit


Welded the side plates on


Double checked the fit


Tacked on


Fully welded

Last edited:
amgvr4
Adventurer
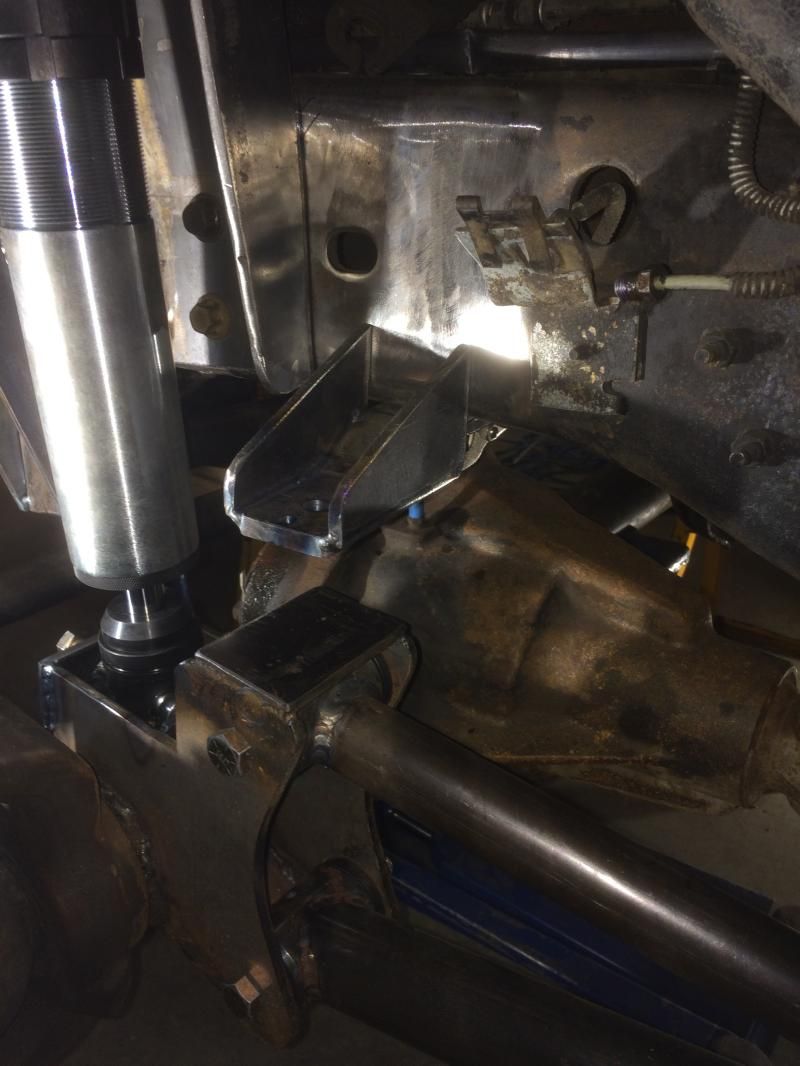
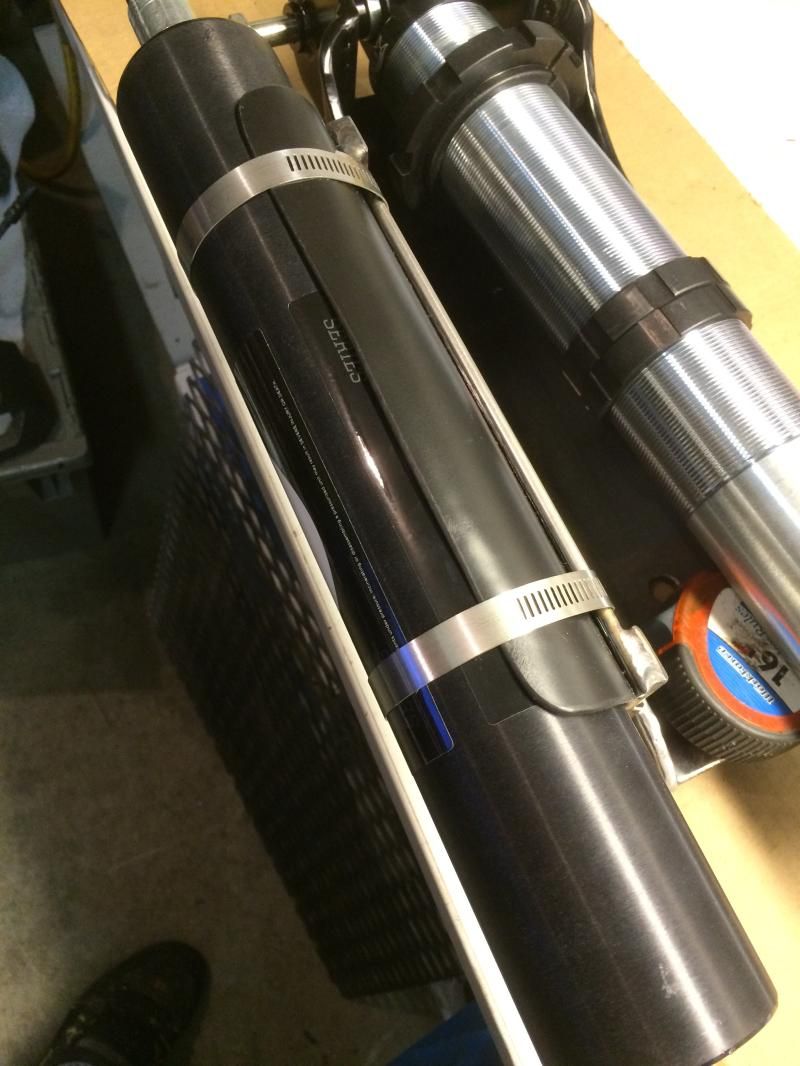
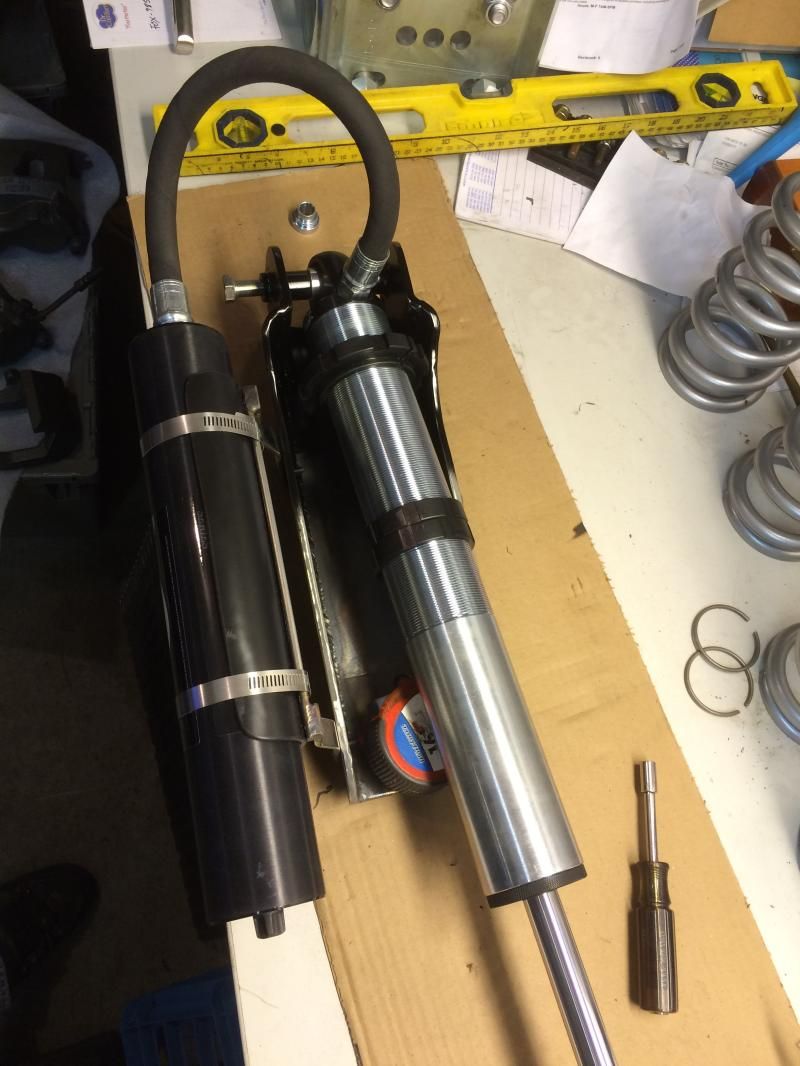
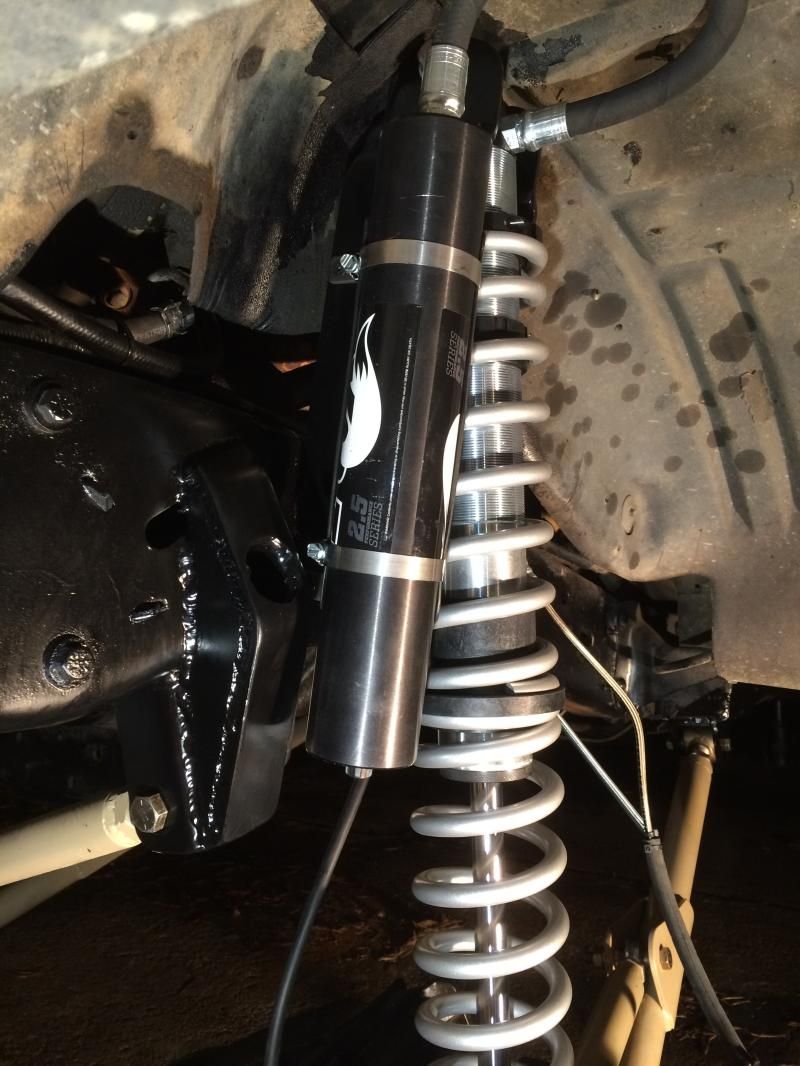
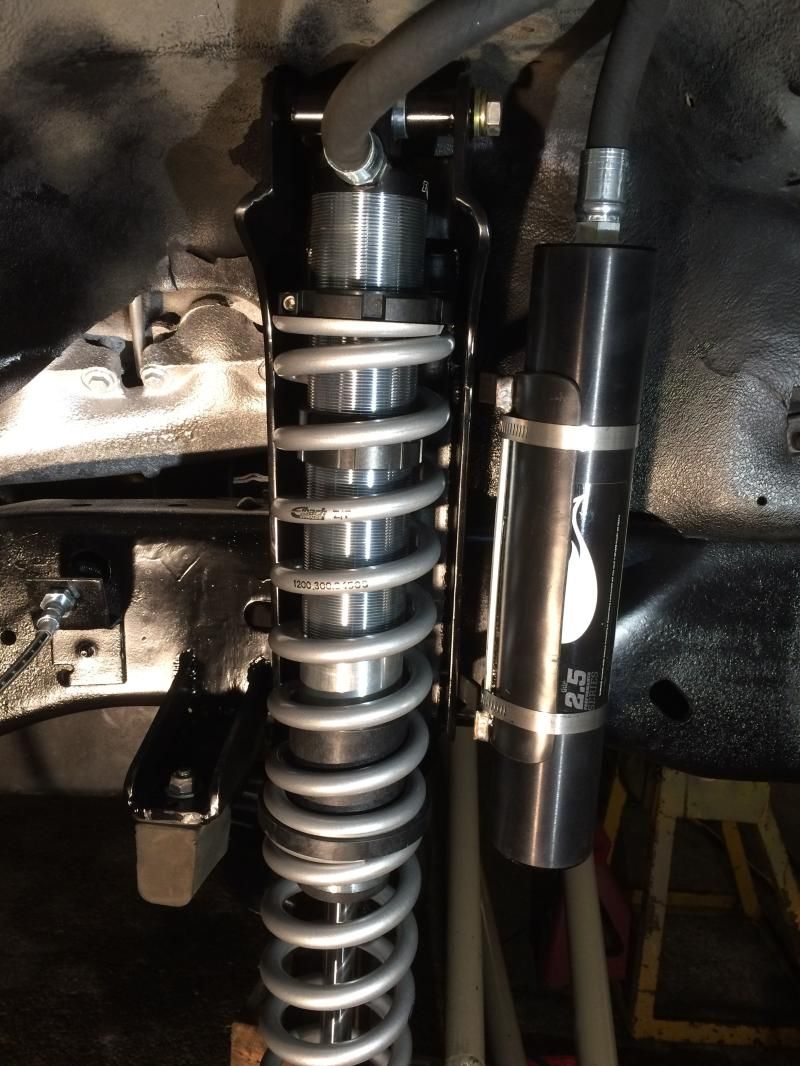
Next I worked on fitting the reservoirs to the towers. I drilled and tapped the forward plate on each one and bolted the stainless brackets to them.
Res test mounted
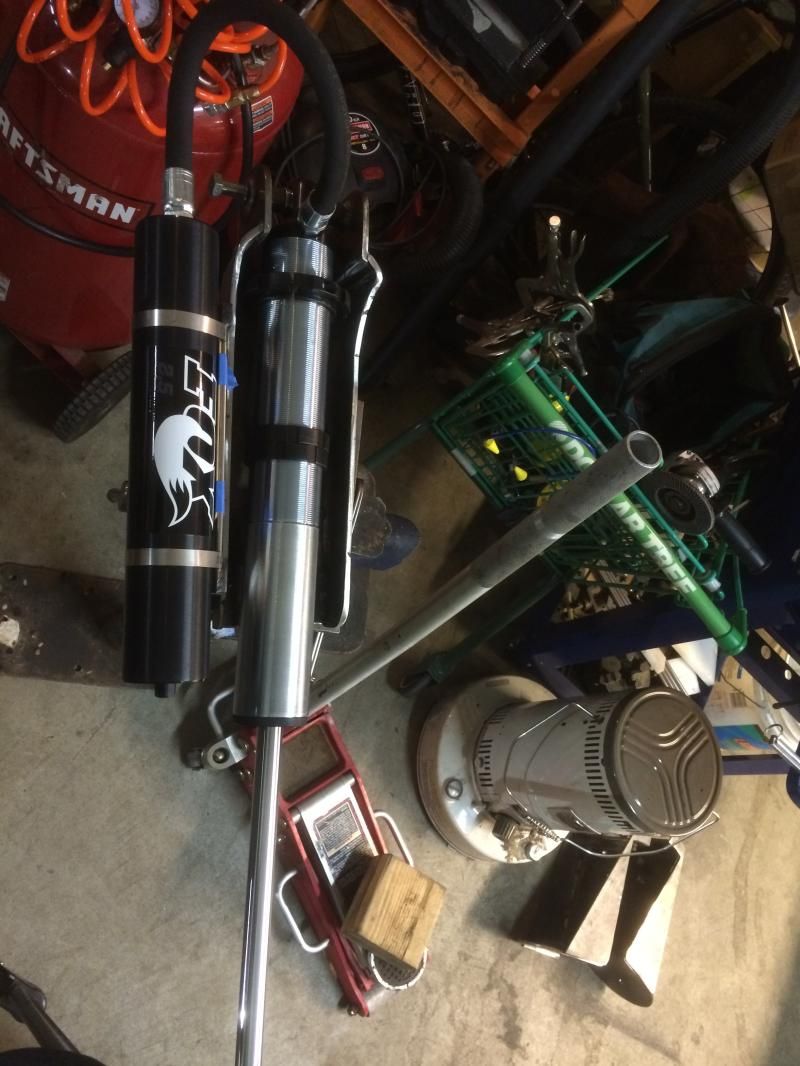
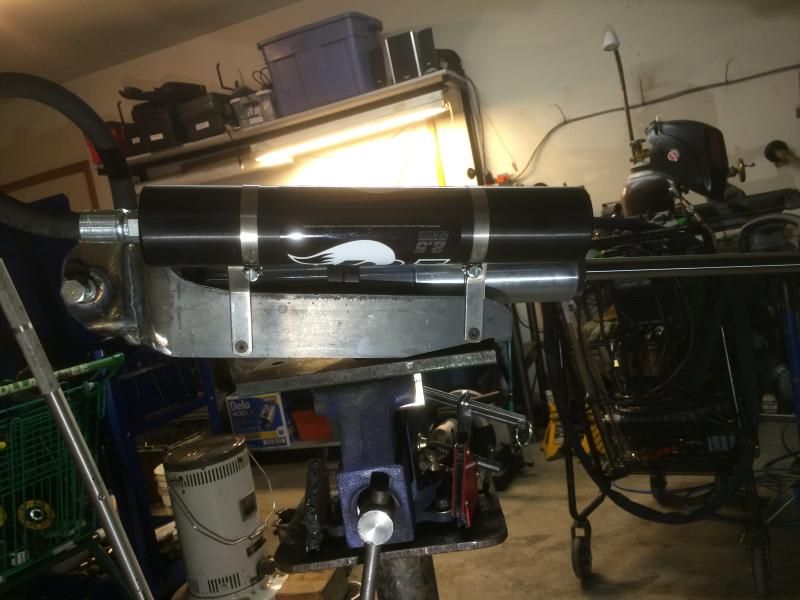
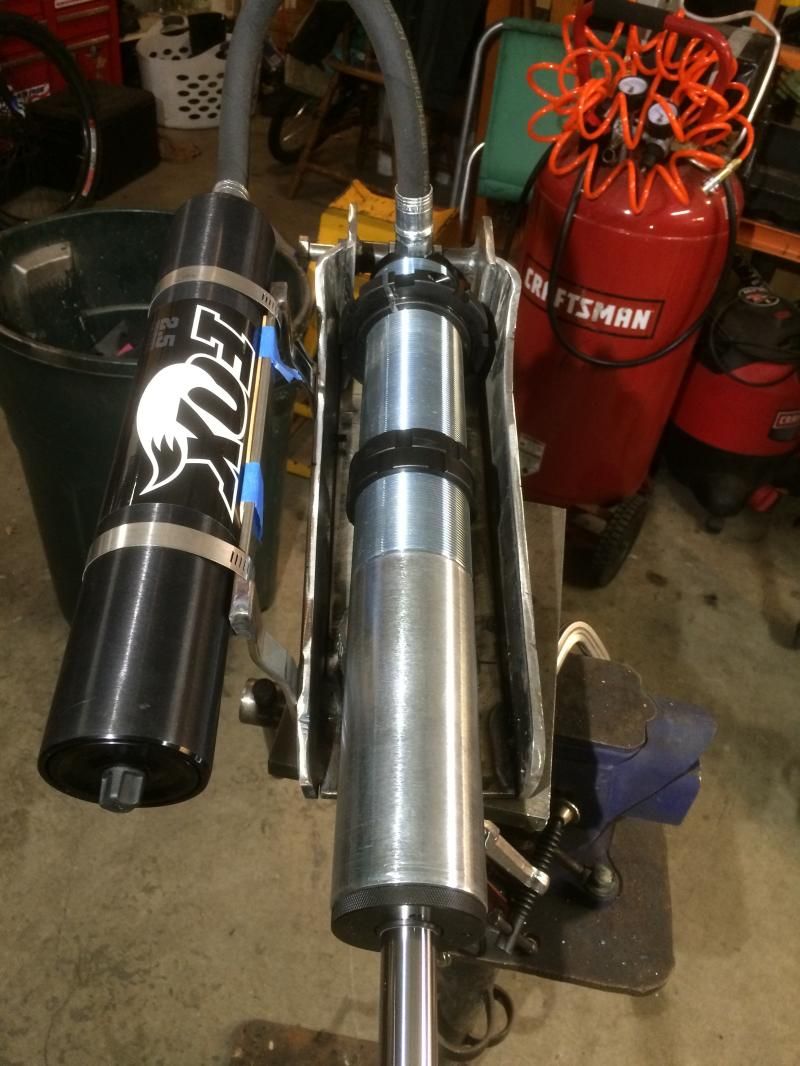
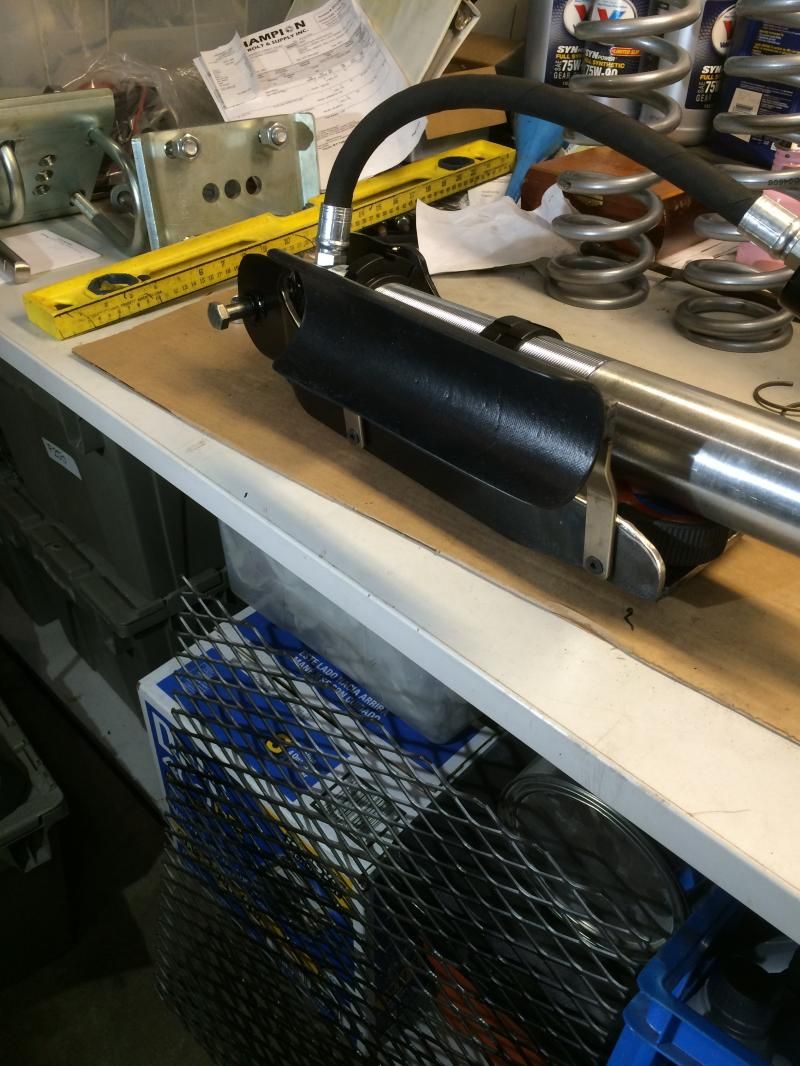
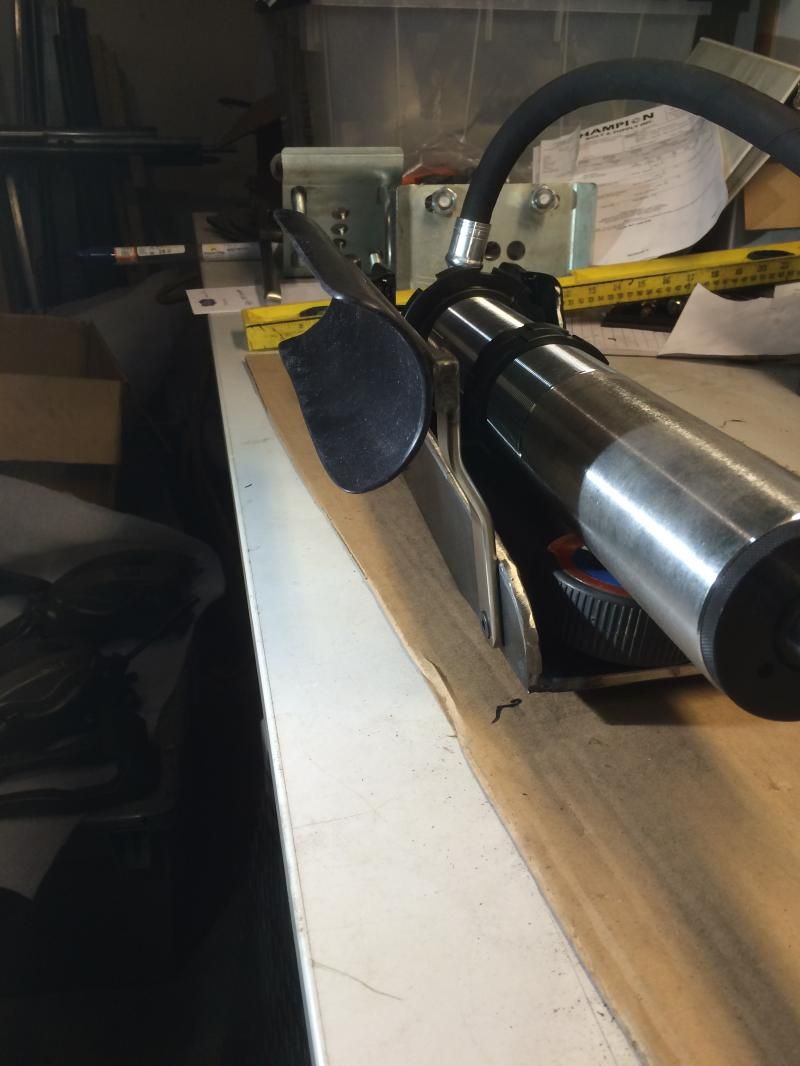
At work today I made a plastic cradle for the reservoirs to sit in. They will work for now, but I will make some carbon fiber sleeves to protect them from rocks and debris

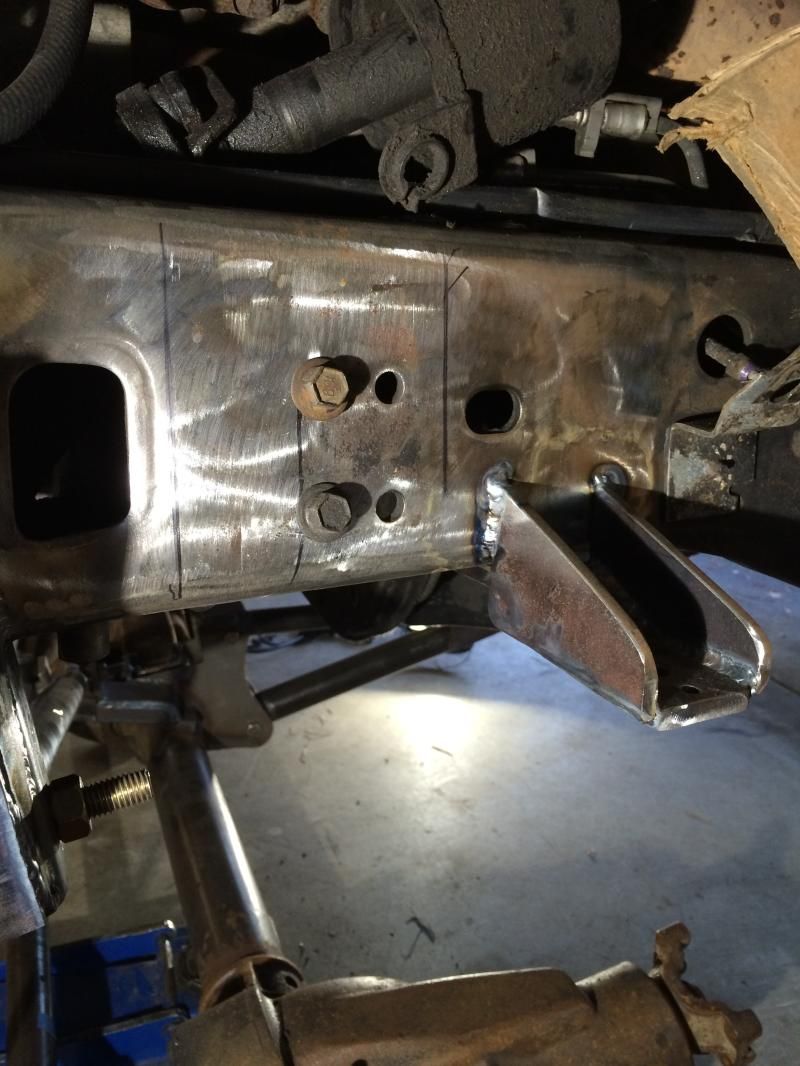
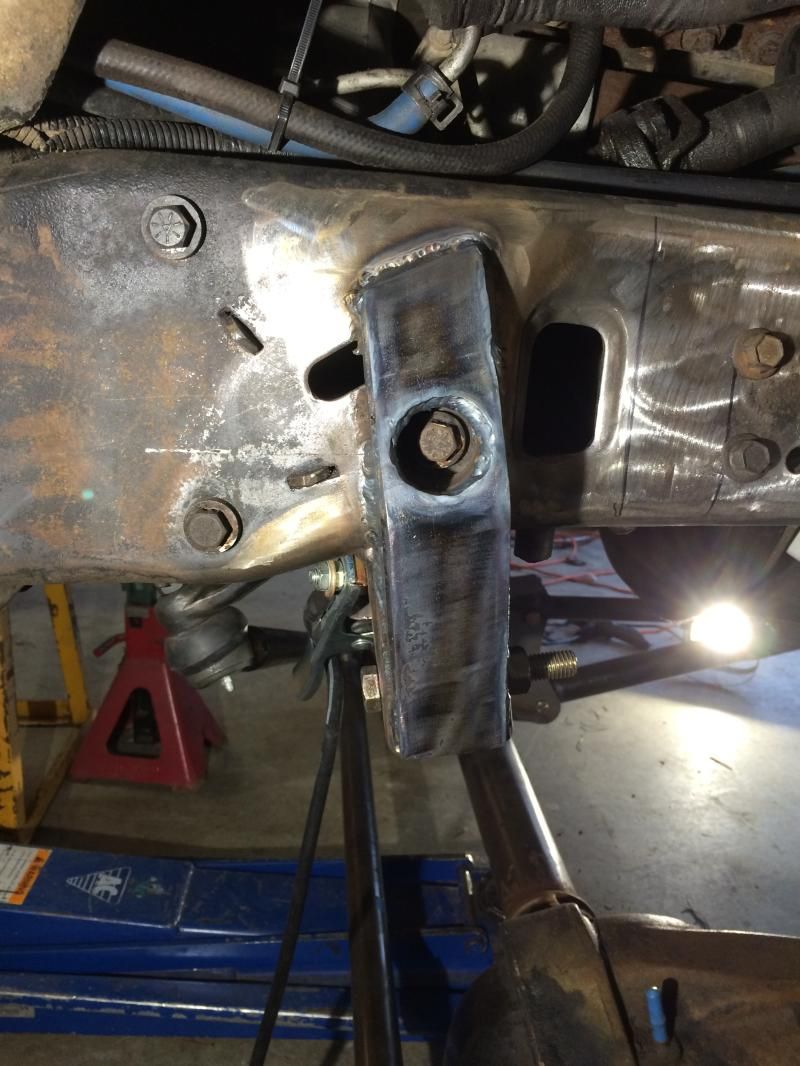
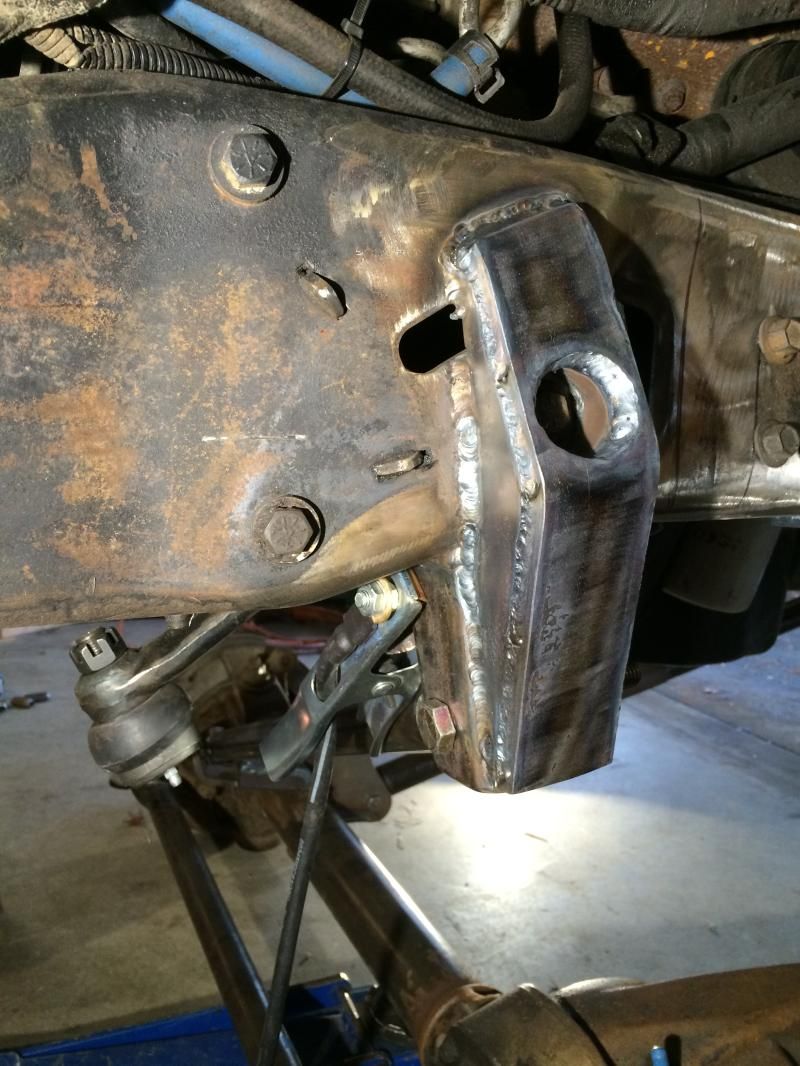
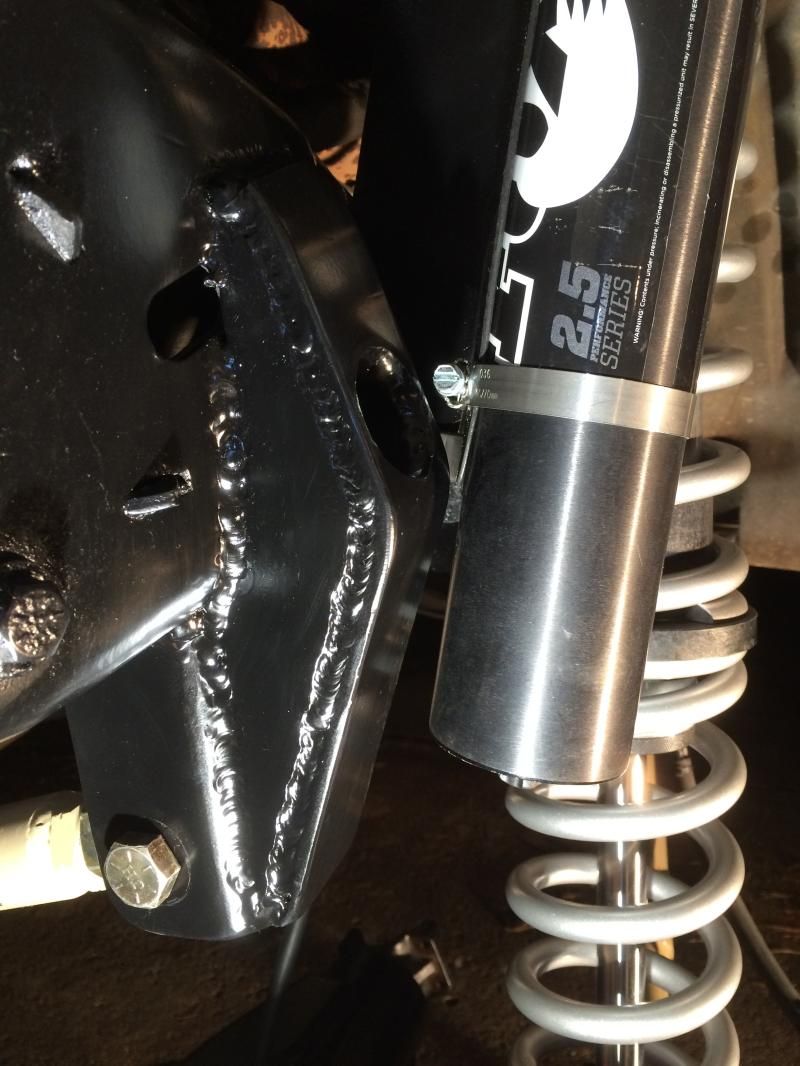
Plated and fully welded the frame side track bar mount
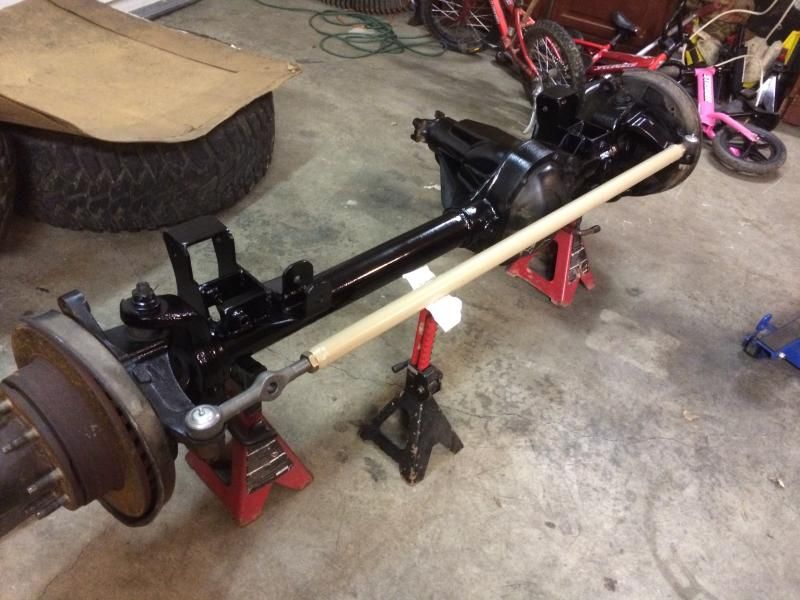
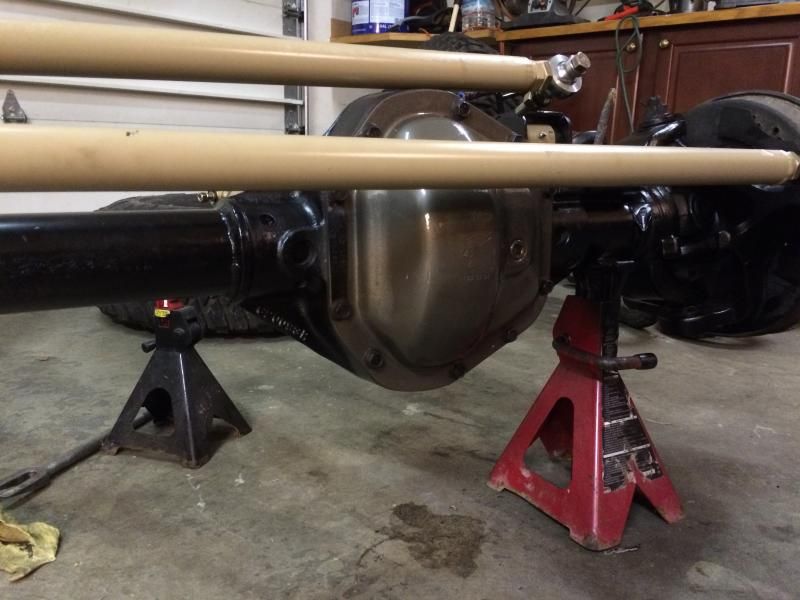
Fully welded and painted the axle
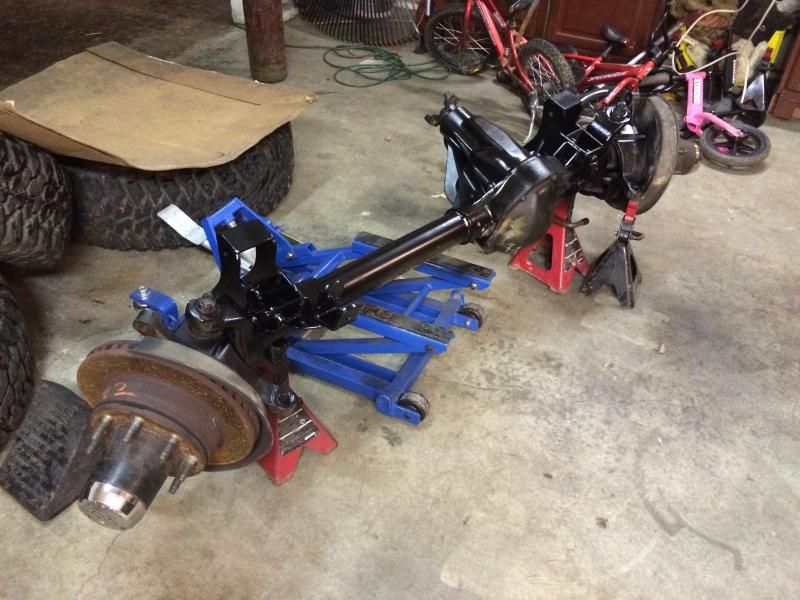
Painted the links and radius arms. It looks a little yellow here but it is actually desert tan
Some other accomplishments included painting most of the frame, cleaning up and painting the engine crossmember, fully welding the towers, and what seems like a thousand other little things. I also ordered the rear shocks, although there was a little snafu on those. Sooper camper was out sick the last few days and so I talked to another guy at polyperformance and he accidentally put down the part number for shocks with studs at the top instead of eyelets. I didn't catch it until they had already shipped so I had to call today and get it sorted out. They took care of me and I should have the correct Fox 2" remote res shocks on Friday so I can get the rear done this weekend possibly. I really like working with polyperformance and would recommend them to anyone looking for a parts source that actually knows about the products they sell. Great customer service to boot!


Res test mounted


At work today I made a plastic cradle for the reservoirs to sit in. They will work for now, but I will make some carbon fiber sleeves to protect them from rocks and debris


Plated and fully welded the frame side track bar mount


Fully welded and painted the axle

Painted the links and radius arms. It looks a little yellow here but it is actually desert tan

Some other accomplishments included painting most of the frame, cleaning up and painting the engine crossmember, fully welding the towers, and what seems like a thousand other little things. I also ordered the rear shocks, although there was a little snafu on those. Sooper camper was out sick the last few days and so I talked to another guy at polyperformance and he accidentally put down the part number for shocks with studs at the top instead of eyelets. I didn't catch it until they had already shipped so I had to call today and get it sorted out. They took care of me and I should have the correct Fox 2" remote res shocks on Friday so I can get the rear done this weekend possibly. I really like working with polyperformance and would recommend them to anyone looking for a parts source that actually knows about the products they sell. Great customer service to boot!
underdrive
jackwagon
The main thing is the lack of fancy fabrication equipment isn't stopping you from doing a good work. Cheap vs. strong vs. light, you can only have two together most of the time, trick is properly choosing which two :ylsmoke:Thank you guys for the compliments. Honestly I feel like a 7 year old with popsicle sticks and paste compared to many of the true fabricators on here. I could have built this so much stronger and lighter with a plasma table and dimple dies, but we all work with what we have.
How do you plan on lifting the rear to match the front, Sky's shackle flip? Cheap solution we've seen is bolting some wide 1/4" plates onto the side of both the frame rails and the trailer hitch and then simply moving the factory hangers down to where they essentially bolt to the hitch, doesn't work with all hitches though.
amgvr4
Adventurer
How do you plan on lifting the rear to match the front, Sky's shackle flip? Cheap solution we've seen is bolting some wide 1/4" plates onto the side of both the frame rails and the trailer hitch and then simply moving the factory hangers down to where they essentially bolt to the hitch, doesn't work with all hitches though.
I am going to make my own shackle flip. I have the shackle mostly done already, I just need to make a bracket. I don't have a factory hitch anymore since I made the rear bumper. It should be super easy to make the flip kit for the rear and bolt on my shocks. The biggest pain in the butt will be referring the springs with new bushings. Tonight I should be able to get the axle back under the truck for the last time and get the coil towers welded onto the frame. Then it is all mechanical from there. Replacing the brakes and hubs and all the little lose ends.
Last edited:
amgvr4
Adventurer
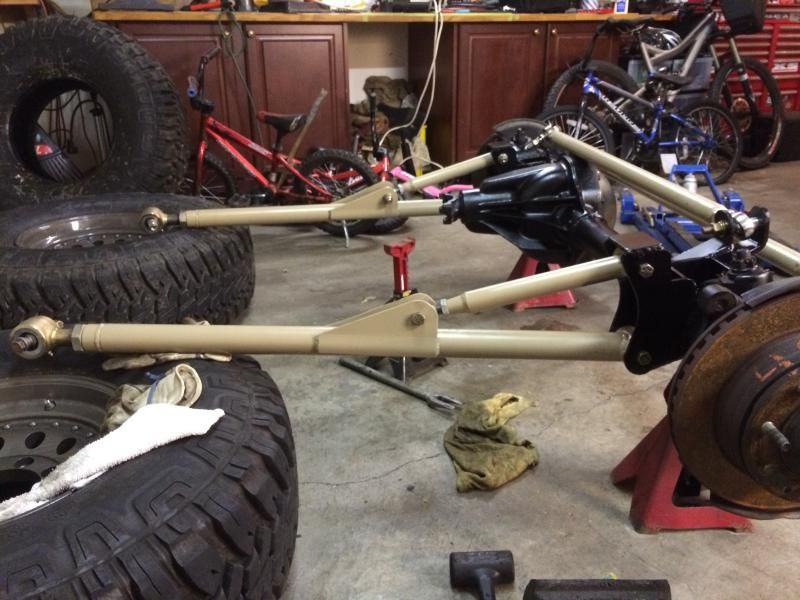
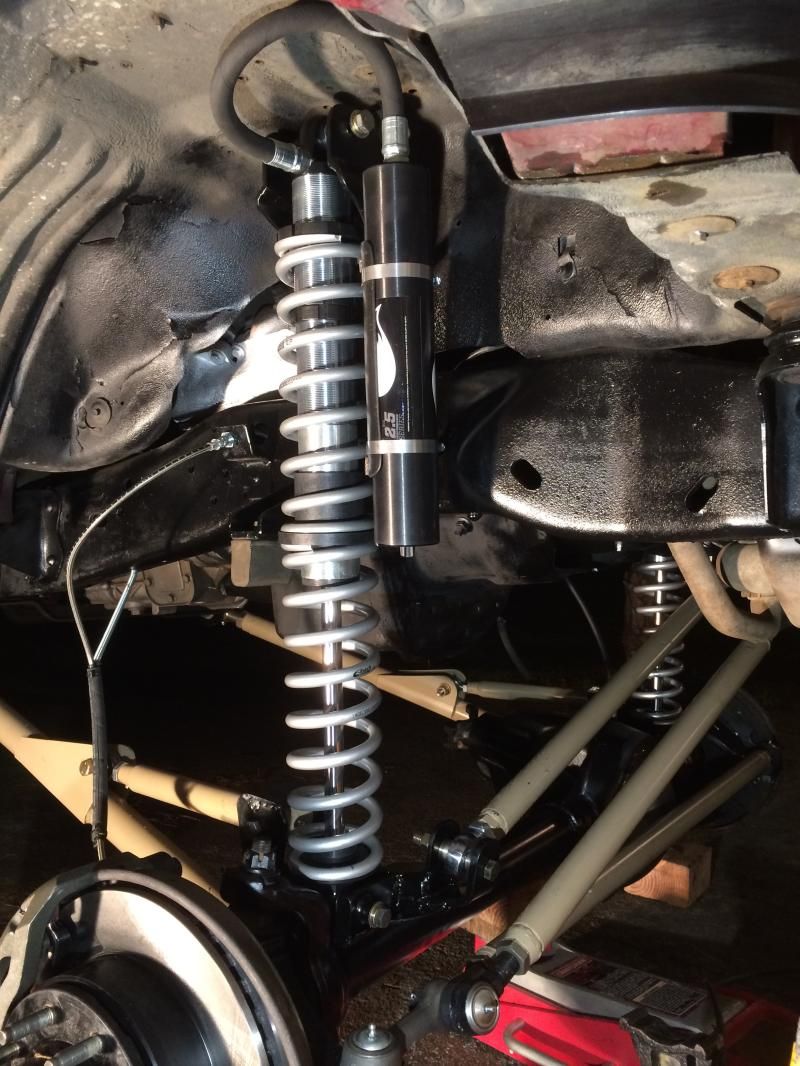
Almost there! I got the radius arms mounted up to the axle and the diff cover bead blasted, painted, and installed. Tomorrow I will try and head out of work early and get this thing under the truck for the last time. Once it is in place and bolted up I can do one last check of the coil tower alignment and then weld them in. Once everything is bolted up I will put the new rotors on, repack the bearings, and swap to the manual hubs. I am really hopeful I can have the front done tomorrow or Saturday. I would love to get started on the rear this weekend as well. We shall see.....
Arms bolted up
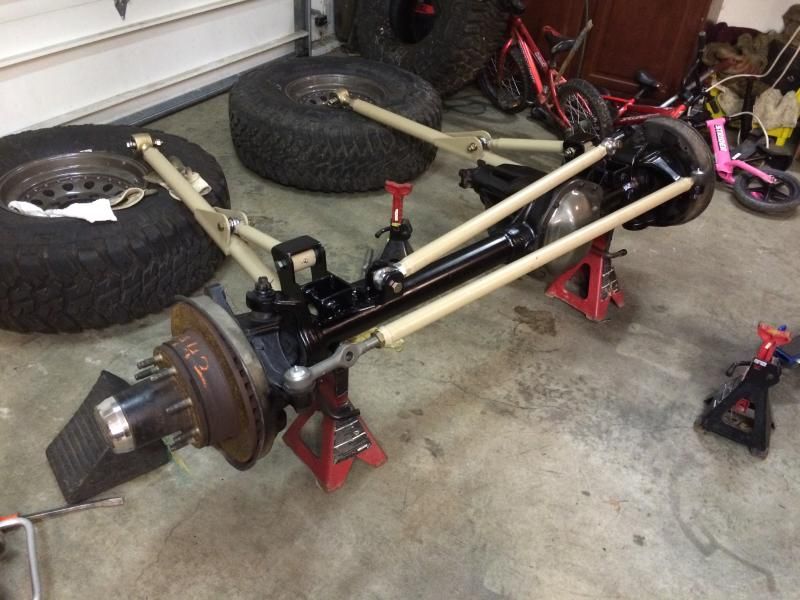
Diff cover
Arms bolted up


Diff cover

amgvr4
Adventurer
Lots of progress last night. I didn't take hardly any pictures since it was mostly maintenance items that are covered many other places. Here is a list of my accomplishments;
Welded in coil towers
Painted towers
Installed New rotors
Cleaned, painted, and repacked the hubs
New wheel bearing seals
Installed the manual hubs from my d50
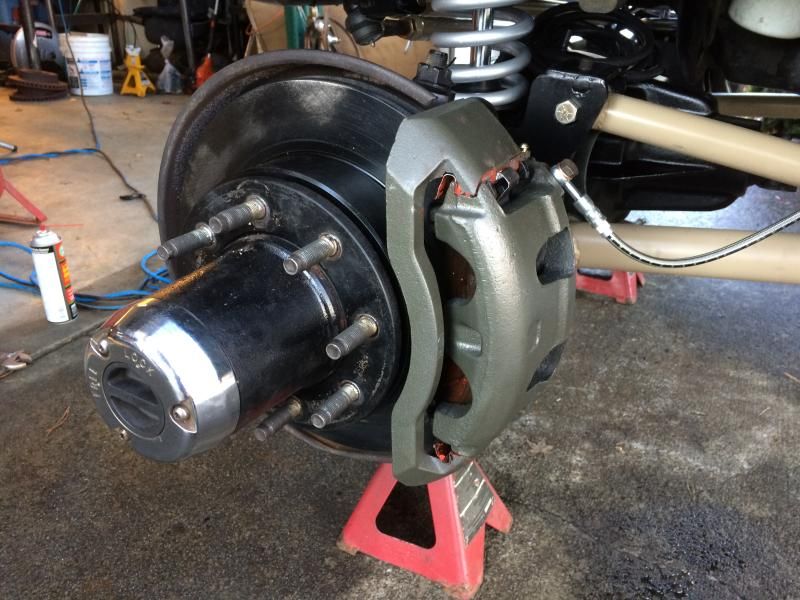
Refurbished brake calipers
Installed new pads in calipers
Installed calipers on axle
Installed the axle in the truck for the last time
Adjusted caster to 4*
Adjusted track bar to center the axle
Adjusted the tie rod for proper toe out
Installed brake lines and tension springs
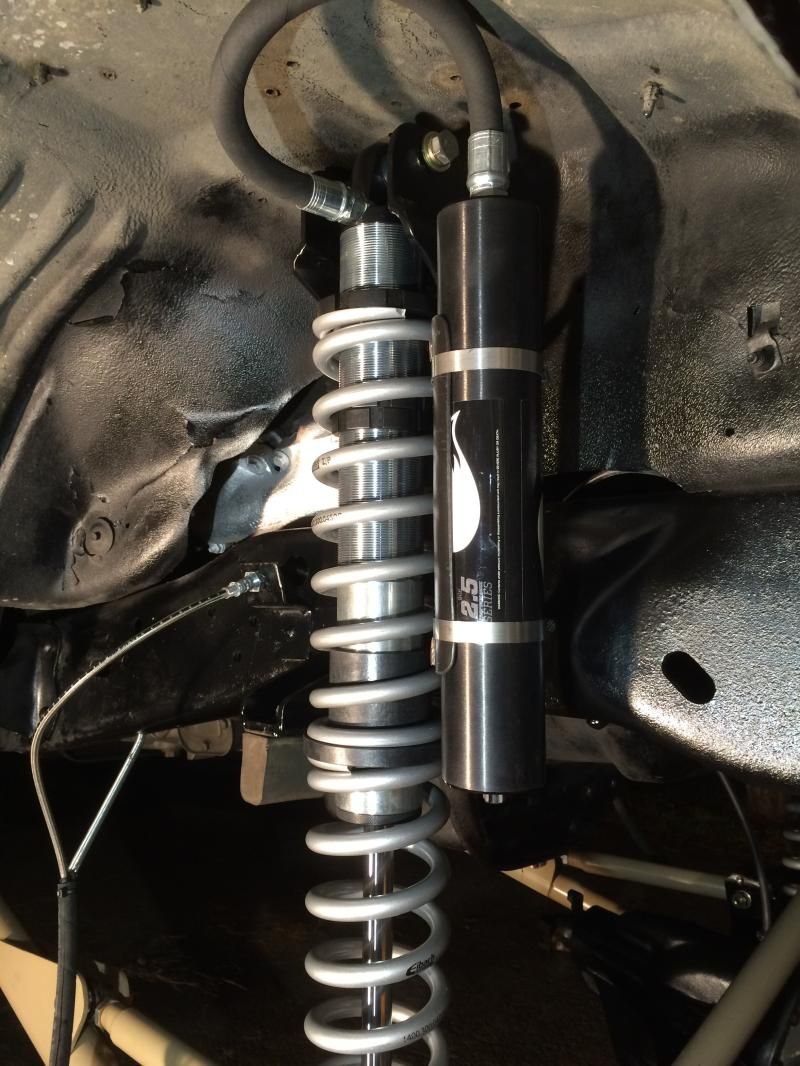
Installed coilovers with only the bottom spring to set the single rate stops
Greased all the joints and TREs
Checked the clearance for the reservoirs
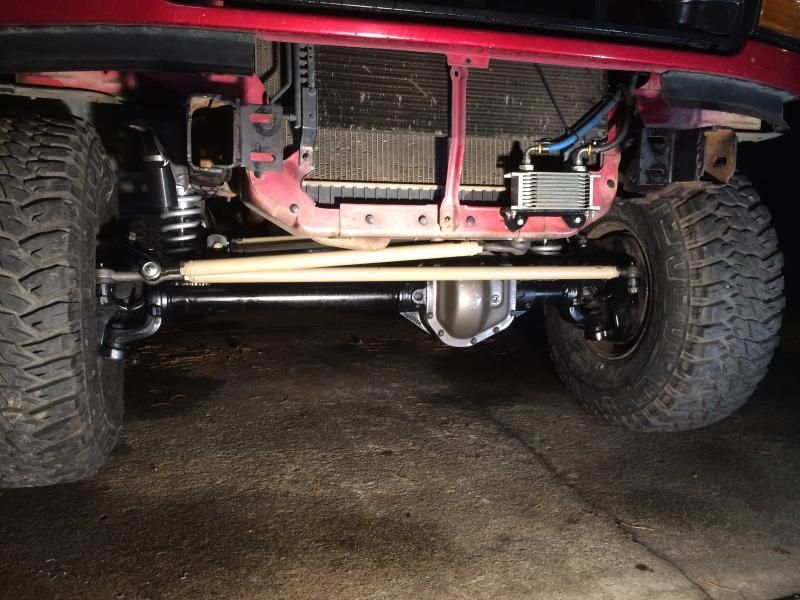
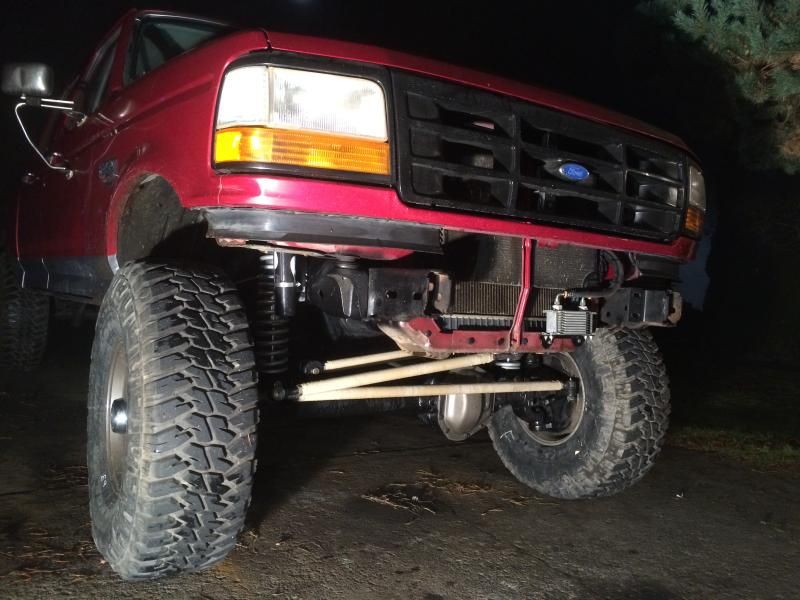
So basically a ton of little things to button the swap up. There are a few things I need to fix before I can bleed the brakes and take it for a test drive. I need to shorten the mounting brackets for the reservoirs. At full stuff/full lock the tires will most likely rub a little. I will need to get stiffer bump stops as the factory ones I used for mock up squish down over an inch. They are the same as common 3/8" stud aftermarket ones and I was planning on replacing them I just needed to get something in there for now. I also need to do a final check of the toe out with the tires on and adjust the drag link to center the steering.
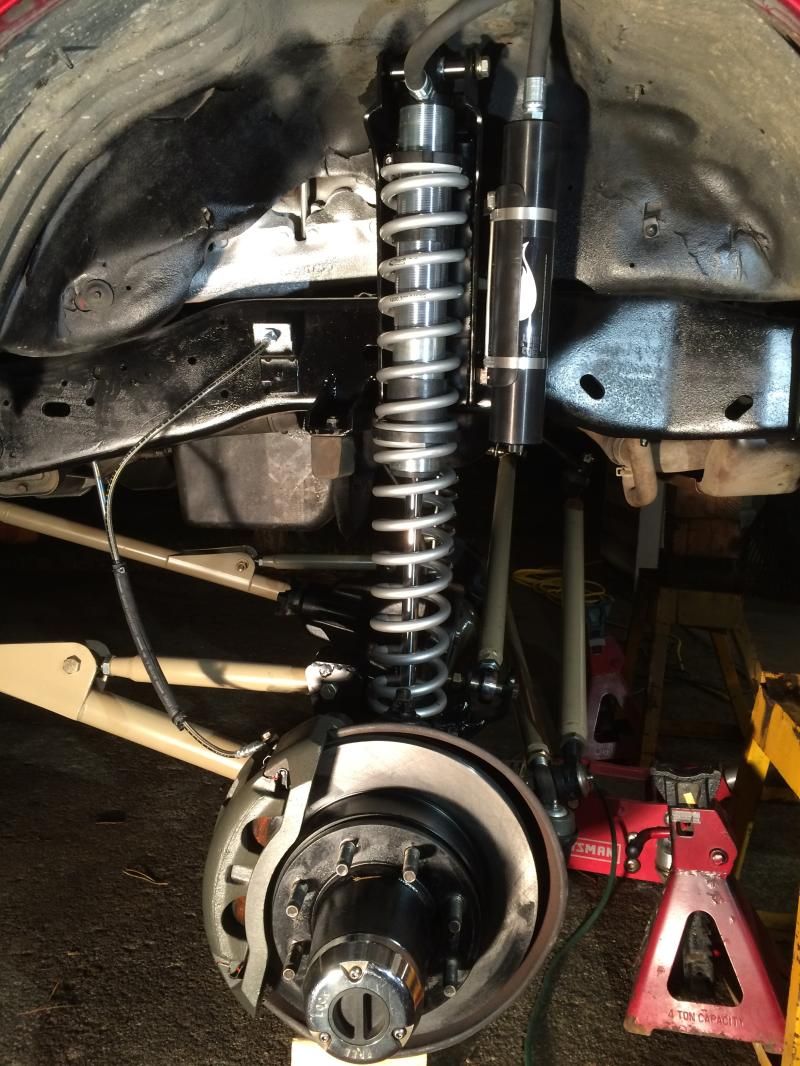
The good ship d60 at its final mooring
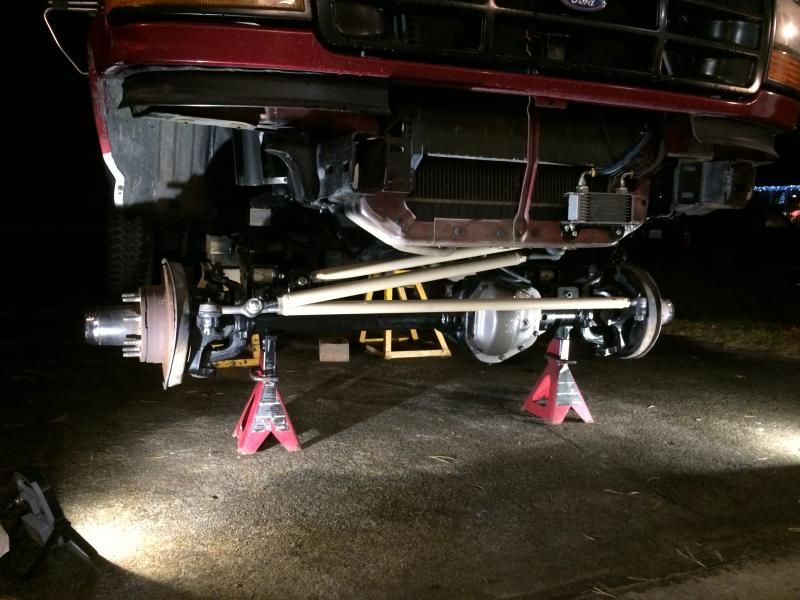
It's all there
Wheels on weight on the suspension
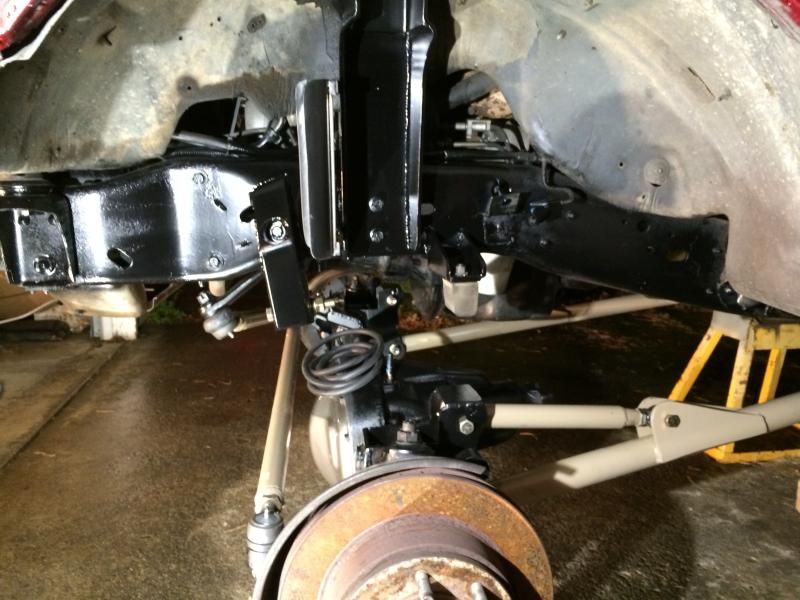
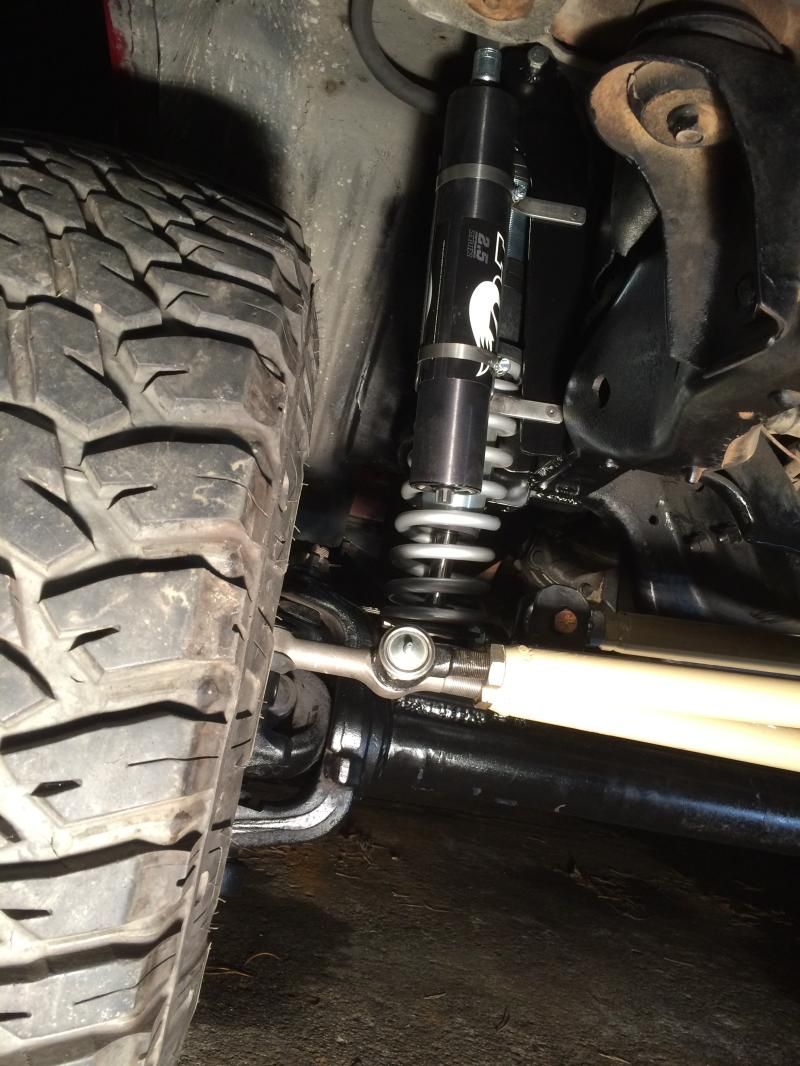
Passenger side
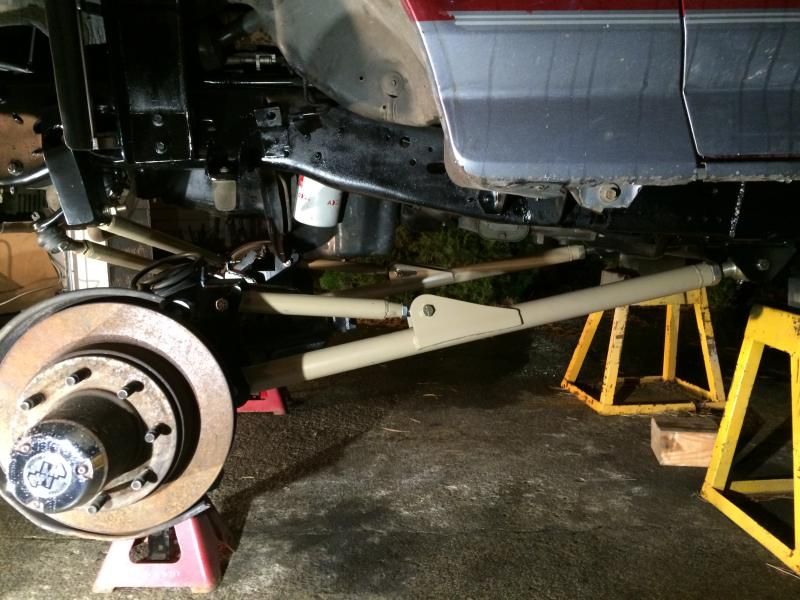
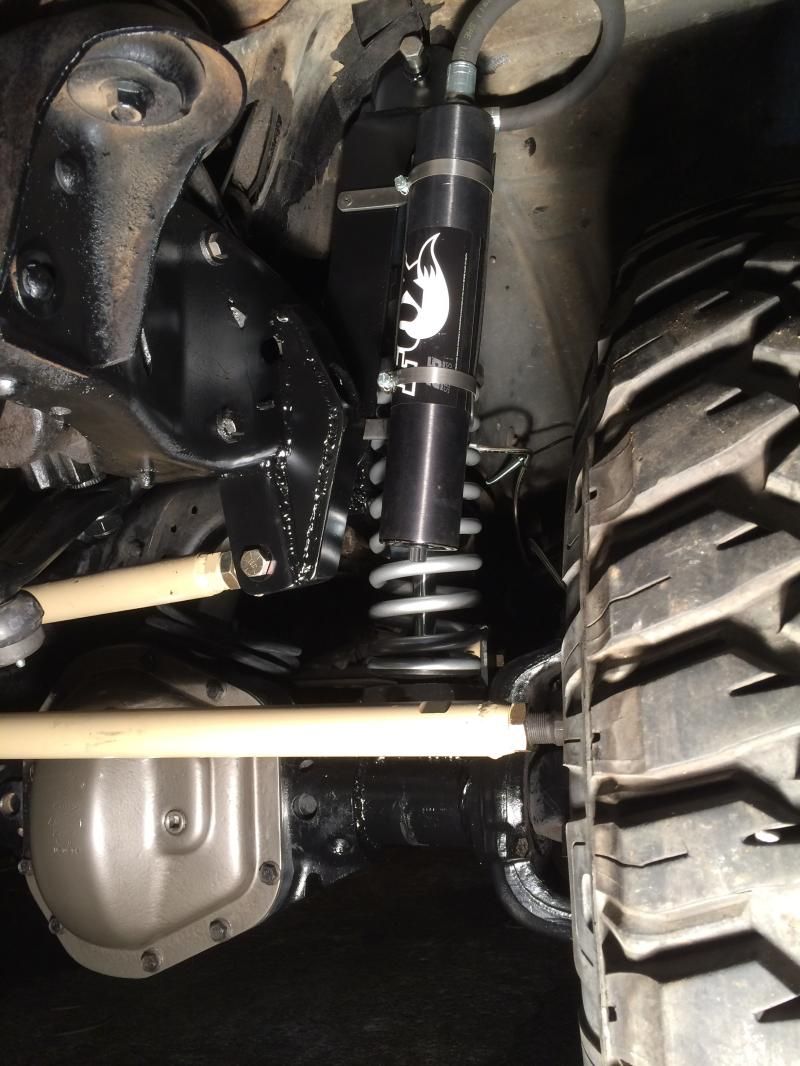
Drivers side
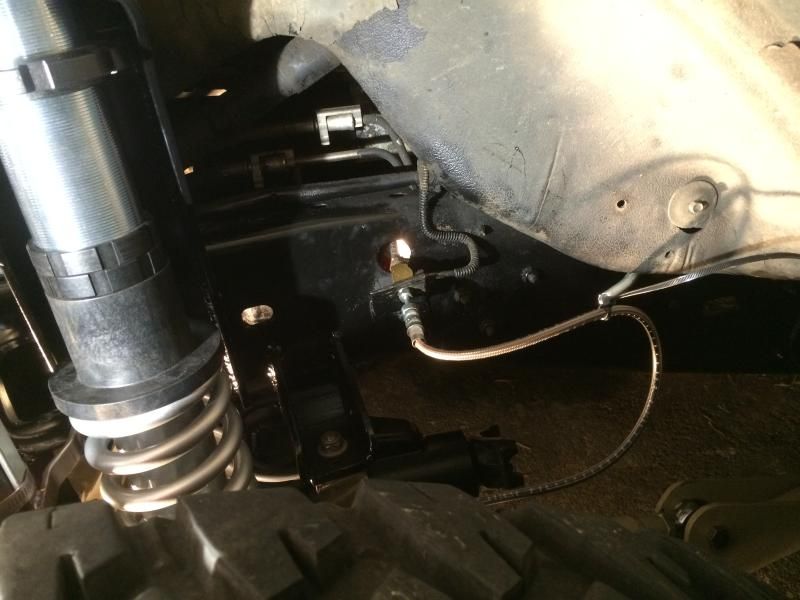
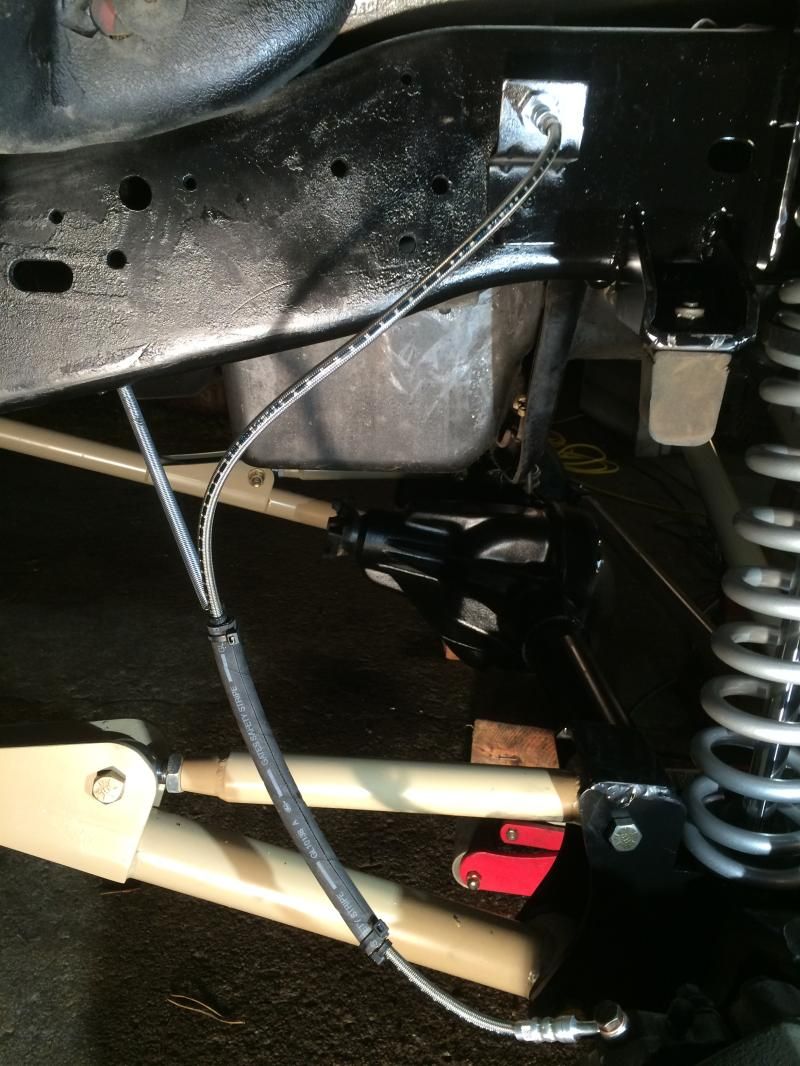
Extended ss brake lines with keeper springs
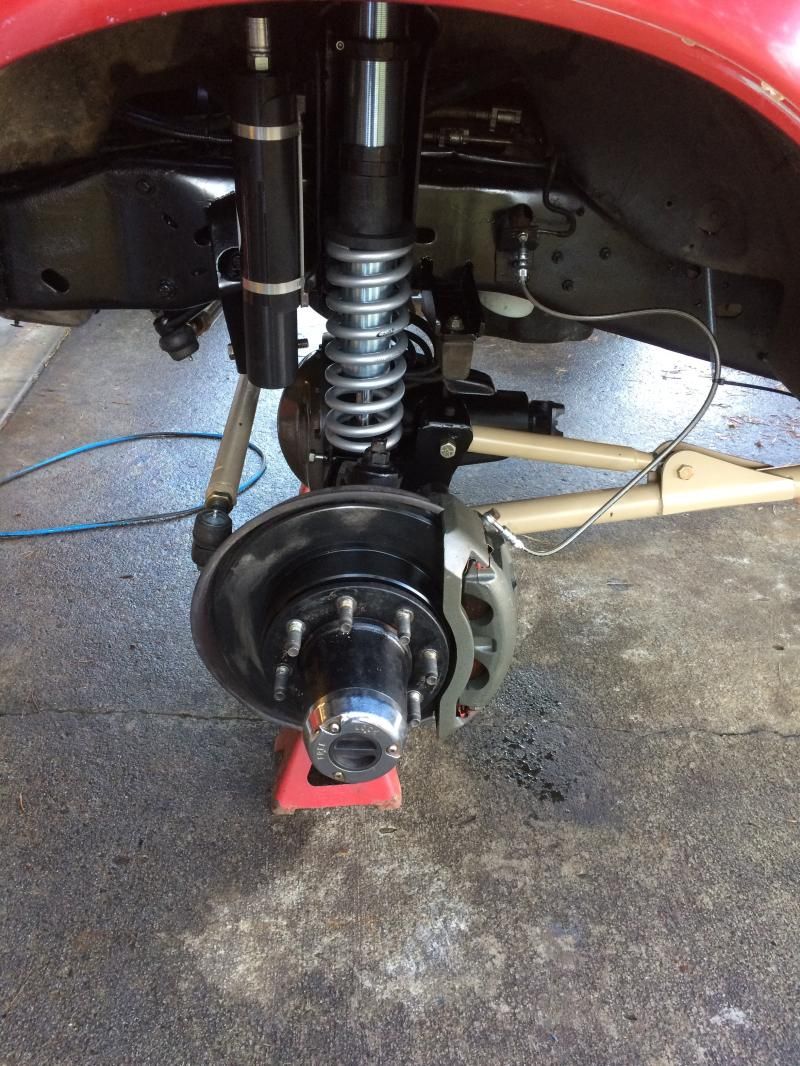
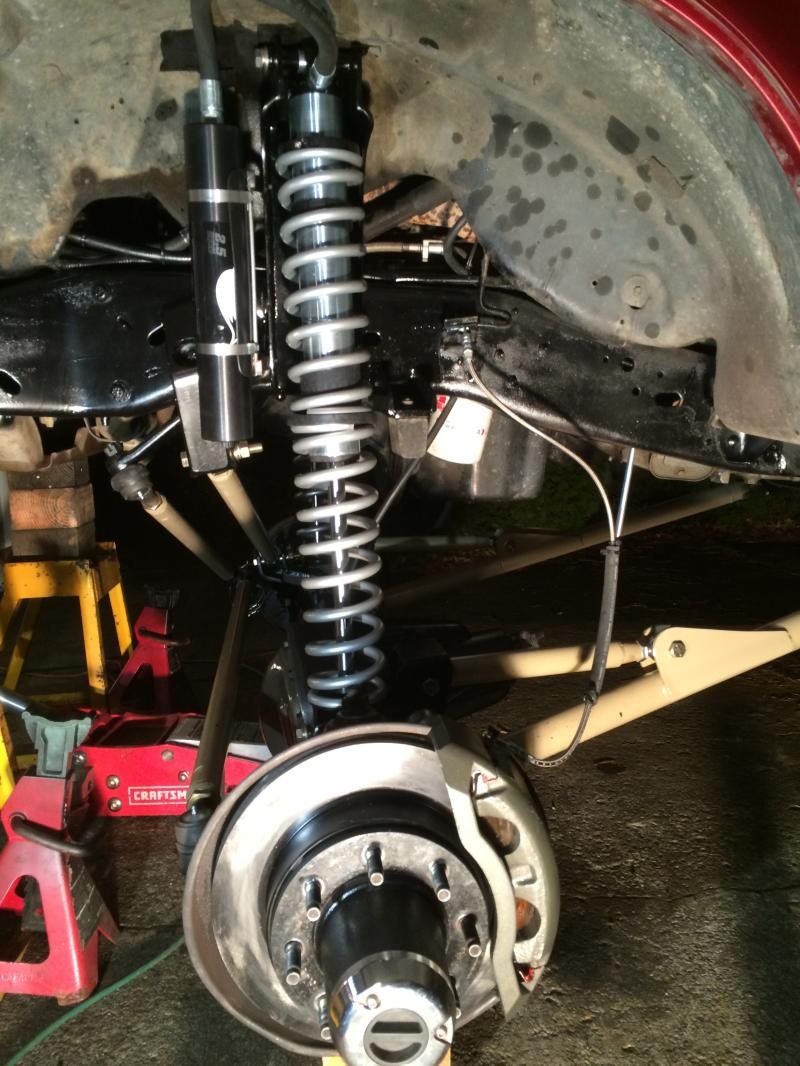
A shot of the manual hubs. This is about 2" lower than ride hight because I only have the lower springs on at this point.
I should get a chance to drive it today.
Welded in coil towers
Painted towers
Installed New rotors
Cleaned, painted, and repacked the hubs
New wheel bearing seals
Installed the manual hubs from my d50
Refurbished brake calipers
Installed new pads in calipers
Installed calipers on axle
Installed the axle in the truck for the last time
Adjusted caster to 4*
Adjusted track bar to center the axle
Adjusted the tie rod for proper toe out
Installed brake lines and tension springs
Installed coilovers with only the bottom spring to set the single rate stops
Greased all the joints and TREs
Checked the clearance for the reservoirs
So basically a ton of little things to button the swap up. There are a few things I need to fix before I can bleed the brakes and take it for a test drive. I need to shorten the mounting brackets for the reservoirs. At full stuff/full lock the tires will most likely rub a little. I will need to get stiffer bump stops as the factory ones I used for mock up squish down over an inch. They are the same as common 3/8" stud aftermarket ones and I was planning on replacing them I just needed to get something in there for now. I also need to do a final check of the toe out with the tires on and adjust the drag link to center the steering.
The good ship d60 at its final mooring

It's all there


Wheels on weight on the suspension

Passenger side

Drivers side

Extended ss brake lines with keeper springs


A shot of the manual hubs. This is about 2" lower than ride hight because I only have the lower springs on at this point.

I should get a chance to drive it today.
seanpistol
Explorer
I can't wait for the test drive... with flex photos too of course :victory:
amgvr4
Adventurer
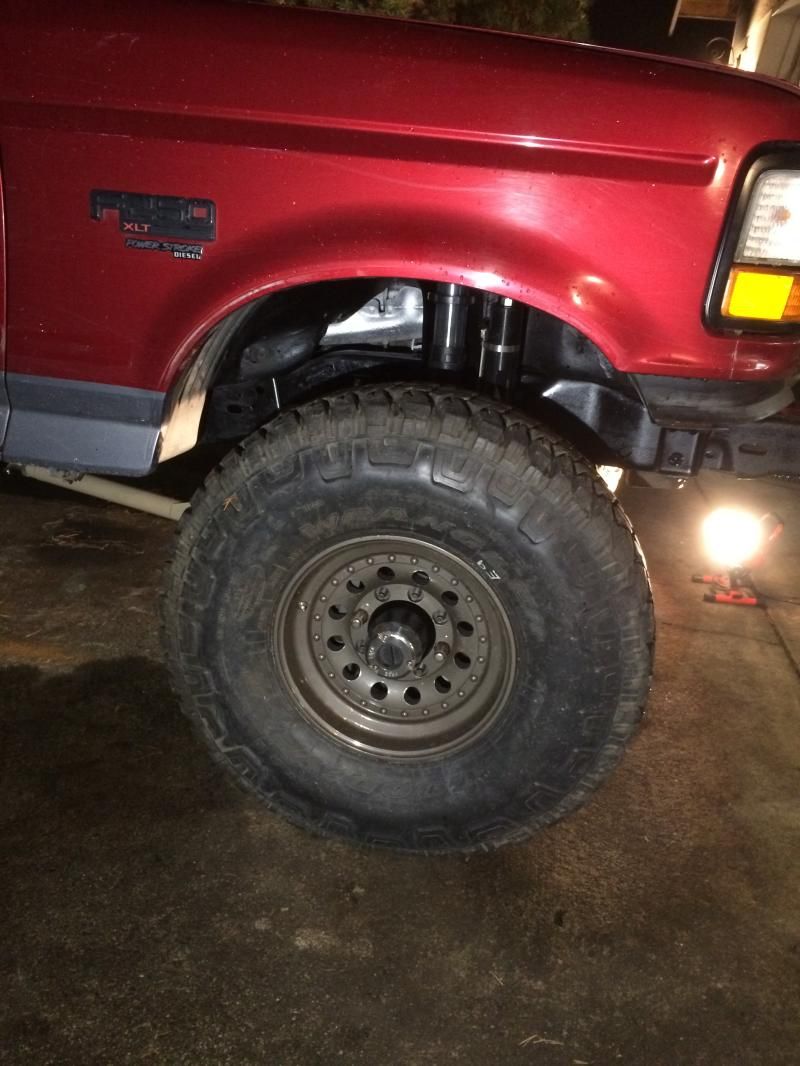
Front is 99% done!
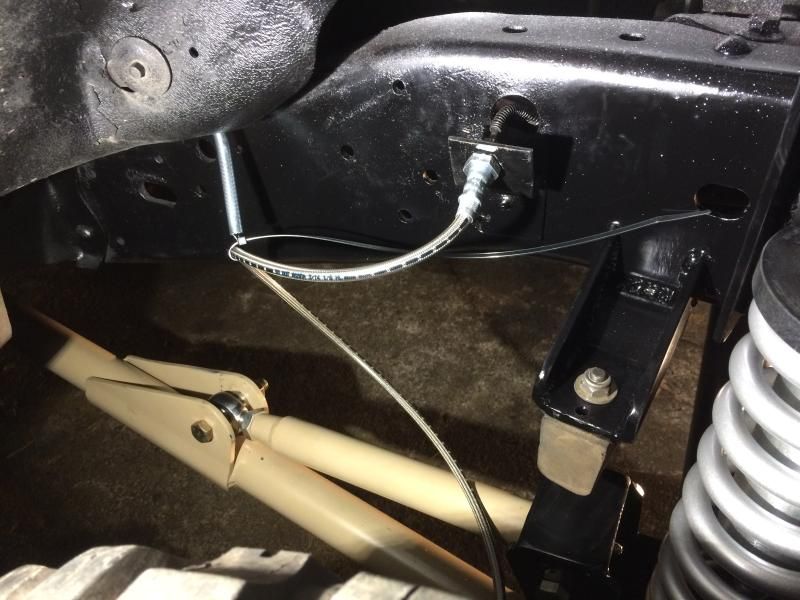
Well it only took two months but it is done! I went for the first test drive tonight and so far so good. I have quite a bit of tire rub on the arms at full lock, but I think some .250" wheel spacers should fix that. I also need to relocate the keeper springs for the brake lines to make sure they don't get pinched between the tire and arms. They never caught on my test drive but better safe than sorry.
Yep I do actually work on this thing during the day sometimes! Got the brakes bled
I extended the diff breather up into the air box area
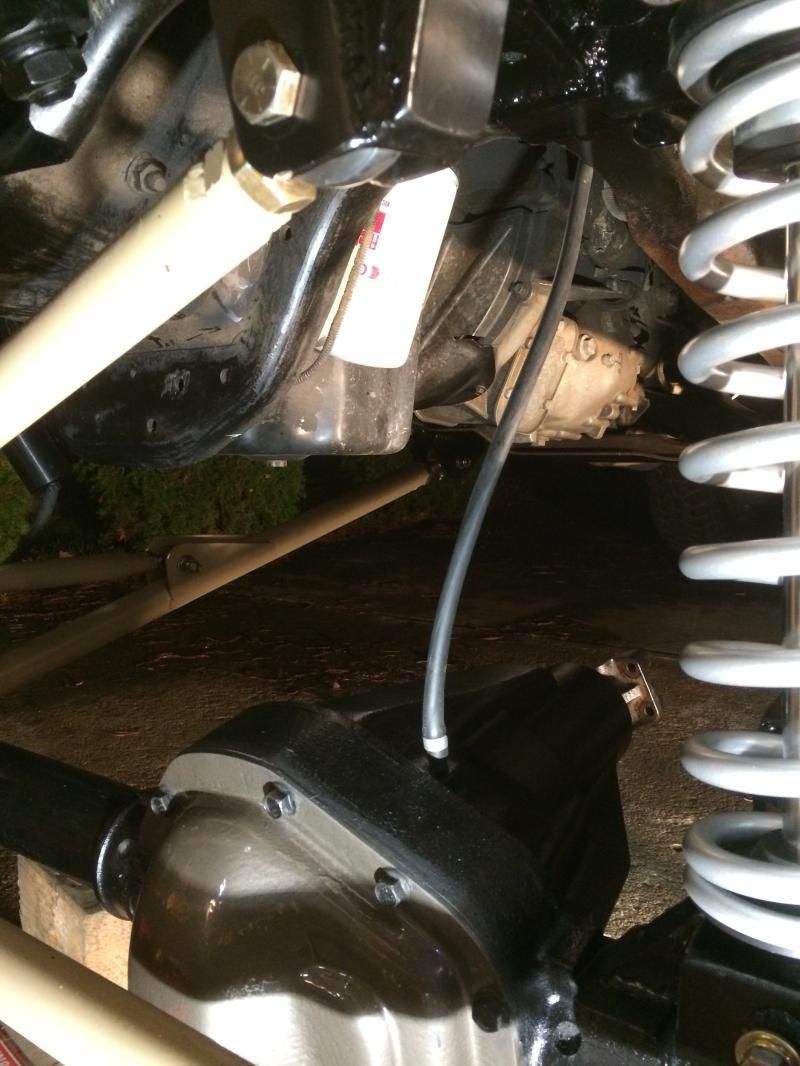
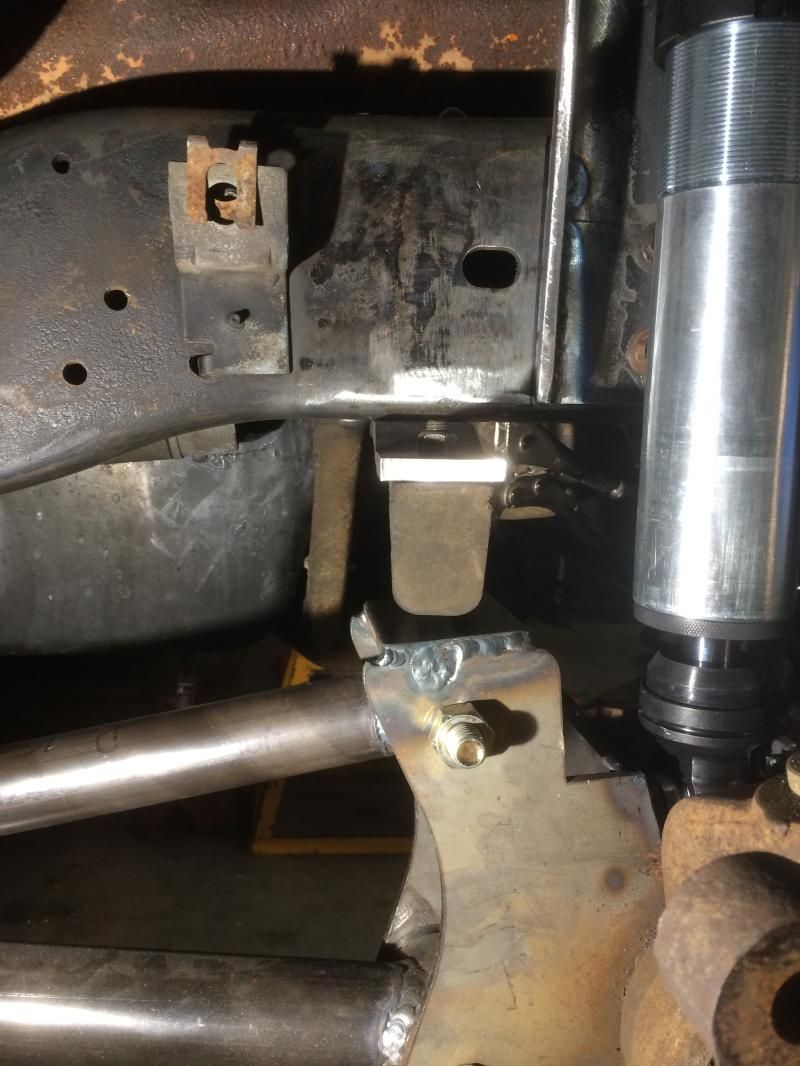
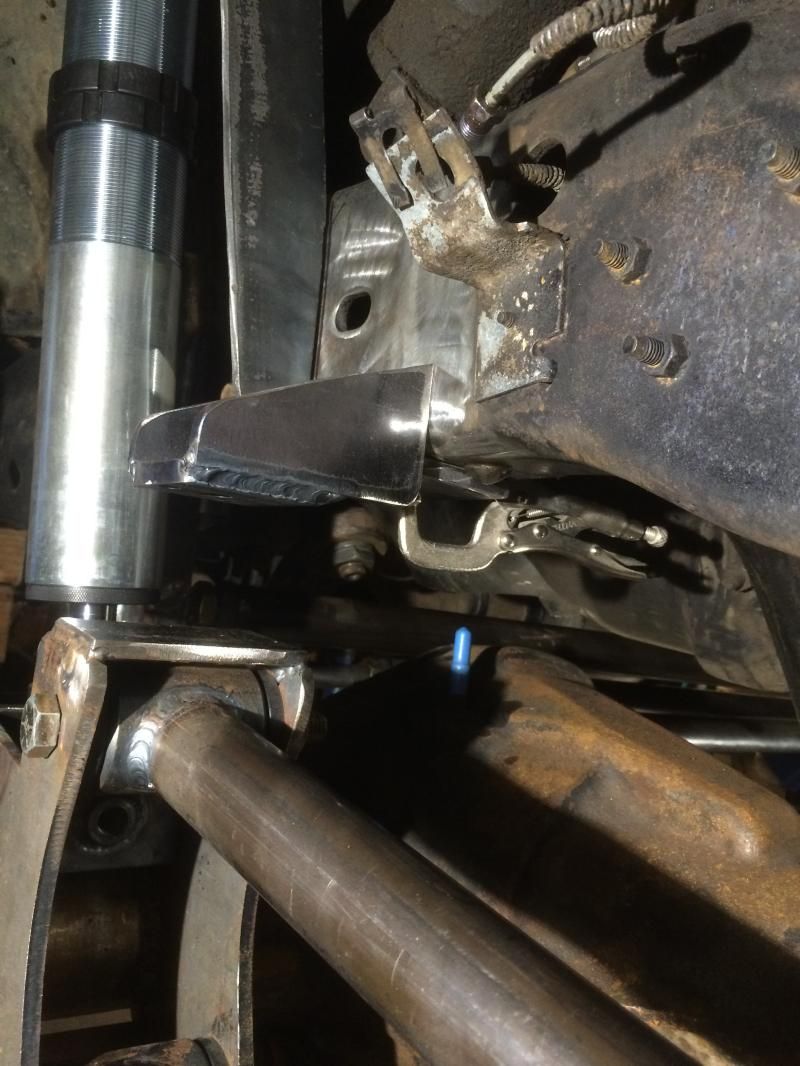
The reservoirs stuck out more than I liked so I shortened the brackets by .75" on the drivers side and 1.25" on the passenger side
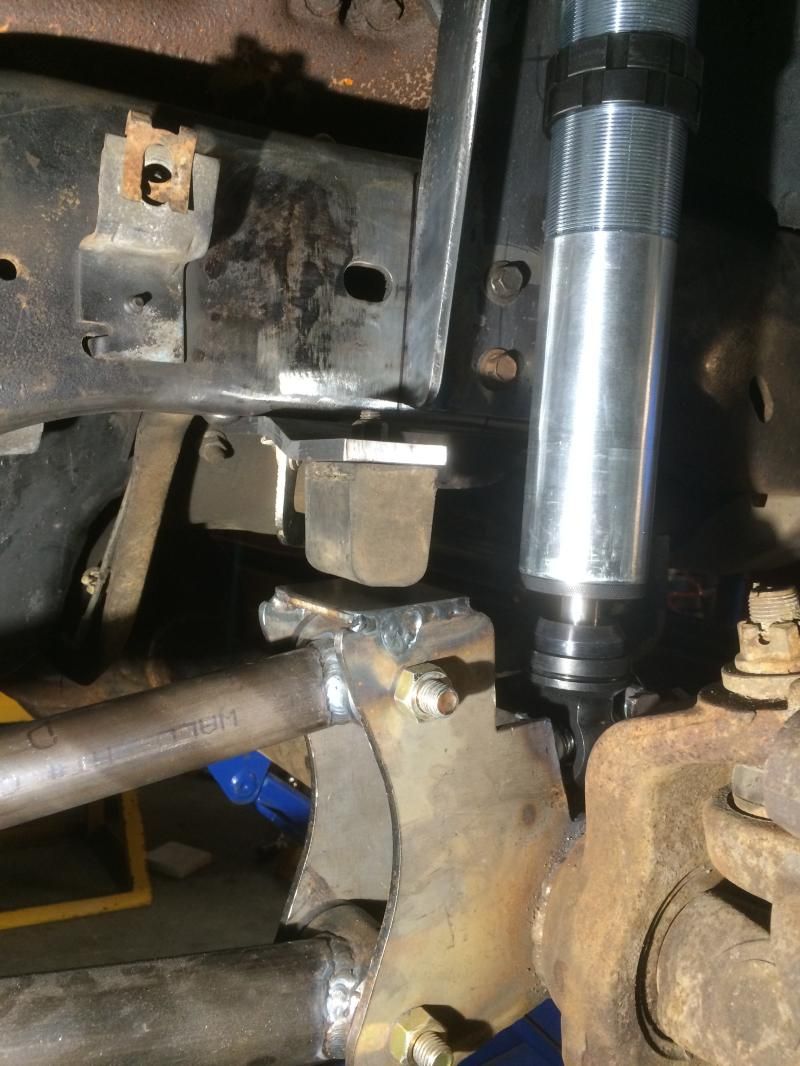
Drivers resi clears the track bar mount by .25"
Drivers side fully assembled for the final time
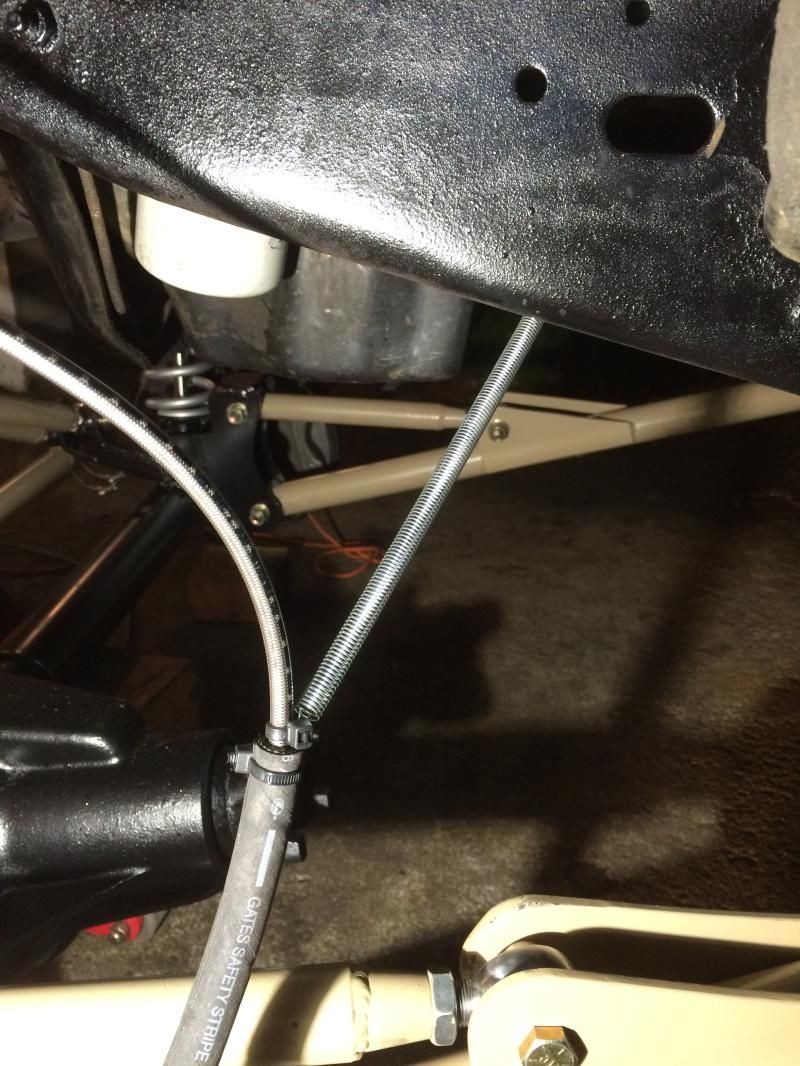
I added some chafing guards to the brake lines using some HD .375" ps hose
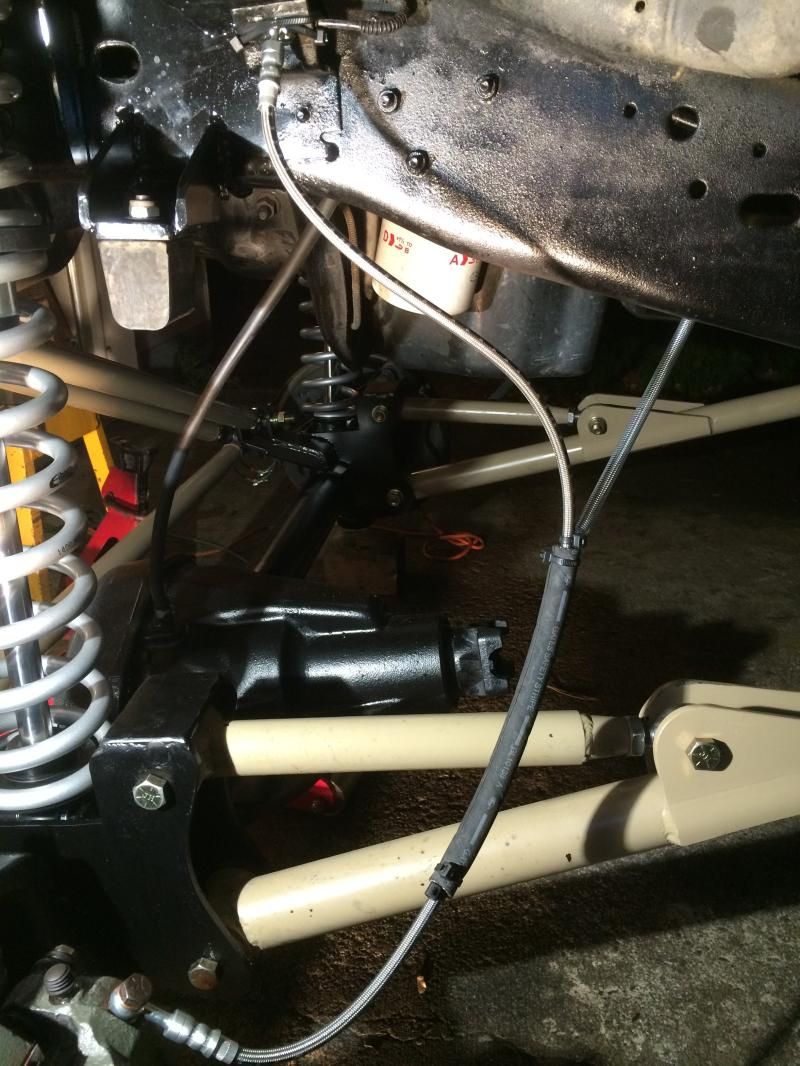
This is the long soft spring I am using to help keep the lines away from the tires. I need to move them more forward to help them clear a little better
Passenger side all together
Back after the maiden voyage
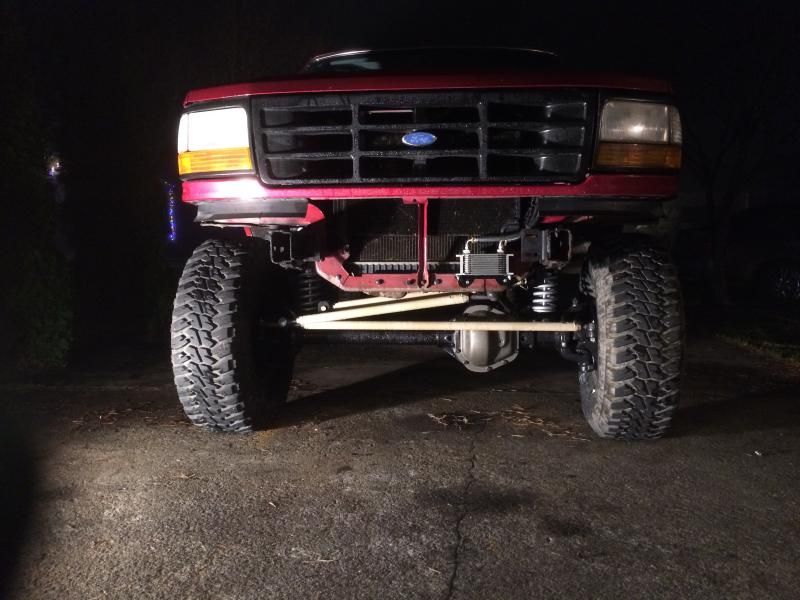
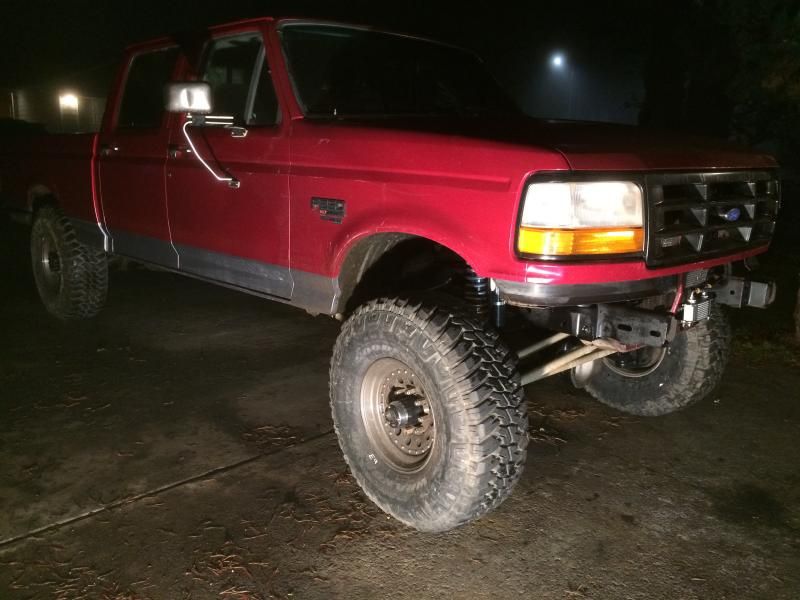
Everything seemed to work well. It is much softer and smoother than the d50 by a mile. The front end is also rock solid. The old stuff was so sloppy that I though the steering box was shot, turns out when your axle moves side to side a few inches as you turn the wheel it's time for an upgrade! There is a bit of body roll, but that is probably more because I am not running a sway bar at all. If the shocks and springs were stiff enough to control the roll then they would be too harsh for everything else. I also flexed it a bit at a little dirt hill by my house, but it was too dark to get pictures. Needless to say it did a mite better than before!
My plan is to drive it for a bit before doing the rear to work out the bugs in the front and give my wife a brake from my crazy project. I got the rear shocks on Friday, but the limit straps never showed up so I still need to get those on the front when I have them. Once I have a little more time and a rear bushing kit I will tackle the shackle flip and get this bad boy evened up, but for now it is sporting the '50s gasser look something fierce!
Well it only took two months but it is done! I went for the first test drive tonight and so far so good. I have quite a bit of tire rub on the arms at full lock, but I think some .250" wheel spacers should fix that. I also need to relocate the keeper springs for the brake lines to make sure they don't get pinched between the tire and arms. They never caught on my test drive but better safe than sorry.
Yep I do actually work on this thing during the day sometimes! Got the brakes bled


I extended the diff breather up into the air box area

The reservoirs stuck out more than I liked so I shortened the brackets by .75" on the drivers side and 1.25" on the passenger side

Drivers resi clears the track bar mount by .25"

Drivers side fully assembled for the final time

I added some chafing guards to the brake lines using some HD .375" ps hose

This is the long soft spring I am using to help keep the lines away from the tires. I need to move them more forward to help them clear a little better

Passenger side all together


Back after the maiden voyage


Everything seemed to work well. It is much softer and smoother than the d50 by a mile. The front end is also rock solid. The old stuff was so sloppy that I though the steering box was shot, turns out when your axle moves side to side a few inches as you turn the wheel it's time for an upgrade! There is a bit of body roll, but that is probably more because I am not running a sway bar at all. If the shocks and springs were stiff enough to control the roll then they would be too harsh for everything else. I also flexed it a bit at a little dirt hill by my house, but it was too dark to get pictures. Needless to say it did a mite better than before!
My plan is to drive it for a bit before doing the rear to work out the bugs in the front and give my wife a brake from my crazy project. I got the rear shocks on Friday, but the limit straps never showed up so I still need to get those on the front when I have them. Once I have a little more time and a rear bushing kit I will tackle the shackle flip and get this bad boy evened up, but for now it is sporting the '50s gasser look something fierce!
seanpistol
Explorer
I want this truck so bad. Nice work!
Root Moose
Expedition Leader
This is a great build. I was worried about the axle side Panhard mount at one point but you've got it all well re-inforced structurally now.
For the anti-roll maybe see if you can adapt the electric disconnect off of a JK. That would be pretty trick, suit the build.
For the anti-roll maybe see if you can adapt the electric disconnect off of a JK. That would be pretty trick, suit the build.
Forum statistics
Members online
- carterd
- LYlqoY2Fo
- parabolD
- gallinastrips
- Howard70
- klobao
- jclarkvfr800
- driveby
- 00greenwj
- mark5280
- Jess831
- DiscoDave3
- Neil
- ThebigMT
- yondermountain
- Hugues
- TNJed
- JaSAn
- JoeRidesBikes
- theegovernor
- rumin8
- pedalwrench
- FJFJFJFJFJFJFJFJ
- Obsessed2findARuggedHybid
- Hk499
- jkalodimos
- CoryQuackenbush
- Off-road Maverick
- syn0s
- Phil Meredith
- The Impossipede
- Vandiesel
- Tesota Overland
- Wakeup2river
- andycygan
- seantos
- FJRanger
- Erockin
- Greg03XLT
- Cgswimmer24
- Neikko
Total: 1,030 (members: 45, guests: 985)