OBS F250 slow adventure build

amgvr4

Adventurer
Thanks for the positive feedback man, I hoped that this thread would provide a good resource and place for ideas for other people so it is nice to hear that it has.

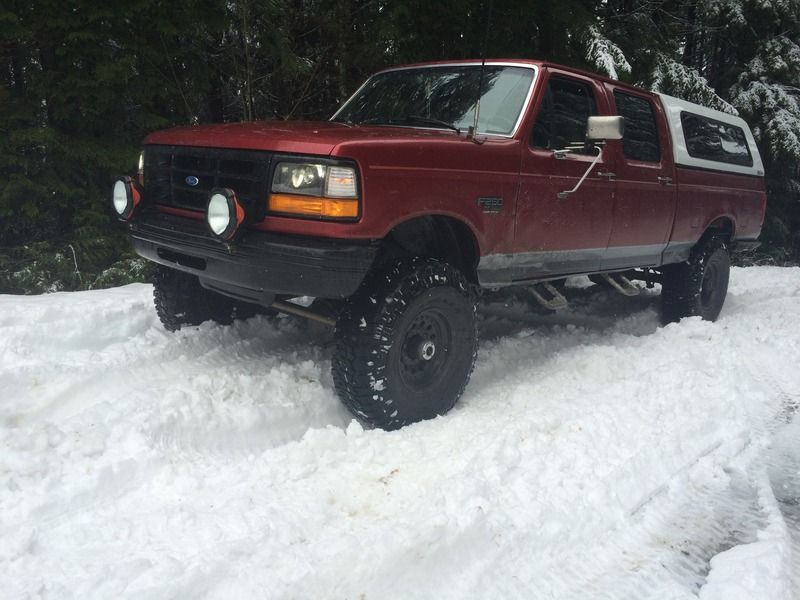
I took the kids out exploring last weekend to see how far I could make it up FS-18 before the snow got too deep. Turns out it was about 3 miles. After mostly clear road with only a few patches of snow we hit close to a foot of crusty impassable white stuff! It looks bretty benign in the pictures but al the truck would do it dig in and sink down. Being on my own I wasn't brave enough to hit it with enough momentum to make it much further!


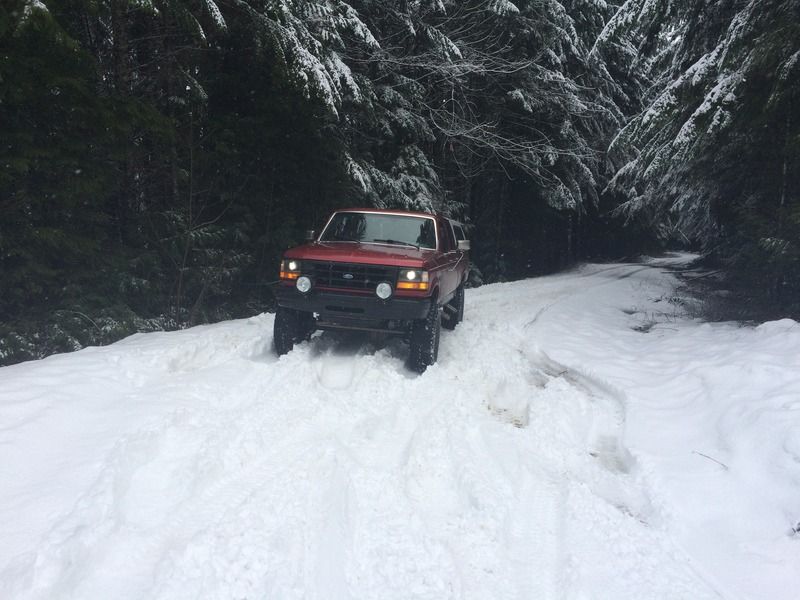
I backed up until I found a spot big enough to do a 7 point ditch to cliff turnaround. Big trucks can be an adventure on the back roads for sure


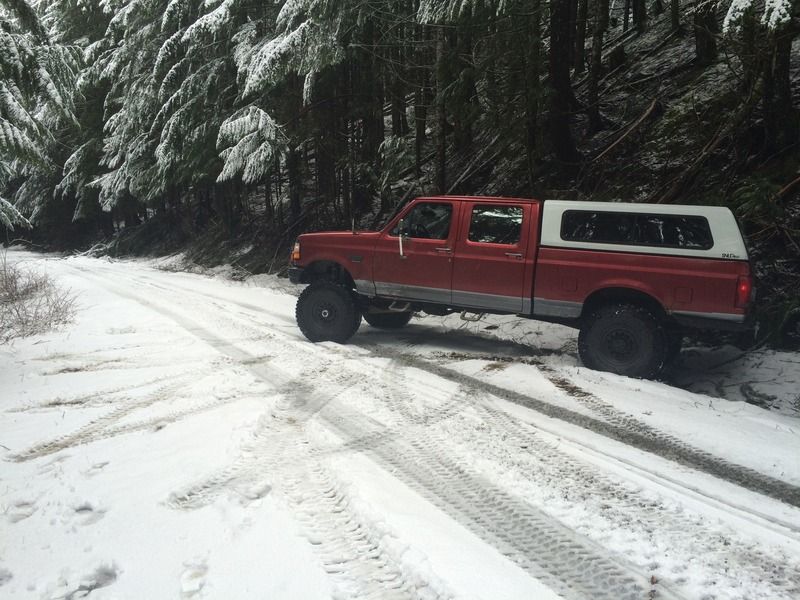
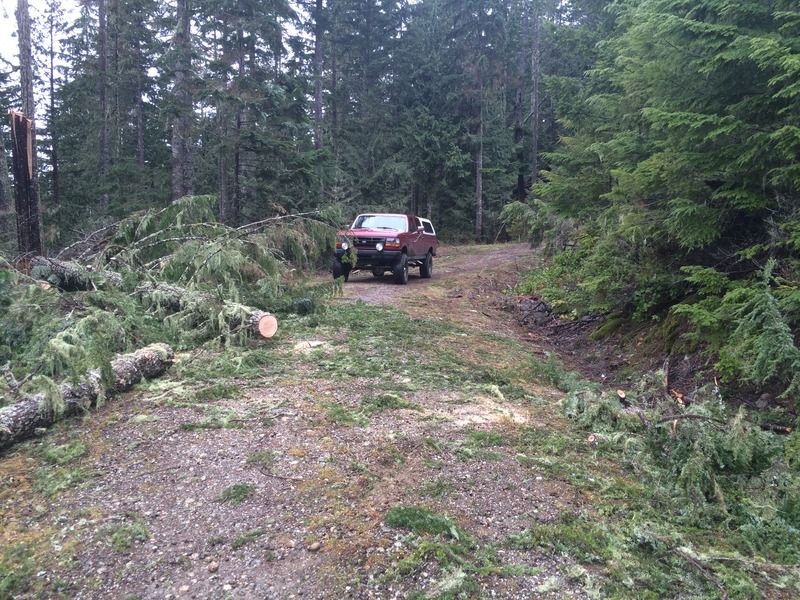
After that we went down every offshoot road I could find just to see what there was. On one we came across this tree that was blocking the road and decided it would be a good time to practice my trail clearing skills and my new to me chainsaw. The saw worked great and after about 30 min of work the road was passable


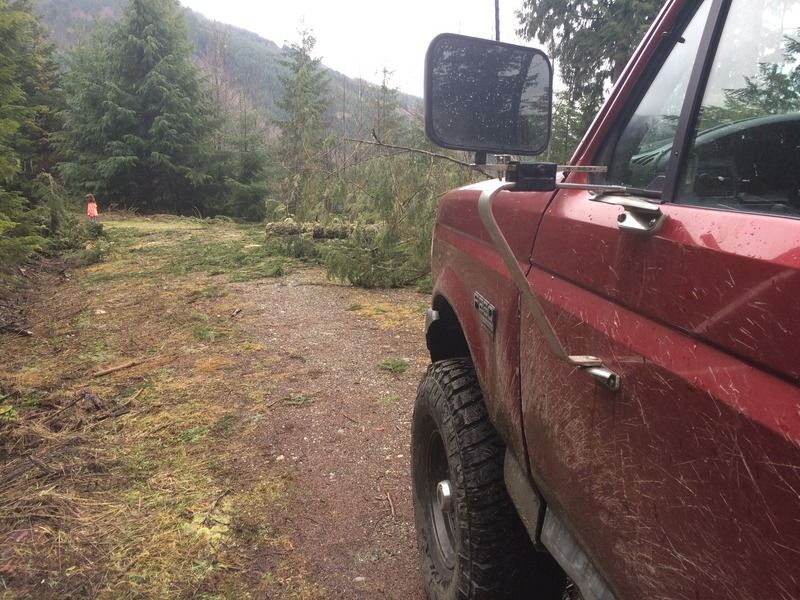
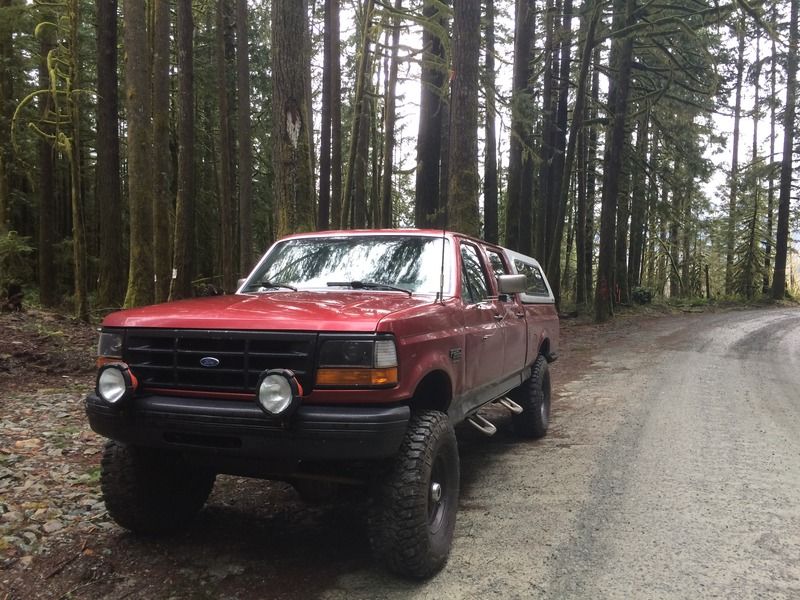
I didn't have enough room in the truck or I would have taken some of it for this summers fire wood. At the bottom I aired up and let the kids play outside for a bit. I have a TMJ compressor and it just barely works for the pressure I run in these big meats. I need to find a bigger one that I can mount in the engine compartment to speed the process up a bit.


I also had to modify my lighting in the canopy as the adhesive lost its stick and the strips were falling down in the bed. I ended up using sticky back hook Velcro since it sticks to the carpet on the canopy really well and it allows me to move the light strips around if I want to adjust the lighting as needed. I am still using a 9V battery so pretty soon I need to hook it into the truck to get a full 12V and eliminate the need to carry batteries.

I also built a simple alignment measuring tool to adjust my toe out on the beast. I picked up a plastic 6" caliper from HF and cut all the caliper tips off so it was more like a sliding rule. Then I got some 1x1" aluminum angle and glued the caliper to it on one end. This allows me to put the angle up aginst the inside edge of the drivers rim and then extend the caliper face to touch the passenger side. Then I zero the caliper and measure the back side of the rim the same way. The difference is the amount your toe is off, a positive number means toe in and a negative number means toe out. Simply adjust the tie rod half the amount the caliper readout measured and recheck. Your toe is set when the caliper reads 0.00 on the front and back of the rim. Takes about 5 min tops and can be done on the side of the trail pretty easy. I plan on making the L angle adjustable in length so I can use it on other cars as well with narrower track widths.

This is V1 when I only had flat aluminum and electrical tape on the caliper.


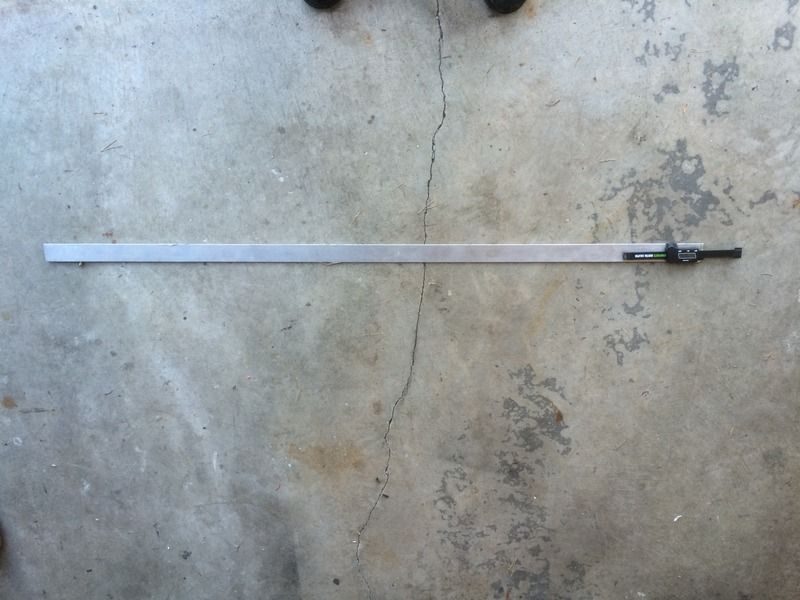
Measure the front edge, zero, then measure the back edge. So much easier than using a tape measure
 

Endless

New member
Hey, I love your build! You sir are just like me, with all the fabrication, machining skills, and equipment at home, and also the truck apparently as well. I just picked up a rolling chassis from an 05 f350, and plan on doing the same thing you've done, but to my 97 obs ex. cab long bed, was my fathers truck since new, til he passed in 07, and I have since used as a truck, and am now retiring to an easy life.
I stumbled across your build thread from google, and spent the past 4 nights reading it while my wife watched tv, and finally made it to the end of the build tonight. Quite an adventure you've taken with this rig, and your family, and I sure hope your proud of what you've accomplished, and have now instilled into your kids by pulling them out of the norm of video games, and exposing them to the great out doors in a great way! What a great build thread. I have been building cars for a long time, and read many builds, and very few have been able to uphold such quality, and integrity as yours. Great job with everything, if you ever come wheeling out east you have friends out here now too..
-John
 

Jones518

New member
Wow! just spent HOURS reading thread start to finish. Bravo! I have owned the same truck for 4 years and searched for a radius arm build back when I got it, but no luck. So glad I looked again! I want to duplicate your front suspension and was hoping to pick your brain first.
1. Turning radius seems to be your biggest hindsight. Besides inboard frame mounts, what about how Ford had a slight bend in their radius arms like my 71 F100 4x4 had??
2. you mentioned you blew out the poly bushings on the axle lowers, but never showed the fix? Should I just build with Johnny joints (or any other spherical) from the beginning?
3. Are you happy with the 4 degrees of Caster? Best compromise of caster and pinion angle?
4. I think my single biggest concern is the body-roll comments. do you think the "circle track" style sway bar (speedway engineering) would 100% fix the street manners? A quick disconnect on an end-link and back to flex mode?
Please let me know all the woulda shoulda couldas before I get started. Thanks.
 

amgvr4

Adventurer
Hey guys, thanks for the kind words! I have been absent from the forum for a bit but the truck has not been siting idle. Not too much to report on the mods and improvements front but I just moved to a new house and the old battleship was a work horse that just wouldn't quit! I ran about 6 loads of stuff from one place to the other with the bed all loaded up and pulling my 16' flatbed trailer as well. For a truck that was built in my driveway and has 3' of articulation this thing does really good towing and hauling. The miles are starting to show on the trans and transfercase though. It's at almost 280k and the syncros on 2nd and 3rd don't like downshifts much anymore and the front output for the transfercase has developed some play and slop. The steering box and shaft are getting pretty bad as well and they will be the first things to get replaced as they will make the biggest improvement.

To answer your questions Jones518;
1. Turning radius seems to be your biggest hindsight. Besides inboard frame mounts, what about how Ford had a slight bend in their radius arms like my 71 F100 4x4 had??

You could bend them a little, however it takes a really stout bender with hydro power to bend 2" .250 wall DOM and that is the minimum I would use for a truck this size. If you are going to use coilovers then you can mount the radius arm brackets at the axle a few inches further in and that would probably solve most of it. I initially located mine with coil springs in mind so I had to outboard them as much as possible to clear the frame. If I were to redo it I would get new brackets for the arm mounts and separate mounts for the coilovers themselves to simplify things and save time.

2. you mentioned you blew out the poly bushings on the axle lowers, but never showed the fix? Should I just build with Johnny joints (or any other spherical) from the beginning?

This is because I have yet to replace them. They are not as bad as Chaos's were so I have just been living with it since I have not done much wheeling since I discovered the issue. In the future I will probably replace them with weld on Johnny joints when I remake the arms for better clearance and turning radius. I would not do threaded joints on both sides of the arm as it is more money and more of a pain to fab.

3. Are you happy with the 4 degrees of Caster? Best compromise of caster and pinion angle?

Yes, I have had no ill effects from too much or too little caster. Bump steer is basically non existent and the on center feel at speed is very good apart from the worn our box and shaft. Any more and I would worry about the excess leaver effect that it puts on the knuckles when turning full lock on the trail.

4. I think my single biggest concern is the body-roll comments. do you think the "circle track" style sway bar (speedway engineering) would 100% fix the street manners? A quick disconnect on an end-link and back to flex mode?
Please let me know all the woulda shoulda couldas before I get started. Thanks.


It is hard to say, you could always start with the factory bar that is attached to the bottom of the D60 and see how that works as a proof of concept. Then if it makes a noticeable difference with it connected vs not you can be pretty confident that a speedway bar would be even better. Packaging is the biggest problem as there is so much that needs to occupy the same space, you really have to get creative with how you lay everything out. I have not settled on what method I will use to add sways to my truck but it will probably be done when I link the rear and replace the front arms. I would most definitely have quick disconnects for trail use to take full advantage of the amazing range of capability these trucks can have when set up well.

As far as things I wish I wold have done first I would say get a good plan ahead of time a try and stick with it. I wasted a lot of time and energy with the way my project snowballed as it went along. Had I set my sights properly from the beginning several things like tires rubbing on the arms could have been avoided instead of dealt with after the fact. If you plan on using the Military take off tires make sure you have the truck aligned properly all the time. On our trip this December my toe got bumped out about .250" and I didn't catch it until we got home. That probably took 10k worth of usage off my fronts and wore the knobs in an odd way that created more noise and vibrations on the freeway. Also so far they seem to last about 20-30K depending on how much you wheel them so plan on replacing every year or two if you drive a lot. Considering they only cost $150 each and many other MT tires have similar life expectancy I feel they are well worth the effort. Do yourself a favor and get a set of Centramatic hub balancers as well and then you won't have to pay to have the wheels spin balanced each time, that way it only cost about $37 to have a set of four mounted when you get a new set. And last but not least a traction bar is a must for the rear axle! The center bearing on my drive shaft is already starting to show signs of wear from not having one and I just had it rebuilt in December.

Have fun and keep me posted on your progress!
 
Last edited:

Jones518

New member
Thank you very much for all the info! I am also finishing my move into a new house and am still dialing in my garage before I rip my truck apart. I plan on finishing my research, having as detailed a plan as possible in place, and starting in a few months. As for bending the 2" .250" wall, I own a JD model 32 that can handle that, so that may be my route. I will start a build thread here or pirate or both when I get going and will probably ask questions along the way if you don't mind! Keep up the good work.
 

amgvr4

Adventurer
Updates... Finally

It has been some time since I have had anything worth posting on the truck front, but I have recently bought a tool, fixed some things, and taken the fam camping.

I have been on the lookout for a JD2 tube bender for over a year now and have been very close to buying one several times. I knew I didn't want to buy it new as shipping alone would have been close to $500 with the bender and dies I wanted so I was relegated to searching Craig's List every day hoping for that elusive bargain. Apparently I'm not the only one with this plan cause every time I would find one it would be gone before I could get chance to make a trip to go get it. A few weeks ago I stumbled on an add for a model 3 with four dies, a stand, and nicer leaver arm for $650. On top of that is was within 20 min of me. I called the guy within hours of being posted and he said he had someone that might get it a 9 am the next morning. I told him I could be there by 7 am and his response was he would be at the shop at 8:30 and its first come first serve. I was waiting in his parking lot at 8:30 am sharp! So far I have only bent some .75 tube for fun but I cant wait to get to work on some sliders and a front bumper.


I also got a chance to max out the the payload building a new fire pit in our back yard. With 1.5 yards of 5/8th minus it was sitting on the bump stops in back and squatting 4", however it still drove fine.


The end result


After converting the headlights to HID I noticed that the cheap housings I selected had enough play in the adjusters the the lights vibrated on the road. This caused a super awesome disco light show on the the back of any unsuspecting cars in front of me at nigh. I'm sure it was not as impressive to them in their rear view mirror was it was to me! I used some two part epoxy to hold the sloppy adjusters in place and eliminate the annoying vibrating they allowed. If I ever have to adjust them again I can pop the glue off and then add some more once they are aimed propperly.


amgvr4

Adventurer
I have noticed that things are starting to get a little worn out since the D60 swap, so I made a holder for my phone so I could get some video of the suspension and drive lines to see how things are functioning under the truck. They are not very exciting but can be really good for people interested in what clearances are like under obs Fords with swaps like this. The first one is when I was putting my trailer away behind the house. I had to pull the truck up and turn it around and then back it over a curb and over an off camber rooted section that flexes the suspension a bit.


The second one is without the trailer driving up on a stump to check for travel limits and any interfearace. Also in the back to check for axle wrap.


I love seeing stuff like this as it shows how well a simple radius arm setup can function even after 1.5 years and 25k miles.
 

amgvr4

Adventurer
Gallaher Head Lake Camping trip

We went on a camping adventure and easy wheeling trip this last weekend. It is the first of the season and it turned out to be perfect weather, not too hot or cold and no rain! We headed over on Friday night and found a place to camp up above hyw 930 outside of Roslyn. It was a really nice spot that overlooked the valley and lake below.


It was the first adventure for our new pup. We had to put our old man down in May of 2015 when he got super serious bladder stones and there was no way to get them out safely. We miss him something fierce!

Rest in peace Nismo!


In February we were finally ready to commit to a new pup and after much searching we found this little guy.


He was abandoned with his three brothers to die behind a house in Socal and when they got to the shelter they were starving and close to death. A local rescue saw them and had them brought up to the PNW to find new loving homes. He has had it rough up to this point but you would never know it, he is the sweetest big old lap dog ever! He came with the name James and despite our best effort we couldn't come up with anything that fit him better. Here he is on his first camping trip relaxing in a camp chair


Gotta love that pittie smile!


The trail was in good shape and I was able to keep it in 2wd for 99% of it. I just put it in 1st and idled up everything without incident

I had some big truck companionship on the trail


We had a pretty good sized and diverse group with us


Here is a video of the trip. My truck made it up crankshaft hill much easier than the last trip a year ago
 

amgvr4

Adventurer
Thanks guys!

We had a little speed bump in our weekend on Saturday. We went down to Olympia to visit some friends for the day and decided to go for a little family friendly hike. We parked at the Woodard Bay Trailhead and set out on our adventure. When we were walking back I was looking at my truck from about 100 yrds away and kept thinking that the front drivers side window looked like it was open. With the lighting it was hard to tell but as I got closer I started to get that sinking feeling that comes with the realization something bad has happened. Sure enough my front window was busted and my wife's purse was gone. We had it tucked under the center arm rest but there must have been enough of it showing for the scumbags to see. The majority of the blame is mine as I know better than to leave valuables in sight at trailheads, but the DNR had signs all over the parking lot saying it was under 24hr video surveillance so I did not take the time to hide things like I normally would. Turns out those are just to make people feel safe when they are not as there were no cameras at all! I was also pretty close to neighborhoods and civilization so it was not out in the booneys where crackheads normally prowl cars. The good news is that they did not go through my glove box or center console at all and we just moved so the home address the thieves got is wrong. Otherwise I would be freaking out as they got her keys to all our cars and the house. They promptly hit up a gas station and filled up then went to Walmart and loaded up on cheap Chinese crap before we could cancel her card. On the plus side it seems like the idiots hit that trail head up daily and the Thurston county Sheriffs seemed pretty keen to catch them so hopefully they are busted soon. They stole a car from the same parking lot on Sunday so they have no fear of getting caught yet. Here is the damage, now I really have to replace that drivers door that got crunched over a year ago!


amgvr4

Adventurer
I have been wanting a hydro conversion for the JD2 bender ever since I picked it up. At first I was planning on getting the SWAG offroad kit but the cost of a hydro cylinder and the mount kit was more than I could justify at this time. I have bent a few things with just the handle and it is not that hard to use, but it requires the bender to be bolted to the floor and means I can only bend with the dies horizontal. I really want the bender mobile so I can take it home and it is easier to get an accurate measurement of the bend with the die facing vertical. I like the idea of using an engine stand as the rolling base and I just so happen to have one sitting around that I have not used in probably ten years. Problem is I loaned it out and forgot who had it. It took me four tries to finally figure out who I had lent it to. LOL! After finally tracking it down I decided to get the hydro conversion started and functioning on the current stand and then make the mount for the rolling base later. I started by picking up an 8 ton air over hydro ram from HF on sale for $89 and then getting 6" of 3" sch 40 pipe to make my ram bracket. Since I have more than enough other scrap for the rest of the build I'm all in @ $15 vs $150 for the SWAG.

The ram mount is split with two flanges welded to it for clamping down when everything is in position


I used three 3/8-16 bolts to pinch the tube together


I had to turn down the spacer for the pivot just a tiny bit to fit inside the 1.5x.250 wall DOM I used for my main pivot


The bushing keeps the two halves of the bender tight and square and the DOM is slightly shorter so it spins freely on the bolt axis. Here is the bushing inside the DOM pivot


The back bone of the mount is some 1.5x1.5x.250 square stock. This spreads the load out over a much greater area then just welding the main tube to the DOM pivot


I wasn't happy with using the supplied .5" bolt for the ram end so I drilled out the bender arms to .625" and upgraded the bolt to match. The hole in the end of the ram was a perfect fit for the 5/8" bolt but I needed to use some DOM to make spacers to keep it centered between the arms


Finally I made a knob for the on off screw to make returning the ram much easier


It bends like butter! One of the biggest advantages to a hydro conversion is the ability to stand over the degree dial and get your angle exactly where you want it. With the handle I was constantly bending, then looking and back and forth until I had it where I wanted. Now as long as I know how many degrees needed to account for spring back I can get it perfect every time with no monkey business.


Forum statistics

Threads
185,823
Messages
2,878,597
Members
225,378
Latest member
norcalmaier
Top