You are using an out of date browser. It may not display this or other websites correctly.
You should upgrade or use an alternative browser.
You should upgrade or use an alternative browser.
1999 Disco I 300TDi: Fixes, Mods, & Trips
- Thread starter NW40
- Start date
NW40
Explorer
I tackled the shocks again last Tuesday, and the impact wrench removed the shock top mount nuts in about 2 seconds flat. For the bottom mount nuts, a pipe wrench on the shock body and a crescent on the nut did the job just fine, albeit with more effort than the impact wrench required. Thanks for all the suggestions. Was able to save the shocks and transfer them back over to the donor truck to keep it drivable.
Spent another 8 or 10 hours in the shop on Thursday and Saturday. The OME springs that came off the parts truck were looking a bit haggard with flaking powder coat and surface rust, so decided to paint the front springs to see how they'd clean up. I'm curious to see how the paint holds up over time. Prepped them as best I could with a steel wire brush, red Scotchbrite pad, degreaser, self-etching primer, and then epoxy paint, but I think I could've used a more aggressive wire brush to take off more of the flaky powder coat. But they turned out okay, and it was a good learning process.
With etching primer before black epoxy paint:
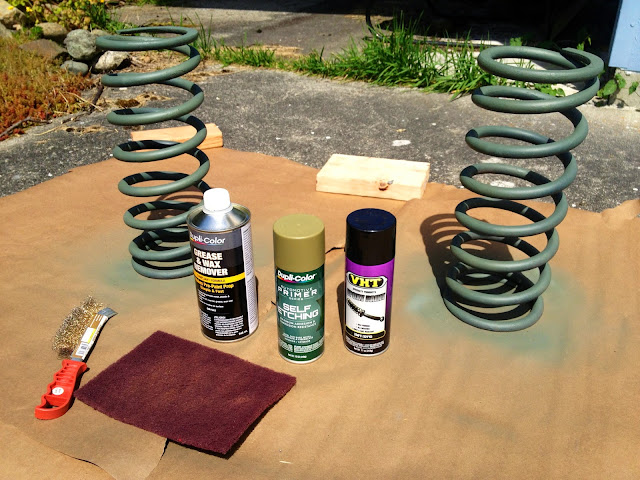
The front OME springs didn't have any label on them, but the rears did: OME-762, which corresponds to HD springs, just as I expected.
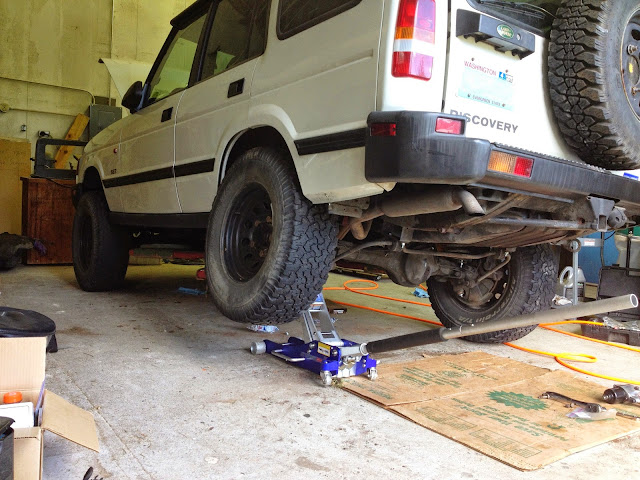
Springs and shocks being removed from the parts truck:
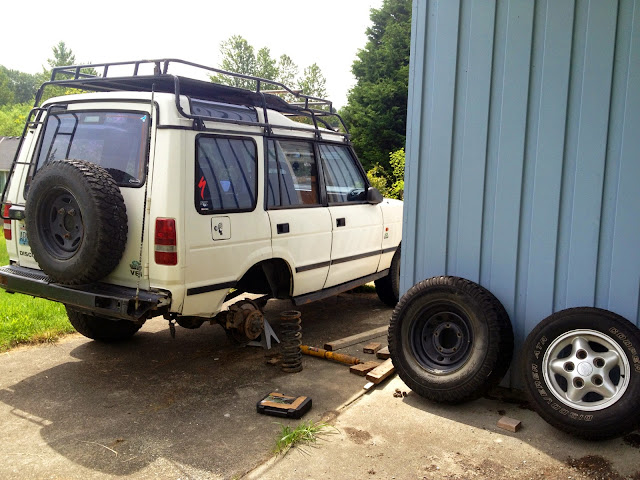
Hoping to wrap up the suspension swap over to the ’99 after work today. Rented a spring compressor from NAPA to make the job a little easier.
For the time being, I’m also moving the black steel wheels and 265/75r16 BFG A/Ts from the parts truck over to the ’99 until I can decide on which tires to mount to the Wolf wheels I picked up here in the ExPo classifieds. Just need to verify I have enough wheel well clearance so I don’t mangle any body panels with the temporary 265/75’s.
Also swapped the fuel tank on Saturday. The original tank had a leak when full, apparently a common ailment for the Disco plastic tanks. The need to empty my fuel tank gave me an excuse to pick up a couple 10L Wavian cans at my new local overland store, MULE Expedition Outfitters! Thanks, Dana and Joe! And thanks to my friends in the photos here for assisting with Saturday’s projects. The fuel tank swap would’ve been a quick and easy job, except for the fact that the mounting bolt for the rear hydraulic step interfered with dropping the tank. The bolt was seized in the frame mount, which resulted in shearing the bolt head off while attempting to extract it. Out came the angle grinder to finish the step removal. It was in bad shape and I didn’t plan on keeping it anyway.
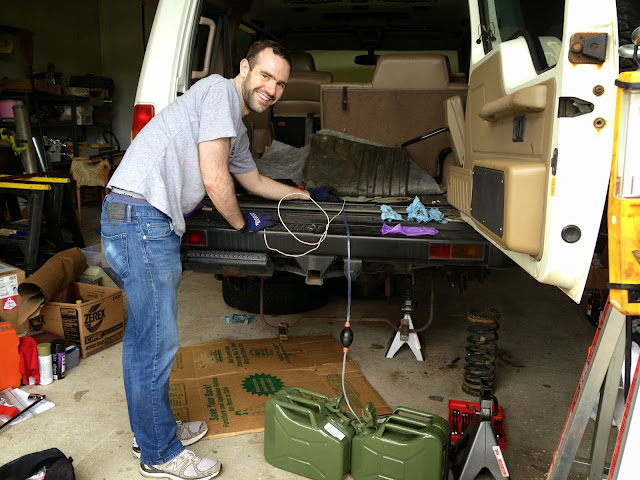

Having accomplished all that we had set out to do despite a few hurdles along the way, Saturday ended with grins. Hoping for a similar outcome after work today as I try to wrap up the suspension install and some other odds and ends.

Spent another 8 or 10 hours in the shop on Thursday and Saturday. The OME springs that came off the parts truck were looking a bit haggard with flaking powder coat and surface rust, so decided to paint the front springs to see how they'd clean up. I'm curious to see how the paint holds up over time. Prepped them as best I could with a steel wire brush, red Scotchbrite pad, degreaser, self-etching primer, and then epoxy paint, but I think I could've used a more aggressive wire brush to take off more of the flaky powder coat. But they turned out okay, and it was a good learning process.
With etching primer before black epoxy paint:
The front OME springs didn't have any label on them, but the rears did: OME-762, which corresponds to HD springs, just as I expected.
Springs and shocks being removed from the parts truck:
Hoping to wrap up the suspension swap over to the ’99 after work today. Rented a spring compressor from NAPA to make the job a little easier.
For the time being, I’m also moving the black steel wheels and 265/75r16 BFG A/Ts from the parts truck over to the ’99 until I can decide on which tires to mount to the Wolf wheels I picked up here in the ExPo classifieds. Just need to verify I have enough wheel well clearance so I don’t mangle any body panels with the temporary 265/75’s.
Also swapped the fuel tank on Saturday. The original tank had a leak when full, apparently a common ailment for the Disco plastic tanks. The need to empty my fuel tank gave me an excuse to pick up a couple 10L Wavian cans at my new local overland store, MULE Expedition Outfitters! Thanks, Dana and Joe! And thanks to my friends in the photos here for assisting with Saturday’s projects. The fuel tank swap would’ve been a quick and easy job, except for the fact that the mounting bolt for the rear hydraulic step interfered with dropping the tank. The bolt was seized in the frame mount, which resulted in shearing the bolt head off while attempting to extract it. Out came the angle grinder to finish the step removal. It was in bad shape and I didn’t plan on keeping it anyway.
Having accomplished all that we had set out to do despite a few hurdles along the way, Saturday ended with grins. Hoping for a similar outcome after work today as I try to wrap up the suspension install and some other odds and ends.
PETER PETRAKIEV
Adventurer
.....A bit more work involved in cleaning up the parts, but that's part of the fun of it.
I liked it alot, .... success in building a the "toy".
")
NW40
Explorer
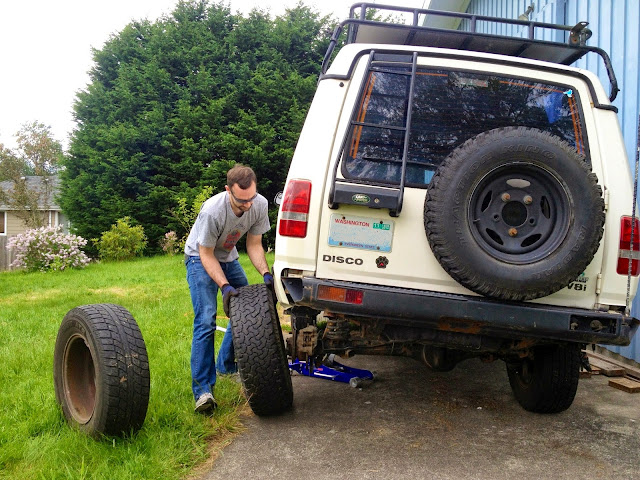
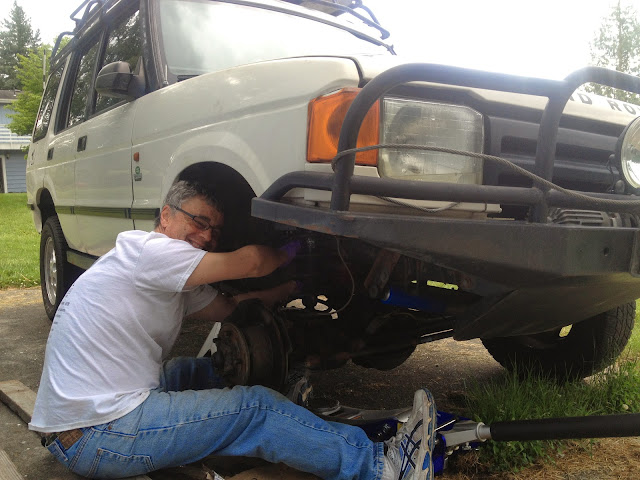
Haven't been keeping up with updates to my build thread, but that doesn't mean I haven't made progress! With the help of my father-in-law, shown here wrenching on the parts truck, we wrapped up the suspension swap a few weeks ago.
Did a simple tire/fender clearance check once the OME HD kit and 265/75's were installed, and we decided it would be fine for street driving until I can get some 245/75's and do any necessary trimming.

As we pulled out of the garage, we noticed the front tires rubbed the bumper when in a tight turn, so did some quick bumper trimming before hitting the road. You can't even tell what we trimmed without me pointing it out. Looks great. And regardless, the bumper will be removed in favor of a steel bumper, probably the Safari Gard that's currently on the parts truck.
Up to this point, I'd been working in my friend's spacious shop for several weeks, so was relieved to get both trucks back on the ground and driving home, giving him back his shop space. Other than some steering wander due to worn ball joints, the '99 drove great with the lift. I'm very happy with the stiffness of the suspension, and haven't heard any propshaft clunking. The parts truck, on the other hand, made a slight driveline grinding noise on the drive back to my place, and within a half-mile of reaching my house, I heard a loud clang and the metal-on-metal grinding noise became a whole lot worse. Stopped to inspect a couple times during the short drive, but couldn't see anything obvious. I'm curious if the truck had a lengthened propshaft to accommodate the OME lift, and upon swapping out the lift for stock suspension, was somehow compressing the propshaft joints. I haven't had time to investigate yet, but I'm open to your speculation. Only thing I've messed with on the parts truck so far is suspension. It would be nice to keep it drivable.
Did a simple tire/fender clearance check once the OME HD kit and 265/75's were installed, and we decided it would be fine for street driving until I can get some 245/75's and do any necessary trimming.
As we pulled out of the garage, we noticed the front tires rubbed the bumper when in a tight turn, so did some quick bumper trimming before hitting the road. You can't even tell what we trimmed without me pointing it out. Looks great. And regardless, the bumper will be removed in favor of a steel bumper, probably the Safari Gard that's currently on the parts truck.
Up to this point, I'd been working in my friend's spacious shop for several weeks, so was relieved to get both trucks back on the ground and driving home, giving him back his shop space. Other than some steering wander due to worn ball joints, the '99 drove great with the lift. I'm very happy with the stiffness of the suspension, and haven't heard any propshaft clunking. The parts truck, on the other hand, made a slight driveline grinding noise on the drive back to my place, and within a half-mile of reaching my house, I heard a loud clang and the metal-on-metal grinding noise became a whole lot worse. Stopped to inspect a couple times during the short drive, but couldn't see anything obvious. I'm curious if the truck had a lengthened propshaft to accommodate the OME lift, and upon swapping out the lift for stock suspension, was somehow compressing the propshaft joints. I haven't had time to investigate yet, but I'm open to your speculation. Only thing I've messed with on the parts truck so far is suspension. It would be nice to keep it drivable.
NW40
Explorer
A couple weekends later, with my wife and kids out of town, I hit the road for the Key Peninsula on the Puget Sound, camping by night at Penrose Point State Park with some friends, and wrenching on the truck by day with Brian at Defenders Northwest. It was my first camping trip with the Disco, and to keep things simple, I removed half of the rear bench seat and slept in the back of the truck rather than bother with a tent. Worked well for my 5'7" height, although i could've used just another 1 or 2 inches to fully stretch out. Removing the rear door pocket will probably make things just about perfect for solo camping in the truck.

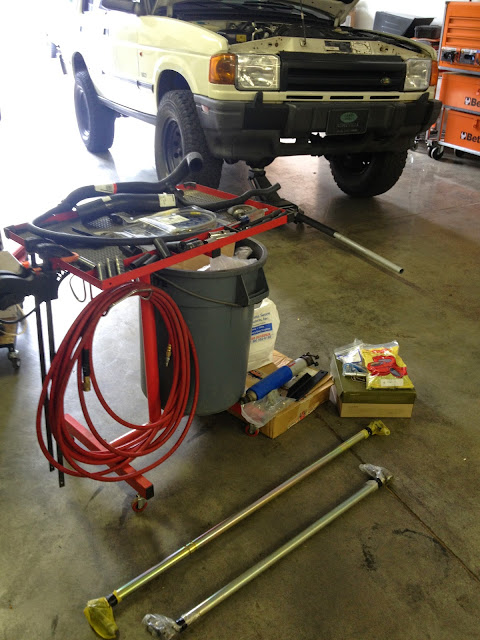
I had a full weekend of work to tackle at DefendersNW, and was really looking forward to getting my hands dirty and learning more about my truck with Brian's helpful instruction. The task list included:
Parts laid out, ready for install:
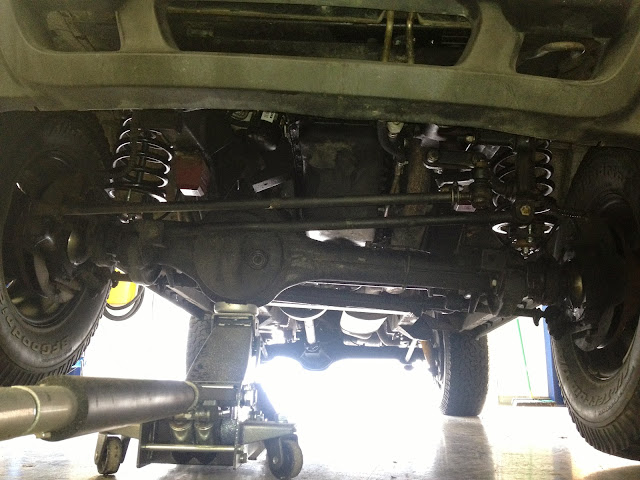
A shot I took of the undercarriage before removing the stock steering linkage and relocating the steering damper (sorry, forgot to take an "after" photo):
Check out how beefy the TerraFirma HD steering rod is compared to the stock rod. The (blurry) photo doesn't do it justice:

The brake lines proved to be one of the most time consuming jobs, as the stock fittings were incredibly challenging to loosen. After much penetrating oil, torching, and some four-letter words, we got the old lines off, the steel-braided lines on, and the system bled. As boring as a photo of a new brake line might be, I've got to show a photo for all our efforts (and you can see the freshly installed HD steering linkage as well as the steering damper relocation bracket waiting for the damper):

I will say that the Harbor Freight pneumatic brake fluid bleeder kit (HF Part 92924) is awesome. Makes it a simple, quick, one-man job.
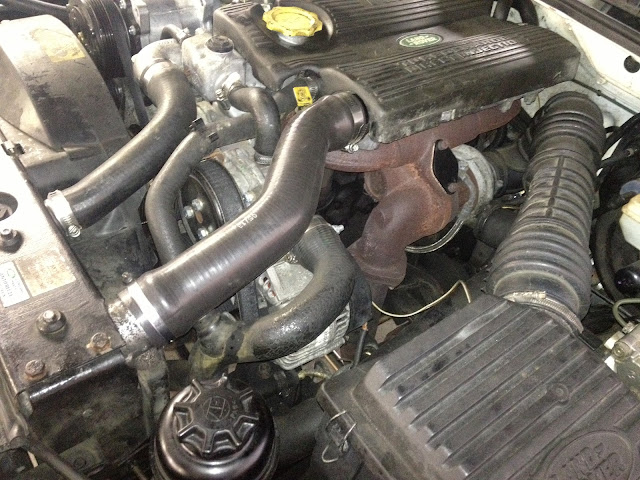
And finally, here's before and after photos of the EGR delete. Further simplifies an already simple engine bay:
Before:

After:
Other than being sore from laying on concrete by day and sleeping on a 1" pad in the back of my truck at night, it was an awesome, productive, educational weekend, bringing the truck several steps closer to where I want it to be.
Upon returning back to Seattle, I took care of a couple more items:
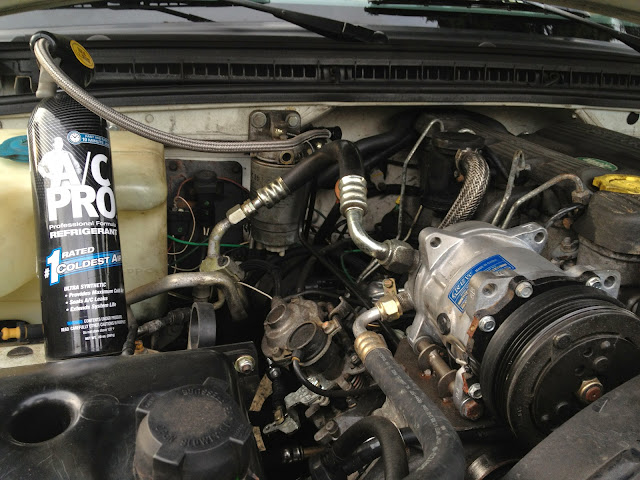
Recharged the A/C, which hadn't blown cold since I bought the truck. It's held its charge for a couple weeks now, which sure has been nice:
Bought new tires!
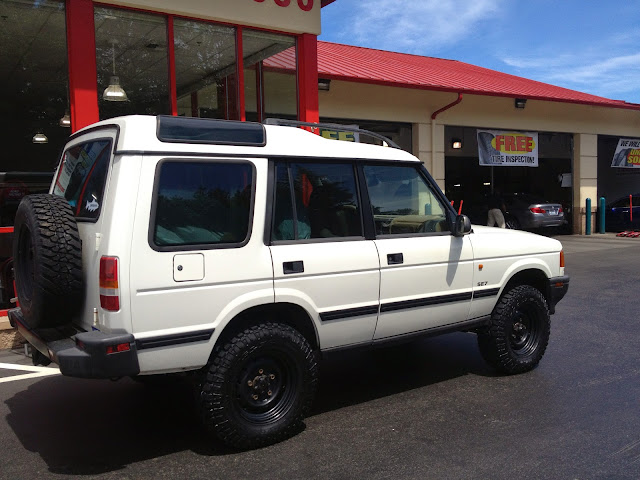
Had been holding out for a nice used set to pop up on Craigslist, but nothing was turning up in my desired size and I couldn't wait any longer. Went with 245/75r16 Goodyear Wrangler Duratracs in Load Range E, mounted up to a set of Land Rover Wolf wheels I bought from a fellow Disco owner in the ExPo classifieds. Loving how the combo looks, quite happy with how they ride, and can't wait to play in the dirt with them. However, I'm not noticing much or any increase in off-the-line performance that I was expecting (and hoping for) when dropping down in tire size. Oh well. It's not unbearable. Interested to see if my fuel mileage changes. I averaged 25-26mpg in stock Disco form (was told up to 30mpg on long road trips), and 20mpg with the OME HD lift and 265/75 well-worn BFG A/Ts on aftermarket steel wheels.
I had a full weekend of work to tackle at DefendersNW, and was really looking forward to getting my hands dirty and learning more about my truck with Brian's helpful instruction. The task list included:
- Replace the aging stock rubber brake lines with steel-braided extended lines to accommodate the 2"+ lift
- Replace the aging lower radiator hose
- Install brass radiator relief plug
- Replace the stock steering rod, drag link, and worn ball joints with TerraFirma Heavy Duty assemblies (these rods are beefy!)
- Relocate steering damper with relocation bracket off parts truck
- Blank the EGR takeoff and replace the upper intercooler pipe with a 1-piece silicone hose
- Resolve the recent issue of why my brake lights were always on (turns out my brake pedal switch had fallen out of its mounting hole)
- Blow out tranny breather tube to whittle away at causes for my transmission dipstick to pop out of the dipstick sleeve. (Most likely cause is dipstick handle is missing one tab that grips the sleeve to hold it in, and it simply vibrates out. I need to replace the dipstick.)
Parts laid out, ready for install:
A shot I took of the undercarriage before removing the stock steering linkage and relocating the steering damper (sorry, forgot to take an "after" photo):
Check out how beefy the TerraFirma HD steering rod is compared to the stock rod. The (blurry) photo doesn't do it justice:
The brake lines proved to be one of the most time consuming jobs, as the stock fittings were incredibly challenging to loosen. After much penetrating oil, torching, and some four-letter words, we got the old lines off, the steel-braided lines on, and the system bled. As boring as a photo of a new brake line might be, I've got to show a photo for all our efforts (and you can see the freshly installed HD steering linkage as well as the steering damper relocation bracket waiting for the damper):
I will say that the Harbor Freight pneumatic brake fluid bleeder kit (HF Part 92924) is awesome. Makes it a simple, quick, one-man job.
And finally, here's before and after photos of the EGR delete. Further simplifies an already simple engine bay:
Before:
After:
Other than being sore from laying on concrete by day and sleeping on a 1" pad in the back of my truck at night, it was an awesome, productive, educational weekend, bringing the truck several steps closer to where I want it to be.
Upon returning back to Seattle, I took care of a couple more items:
Recharged the A/C, which hadn't blown cold since I bought the truck. It's held its charge for a couple weeks now, which sure has been nice:
Bought new tires!
Had been holding out for a nice used set to pop up on Craigslist, but nothing was turning up in my desired size and I couldn't wait any longer. Went with 245/75r16 Goodyear Wrangler Duratracs in Load Range E, mounted up to a set of Land Rover Wolf wheels I bought from a fellow Disco owner in the ExPo classifieds. Loving how the combo looks, quite happy with how they ride, and can't wait to play in the dirt with them. However, I'm not noticing much or any increase in off-the-line performance that I was expecting (and hoping for) when dropping down in tire size. Oh well. It's not unbearable. Interested to see if my fuel mileage changes. I averaged 25-26mpg in stock Disco form (was told up to 30mpg on long road trips), and 20mpg with the OME HD lift and 265/75 well-worn BFG A/Ts on aftermarket steel wheels.
Last edited:
NW40
Explorer
Thanks, Brad! Hope you're doing well!
I've been tracking mileage with the Gas Cubby app on my iPhone. Mileage with the Wolf wheels and Duratracs has been consistently between 19-20mpg with regular commuting to work (20 miles roundtrip of freeway driving at 35-60mph) and around town on the weekends. Longer road trips (like Seattle to Portland) cruising at higher speeds of 65-70mph gives me 18.5mpg. All those numbers include a Highlander roof rack and massive cargo box up top. The rack and cargo box don't seem to change my mpg much, surprisingly. Maybe I'd eek out another 0.5mpg on longer, 70mph road trips. Not sure. Slowing down to 55-60mph would certainly help. And maybe all those mpg numbers are 5% better than listed due to the odometer error with the larger tires?
I've done a few more things to the truck recently. I'll try to make another post soon.
DoKarider16
Observer
I have a 93 Range Rover Classic with a 300tdi in it and the same size Duratracs that you just put on. I am getting about 19 around town and get about 22 on highway trips. The best I have seen is 24mpg and that has popped up on a few random long trips. I do have a Baja Rack on it all the time. I think I recognize your post from over on NW Overland. I am out an hour east of Portland Oregon. At some point we should try and get all of the NW TDI's together and swap stories and maintenance/performance tips.
This looks like a sweet project. Can't wait to see how it progresses.
the other Craig (from NW Overland)
This looks like a sweet project. Can't wait to see how it progresses.
the other Craig (from NW Overland)
NW40
Explorer
Hey Craig! Not sure how I missed your post here. Yes, I recognize you from NWOL. I had hoped to meet you at the get-together at DasMule in Issaquah, WA (you were there, right?), but I couldn't stay long and didn't get the chance to say hi. Was it your dad that has a Disco 300tdi? I chatted with him for a few minutes before I had to leave.
Being that you live in White Salmon, you probably know southern WA/northern OR pretty well, eh? I'm planning on heading to the WA/OR border this weekend for some remote camping with my wife and a couple friends. Any chance you have recommendations for a forest road and dispersed camping that's worthwhile and within 1-1.5 hours north or east of Portland? Was originally thinking of heading to Big Lava Bed/South Prairie just north of Carson, WA, but I don't think we'll make it that far Friday night. Hence I'm looking for a campsite earlier enroute, and then we'll likely continue the journey to South Prairie on Saturday. Thanks for any suggestions you might have! And have you ever been to South Prairie?
-Chad
NW40
Explorer
Time for an update to the thread...much has happened in the last 8 months on all fronts: fixes, mods, and trips! I'll make a renewed effort to make a post or two every week to try to catch up, probably in no particular order. Some mundane stuff, some exciting stuff. And some of you might recognize the now past trip reports that I've published elsewhere, but I'd like to keep ExPo up to date. Warning: lots of photos ahead! So here it goes, starting with the trip I was planning last September...
Big Lava Bed Trip Report: Rivers, Caves, and Disappearing Lakes - September 2014
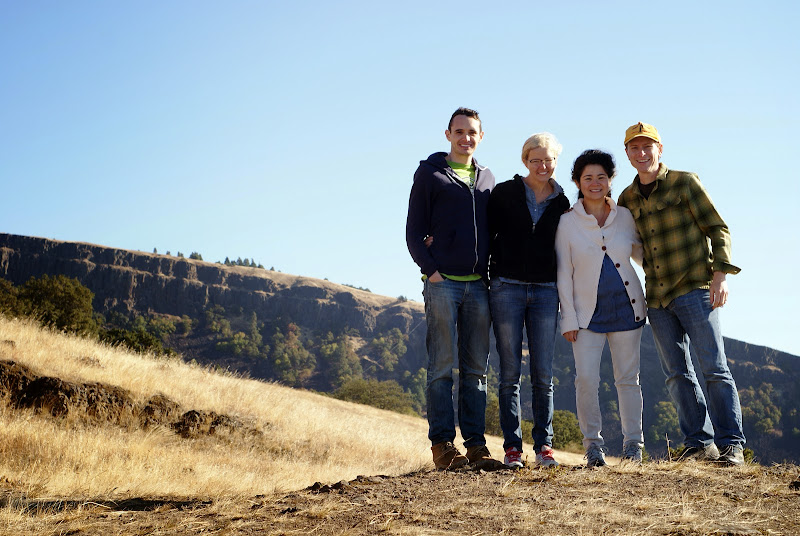
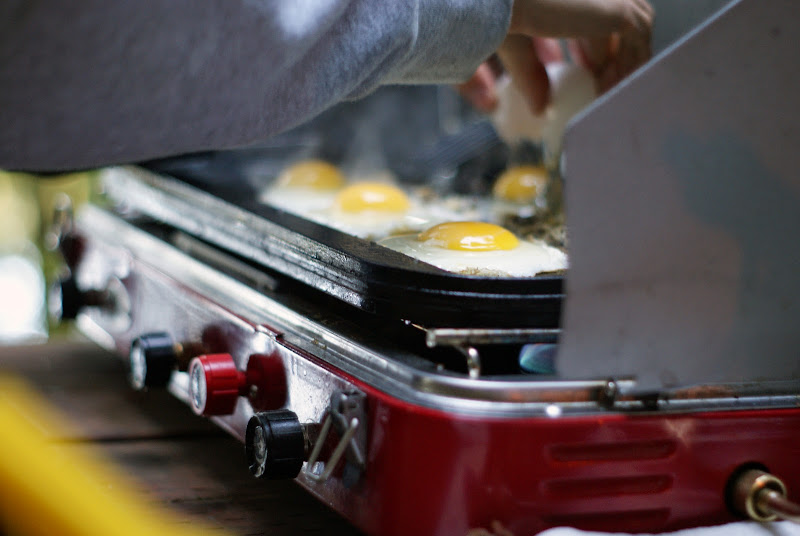
We departed after work on a Friday, dropping off our kids at my parents’ place on the way out of town. Up until Thursday night, we didn’t know where we were going. For months I’ve wanted to tour around Big Lava Bed near the WA/OR border, but was sure we wouldn’t make it that far Friday night, so started thinking about other options. Maybe my default choice, Gallagher Head Lake. Some recent NWOL trip reports by Cascade_Wanderer and pasty63 had also piqued our interest: Harts Pass and Rat Trap Pass. Or maybe even the Tillamook State Forest.
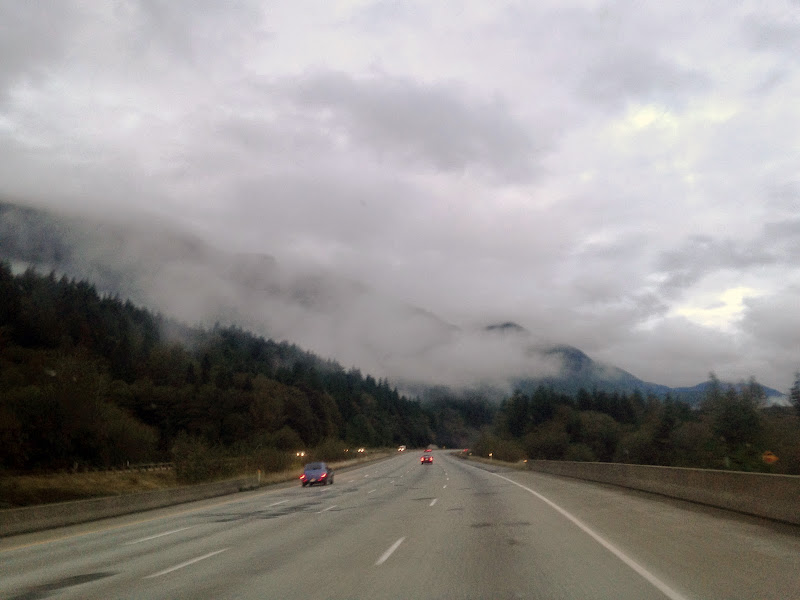
But by Thursday night, I couldn’t resist the unknown of Big Lava Bed and some other intriguing sites nearby. That intrigue, combined with a campsite found by NWOL member BradleyC on the Columbia River that I thought would be within a reasonable Friday night’s drive, and which would put us within striking distance to Big Lava Bed on Saturday morning, settled our plans. We decided to drive out I-90E to I-82E/US-97S to cover some ground we’d never traveled. The low clouds made us question what weather we were in for, but this was the last we’d see of a questionable forecast.
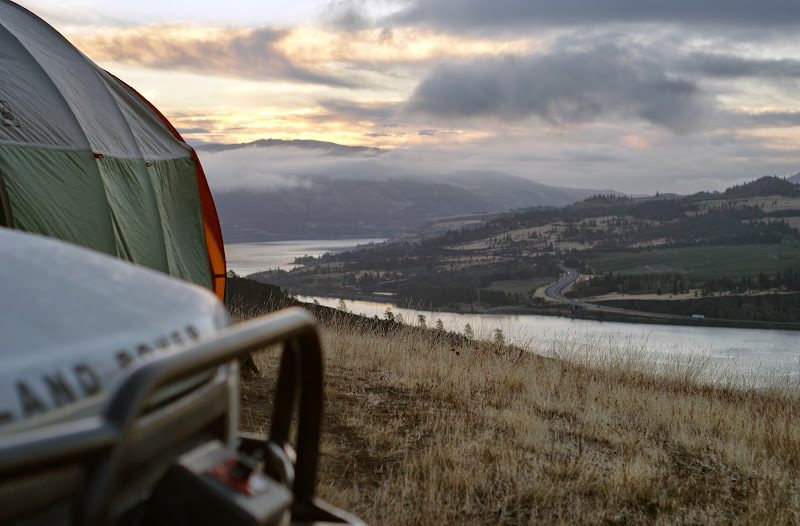
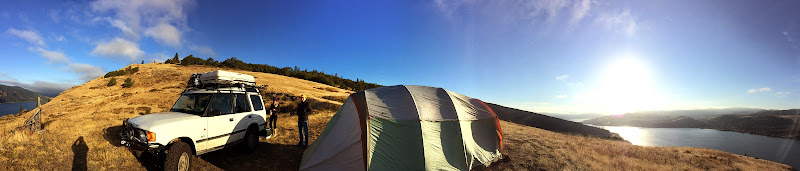
What I didn’t anticipate were the multiple passes and surprisingly mountainous terrain east of the Cascades. Beautiful, yes, but oh-so-slow in my fully-laden turbo diesel Discovery. What should’ve taken us 4.5 hours took us 6, and shortly after midnight, in complete darkness, we rolled onto the pad of shallow dirt and mostly rock that we would call camp. We fumbled around setting up our tent with a stiff breeze and stake-unfriendly ground, and finally crashed at 1AM.
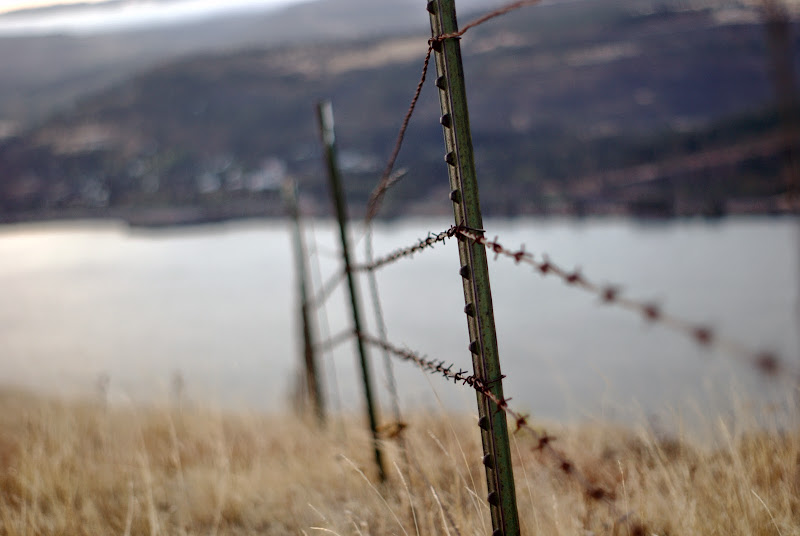
The picture we awoke to at sunrise quickly erased the foggy memory of the night before. Vast stretches of golden rolling hills, sheer cliffs, and the massive Columbia River all coming to life with the rising sun. None of which we could fully comprehend in the blackness just hours before.


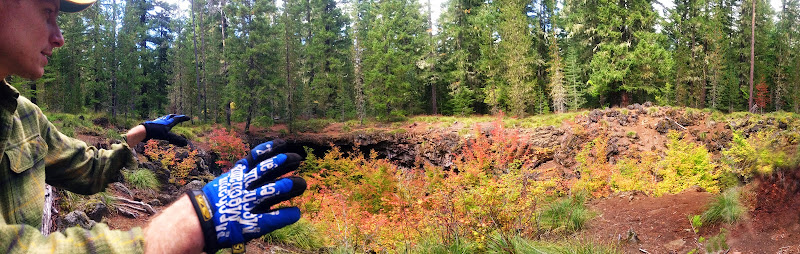
We packed up camp, headed into the small town of White Salmon, WA for breakfast and a Wi-Fi connection (we still had to download maps!), and made our way north towards what I’d like to think is one of the best kept yet easily accessible secrets of the Gifford Pinchot National Forest: an unmarked yet spectacular lava tube that doesn’t seem to get much press. Thanks to my friend and former spelunker, Rich, for sending me in that direction. Granted, I’m relatively new to this Northwest overlanding/exploratory lifestyle, so maybe 30-50 foot diameter caves that measure a mile long are old hat to y’all. But we were impressed!

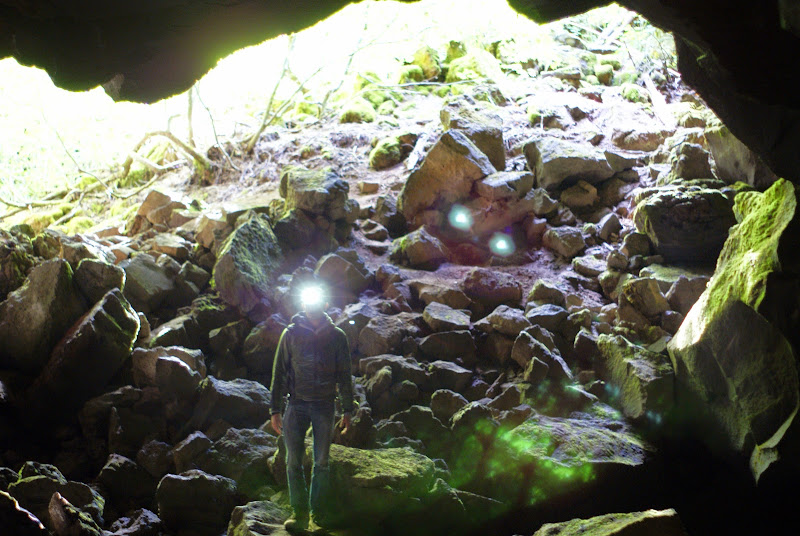
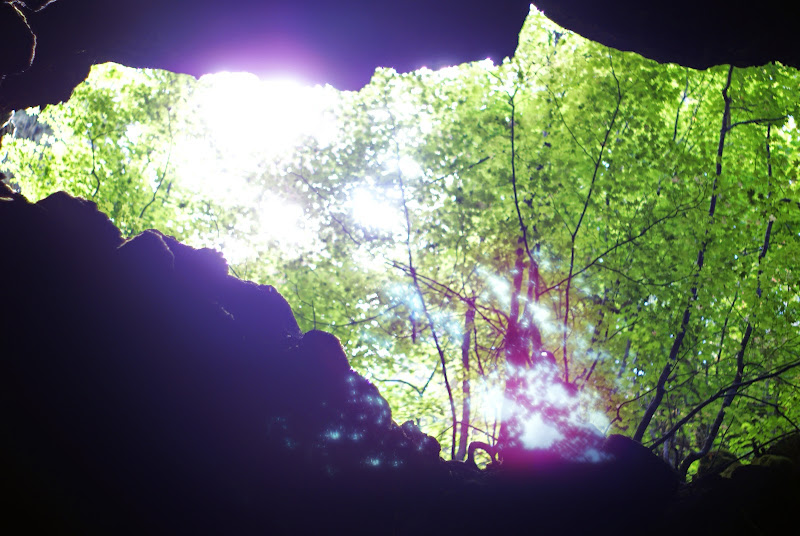
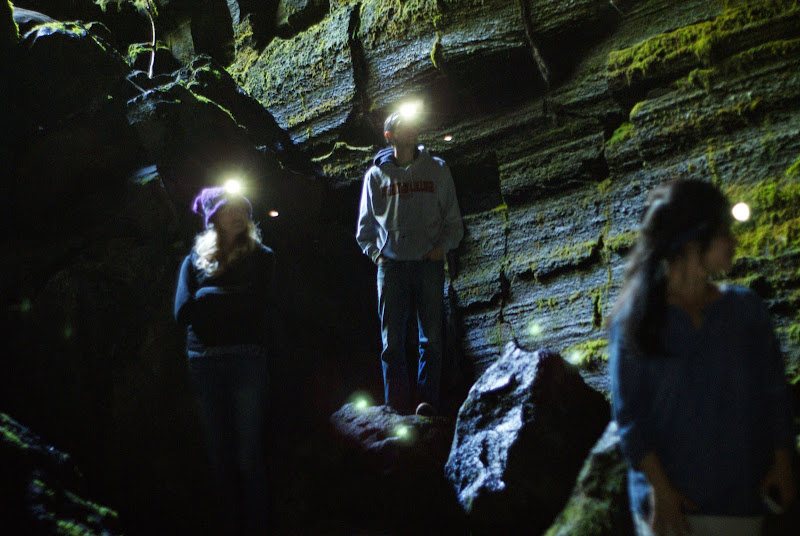
Once parked to the side of a dirt forest road 1.5 hours northwest of White Salmon, we donned our headlamps and jackets, walked 100 yards along an unmarked trail that skirts the edge of a massive sink hole filled with fall colors, and scrambled down 30 feet of boulders into a collapsed section of the lava tube. We were in awe at the sheer size of this cavern, yet this was just a sampling of what was ahead. Scrambling through the tube another 100 yards and exiting the cavern at the far end, we found ourselves in another deep sink hole full of vine maple trees with a brilliant display of color, the sink hole walls covered in moss and ferns. At the opposite end of this third sinkhole was another cave entrance, but this one was far more impressive than the first. The mouth of this cave, already 20 or 30 feet below the surface, extended another 60 feet into the earth. Overcoming any remaining apprehension, we slowly scrambled deep into the cool, misty darkness. Photos can’t describe the landscape we saw, because, well, it was too dark for any decent photos with my camera skills. But we hiked and scrambled what seemed like a quarter mile into the cave with no end in sight to the 30 foot ceilings. (It supposedly meanders for roughly 1 mile, with a couple small offshoot caves, before coming to an end.)


Getting hungry, we headed back to the truck to search for a campsite. Making our way around Big Lava Bed (a fantastic and mind-boggling 9000 year old lava flow in southern Washington that can be easily spotted via satellite imagery), we came upon Goose Lake with a National Forest Service campground that was too tranquil to pass up. Not to mention it was getting late, and we had beer-boiled brats to cook up! And best part of this meal is drinking the hot broth on a cold night under the stars. Yeah, it was awesome.


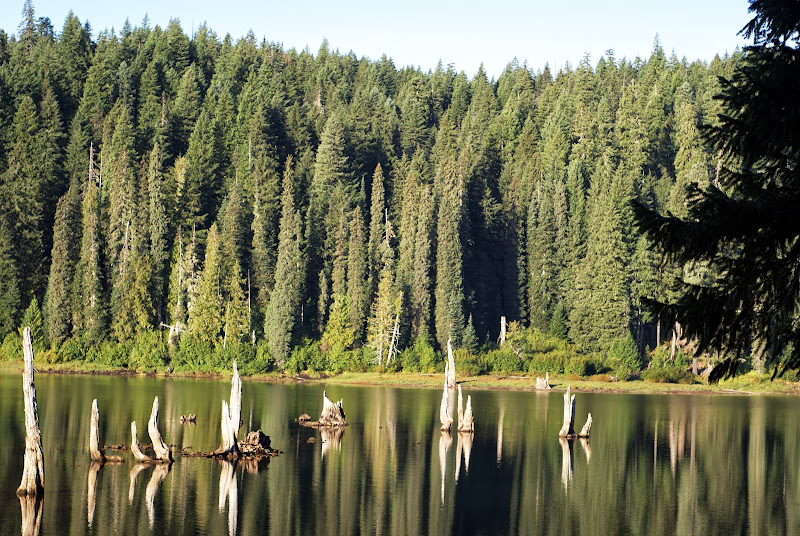
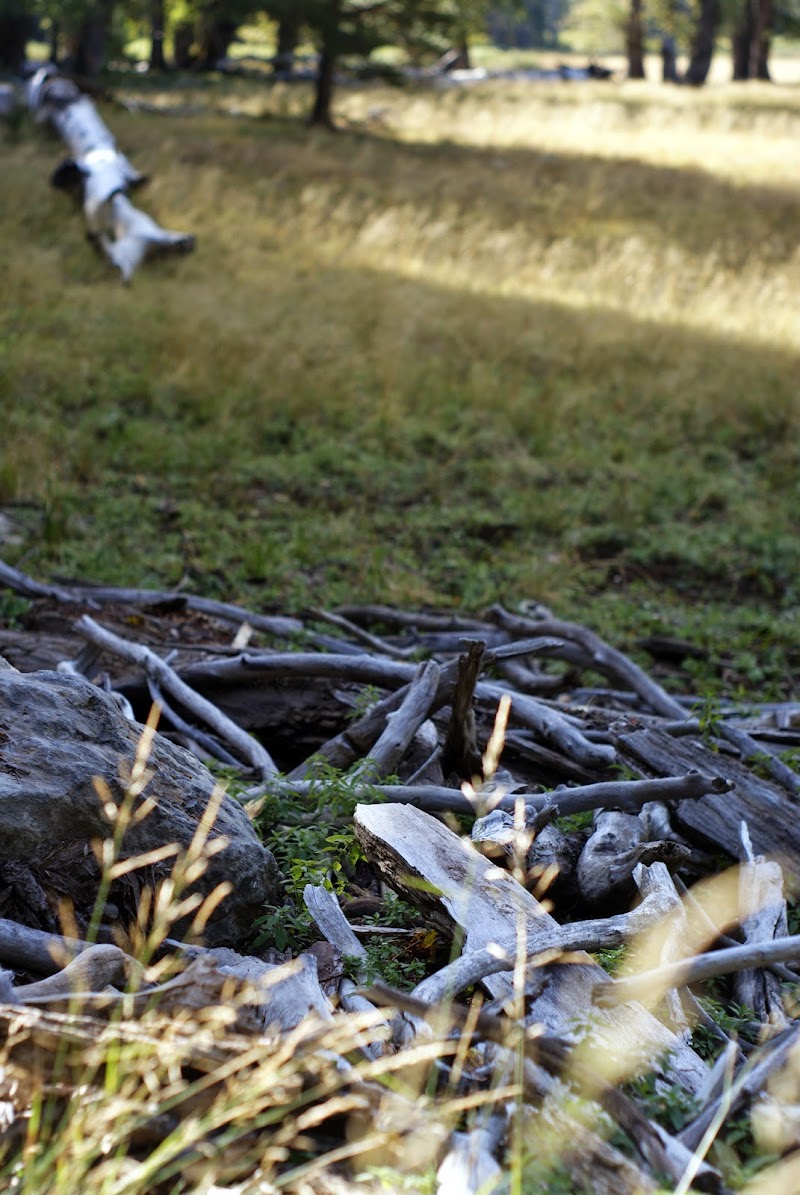
Packed up the next morning and continued clockwise around Big Lava Bed to the site that had lured me to explore this incredible area in the first place: South Prairie, also known as Disappearing Lake. Every winter, it’s believed a lava tube next to the Prairie fills with water and freezes, creating an ice dam. Seasonal streams continue to flow into the prairie, creating an 8-foot deep lake. A few months later, in the spring, the ice dam melts, and the lake drains within a few weeks. I’m fascinated by this stuff.
7-minute Documentary Video
Of course, this time of year, it’s a grassy prairie, but was still worth passing through. We noticed some of the clues which point to its alter ego: driftwood, water lines, and the leaves on the trees seem to only grow starting 6 or 8 feet and above. I’d love to return in the winter and take a canoe out on the lake.

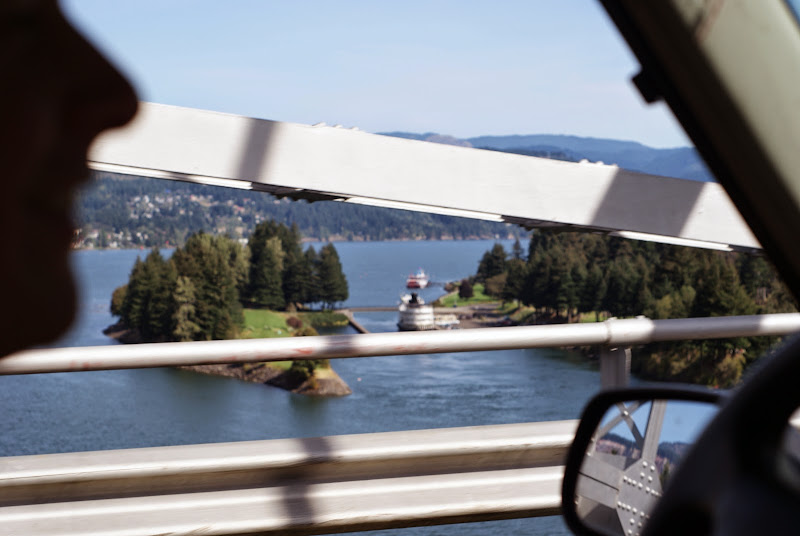
We headed home via Bridge of the Gods, past Multnomah Falls, through Portland for lunch at the unique Elephant Delicatessen, and arriving back in Seattle by nightfall.

Again, the drive took longer than it should have, even on I-5, but a slower pace allows more opportunity to take in the views, right? 20 MPG doesn’t hurt, either.
Big Lava Bed Trip Report: Rivers, Caves, and Disappearing Lakes - September 2014
We departed after work on a Friday, dropping off our kids at my parents’ place on the way out of town. Up until Thursday night, we didn’t know where we were going. For months I’ve wanted to tour around Big Lava Bed near the WA/OR border, but was sure we wouldn’t make it that far Friday night, so started thinking about other options. Maybe my default choice, Gallagher Head Lake. Some recent NWOL trip reports by Cascade_Wanderer and pasty63 had also piqued our interest: Harts Pass and Rat Trap Pass. Or maybe even the Tillamook State Forest.
But by Thursday night, I couldn’t resist the unknown of Big Lava Bed and some other intriguing sites nearby. That intrigue, combined with a campsite found by NWOL member BradleyC on the Columbia River that I thought would be within a reasonable Friday night’s drive, and which would put us within striking distance to Big Lava Bed on Saturday morning, settled our plans. We decided to drive out I-90E to I-82E/US-97S to cover some ground we’d never traveled. The low clouds made us question what weather we were in for, but this was the last we’d see of a questionable forecast.
What I didn’t anticipate were the multiple passes and surprisingly mountainous terrain east of the Cascades. Beautiful, yes, but oh-so-slow in my fully-laden turbo diesel Discovery. What should’ve taken us 4.5 hours took us 6, and shortly after midnight, in complete darkness, we rolled onto the pad of shallow dirt and mostly rock that we would call camp. We fumbled around setting up our tent with a stiff breeze and stake-unfriendly ground, and finally crashed at 1AM.
The picture we awoke to at sunrise quickly erased the foggy memory of the night before. Vast stretches of golden rolling hills, sheer cliffs, and the massive Columbia River all coming to life with the rising sun. None of which we could fully comprehend in the blackness just hours before.
We packed up camp, headed into the small town of White Salmon, WA for breakfast and a Wi-Fi connection (we still had to download maps!), and made our way north towards what I’d like to think is one of the best kept yet easily accessible secrets of the Gifford Pinchot National Forest: an unmarked yet spectacular lava tube that doesn’t seem to get much press. Thanks to my friend and former spelunker, Rich, for sending me in that direction. Granted, I’m relatively new to this Northwest overlanding/exploratory lifestyle, so maybe 30-50 foot diameter caves that measure a mile long are old hat to y’all. But we were impressed!
Once parked to the side of a dirt forest road 1.5 hours northwest of White Salmon, we donned our headlamps and jackets, walked 100 yards along an unmarked trail that skirts the edge of a massive sink hole filled with fall colors, and scrambled down 30 feet of boulders into a collapsed section of the lava tube. We were in awe at the sheer size of this cavern, yet this was just a sampling of what was ahead. Scrambling through the tube another 100 yards and exiting the cavern at the far end, we found ourselves in another deep sink hole full of vine maple trees with a brilliant display of color, the sink hole walls covered in moss and ferns. At the opposite end of this third sinkhole was another cave entrance, but this one was far more impressive than the first. The mouth of this cave, already 20 or 30 feet below the surface, extended another 60 feet into the earth. Overcoming any remaining apprehension, we slowly scrambled deep into the cool, misty darkness. Photos can’t describe the landscape we saw, because, well, it was too dark for any decent photos with my camera skills. But we hiked and scrambled what seemed like a quarter mile into the cave with no end in sight to the 30 foot ceilings. (It supposedly meanders for roughly 1 mile, with a couple small offshoot caves, before coming to an end.)
Getting hungry, we headed back to the truck to search for a campsite. Making our way around Big Lava Bed (a fantastic and mind-boggling 9000 year old lava flow in southern Washington that can be easily spotted via satellite imagery), we came upon Goose Lake with a National Forest Service campground that was too tranquil to pass up. Not to mention it was getting late, and we had beer-boiled brats to cook up! And best part of this meal is drinking the hot broth on a cold night under the stars. Yeah, it was awesome.
Packed up the next morning and continued clockwise around Big Lava Bed to the site that had lured me to explore this incredible area in the first place: South Prairie, also known as Disappearing Lake. Every winter, it’s believed a lava tube next to the Prairie fills with water and freezes, creating an ice dam. Seasonal streams continue to flow into the prairie, creating an 8-foot deep lake. A few months later, in the spring, the ice dam melts, and the lake drains within a few weeks. I’m fascinated by this stuff.
7-minute Documentary Video
Of course, this time of year, it’s a grassy prairie, but was still worth passing through. We noticed some of the clues which point to its alter ego: driftwood, water lines, and the leaves on the trees seem to only grow starting 6 or 8 feet and above. I’d love to return in the winter and take a canoe out on the lake.
We headed home via Bridge of the Gods, past Multnomah Falls, through Portland for lunch at the unique Elephant Delicatessen, and arriving back in Seattle by nightfall.
Again, the drive took longer than it should have, even on I-5, but a slower pace allows more opportunity to take in the views, right? 20 MPG doesn’t hurt, either.
NW40
Explorer
Mod: Rear Cargo Door Panel
Mod: Rear Cargo Door Panel
Having seen so many uses for a rear cargo door panel (tool storage, camp kitchen, quick access med kit, fire extinguisher, etc) I knew I wanted to tackle a similar project. I needed a clean slate to build on. The first step was replacing the stock door panel with something more load-bearing.
Here was the stock panel, complete with cracked door pocket, totally blown subwoofer, and dented up subwoofer grill:

Queue its replacement, the Columbia Overland stainless steel cargo door panel. It's a quality piece, fits beautifully, and provided the clean slate I was looking for. When I first attempted contact with the company, I wasn't even sure they were still in business; I think they had recently changed ownership, were in the middle of a website update, moved to a new office location, and had also moved their manufacturing to a new supplier. (I think all this has since been ironed out.) And in the end, after a couple minor manufacturing delays and generally excellent communication with Simeon, the product was delivered in a tank of a box. Call me a happy customer.

As with any large metal panel, there can be vibration issues, so, as shown in the pic above, I backed the panel with a couple adhesive rubber strips (some weatherstripping I had laying around) where the panel might vibrate against the door structure, and also isolated the stainless button head bolts with rubber washers.


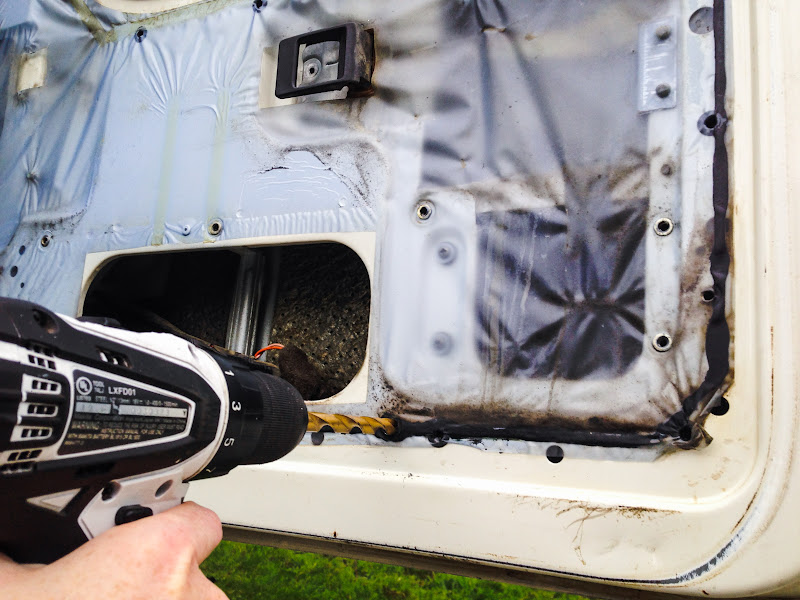
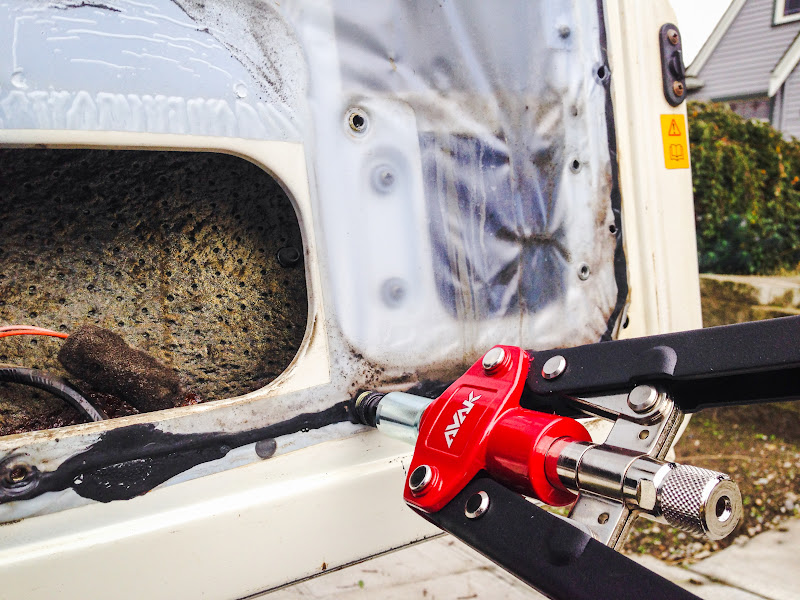
While Columbia Overland supplies some sufficient mounting hardware with the panel, I wanted something a bit more heavy duty (and needed an excuse to try out a new tool!). I drilled out the stock panel mounting locations in the door and installed M6 rivet nuts with my newly acquired and totally awesome rivet nut setter I picked up on Amazon, the AVAK ML100. I chose a larger, high-leverage rivnut tool to allow me the capability to install some M8 rivnuts down the line for my SafariGard skid plate and sliders. It includes mandrels for M4x0.7, M5x0.8, M6x1.0 and M8x1.25, which should cover any application I'll need it for. It even comes in a nice blow-molded case!
It's easy to over-tighten the rivnuts, so after some practice and drilling out a few poorly set rivnuts, the Avak worked like a charm.

A few hours of mild labor on a Saturday afternoon and the install was complete and ready for customization:

Still haven't mounted anything to it, but not for lack of inspiration. More a result of indecision and lack of time. There's plenty of awesome, well-executed ideas here on ExPo and elsewhere. I'm thinking I'll mount my highly recommended and beloved Fiskars X15 axe, a flashlight, another fire extinguisher, possibly a folding table, and a molle panel for a med kit. I love the Maxpedition series of MOLLE bags, like this first aid pouch. Just wish it came in red.
Mod: Rear Cargo Door Panel
Having seen so many uses for a rear cargo door panel (tool storage, camp kitchen, quick access med kit, fire extinguisher, etc) I knew I wanted to tackle a similar project. I needed a clean slate to build on. The first step was replacing the stock door panel with something more load-bearing.
Here was the stock panel, complete with cracked door pocket, totally blown subwoofer, and dented up subwoofer grill:
Queue its replacement, the Columbia Overland stainless steel cargo door panel. It's a quality piece, fits beautifully, and provided the clean slate I was looking for. When I first attempted contact with the company, I wasn't even sure they were still in business; I think they had recently changed ownership, were in the middle of a website update, moved to a new office location, and had also moved their manufacturing to a new supplier. (I think all this has since been ironed out.) And in the end, after a couple minor manufacturing delays and generally excellent communication with Simeon, the product was delivered in a tank of a box. Call me a happy customer.
As with any large metal panel, there can be vibration issues, so, as shown in the pic above, I backed the panel with a couple adhesive rubber strips (some weatherstripping I had laying around) where the panel might vibrate against the door structure, and also isolated the stainless button head bolts with rubber washers.
While Columbia Overland supplies some sufficient mounting hardware with the panel, I wanted something a bit more heavy duty (and needed an excuse to try out a new tool!). I drilled out the stock panel mounting locations in the door and installed M6 rivet nuts with my newly acquired and totally awesome rivet nut setter I picked up on Amazon, the AVAK ML100. I chose a larger, high-leverage rivnut tool to allow me the capability to install some M8 rivnuts down the line for my SafariGard skid plate and sliders. It includes mandrels for M4x0.7, M5x0.8, M6x1.0 and M8x1.25, which should cover any application I'll need it for. It even comes in a nice blow-molded case!
It's easy to over-tighten the rivnuts, so after some practice and drilling out a few poorly set rivnuts, the Avak worked like a charm.
A few hours of mild labor on a Saturday afternoon and the install was complete and ready for customization:
Still haven't mounted anything to it, but not for lack of inspiration. More a result of indecision and lack of time. There's plenty of awesome, well-executed ideas here on ExPo and elsewhere. I'm thinking I'll mount my highly recommended and beloved Fiskars X15 axe, a flashlight, another fire extinguisher, possibly a folding table, and a molle panel for a med kit. I love the Maxpedition series of MOLLE bags, like this first aid pouch. Just wish it came in red.
Last edited:
Ray_G
Explorer
How did I miss this thread? I guess it came on as I was moving and getting into work out here-fantastic truck and great pics in your recent updates. I'm jealous of the clean slate you started with, while I love my D1 and think she is about perfect I have this odd desire to start a new one and go more minimalist-i.e. a 300TDi 5 speed with 245's...alas that isn't in the cards now so I'll just live vicariously through yours.
r-
Ray
r-
Ray
NW40
Explorer
Hi Ray, I've been following your thread on Coyote for quite some time! It's given me some ideas along the way, so thank you. And I love that you get your kids out there with you. I'm starting to do that more and more as my kids get older. Taking my 3yo and 5yo kids on a camping trip to central WA this weekend, in fact.
I'd love a 5-speed in mine as well, but we specifically searched out an Auto so that my wife would be more comfortable driving it. But while the ZF Auto is less effort on- and off-road, the 300Tdi performs better with the R380. And I'd also do well to install a 1.4 LT230 out of a Defender. The 300Tdi looses some oomph when paired up with the 1.2 Disco-spec LT230, auto box (even with diesel gearing/timing), and 245/75 tires. It's certainly drivable as-is (it's both my daily driver and adventure-mobile), but I was surprised at the difference when I drove a friend's manual Defender 300Tdi a couple months ago. Maybe some day I'll have the time and money to swap out at least the transfer case!
I'd love a 5-speed in mine as well, but we specifically searched out an Auto so that my wife would be more comfortable driving it. But while the ZF Auto is less effort on- and off-road, the 300Tdi performs better with the R380. And I'd also do well to install a 1.4 LT230 out of a Defender. The 300Tdi looses some oomph when paired up with the 1.2 Disco-spec LT230, auto box (even with diesel gearing/timing), and 245/75 tires. It's certainly drivable as-is (it's both my daily driver and adventure-mobile), but I was surprised at the difference when I drove a friend's manual Defender 300Tdi a couple months ago. Maybe some day I'll have the time and money to swap out at least the transfer case!
Forum statistics
Members online
- MTNWest
- JRooz
- 00EFJones
- obsidian_chips
- czechmate83
- jterryepp
- Johnny4runner
- RollingTaco
- nckwltn
- sweetsdream
- STREGA
- HokeyRover
- Alwaysstranded
- ChristopherRRSC
- arne
- driveby
- tano
- Sabey
- Stewy910
- gator70
- gallinastrips
- a1gemmel
- sumnrfam
- Pizza37
- Raul
- Czechsix
- hmmwv.explorer
- svmaple
- Savagenut
- sdjeppa
- Rockymountainhunter
- mark5280
- spacecowboy7777
- Marioa2z
- ZONE ZERO
- BigBodyLevi
- njc955
- Todd n Natalie
- Mel.Specs
- N.Penley
- ///KM
- Spencer for Hire
- LordExplorer
- Cmin
- Homer Crimson
- MotoDave
- matttahoe53
- Philbro
- rbaldus
- Gadgetech
Total: 739 (members: 62, guests: 677)