xj storage build

Dazrin

Adventurer
thanks to the top, the drawer can now function as additional counterspace when i'm making up some grub

IMAG0584.jpg

Looks great, but have you considered changing the lower drawer to have a split top? It seems a 60/40 split would let you open the larger half even when using the stove and would add a lot to the convenience. You might need to add a divider to the drawer in order to have the top supported on both sides for a work surface, but IMO it would add a lot of usefulness to that drawer.
 

uber

Observer
that drawer really only has one purpose, as southpier caught on to.. doubt I'll be needing access to those while making lunch ;) haha

but yeah, if the drawer was meant for other items, that would have been a consideration.
 

uber

Observer
speaking of fun stuff.. stick a fork in this thing, because it is done!

for starters, i bit of an oops. the problem with the way i happen to do things (just wing it with zero plans) is that sometimes i forget important things along the way and end up having to rebuild stuff.

when i first made the cubby cover behind the seat, i failed to notice that i didn't have the main box mounted down. when i popped the seat up against it, i assumed it fit because the seat latched shut. after that, i put the piece aside an proceeded with assembly of the rest of the box. once it was all mounted down and put that cover back in, the seat wouldn't latch. the half an inch screwed me. as a temp fix i just unbolted the seat catches and moved them forward that half an inch. bugged the crap outta me, but my kids needed the seat.

well, today i fixed it.. first i cut out and mounted the wings (and cut some leftover rubber mat for the cubby)

IMAG0592.jpg


then i installed some cleats to attach the main insert to. with just a few screws holding it in, it will be easy to remove just in case i have a spill in there

IMAG0597.jpg


then i made some removable wings for the top sides. i was going to hinge them, but decided to keep it simple and just make them floating pieces instead. i did drill thru and install some dowel pegs to keep them lined up with the rest of the top.

IMAG0593.jpg


and here's a final shot of the beast all put together. overall i am extremely happy with how it turned out.

IMAG0594.jpg


on to the next! :thumbup:
 

4RunAmok

Explorer
I love this build, and it made me rethink my own if I ever make another.

Couple items of issue that I see, could be something, could be nothing.

Your drawer faces, being only 1/4" MDF with a dry erase surface, and the large overhangs on the sides of the drawers, I fear those could be subject to nudges of use and crack off. A solution would be to pick up some of that material you used for the locking top on your bottom drawer, screw that into place on the drawer fronts, and then use dry erase laminate glued on over it (added benefit of hiding those screw heads). Stability, and can still use your favorite feature! (My favorite feature is your butane burner drawer, because I have the same burner! :))
 

uber

Observer
I was actually thinking just that the other day when I was putting that counter piece on. they have the same material in 1/4" there, and I can just give them the dimensions on the old fronts and be done. I figure I'll end up doing that later on down the road. not too worried about the screws tho, as I think it gives it a bit of an industrial/rugged look. and they'll match the look of my bolt on quarter armor
 

uber

Observer
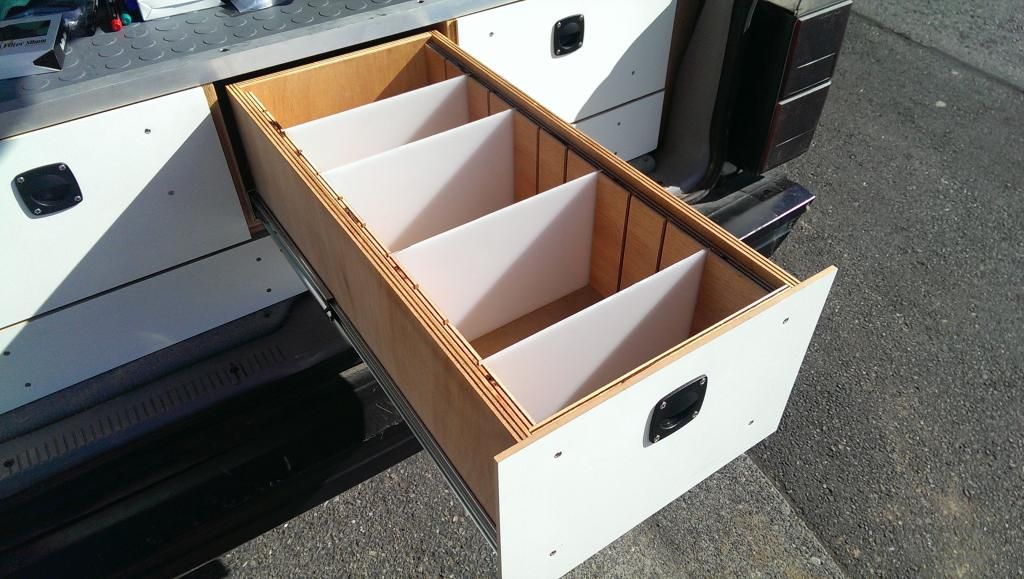
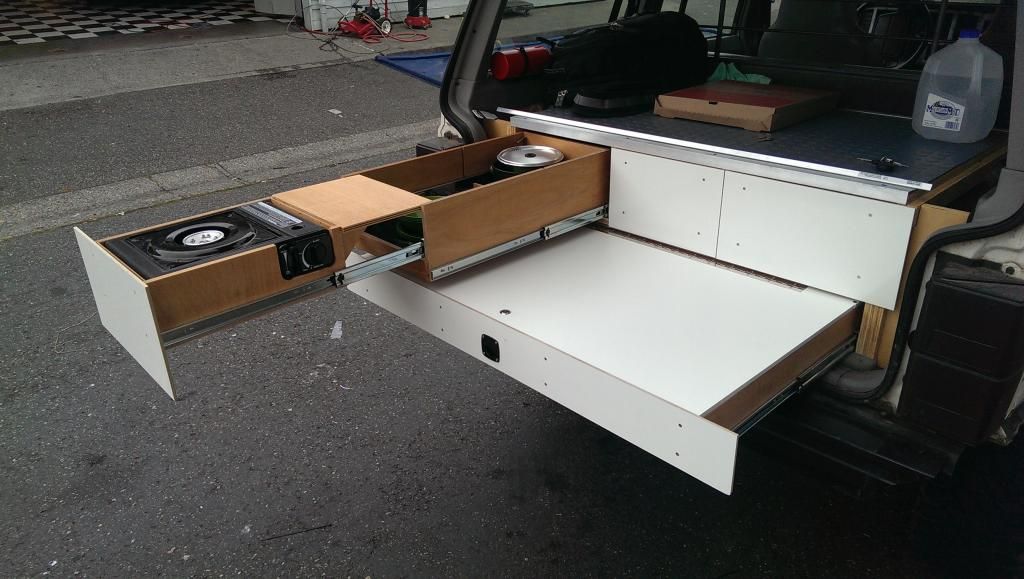
decided to add some adjustable dividers to the center drawer. it's the catch-all drawer, so a bit of organization couldn't hurt.

IMAG0664.jpg


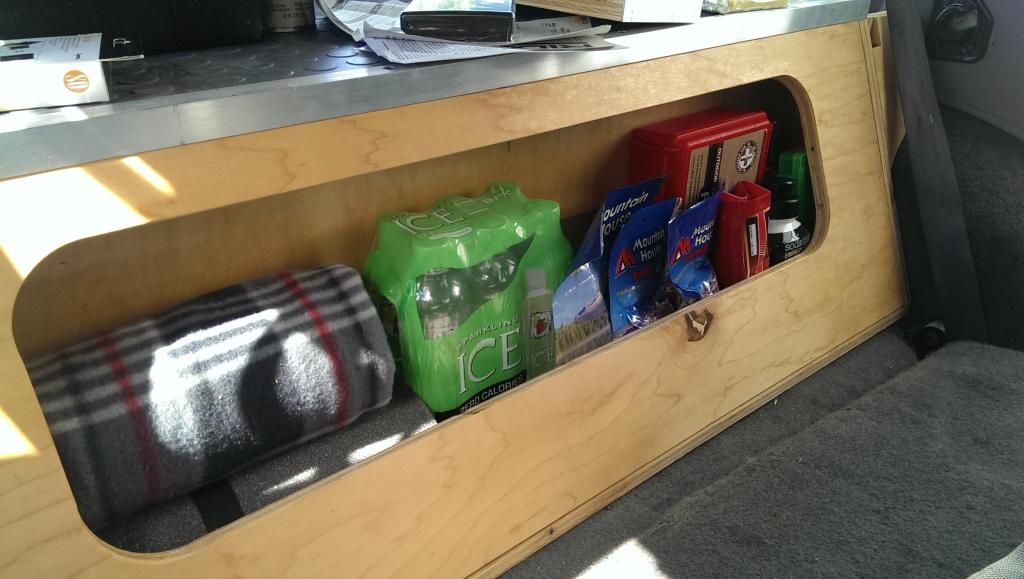
and just because, i figured i'd share my normal load-out. most of this stuff lives in there full time because a) you never know when the need may arise and b) hauling it all in and out is a pain. lol

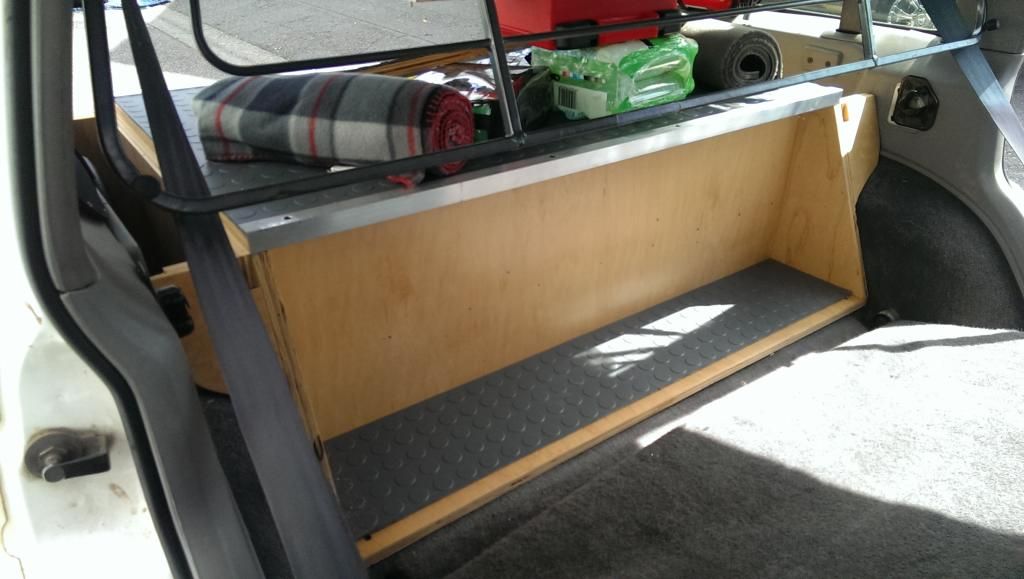
first, behind the seat. blanket, rolled up foam mat, air compressor, first aid kit, 2 cans of butane fuel for the stove, some drinks, freeze dried food, and a package of jerky to snack on

IMAG0659.jpg


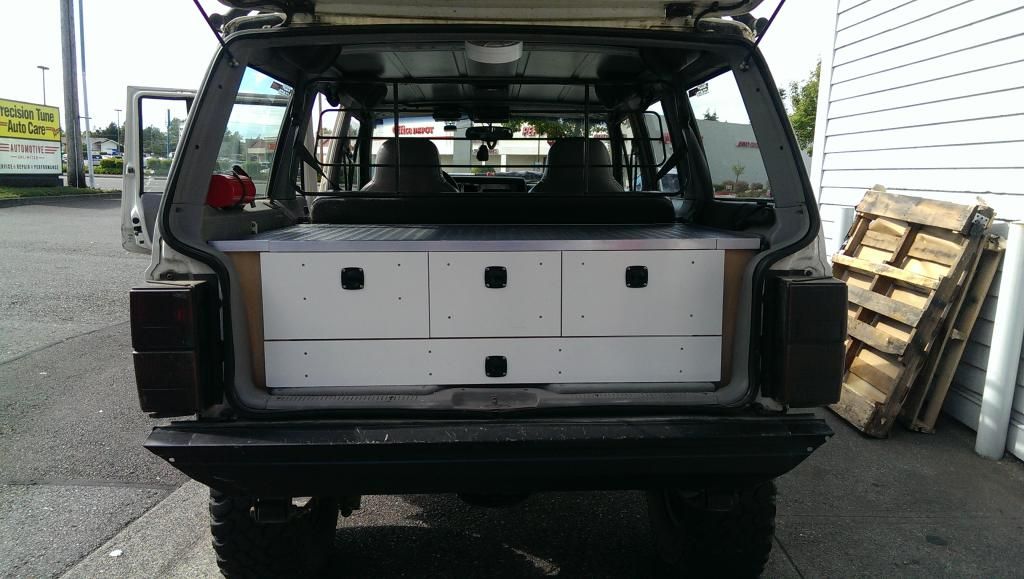
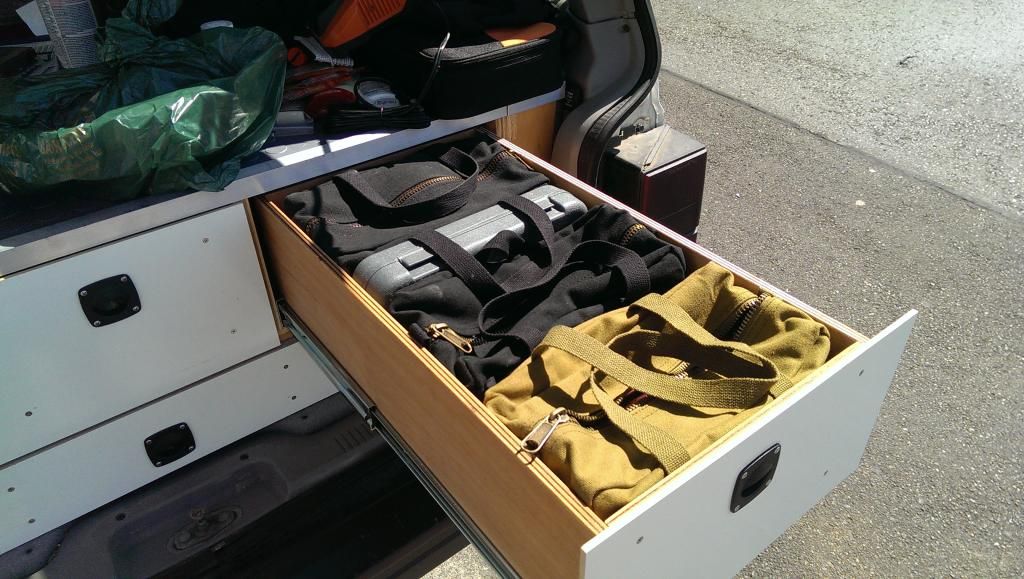
the tool drawer.. bag in the back is screwdrivers, pliers, etc.. then my socket set .. next bag holds wrenches and my oversize sockets for axles and such .. green bag is for brake cleaner, pb blaster, rtv, etc..

IMAG0661.jpg


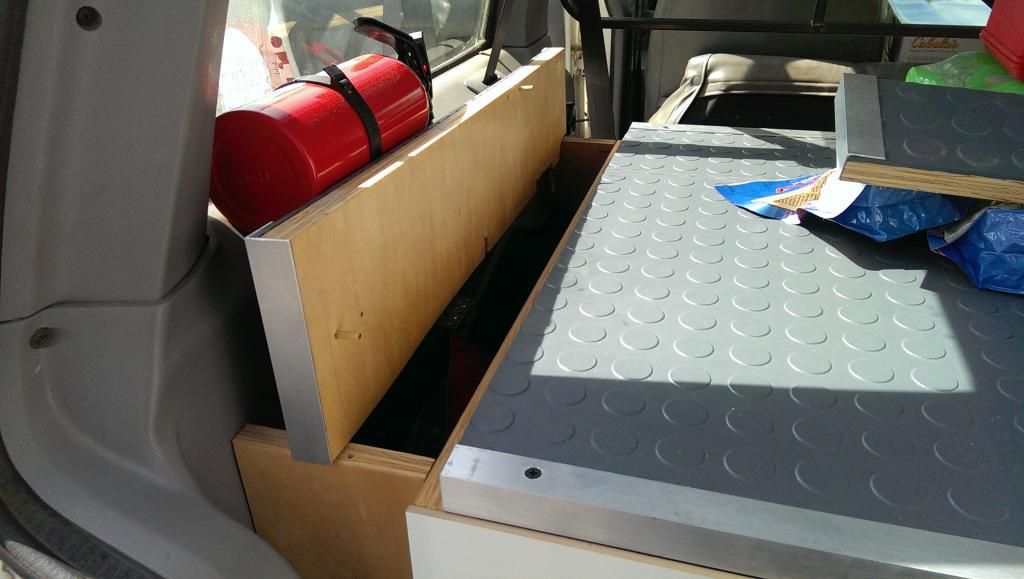
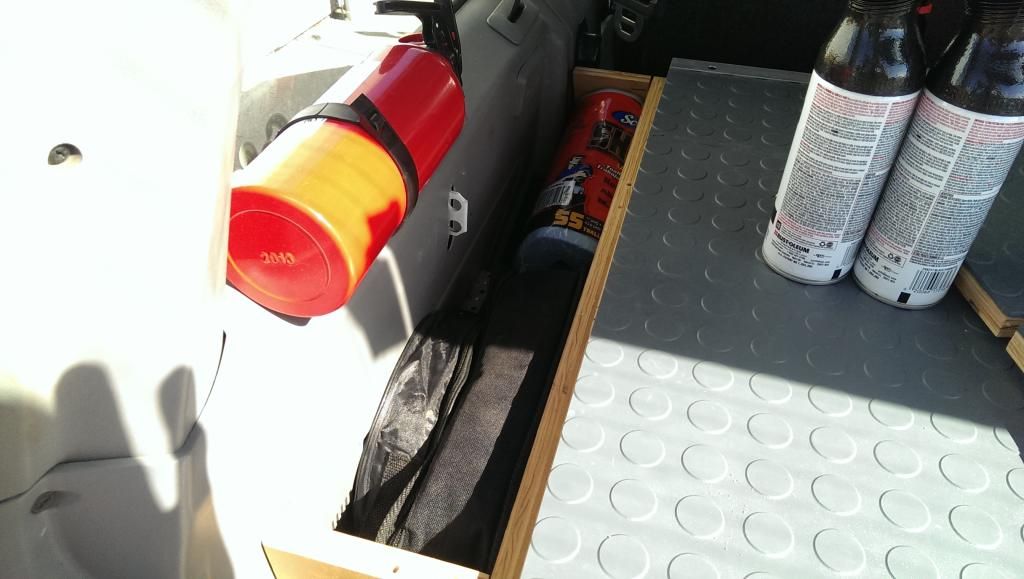
passenger side cubby holds recovery related stuff. tree saver underneath, tow strap in zip up case, jumper cables, and a roll of shop towels

IMAG0662.jpg


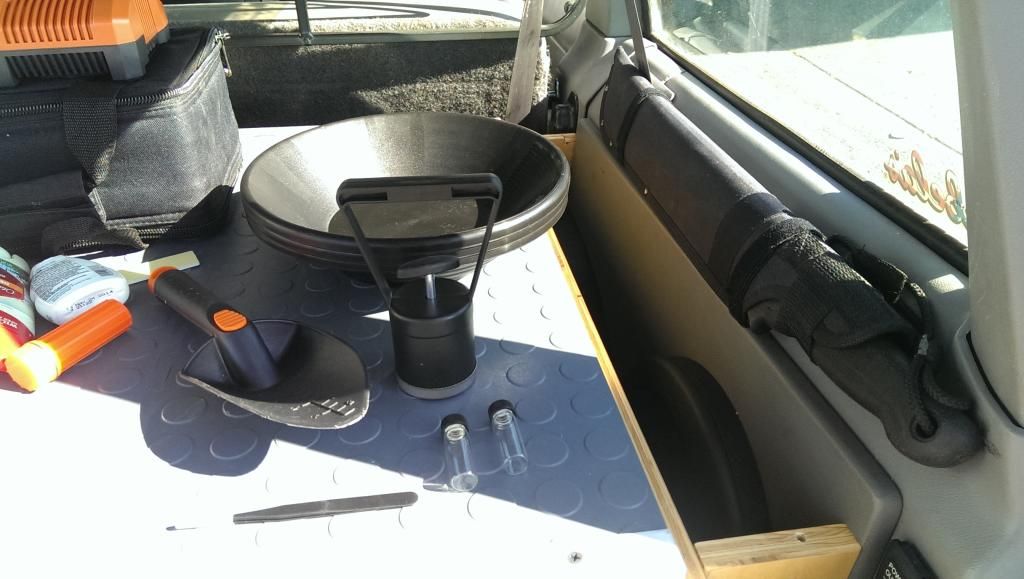
and in the driver side some gold panning stuff. we camp near rivers a lot, and the kids enjoy their newfound hobby quite a bit. it's also a great way to pass some serious time during the day.

IMAG0663.jpg
 

65BAJA

Da Nu Guy
It's quite possible I'm going to steal most of this design. :drool: What thickness plywood did you use? Where did you get the slides?
 

uber

Observer
be sure to post pics when you do!

main cabinet is 3/4, drawers are 1/2 with 1/4 bottoms.. slides came from home depot
 

Forum statistics

Threads
185,841
Messages
2,878,757
Members
225,393
Latest member
jgrillz94
Top