xj storage build

uber

Observer
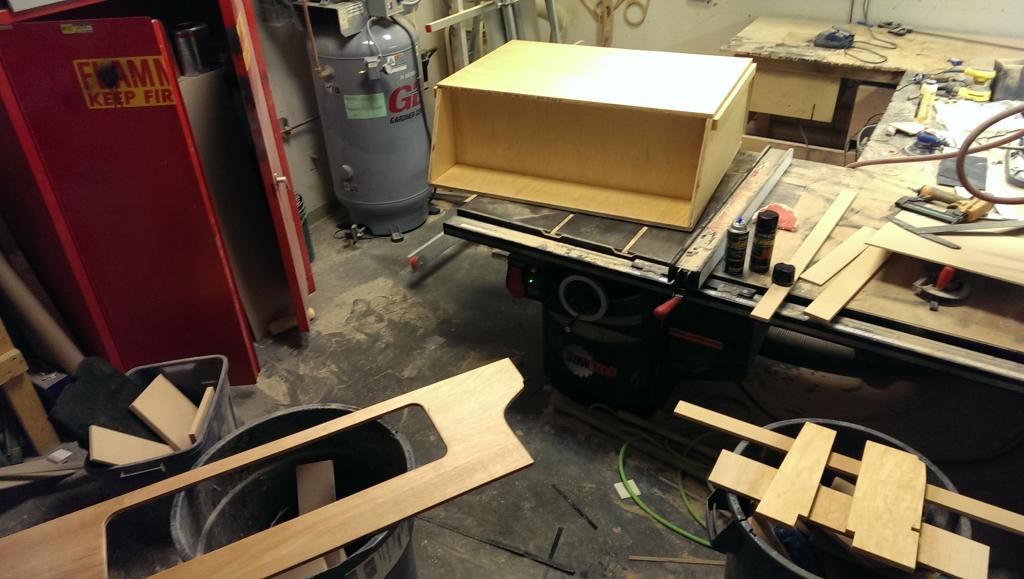
not gonna bother to explain much as the pictures should do most of the talking on their own.. feel free to ask questions tho if there's something specific you're curious about.

DAY 1

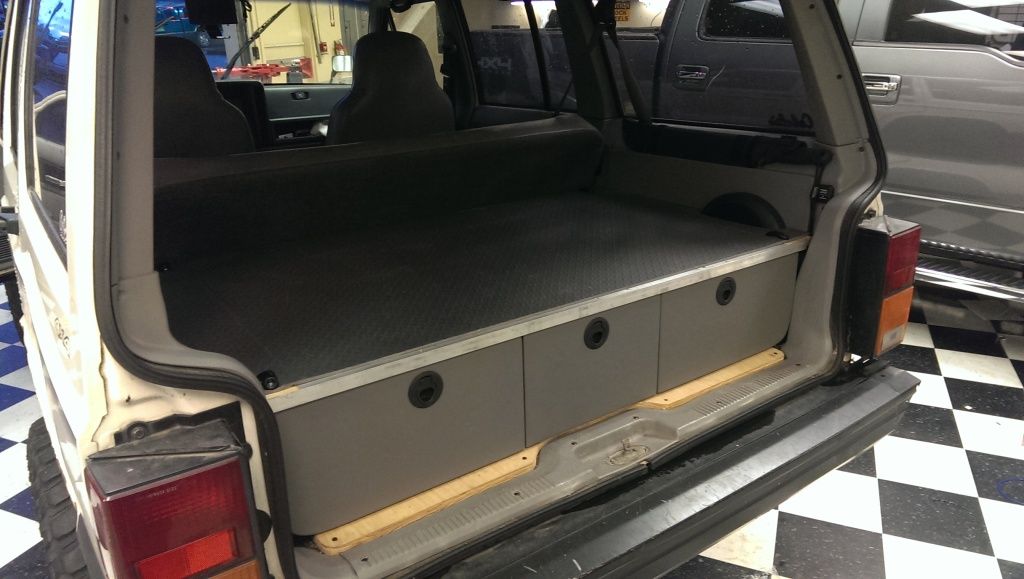
old unit.. served it's purpose, but i felt an upgrade was in order based on how i wanted to continue using the jeep

IMAG0051.jpg


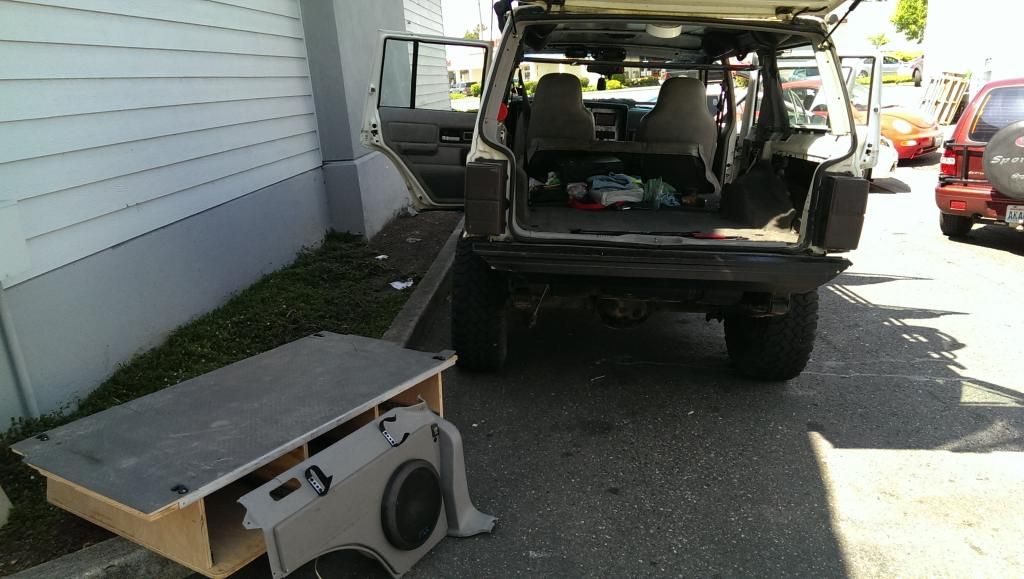
so out she goes (needed to beat a dent out behind the sub)

IMAG0486.jpg


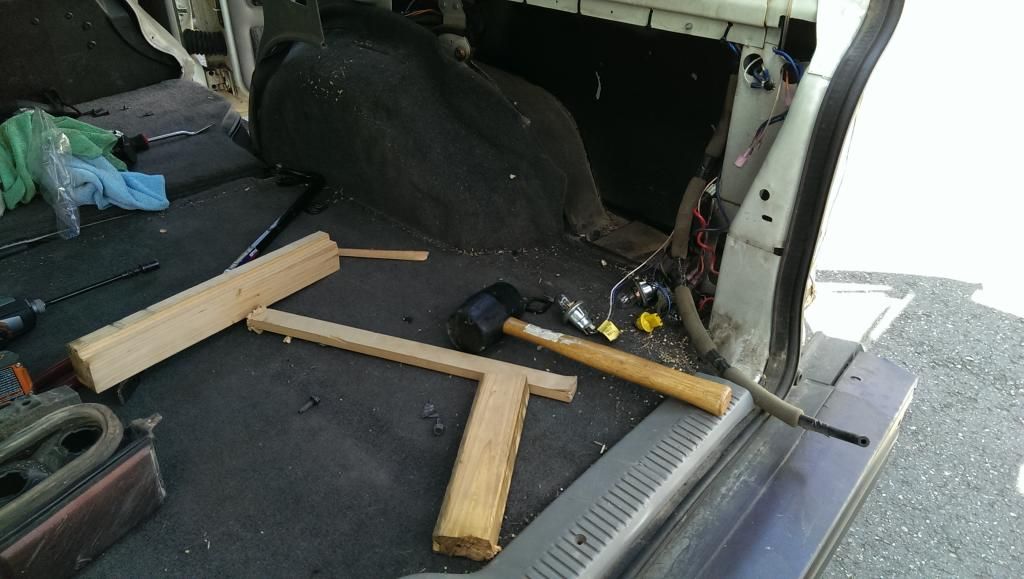
beat the caved in quarter panel back out.. again.. notice the high dollar tools being used here.. lol

IMAG0487.jpg


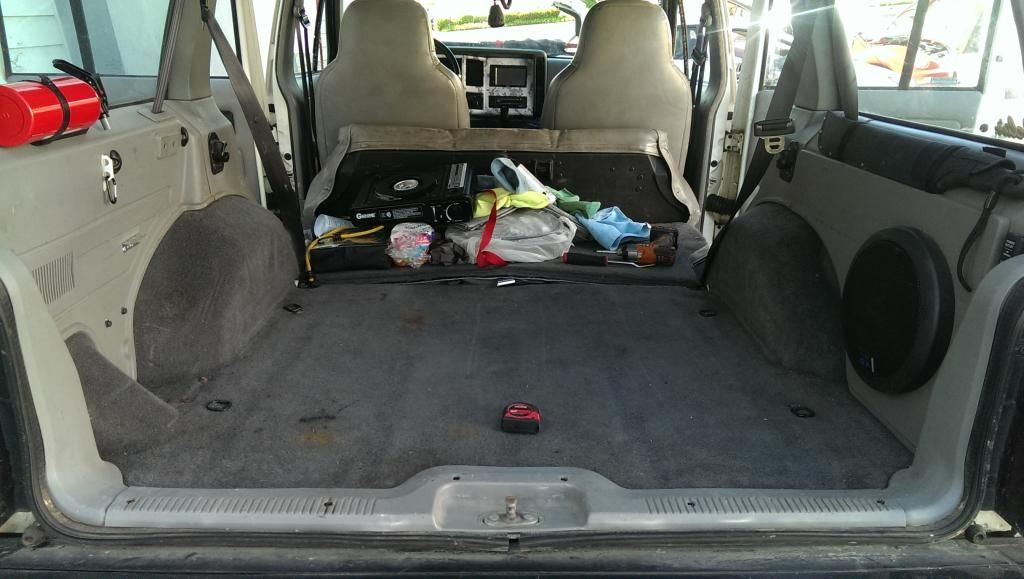
got the sub panel mounted back in when i was satisfied with the "body work"

IMAG0488.jpg


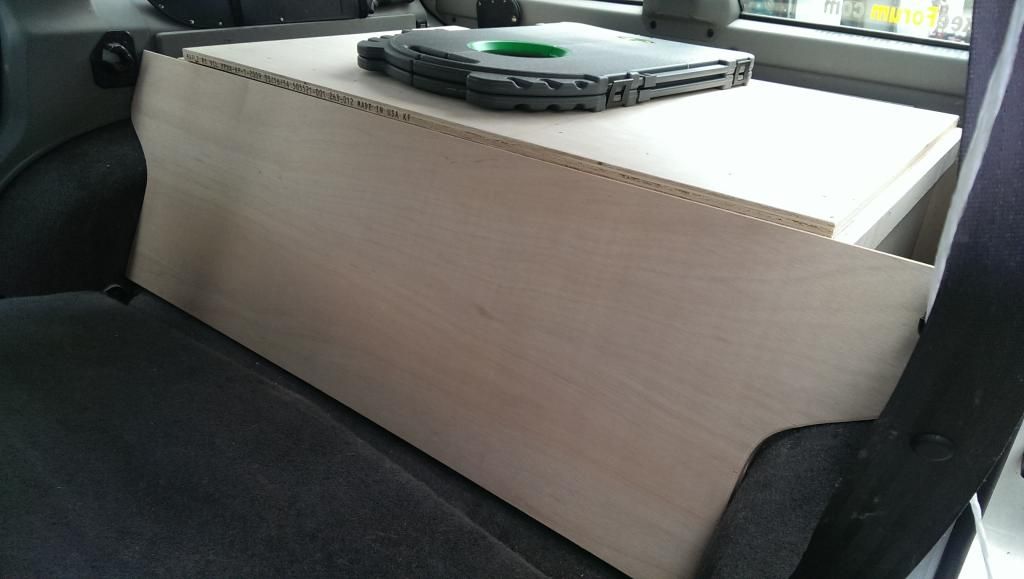
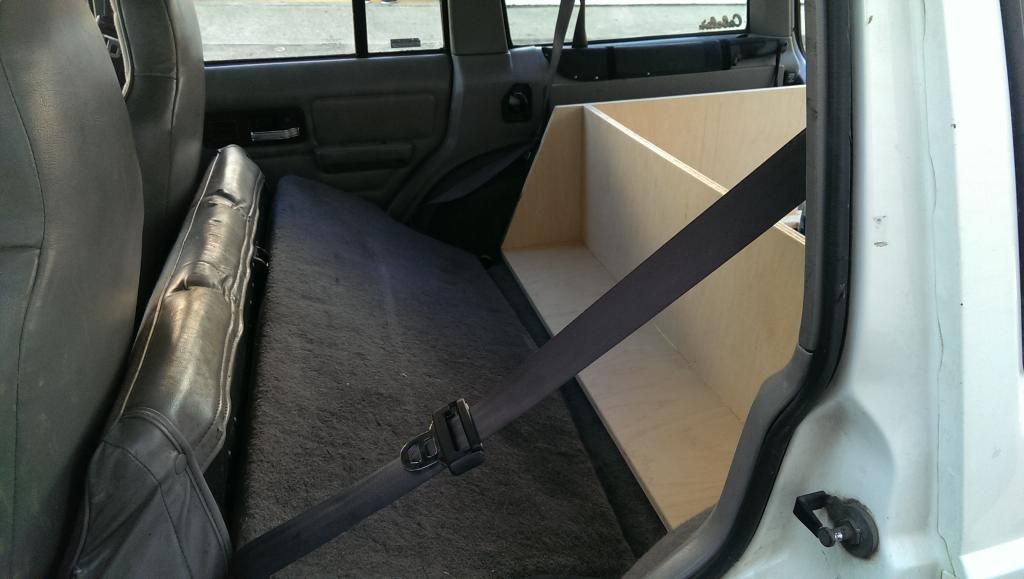
and started building the base for the new cabinet. the hole is just to help save some weight on the finished project.

IMAG0489.jpg


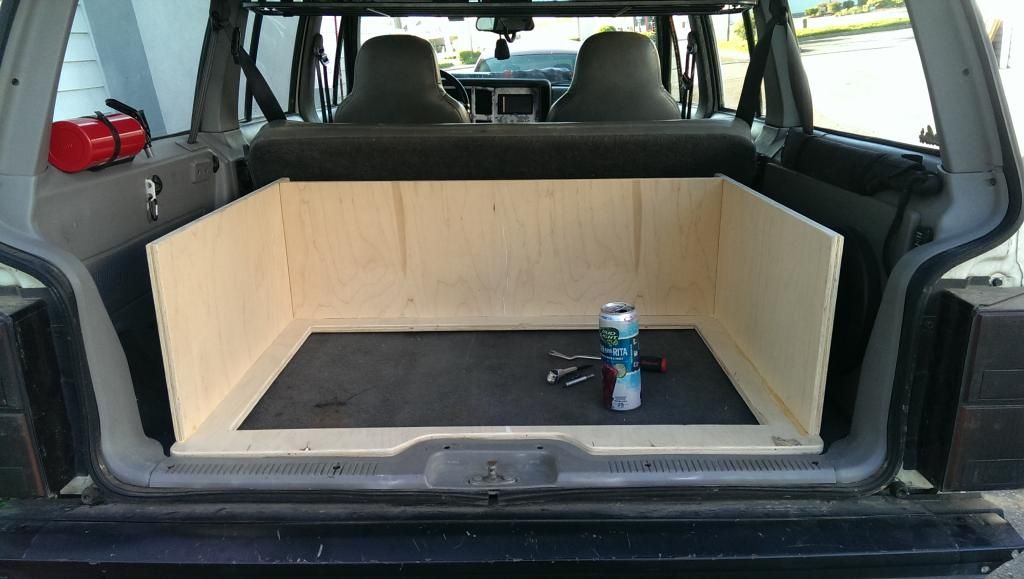
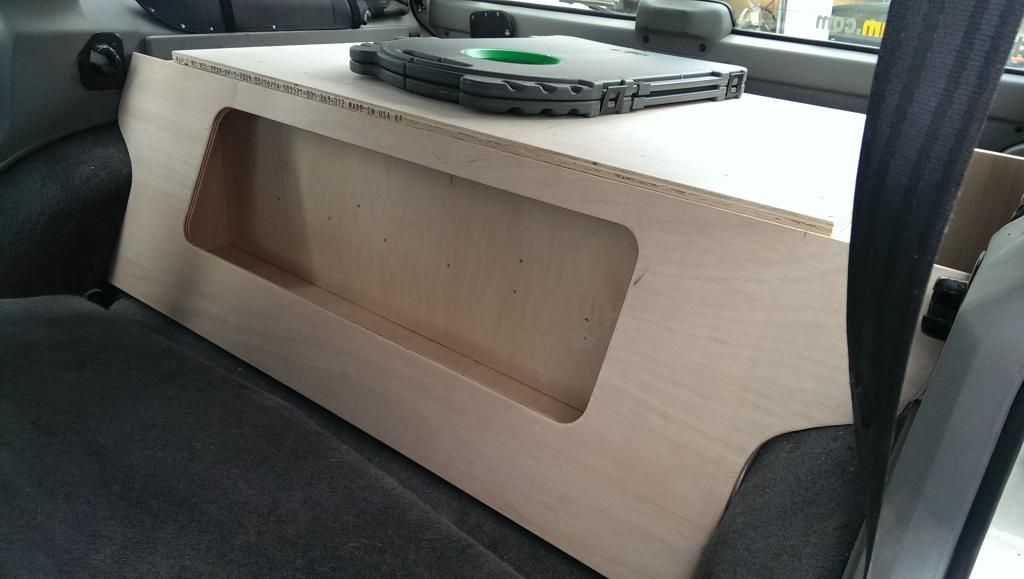
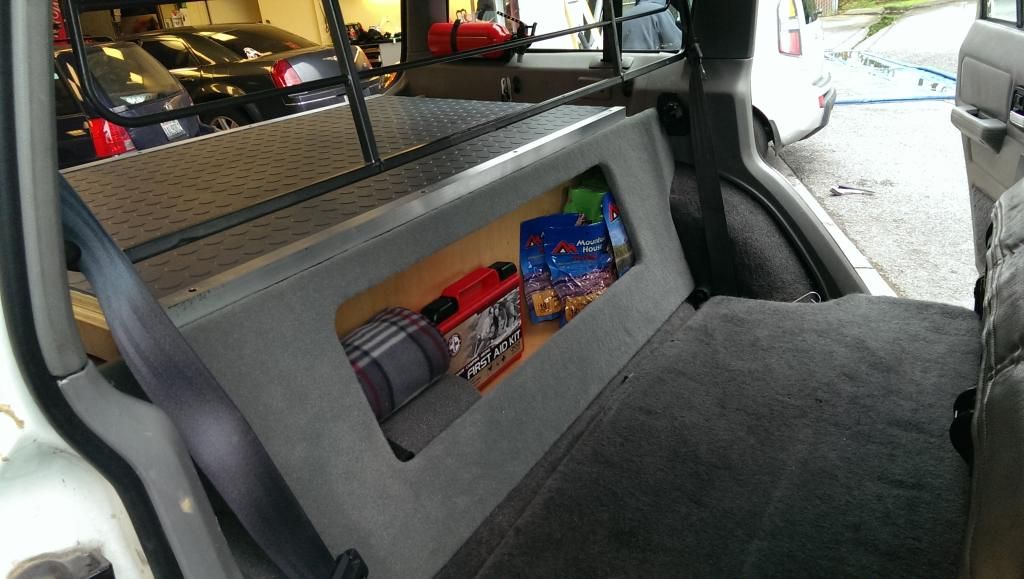
still keeping a decently sized hidden cubby behind the seat..

IMAG0491.jpg


DAY 2

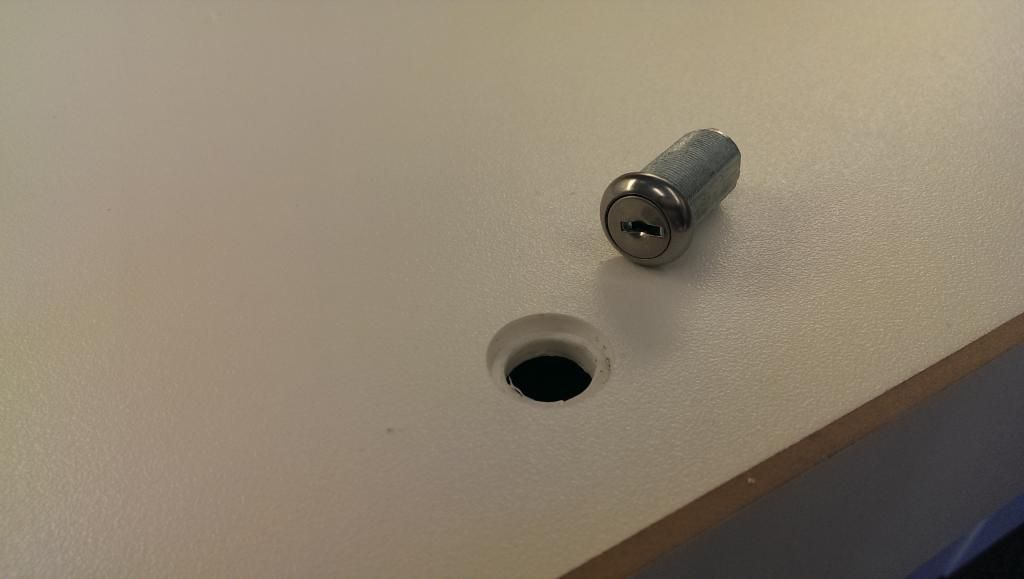
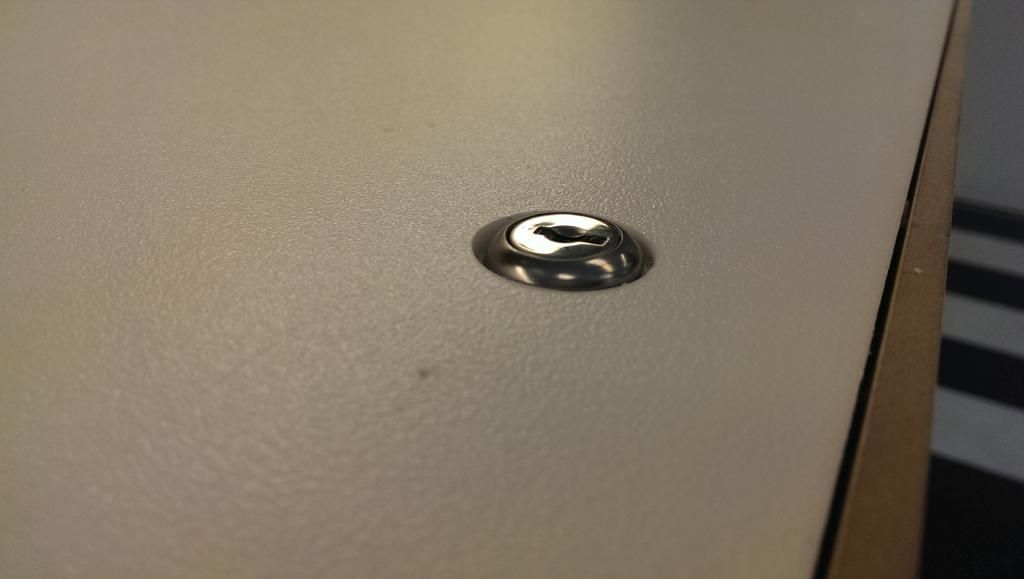
new self-close drawer slides, full extension of course..

IMAG0495.jpg


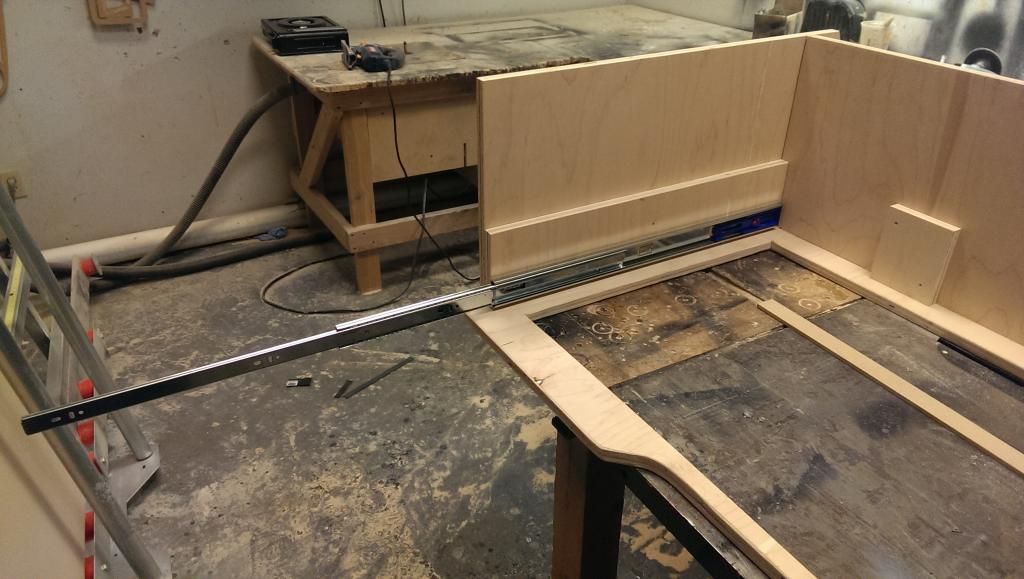
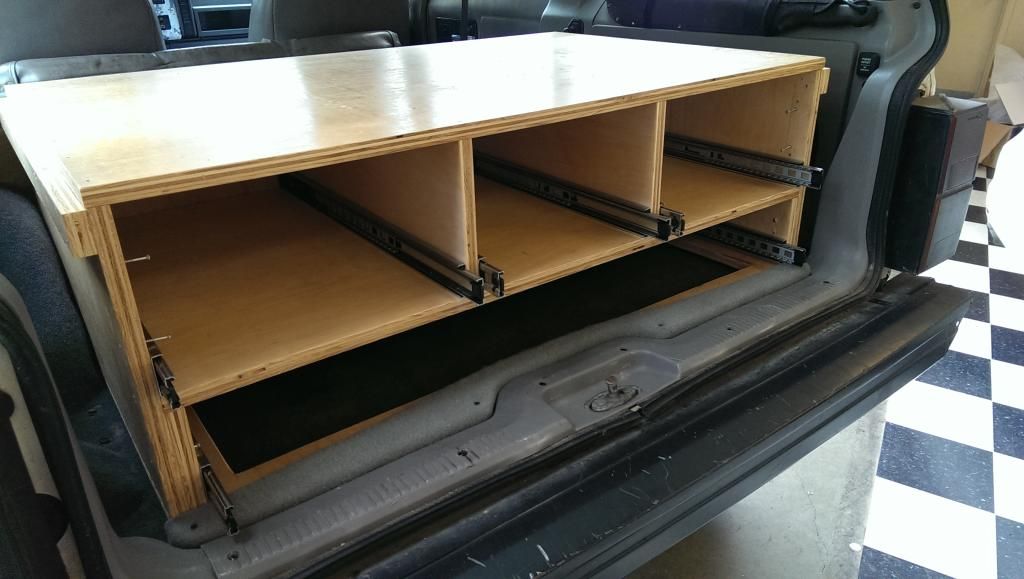
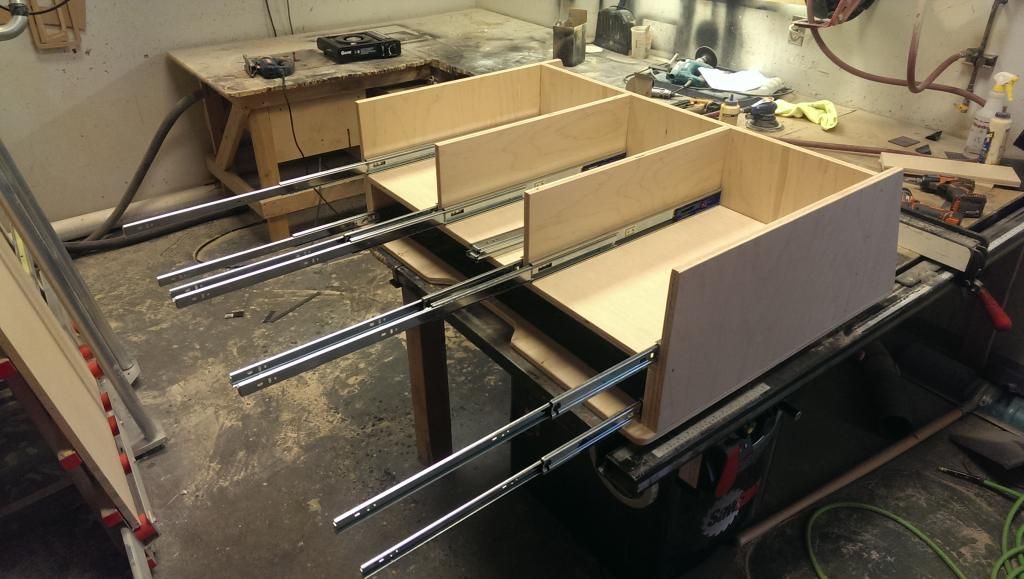
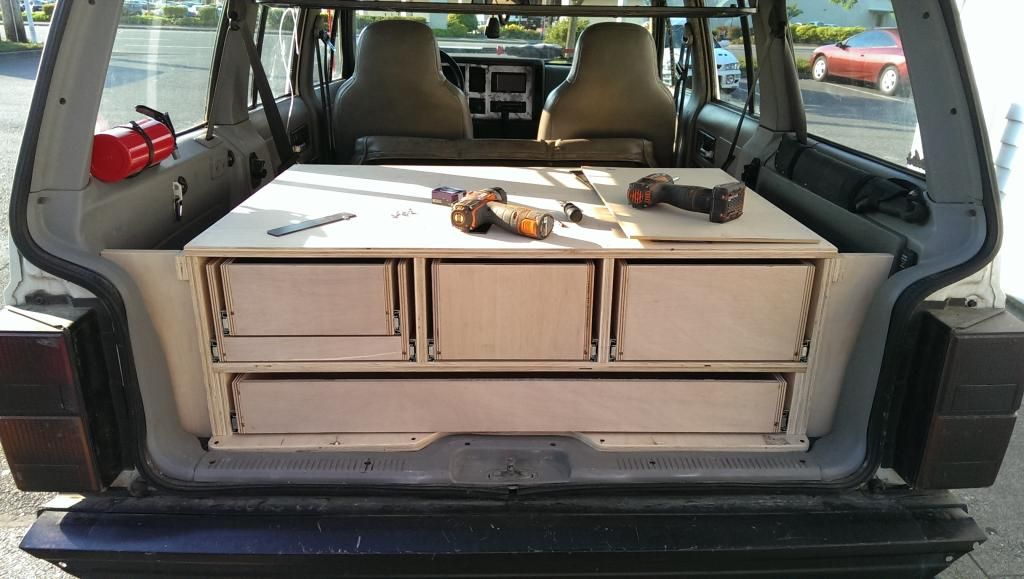
upper section and dividers in..

IMAG0496.jpg


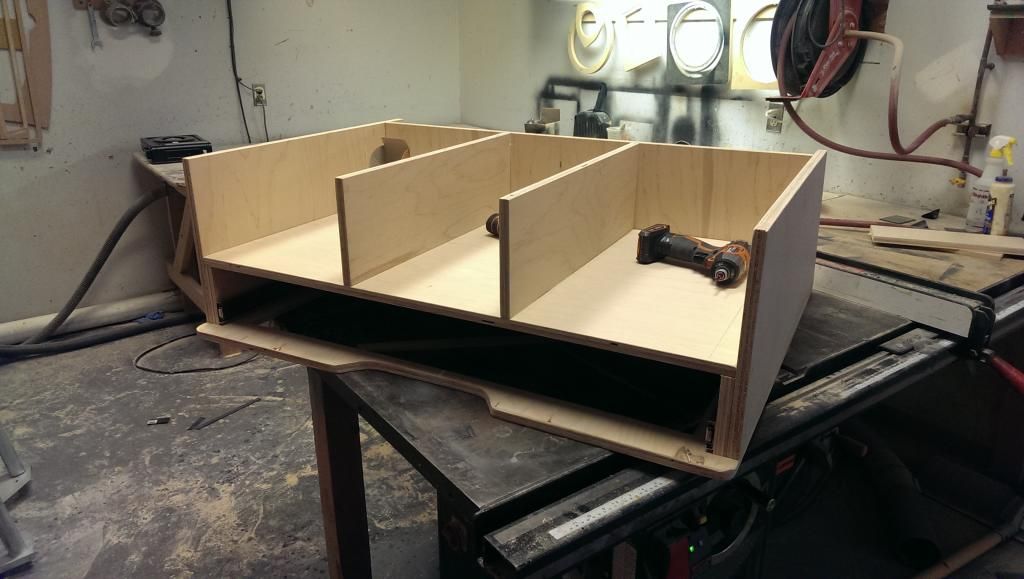
so many slides!!! lol

IMAG0499.jpg


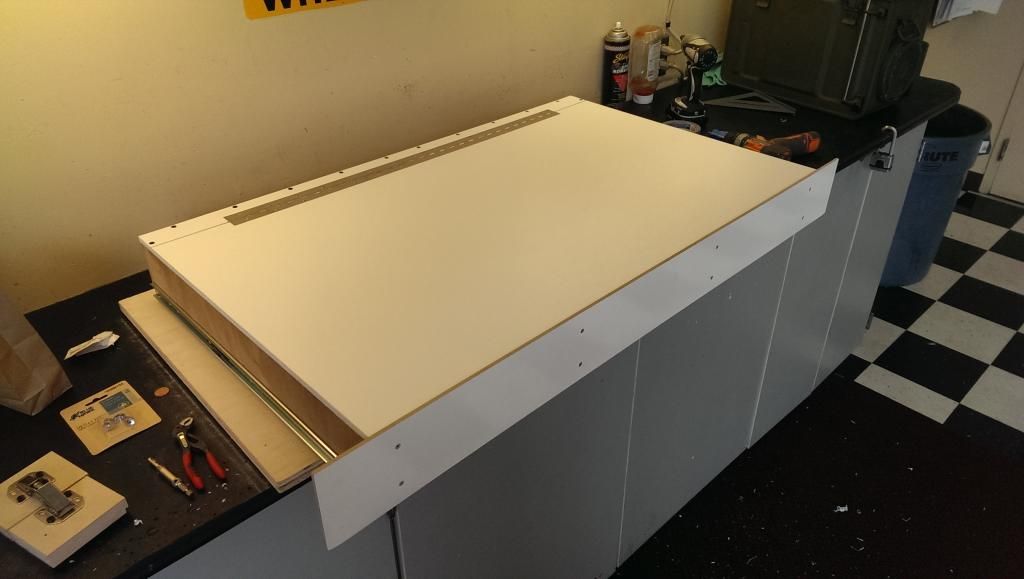
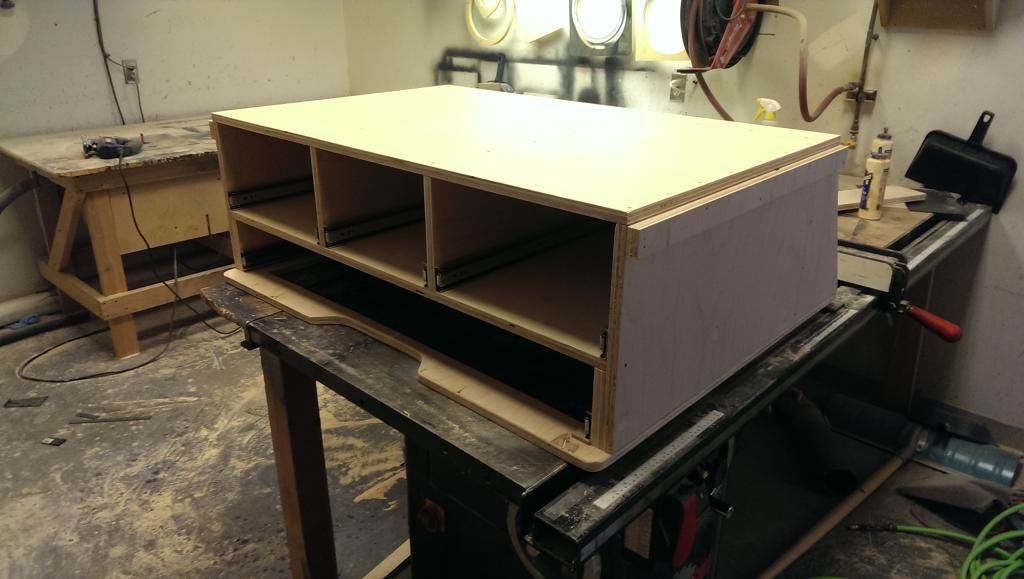
top mounted down, cleats along the sides to support the hinged wing pieces..

IMAG0500.jpg


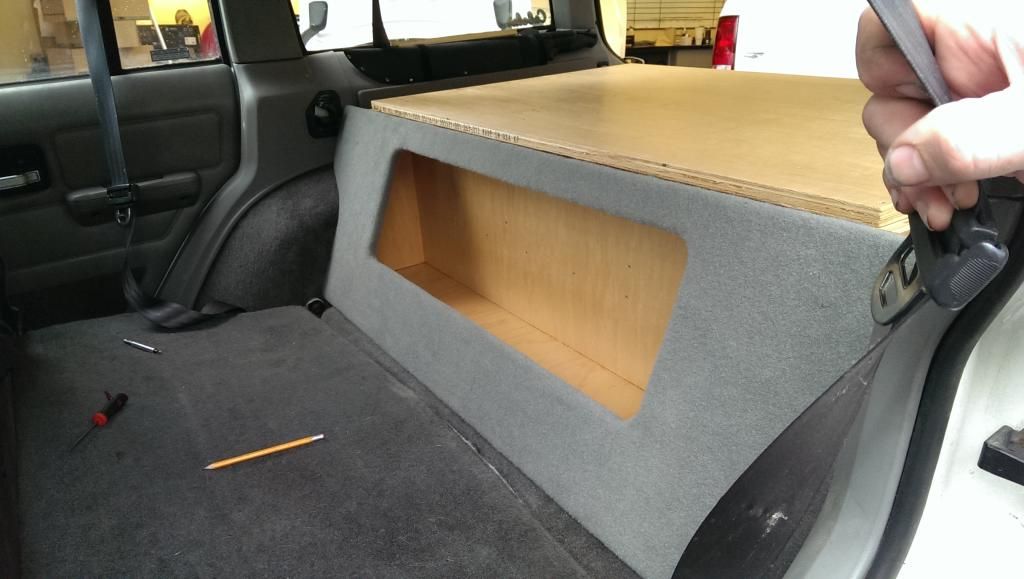
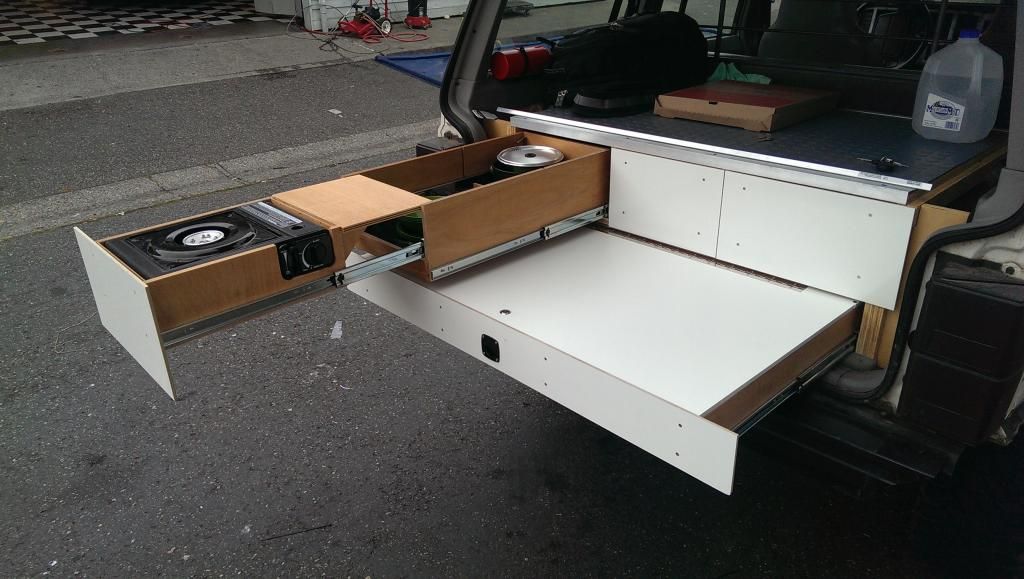
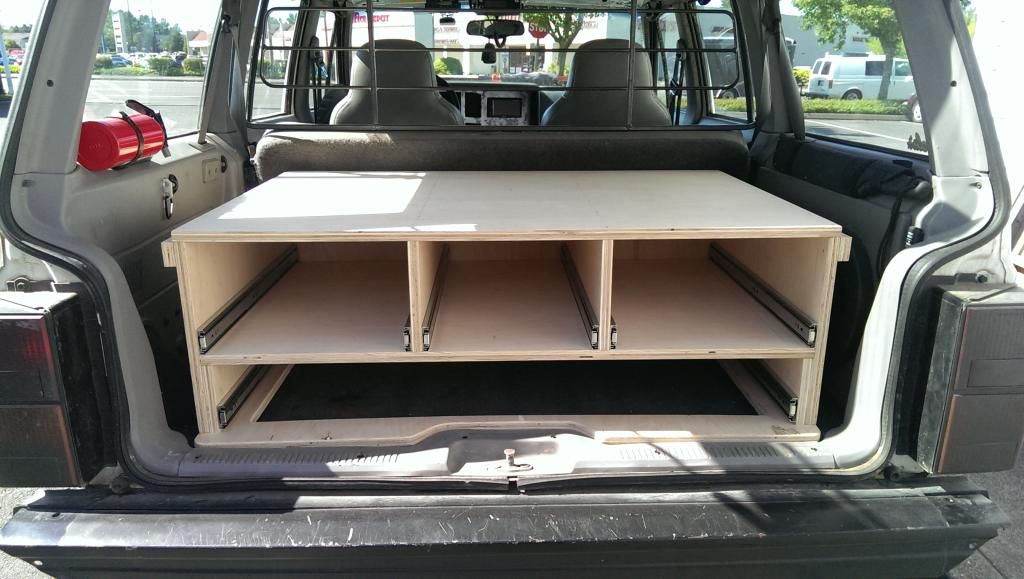
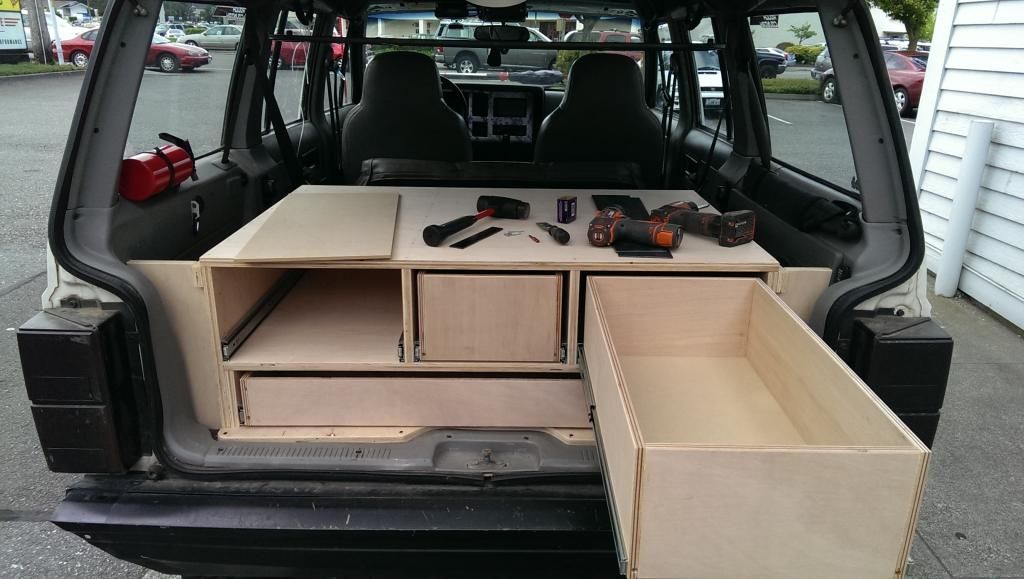
and mounted in the jeep!

IMAG0501.jpg


DAY 3

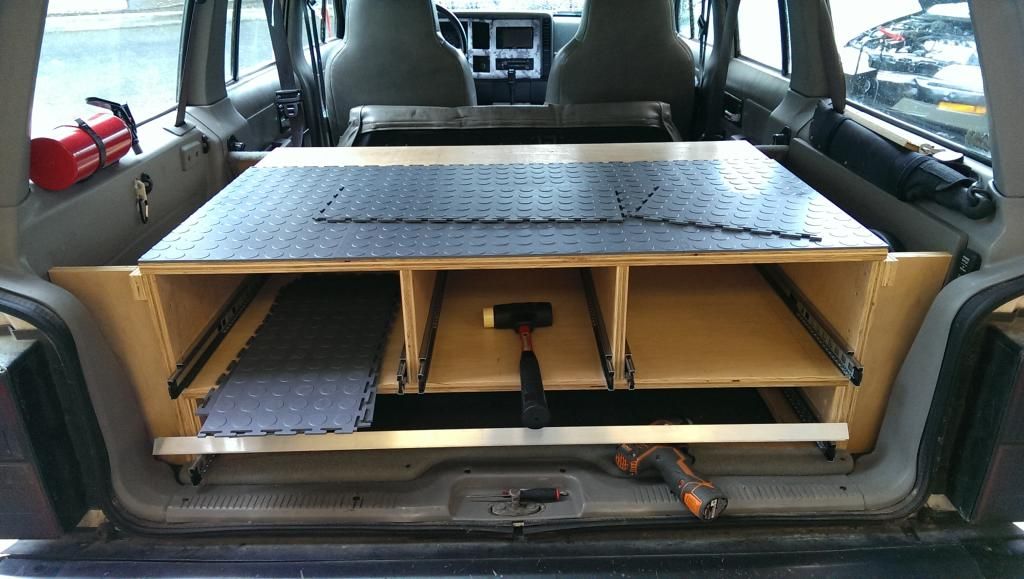
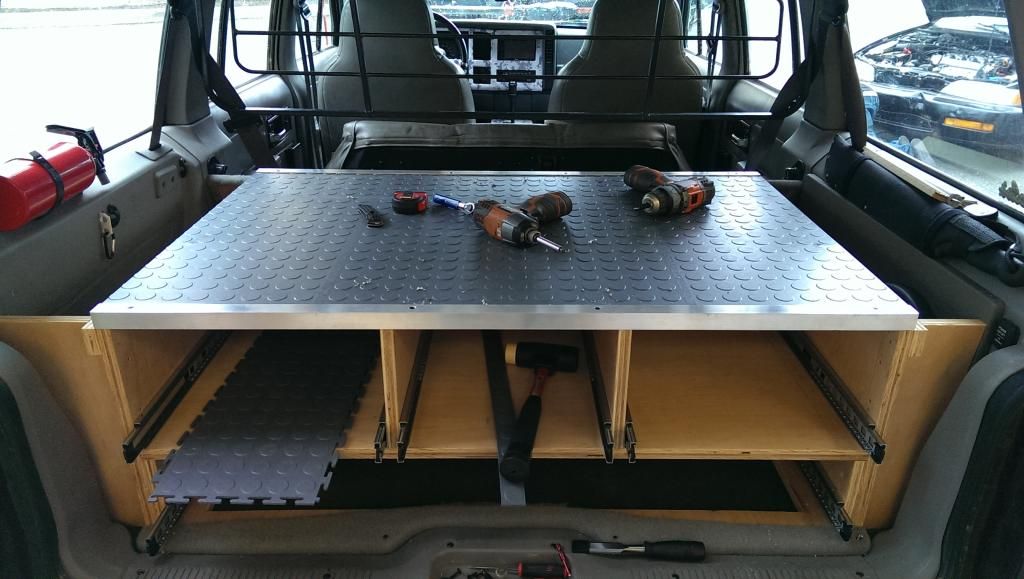
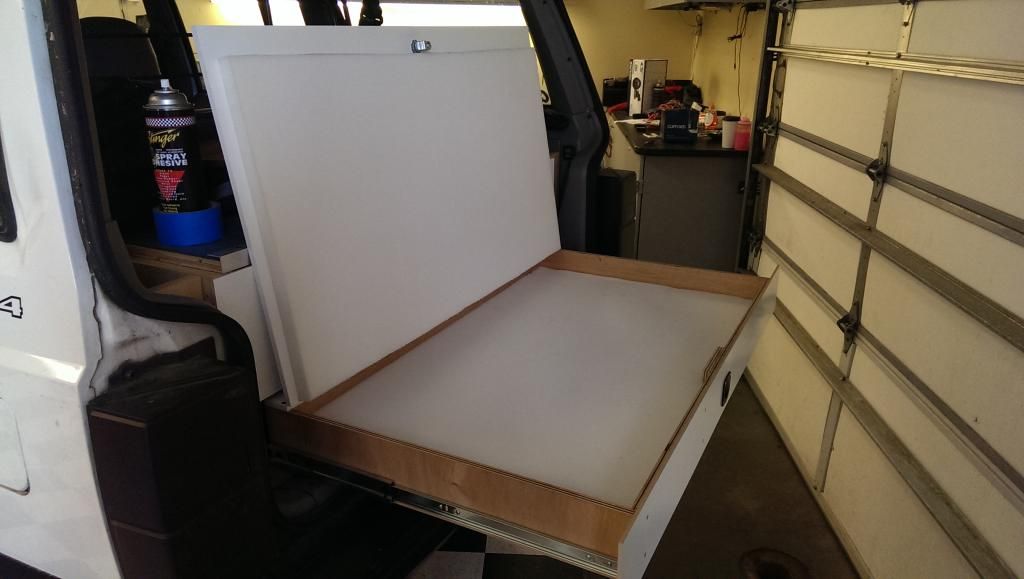
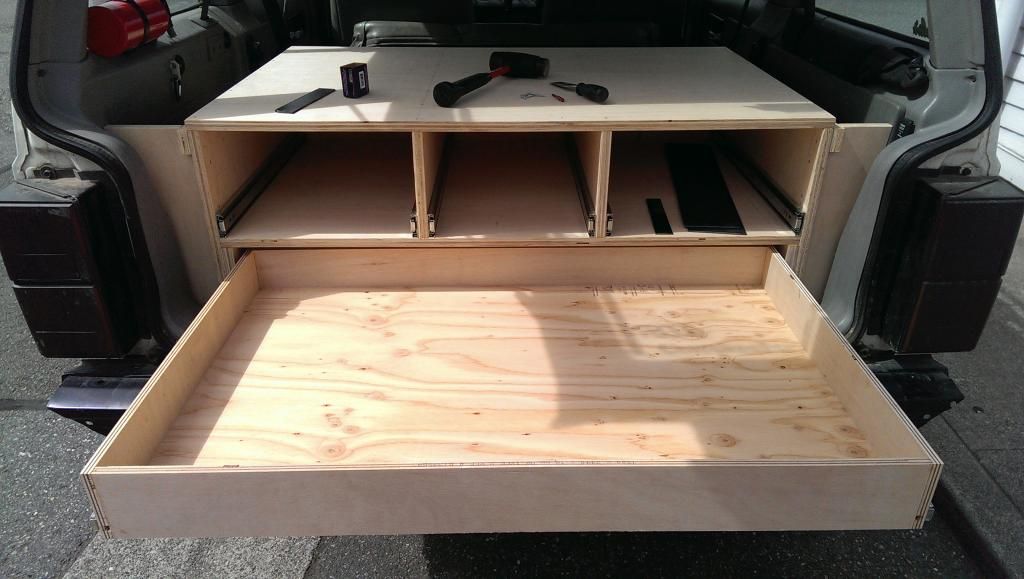
got some wings made up to close off the side cubbies. wasn't a fan of how they were open on the last build. also got the big drawer built. used 3/8 ply as the base for this one, as it needs to carry a bit of weight.

IMAG0523.jpg


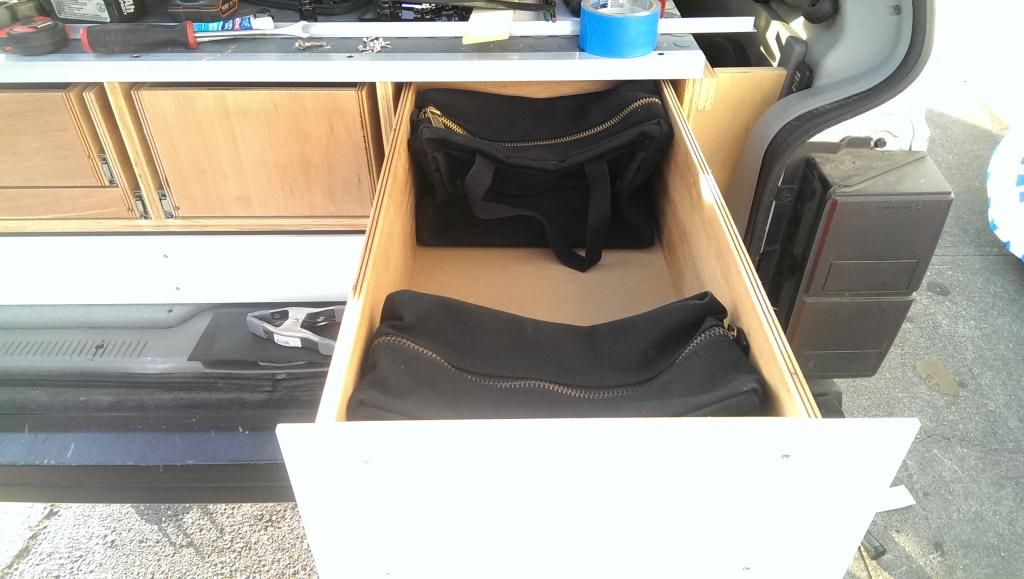
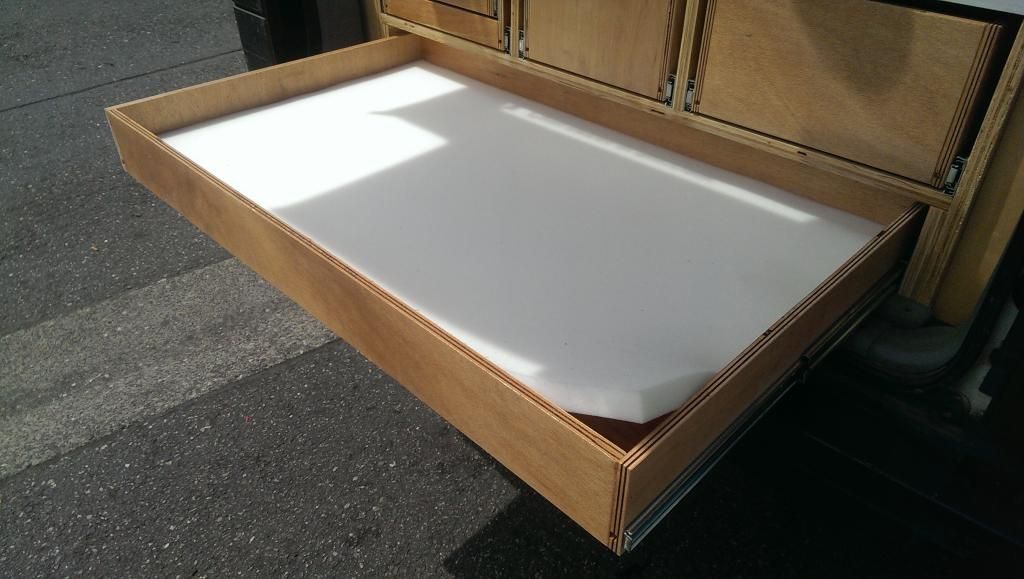
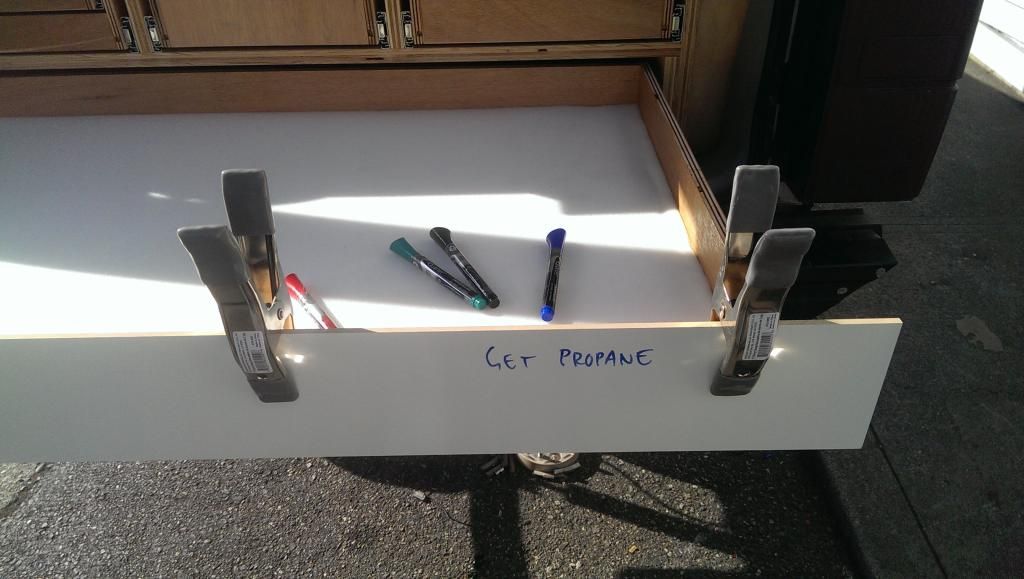
next couple drawers are pretty standard

IMAG0524.jpg


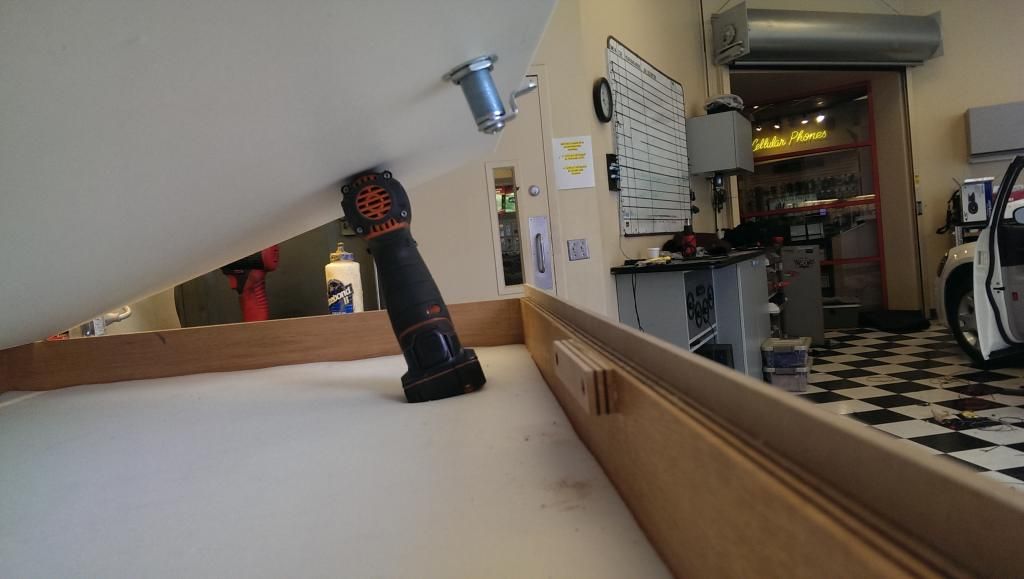
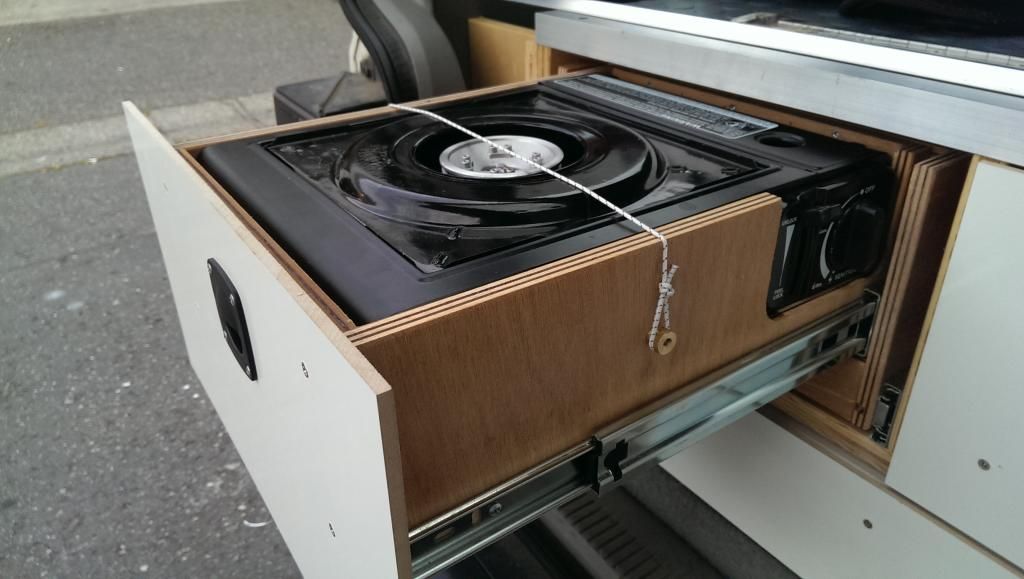
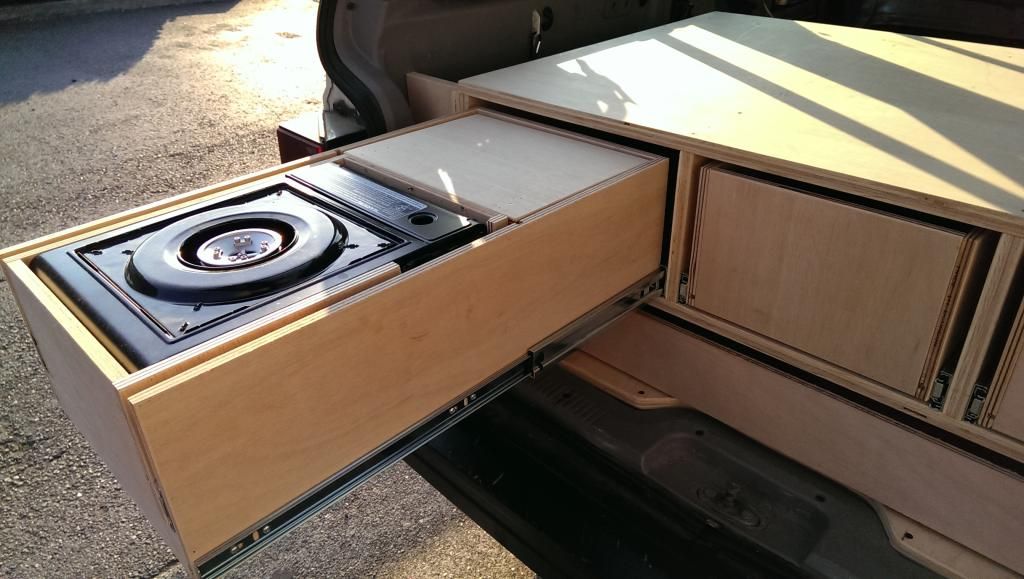
last drawer is a bit more complicated. i've been using a portable stove for camping, but didn't have a convenient place to use it. debated buying a small aluminum table from walmart, but that would just be one more piece of equipment to have to pack up. dug around the expo forums for a bit and saw something i really liked. first, a mount for the stove itself..

IMAG0525.jpg


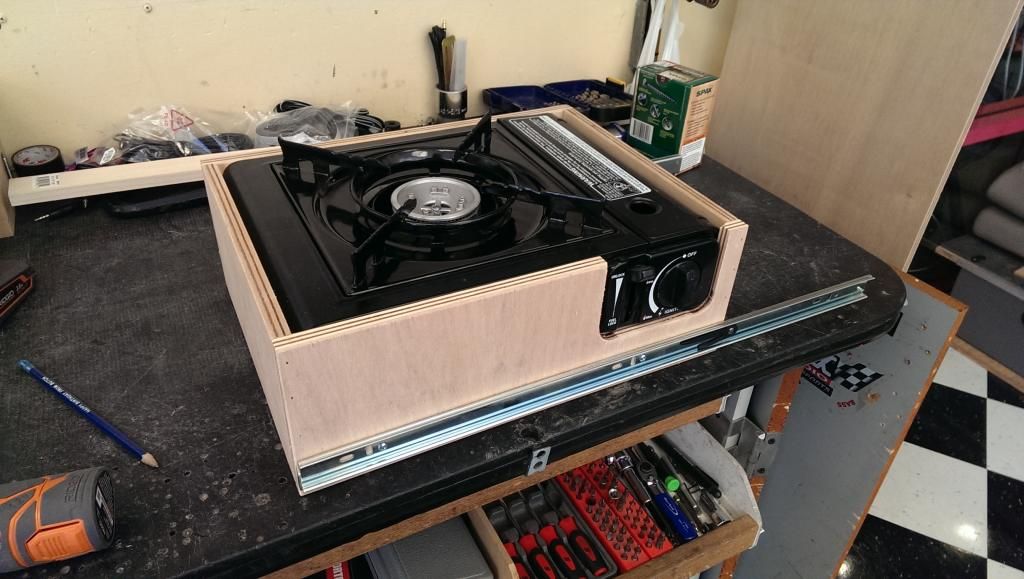
then a way for fresh air to get pulled up thru it, as well as a small counter addition..

IMAG0530.jpg


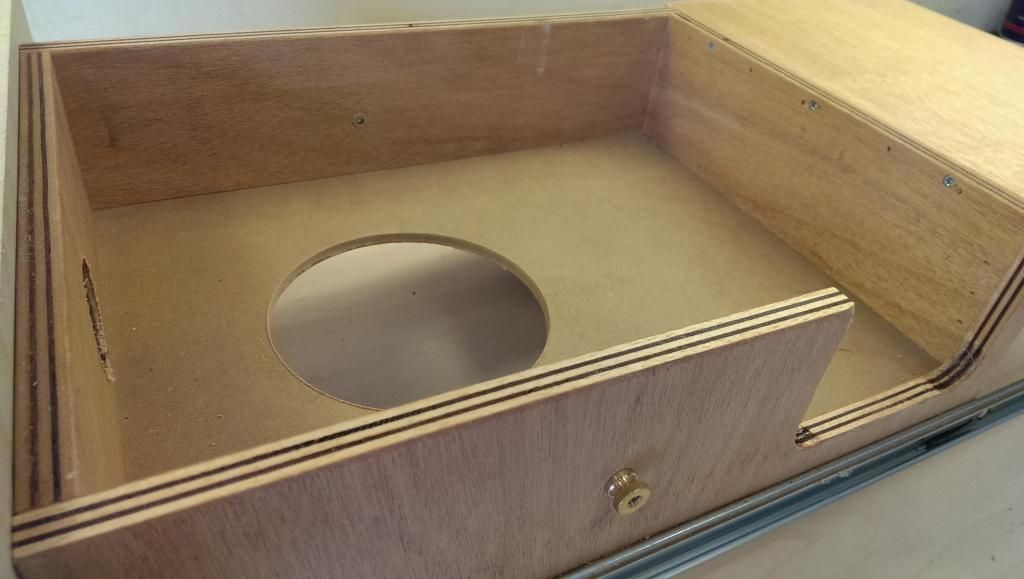
then built drawer for the drawer to sit in..

IMAG0526.jpg


step 1.. stove and counter

IMAG0531.jpg


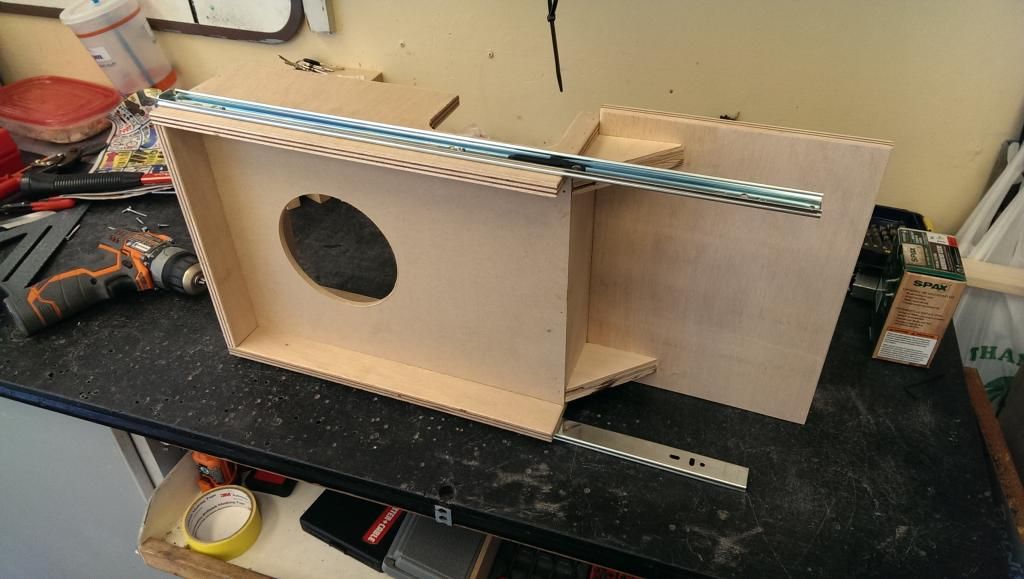
step 2.. storage under burner for plates and utensils, taller stuff fits under the counter at the back of the drawer

IMAG0532.jpg


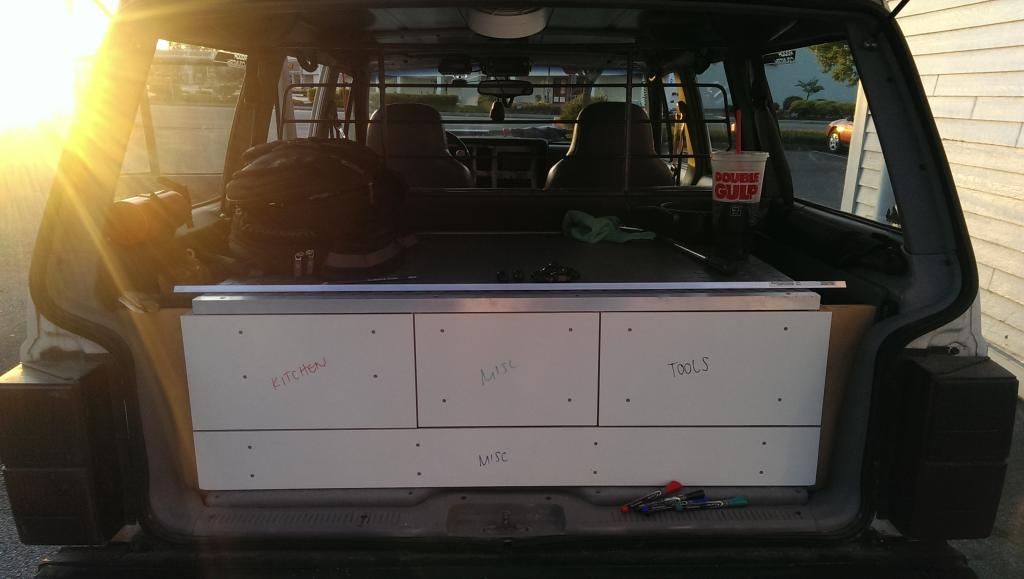
and that's where she's currently at.. because of work and kids, i only get to work on it one day out of the week. will keep this thread updated as i go tho
 

Herbie

Rendezvous Conspirator
How are you getting propane to the stove?

Answering on uber's behalf: It's a butane stove - the disposable fuel bottle is contained on the right side of the stove. I use the same basic kind, but mine comes with an adapter to allow it to use propane as well. I love the stove for being easy to pack, light, and has good heat control. I prefer the butane, for most trips the bottle lasts all weekend.
 

uber

Observer
herbie got it, portable fuel bottles.. when i build my trailer, i'll be using a bigger propane stove hooked up to a standard bottle. this stove is more of an "on the trail" kinda thing. i'll typically spend the entire day out running trails, and this will give me more options for lunch without having to return to camp.
 

uber

Observer
got a little bit of free time at work today, so took advantage of it.

the big cubby behind the seat is going to be a catch-all of sorts for spare clothes, blankets, and a pillow or two. don't want the stuff falling out everytime i flip down the seat tho, so i came up with this.

IMAG0540.jpg


IMAG0541.jpg


it's not attached yet, as it will make the box non-removable. still need to seal the box with polyurathane first. soon tho..
 

uber

Observer
put a few more hours into this thing today. doesn't feel like i got much done just because most of my day was spent waiting for stuff to dry.

disassembled the whole thing so i could spray everything down with some spar urethane. it's pretty safe from the rain, but figured i'd play it safe anyway. waiting for this stuff to dry ssuuuuuccckkks.

IMAG0545.jpg


once dried, carpeted the cubby trim piece

IMAG0547.jpg


and carpeted the exposed bit under the drawers.

IMAG0548.jpg


instead of the foam pad i used last time, i went with interlocking rubber tiles for the top. the foam took quite the beating, and this stuff should be a lot stronger

IMAG0549.jpg


and decided to keep the same aluminum edge protector i used last time

IMAG0550.jpg


and just for giggles, here's a cubby 'action shot' haha

IMAG0551.jpg


now i'm just waiting for the urethane on the drawers to dry so i can put them back in and start working on their fronts.
 

uber

Observer
supposed to get a bunch done today, but ended up spending a good chunk of my morning nursing a hangover from my buddy's annual summer kick off bbq.

decided to run around and do a bit of shopping tho. first i hit up cabelas for some camp kitchen stuff. 4 plates and 4 bowls stacked up fit under the stove slideout perfectly. lucky coincidence?

IMAG0571.jpg


then i hit up a surplus store on the hunt for some pouches to keep my tools in. before i just had them tossed in a drawer, and it was kind of a pain. now everything can be better organized, and easier to take out and use. once again, lucked out on finding something in the perfect size.

IMAG0570.jpg


then after a quick stop at home depot, i hit the fabric store by the shop and snagged my first chunk of foam for my bottom drawer. got that glued in first thing

IMAG0568.jpg


so rewind to home depot.. i wondered around that place for quite a while today trying to decide what i wanted to face my drawers with this go round. looked at sheet metal, counter laminate, plastic sheeting, etc.. but nothing really jumped out. then i got an idea..

IMAG0569.jpg


whiteboard material. it's just 1/4" mdf with a glossy white coating on it made for dry erase markers. now if i'm running low on something, i can jot a quick note to myself right there on the drawer! quite pleased with myself, i finished the rest of the drawers in it. gotta admit, this is my favorite part of this whole build right now.. haha

IMAG0572.jpg


so while i didnt get a lot of actual work done today, i'm ok with it. hopefully i'm gonna toss a few hours into it tomorrow to make up for it.
 

uber

Observer
spent a bit more time on it today to get me caught back up to where i wanted to be. first i went down to my local tap plastics and got myself a big chunk of starboard. it's similar to chopping board material, but handles uv a lot better. got a 3/8" piece big enough to cover the bottom drawer of the cabinet. next i tossed a piano hinge on it and mounted it down.

IMAG0577.jpg


next i set about locking it up.. don't need anything too hardcore, so a simple cylinder lock will do the job here. i decided to flash it up a bit by sinking the head into the lid a bit. no real reason other than "why not"

IMAG0579.jpg


IMAG0581.jpg


then i attached the locking tab and attached a strip of plywood for it to slide under

IMAG0582.jpg


thanks to the top, the drawer can now function as additional counterspace when i'm making up some grub

IMAG0584.jpg


and speaking of the kitchen drawer, i needed to address one major annoyance. the flip over section for the burner had a nasty habit of rattling around as i was driving down the road. to solve this issue, i installed some little knobs that i could attach a piece of bungie rope to help hold it in place. no more rattles :thumbup:

IMAG0585.jpg


IMAG0586.jpg


last thing for the day was another piece of the foam under the big drawer lid. now stuff in there should be held nice and snug.

IMAG0588.jpg


i also installed some simple drawer pulls, but apparently i failed to snag a pic of those all done (you can see one on that stove pic tho.

not much left to do now.. should be wrapped up next sunday, unless i find something else to change. haha
 

Forum statistics

Threads
185,821
Messages
2,878,572
Members
225,378
Latest member
norcalmaier
Top