You are using an out of date browser. It may not display this or other websites correctly.
You should upgrade or use an alternative browser.
You should upgrade or use an alternative browser.
Battleship Jones: 2015 Tacoma DCLB Build Thread
- Thread starter Adventurous
- Start date
Adventurous
Explorer
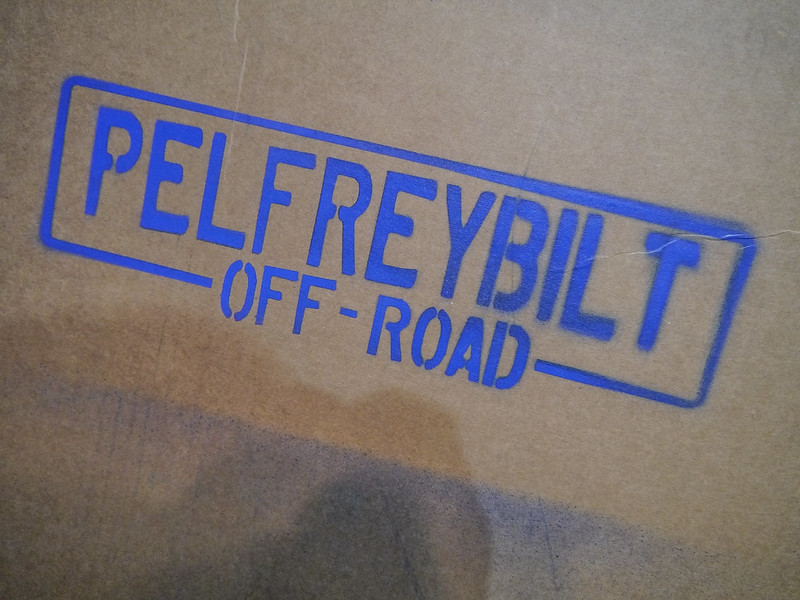
As mentioned in a prior post, I had a few goodies coming my way courtesy of Pelfreybilt and Wheelers. It was already in the works prior to my trip to Moab a few weeks ago but after doinking some of the undercarriage on rocks it re-affirmed my decision to put a little bit of armor on my belly.
I got home last Thursday to 100lbs of 3/16" steel. I can only imagine the Fedex guy is starting to dislike me at this point for having to shuttle all these heavy packages to my door. Oh well. What kind of goodies are inside!?
 20150529-P1010405 by Tim Souza, on Flickr
Tada! One very nicely finished IFS and mid skid. I did a test fit to see how everything lined up and was pleasantly surprised to find that no grinding or massaging was necessary to get bolts through all of the holes.
 20150529-P1010406 by Tim Souza, on Flickr
Now came the difficult part. I have always struggled with the patience aspect of painting things. It's always much more fun to install and play with them than it is to watch paint dry. Literally. So I cleaned them up real good with scotch brite, some acetone, and layed down a coat of metal primer.
 20150529-P1010407 by Tim Souza, on Flickr
I actually waited the recommended amount of time before top coating too! All in the hopes that it would set up nice and hard and not just peel away when I installed the bolts.
Turned out to be all in vain as the enamel paint doesn't cure enough in the 48 hours they recommend to withstand the torque of tightening bolts. Oh well, they are skidplates after all, a component whose sole purpose is to get beat on rocks.
 20150603-P1010413 by Tim Souza, on Flickr
 20150603-P1010414 by Tim Souza, on Flickr
 20150603-P1010415 by Tim Souza, on Flickr
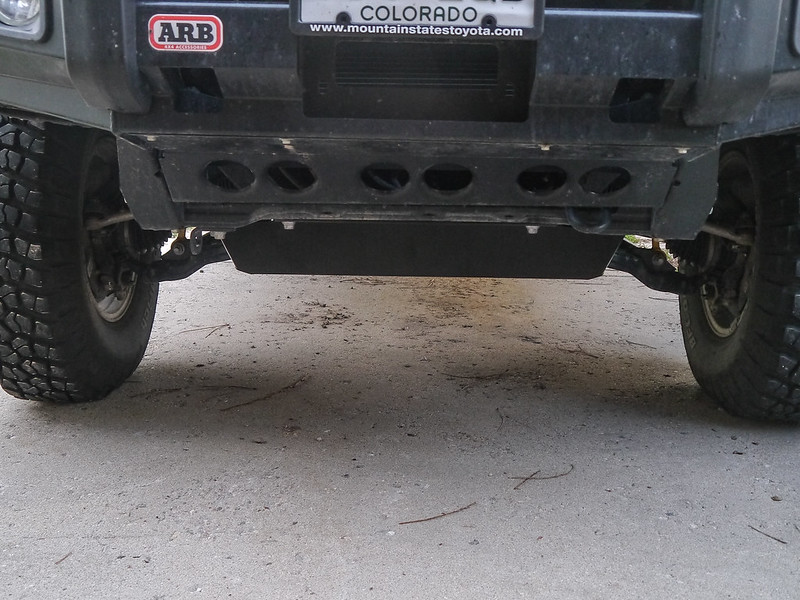
I did not measure before and after but clearance definitely improved a little bit. Everything bolted on smoothly with the exception of getting the nuts off the driver's side of the transmission cross member. Clearance was too tight with the exhaust hanger and I did not have either a 16mm socket to turn the head of the bolt, or a ratcheting wrench (ratchet + socket didn't fit) to get at the nut. It was a painful exercise with two open ended wrenches. It really makes me wish I had my toolbox that is just sitting in my parents garage on the East Coast. I really need to get that out here.
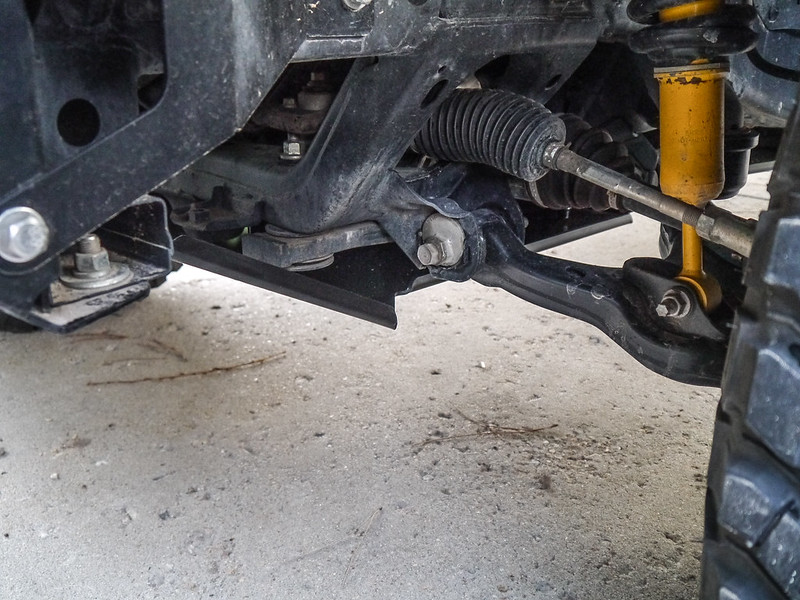
I followed up the installation of the skid plates with a set of Wheeler's Superbumps. I was never totally pleased with the ride up front, I'm not sure if the ARB bumper alone just isn't enough weight to get the OME 886 coils moving, but it never felt quite as controlled as I would have liked. I was hoping the longer, softer Superbumps would add some progressiveness to the front suspension and reduce the tendency to pogo a bit.
Installation was pretty straightforward, unscrew the old bump stops, cut about an inch off the long end of the provided 8mm allen key, and screw the new ones in. I tried to engineer a way around cutting down the allen key but no combination of allen key, hex drive socket, u-joint, or extension worked. After cutting it down I was able to swap them out in 5 minutes.
I took it for a spin after everything was buttoned up and was quite pleased with the outcome. I can't attribute the perceived increase in ride quality to the additional weight or the Superbumps, but the combination of the two left the front end feeling a lot more planted and in control. There was, as expected, less of the pogo effect and a reduction in harshness through larger bumps. I now fully intend to put a set of Superbumps in the rear once I gather the parts to do the u-bolt flip.
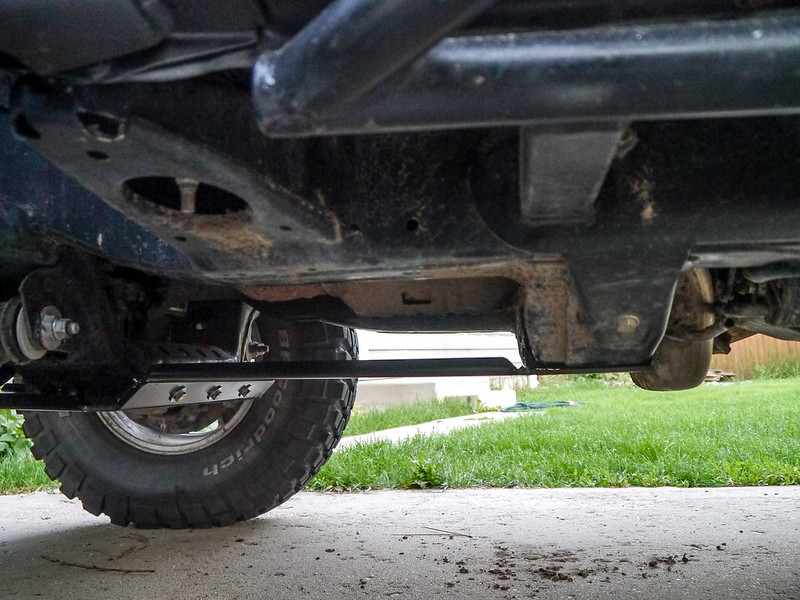
Unfortunately I do not have pre/post numbers for the increase in clearance due to the new skids or the decrease in ride height due to the additional weight.
And for those wondering, no, my truck does not have a super advanced case of rust. I know the pictures make it look particularly awful but rest assured that that is just the red mud of Moab coating the underside.
I got home last Thursday to 100lbs of 3/16" steel. I can only imagine the Fedex guy is starting to dislike me at this point for having to shuttle all these heavy packages to my door. Oh well. What kind of goodies are inside!?
20150529-P1010405 by Tim Souza, on FlickrTada! One very nicely finished IFS and mid skid. I did a test fit to see how everything lined up and was pleasantly surprised to find that no grinding or massaging was necessary to get bolts through all of the holes.
20150529-P1010406 by Tim Souza, on FlickrNow came the difficult part. I have always struggled with the patience aspect of painting things. It's always much more fun to install and play with them than it is to watch paint dry. Literally. So I cleaned them up real good with scotch brite, some acetone, and layed down a coat of metal primer.
20150529-P1010407 by Tim Souza, on FlickrI actually waited the recommended amount of time before top coating too! All in the hopes that it would set up nice and hard and not just peel away when I installed the bolts.
Turned out to be all in vain as the enamel paint doesn't cure enough in the 48 hours they recommend to withstand the torque of tightening bolts. Oh well, they are skidplates after all, a component whose sole purpose is to get beat on rocks.
20150603-P1010413 by Tim Souza, on Flickr
20150603-P1010414 by Tim Souza, on Flickr
20150603-P1010415 by Tim Souza, on FlickrI did not measure before and after but clearance definitely improved a little bit. Everything bolted on smoothly with the exception of getting the nuts off the driver's side of the transmission cross member. Clearance was too tight with the exhaust hanger and I did not have either a 16mm socket to turn the head of the bolt, or a ratcheting wrench (ratchet + socket didn't fit) to get at the nut. It was a painful exercise with two open ended wrenches. It really makes me wish I had my toolbox that is just sitting in my parents garage on the East Coast. I really need to get that out here.
I followed up the installation of the skid plates with a set of Wheeler's Superbumps. I was never totally pleased with the ride up front, I'm not sure if the ARB bumper alone just isn't enough weight to get the OME 886 coils moving, but it never felt quite as controlled as I would have liked. I was hoping the longer, softer Superbumps would add some progressiveness to the front suspension and reduce the tendency to pogo a bit.
Installation was pretty straightforward, unscrew the old bump stops, cut about an inch off the long end of the provided 8mm allen key, and screw the new ones in. I tried to engineer a way around cutting down the allen key but no combination of allen key, hex drive socket, u-joint, or extension worked. After cutting it down I was able to swap them out in 5 minutes.
I took it for a spin after everything was buttoned up and was quite pleased with the outcome. I can't attribute the perceived increase in ride quality to the additional weight or the Superbumps, but the combination of the two left the front end feeling a lot more planted and in control. There was, as expected, less of the pogo effect and a reduction in harshness through larger bumps. I now fully intend to put a set of Superbumps in the rear once I gather the parts to do the u-bolt flip.
Unfortunately I do not have pre/post numbers for the increase in clearance due to the new skids or the decrease in ride height due to the additional weight.
And for those wondering, no, my truck does not have a super advanced case of rust. I know the pictures make it look particularly awful but rest assured that that is just the red mud of Moab coating the underside.
Last edited:
brianjwilson
Some sort of lost...
The skids look great!
prerunner221
Adventurer
To silence the HiLift run a handle isolater and then run a heavy duty bungee cord from the base plate to one of the holes in the jack. I don't hear mine rattle at all.
Adventurous
Explorer
The skids look great!
Thanks! I'd certainly recommend Pelfreybilt when it comes time for you to armor up.
To silence the HiLift run a handle isolater and then run a heavy duty bungee cord from the base plate to one of the holes in the jack. I don't hear mine rattle at all.
I'll give that a shot. I tried tying it up with some rubber twist ties to no avail. Of course I'm not certain at this point that it's the foot, it could also be the lifting mechanism as well.
Adventurous
Explorer
I tried drilling out the bolt from the Rotopax handle this weekend with mixed success. I was able to get the bolt out, but not without potentially rendering the handle useless. I wasn't able to drill all the way through the roll pin, even using some brand new bits. It just wouldn't. So I cut the bolt off flush with the handle and started drilling it out in that direction. Managed to get down to the roll pin and drill through it. I discovered that in addition to the roll pin they also use a fair amount of red loctite to retain the bolt. By the time I was able to drill out the remnants I had destroyed any threads inside the handle. I suppose I could epoxy and pin in my own 5/16" bolt, but at this point I'll probably just buy new handles, as much as that annoys me.
Lesson learned, when putting a full Rotopax container onto the mount plate, remove the handles first. It is too difficult to jockey the container into place fighting the alignment of the two handles.
Lesson learned, when putting a full Rotopax container onto the mount plate, remove the handles first. It is too difficult to jockey the container into place fighting the alignment of the two handles.
Adventurous
Explorer
So my siblings came out to visit for the first time since I moved here two years ago. As part of their introduction we took a trip around Colorado. The itinerary was to head down to Southwest Colorado to Silverton/Ouray, then up to Crested Butte, camp a night in Granby, then head up over Trail Ridge Road and back home. 5 days and a little over 900 miles.
Here are a couple of pictures from our travels.
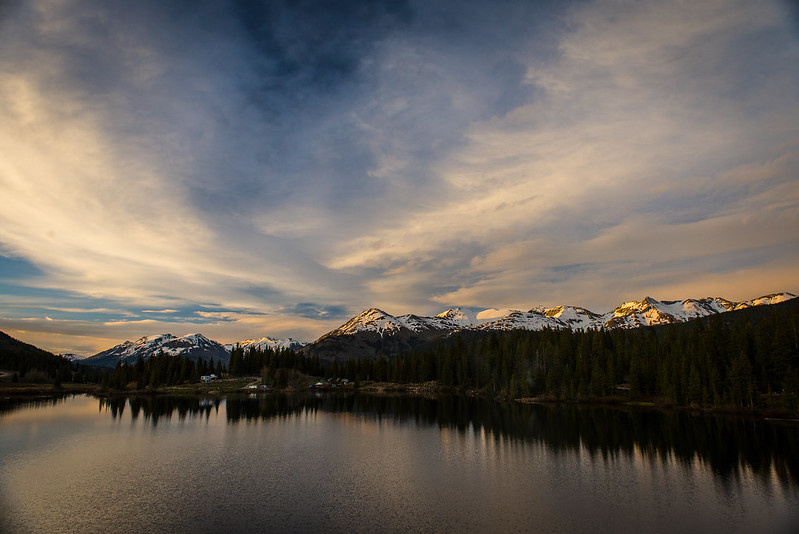
One direction of our views from Molas Lake Campground outside of Silverton, CO.
 20150613-DSC_0091 by Tim Souza, on Flickr
Turning 180 degrees...
 20150613-DSC_0070 by Tim Souza, on Flickr
Part of the goal of going down to Southwest Colorado was to try and do the Alpine Loop. The idea was to split the group up into two trips as the GF's Civic was in no way going to make that trip. We started off with a brief visit to the Animas Forks ghost town.
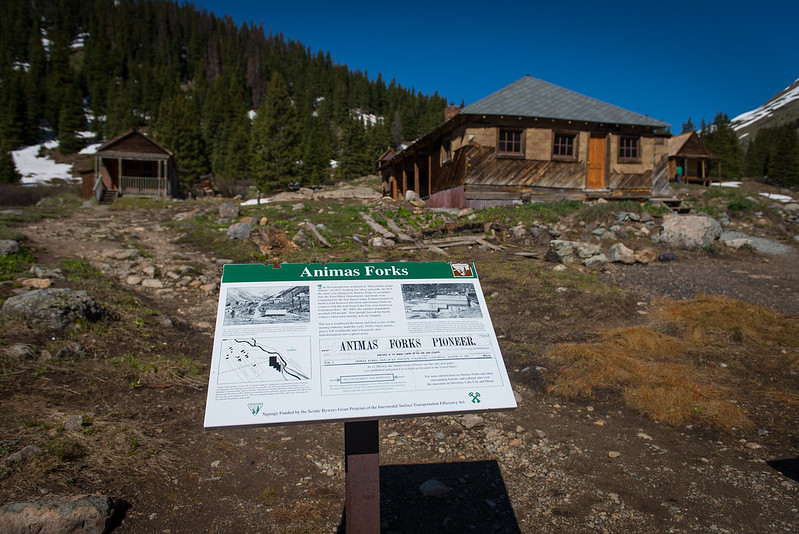 20150614-DSC_0142 by Tim Souza, on Flickr
As with most of the ghost towns, it has an interesting boom-bust history to it. We wandered around for a little bit taking pictures before airing down and getting ready to hit Engineer Pass. I don't have many pictures of the trail on the way up as I was driving, it is a pretty narrow shelf road, and the fact that it had just opened up a week ago made for slow going. I definitely felt the length of the DCLB going around a few of the switchbacks, but it was nothing a 3 point turn couldn't take care of. I am still impressed with how easily the Tacoma walks up the steep rocky sections.
We made it to the top of the pass before realizing that doing the entire Alpine Loop would take the better part of 8+ hours. As the rest of Engineer Pass is a 2wd road into Lake City, we decided to turn around and come back down the way we came up.
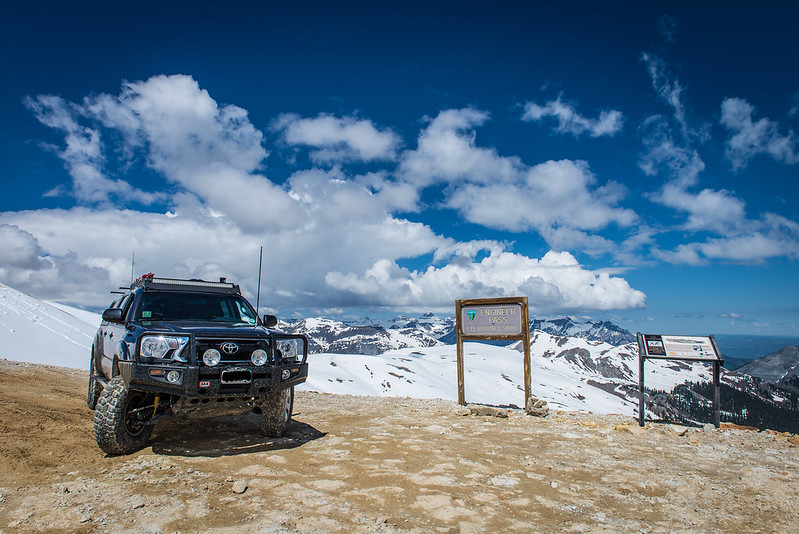 20150614-DSC_0153 by Tim Souza, on Flickr
Things got a little bit more interesting as we encountered traffic coming the other direction. The trail is simply not wide enough to fit two vehicles in most places, so when I ran into two other trucks I had the pleasure of backing down the shelf road, through healthy sized ruts and in the snow/ice, while the other guy was essentially on my front end. I found it quite rude actually.
The rest of the encounters along the way were nothing to mention. We made it back down in fairly short order and headed back into town. I fully intend to come back and do the entire loop at some point. I know we will be back in the Fall to check out the Aspens, so we'll see if the weather cooperates.
As with any trip, the more you get out, the more you learn about what works and what doesn't work. I keep a mental list of things to work on/improve and this is what I came up with from this trip:
- The weather was less than optimal the entire time we were out with scattered showers every day. I really need to get an awning to provide some sort of shelter in those instances.
- I also need to find a better solution for airing down. Whether it is the ARB quick deflator or a set of Stauns, I need to save myself the trouble of finding that perfect stone to depress the valve stem and save the 10+ minutes airing down.
- I happened to see the elegant way that Paul from Equipt integrated the Expedition One Geri can into his rear platform setup. I happened to stumble upon one while in Ouray and picked it up with the intentions of doing something similar. At the very least it provides a low profile, easy to pack additional 4 gallons of water capacity.
- Curtains are now on the list for the topper windows. Getting blasted in the face at 6am from the rising sun is a major buzzkill.
- I also need to research navigation setups. Although I was well prepared with the Funtreks guide book, a paper map, and a GPS unit, I need to consolidate that all into a good, single, easy to read package with a paper map backup.
Now to try and sneak in some time to work on the truck before the next camping trip. Hopefully the rainy season is now over so some of the house related items on the to-do list move down on priority from mission critical.
Here are a couple of pictures from our travels.
One direction of our views from Molas Lake Campground outside of Silverton, CO.
20150613-DSC_0091 by Tim Souza, on FlickrTurning 180 degrees...
20150613-DSC_0070 by Tim Souza, on FlickrPart of the goal of going down to Southwest Colorado was to try and do the Alpine Loop. The idea was to split the group up into two trips as the GF's Civic was in no way going to make that trip. We started off with a brief visit to the Animas Forks ghost town.
20150614-DSC_0142 by Tim Souza, on FlickrAs with most of the ghost towns, it has an interesting boom-bust history to it. We wandered around for a little bit taking pictures before airing down and getting ready to hit Engineer Pass. I don't have many pictures of the trail on the way up as I was driving, it is a pretty narrow shelf road, and the fact that it had just opened up a week ago made for slow going. I definitely felt the length of the DCLB going around a few of the switchbacks, but it was nothing a 3 point turn couldn't take care of. I am still impressed with how easily the Tacoma walks up the steep rocky sections.
We made it to the top of the pass before realizing that doing the entire Alpine Loop would take the better part of 8+ hours. As the rest of Engineer Pass is a 2wd road into Lake City, we decided to turn around and come back down the way we came up.
20150614-DSC_0153 by Tim Souza, on FlickrThings got a little bit more interesting as we encountered traffic coming the other direction. The trail is simply not wide enough to fit two vehicles in most places, so when I ran into two other trucks I had the pleasure of backing down the shelf road, through healthy sized ruts and in the snow/ice, while the other guy was essentially on my front end. I found it quite rude actually.
The rest of the encounters along the way were nothing to mention. We made it back down in fairly short order and headed back into town. I fully intend to come back and do the entire loop at some point. I know we will be back in the Fall to check out the Aspens, so we'll see if the weather cooperates.
As with any trip, the more you get out, the more you learn about what works and what doesn't work. I keep a mental list of things to work on/improve and this is what I came up with from this trip:
- The weather was less than optimal the entire time we were out with scattered showers every day. I really need to get an awning to provide some sort of shelter in those instances.
- I also need to find a better solution for airing down. Whether it is the ARB quick deflator or a set of Stauns, I need to save myself the trouble of finding that perfect stone to depress the valve stem and save the 10+ minutes airing down.
- I happened to see the elegant way that Paul from Equipt integrated the Expedition One Geri can into his rear platform setup. I happened to stumble upon one while in Ouray and picked it up with the intentions of doing something similar. At the very least it provides a low profile, easy to pack additional 4 gallons of water capacity.
- Curtains are now on the list for the topper windows. Getting blasted in the face at 6am from the rising sun is a major buzzkill.
- I also need to research navigation setups. Although I was well prepared with the Funtreks guide book, a paper map, and a GPS unit, I need to consolidate that all into a good, single, easy to read package with a paper map backup.
Now to try and sneak in some time to work on the truck before the next camping trip. Hopefully the rainy season is now over so some of the house related items on the to-do list move down on priority from mission critical.
Last edited:
brianjwilson
Some sort of lost...
Looks like a good trip!
I need to decide on deflators again too, I seem to have lost my stauns (may have been left in the jeep when I shipped it)
Every time I used the staun deflators the psi seemed to vary. They should have been convenient but I feel like I tweaked the pressure every time I aired down anyway. I initially set them at The arb ez deflator is in my Amazon cart right now with misc other items, I think I will give it a shot.
wreckdiver1321
Overlander
Great photos! Love your style. What camera are you using?
Really nice truck too by the way. You don't see as many LB builds, it's nice to see something different. Looks like you have it set up really well. Nice work!
Really nice truck too by the way. You don't see as many LB builds, it's nice to see something different. Looks like you have it set up really well. Nice work!
bknudtsen
Expedition Leader
Looks like a good trip!
I need to decide on deflators again too, I seem to have lost my stauns (may have been left in the jeep when I shipped it)
Every time I used the staun deflators the psi seemed to vary. They should have been convenient but I feel like I tweaked the pressure every time I aired down anyway. I initially set them at The arb ez deflator is in my Amazon cart right now with misc other items, I think I will give it a shot.
The ARB deflator is what I use. It is pretty simple once you get the hang of it, and the pressure is controlled by you, so it is always consistent. It just takes more time than the Stauns. I had the same issues with Stauns; random complete deflations or inconsistent PSI.
bknudtsen
Expedition Leader
- Curtains are now on the list for the topper windows. Getting blasted in the face at 6am from the rising sun is a major buzzkill.
How is the condensation when sleeping in the topper? Any plans/need for a exhaust fan?
Adventurous
Explorer
The ARB deflator is what I use. It is pretty simple once you get the hang of it, and the pressure is controlled by you, so it is always consistent. It just takes more time than the Stauns. I had the same issues with Stauns; random complete deflations or inconsistent PSI.
ARB it is then!
How is the condensation when sleeping in the topper? Any plans/need for a exhaust fan?
There is most definitely a condensation issue when sleeping in the topper. The two of us usually end up with droplets on all of the windows even with the two sides mostly open throughout the night. If this topper was my final solution I would definitely add a fan, but given that I would like to upgrade to the high topper at some point I'll wait. I doubt there are a ton of people out there looking for a topper with a hole in the roof.
That being said, any recommendations on fans?
Great photos! Love your style. What camera are you using?
Really nice truck too by the way. You don't see as many LB builds, it's nice to see something different. Looks like you have it set up really well. Nice work!
Thanks! The practicality of the LB for every day life plus the requirement of sleeping in the back drove my decision more so than offroad prowess.
The majority of the build photos are shot with a mirrorless Panasonic. All of pictures from the trips are a Nikon D600 with either a 24-70 or a 70-200, each occasionally clad with a B+W polarizing filter. Editing is done through Lightroom and in rare cases, Photoshop.
Looks like a good trip!
I need to decide on deflators again too, I seem to have lost my stauns (may have been left in the jeep when I shipped it)
Every time I used the staun deflators the psi seemed to vary. They should have been convenient but I feel like I tweaked the pressure every time I aired down anyway. I initially set them at The arb ez deflator is in my Amazon cart right now with misc other items, I think I will give it a shot.
I'll be curious to know your thoughts. I've had the ARB sitting in my cart for a little while as well and have almost pulled the trigger several times. I'm not 100% sold on the Stauns.
deadbeat son
Explorer
ARB it is then!
I'll be curious to know your thoughts. I've had the ARB sitting in my cart for a little while as well and have almost pulled the trigger several times. I'm not 100% sold on the Stauns.
I'm somewhat local and have the ARB if you'd like to try it out sometime.
wreckdiver1321
Overlander
The majority of the build photos are shot with a mirrorless Panasonic. All of pictures from the trips are a Nikon D600 with either a 24-70 or a 70-200, each occasionally clad with a B+W polarizing filter. Editing is done through Lightroom and in rare cases, Photoshop.
Nice setup! I've got a D610 and a 24-120. Can't beat the full frameness.
brianjwilson
Some sort of lost...
ARB it is then!
There is most definitely a condensation issue when sleeping in the topper. The two of us usually end up with droplets on all of the windows even with the two sides mostly open throughout the night. If this topper was my final solution I would definitely add a fan, but given that I would like to upgrade to the high topper at some point I'll wait. I doubt there are a ton of people out there looking for a topper with a hole in the roof.
That being said, any recommendations on fans?
Thanks! The practicality of the LB for every day life plus the requirement of sleeping in the back drove my decision more so than offroad prowess.
The majority of the build photos are shot with a mirrorless Panasonic. All of pictures from the trips are a Nikon D600 with either a 24-70 or a 70-200, each occasionally clad with a B+W polarizing filter. Editing is done through Lightroom and in rare cases, Photoshop.
I'll be curious to know your thoughts. I've had the ARB sitting in my cart for a little while as well and have almost pulled the trigger several times. I'm not 100% sold on the Stauns.
Well I ordered the arb deflator but I won't be home for over a week. Will let you know. I wasn't too impressed with the stauns. Videos of the arb deflator look good, pretty quick and straight forward.
Forum statistics
Members online
- svmaple
- Howsay
- speroleon
- Slappy
- USMC Dude
- Pierre D
- Cgswimmer24
- stickboy27
- dzrtrataz
- TrystanZ24
- SapperLdr
- driveby
- JackW
- Nimbl Vehicles
- livemusic
- Montero_cruz
- SilicaRich
- gabrielef
- Obsessed2findARuggedHybid
- GeorgeHayduke
- locrwln
- BOHICA
- jbtradingco
- trabs00
- llamalander
- Blowby
- Muttle
- jawha1020
- LikeABoss
- claymond
- Frisman
- modernbeat
- hudd07
- Raisinhead
- Burlydirtyhippy
- FJRanger
- Robbus
- CH261XL
- shortbus4x4
- salbalboa
- Alloy
- Fishenough
- pugslyyy
- knutsCO
- MaynardFerguson
- dizzydom
- rover26c
- monsieurhodge
- Chasing Snow
- BlueCruiser98
Total: 1,094 (members: 62, guests: 1,032)