Dual Battery Installation in LR3

DiscoNels

Adventurer
Thanks guys, this definitely helps. I also notice that the rubber grommet surrounding the huge bundle going into the cabin is quite pliable and would have room on the edge to run some wires thru. This would simplify things for me as that top grommet you speak of is in no-man-hands-land and isn't very accessible. Now I've got some choices to consider.
 

jerdog53

Explorer
Yah what they said! Its a very problematic location to find and access from the front, not so bad inside the cab but you definitely need to be an contortionist!
 

unseenone

Explorer
I wouldn't recommend disturbing the wire bundle. These vehicles are finicky enough with their wiring. I considered using it for a second, and scratched the idea. If something in there were to break, it would be an expensive adventure to fix it.

I'd refer you to this post on that one, and the previous page. http://www.expeditionportal.com/forum/threads/11094-Post-pictures-of-your-Land-Rover/page489 You'd need to order a standard jar of Lucas wiring smoke.
 
Last edited:

DiscoNels

Adventurer
Well, using a coat hanger like cmb6s mentioned I managed to get the wires thru the firewall and I have to say it was actually pretty easy. Only took me about 10-15 minutes. Pushed the wire from the engine side into the cabin, looked where the coat hanger poked thru, taped my wires onto the hanger and pulled back into engine compartment. The rubber grommet did pop out put I just grabbed each end of the wires and jiggled them back and forth until the rubber grommet pushed back into place.

I'm running (2) 8 Gauge wires thru the hole and will have another smaller wire to run for my Traxide switch. (I'm running my own wire to the back end. I purchased the D3-AU kit).

20150412_163511-2.jpg20150412_163136-2.jpg20150412_171334-2.jpg
 

unseenone

Explorer
Well done. I had a bit of fun myself today. I wanted to fit the new Traxide upgrade, didn't get to that. I did remove the bumper to fix a wiper fluid leak, turned out to be a split hose. It was an all day project. Before that, upgraded the winch battery wiring. Whew, worn out for sure.

Good job-- I'm glad it went smoothly. I want to redo my boot wiring and run #6 there, but I think I'll take a break first.
 

Jwestpro

Explorer
... Did some research on line and read some forums and decided on the D3-DU kit from Traxide in Oz and was very pleased with what arrived. It wasn't until this last weekend I had time to attempt the install.

http://www.traxide.com.au/complete-...y-3-dbs-kits/d3-du--usi-160--abg-25--fpc.html

I've heard the National Luna system is also very good. Did you compare both of these and why did you go with the Traxide?

I have what appears very basic, the Wrangler, but always seems to work. I couldn't find the source on Atlantic British anymore but ironically found this link: http://expeditionportal.com/equipment/vehicles/feature_vehicle/part3/
Thanks
 

unseenone

Explorer
I installed a NL kit for someone in town that had one, it was the biggest piece of junk I've ever seen in my opinion. I've never heard a complaint from anyone with a Traxide system, there are entire threads dedicated to issues with the NL. If you are into DIY, you can order the bare bones Traxide and get out of it cheaper, save some money on the shipping of wire you can get locally. The pre-made harness is handy though. I don't mean to run them down, but I do not recommend that bit of kit.
 

Jwestpro

Explorer
Thank you for the info. About the wiring, you mean with Traxide? I'd probably opt for any sort of pre-thought out harness available with the kit.
 

unseenone

Explorer
ok, what all do you want, for the LR3.. .

First, I suggest two good batteries. Deka 9A94 & Deka 9A47 as the 2nd battery.

The "full kit" would include the 50A Anderson power plug & wiring harness to the rear of the truck. If you aren't charging a battery in a trailer or do not intend to use the external plug, you can get the next kit down, which excludes that. http://www.traxide.com.au/complete-...y-3-dbs-kits/d3-du--usi-160--abg-25--fpc.html

The "next" kit-- I think this is the one jerdog got, if I recall. It should including everything except the wiring harness parts that include the wiring for the 50A Anderson plug. http://www.traxide.com.au/complete-...covery-3-dbs-kits/d3-bu--usi-160--abg-25.html

Of course, confirm with Tim, call or e-mail with what you want. I've set up a couple of group buys previously if there are a few folks that want various kits, it's easier to bundle it together and ship, ie: the group should save money. Shipping was pretty fast the last time.

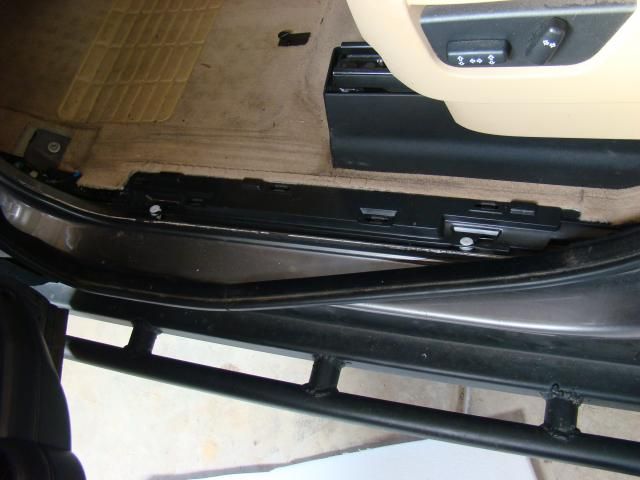
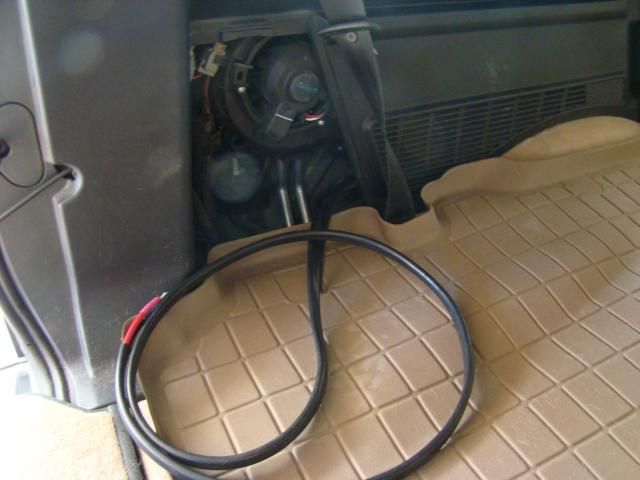
I would deviate from the recommended install on the sockets in the rear, I did a bit of my own stuff. I relocated the plugs to a better spot, and later added an Anderson Power Pole to run all my gadgets, added solar, etc. I think I posted a link to all the pictures previously.

I got around to installing my 160, and I am quite happy with it, I upgraded from the SC80..
 

Jwestpro

Explorer
Thanks but maybe I didn't already say so but I have a system installed already that does work just fine. It doesn't show battery status or charge a trailer set of batteries but for a classic dual/backup it works perfectly. I obviously then also have both batteries already and wouldn't need their Deka items. I have an Odyssey 2150 as my 2nd and slightly smaller version as the primary.
I much of my interior factory lighting is powered from the 2nd such as the 3rd row reading and both forward row reading/side lamps. Only the center lamps are stock sourced from primary.
I have an inverter and 4 additional 12v sockets all from 2nd battery, full time powered of course so the fridge will run as needed.

I have a simply 3 way switch to combine if needed in emergency but both are charged as needed during engine run time.

I just thought that at some point it would be nice to ad in a way to monitor the batteries so that I am not caught by surprise sometime. F

For the size and weight of the 2150, it would be cool someday to swap in some of the modern higher density/lightweight batteries becoming available. They might be lithium based, I forget.
 

unseenone

Explorer
No problem... Sounds Interesting. There are quite a few discussions in the solar section of the board on various battery monitors. Some may be overkill. The Traxide doesn't really provide a meter, it just works, but it is nice to know. I have a meter on the solar controller, beyond that I don't worry too much about it too much.
 

DiscoNels

Adventurer
Okay, another question. How the heck do you get this channel cover to slide forward? When I ran my wires thru the firewall over the weekend I attempted to gain access to the wire harness trough by removing the B pillar lower trim, the sill trim, and even the trim piece on the outer edge of the drivers seat. It appears that the remaining cover piece to the channel/trough slides forward to "unlock". I wedged a screw driver and started pounding with a hammer from the side at an angle but it wouldn't more more than an 1/8th inch. So, I had to abort for the day and put it all back together. What am I missing here?

Access the driver's side of the truck by removing the B pillar lower trim panel then the drivers and passenger sill trim piece.

The drivers foot rest needs to be removed by popping the center portion off than unbolting it from the floor. Next is the drivers kick panel held in with clips. Peel up the outboard side of the door seal and remove it enough to pry up sub-floor I guess you could call it revealing the wire harness trough underneath.


DSC05136_zpsf96550de.jpg


Seems like a step or information is missing on how to get the wire from the point at the rear passenger seat in the wire channel/trough into the rear compartment where the 12V plug in socket is located. Looking in the LR3 workshop manual it seems like the procedure to remove the plastic panel is quite a job. Is there a shortcut to just take a peak at the innards enough to guide the wires and drill holes to mount more fun stuff?

Route the feeder wire up under the lip of the heater box along the floor of the cargo area drivers side and pull out the wire through the hitch storage compartment .

DSC05140_zps02d493c7.jpg


Gain access to the back side of the OEM power port in the right rear cargo compartment by popping the clips and pulling the heater box inboard.

DSC05148_zps08443a0a.jpg

Thanks for any information on how to make this easy. My Traxide D3-AU I ordered showed up today and I just did a dry run installation on my living room floor. It should only take about 30 minutes to install. It's the wires I need to run from under the dash to the rear that is going to hold me up.
 

jerdog53

Explorer
First off thanks Todd for answering all of Jwestpro's questions so I didn't have to! :)
I have the SC180 unit with the solar plug in the aft.

The answer to your original question Jwestpro is I wanted an turn key kit so to speak something I can install and didn't have to figure anything out part wise.


DiscoNels

The door sill piece I could not get to move either so don't feel bad, using as flat tip screwdriver or a butter knife get up underneath the white buttons and pop them up out of the holes they reside in then the black plastic piece can be lifted up albeit slightly enough to rout the wires underneath.

Routing the wires into the back underneath the left side rear sidewall is a bit labor intensive. Essentially lay the wires along the floor side wall junction, using your butter knife get up underneath the lip to the sidewall prying up follow closely with the wires pushing them underneath working from the front to the back until you get to the storage compartment door. I did pull the side wall away from the body a bit due to the location of the added power port outlet and really isn't overly challenging, there is a few bolts up front related to the seat belt but the rest is those "clips" used all over the truck.
 
Last edited:

Forum statistics

Threads
185,916
Messages
2,879,585
Members
225,497
Latest member
WonaWarrior
Top