Boden Build - 2015 Tacoma DCLB 4wd

tacozord

Adventurer
With how well documented and well written all of your stuff is I'm surprised you actually have a chance to do anything. I can only imagine how much time putting stuff like that write up together takes.

That being said it is now bookmarked and will be referenced in the future. So thank you for that.
My biggest complaint in life is there's not enough time. But somehow I get things done. I have so many projects going concurrently along with a full time job that it's crazy. No rest for the wicked I guess.

Glad the tutorial will be of help. I'm looking forward to seeing your build.
 

kwill

Observer
I admire guys like you that not only have the skills to do these things, but also have the patience to document it for the rest of us. One very minor suggestion: I like the debadged look so I would debadge the ARB bumper and Warn winch.
 

tacozord

Adventurer
I admire guys like you that not only have the skills to do these things, but also have the patience to document it for the rest of us. One very minor suggestion: I like the debadged look so I would debadge the ARB bumper and Warn winch.

Thank you. It's definitely a lot of work.

Yeah...I'd like to continue debadging everything. The Flippac has some AT Overland stickers on it that I want to remove as well. Someday soon.
 

tacozord

Adventurer
My rear seat platform is complete with the exception of bolting it in. I was held up because of a missing bolt. Basically, there's a total of six bolts to secure the rear seat brackets and four bolts for the seatbelts. To secure the platform, I'm using three of the mounting points for the rear seats and will plug the remaining unused holes with bolts. Unfortunately, I lost one of the 12mm bolts that secured the middle seatbelts. What's weird is that a replacement bolt from the hardware store wouldn't thread despite it being the same size: 12mm x 1.25 fine thread. Anyway, I had to go to the dealership today to get a replacement bolt. The parts guy was kind enough to give them to me for free, because I took the time to open up the Flippac and show him. Awesome!

Alright...here's the final steps.

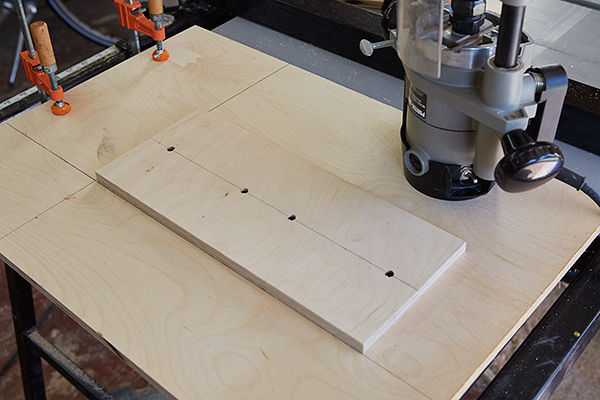
I wanted access holes to utilize the storage compartments underneath the platform. So I began by cutting a piece of plywood 6" x 14", which is the size of panel that I wanted. This was secured to another piece of plywood that will then become a template to use with a router.
2015-11-13_TacomaBackSeatPlatform_Z2A6666_web600.jpg


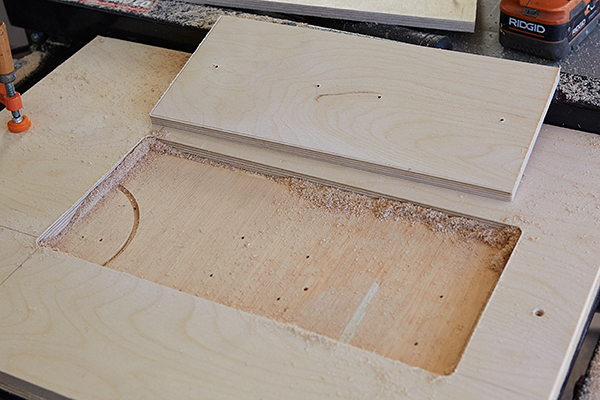
With a 3/8" guide bushing and a 1/4" router bit, I followed the pattern, and the template was complete.
2015-11-13_TacomaBackSeatPlatform_Z2A6670_web600.jpg


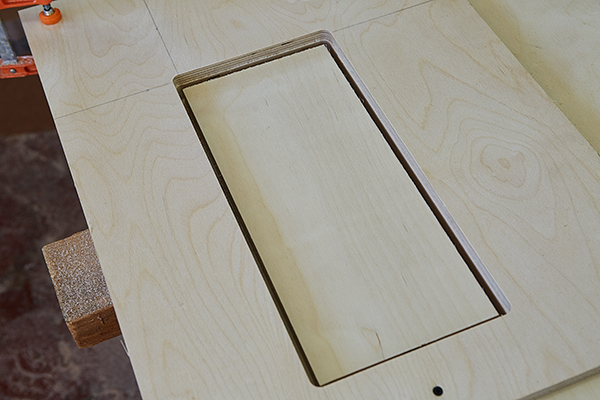
The template will be used on the platform to cut out the access compartment holes while simultaneously making the panels. While doing so, the panel needs to be temporarily secured from underneath. Otherwise the panel instantly floats when you complete the cut, and this is a good way to ruin it. I used scrap plywood.
2015-11-13_TacomaBackSeatPlatform_Z2A6672_web600.jpg


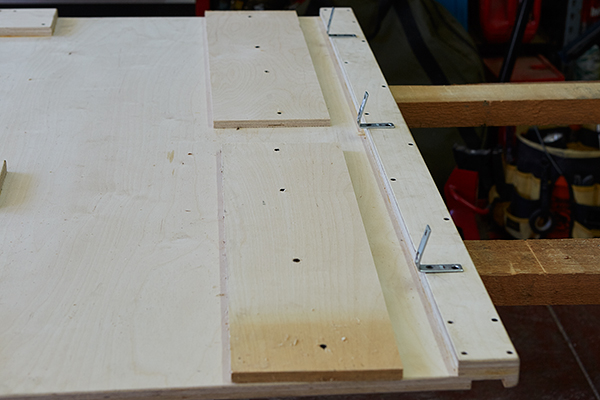
I made the template in such a way that I can align it with the edges of the platform, which places the cutouts exactly where I want them.
2015-11-13_TacomaBackSeatPlatform_Z2A6675_web600.jpg


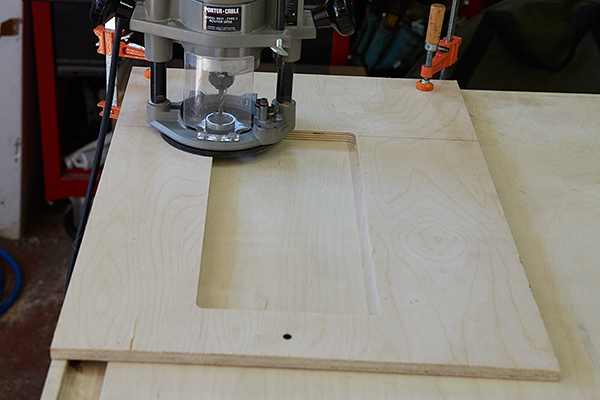
I used the same guide bushing and router bit to cut out the panel.
2015-11-13_TacomaBackSeatPlatform_Z2A6687_web600.jpg


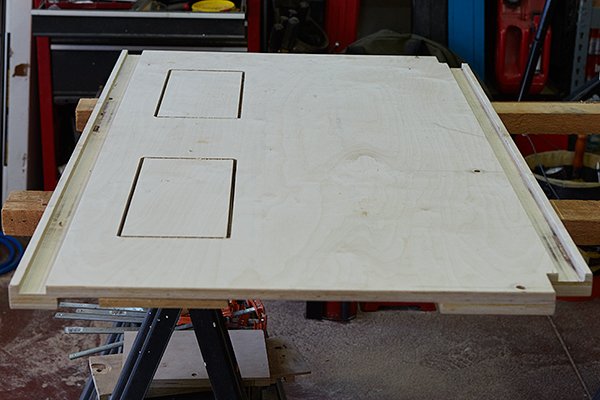
After the first cutout, I flipped the template, re-positioned it, and cut out the second panel.
2015-11-13_TacomaBackSeatPlatform_Z2A6692_web600.jpg


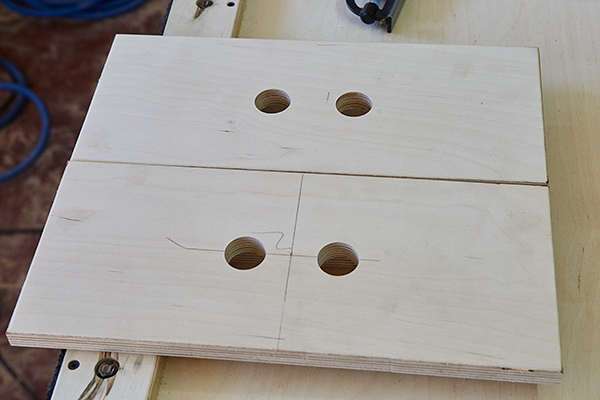
I then cut two finger holes in the panels to be able to remove them.
2015-11-13_TacomaBackSeatPlatform_Z2A6714_web600.jpg


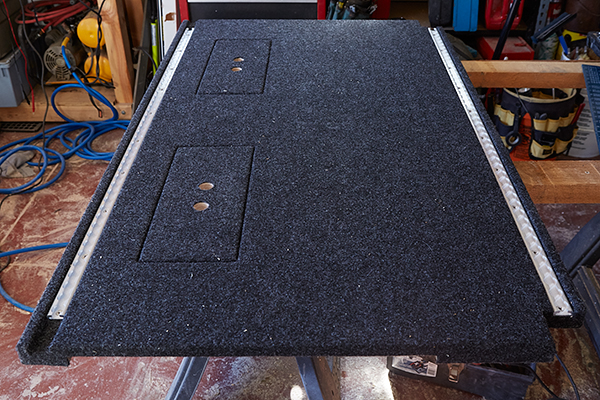
The next step was to cover the platform and panels with carpet. I used a very thin carpet that is typically used for speaker cabinets and road cases. I purchased what I needed from www.diyroadcases.com. I used 3M Hi-Tack 76 spray adhesive as well as 1/4" crown x 5/8" staples.
2015-11-13_TacomaBackSeatPlatform_Z2A6727_web600.jpg


To prevent the panels from falling all the way through, I attached small strips of plywood on the bottom.
2015-11-13_TacomaBackSeatPlatform_Z2A6717_web600.jpg


2015-11-13_TacomaBackSeatPlatform_Z2A6720_web600.jpg


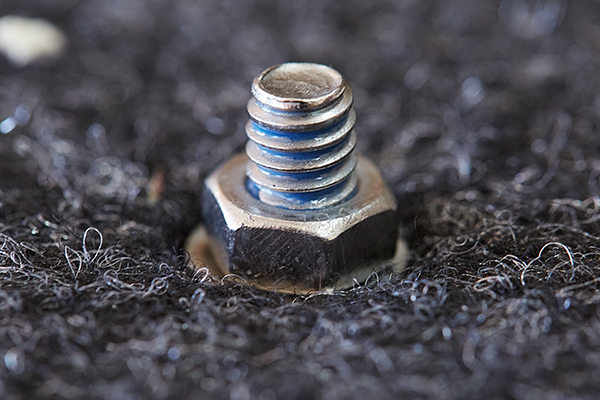
The front L-Track was simply bolted with hardware that I left standing proud on the underside. I don't think this will be a problem with anything hitting or catching them. Also note that I used Loc-Tite on all of these bolts.
2015-11-13_TacomaBackSeatPlatform_Z2A6702_web600.jpg


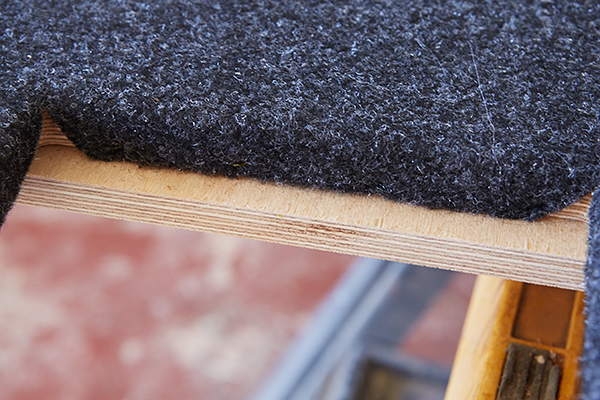
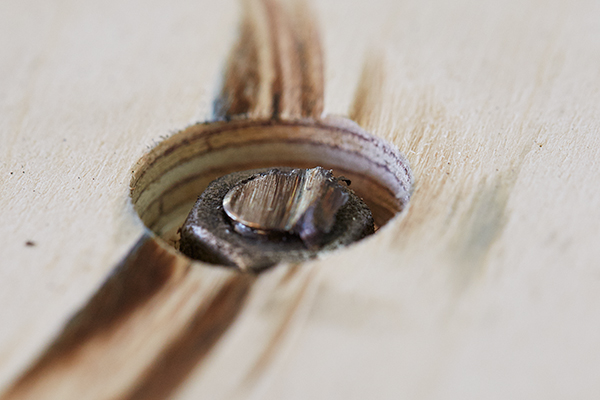
The rear L-Track was bolted all the way through as well, but I recessed the nut using a forstner bit and cut off the extra length. This was necessary so that the platform sat on itself instead of the bolts. This didn't need to be pretty.
2015-11-13_TacomaBackSeatPlatform_Z2A6711_web600.jpg


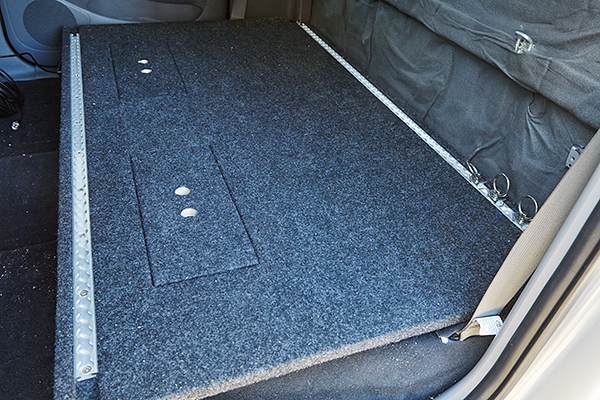
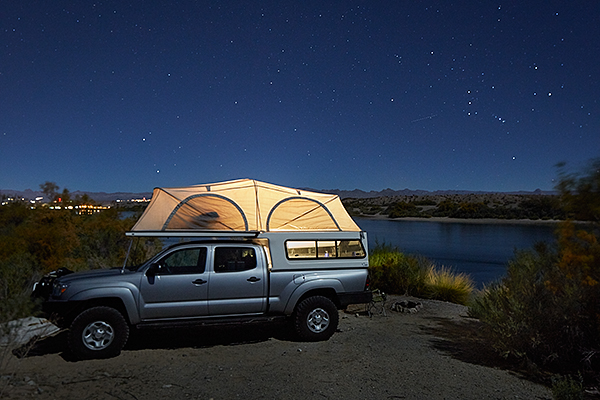
And here it is finally in the vehicle. I'll take another picture later with it in action.
2015-11-13_TacomaBackSeatPlatform_Z2A6740_web600.jpg
 
Last edited:

brianjwilson

Some sort of lost...
My biggest complaint in life is there's not enough time. But somehow I get things done. I have so many projects going concurrently along with a full time job that it's crazy. No rest for the wicked I guess.

Ugh tell me about it. I get 12 days a month at home, 8 of them I have my 18 month old daughter by myself all day while the wife works. It is nearly impossible to work on projects at home lately.

Your platform looks nice! At one point I considered doing this with the larger part of my back seat. But soon I'll be installing a second car seat in and we'll really be strapped for space!
 

mouse007

Explorer
WOW..!! Simply amazing, good job sir. Your making me want to drive over so you can help me build a bed storage system.
 

tacozord

Adventurer
WOW..!! Simply amazing, good job sir. Your making me want to drive over so you can help me build a bed storage system.
Thanks. Building out bed storage will be coming sometime early next year. I'm still trying my to figure out exactly what I want to do. Ideally, I want an aluminum tube frame with plastic or wood paneling. But I don't know how to weld. So I'll be taking my time to plan this out. I have some requirements such as fridge and water tank. So these probably need to be purchased first and then build around them.
 

tacozord

Adventurer
Ugh tell me about it. I get 12 days a month at home, 8 of them I have my 18 month old daughter by myself all day while the wife works. It is nearly impossible to work on projects at home lately.

Your platform looks nice! At one point I considered doing this with the larger part of my back seat. But soon I'll be installing a second car seat in and we'll really be strapped for space!
If you're like me at all, then you will find the time some how and make it happen. Good luck!
 

tacozord

Adventurer
Mojave Road

I recently completed a solo trip across the Mojave Road. This was a fantastic five day trip that I would recommend to anyone. I know many people who don't appreciate the beauty of the desert, but I just have to say that there's beauty all around you when you're out in the wild.

For navigation, I purchased the Mojave Road Guide by Dennis Casebier and entered the GPS coordinates into Google Earth. I then plotted the route and exported as a .kml file.
MojaveRoad_GoogleEarth.jpg


I emailed myself the .kml file and imported it into MotionX HD on my iPad. This gave me a rather accurate route to follow.
MojaveRoad_MotionX-HD.jpg


I also have a DeLorme InReach Explorer that I use for tracking and communication with my family and friends when out of cell range. Aside from the SOS feature, I can send/receive text messages, and people are able to track me on a MapShare page. The waypoints in the below image are what I added as I made my travels. You'll also notice that I varied off-route for exploration at times. Additionally, I bypassed the salt flats due to the rangers recommendation.
MojaveRoad_DelormeTracking.jpg


I took many photos along the way, including a fair amount of film. As I process images, I'll post them. In the meantime, here's a few from the trip.

The first night was spent next to the Colorado River at the trailhead. Although it was serene, the night was quite windy and I didn't sleep very well.
2015-11-20_MojaveRoad_Z2A7727_web600.jpg


It seems like everyone stops off and photographs the bus. Here's my take on it with a 17mm lens.
2015-11-21_MojaveRoad_Z2A8124_web600.jpg


The 2nd night was spent next to this watering hole. This was probably the best night of sleep I've had in such a long time. Incredible location!
2015-11-21_MojaveRoad_Z2A8221_web600.jpg


The next morning, I spent a couple hours photographing wildlife with a 500mm lens and 2x extender. 1000mm!!!!! This was a very pleasant experience relaxing, drinking coffee, and soaking it all in.
2015-11-22_MojaveRoad_Z2A8733_web600.jpg


The mailbox roughly marks the half-way point.
2015-11-23_MojaveRoad_Z2A9478_web600.jpg


This is the view leaving the mailbox.
2015-11-23_MojaveRoad_Z2A9443_web600.jpg
 
Last edited:

forty2

Adventurer
Awesome. My brother, sister and I are currently planning a trip across Death Valley and Mojave in the spring. It'll be the first thing we've ever done together without our parents, spouses, or kids. Ever. Every time I see pictures of the area I get more excited.
 

tacozord

Adventurer
Looks like it was an awesome trip! Nice shots!

Thanks. It was a fantastic trip! If I had the time, I would have stayed longer.

Awesome. My brother, sister and I are currently planning a trip across Death Valley and Mojave in the spring. It'll be the first thing we've ever done together without our parents, spouses, or kids. Ever. Every time I see pictures of the area I get more excited.

Let me know if I can answer any questions. This was my first time there, so I now have a good lay of the land. There's some areas I visited that I want to go back to and others that I didn't have time for. So there's definitely another trip in my future. Also, make sure you don't go too late in the spring for either locations. It gets HOT out there!
 

Forum statistics

Threads
185,903
Messages
2,879,394
Members
225,497
Latest member
WonaWarrior
Top