HSKR4X4
Adventurer
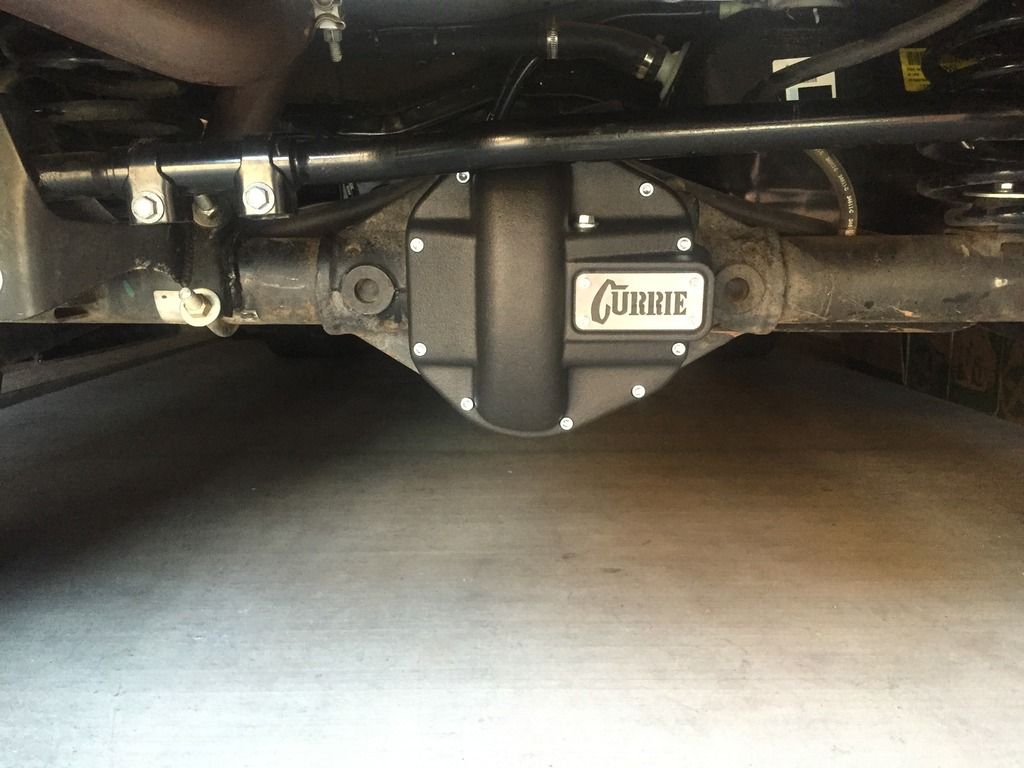
Currie Enterprises® Rear Differential Cover Write-Up
Mfg: 44-1005CTB
Price: $194.95
Description
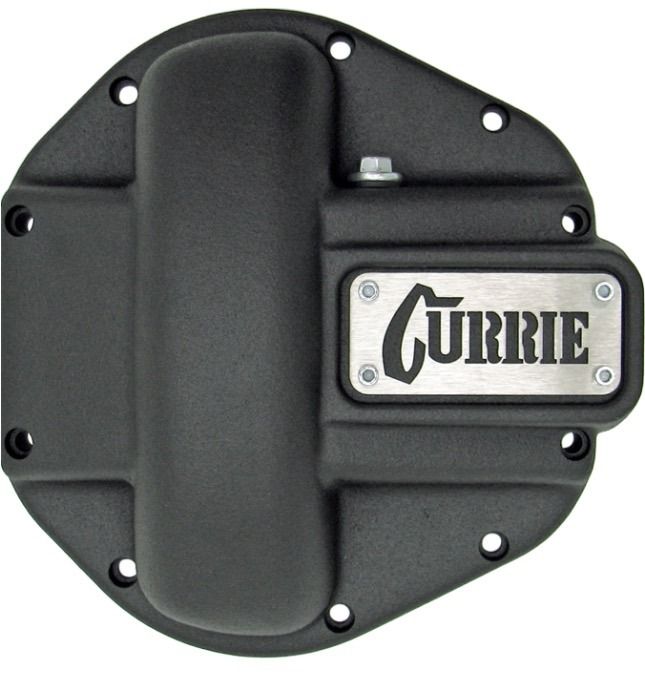
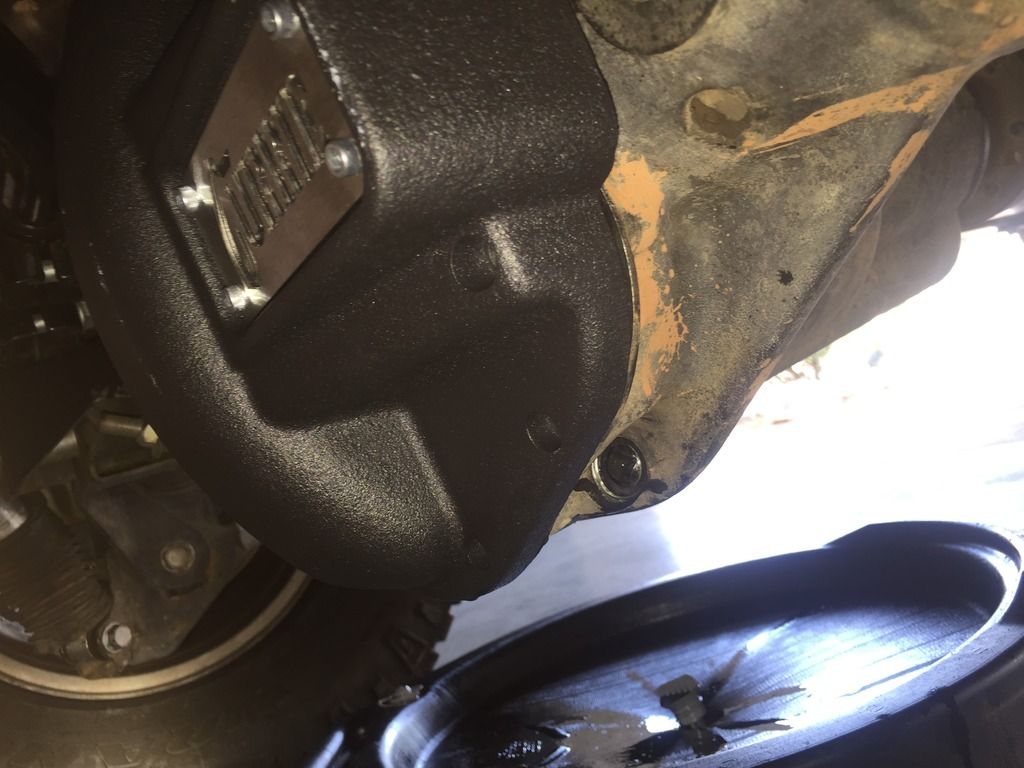
This 65-45-12 ductile iron covers are a clean, trim shape that provides ample clearance for front or rear applications where steering or gas tank clearance is a concern due to it’s slim 3 1/16” height. Cover is finished in textured black. Currie badge is laser cut stainless steel, gasketed fill plug with dipstick, socket head allen hardware and cover gasket included. Fits all Currie RockJock® 44 high and low pinion housings as well as stock Dana 44 high and low pinion housings.
My Thoughts
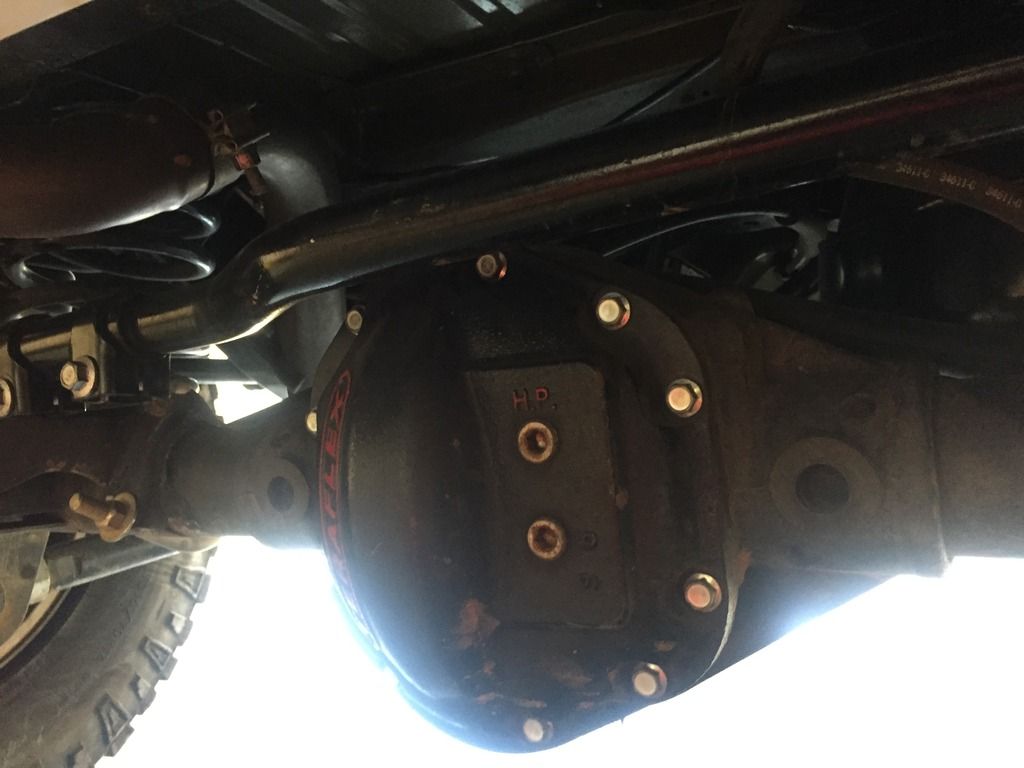
I have changed quite a bit of my Jeep add-ons over to Currie Enterprises® and I’ve been extremely happy with the quality and looks of all of their products so far. This differential cover is no exception, and is a great design. I really like that it has the dipstick in it. The install is a breeze just like any other differential cover. I changed out my Teraflex rear differential cover over to Currie mainly to match my new RockJock® 44 housing up front.
Notes
They make differential covers from 44-70 housings. They offer in a textured black like mine, textured red, black semi-gloss, and unpainted. All differential covers have their own part number, but all have a parts list in case something ever happens to your cover.
Parts Included
• Differential Cover with Dipstick
• Cover Bolts
• Gasket
• Instructions
Tools Needed
• Protective Eyewear
• Gloves
• Paper Towels
• Oil Catch
• Brake Cleaner
• Fluid Pump
• Gear Oil (2 quarts 12 ounces)
• Thread Tape
• 3/8 Ratchet
• 3/8 Ratchet Extension
• ¼ Ratchet
• Torque Wrench
• Gasket Scraper or Straight Razor
• RTV, Gasket, or Lube Locker
• Dead Blow
• 13mm or ½ ratchet wrench or socket
• ¼ allen
• Chisel
• Hammer
Install Time
30 minutes to 1 hour
Install Guide
Step 1
Park Jeep on level ground
• Pull emergency brake for extra safety while under Jeep.
Step 2
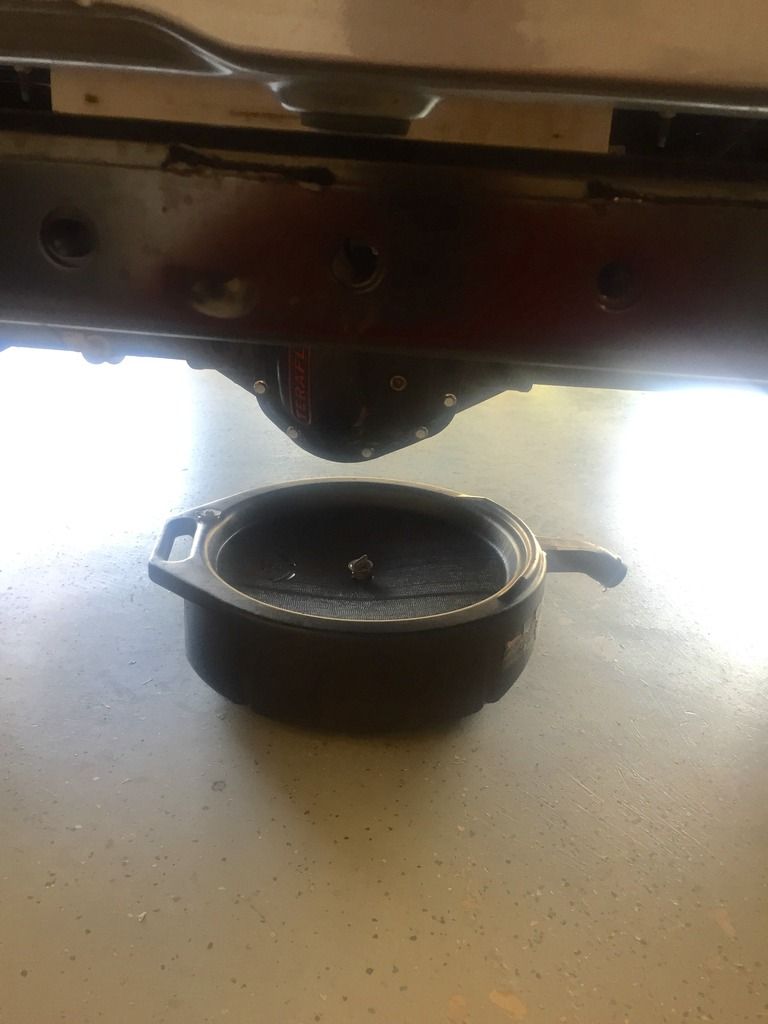
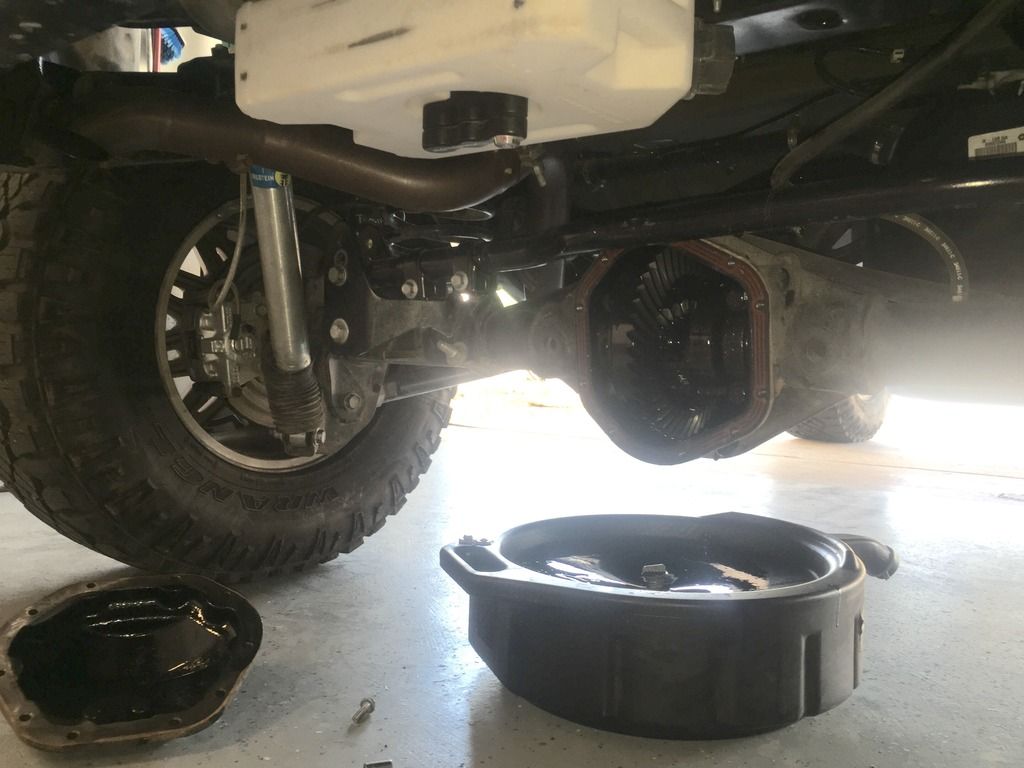
Place oil catch under rear differential cover and drain differential fluid.
• Make sure drain plug on oil catch container is open.
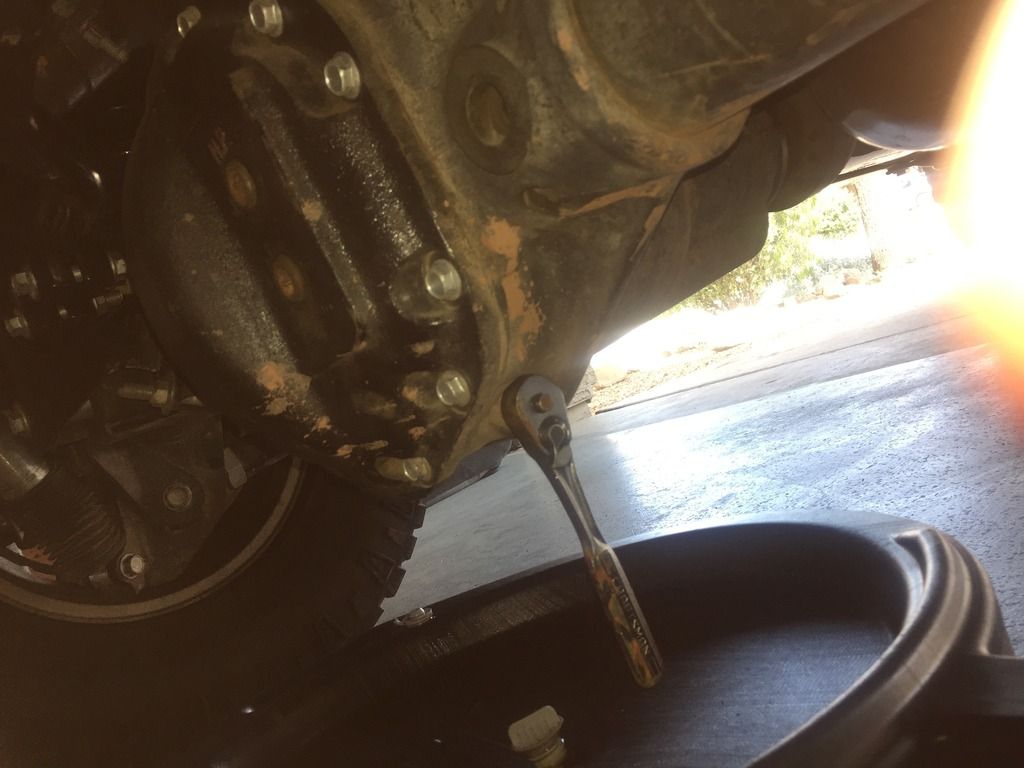
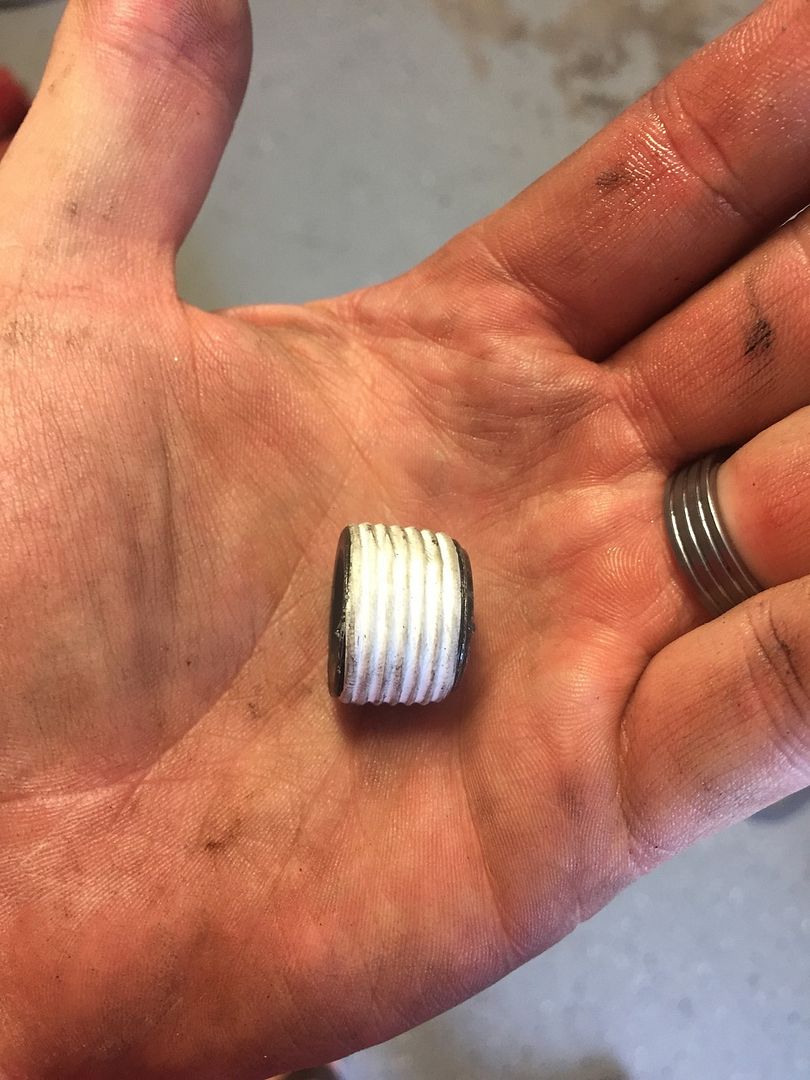
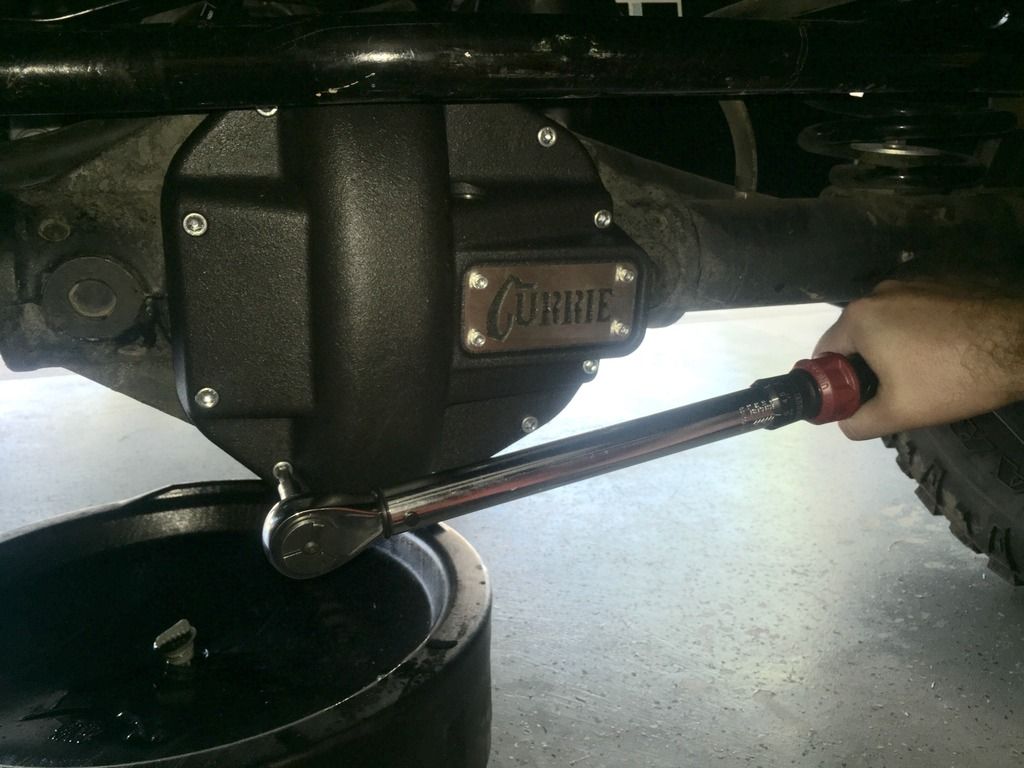
• Remove filler plug (front of cover) with 3/8 ratchet.
• Remove side drain plug of housing with a 3/8 ratchet or 3/8 extension if needed.
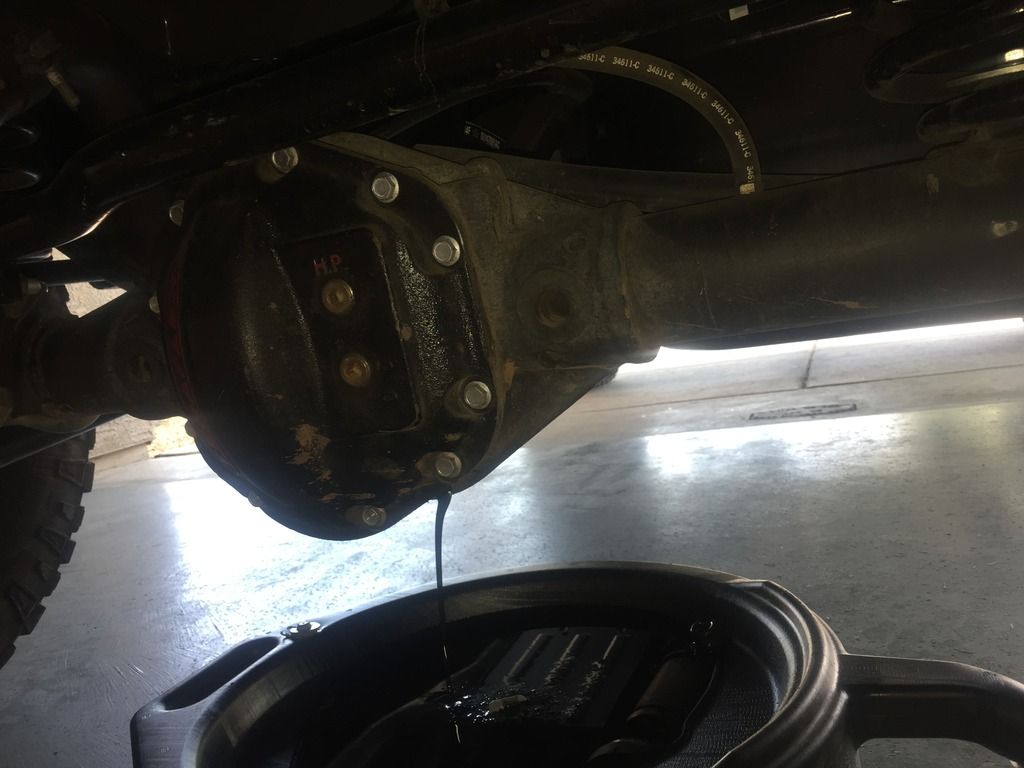
• Don’t start on (Step 3) until fluid is barely leaking out.
• The drain bolt on differential is magnetic on the inside end of it. It’s ok to find fuzzy particles or shaving, but if you have chunks you may have damage to your gears. Wipe drain plug with paper towel and brake cleaner if needed.
Step 3
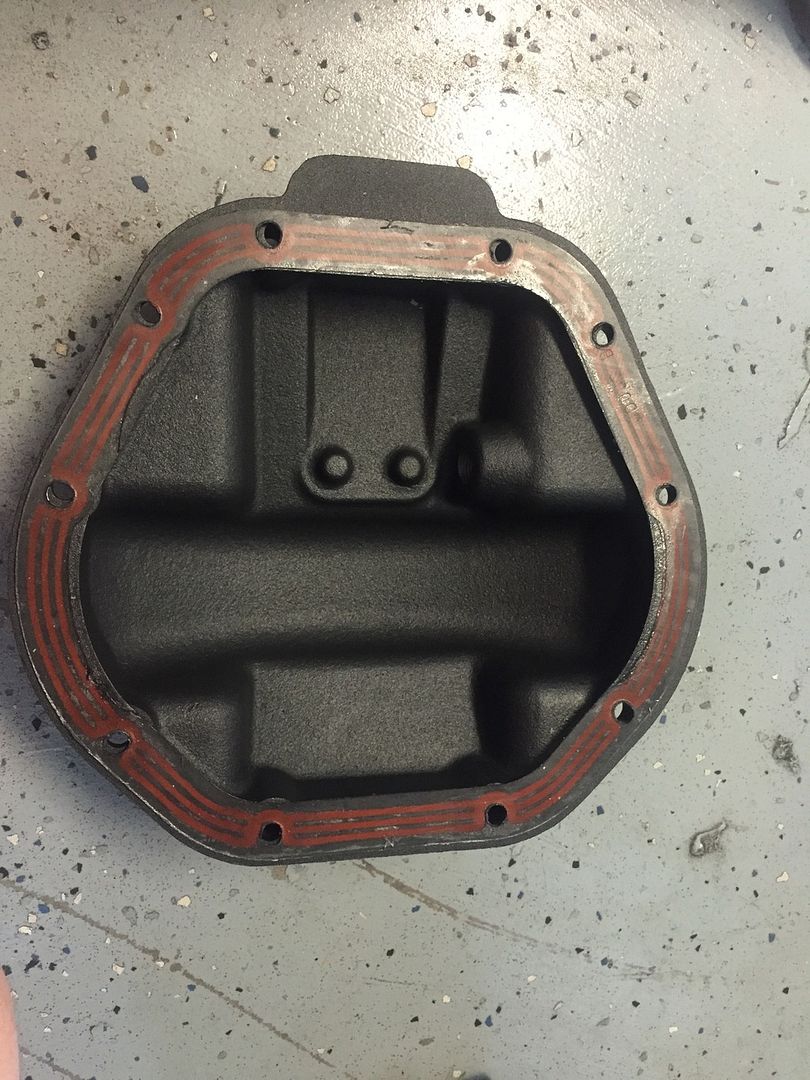
Remove the 10 differential cover bolts and remove cover.
• Start with top bolt and work your way back and forth until at bottom bolts.
• Once all 10 bolts are removed, you will most likely have to hit around differential cover with dead blow to break cover free.
• Don’t not use chisel or pry on cover!
• Use ½ or 13mm ratchet wrench/socket to remove 10 bolts.
Step 4
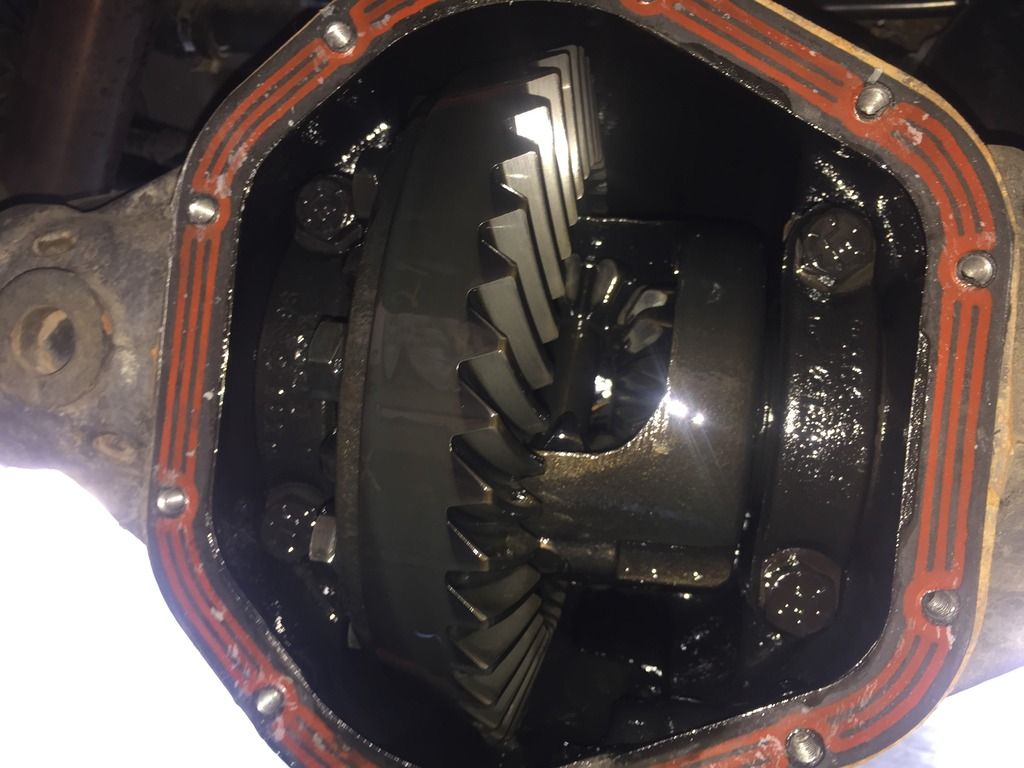
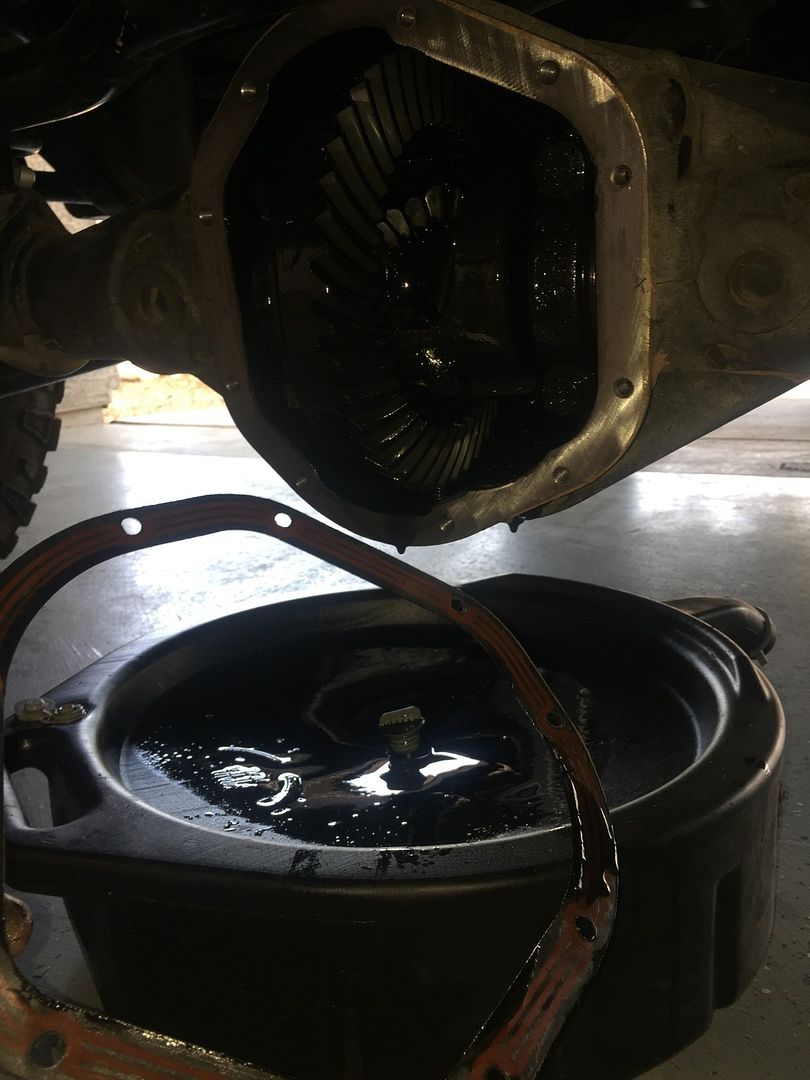
Clean out housing and prepare for install of new cover.
• Remove old RTV seal (If used) using gasket scraper or straight razor.
• Look for any damages in housing, around the gears or lockers. (If lockers are installed.
• Make sure you are wearing protective eyewear!
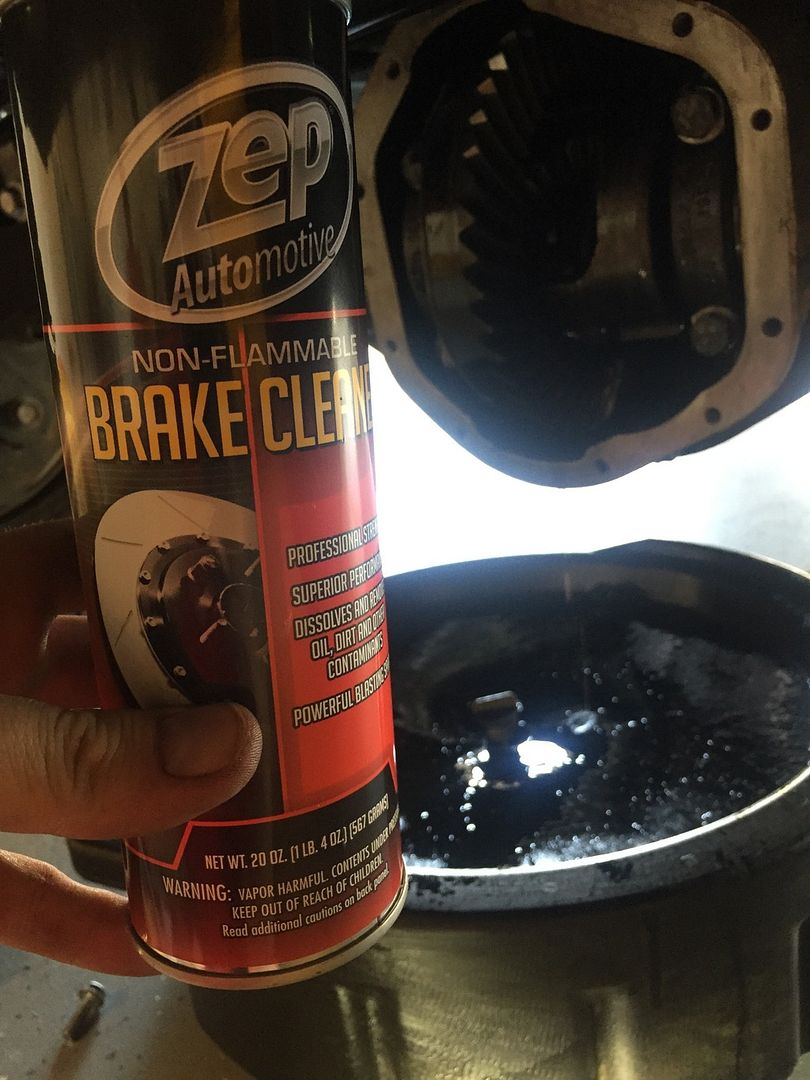
• Make sure oil catch is still under housing and spray brake cleaner around entire housing.
• Try to clean out the old gear oil as much as possible.
• You can use paper towels to help wipe clean.
• Don’t start on (Step 5) until housing is dry. (Brake cleaner evaporates fast.)
Step 5
Install new Currie Enterprises® Rear Differential Cover.
• Start by spraying off edge of housing where RTV, gasket, or Lube Locker was with brake cleaner.
• Then spray off inside and edges of new cover with brake cleaner and wipe dry.
• Wrap housing drain plug with thread tape and reinstall. Torque to 25 ft. lbs.
• MAKE SURE THIS IS INSTALLED BEFORE MOVING ON!
• If using RTV, run bead on the cover not housing. If using seal or Lube Locker, make sure to line holes up with cover holes.
• Place differential cover over housing and install top center bolt a few thread turns in. (Don’t tighten.)
• Once the top bolt is in place, run the other 9 bolts in, but do not tighten.
• The 4 longer bolts go in the center where the cover protrudes more. Make sure all allen head bolts are installed with the supplied washers.
• Now that all allen head bolts are in place, use ¼ allen to tighten down.
• Tighten all 10 bolts like you would on a wheel going back and forth and torque to 30 ft. lbs.
Step 6
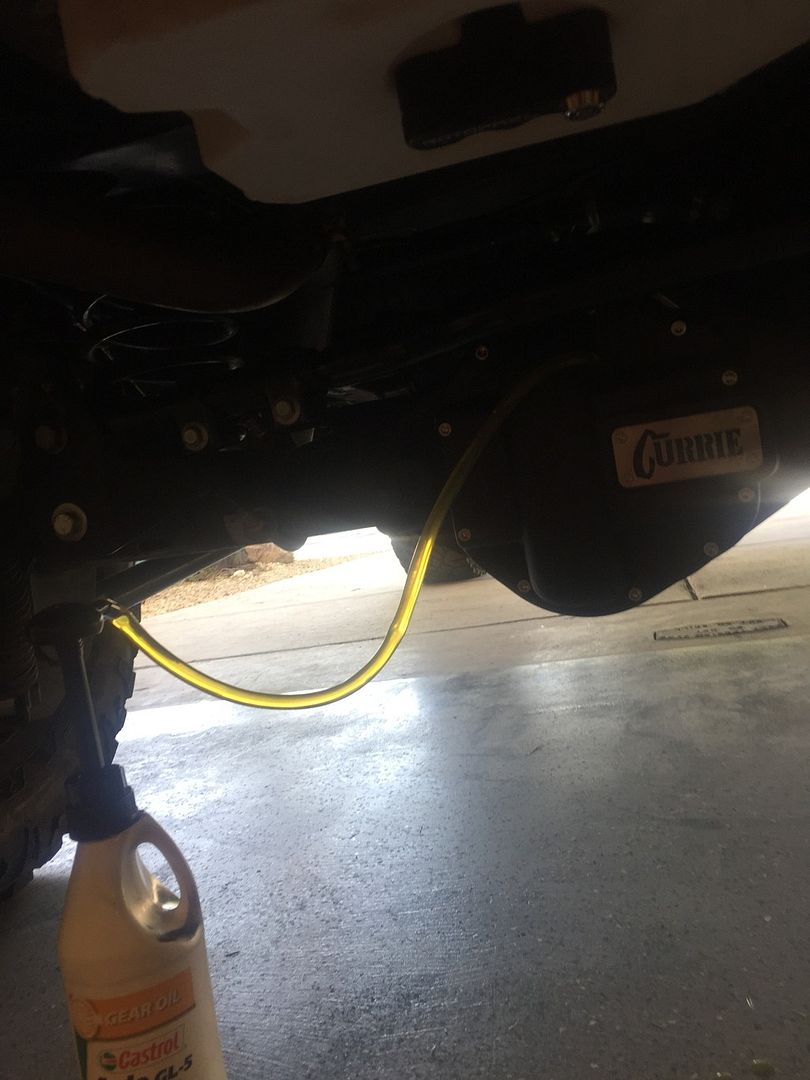
Fill up your differential with the factory specified amount of gear oil.
• Currie Enterprises@ recommends 9+ gear oil. (85-140wt or higher non synthetic.)
• On a Jeep JK Wrangler rear Dana 44, is 2.375 quarts. (2 quarts 12 ounces.)
• A good rule of thumb to follow is that you only need as much gear oil as is needed to get it to reach the bottom of your axle tubes.
• Use Transmission fluid pump to help pump gear oil into housing.
Step 7
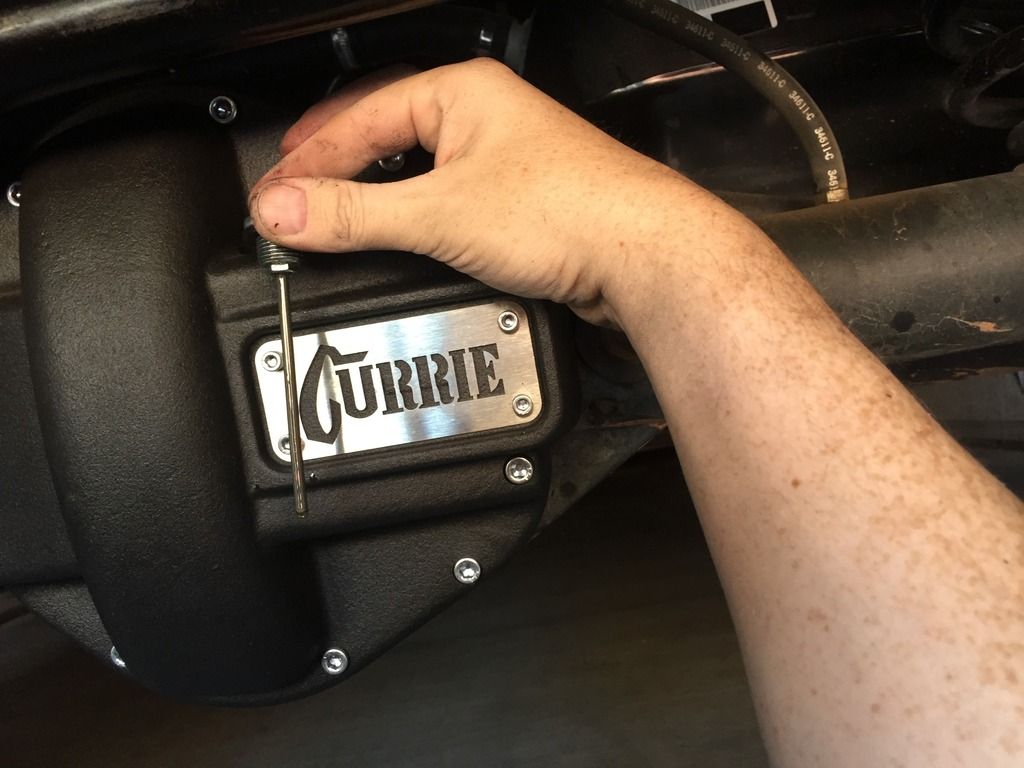
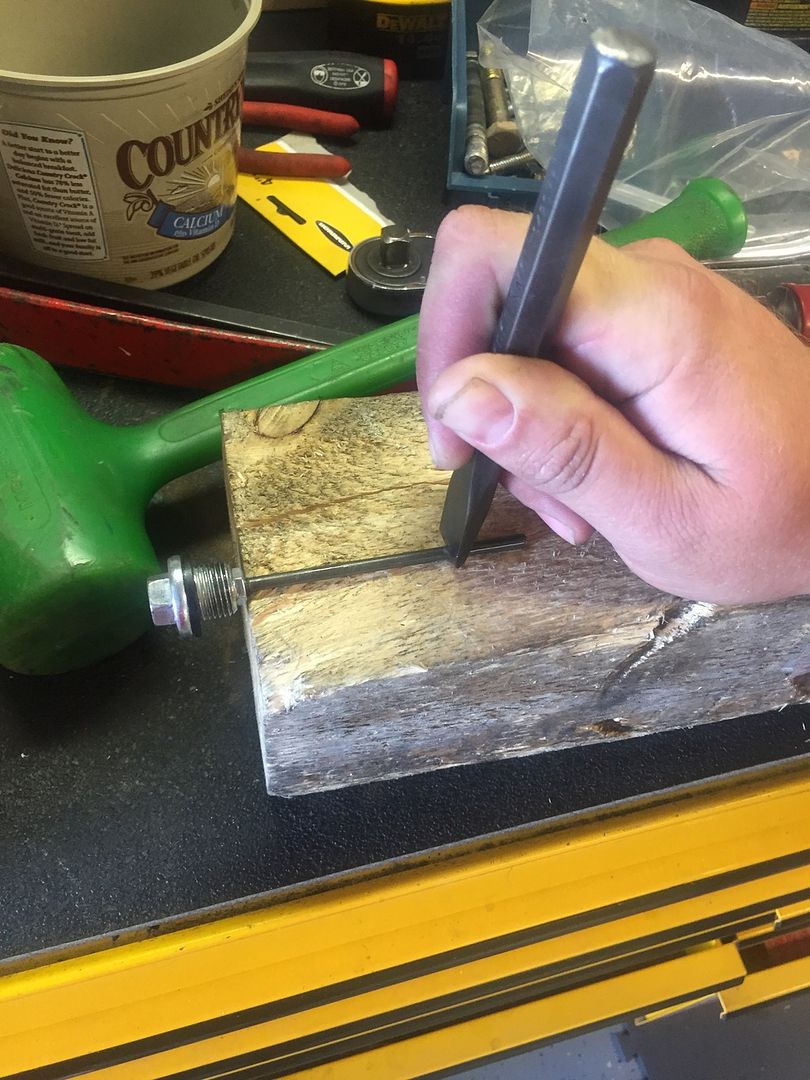
Marking your dipstick
• Place dip stick on front of differential cover and imagine it is seated all the way down into filler hole.
• Mark dipstick to match bottom of axle tube, then take hammer and chisel and make a indention into metal to know where fill line should be.
• Install dipstick, then remove and make sure fluid is at correct level.
• Now install dipstick with 13mm socket and torque to 30 ft. lbs.
Congratulations!!! You have now successfully installed your new Currie Enterprises@ rear 44 differential cover!
Note
After 25-50 miles of use, make sure you don’t have any leaks around differential cover or plugs. If you see any coming out of axle seals or breather tube, it is because you overfilled your housing and it’s releasing it.
Thank you for taking the time to look over my write-up. If you have any questions please feel free to ask on thread or PM. You may also contact me at husker.n.az@gmail.com
My Facebook Pages
http://www.facebook.com/azwranglers
http://www.facebook.com/husker4x4
Currie Enterprises® Website & Facebook Page
Currie Enterprises - Custom Rearends, Jeep/Off-road Parts, Crate Rearends, 4x4 Rearends
https://www.facebook.com/Currie.Enterprises
Mfg: 44-1005CTB
Price: $194.95
Description
This 65-45-12 ductile iron covers are a clean, trim shape that provides ample clearance for front or rear applications where steering or gas tank clearance is a concern due to it’s slim 3 1/16” height. Cover is finished in textured black. Currie badge is laser cut stainless steel, gasketed fill plug with dipstick, socket head allen hardware and cover gasket included. Fits all Currie RockJock® 44 high and low pinion housings as well as stock Dana 44 high and low pinion housings.
My Thoughts
I have changed quite a bit of my Jeep add-ons over to Currie Enterprises® and I’ve been extremely happy with the quality and looks of all of their products so far. This differential cover is no exception, and is a great design. I really like that it has the dipstick in it. The install is a breeze just like any other differential cover. I changed out my Teraflex rear differential cover over to Currie mainly to match my new RockJock® 44 housing up front.
Notes
They make differential covers from 44-70 housings. They offer in a textured black like mine, textured red, black semi-gloss, and unpainted. All differential covers have their own part number, but all have a parts list in case something ever happens to your cover.
Parts Included
• Differential Cover with Dipstick
• Cover Bolts
• Gasket
• Instructions
Tools Needed
• Protective Eyewear
• Gloves
• Paper Towels
• Oil Catch
• Brake Cleaner
• Fluid Pump
• Gear Oil (2 quarts 12 ounces)
• Thread Tape
• 3/8 Ratchet
• 3/8 Ratchet Extension
• ¼ Ratchet
• Torque Wrench
• Gasket Scraper or Straight Razor
• RTV, Gasket, or Lube Locker
• Dead Blow
• 13mm or ½ ratchet wrench or socket
• ¼ allen
• Chisel
• Hammer
Install Time
30 minutes to 1 hour
Install Guide
Step 1
Park Jeep on level ground
• Pull emergency brake for extra safety while under Jeep.
Step 2
Place oil catch under rear differential cover and drain differential fluid.
• Make sure drain plug on oil catch container is open.
• Remove filler plug (front of cover) with 3/8 ratchet.
• Remove side drain plug of housing with a 3/8 ratchet or 3/8 extension if needed.
• Don’t start on (Step 3) until fluid is barely leaking out.
• The drain bolt on differential is magnetic on the inside end of it. It’s ok to find fuzzy particles or shaving, but if you have chunks you may have damage to your gears. Wipe drain plug with paper towel and brake cleaner if needed.
Step 3
Remove the 10 differential cover bolts and remove cover.
• Start with top bolt and work your way back and forth until at bottom bolts.
• Once all 10 bolts are removed, you will most likely have to hit around differential cover with dead blow to break cover free.
• Don’t not use chisel or pry on cover!
• Use ½ or 13mm ratchet wrench/socket to remove 10 bolts.
Step 4
Clean out housing and prepare for install of new cover.
• Remove old RTV seal (If used) using gasket scraper or straight razor.
• Look for any damages in housing, around the gears or lockers. (If lockers are installed.
• Make sure you are wearing protective eyewear!
• Make sure oil catch is still under housing and spray brake cleaner around entire housing.
• Try to clean out the old gear oil as much as possible.
• You can use paper towels to help wipe clean.
• Don’t start on (Step 5) until housing is dry. (Brake cleaner evaporates fast.)
Step 5
Install new Currie Enterprises® Rear Differential Cover.
• Start by spraying off edge of housing where RTV, gasket, or Lube Locker was with brake cleaner.
• Then spray off inside and edges of new cover with brake cleaner and wipe dry.
• Wrap housing drain plug with thread tape and reinstall. Torque to 25 ft. lbs.
• MAKE SURE THIS IS INSTALLED BEFORE MOVING ON!
• If using RTV, run bead on the cover not housing. If using seal or Lube Locker, make sure to line holes up with cover holes.
• Place differential cover over housing and install top center bolt a few thread turns in. (Don’t tighten.)
• Once the top bolt is in place, run the other 9 bolts in, but do not tighten.
• The 4 longer bolts go in the center where the cover protrudes more. Make sure all allen head bolts are installed with the supplied washers.
• Now that all allen head bolts are in place, use ¼ allen to tighten down.
• Tighten all 10 bolts like you would on a wheel going back and forth and torque to 30 ft. lbs.
Step 6
Fill up your differential with the factory specified amount of gear oil.
• Currie Enterprises@ recommends 9+ gear oil. (85-140wt or higher non synthetic.)
• On a Jeep JK Wrangler rear Dana 44, is 2.375 quarts. (2 quarts 12 ounces.)
• A good rule of thumb to follow is that you only need as much gear oil as is needed to get it to reach the bottom of your axle tubes.
• Use Transmission fluid pump to help pump gear oil into housing.
Step 7
Marking your dipstick
• Place dip stick on front of differential cover and imagine it is seated all the way down into filler hole.
• Mark dipstick to match bottom of axle tube, then take hammer and chisel and make a indention into metal to know where fill line should be.
• Install dipstick, then remove and make sure fluid is at correct level.
• Now install dipstick with 13mm socket and torque to 30 ft. lbs.
Congratulations!!! You have now successfully installed your new Currie Enterprises@ rear 44 differential cover!
Note
After 25-50 miles of use, make sure you don’t have any leaks around differential cover or plugs. If you see any coming out of axle seals or breather tube, it is because you overfilled your housing and it’s releasing it.
Thank you for taking the time to look over my write-up. If you have any questions please feel free to ask on thread or PM. You may also contact me at husker.n.az@gmail.com
My Facebook Pages
http://www.facebook.com/azwranglers
http://www.facebook.com/husker4x4
Currie Enterprises® Website & Facebook Page
Currie Enterprises - Custom Rearends, Jeep/Off-road Parts, Crate Rearends, 4x4 Rearends
https://www.facebook.com/Currie.Enterprises