Lighting up the Jeep

drcoopster

Adventurer
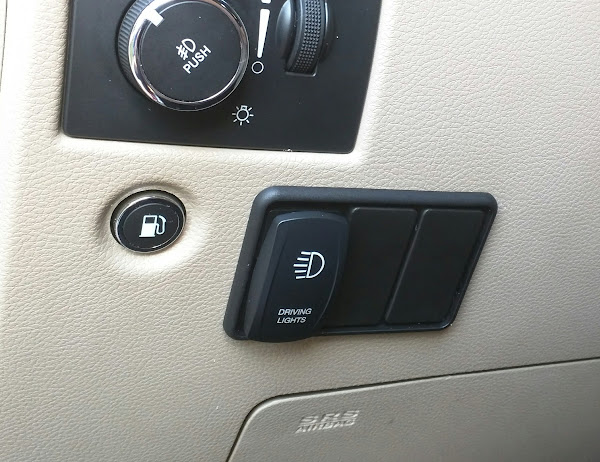
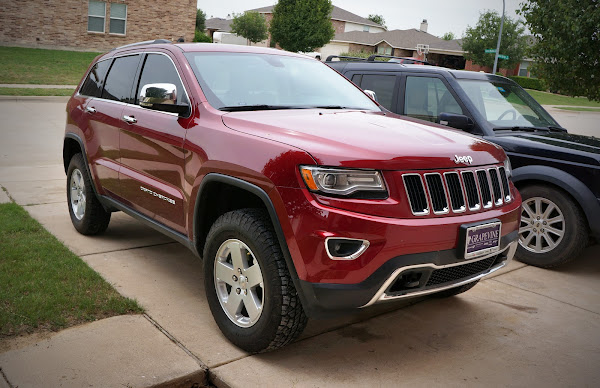
I'm going to add some lights to the face of the Jeep. I haven't decided on exactly what and where, but I want some extra light to supplement the high beams for use off the beaten path.

Here's what I'm starting with:
DSC02259.JPG


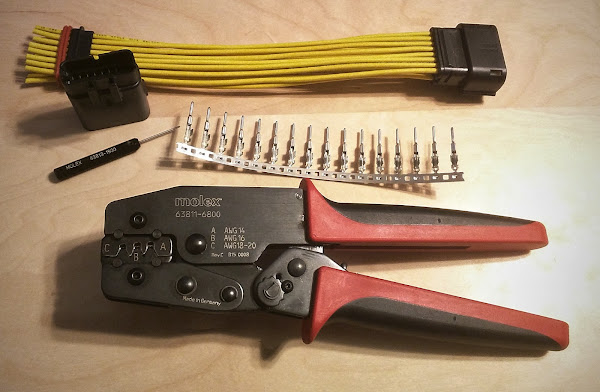
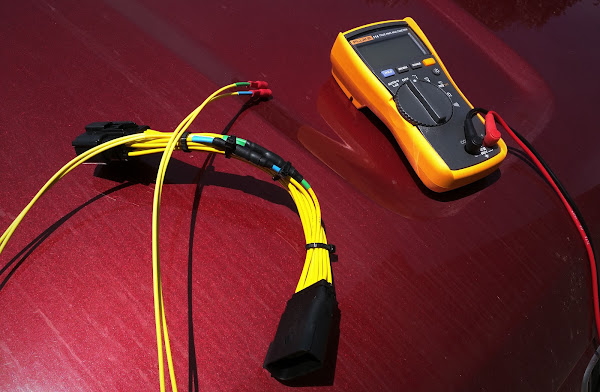
I got a nice SPDT switch and terminals from OTRATTW:
IMG_20150422_202004.jpg


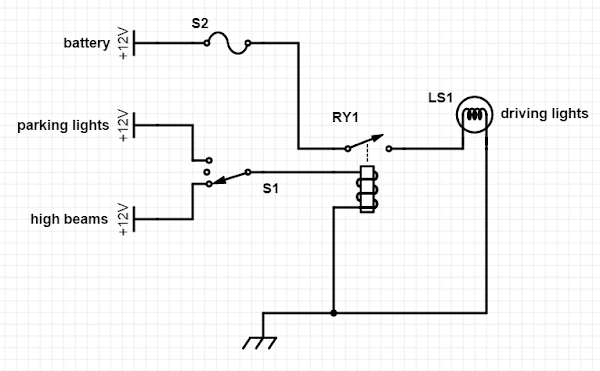
I want the switch positions to work as such:
  • up - manual on, but only if the parking lights are on, too
  • center - off
  • down - auto on, turn on with the high beams
so I came up with the following basic schematic:
schematic.png


I'm going to ignore switch illumination at this time.

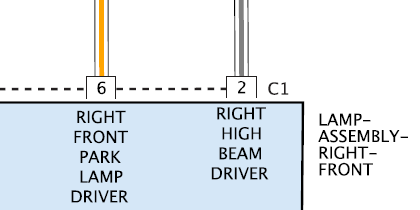
I need to tap into the high beam and parking light circuits, but I don't want to cut any factory wiring. So I found the plug that goes into the headlight:
IMG_20150422_194625.jpg


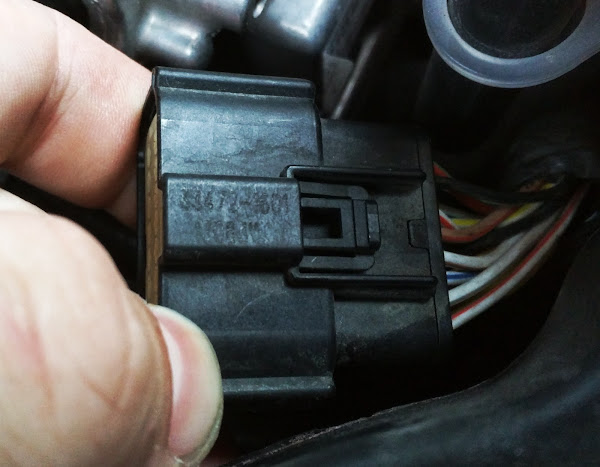
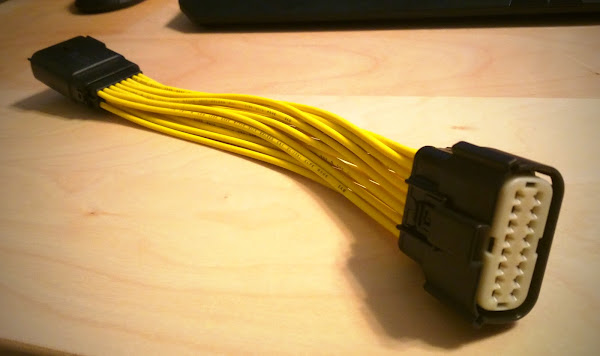
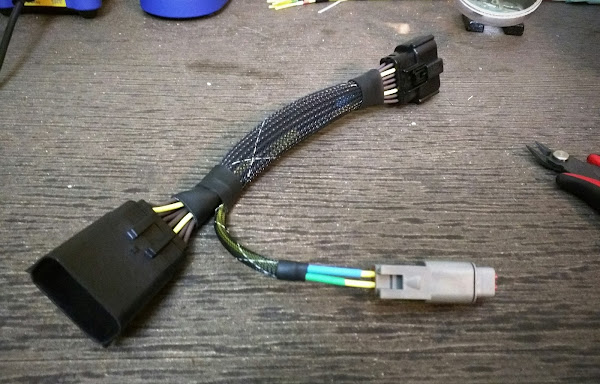
It's hard to see in the picture, but the part number on the plug is 33472-1601. This is a Molex part number for the receptacle itself. I just ordered another one of the receptacles and the corresponding plug and terminals (male, female), so the next step is to make an adapter harness a few inches long that allows me to tap into the parking and high beam circuits to trigger the relay.

I haven't ordered a relay yet (I'm figuring a standard 30A sealed relay), and I'm going and try to use one of the spare fuse slots in the fuse box if possible. I've done it before in my VW so I'm almost certain it's possible with the right terminals.

Stay tuned, this is going to be slow! :coffee:
 
Last edited:

drcoopster

Adventurer
I built a short wiring harness to use to tap the high beam and parking light triggers. I don't think all of the pins are used in the actual headlight plug, but I'm sure I'll re-make this part of the harness (and sleeve it) anyways once I figure out the details.

IMG_20150429_221808.jpg


IMG_20150430_052409.jpg


It looks like the factory wiring is 18- and 20-gauge wiring at the headlight plug; I'm using 18-gauge for everything here right now. I'll probably get some 14-gauge to use for main power cable from the battery to the relay and the relay to the lights. I'll post a full parts list and wiring diagram when I'm done with everything.
 
Last edited:

drcoopster

Adventurer
I fit the extension into the main plug going into the right-side headlight assembly, and everything still works, so I guess that's progress. I'll attack it with a multimeter tomorrow to isolate the high beam and parking light signals. :sombrero:

IMG_20150501_174215.jpg


Even though the wiring diagram from #2 only shows 10 of the wires, all 16 terminals are connected to something. I have an order coming in from Waytek sometime next week with some fuses and relays so the rest of the wiring can be planned and installed.
 

drcoopster

Adventurer
I mounted the switch panel in the dash down by the fuel door button. Nothing is wired yet.

IMG_20150503_190714~2.jpg


IMG_20150503_190725~2.jpg


Also, I ordered some lights; they should be here sometime next week.
 

drcoopster

Adventurer
Lights are in; I'm going with Baja Designs Squadron lights behind the tops of the 3rd and 5th slots of the grill (which I am swapping for the SRT-style honeycomb grill).

Also, I identified the wires that I need to connect to and verified that they are hot with 12V when needed.

IMG_20150511_135310.jpg


On the right-side headlight connector, pin 2 (white/gray) is at 12V when the high beams are on, and pin 6 (white/orange) is at 12V when the parking lights are on. There are other wires with these colors, so go by the connector pin location rather than the just the colors. The pin locations are marked on the connector.

diagram.png
 

snwbrdr

New member
Looks great! That's about exactly what I'm going for, except I want the lights at the top of the slots rather than the bottom. Do you have any pictures of how exactly you have the lights mounted?

It takes a bit of light output when mounted behind the grille, but looks much better than in front of it.

I mounted it with alloy clamps used normally for hydraulic lines and mounted an angled alloy profile to them. Then just made holes on the right place, painted it black and I was done. (Had it first on the outter slots, see third pic)

ImageUploadedByTapatalk1432235478.165033.jpg

ImageUploadedByTapatalk1432235500.215407.jpg

ImageUploadedByTapatalk1432235528.017980.jpg

Hope that helps!
Cheers
Adrian
 

drcoopster

Adventurer
Thanks, that helps a lot! I figure if the grill obscures too much of the light, I'll cut holes in the grill and move the lights forward so that the lens is basically flush with the face of the grill. It won't look quite as good but I don't want to sacrifice function for form. Plus, I have an extra set of grill inserts, so I'm not afraid to cut one of them up. :ylsmoke:
 

aclark79

New member
How do you like the lights now that they are in? What made you go with the Bajas? They look nice and I'm trying to make some decisions on what to get.
 

drcoopster

Adventurer
I went with the BD Squadrons because I know that they're good quality, both with regards to build and optics. The Rigid lights are good and well-priced but their optics just don't touch those of the Squadron. There doesn't seem to be anything else that comes close in the 3" cube light sector.

If the grill slots had been a little bit wider, it would have come down between the BD Squadron XL and the VisionX 4.5" light cannon. I think that I probably would have gone with the VisionX. But since the grill slots are just under 4" wide, the BD Squadron didn't really have any competition in my mind.
 

Forum statistics

Threads
185,910
Messages
2,879,485
Members
225,497
Latest member
WonaWarrior
Top