The Frankenstein Build: 1996 Tacoma Long Travel/Expo/Trail Rig

Blackdawg

Dr. Frankenstein
Cool write-up! I've read the sos report and it was awesome too!

-Andy

Thanks! Yea the SOS is awesome haha The Epic actually is some of the same trails really. Kinda why i might just skip the write up on that.

The long travel kit looks so awesome. Cant wait to see more pics of it.

Thanks! Yea many more photos of that. Just about two years left to catch up on before that haha
 

big a

Adventurer
It's been a while since I read thru the sos thread, but if memory serves me correctly, wasn't the ball joint failure something had had happened previously on the other side? I was reading this thread to see if that showed up since it was previous to that trip.

Either way, good times man! I can't wait to get mine finished and start my adventures!

-Andy
 

Blackdawg

Dr. Frankenstein
It's been a while since I read thru the sos thread, but if memory serves me correctly, wasn't the ball joint failure something had had happened previously on the other side? I was reading this thread to see if that showed up since it was previous to that trip.

Either way, good times man! I can't wait to get mine finished and start my adventures!

-Andy

That is true! I did blow the other just before the SOS. I will get to that eventually as well. Have all the photos for it.

Heck yea man! Get er done!
 

wreckdiver1321

Overlander
It's fun to watch Frank come together like this. It's also fun reading about your ridiculous antics :D

You always seem to be finding the right kind of trouble.
 

Blackdawg

Dr. Frankenstein
It's fun to watch Frank come together like this. It's also fun reading about your ridiculous antics :D

You always seem to be finding the right kind of trouble.

Haha yea I certainaly seem to find puddles of **** to drive through to cause problems. Trust me. It only gets worse haha
 

Blackdawg

Dr. Frankenstein
Crap! I skipped some stuff! About 4 little trips and some welding..

Welp. I'll post those before doing The Epic trip.
 

big a

Adventurer
Yeah man, cuz you can't skip around in this awesome man-soap-opera! This is just too good! :coffee::lurk::clapping:

-Andy
 

Blackdawg

Dr. Frankenstein
Such a good thread. I found a local guy selling a 96 with low miles for a song because it's got a broken front drivers side ball joint and he's getting old and doesn't want to deal with fixing it...here I am wondering if that's enough for me to pass on it and I hop on Expo and search "ball joint Tacoma" and find your thread and now I'm hoping that the rest of the truck is good, because if all it is a ball joint, I'm in! Loving these old Tacos.

Nice! I've destroyed two. But truck still works fine. Haha they are kinda expensive but not overly all things considered.

Good luck man and thanks for posting!
 

Blackdawg

Dr. Frankenstein
Hard to find on the coast without rusty frames but I'm being patient. I'm selling my 98 Cruiser to get into one. I do miss having a bed! Used to the Toyota prices on repairs so I'm hoping the price shock for that repair won't hit hard.

A set of OEM LBJ are about 200 bucks or so. Don't get any other kind of LBJ. Trust me. The Toyota ones are superior in every way and worth the extra bucks.
 

justcuz

Explorer
What is it that makes those lower ball joints come loose? Do they thread directly into the joint without a through bolt or just not have a proper lock washer or lock nut from the factory?

Another question, what happened to your drunk, thief, arsonist neighbor? Did he go to jail or did you take him on a trip to the way back country and leave him there?
 

Blackdawg

Dr. Frankenstein
What is it that makes those lower ball joints come loose? Do they thread directly into the joint without a through bolt or just not have a proper lock washer or lock nut from the factory?

Another question, what happened to your drunk, thief, arsonist neighbor? Did he go to jail or did you take him on a trip to the way back country and leave him there?

The lower ball joints thread into the spindles. They are however single shear joint and it's held on by 4 small bolts that face down. You have two things happen, both have happened to me.

1) a couple of the 4 bolts fall out and then then wi that are left can't cope with the stress and sheer off. This happened to me in CO on the trail. Also almost happened to my buddy.

2) the joint itself eats itself away from the grease getting washed away and it just rips out of the cup. This also happened to me....twice.

2nd gens fixed this by having a built in double shear and bigger bolts.

He went to jail. For a few years then was let out on parole. Disappeared after then then was found again in Oregon. Brought back and put in jail again. Not sure what happened to him as of late. Haha

Useless person though. Stain on society pretty much. Oh well..
 

Blackdawg

Dr. Frankenstein
How about a thread revilval?

Now that i can just copy and paste IMG code, this will go WAY faster and now i have motivation to do it since i won't have to rewrite and re link everything.

So


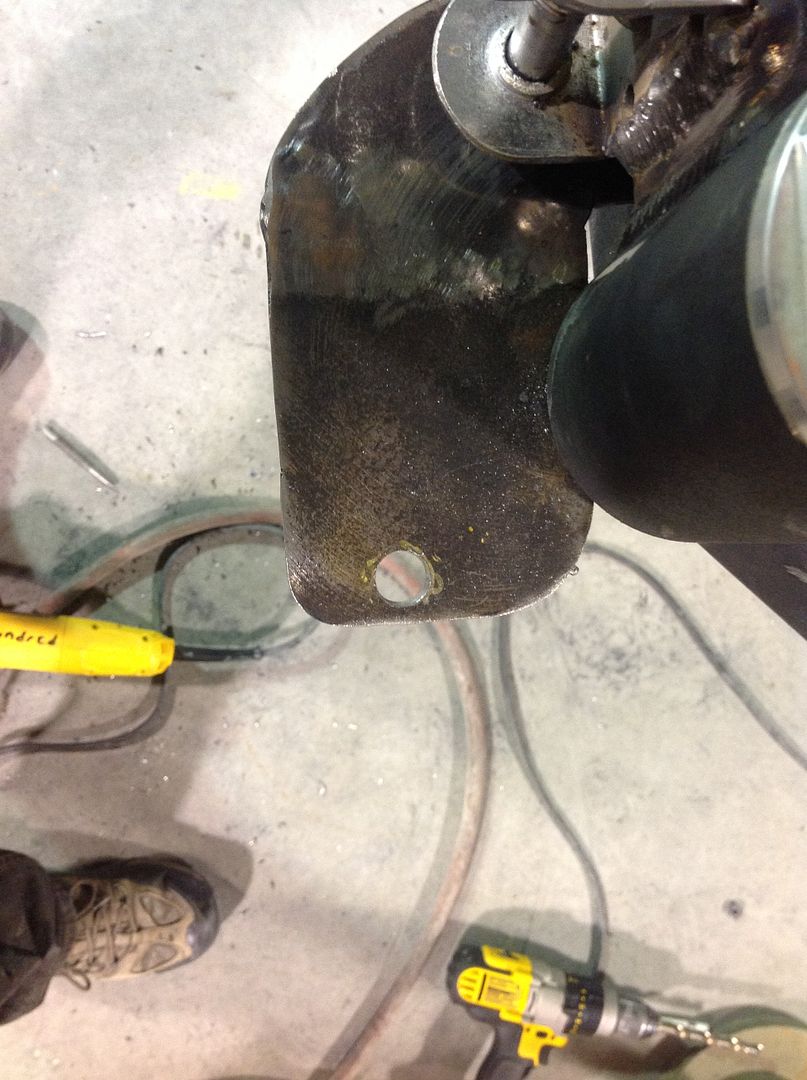
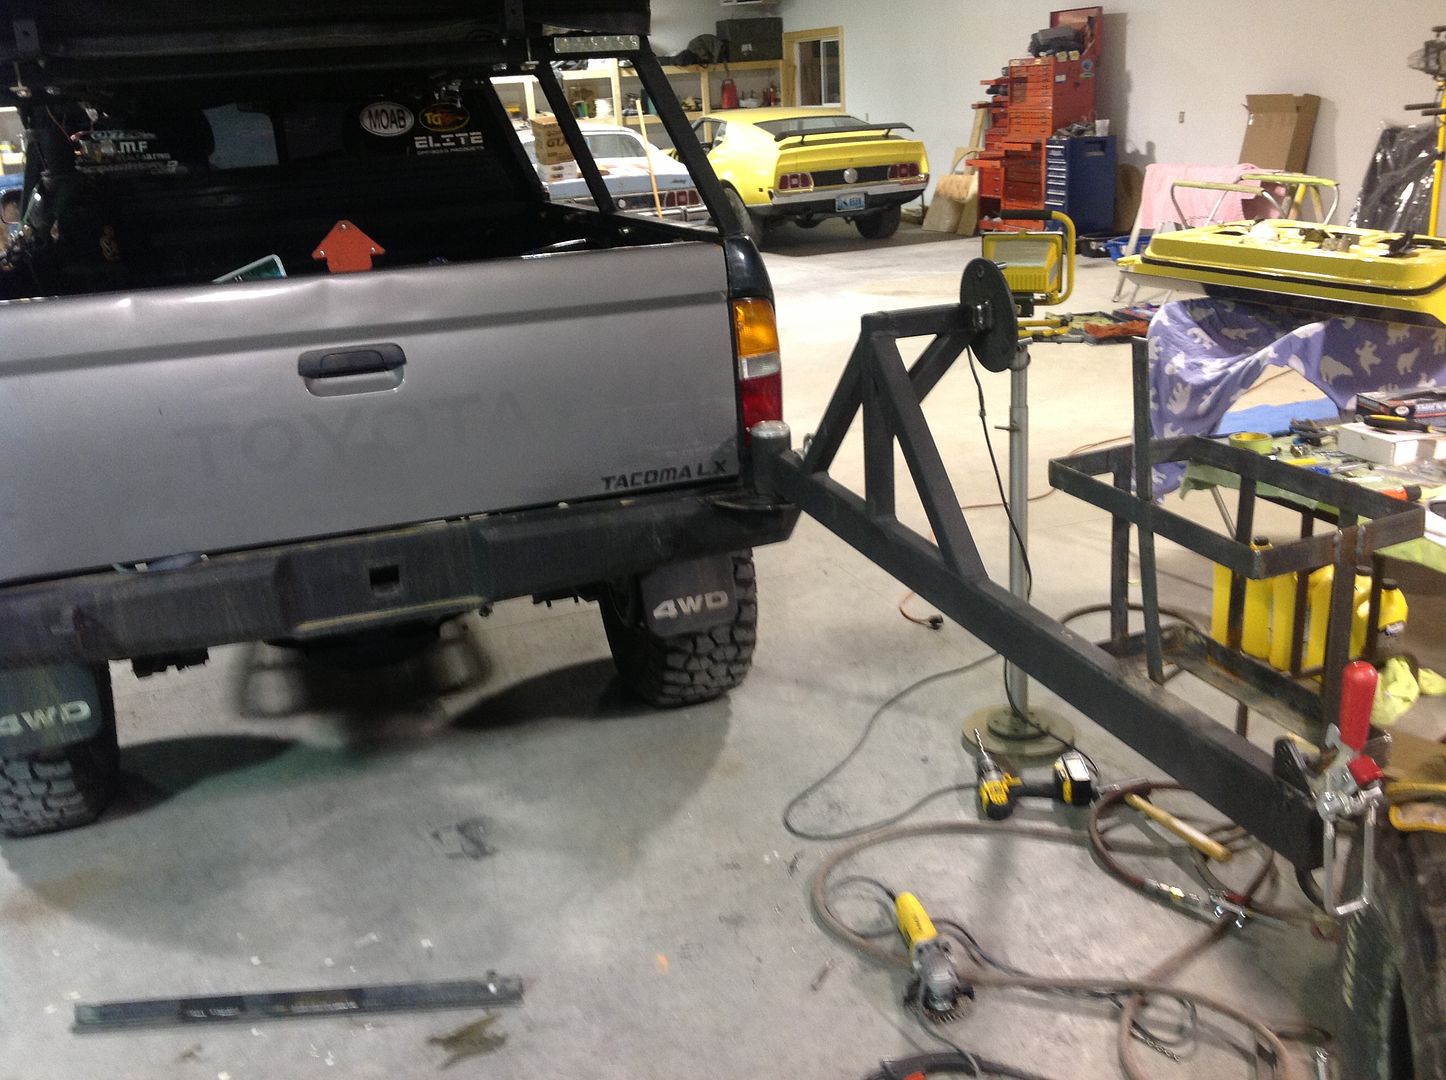
Here is some welding I missed early on. I fixed the tire mount to angle it up a bit and added my folding table and 90º latch. Id like to redo the latch to a smaller pin style later..

Ok here we go.

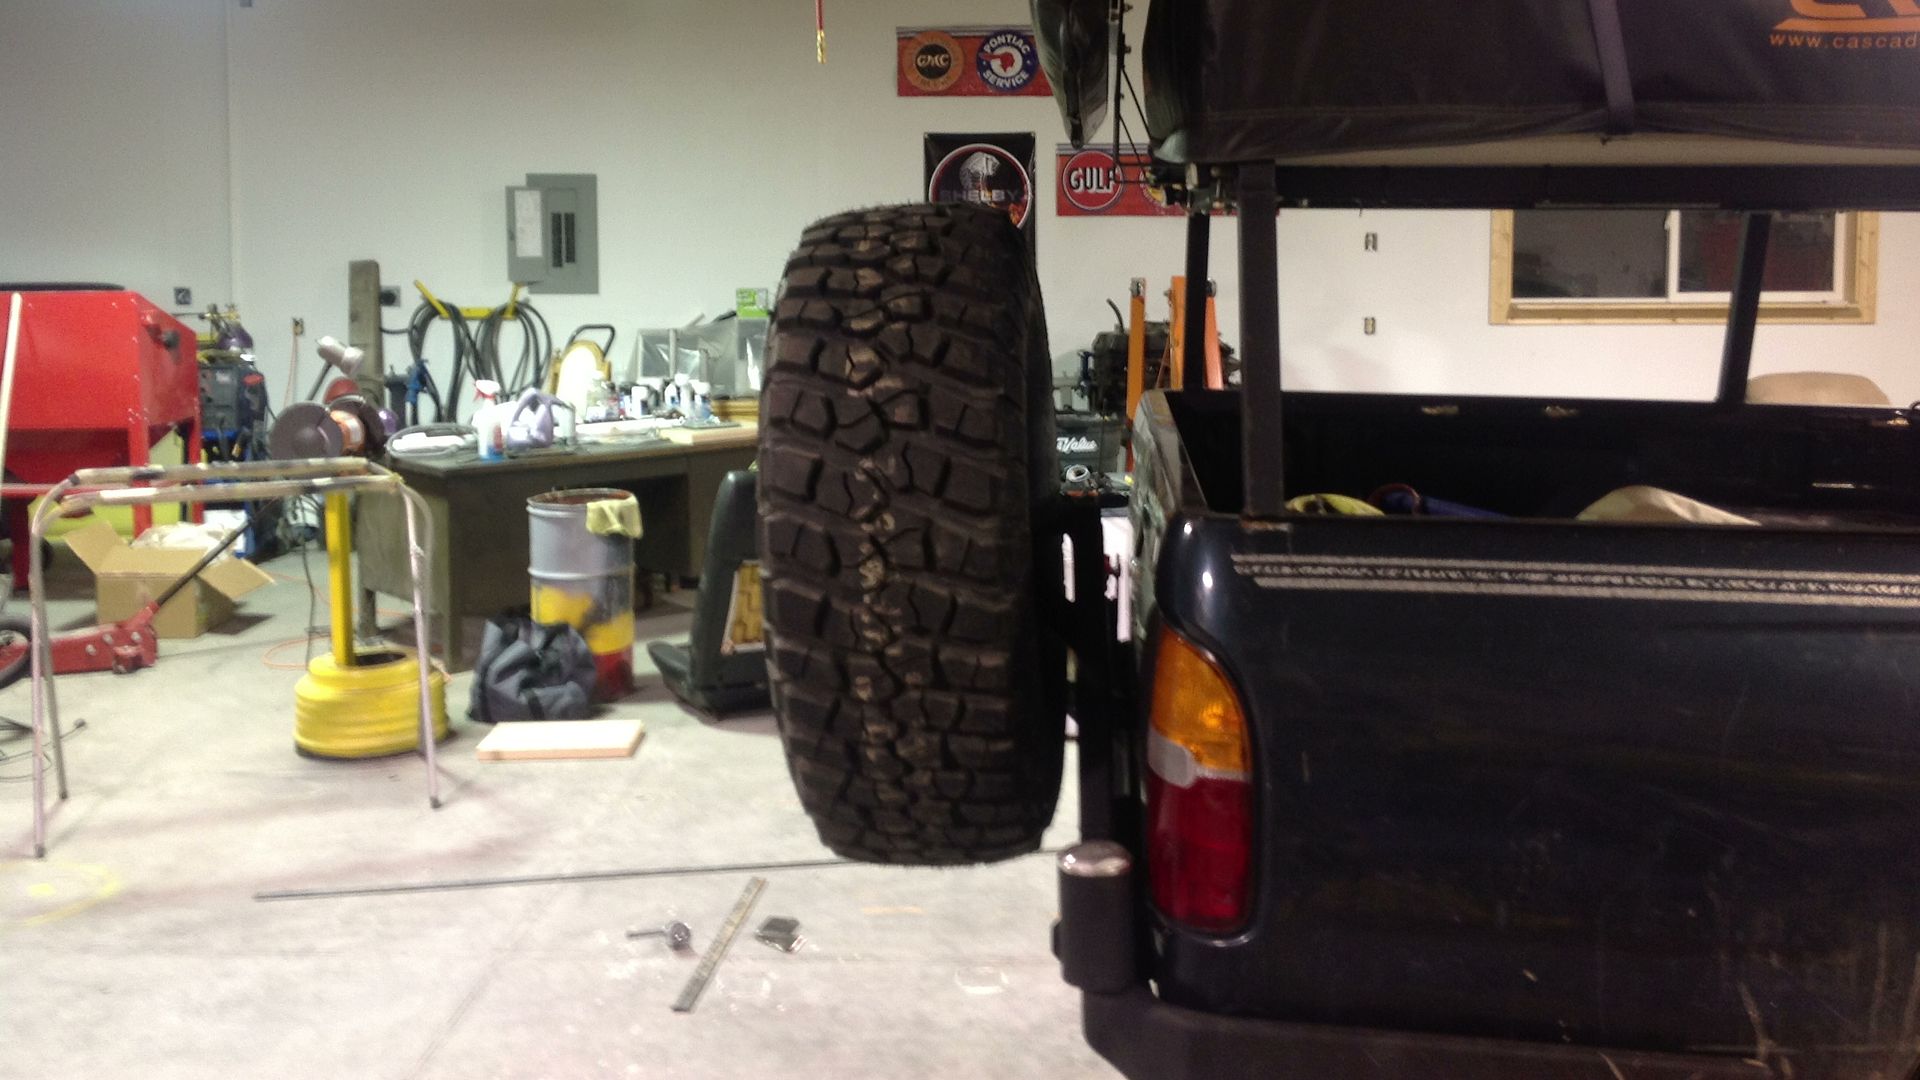
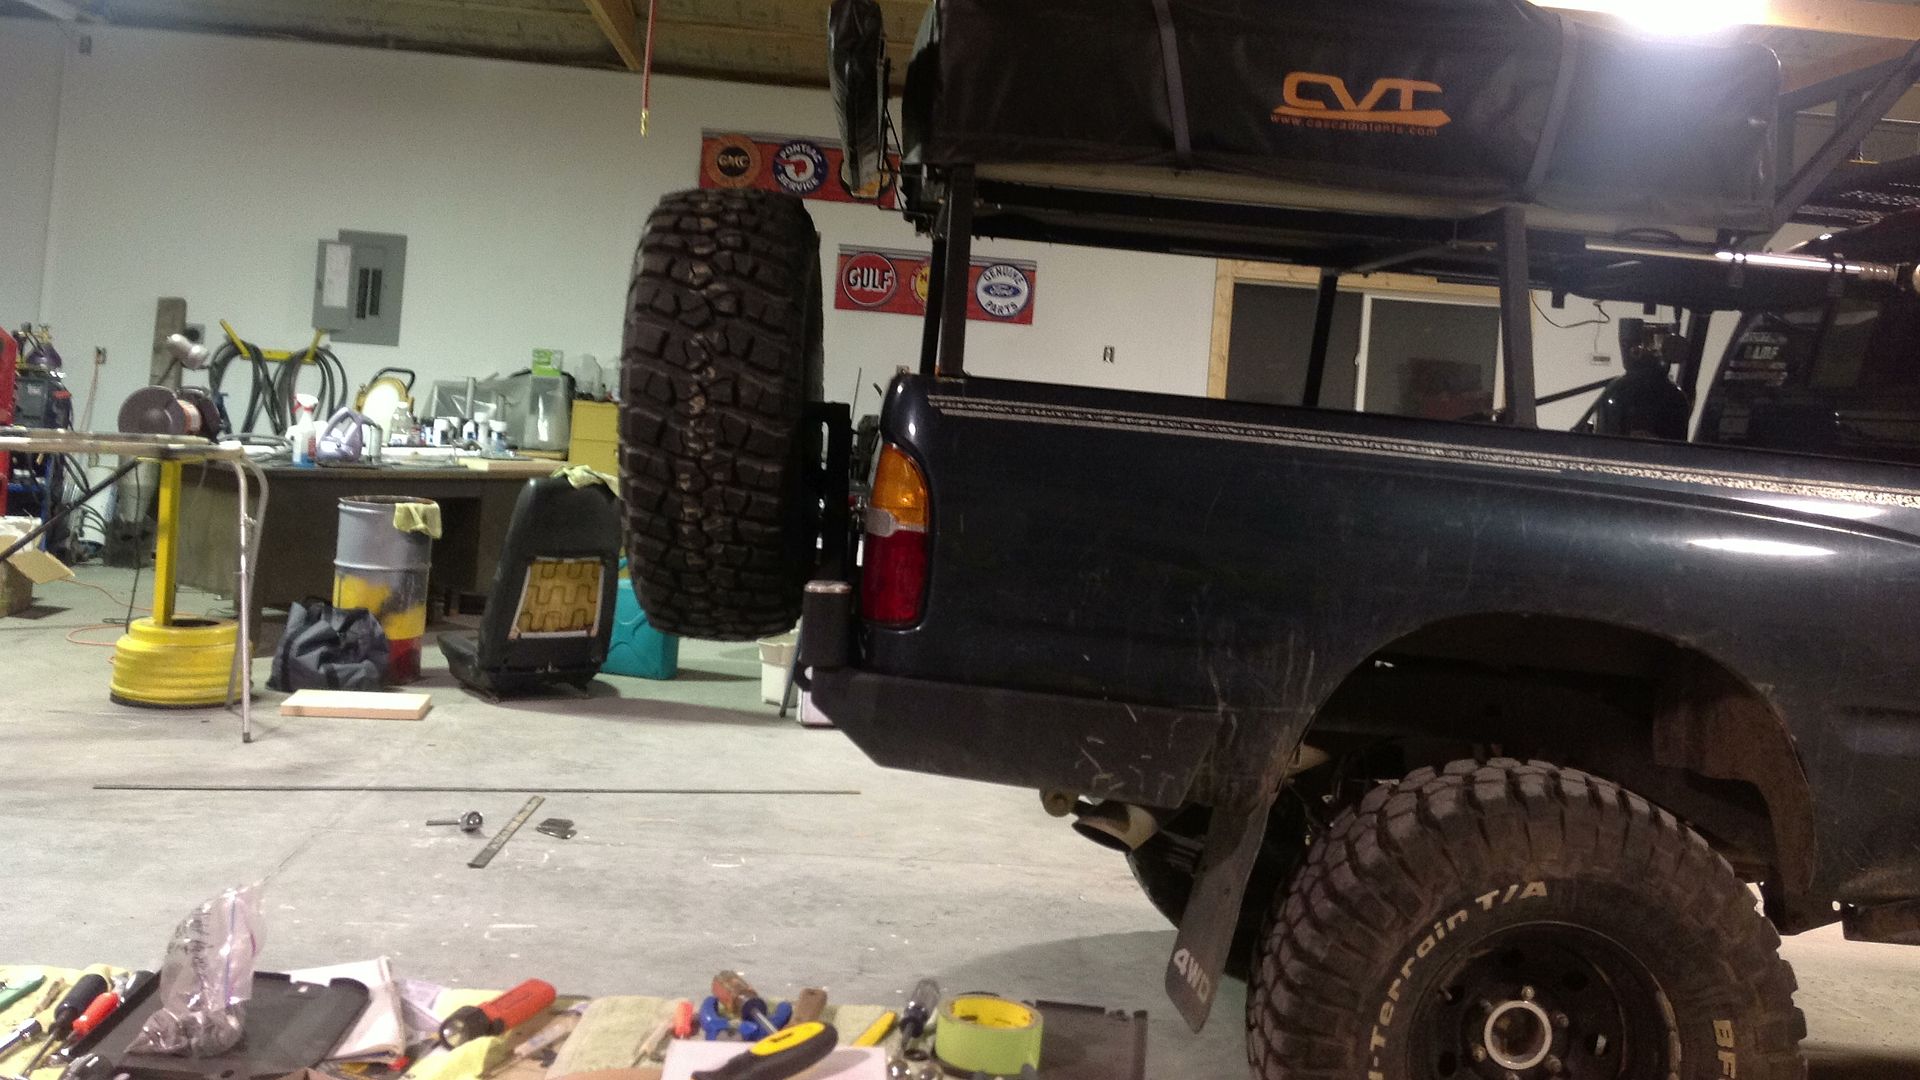
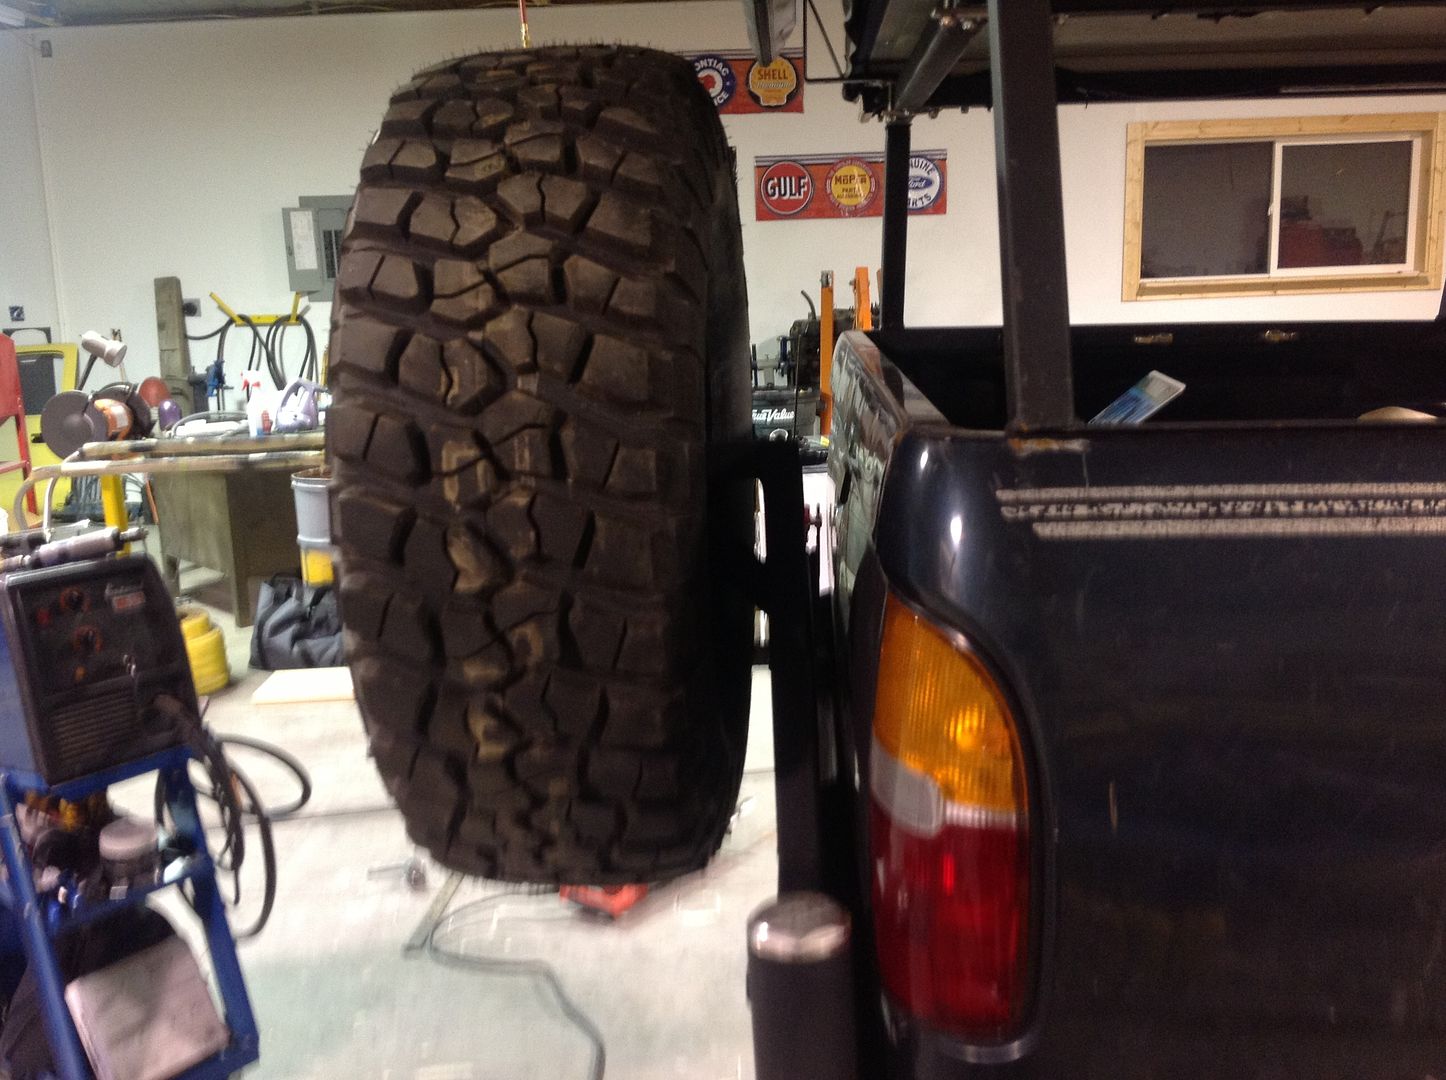
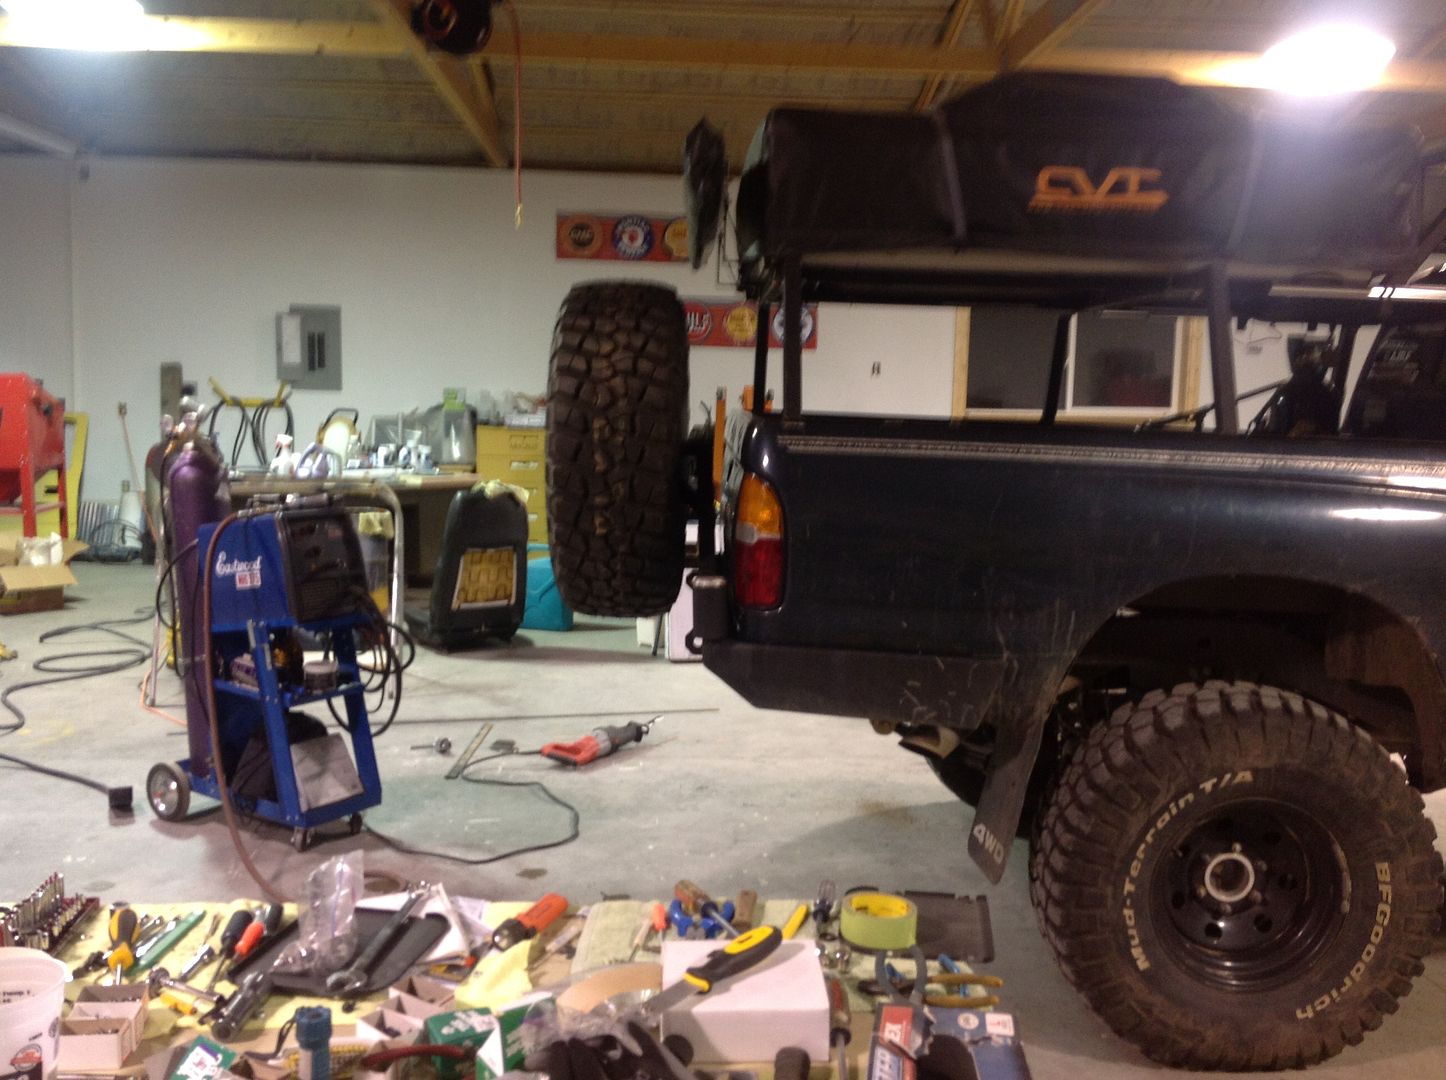
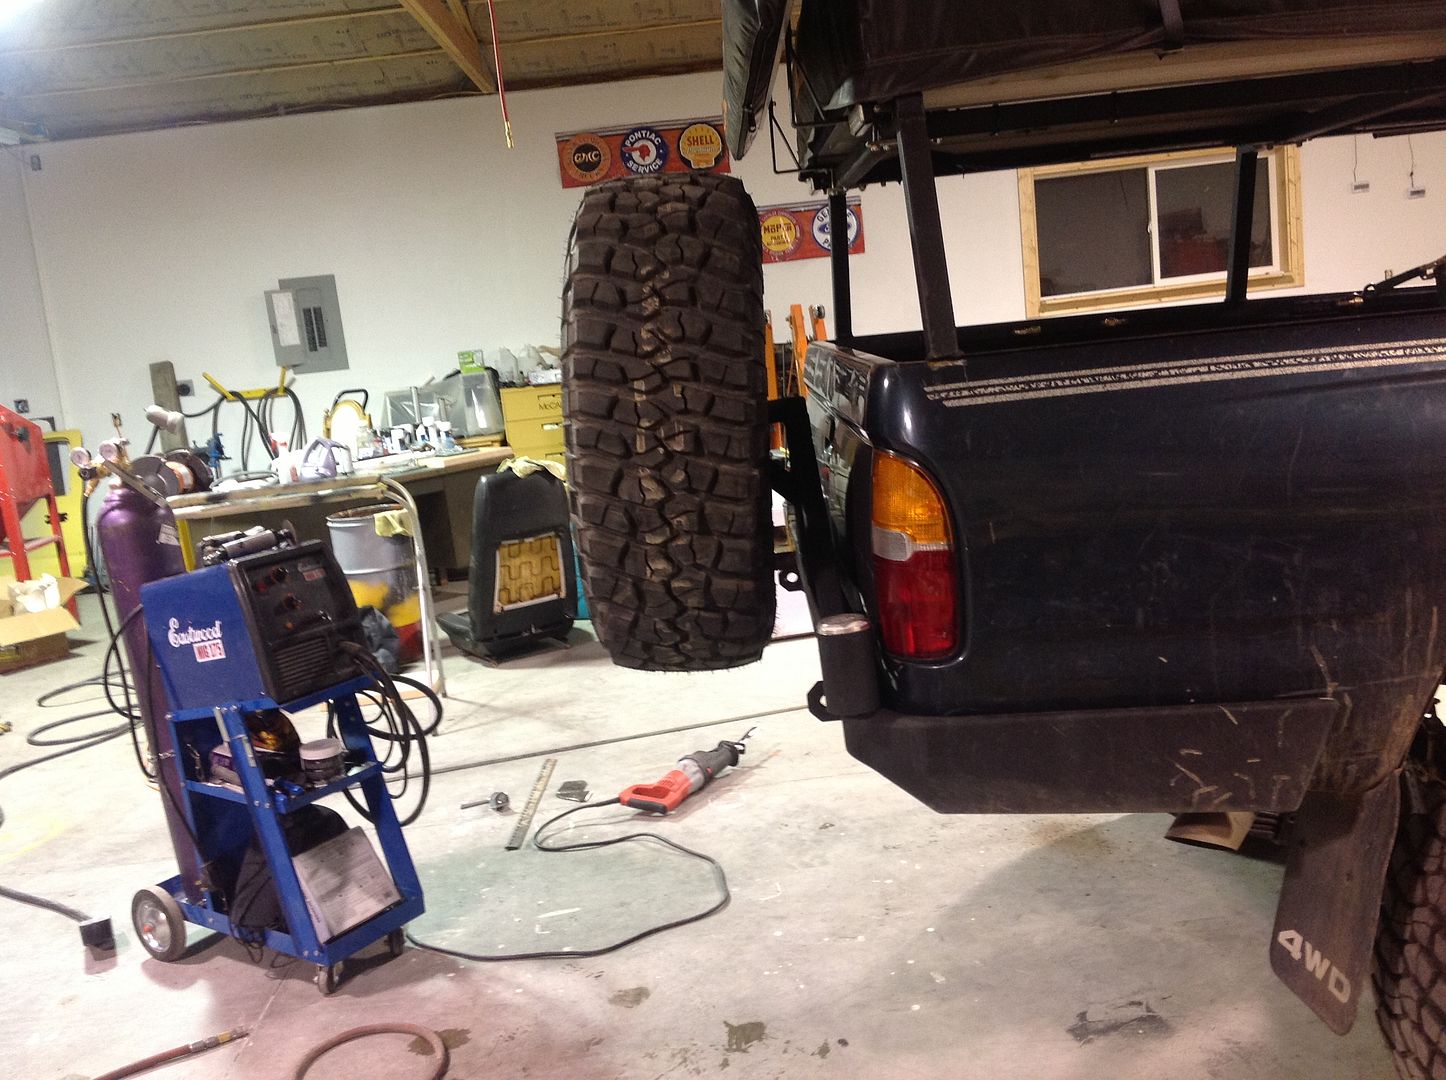
So first I did the tire mount. As you can see the tire leans back a bit. I didn't like that

46937395f085d6df1dc2878c9a2dece7_zps20de9592.jpg

43b8a900053d9b252178549c76f82356_zps62670afa.jpg


So I made a cut as close as I could with a cut off wheel

c938455a6dac530cbb1f3559695f65eb_zpsf295bf20.jpg


Then took the BFH to it and whalla!

5b5cc9a515694ac7490ff9808a809dea_zpsc20dd0c0.jpg


Seemed to level it out..

89c40c87a115b50b951879d6dd6a9e44_zps6d007008.jpg

5b8827560214ca98dc75d54673499221_zpsd59f81b7.jpg


I still wanted it angled forward a bit tho

So..made another cut in the same spot..

4ad3ae70ed791933afc89297a37544f1_zps1c3cf0cf.jpg


And more BFH time!

2f36e4766dc454cbba060543089cdf3a_zps592c409a.jpg


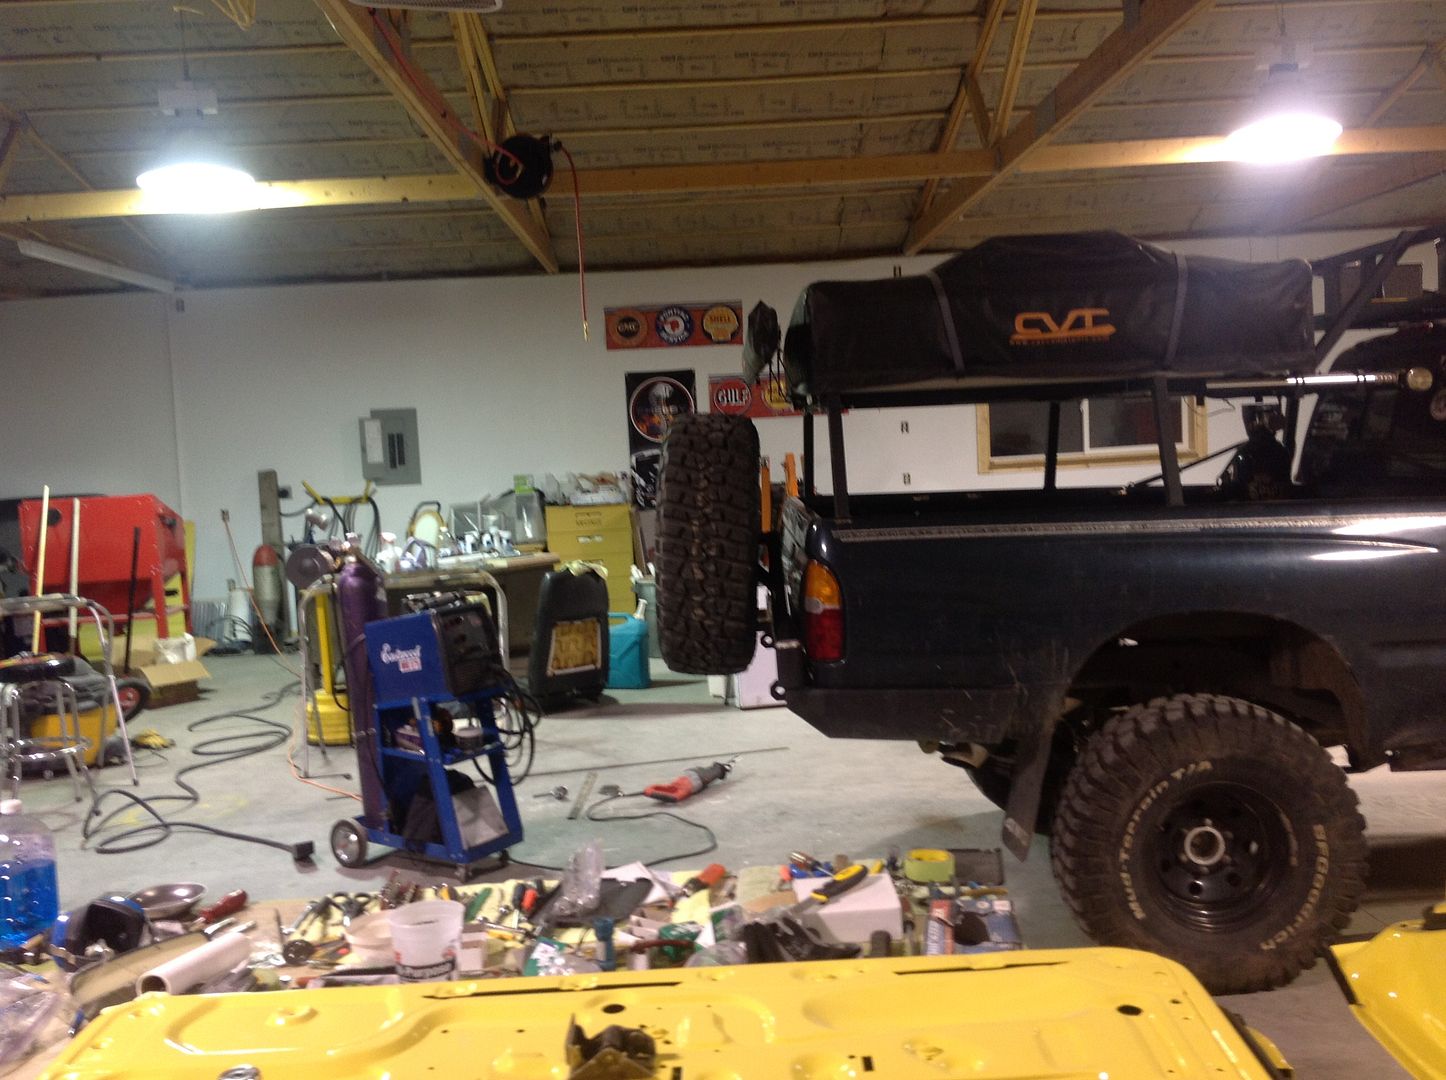
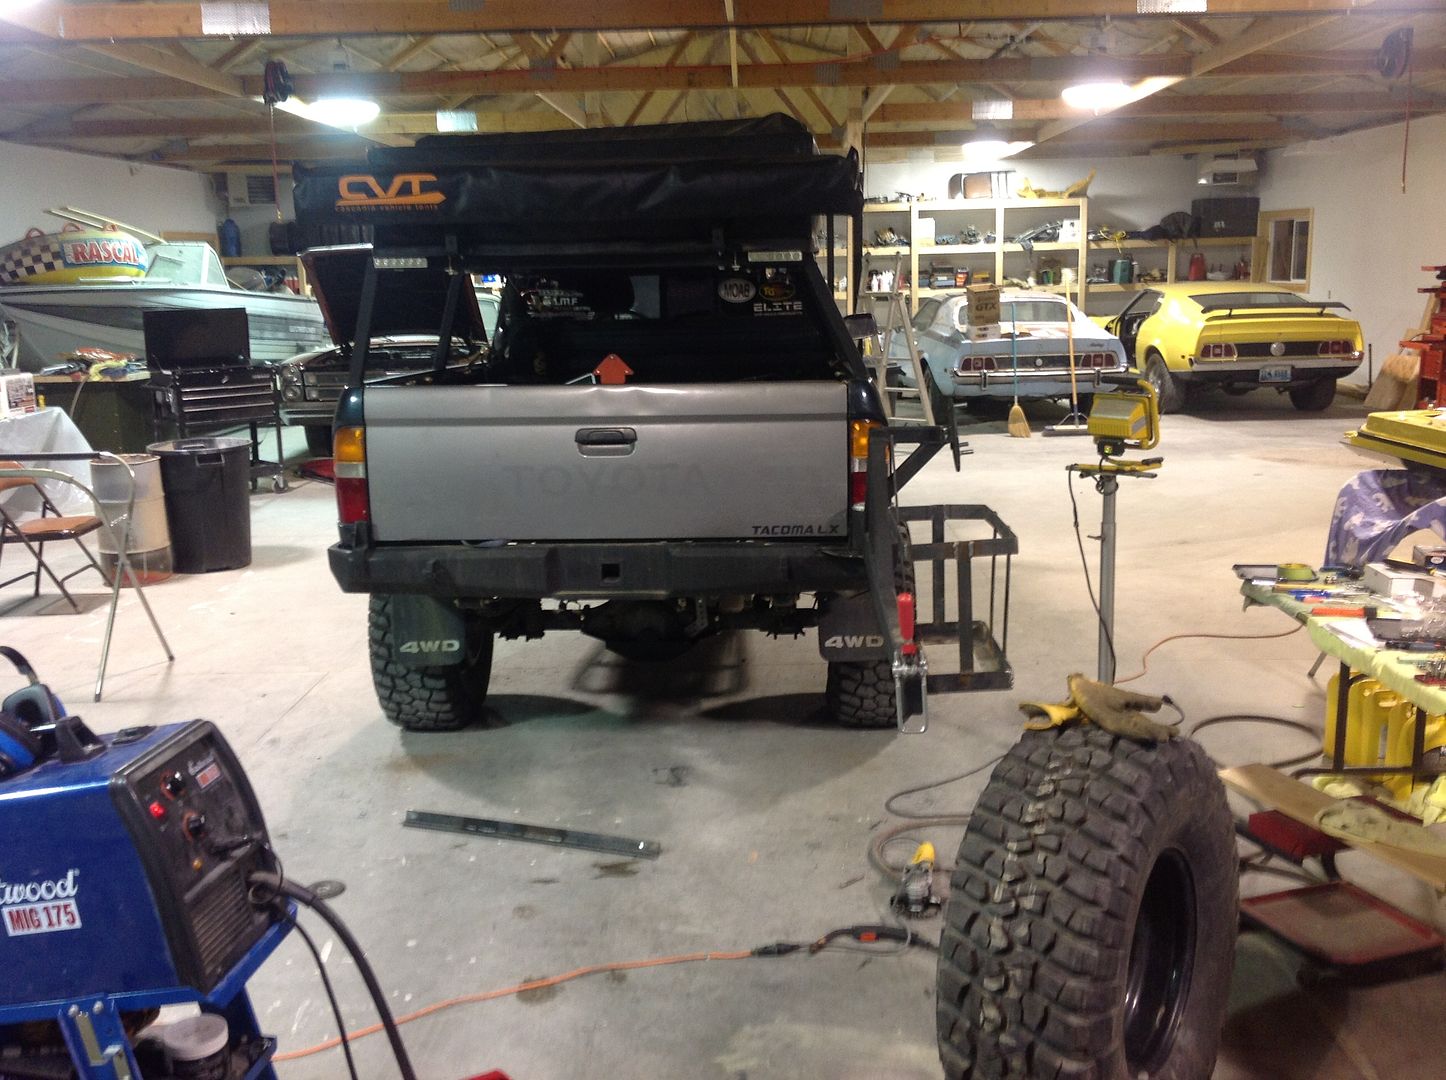
And this is how the tire will sit now. I like it.

d859e8d1cc43485a6347e2373e96e250_zpse91859ad.jpg

ed4f46f4b468cd33b83ddf445b7afecc_zps2d6f1b6d.jpg


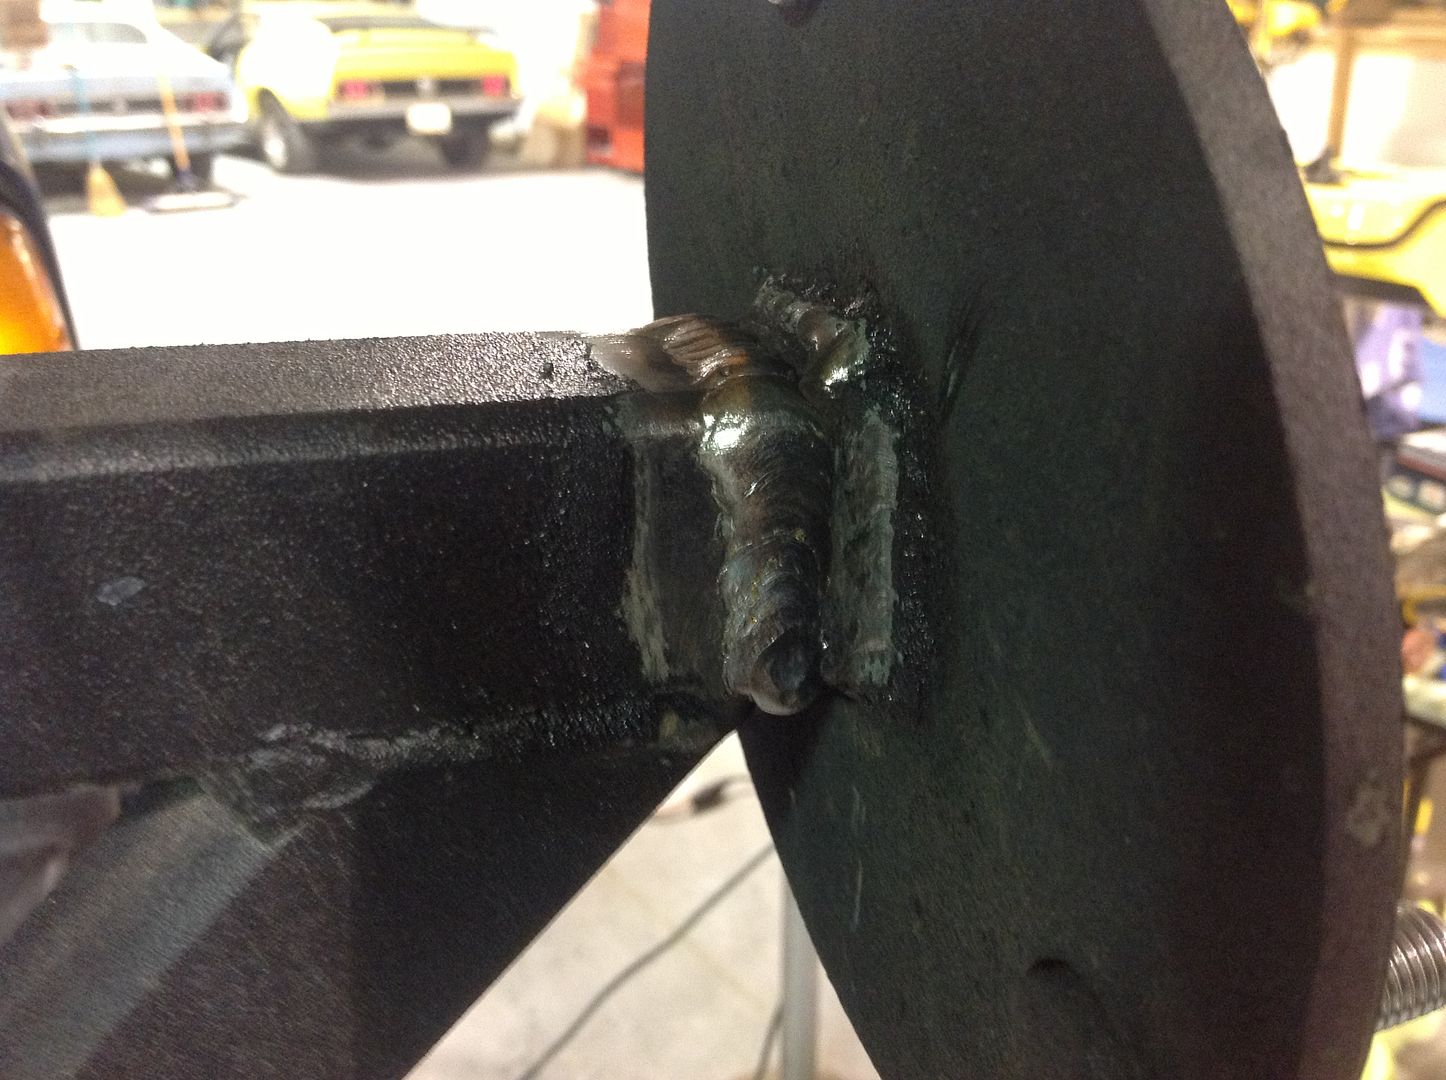
Welded up the cut. Mark..are you taking notes?? This is how you weld :p

a22e343f4b4425dd08e0d10d3fffbceb_zps0050a26a.jpg

a15b85f566433808d70c8602c563f766_zps3511693f.jpg


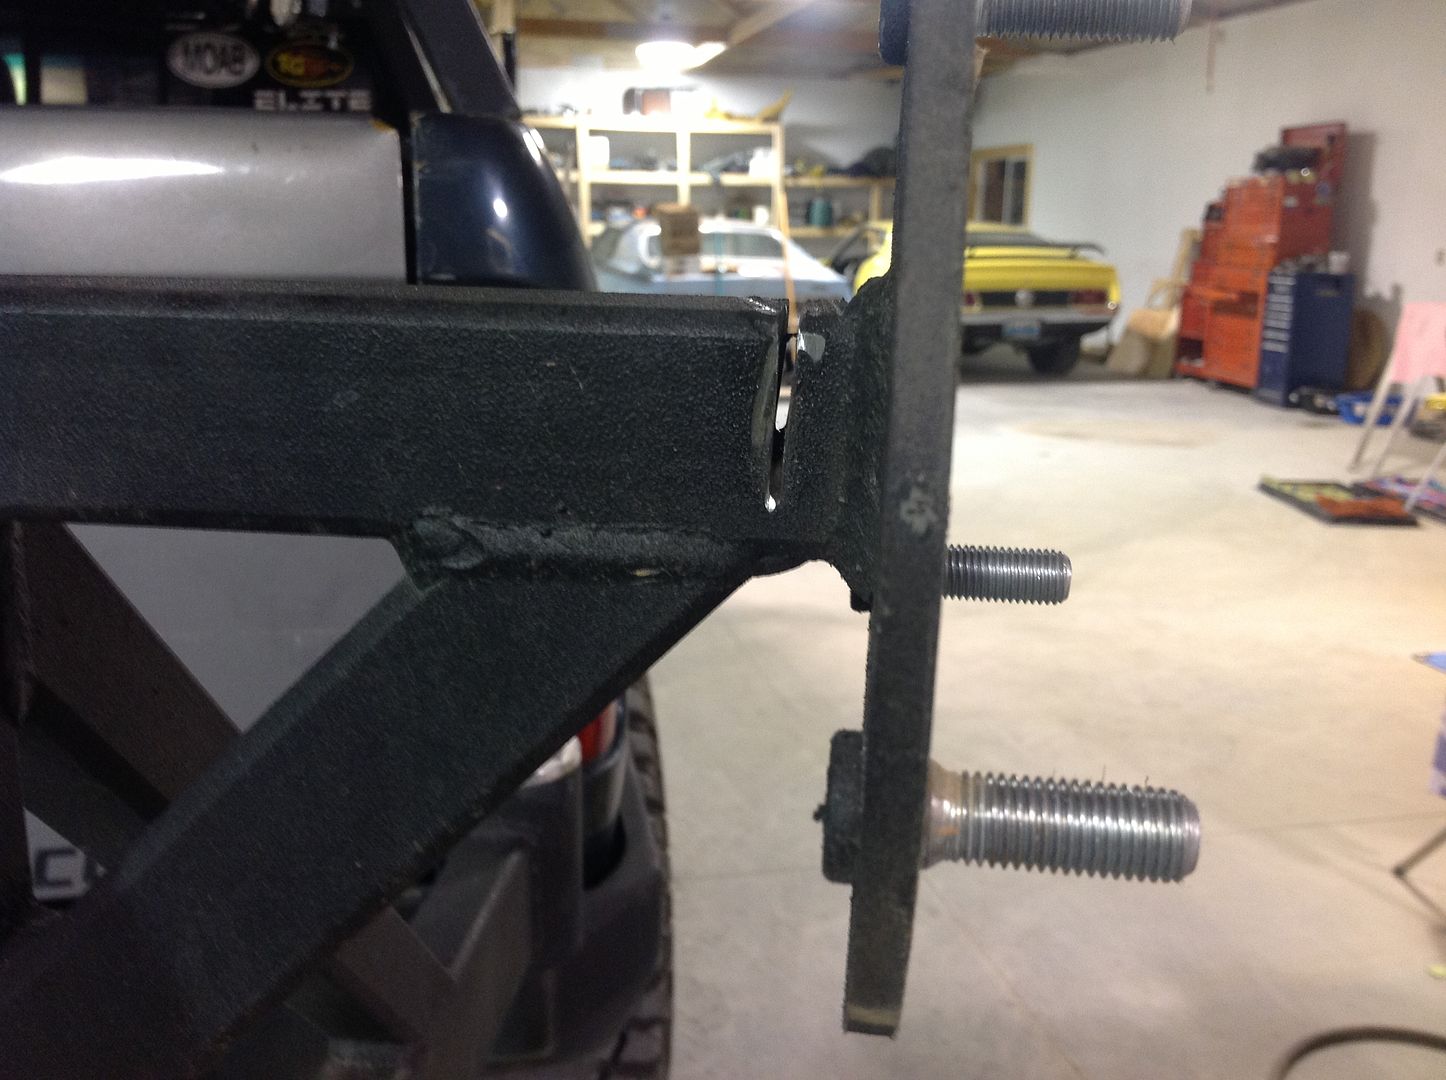
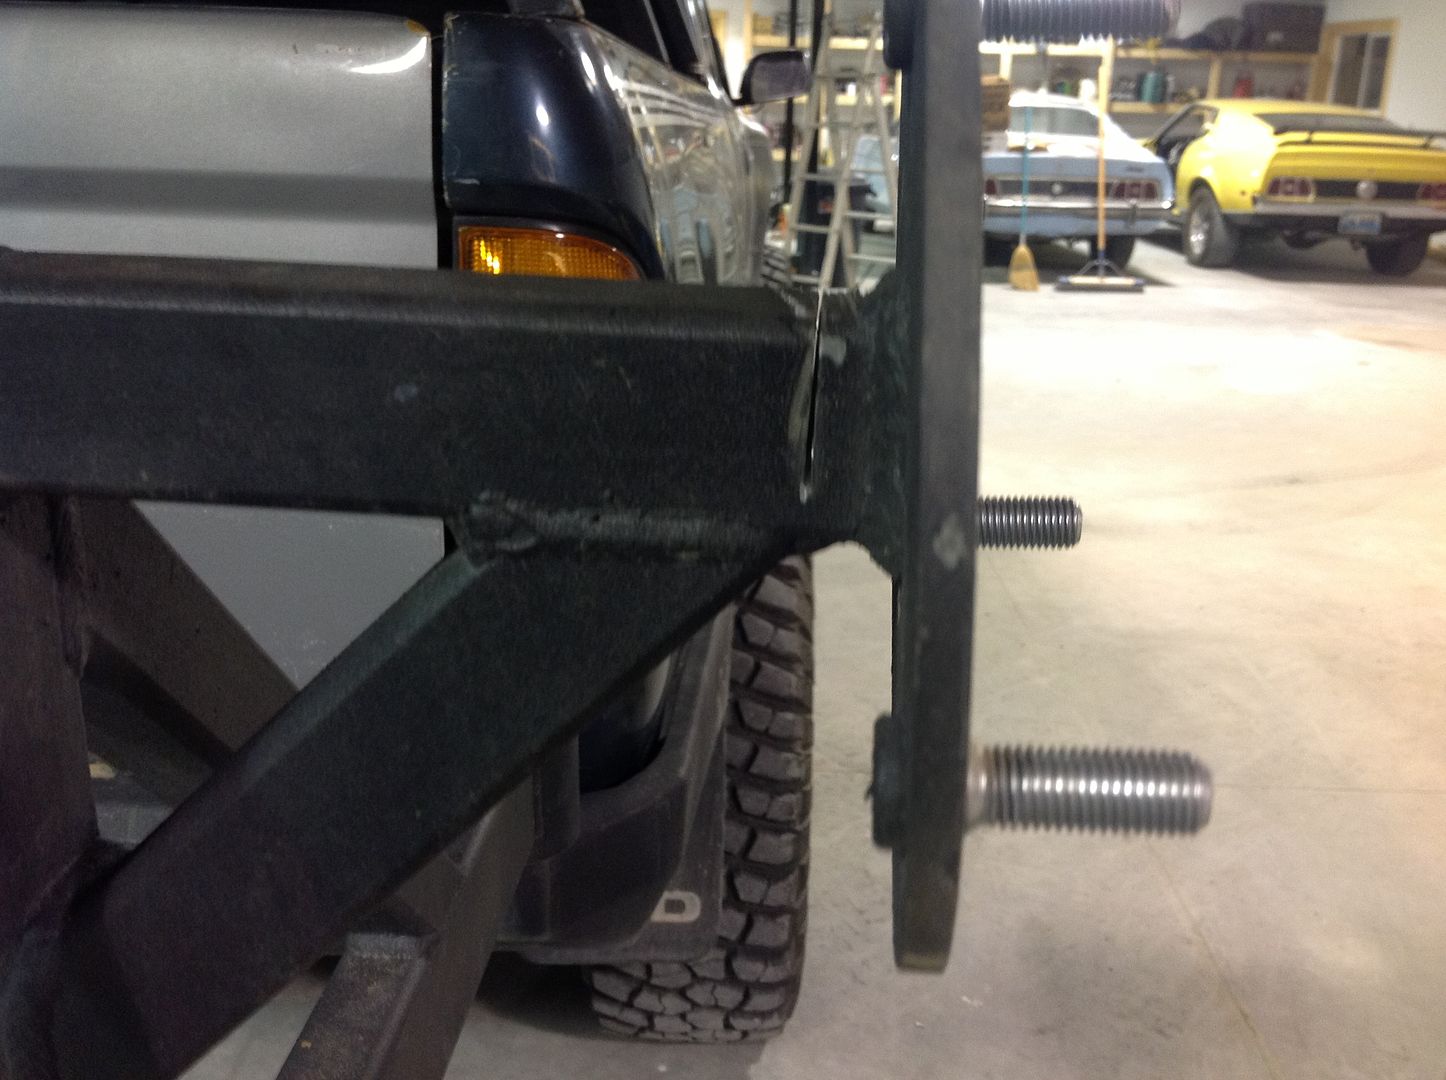
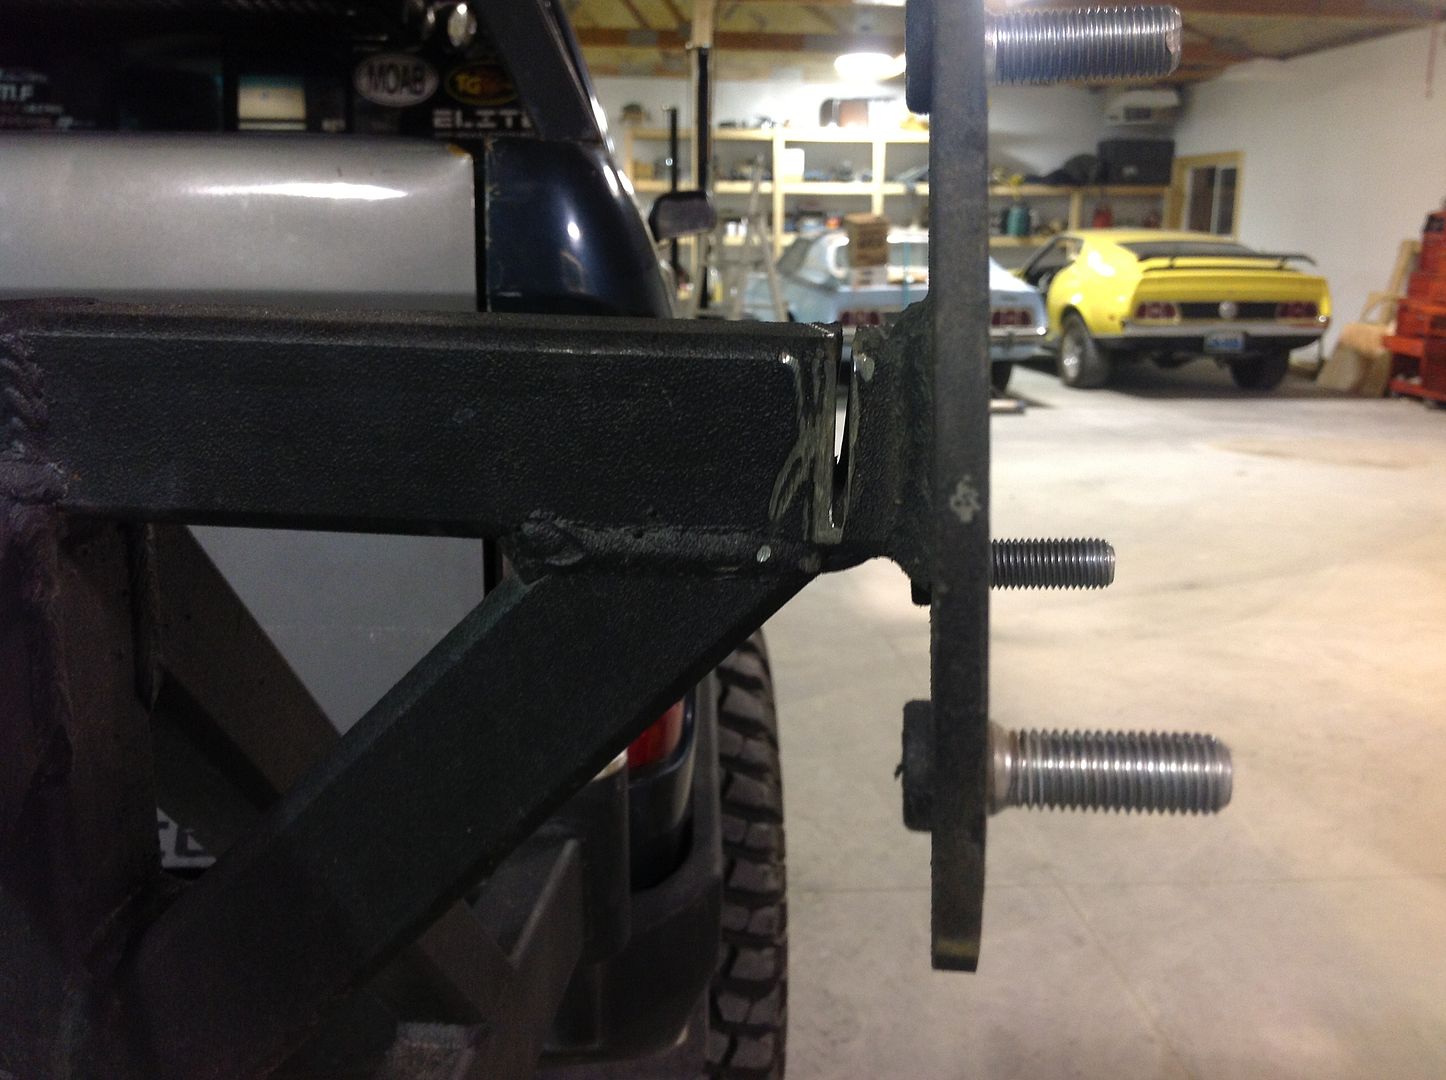
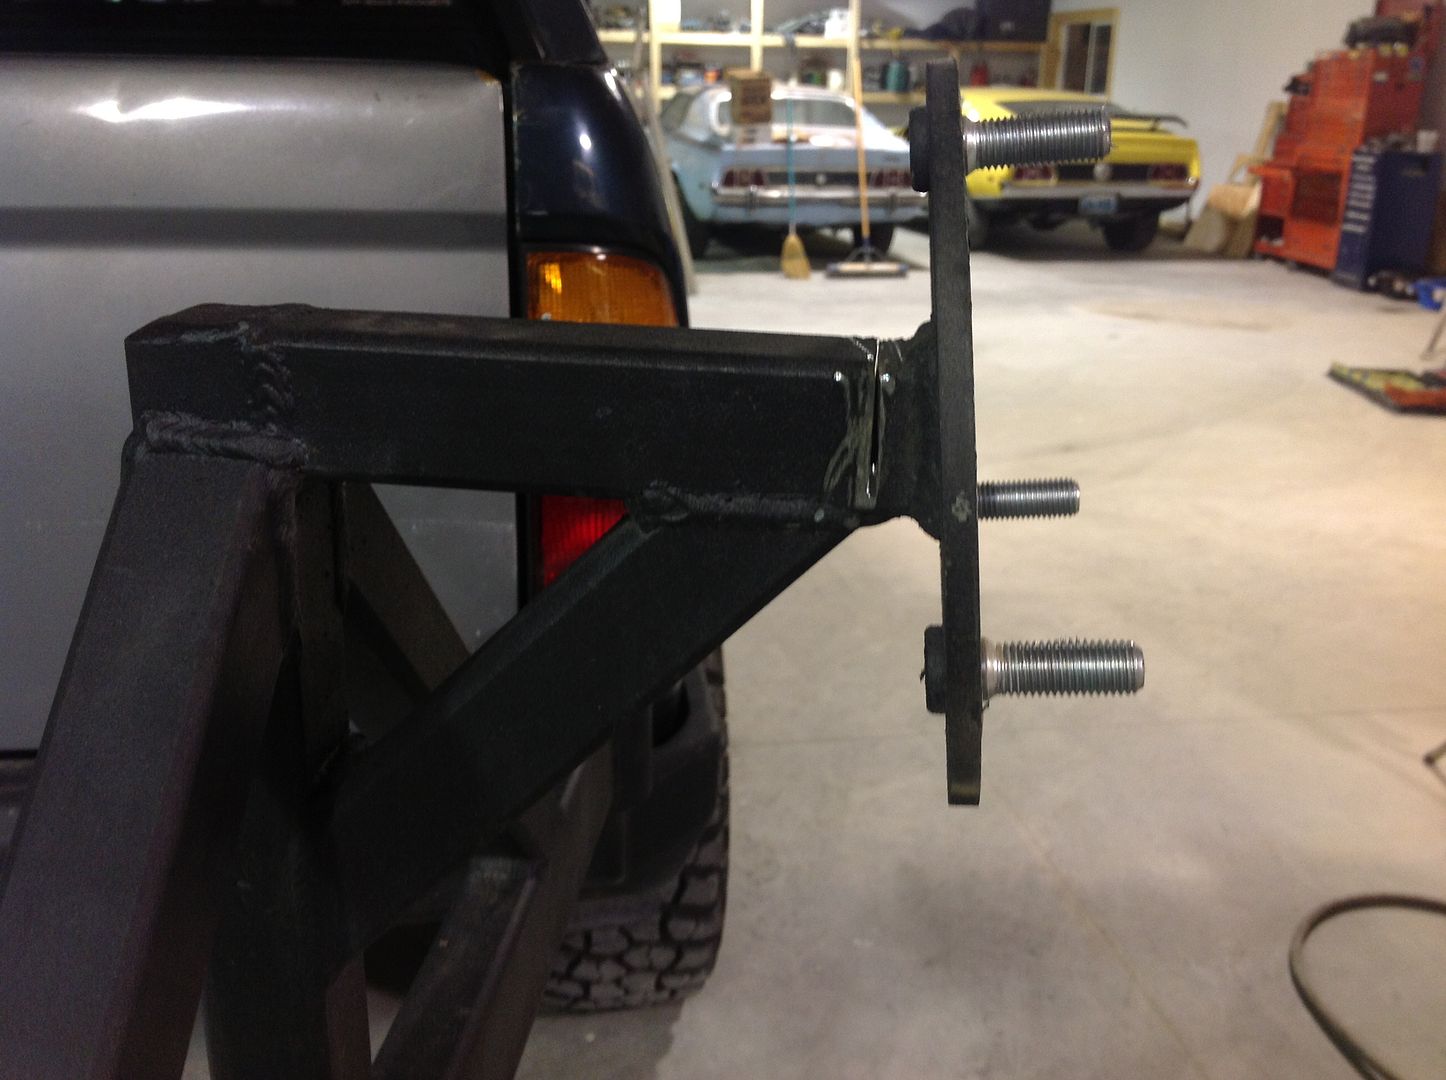
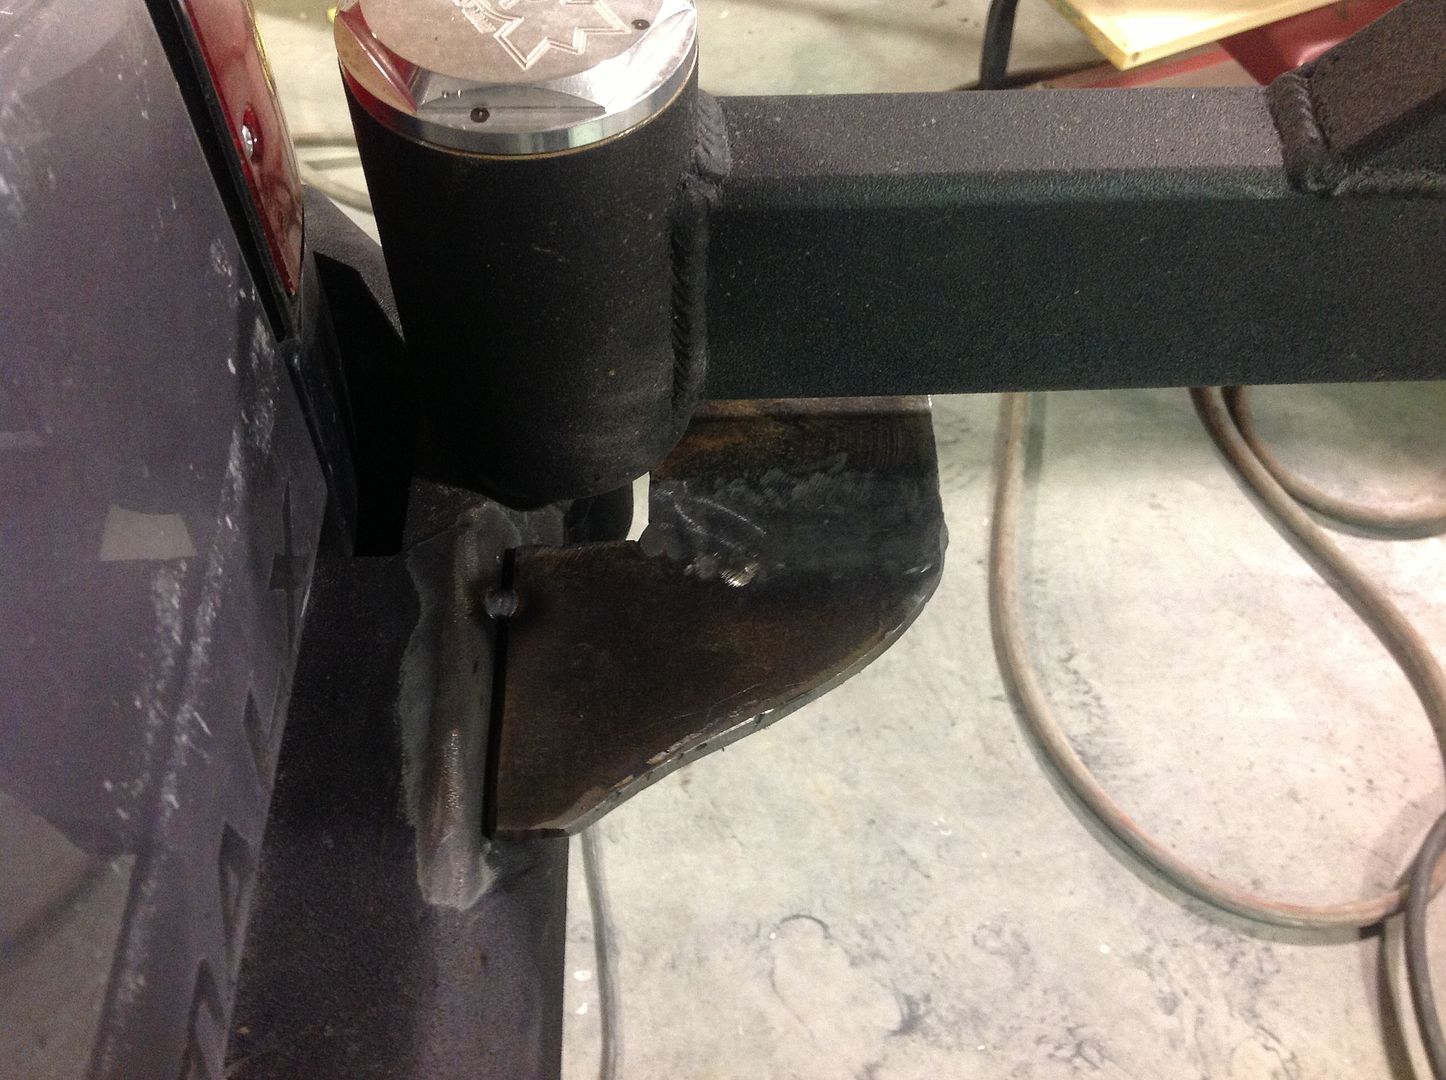
Next I did the part for the hole for my lock pin. I fabbed up this piece before I left out of boiler 1/4" plate with the cutting torch. Time to weld it on!

Tached on

214b8108b1f460b16f4e721cea1e2092_zpsc58a3342.jpg

d2b6da2c175dbf36bd3557e917566c39_zps68906774.jpg


Welded on!

Again mark..taking notes still?

06c494a03e8a57a2f1563da4e5d470fe_zps373fe10d.jpg


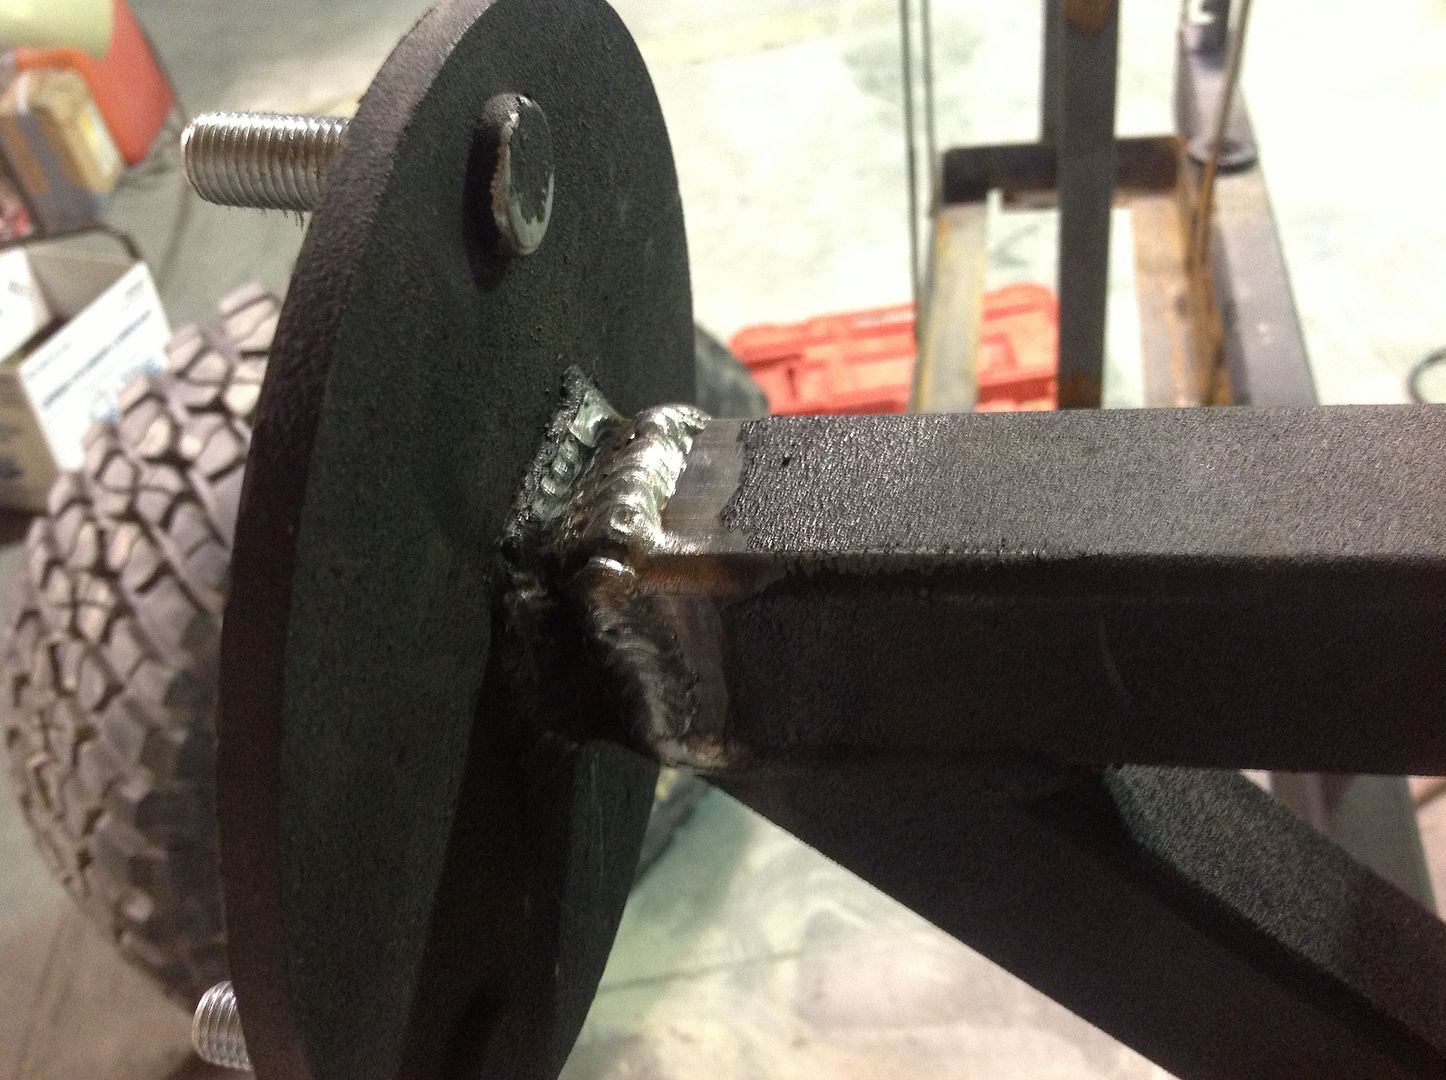
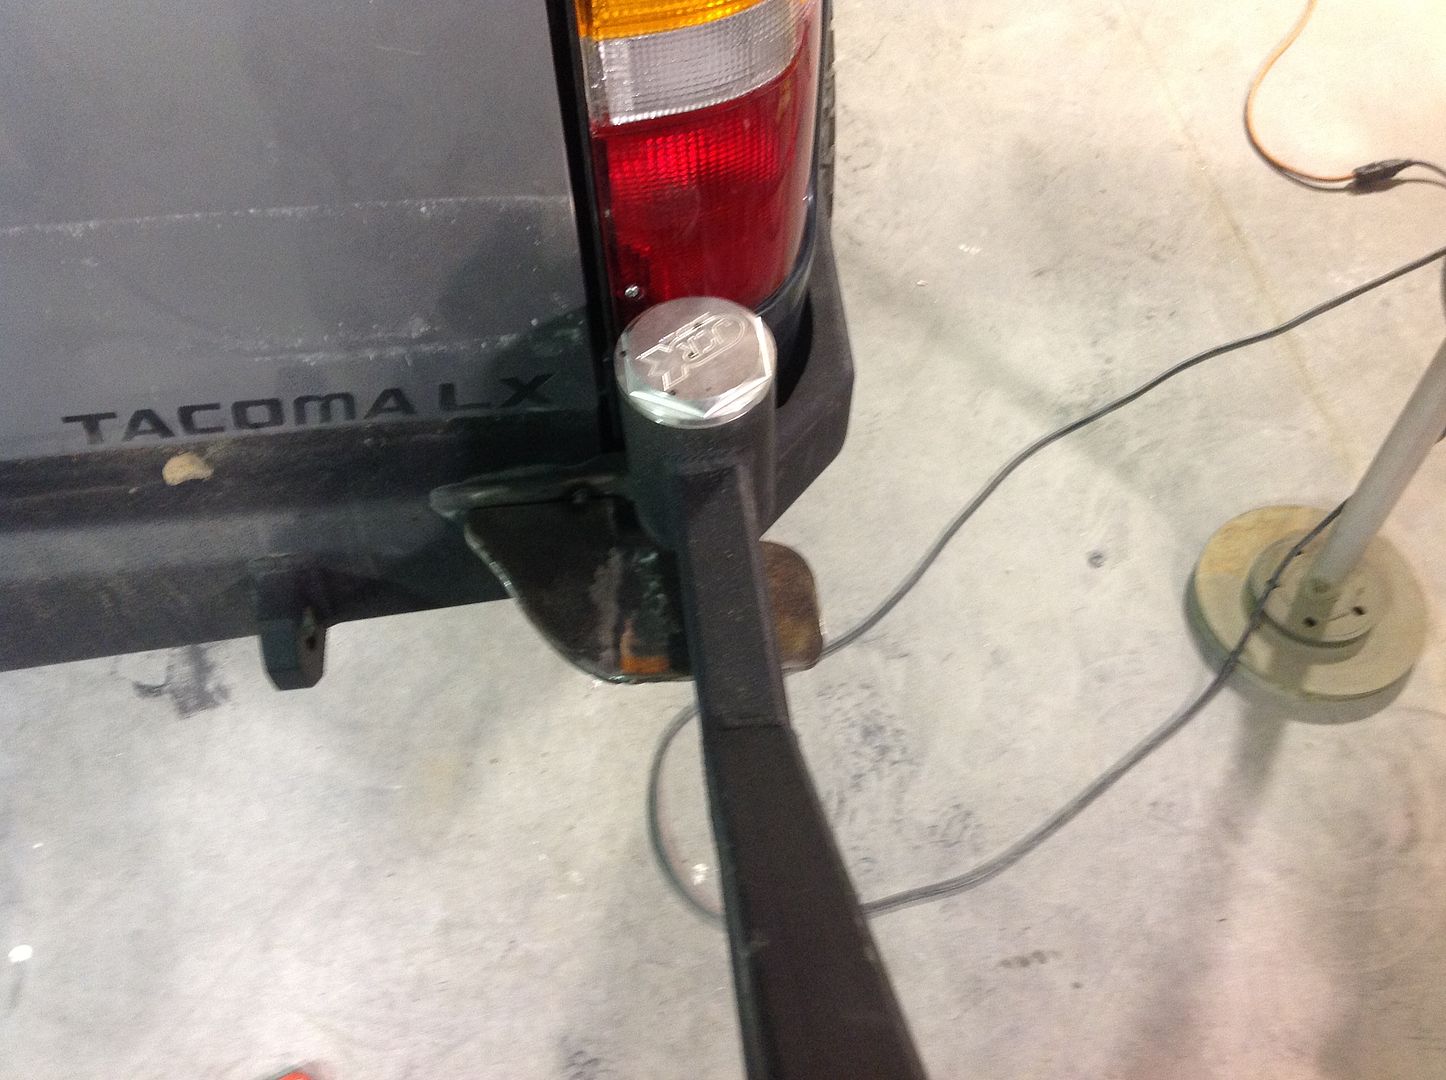
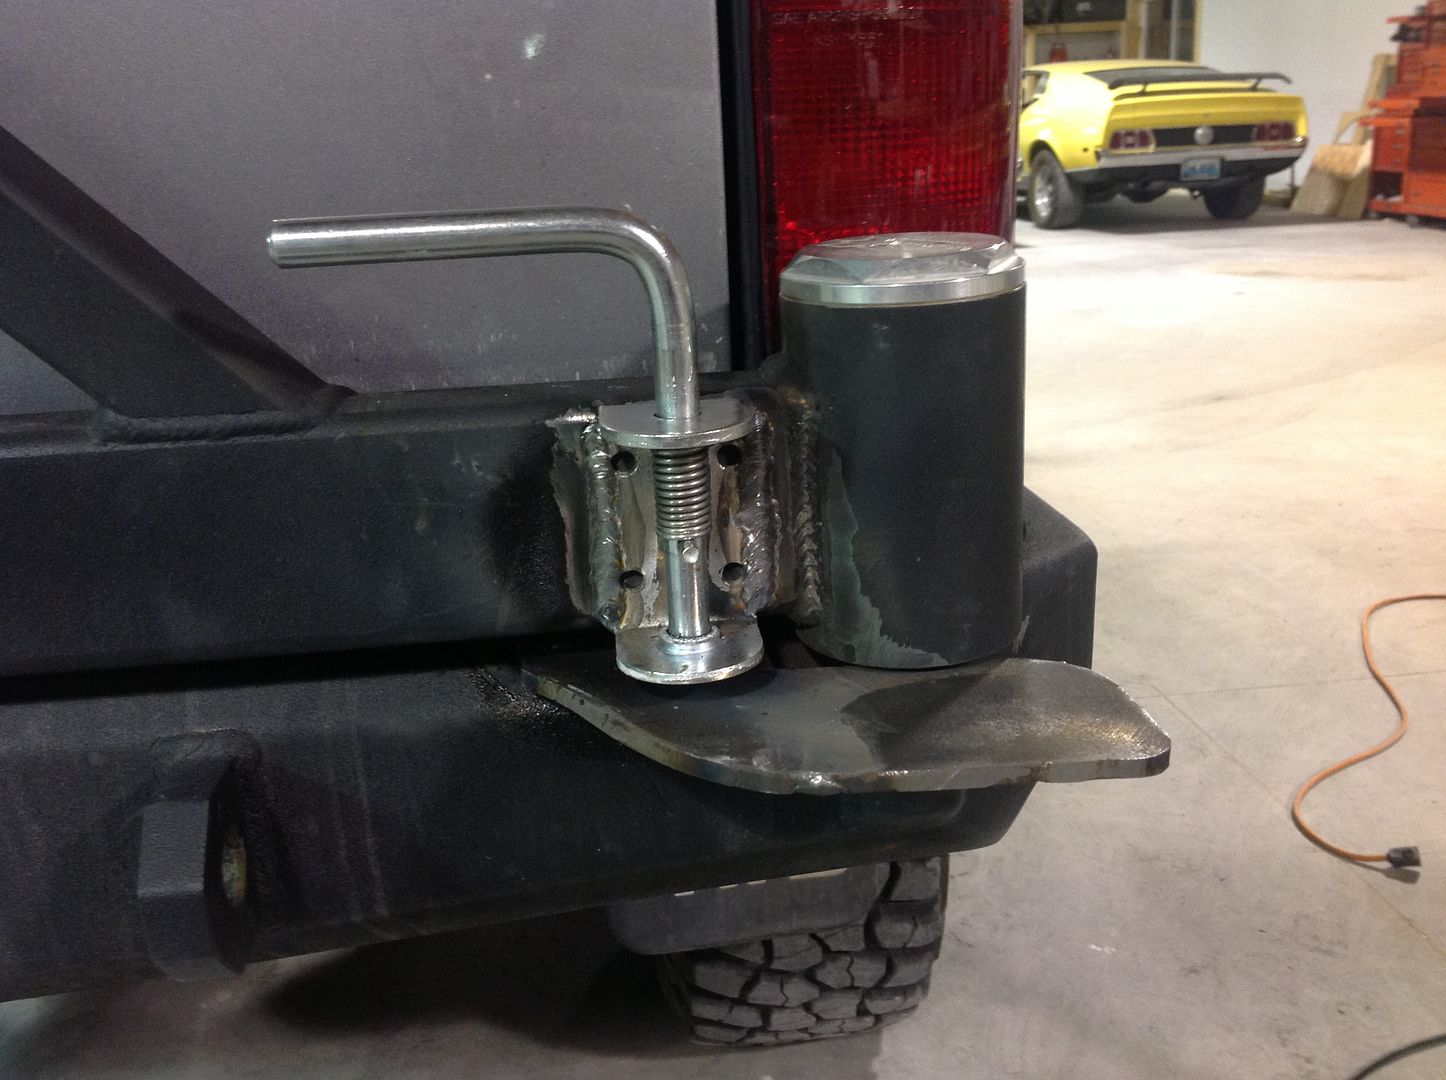
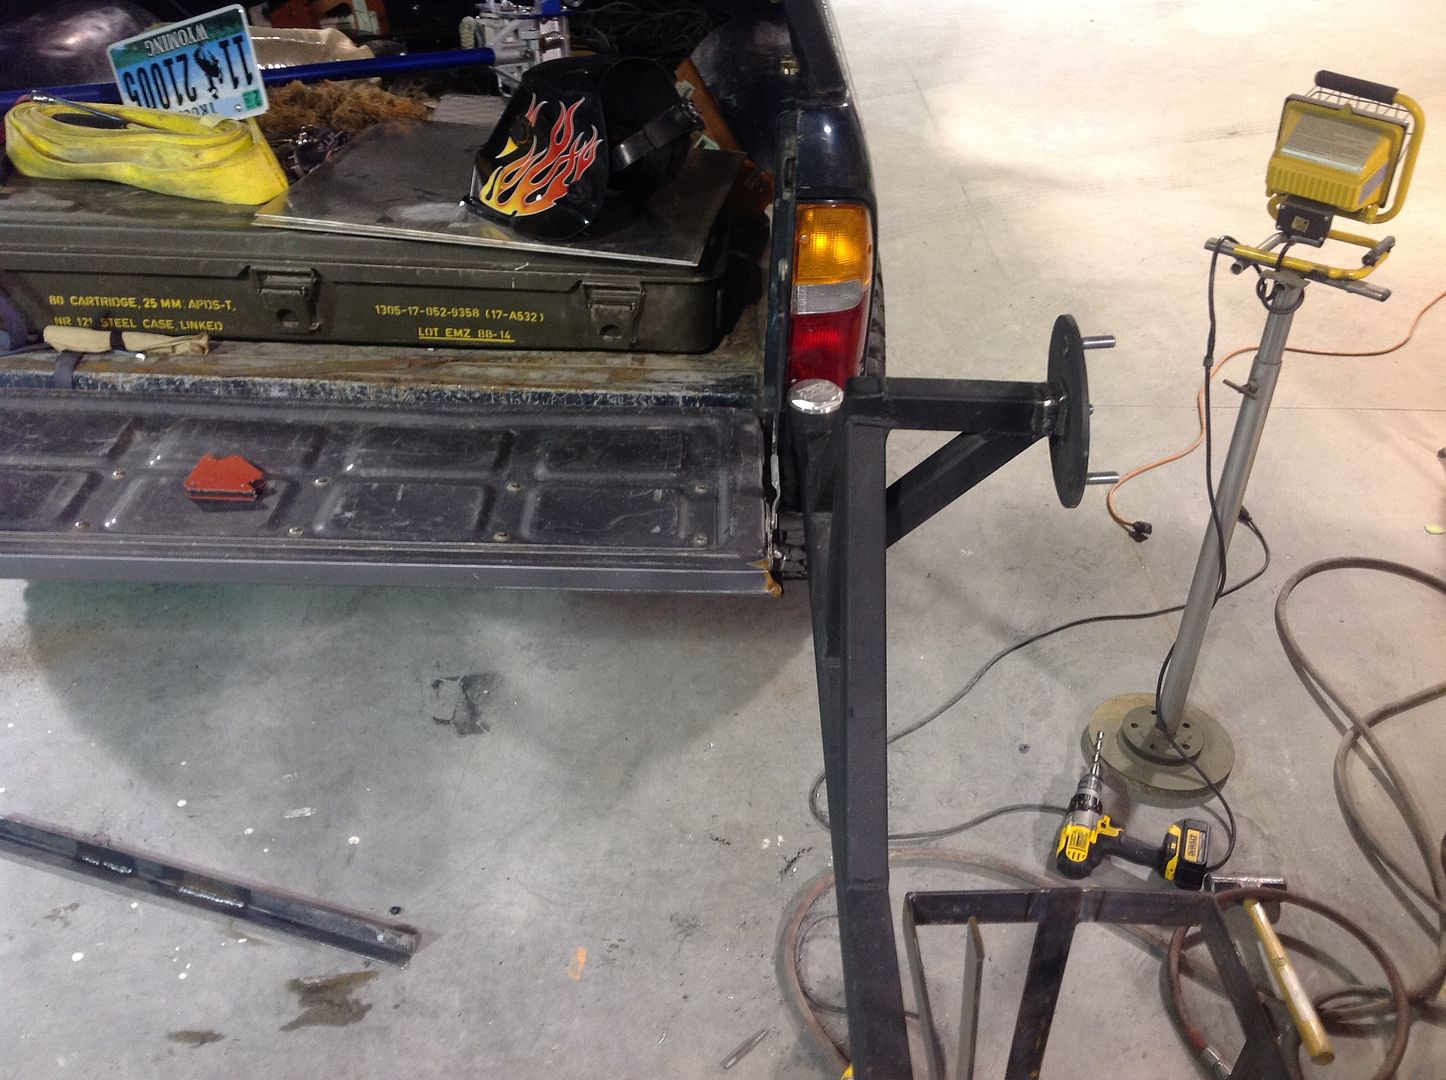
Welded on the lock pin.

3049d8840353d8aa98514610a5613c4f_zps3780170e.jpg


Drilled a 1/2" hole for the pin. Had to file it a tad bigger

5f084b56a00f639e1515eef31afc86c0_zps912910db.jpg


And this is how the swing out sits when the pin is down and locked

8c8eae938b9b119365c88369f3a7f8cf_zps1a2b2f1a.jpg

1a665e91011a1c468ffd9240deb41b01_zps983accb5.jpg

3586ed60dce78a29129655a75654ec7c_zps59c299ff.jpg


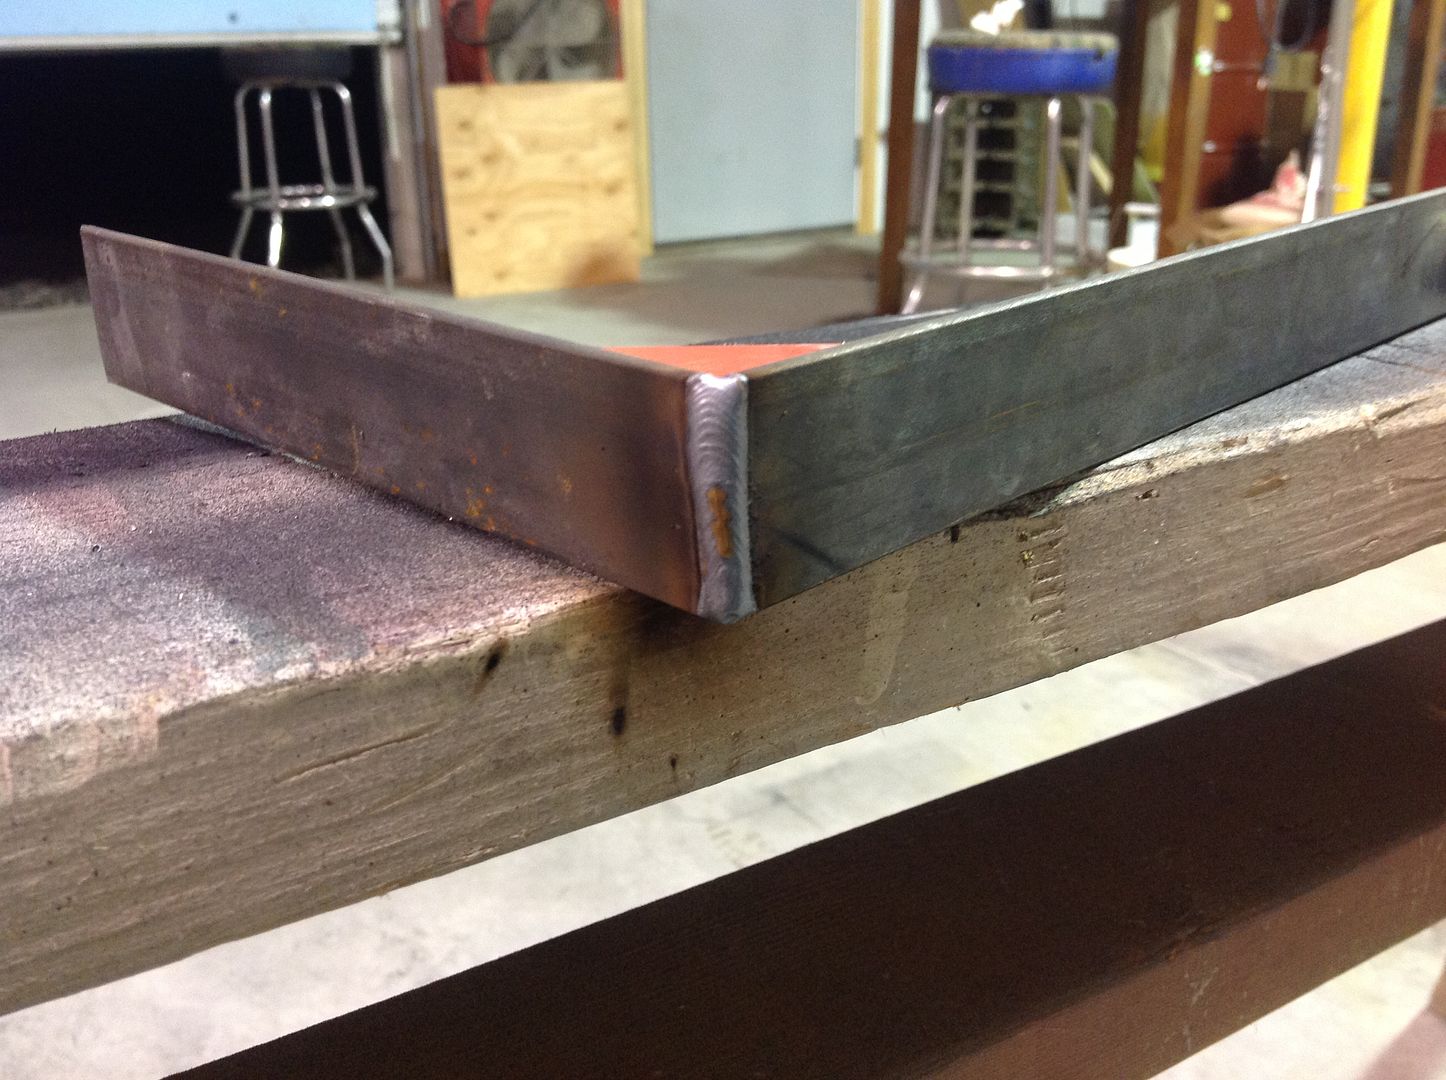
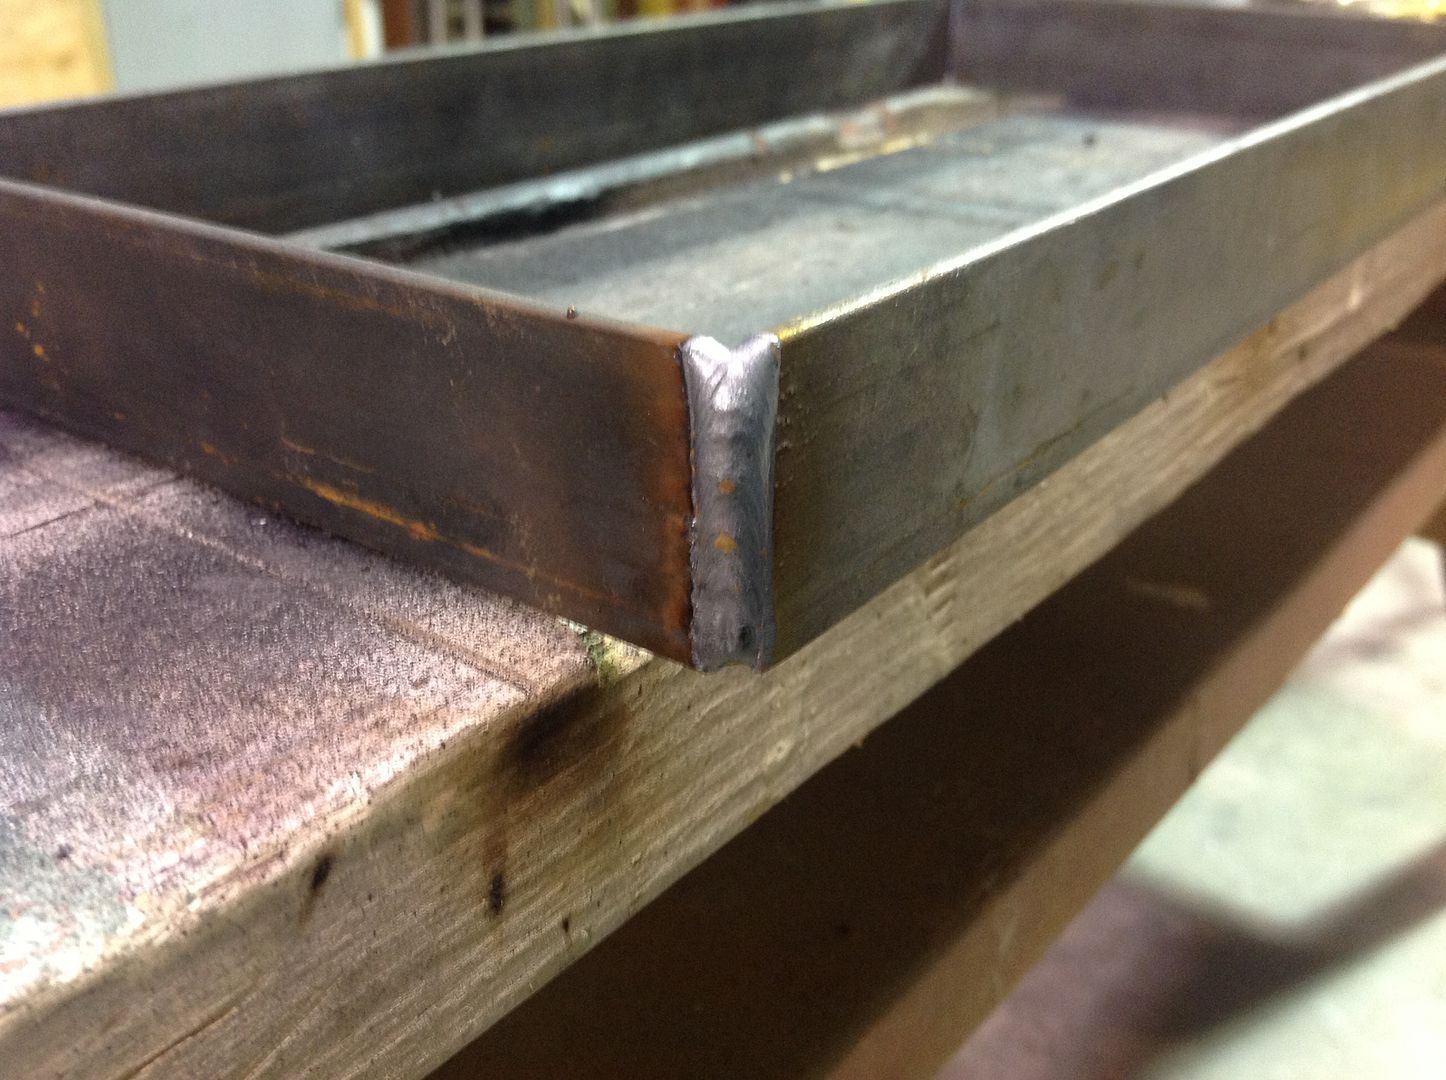
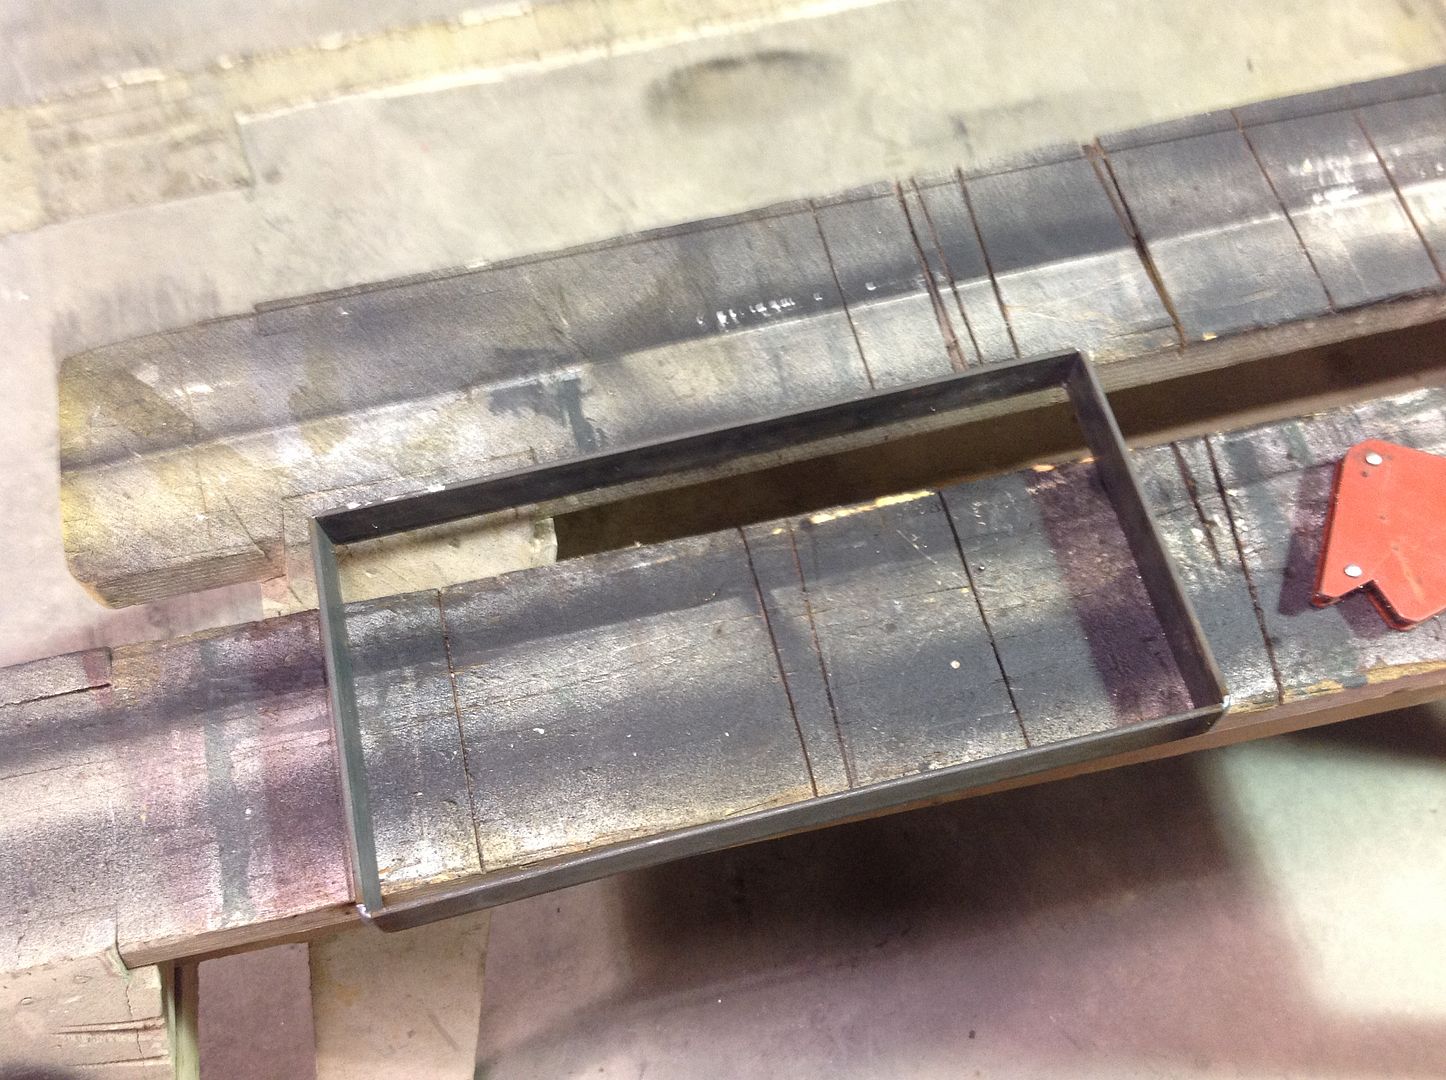
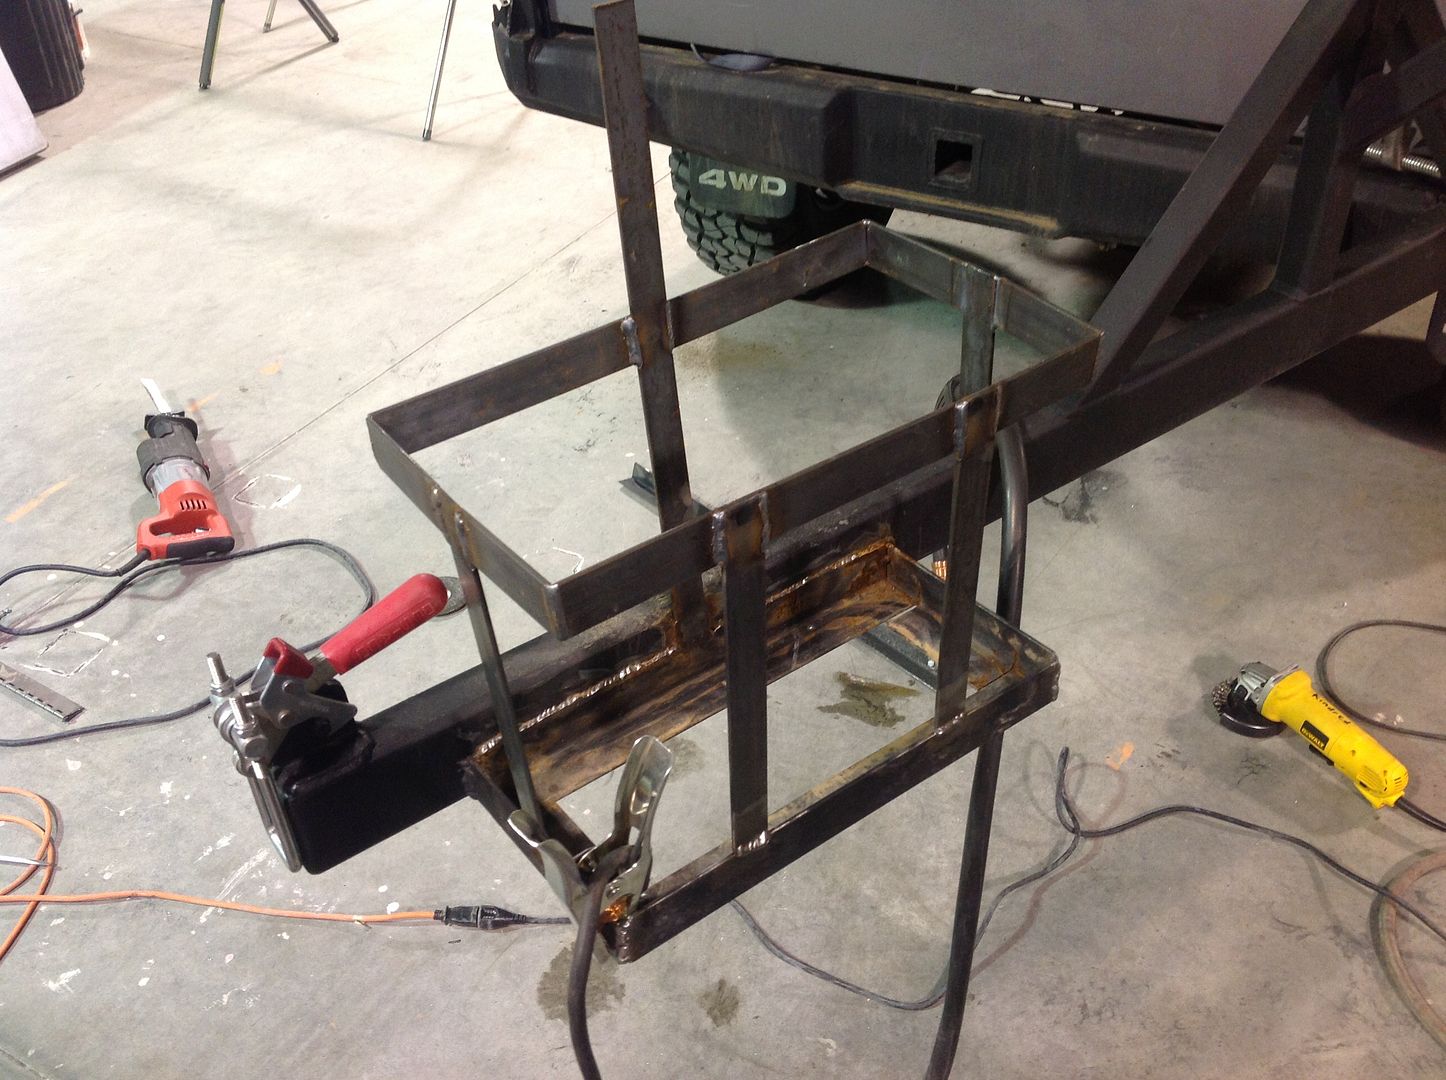
And now the Jerry can mount! I started by making a box 14x7" out of 1.25" strap

Mark..again...keep those notes going..

49cab05c4e1d2b477117d6ed617ff447_zps6857a584.jpg

063c8b44e1dd05a4904d60dd7a945939_zps4d451684.jpg

b1576e656d11934fb1dabc86ca0a90fb_zpsde64df94.jpg


Then I ended cutting it on the 7" side to weld to the sides of the side posts I had to allow it to be just over 8" wide. Why? Well my Jerry can had expanded from being in the sun and filled with gas. So I needed it wider then my original dimensions. It's no big deal as it fits perfect and the lower part holds it very tight as it is.

821c9647d1f0b0b33c6ce3b335802e9a_zpse64bceff.jpg
 

Forum statistics

Threads
185,891
Messages
2,879,282
Members
225,450
Latest member
Rinzlerz
Top