2006 GMC Sierra Build

ZMagic97

Explorer
Really nice looking truck! I have a 98 GMC with a 3rd door extended cab and I kinda wanna upgrade to something a little newer.

Thanks! I like this GMC a lot and have an 05 Silverado as well that has never given me a problem. The 99-07 classic trucks have been my favorites for some time.
 

ZMagic97

Explorer
Good looking truck. I have a 4 Door JKU that I'm close to getting rid of and moving to a truck so this is nice motivation to move on.

Thank you! I have been a lot happier with the truck over my JK. The JK was great and very reliable, but the extra room, power, and storage space makes life so much easier.
 

ZMagic97

Explorer
I figured I'd take a quick moment to talk about the fridge I have since I'm very happy with it especially considering the cost that has been put into it.

The unit itself is an Edgestar FP430 that I bought 2nd hand from a gentleman on Craigslist a few years ago when I had my JK. He was in the area and the fridge was in great shape: I took it home for $350 if I remember correctly.

While the fridge works great (I have had it at -8F before) there were a couple of things that I felt needed improving.

The most important (ironically the last) improvement I made was to the plug itself. If you do some online searching, you will see that many people have changed the plug out, and even the receptacle on the fridge itself. The issue with the 12V end is that it does not use a "traditional" screw-on cap with a spring assisted cylindrical fuse, but instead had a bent, flat piece of metal that acted as a spring, and the entire plug had to be disassembled to get to it. The main issue was this caused the connection to be intermittent so I picked up a new, "standard" plug and a 7.5W fuse and installed the new end. It works much better and never has a bad connection.


The first "mod" I actually did was for lighting. I found that I usually used the fridge in the darker hours and was always grabbing a flashlight to see the inside of the fridge. One day at IKEA I spotted this very bright LED puck light with double sided tape for ~$5 and decided to grab it. It uses 3 AAA batteries and the tape has yet to fail in 2 years. Pressing the dome area is the on/off switch so it's very easy to use for just a few moments. These are pretty standard finds at many stores these days.


The most expensive mod I did was changing out the plastic handles for metal ones. It wasn't cheap, but well worth it. I had it tied down in my JK and heard a loud snap on a bumpy trail: one of the plastic handles broke in half. I cannot take credit for the idea on this, as it was originally done by forum member "Silver dude" to the best of my knowledge. theksmith also did a write up.
The link is here: http://www.expeditionportal.com/forum/threads/47802-Edgestar-Fridge-Modifications-Thread/page4
From theksmith: http://offroadpassport.com/forum/showthread.php?t=1416


I did have a Tembo Tusk fridge slide, but am currently selling the set-up since it is not needed any longer.

Hope this info was helpful to some!
 
Last edited:

ZMagic97

Explorer
A little has been going on with the GMC in the last few days: On June 29th I drove it to Vegas and came back July 6th (stayed a week). On the way there, I ran into a small issue that I had when I went fishing a few days prior: the A/C begins to blow less and less until it becomes a trickle. It started about 50 miles out on my way in, but wasn't too bad, just a little warm. On the way back it started about 50 miles out going home...I figured the condenser was freezing up.

So, near Kingman I turned off the compressor and left the fan going...air flow began to come back and the air was still cold.

....then it hit me. Literally. As I was going uphill I hear a cracking sound and start getting hit in the face...with ice! After that it was fine the whole way home. I still plan to clean out the outside of the condenser soon.

Besides that, it will fit (barley) in the parking garages there, and it makes crossing the Colorado river via Hoover Dam a dream!


Also, I found out State Farm, the insurance company of the woman that hit me, has acceptable all responsibility and will be repairing my truck. I am trying to get it to a shop I like, and they will pay it all, or if it is more than they assess it for I pay the extra. I also get a free rental car.
 

ZMagic97

Explorer
Well, I did this prior to going to Vegas but haven't had much time to sit down and write it up. One thing I noticed was this little shark fin looking thing on top of the truck...

...as I figured it is for Sirius/XM service which my truck has factory (well, XM anyway). So, since I already have a radio and service I paid for back in late April and activating another radio is more $$$ I decided to install a car kit. With that in mind, I figured there must be a way to use the antenna already on the truck....

So I did some research and digging around and found where the cable for it is. I saw mixed opinions on compatibility, most of which were not so good looking. So, I got to finding where the antenna is. I figured it'd be a huge PITA, but to my amazement it's not: the connector goes to a module for the radio right behind the glove box. It is the one with the yellow connector. You need to "pinch n pull" to remove it. It isn't too bad. (Below photo is not one I took)


The only downside is it is short and will not reach to the center console where I want to mount the unit. I wanted it there as to not block and A/C vent. So, I had to buy a cable from Amazon. They came in 6' and 12' lengths even though I only needed like 2', however a 6' one was ~$7 to my door. I ordered one.


The yellow connector piece needs to come off. It cannot be cut, but the tabs come apart to remove the yellow housing. Using 2, flat head jewel screwdrivers is best. The result is the cable end on the right, the one on the left is the extension cable.


Now...here's the catch. The two cable ends will meet together...but will not hold. They not made to mate so they can make and break connection with no effort. So, you need to make them stick. First, the end of the antenna cable that had the yellow connector needs to be flared. You can cut the tabs off, but I kept them for a better fit.


Next, I used electrical tape to keep the ends together. I slipped some heat shrink on first.


Sorry, but I don't have a pic of the shrunken heat shrink..but you get the idea. Before I got too far, I pulled my Silverado next to the Sierra to test the antenna. My Chevy has a car kit already, and I can run the extra length of the 6' extension to from the GMC to the Chevy to test it...


And as you can see, I have 3 bars! (Full reception)
 

ZMagic97

Explorer
Next, I had to pop off the dash bezel. To get it off, just grab it and pull. It is just press fit.


Same goes for the passengers inner most ac vent. You may need a a thin flat head to get under it to pull it out. Be careful. Again, press fit part.


I then ran the cable behind the glove box support bar to keep it out of the way.


Next, I fed it through the A/C vent area. You can do this without removing the vent...but it's a challenge.


I then fed it into the center area by the cubby box...


...and to where the stand will be mounted.


I then coiled up the extra cable and pushed it behind the glove box.


Next, I wanted a keyed power source. No playing with wires, switches...etc. Turn the key and go. So, I got the the fuse box. The panel in the triangle facing the door on the driver's side of the dash.


With the radio and stand mounted with RTV (stock tape failed in minutes. I let this dry overnight). I plugged in the power cable and ran it through the previously removed dash bezel and tucked it away where need be.


And placed part of it under the dash mat...


And down the back seam by the firewall. I jumpered to the 15A fuse on the top left which is for power and heated seats...I only have power. I'm good for amperage there. I then grounded it between the body and washer on the bolt to the lower left of the photo by crimping on a ring lug.


And there it is! Poor photo I know but it survived an off-road trip the the lake and round trip to Vegas!
 

ZMagic97

Explorer
It's been a while since I've made a post.

As I write this the GMC is away for paint and I'm using a Cruze as my free rental car (not a bad little thing really). Hopefully I will have it back soon as I had an itch to go on some trails this weekend.

A couple weekends ago I was going to drop it off, but on a Tuesday while coming home from work I had a hard downshift while passing someone and when I hot the off ramp, the CEL went on and all I had was second gear. I figured I had wiped some of the clutches and was in for a LONG weekend. And an expensive one at that.

I got home worried, but fine. Pulled into the garage, hooked up the scanner and found a code P0758 which is a "B" shift malfunction. I was hoping it was the solenoid, so I ordered 2 ACDelco ones at the local dealer ($25/each like any auto parts store) and also found an AFE deep trans pan for ~$120 off on Amazon and had it shipped.

It was a PITA getting the old pan off since the linkage guide is almost impossible to get off on this truck, so I moved the front drive shaft and loosed the tail shaft to gain working room and clearance.

Here's a Google image of the stock pan:


Upon getting the pan off I swapped both solenoids and put the AFE pan on. I like the AFE pan a LOT. Another stock photo:


The driver side also had a tap for a temp sensor, but I will get that installed at a later date, like in the cooler winter.

Luckily when it was all buttoned up and the fluid was in, turning the key immediately extinguished the CEL. I went down the street and noticed a much firmer shift from the watery, old fluid to the new, thicker fluid.
 

ZMagic97

Explorer
As of Friday night I have had the truck back. I took it up the Apache Trail for some fun Sunday and shined it up Monday to show off the paint repairs. The shop did a GREAT job. I am very happy with the results. The shop that did the work was Casey Auto Works in north Phoenix.


Bikemobile

Adventurer
Great looking truck!

I just sold my lifted Jeep WK for a 2007 Chevy Silverado 1500 LT3. It came with a topper and bedrug. Great combo!


I'm thinking about a mini me version of your lift and tires combo. 2" torsion lift, add a leafs and 33's. 33/12.50-20. My truck came with these VHO wheels that are apparently desirable. I really like those Denali wheels.
 

ZMagic97

Explorer
Thanks! I like the look of your truck as well.

The Denali wheels took a little while to grow on me, but they did.
 

ZMagic97

Explorer
I thought I'd post an update:

Starting around Halloween the "Check Engine" light came on while my girlfriend was taking the kids to school. Attempting to help me out, she went to Auto Zone for a free code scan and got P0172 from the employee. They also cleared the code, so I waited to see if it'd come back.

Sure enough it did. Having a scanner at home I saw P0172 and P0175, which is running rich on both banks.

Now, I had two things in mind with this. One is, the truck has a tune and runs on 91. The second is the weather is getting cooler out than when I did the tune. Perhaps the cool weather and tune had it running rich?

Either way, the MPG wasn't changing, there was no noticeable difference in how it ran to me, and emissions isn't due until the end of April.

Being too busy to care too much, I would clear the light and it would come on a day later or 2 weeks later until this past week.

Thursday night I move the truck to get in the garage attic and notice the light is now off. Since I leave the scanner in the center console, I assumed the Mrs. cleared it. However when I asked, she had not. She said the light extinguished itself.

A little surprised and relieved, I poked under the hood. While she was out earlier that day at the auto parts store I had her get some spray, electrical cleaner. I have to change the oil Monday and was planning on doing plug and wires as well to try and help the issue, but I wanted to see what I could try tonight.

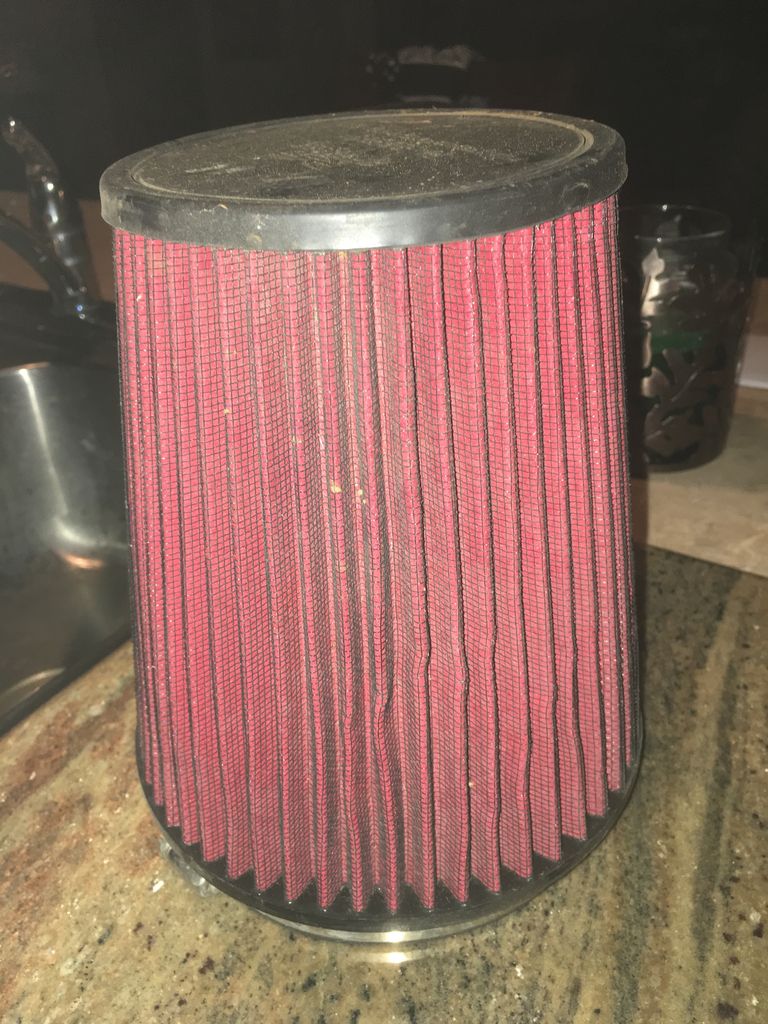
First I pulled off the air filter. I was wondering if the readings/trouble code were caused by dirty air coming through to the MAF. I had heavily cleaned the filter in the summer (it was awful. Prior owner never cleaned it) but thought it cannot hurt to do again. Here is how it looked. Not too bad:


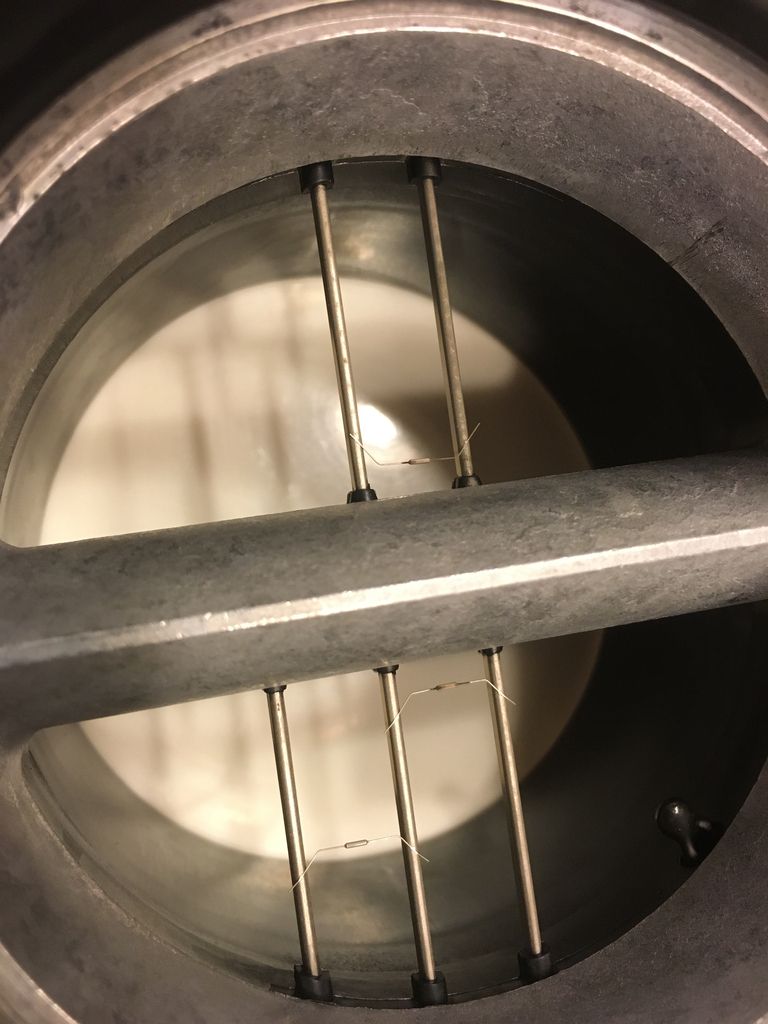
Next was the MAF sensor. I took it out and carefully inspected it. It seemed ok, but after hitting it with cleaner, I realized all the "rails" in it were black. Afterwards they were clean and shiny as so:


After reinstalling it all, I feel like the truck ran better on the quick late-night test drive, but I have a feeling that's just my mind playing tricks on me. Either way, no light so far...
 
Last edited:

ZMagic97

Explorer
Well, after some head scratching a new code came in: P0327, which indicated a bad knock sensor. It was for he bank 1, closest to the firewall.

So, to get rid of this:


I replaced both and the harness.


Issue solved! Took the truck up to the snow for a cabin rental the last few days. I will post on that soon.
 

ZMagic97

Explorer
It's been about a month, and not much has happened. However, for one, I did get a new GPS that I am looking to integrate into the truck...that'll be for another day as I'm still working on it.

Just before New Years I ended up getting a set for (4) 8 hold steel wheels from my dad's old single cab Sierra. Here's one:


Being that I don't care for the chrome rims too much and the mud terrains wear fast, are tough to balance on the 20", and they are very loud, I want to switch to all terrains when the time comes in a few months. Also, these stock rims were a little scuffed up, so I decided to clean them up, starting with primer.


I then painted them black, leaving the center caps alone:


I really like how it came out, so I'm planning on doing this to all 4 and mounting them with A/T late spring/early summer and selling the chrome rims with the M/T on them. I feel like t'll give the truck a more aggressive look I'm desiring.
 

Forum statistics

Threads
185,910
Messages
2,879,487
Members
225,497
Latest member
WonaWarrior
Top