2006 Fleetwood Neon - Family Adventure Basecamp

Jeepinaaron

Adventurer
I recently had the opportunity to purchase a Fleetwood Neon from a fellow ExPo member. I had been looking at off-road trailers, Neon's, Dinoots, etc for a long time, occasionally showing a picture to the wife to test the water's and see her response. I thought it would be at least another year before I was able to get an off-road worthy trailer/camper until I came across the Neon for sale. In passing I mentioned it to the wife, and a few weeks later I was on my way back from Georgia with my new to me Fleetwood Neon.

Sorry for the cell phone picture:


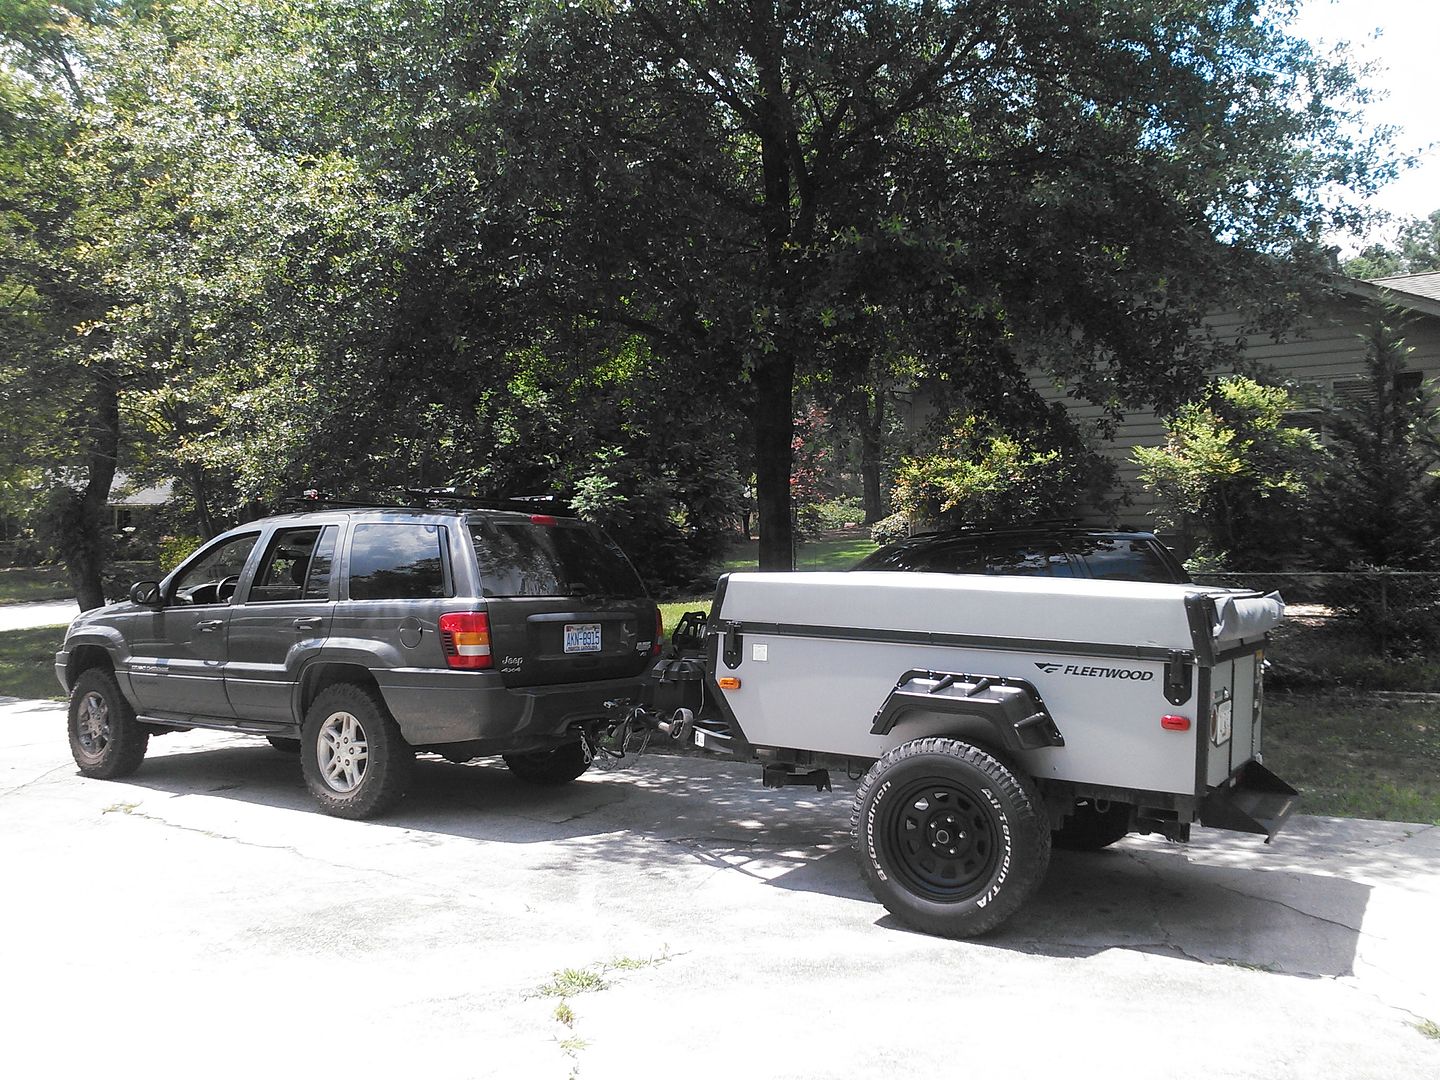
What specifically drew us to this camper was its compact size while still having two beds. We were not interested in fancy amenities, as we both have been tent campers. Primarily this camper will be a staging point for our family adventures. We have a toddler and want her to spend as much time traveling as she grows up, just as we both did. I want to design and modify this camper to increase its functionality and also beef it up for the occasional off-road adventure.

The trailer already has a new 3500 lb axle, the fenders were raised, and it sits on 245/70/17 BFG AT's. The previous owner put on an ARB rear awning.

Immediate plans include:
Replacing the tongue jack
Replacing the stabilizers (they are not long enough and are a pain to adjust)
12v Fuse Box with some interior 12v and USB charging ports.
Some sort of tongue box
Softening up the suspension
 

Jeepinaaron

Adventurer
It didn't take us long to hit the Blue Ridge Parkway with it, just to spend a night and see how the kiddo slept in it.


The first thing we did was instal a rail on the pull out twin bed. I purchased a rail from Baby Home, as it was pretty long, high, and folds when it is attached. I placed some brackets on the bottom of the pull out to slip the rails into. I had to cut the rails short since they were too long. The bed rail breaks apart and folds down, but I have been able to keep it assembled and lay it on top of the pull out when the camper folds down.
 

MountainD

Adventurer
Awesome! Check out the BAL C-Jacks for stabilizers. They work great and super easy to deploy/retract.
 

MountainD

Adventurer
They are the perfect length for me for sure. Just tall enough that I don't need to use blocks under them if the ground is somewhat level (have several inches to spare--about 5 or so) which is super sweet. Then I have some tire stackable platforms that can go under them if need be or super soft turf. The 31" seemed long when they arrived but I am super thankful to have gotten them. Extra length is great when off road... I think the 31" is recommended for 24" mounting and above...
 

Jeepinaaron

Adventurer
Andersen Trailer Leveler and Fuse Block

My dad and I have decided to make a Telluride / Moab trip in the up coming months. As a result, modifications to the Jeep and trailer will be bumped up a notch to meet my deadline to have everything ready.

One of the first things that I noticed was how much of a pain it was to get the trailer level when parking it on uneven surfaces. Even where I live, the area that the trailer is parked is not flat. For me to even open the trailer up to work on it is an ordeal of stacking blocks, backing up, stacking more blocks, cursing, stacking more blocks, etc etc. I knew there had to exist an easier way so after a quick Google search I came across the Andersen Trailer Leveler. It is an ingenious little device which allows you to pull up on it until the trailer is level, then chock it so that it stays in place. One thing I noticed with using the stacking of blocks/boards method, it was hard to secure the trailer so that it would not rotate or take off once I disconnected it from my vehicle. The Andersen Leveler changed all of that and cut my set up time by 80%. There are two versions of this Leveler available. One is 4" tall and I believe this one is 6 or 7" tall. The 4" tall version comes with the chock and with the 7" you need to purchase the chock separate. The item I purchased is the "3620 Rapid Jack" and the "3605 Tuff Chock".


This picture shows how bad I need to upgrade the stabilizer jacks.


Next I installed a Blue Sea Fuse Block to keep all of my wiring of additional accessories organized. I mounted it inside of the middle floor cabinet so that the fuses would be easy to access.


Jeepinaaron

Adventurer
Ok I have a question about the wiring on this trailer for those who may know. It seems to me there are two systems, 12v and 110. The interior lights work both off the 12V battery and off of the 110v when it is plugged in. There is an inverter of sorts under the couch. My question is, when the trailer is plugged into shore power does this inverter also charge the 12V battery? It basically says on the side of the inverter "not for battery charging".

I disconnected the battery and plugged in the shore power. I used my multi meter to check the wires which connect to the battery and it didn't read any power so my thoughts are that no, the shore does not charge the battery. I just wanted to confirm with others who have the same trailer....

My plan is to install a 100W solar panel on the roof to charge the battery.
 
Last edited:

BADDANDY

Adventurer
It must be a PO installed inverter as I haven't seen any 110v references in the brochure. Only a 12v system is stated.
 

Jeepinaaron

Adventurer
Andy,

Does your Neon have shore power at all? I looked through your pictures and noticed on the front of your frame, driver's side, was an empty hole. My camper has a factory looking plug here. Also on the rear of mine, passenger's side is a set of exterior outlets. I don't think this was installed by the PO, the wires seem pretty factory. Also thanks for the reply about the springs. I am going to order those 1150 springs tomorrow. Trying to drop this thing off at my fabricator soon so he can do the suspension, beef of the frame, and extend the hitch a smidgen.
 

BADDANDY

Adventurer
Andy,
Does your Neon have shore power at all? I looked through your pictures and noticed on the front of your frame, driver's side, was an empty hole. My camper has a factory looking plug here. Also on the rear of mine, passenger's side is a set of exterior outlets. I don't think this was installed by the PO, the wires seem pretty factory.

PO installed my marine 110v plug using household wiring to a household 2 fuse panel then to a car battery charger. He wired in a 12v fuse panel from the battery charger which also overcharged the trailer batteries. I ripped out the car battery charger and wired in a double GSFI 110v outlet from the fuse panel using household wiring. I then plugged in an Optima battery charger to the 110 outlet when plugged into shore/gen power sends 12-14v power to the 12v fuse panel and to the trailer battery. The PO also wired in a marine 12v socket from the fuse panel which I retained. See pic in my thread of this setup
Basically I run on BATT power. If I have shore power, I plug that in and have 110 and 12v power. I also have a Honda 1000 gen if I need to charge the battery or if I want to watch movies while out in the boonies.
 

Jeepinaaron

Adventurer
Modified and extended tongue

Just picked up my trailer from HCORE4x4 where some modifications have been performed. I wanted to lengthen the tongue of the trailer. The tongue is removable so that I can easily change the length of the tongue and from a 2" ball to a three axis hitch. The tongue bar is held on via two hitch pins.


bugnout

Adventurer
Do either of you use a brake controller? Seems overkill for this size trailer to have electric brakes.
 

BADDANDY

Adventurer
Do either of you use a brake controller? Seems overkill for this size trailer to have electric brakes.

Yes I do.
If you've seen how fast I drive forest roads, you'd understand why.
Also, it removes 1,000lb of weight the Jeep brakes have to handle pointed downhill on a trail.
 
Last edited:

Forum statistics

Threads
185,795
Messages
2,878,263
Members
225,352
Latest member
ritabooke
Top