I wanted to get a thread started to cover this project. I recently picked up a 1984 FJ60 Land Cruiser and im in the process of getting it mechanically sound as well as setup as a Expo truck. I will mainly be using this for running trails, camping, hunting and fishing. The long range road trip will also be on the ticket. this will be mostly my daily driver so dependability will be a need.
The basics:
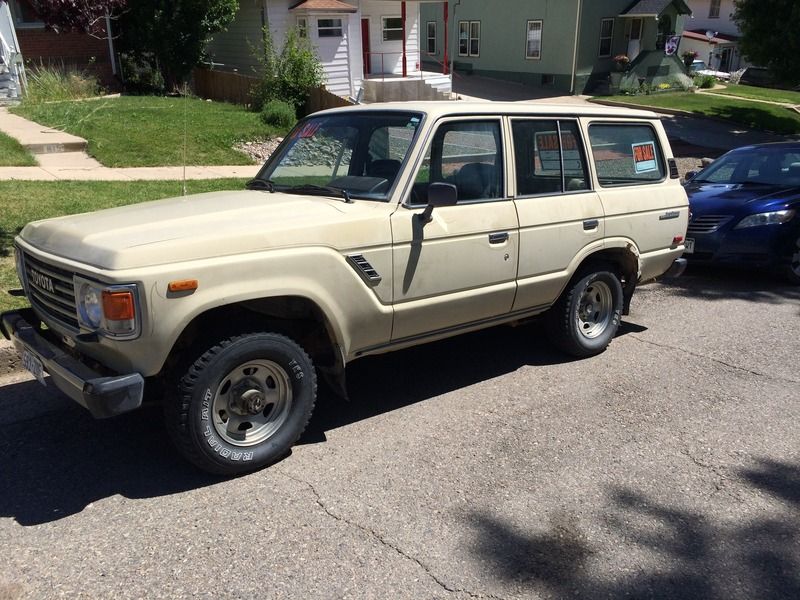
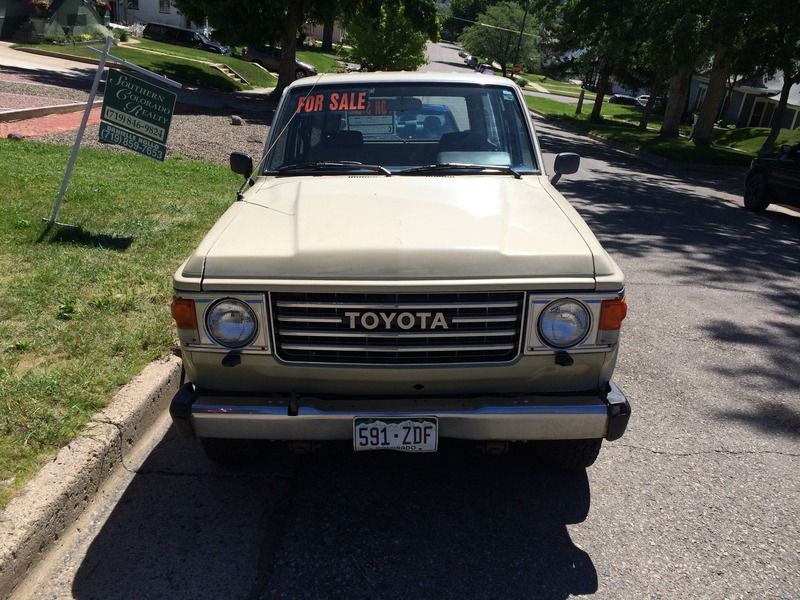
- 1984 Toyota Land Cruiser "FJ60" Production Date was Late 1984
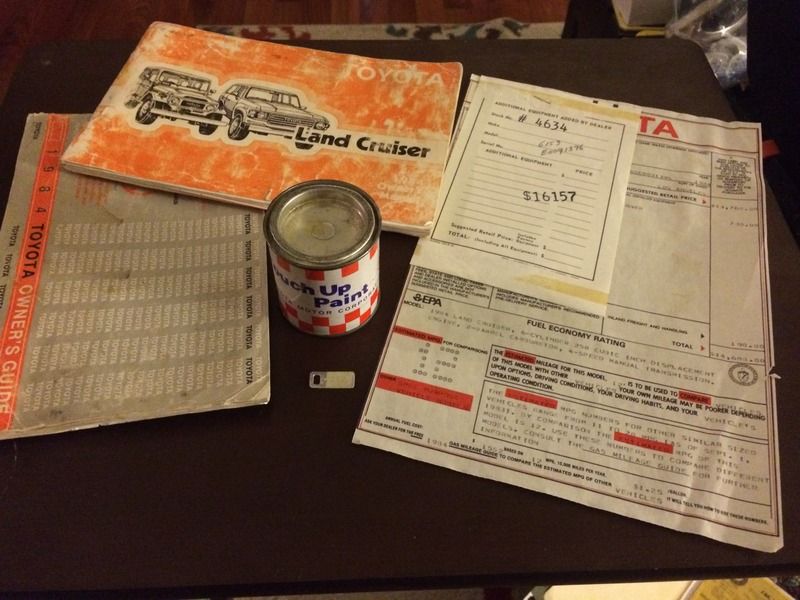
Color is Tan/Beige, it currently has just over 202,000 on the factory non-rebuild motor. Im the 3rd owner and it is a factory A/C wagon. The person I bought it from had all sorts of goodies: factory touch up paint, window sticker, key code, all the owners manuals and lots of maintenance records. the engine is till very strong and starts up easy. 2 years ago the past owner had some basic work done. Plugs changed, new cap and rotor with wires, the the gear oil was changed, transmission oil changed and basic service shop checked it over. I think its a really great find and it has come to a caring home. the bad, it is 31 years old and needs some general TLC, and the rust in the rear quarters. The rust is pretty much limited to this area and the rest of the truck only has light surface rust. I have started to go through and get the maintenance up to snuff.
Things I have knocked off the list so far:
- Battery Cables upgraded to 2/0 and Military terminals installed. All grounds are new as well
- All Grease Zerks have been serviced
- Oil Change 15w40 Mobil 1 w/new oil & air filter
- Replaced all exterior lights that needed it(Rear Side Markers L&R)
- New Wiper Blades
- Alternator belt Tightened (New OEM Belts on order)
- All window seals restored
- Door welting has been fixed, they were sagging In the corners
- White Lithium deployed on doors and any other place that could use
- Front Bumper corners removed, they were rusted and gone. New bumper will be made down road.
- Basic cleaning inside and making list of need and things to do.
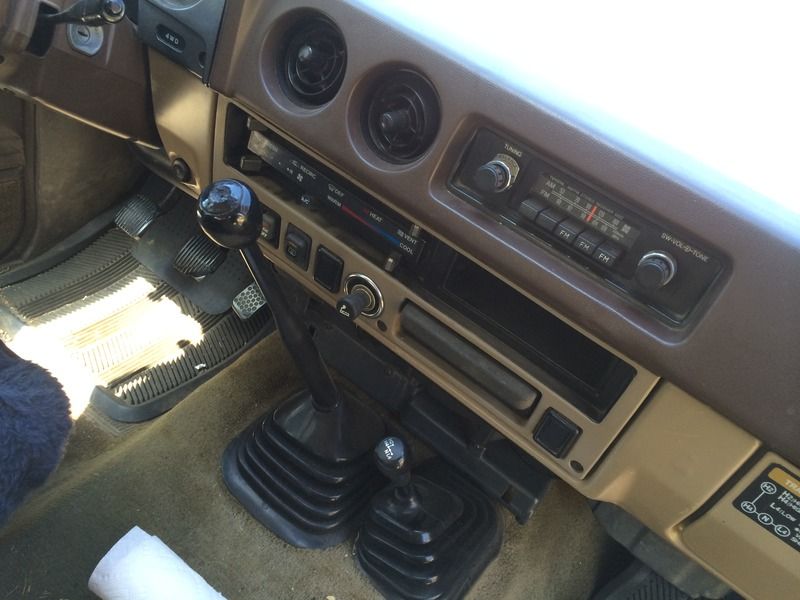
- Carb Tuned
Things on the "to do list"
- Adjust valve lash - Gasket on order
- Front Knuckle Rebuild, Inner Seals
- Tie Rod/Drag Link Kit
- Front Brakes
- Oil Changed F/R Diff, Tranfer and Trans
- Braided Brake Lines
- Vacuum lines replaced
- OME Heavy/Heavy with Firm shocks
- Rust Repair with welded in panels
- Interior Re-Upholstered and rear cargo are installed
- 16x7 Tacoma Wheels w/FJ40 Hub Cap Clips welded on + Spacers
- Cooper Discover S/R 255/85r16 Tires x6
- Custom Front Bumper with swing out tire and carrier
- Custom Front Bumper with winch mount, trail lights and shackles
- Custom Roof Rack
- Full Repaint in factory color and the pinstriping put back on
----This is a growing list and not all inclusive, things like onboard air, and power inverter would be nice to and I just need to research before I put it on the list. I will try and document with photos and post, if I can I will post up how to's or cover step by step
I will be posting questions or advice from you guys as well here, stop by and see whats new.

The basic idea for me is to have a pretty much stock look with a few exception. Interior will be redone to look period/original, exterior kept pretty standard. Suspension will be gone through/rebuild. I will add a few personal touches to the paint when I have the guy do the pinstripe.
30 Day Plan: Knuckle Rebuild, Inner Seals, Tie Rod/Drag Links, Valve Lash Adjustment, Diff Fluid Changed, Im thinking about going ahead and getting a set of tires on it for the time being as it will probably be a year or so before I get the 16" wheel upgrade completed. Cooper makes a 30x9.5r15 that I think would run good on the stock suspension and wheels.
The basics:
- 1984 Toyota Land Cruiser "FJ60" Production Date was Late 1984
Color is Tan/Beige, it currently has just over 202,000 on the factory non-rebuild motor. Im the 3rd owner and it is a factory A/C wagon. The person I bought it from had all sorts of goodies: factory touch up paint, window sticker, key code, all the owners manuals and lots of maintenance records. the engine is till very strong and starts up easy. 2 years ago the past owner had some basic work done. Plugs changed, new cap and rotor with wires, the the gear oil was changed, transmission oil changed and basic service shop checked it over. I think its a really great find and it has come to a caring home. the bad, it is 31 years old and needs some general TLC, and the rust in the rear quarters. The rust is pretty much limited to this area and the rest of the truck only has light surface rust. I have started to go through and get the maintenance up to snuff.
Things I have knocked off the list so far:
- Battery Cables upgraded to 2/0 and Military terminals installed. All grounds are new as well
- All Grease Zerks have been serviced
- Oil Change 15w40 Mobil 1 w/new oil & air filter
- Replaced all exterior lights that needed it(Rear Side Markers L&R)
- New Wiper Blades
- Alternator belt Tightened (New OEM Belts on order)
- All window seals restored
- Door welting has been fixed, they were sagging In the corners
- White Lithium deployed on doors and any other place that could use
- Front Bumper corners removed, they were rusted and gone. New bumper will be made down road.
- Basic cleaning inside and making list of need and things to do.
- Carb Tuned
Things on the "to do list"
- Adjust valve lash - Gasket on order
- Front Knuckle Rebuild, Inner Seals
- Tie Rod/Drag Link Kit
- Front Brakes
- Oil Changed F/R Diff, Tranfer and Trans
- Braided Brake Lines
- Vacuum lines replaced
- OME Heavy/Heavy with Firm shocks
- Rust Repair with welded in panels
- Interior Re-Upholstered and rear cargo are installed
- 16x7 Tacoma Wheels w/FJ40 Hub Cap Clips welded on + Spacers
- Cooper Discover S/R 255/85r16 Tires x6
- Custom Front Bumper with swing out tire and carrier
- Custom Front Bumper with winch mount, trail lights and shackles
- Custom Roof Rack
- Full Repaint in factory color and the pinstriping put back on
----This is a growing list and not all inclusive, things like onboard air, and power inverter would be nice to and I just need to research before I put it on the list. I will try and document with photos and post, if I can I will post up how to's or cover step by step
I will be posting questions or advice from you guys as well here, stop by and see whats new.


The basic idea for me is to have a pretty much stock look with a few exception. Interior will be redone to look period/original, exterior kept pretty standard. Suspension will be gone through/rebuild. I will add a few personal touches to the paint when I have the guy do the pinstripe.
30 Day Plan: Knuckle Rebuild, Inner Seals, Tie Rod/Drag Links, Valve Lash Adjustment, Diff Fluid Changed, Im thinking about going ahead and getting a set of tires on it for the time being as it will probably be a year or so before I get the 16" wheel upgrade completed. Cooper makes a 30x9.5r15 that I think would run good on the stock suspension and wheels.


