79 series dual cab build

Rumpig

Adventurer
Here's the last pic i took after getting the vehicle back from TJM a few weeks ago. New bullbar all fitted up (winch compatable but no winch fitted yet), my old Lightforce 240 XGT's on there aswell as my old uhf aerial also. The uhf radio is fitted to a new Outback roof console, and the dual battery system aswell as a monitor for it were installed at the same time, aswell as a brake controller for the trailer (pics still to come of these though).


Spore

New member
Coming along very nicely mate!

I have an older version of the Tjm bar and found out the hard way that my hi lift jack (hilift brand) did not fit in the cutouts on the bar. This resulted in me doing a hack job with a grinder and some bright red touch up paint. Not sure if this is still the case but it's probably worth having a check if you carry/use a farm jack before you need it.
 

Rumpig

Adventurer
Coming along very nicely mate!

I have an older version of the Tjm bar and found out the hard way that my hi lift jack (hilift brand) did not fit in the cutouts on the bar. This resulted in me doing a hack job with a grinder and some bright red touch up paint. Not sure if this is still the case but it's probably worth having a check if you carry/use a farm jack before you need it.
cheers for the heads up mate, i don't actually have a hi lift jack though
 

Rumpig

Adventurer
Here's a few more pics of stuff i got added the other week to the vehicle, i managed some decent pics of them on the weekend just gone. I added an Outback roof console to the vehicle so i had somewhere to put my uhf radio, i had also won a set of MSA front seat covers at the open day of TJM at Hendra....so these went into the vehicle also.

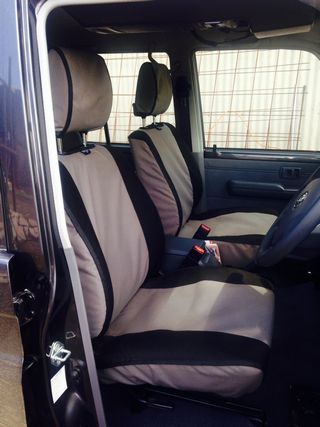
MSA CANVAS SEAT COVERS


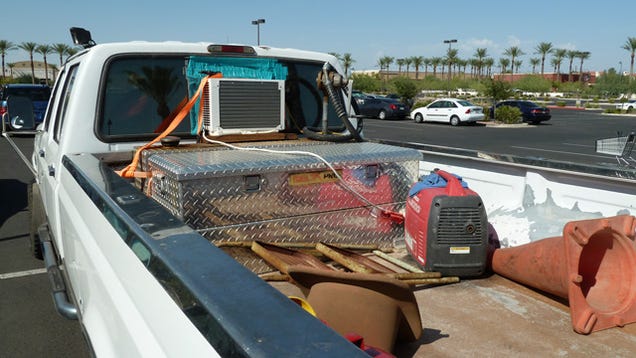
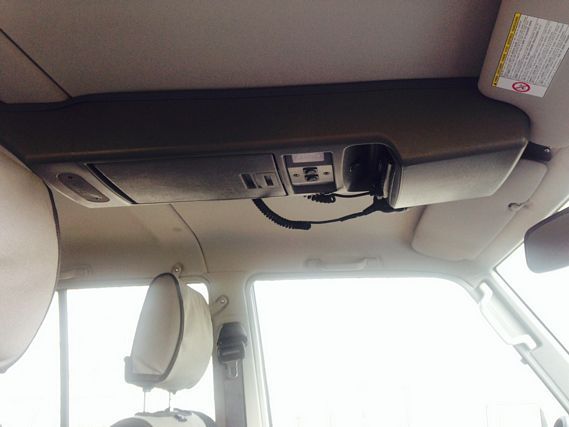
OUTBACK ROOF CONSOLE


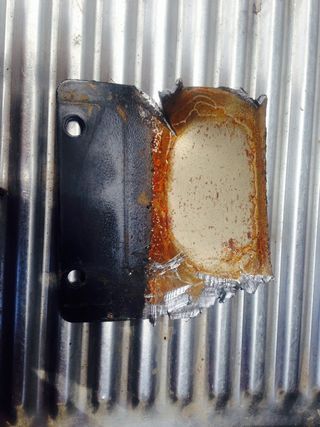
On the weekend i decided to replace the trailer plug to the size that i had actually ordered it from Toyota, they buggered that up and installed the wrong size. They were supposed to swap it over when it went in for it's free 1 month service, but being an after hours service on the night they suddenly reckoned they needed the auto electrician to do it due to something to do with the canopy fitment, and he only works during the day, so it didn't get done. They did offer me a loan vehicle for when i bring it back to get done, but i don't have time to visit them during business hours....So on the weekend i not only swapped it to a 7 pin large round size, i also moved it to a location where it won't get ripped off the first time i go proper offroading. I'm glad i then decided to grab the grinder out and remove the old mounting plate for the trailer plug also, as when i did i found that the plate gets welded in location before any paint is applied to the towbar, and when i removed it there was already rust forming on the towbar and mounting plate due to it being unpainted steel on both surfaces. Pic below will show what i mean, it might take a few years to be a problem, but eventually the unprotected steel would rust away.

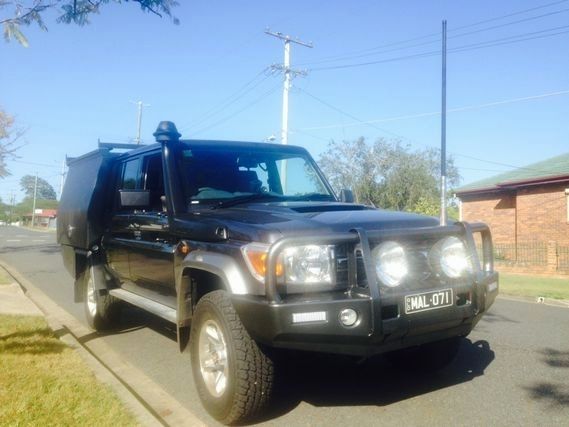
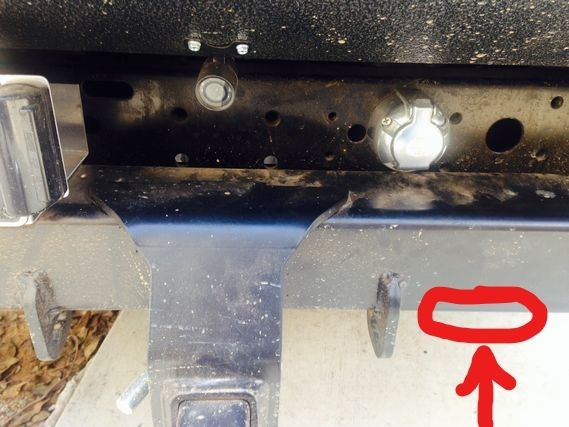
ARROW AND CIRCLE SHOW WHERE THE O.E TRAILER PLUG PLATE WAS LOCATED...YOU CAN SEE THE NEW PLUG ABOVE THAT I INSTALLED ON THE WEEKEND...CAN ALSO SEE THE REVERSE CAMERA IN THE PIC I GOT FITTED, SO I CAN EASILY HOOK TRAILERS UP


HERE'S THE MOUNTING PLATE I REMOVED FROM THE UNDERSIDE OF THE TOWBAR, YOU CAN SEE THE RUST THAT'S ALREADY FORMED ON THE UNPAINTED STEEL. THE TOWBAR WAS THE SAME UNDERNEATH WHERE I REMOVED THE PLATE FROM ALSO....NOW ALL CLEANED UP AND REPAINTED


Rumpig

Adventurer
Got some new suspension fitted to the Cruiser on Thursday, so it's no longer riding on stock suspension anymore. Have gotten a 3" EFS suspension lift put in and a Carrolls GVM upgrade done at the same time, definately drives nicer and sits heaps higher now as you'd expect it to do. I took our camper trailer away a few weekends ago camping with the stock suspension fitted, even with the trailer hitch inverted i struggled to fold the jockey wheel down on the camper to unhitch it as it sat way to low, so hopefully this is a non issue from now on. After getting the vehicle home on Thursday arvo i had to flip the hitch back over to the orignal way it sat, so my work trailer would sit level instead of nose in the air.


BEFORE NEW SUSPENSION WENT IN


AFTER NEW SUSPENSION WENT IN


And as part of the GVM upgrade they have to replace the indicators in the side guard with bigger ones that face rewards only, and put a mod plate on the firewall in the engine bay also.

NEW INDICATORS


Rumpig

Adventurer
Not a lot been happening with the vehicle of late, but have made a couple of additions / changes recently. Last Friday i installed a roofrack, which is an alloy Rhino Rack. It's the tradie style one, so has sides but no front or rear to it, which suits my job. I also recently changed my old Lightforce 240 spotties over to a new set of X Ray Vision HID 220's that i had won in a raffle. Will be good to have the ever so slightly smaller spotties on the front to help with air flow into the radiator, i'm a bit paranoid about trying to keep this engine cool after my previous vehicle had heat issues when towing the camper trailer. So below is how the vehicle looks currently....


Rumpig

Adventurer
Spent this morning fitting my old shovel holders and Gunyah awning that i removed from my old bus, onto the new roofrack i recently had fitted.


Rumpig

Adventurer
So it's been a while since i did anything to the Crusier (as is evident by the 7 pages i went back through searching for this thread...lol), but i got a new addition added to the Crusier this morning :cool:
After giving the vehicle it's suspension lift, it made it nearly impossible to climb up onto the top of it to tie stuff down on the roofrack, so i got a ladder made up to go on the back of the canopy. I was actually supposed to get 2 items fitted onto the vehicle today, but after both items were completely fitted we noticed the other item wasn't made correctly (James who made it noticed before i did actually), so it's been removed and a new one getting made up first thing Monday. It's then got to go to the powdercoaters as a priority job, and hopefully will be ready by the end of the week to go back on the vehicle again. Below is a few pics i took this morning, you can see the bottom of the ladder folds down for easier access and folds back up so it doesn't block the tail, brake and idicator lights at all.

NEW LADDER FITTED ONTO THE VEHCILE


BOTTOM SECTION FOLDS DOWN FOR EASIER ACCESS


AND HERE'S A PIC OF WHERE THE OTHER ITEM WAS FITTED UP AND THEN REMOVED, SO YOU CAN GUESS WHAT IT IS...LOL


Matto

Observer
Ladder looks great. Very handy.

Re: "the other thing" - my money is on:
18n3hwkebc2opjpg.jpg


Cheers,
Matt
 

Rumpig

Adventurer
I stopped by the canopy makers shop on the way home this arvo, new parts were ready to be fitted to the vehicle and this time they are correct. Having the spare wheel mounted inside the vehicle means i no longer have anywhere to fit my rubbish bag holder on this rig....so i had these bars made to do that job. Don't want rubbish inside the canopy stinking it all up.

NEW BARS CORRECTLY MADE AND FITTED TO THE VEHICLE...last time they mucked it up and welded the tags that hold the bag straps in place on the outside of the bars, instead of the inside....whoops. It was an easy enough mistake to make going on the hand drawings they were working off of, all fixed now though.


RUBBISH BAG NOW IN PLACE ASWELL


I ALSO HAD A CANVAS SHOVEL COVER MADE UP LAST WEEK ASWELL...hides the rusty look of the shovel which stood out heaps on a shiny new rig.


Thelittlechef

New member
Interesting build. The canopy looks brilliant, and very tidy. New springs are a vast improvement on stock too!

Re: spare tyre - can it fit under-tray? I'm planning a dual cab build and am struggling with the spare location. I've seen a couple of photos of roof mounts for spares - but don't fancy the weight being that high (plus changing a tyre is already annoying enough).
 

Forum statistics

Threads
185,910
Messages
2,879,489
Members
225,497
Latest member
WonaWarrior
Top