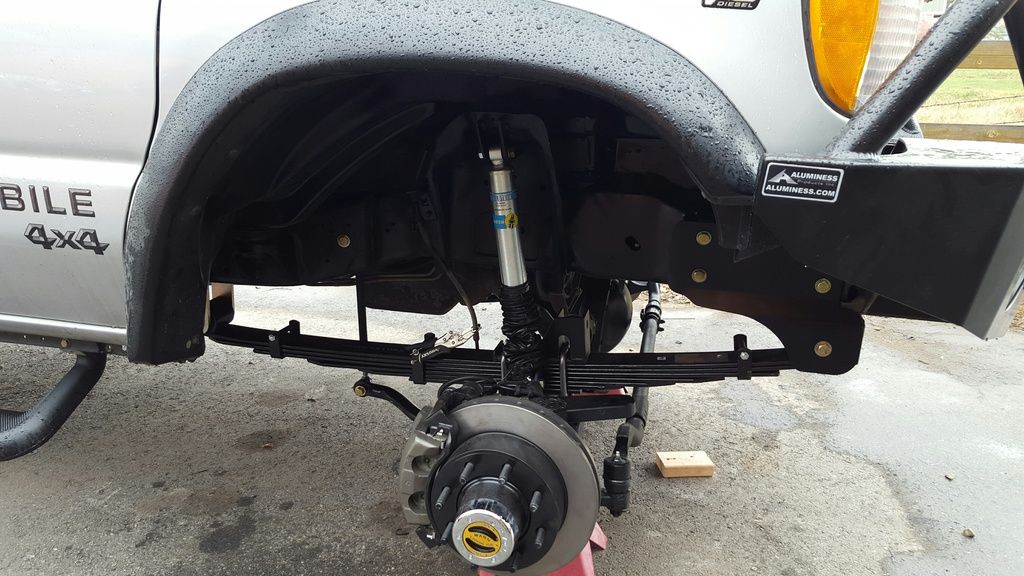
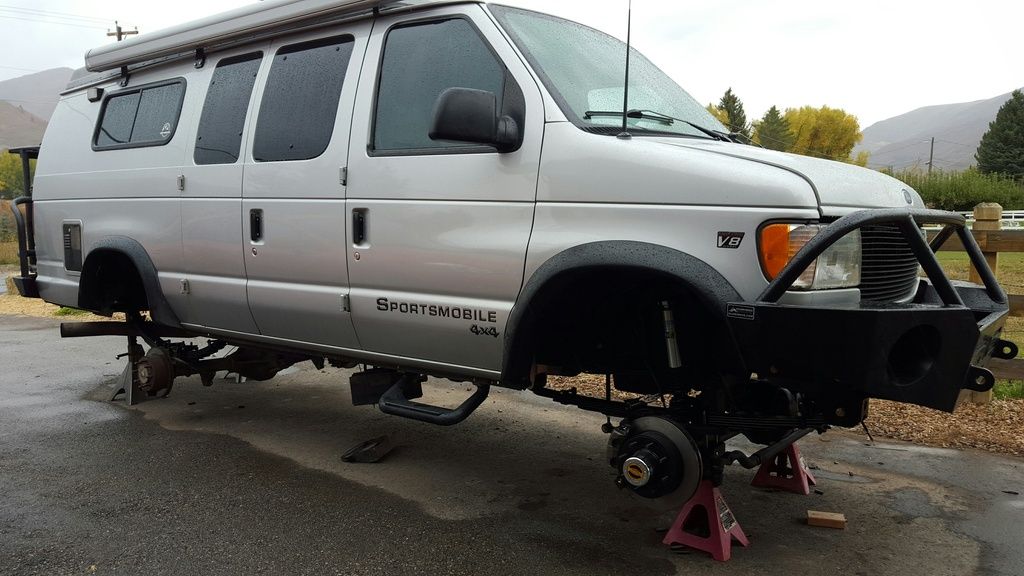
UJOR De-Quiglify in progress....

Gravity

Observer
Well, I finally dug in this last week and started the daunting task of a DIY De-Quiglify in the driveway...Rig is a 2002 7.3 Sportsmobile w/ a Quigley conversion and just over 90k on the ticker. Going with a UJOR 6" kit w/ one of Chris' Stage 2 axles up front. Looking forward to eliminating some of the vagueness with it's road manners along with gaining some more 'attitude' and finally squeezing some 35's under her. The 4x4 EBs just look so out of place w/ 33s...

There's been a ton of well documented builds so you'll just need to wait til it's all done for pics (that and quite frankly I have better things to do than stop and take photo's with my greasy grimy hands....)

So far front hangers are drilled/painted, rear springs installed, majority of all the Quigley front end bits are all unbolted and tomorrow I'll fab up a quick axle dolly to wheel the front axle out of the way. Hoping in the next day or 2 to get front shackles drilled/welded along with the Shock mounts. Really hoping to be up and driving by this Sat or Sun this coming weekend. Been starring at the beauty of an axle and all the trimmings since early July, unfortunately being self-employed and also having 2 young kiddos at home free time has not been on my side this yr....Finally the stars aligned and this week is it!

Just need to solidify my wheel/tire choice the next day or so so that might be the one hold up...Hopefully the local shop can have me dialed by Thurs/Fri this week.

Thanks for all the encouraging threads from the fellow DIYers. Hands down the biggest mechanical undertaking I've taken on. Stoked for it and I'm really enjoying learning more about the rig in the process.

Any other tips from the DIY Ujoint installers??
 

Jb1rd

Explorer
As we are fond of saying around here; "Welcome to the sickness"!!! Enjoy your time in the sanatorium and though you may leave, you'll be back :sombrero:
 

jjohnny350

Adventurer
Sounds like you have some of the tougher stuff done. Nice work, you are going to love it. Ive always thought the EBs looked out of place with 33s as well. I have a 99 e350 EB, ujor and it was a DIY. It is still 2wd as I havent finished the transfer case and gas tank yet. Nice for you those are already on yours. I am just down the road in springville if you need any help. I am kind of in the same boat, work a lot and have 2 small kiddies too. But Id love to come check it out or offer any advice, I could probably offer more advice on how not to do it that I learned from doing mine. Feel free to hit me up though, pm me if you want my number.
 

ujoint

Supporting Sponsor
Look forward to the updates. As alway, post questions here or shoot me an email or text and we'll get the ? answered asap! We have another DeQuig on the lift right now, about to tear it down.
 

Gravity

Observer
Quigley front-end all disconnected and ready to roll out of the way...shocked how easy it all was. Just need to remove the torque arm brackets so I can start on the Shackle sleeve drilling.

Now, why the hell did Quigley have to place an 1-1.5" long weld on the torque arm brackets in the most difficult spot to access on the inside of the frame rail??? May just have to cut the inside tab of the bracket off....Chris, guessing you guys remove the entire bracket? No plasma cutter at my disposal unfortunately...
 

ujoint

Supporting Sponsor
Quigley front-end all disconnected and ready to roll out of the way...shocked how easy it all was. Just need to remove the torque arm brackets so I can start on the Shackle sleeve drilling.

Now, why the hell did Quigley have to place an 1-1.5" long weld on the torque arm brackets in the most difficult spot to access on the inside of the frame rail??? May just have to cut the inside tab of the bracket off....Chris, guessing you guys remove the entire bracket? No plasma cutter at my disposal unfortunately...

Yea we remove the whole thing. Its funny when you find a weld like that, nobody thinks of removal when laying down those beads! We're all guilty of that though.....
 
G

Gravity

Guest
Well. That was a lot easier than it looked. Ground off the outer welds and used a big@$$ pry bar to remove the brackets. The inner welds were no match and simply peeled away from the frame. Next task, -trying to find someone who could come to my driveway and quick weld the shackle sleeves and shock mounts.... so far no takers. Hmmm, maybe it's time to learn

Sent from my SAMSUNG-SM-G890A using Tapatalk
 

Gravity

Observer
And another productive afternoon was had in the driveway this afternoon after work. Front spring hangers have now been hung, the stock pitman arm has been removed (given all the horror stories I saw on line, guess i was lucky - a breaker bar/cheater pipe for a few turns followed by a hit of the impact wrench and it popped right off), got the passenger side Shackle sleeve drilled out. Glad I picked up a nice lo-profile Dewalt cordless right angle drill. The inner brace folded right out of the way and I drilled all the way thru.

Tomorrow will be drilling out the Driver side shackle sleeve hole and I lined up my neighbor to come over and weld up the sleeves and shock mounts. Hopefully drivers side drilling goes like the pass side did

Chris, on the Pitman arm that came with the 6" kit, the splines were offset a bit from the stock unit I removed. That OK? Stock had splines at 12-3-6-9 o'clock, yours was 2-5-8-11 o'clock

Getting super stoked how this is all moving along. Also solidified my wheel/tire choice today - unfortunately they won't be here until Tues. After seeing SixString's post about the 18" 305/70/18s I looked into that size option. With my fully loaded EB Sportsmobile build out, the 4000+ load rating of the 18" vs the 3100 lbs of the 17" Cooper Maxx's sold me. Went for the new ATX Chamber2 rims w/ E-rated Cooper STT Maxx 305/70/18s
 

SHAFT

Observer
Next task, -trying to find someone who could come to my driveway and quick weld the shackle sleeves and shock mounts.... so far no takers. Hmmm, maybe it's time to learn

my project has been quite the re-education as far as welding is concerned. used a mig with flux cored wire and, a bit of spatter aside, i'm pretty happy with my results. i'd say borrow or craigslist a 130 or 140 115 volt welder, get some scrap and get it dialed in. it's hooked me and i've been sticking random pieces of metal together on rainy days....
Good luck and congrats on the build
 

Gravity

Observer
Got everything all welded up last night with the help of my neighbor. Today I made some huge progress, only thing remaining is bleed the brakes and install the longer lines, finishing installing the steering/track bar and get the wheels on (unfortunately those will be ready Tues afternoon...). As luck would have it the stock Quigley front bracket bolt holes were in pretty much a perfect location for the sway bar links. And they were drilled already to 1/2" - Woohoo! no more drilling!!

Couldn't wait to show off my handiwork so here is Agnes without her new shoes. Aside from the welding it has 100% been a solo effort. Bit sore from wrestling the leaf springs but I am beyond Stoked for tackling a project like this!!


Gravity

Observer
Thanks Brad! Your thread and detailed photos of your DIY build were studied more than once in getting myself mentally prepared for this buildout. I noticed your latest build is Agnes as well - maybe they'll meet up one of these days. My 7 yo daughter picked the name last year on our maiden camp trip watching Despicable Me on the laptop...
Cheers
-d
 

silvrzuki77

explorer
Nice job! I did mine during the middle of summer here in Vegas. Wasn't very fun. Truck is going to look great!


Sent from my iPhone using Tapatalk
 

Forum statistics

Threads
185,782
Messages
2,878,177
Members
225,329
Latest member
FranklinDufresne
Top