You are using an out of date browser. It may not display this or other websites correctly.
You should upgrade or use an alternative browser.
You should upgrade or use an alternative browser.
Building, Driving and Adventuring the MTN4RNR
- Thread starter MTN4RNR
- Start date
MTN4RNR
Adventurer
Highway 4 to 88 - 1 of 3
See 2 of 3 below
Now that the snow is melting in the Sierras, v_man [Vincent] and I decided that it would be good to head up to the hills off of Highway 4 to see what we could find. After a quick post on Expo, we had a group of guys for a 2 day 1 night trip.
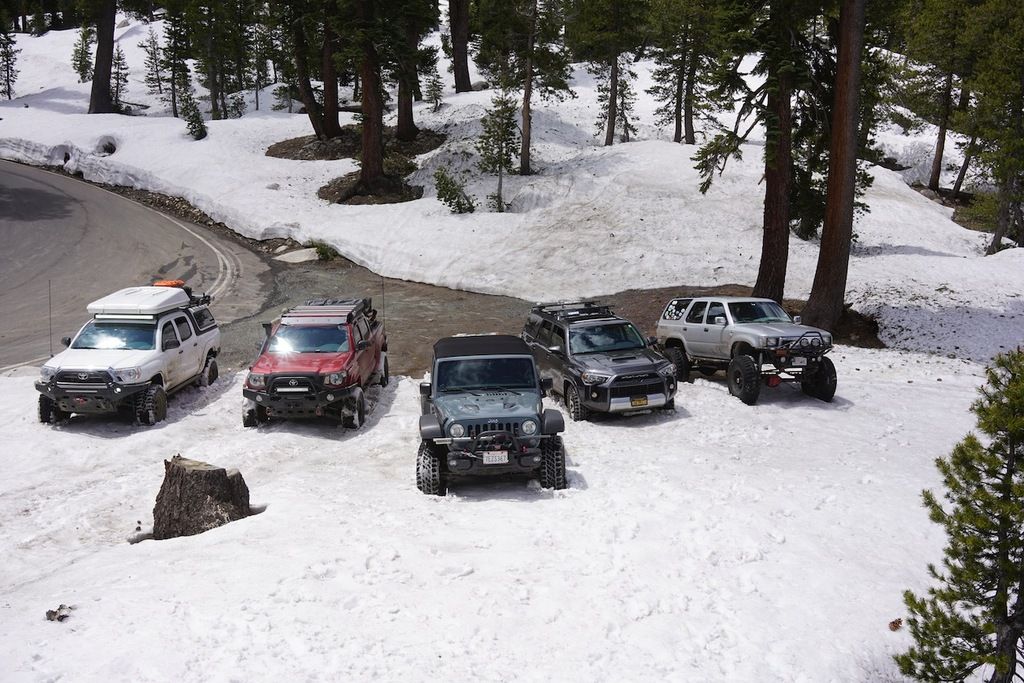
Driver/Rig:
V_man[Vincent] - 1990 Toyota 4Runner
younglexx [Alex] - 2005-2010 Toyota Tacoma
Comanche Scott [Scott & Thor] - 2014 Jeep JKUR-X
jAndyMendo [Andy & Taco] - 2014 Toyota Tacoma TRDOR
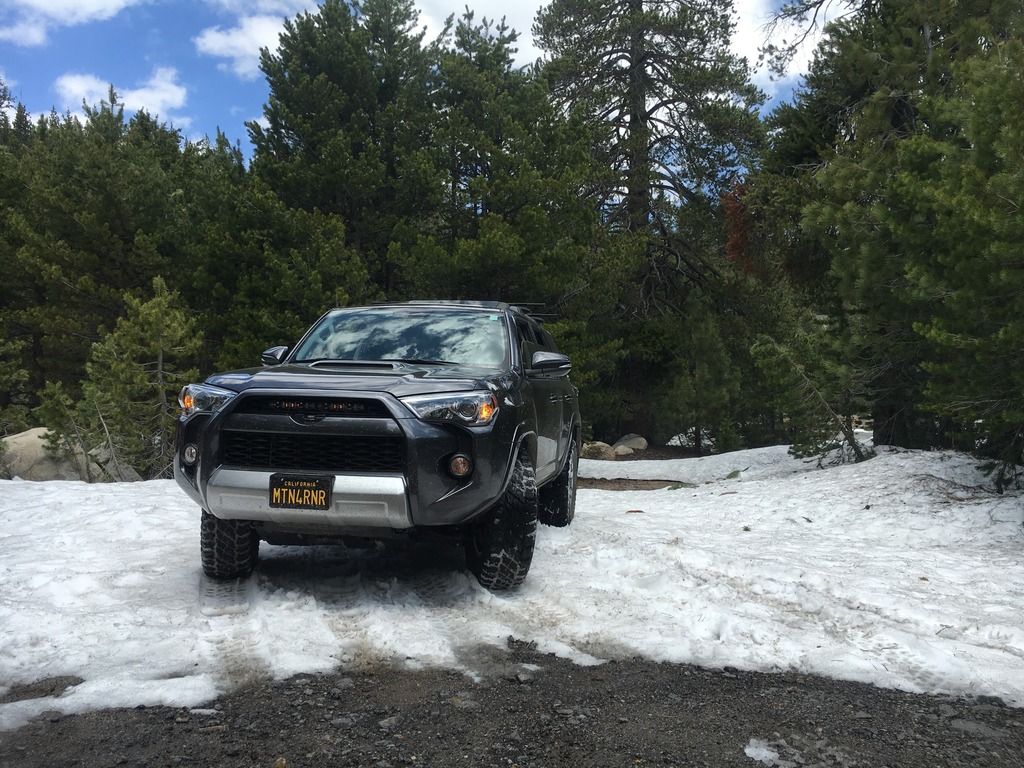
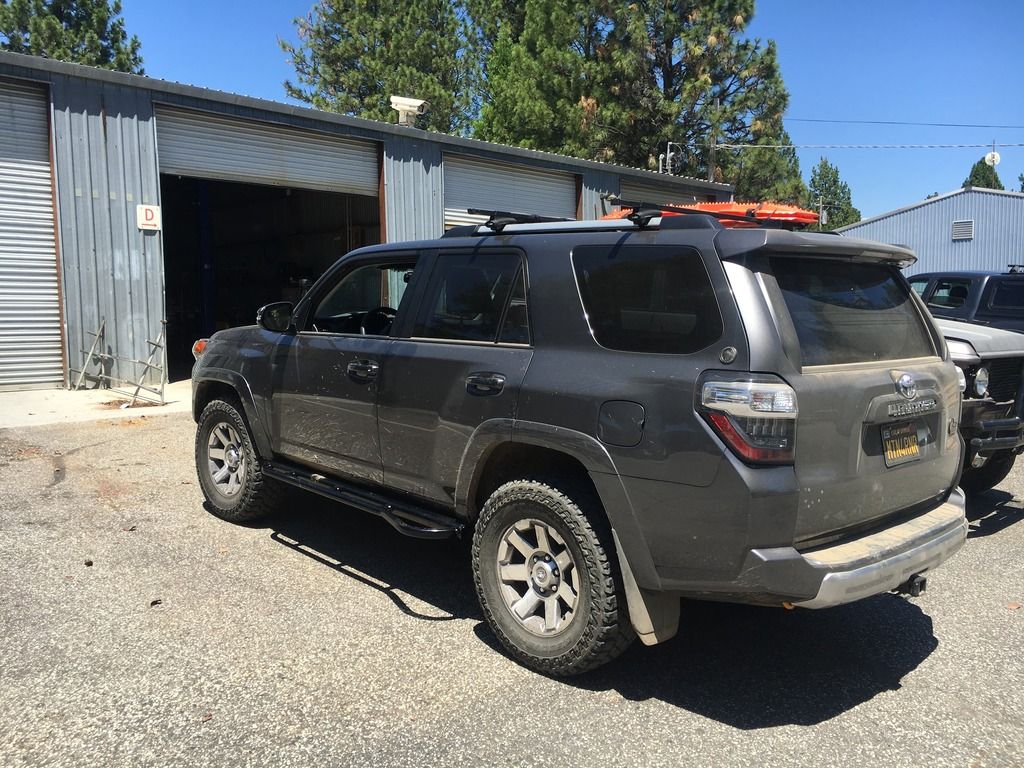
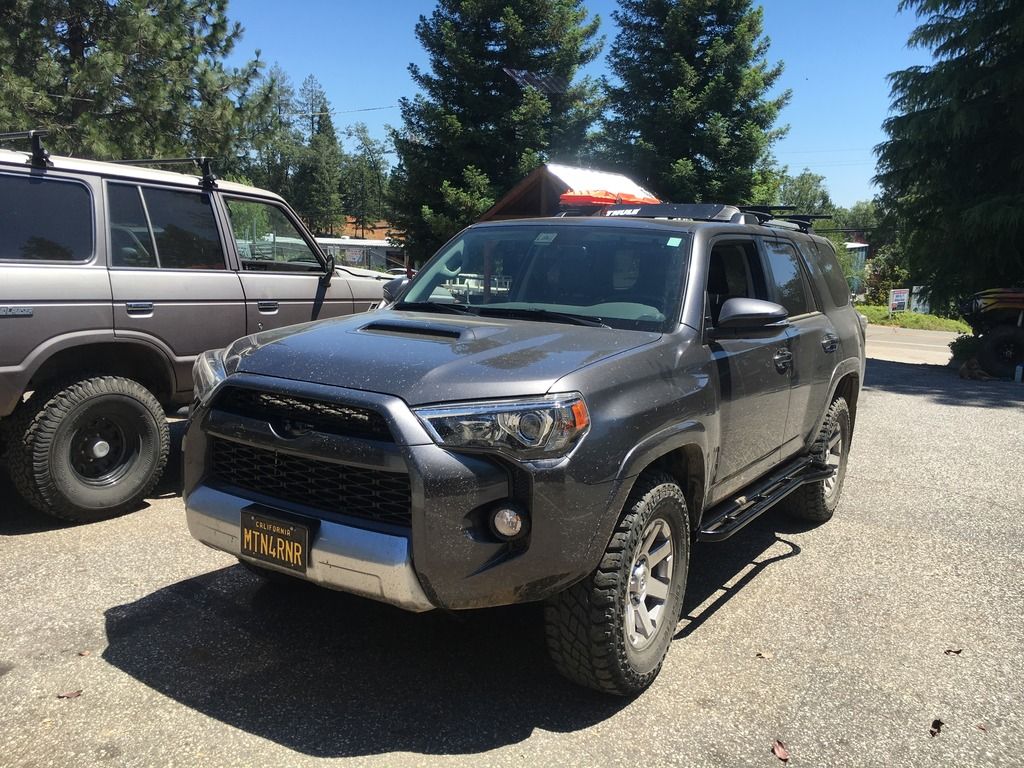
MTN4RNR [Max] - 2016 Toyota 4Runner Trail
Vincent, Andy and I met in the Bay Area and headed East to meet the others in Stockton
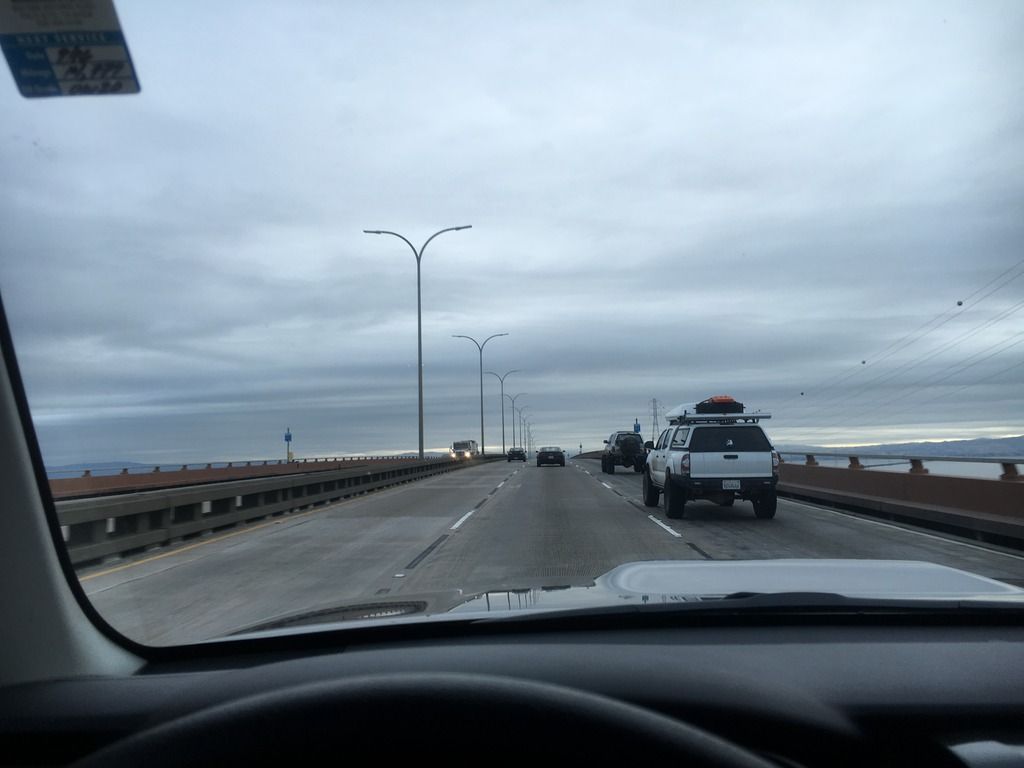
We all met in Stockton, refueled and headed up to the mountains!
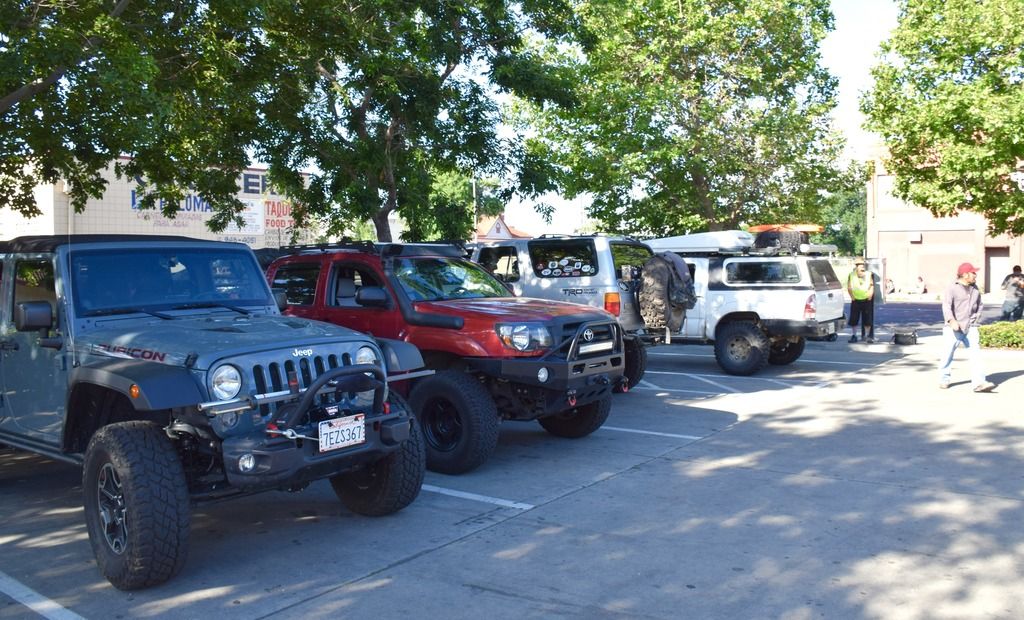
PC: Vincent
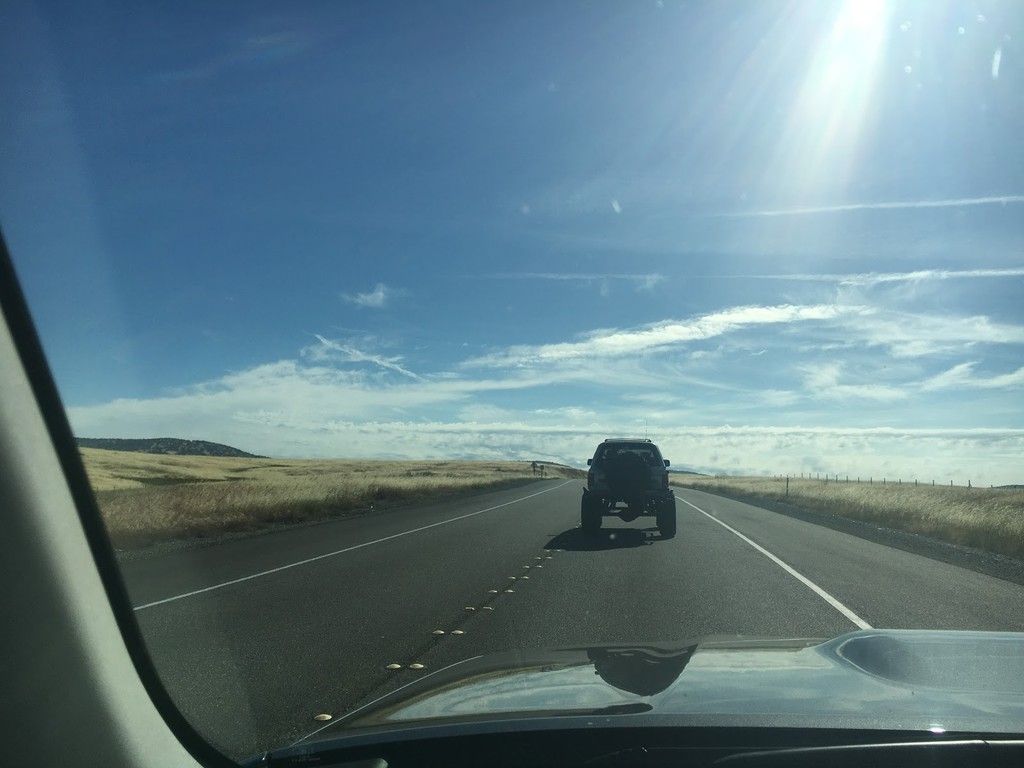
Soon, snow!
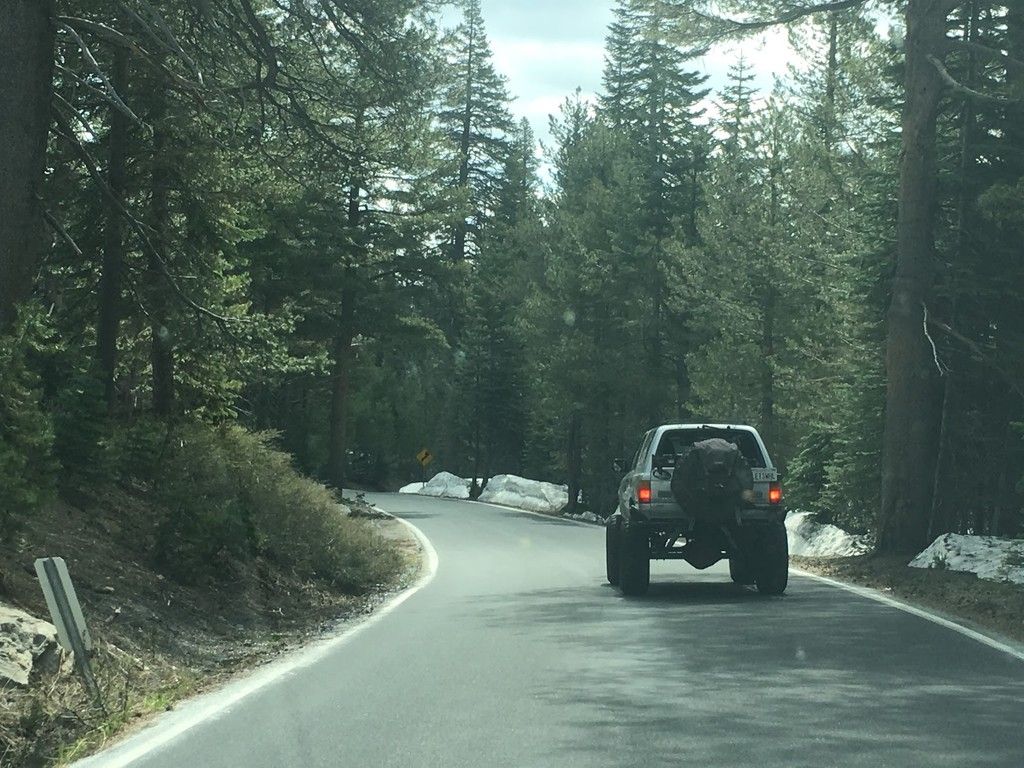
After a quick refuel in Arnold, our first stop was the famous Slick Rock trail. We were stopped at the trailhead due to heavy snow on a North facing slope. Still about 3' left, so maybe in a month or so we can try again!

PC: Vincent
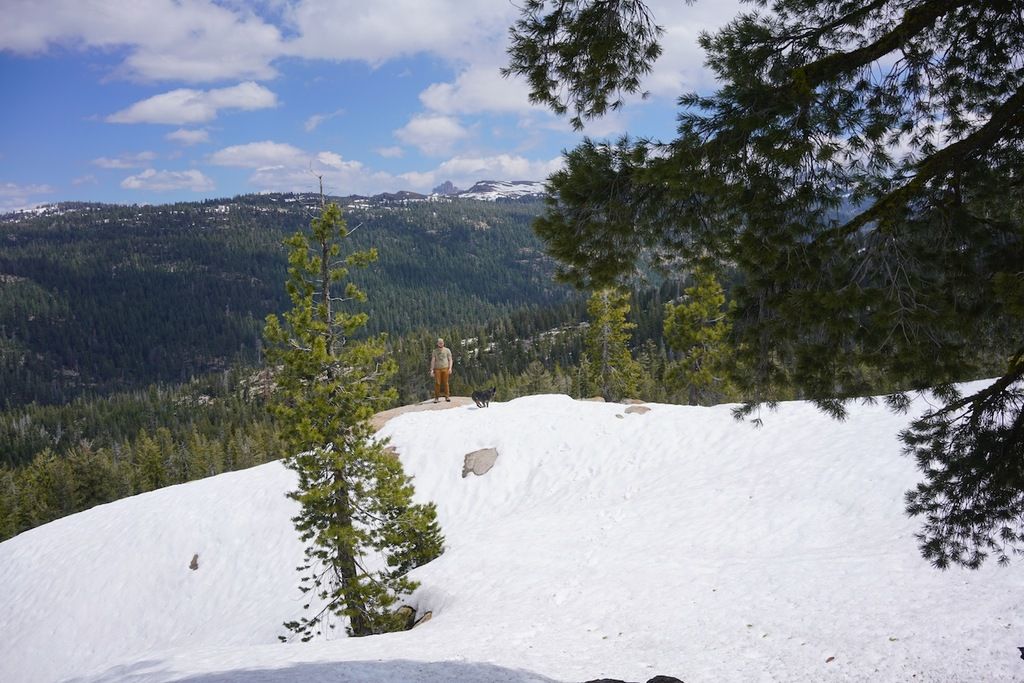
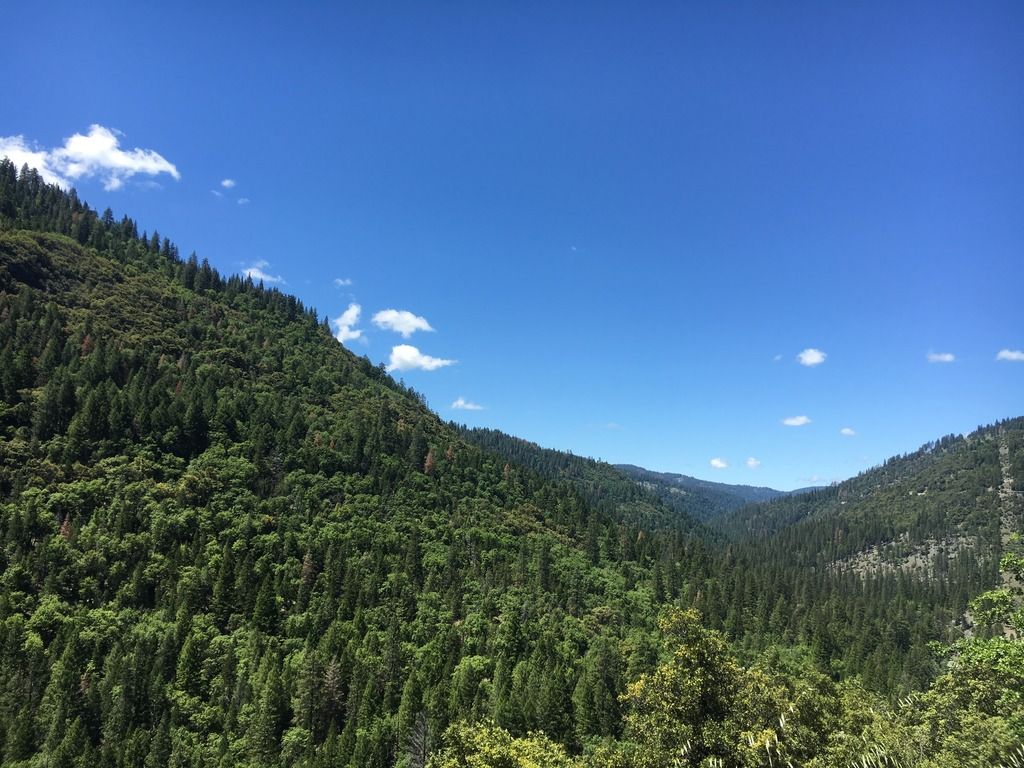
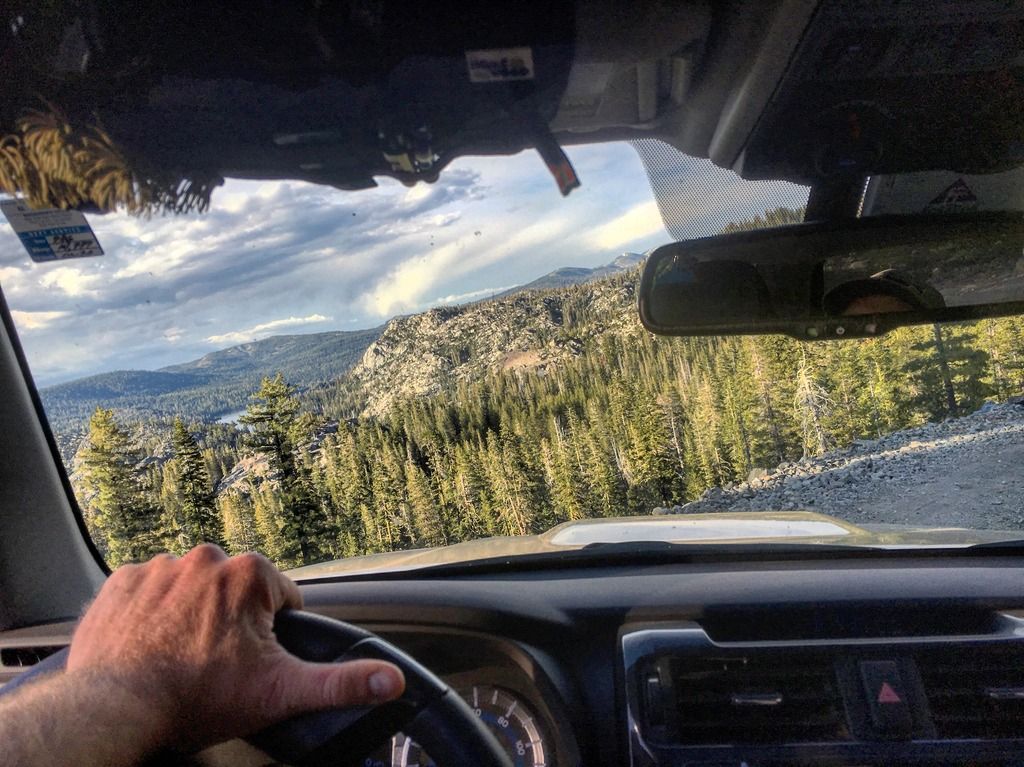
We moved up the highway to a nice overlook at the top of the Pacific Grade where we got a chance to get out and check out the scenery.
PC: Andy
PC: Andy
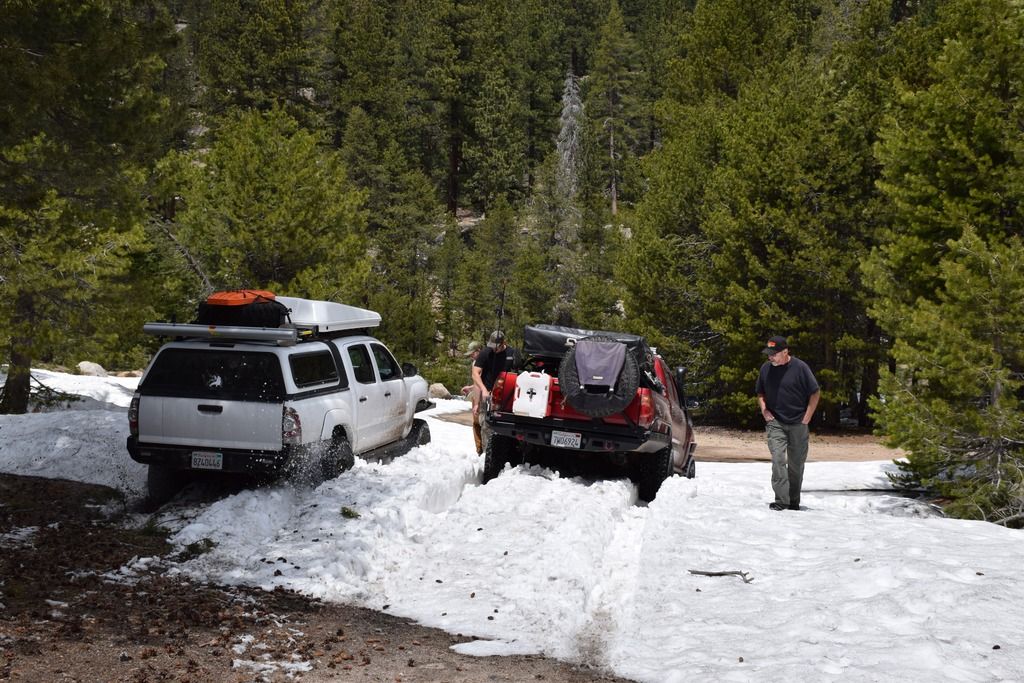
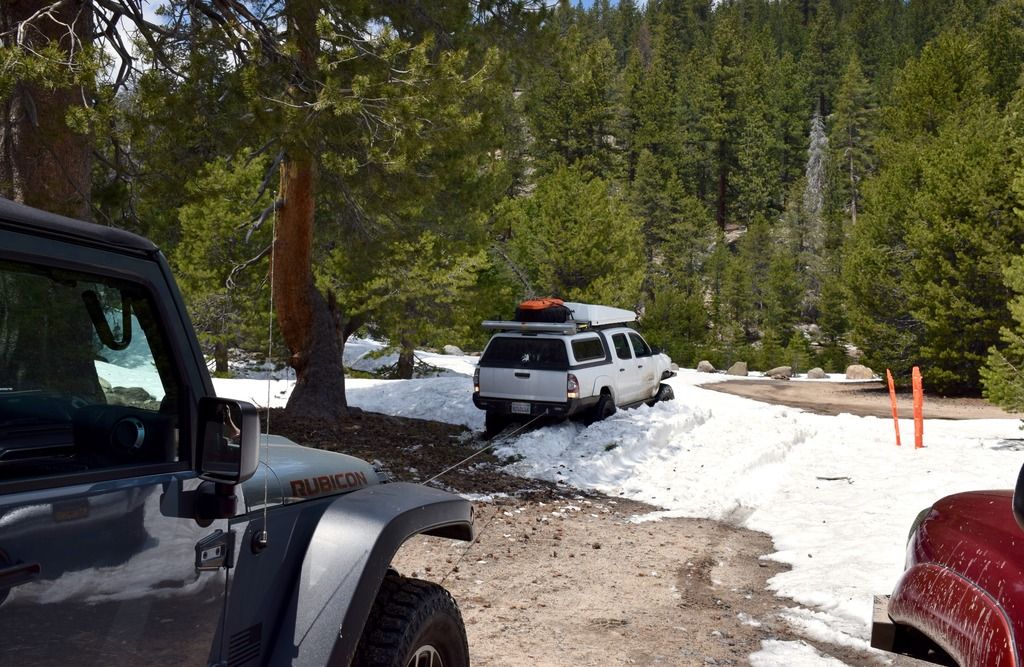
We then down the eastern side of the Pacific Grade, into Deer Valley. The pass had just opened the day before, so people and cars were scarce. We pulled over and watched Vincent plow through a bank with his 37's. The Tacomas tried to follow, and weren't successful. A good use of Scott's winch, and we had them out.
PC: Vincent
PC: Vincent
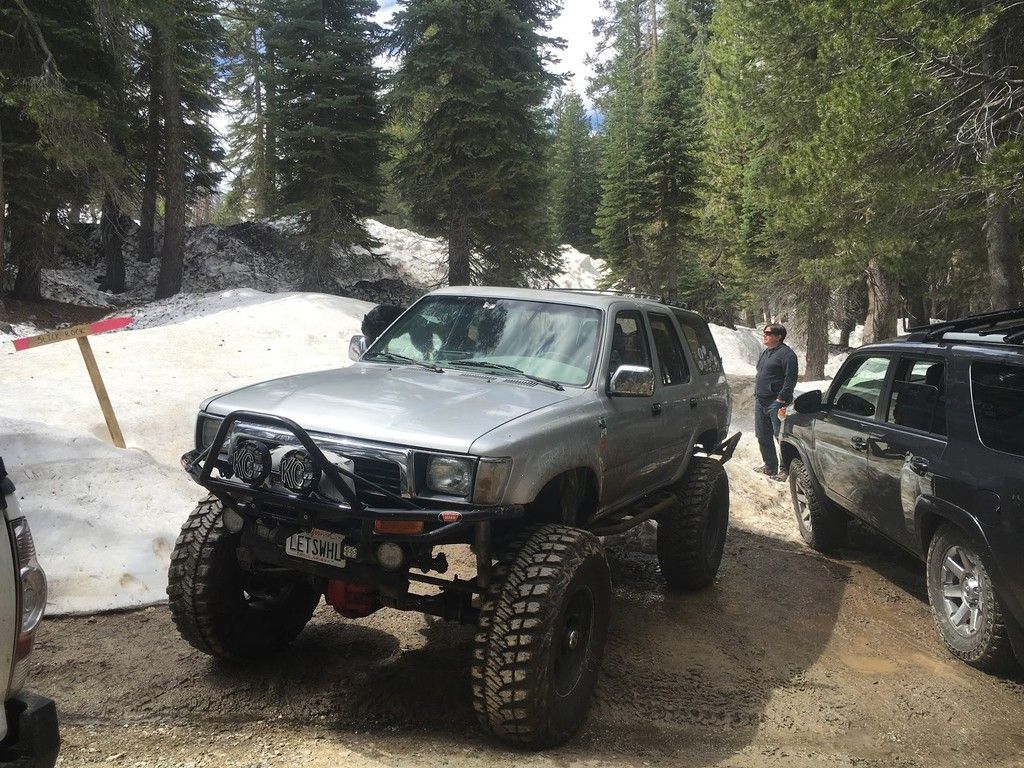
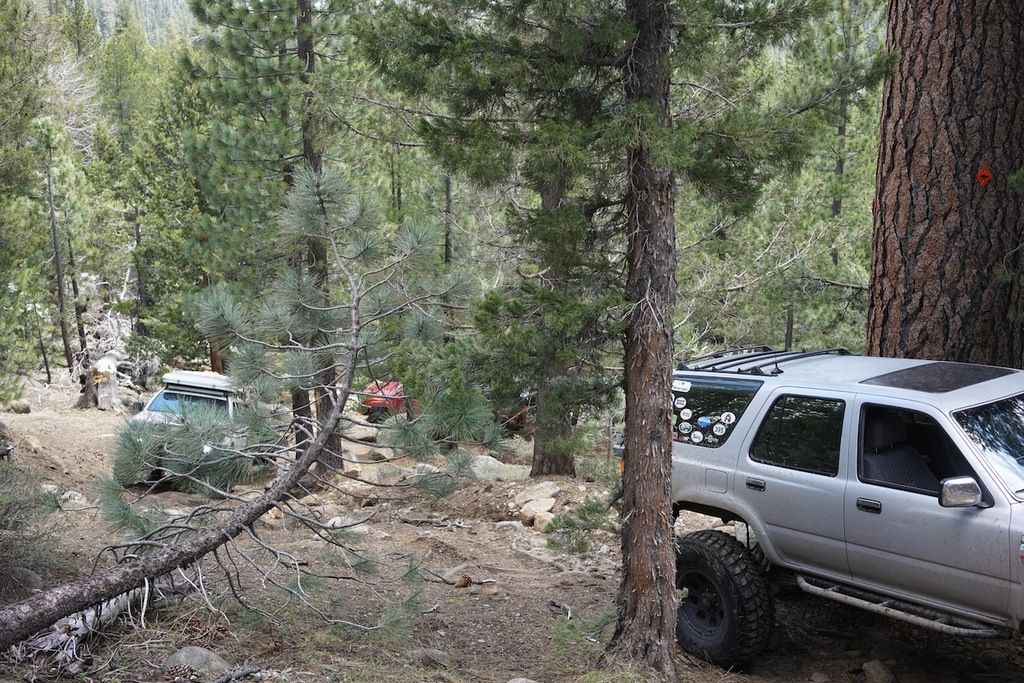
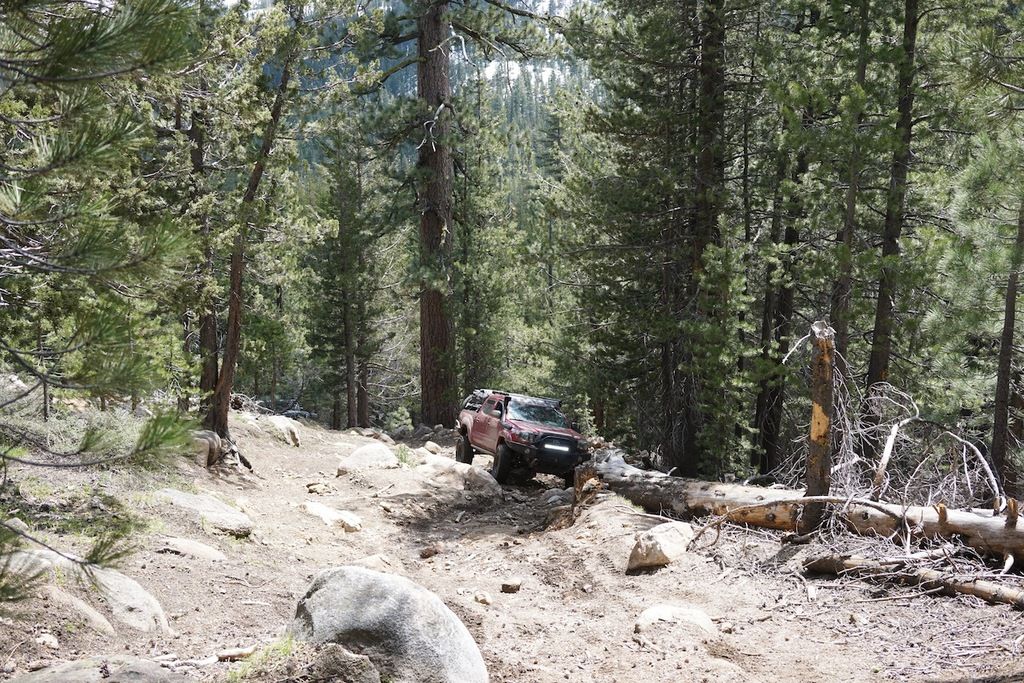
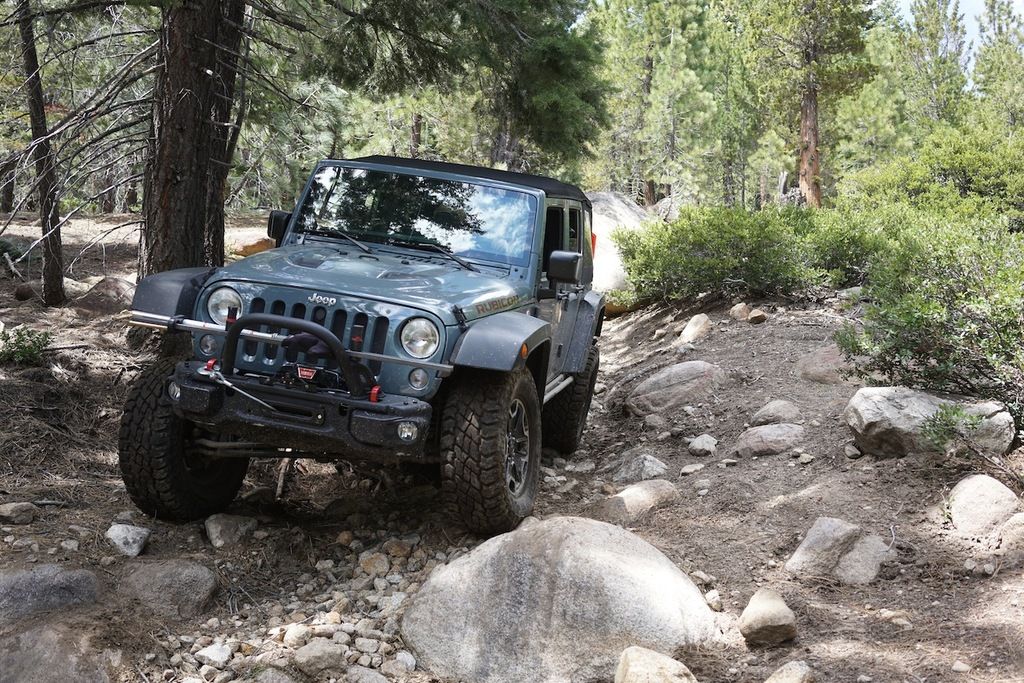
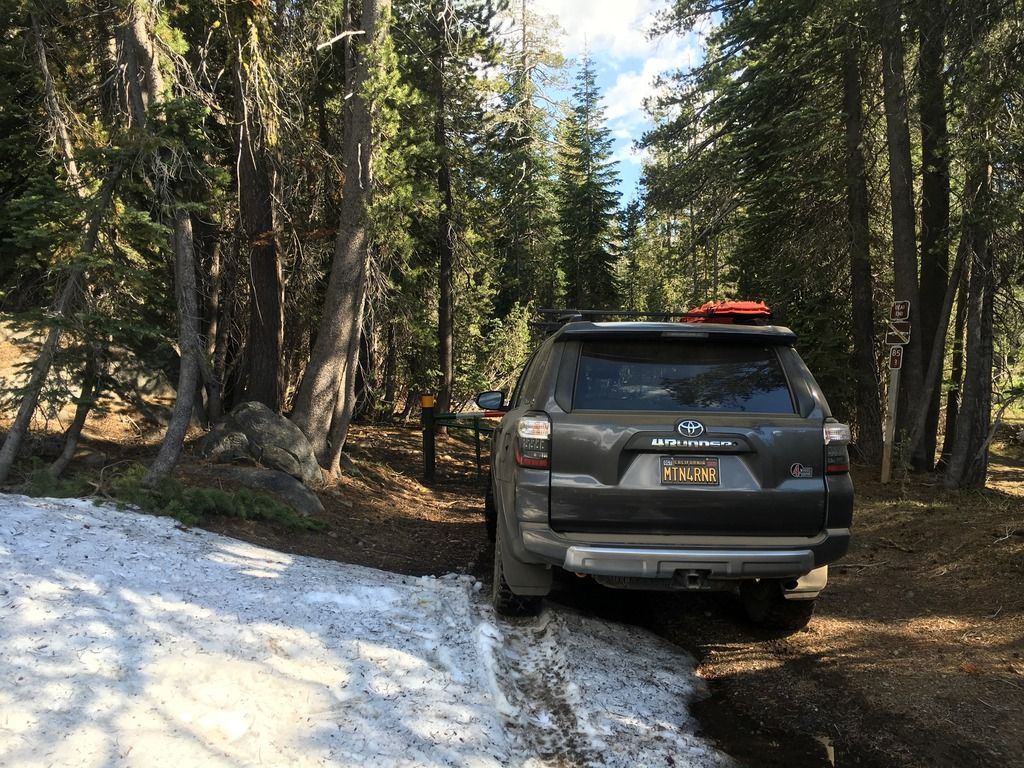
After our quick recovery session, we drove a few feet up the road to the Deer Valley 4x4 trail. Taking a quick look up the trail, and a short walk, I realized that my mostly stock 4Runner would have a hard time with the trail if I didn't want to sustain body damage. Seeing as I am installing sliders within a few weeks, it seemed foolish to try, so I parked at the bottom and became the spotter/cameraman for the trail run.
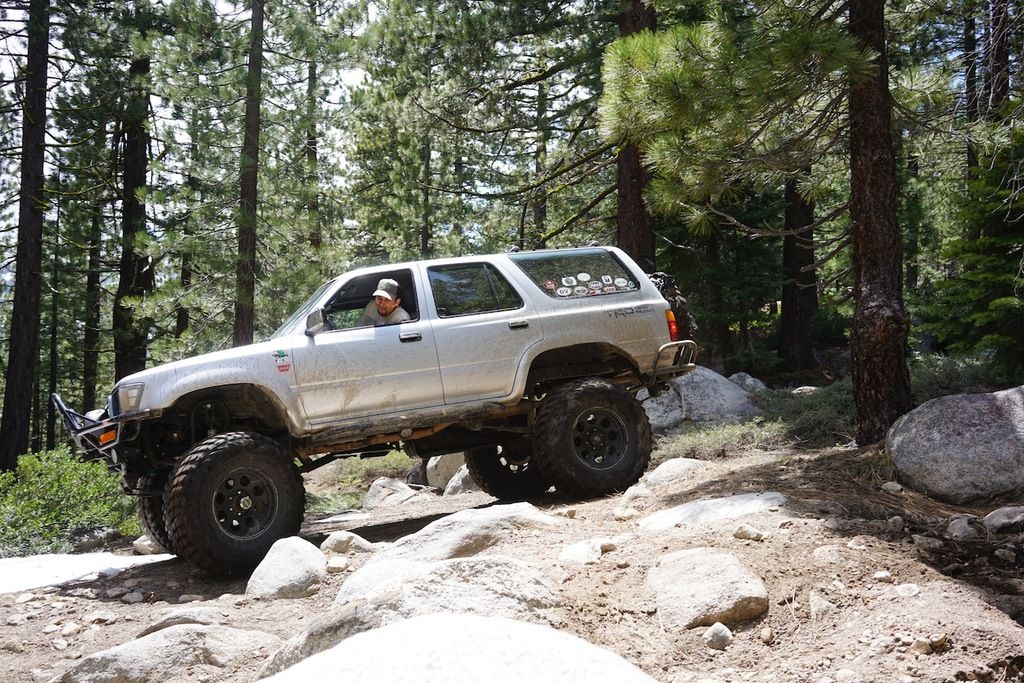
Vincent led the group with his 4Runner. 37” tall tires and low, low gears made his rig the most capable of the group. He hardly required a spot, and was usually far ahead on the trail.
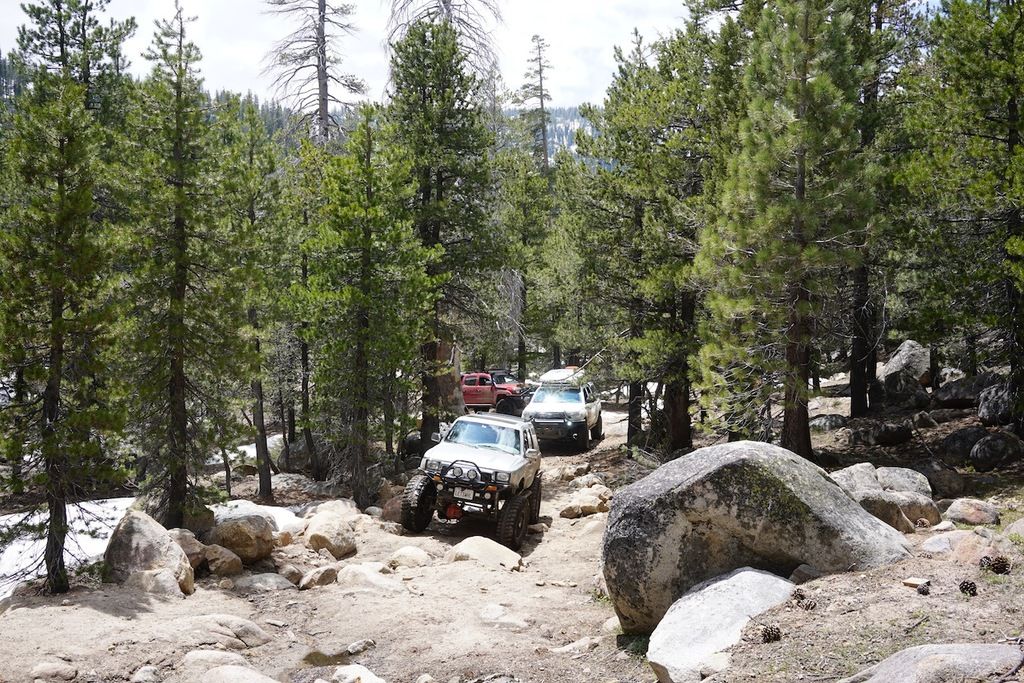
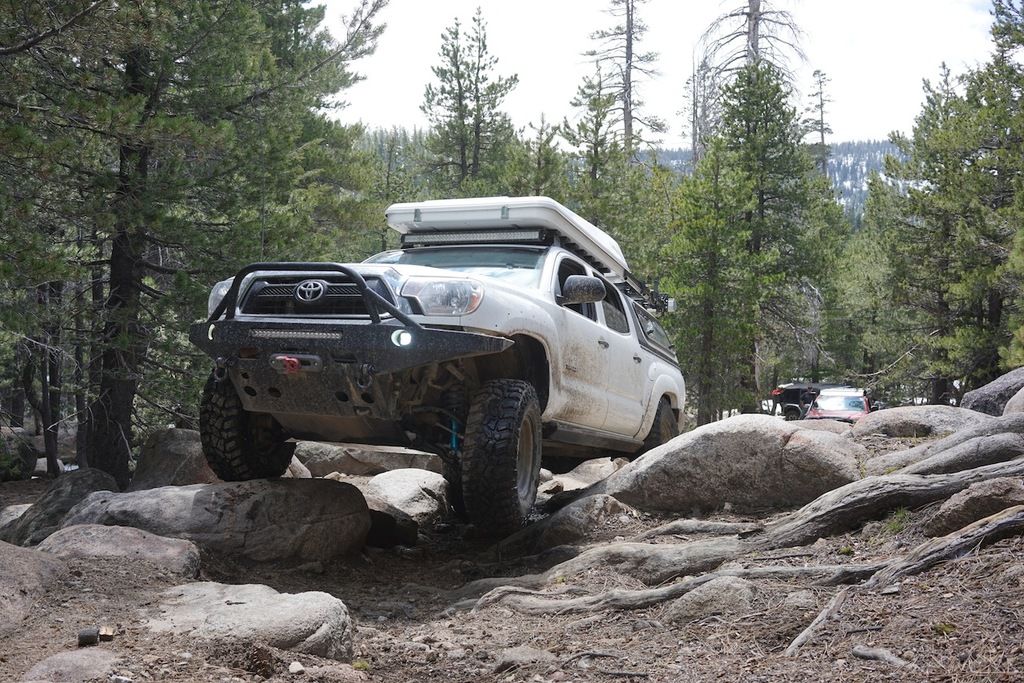
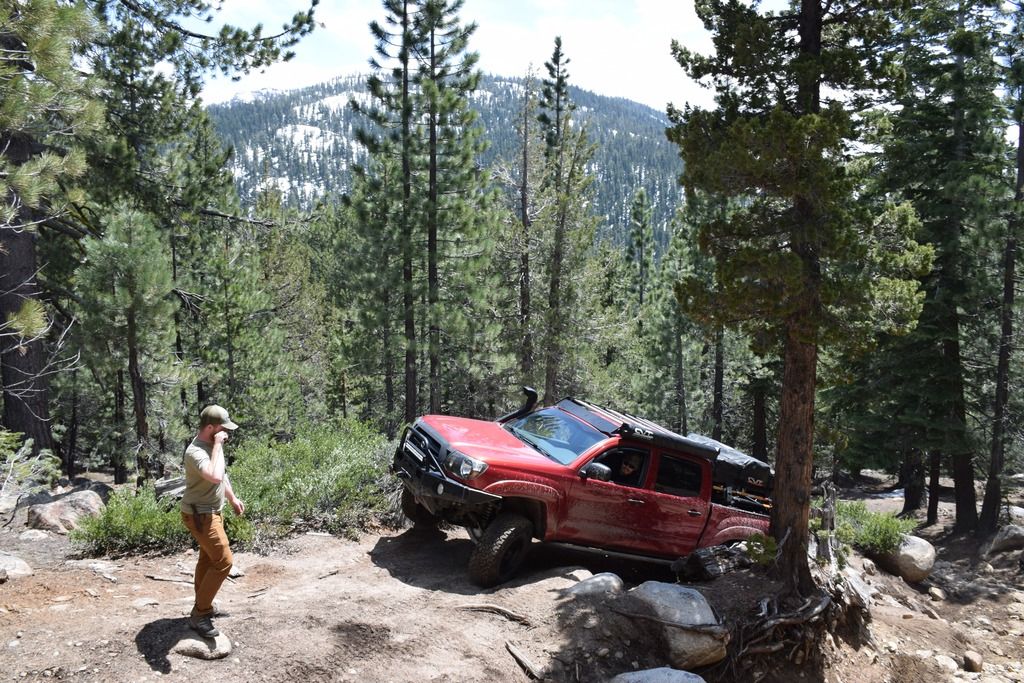
Andy took a tough line and ended up 2 wheeling on a boulder and lost forward momentum, ultimately taking the other line. Major props for the attempt, it was awesome! SLIDERS for the win!
PC: Vincent
Driver/Rig:
V_man[Vincent] - 1990 Toyota 4Runner
younglexx [Alex] - 2005-2010 Toyota Tacoma
Comanche Scott [Scott & Thor] - 2014 Jeep JKUR-X
jAndyMendo [Andy & Taco] - 2014 Toyota Tacoma TRDOR
MTN4RNR [Max] - 2016 Toyota 4Runner Trail
Vincent, Andy and I met in the Bay Area and headed East to meet the others in Stockton
We all met in Stockton, refueled and headed up to the mountains!
PC: Vincent
Soon, snow!
After a quick refuel in Arnold, our first stop was the famous Slick Rock trail. We were stopped at the trailhead due to heavy snow on a North facing slope. Still about 3' left, so maybe in a month or so we can try again!
PC: Vincent
We moved up the highway to a nice overlook at the top of the Pacific Grade where we got a chance to get out and check out the scenery.
PC: Andy
PC: Andy
We then down the eastern side of the Pacific Grade, into Deer Valley. The pass had just opened the day before, so people and cars were scarce. We pulled over and watched Vincent plow through a bank with his 37's. The Tacomas tried to follow, and weren't successful. A good use of Scott's winch, and we had them out.
PC: Vincent
PC: Vincent
After our quick recovery session, we drove a few feet up the road to the Deer Valley 4x4 trail. Taking a quick look up the trail, and a short walk, I realized that my mostly stock 4Runner would have a hard time with the trail if I didn't want to sustain body damage. Seeing as I am installing sliders within a few weeks, it seemed foolish to try, so I parked at the bottom and became the spotter/cameraman for the trail run.
Vincent led the group with his 4Runner. 37” tall tires and low, low gears made his rig the most capable of the group. He hardly required a spot, and was usually far ahead on the trail.
Andy took a tough line and ended up 2 wheeling on a boulder and lost forward momentum, ultimately taking the other line. Major props for the attempt, it was awesome! SLIDERS for the win!
PC: Vincent
See 2 of 3 below
Last edited:
MTN4RNR
Adventurer
Highway 4 to 88 - 2 of 3
See 3 of 3 below
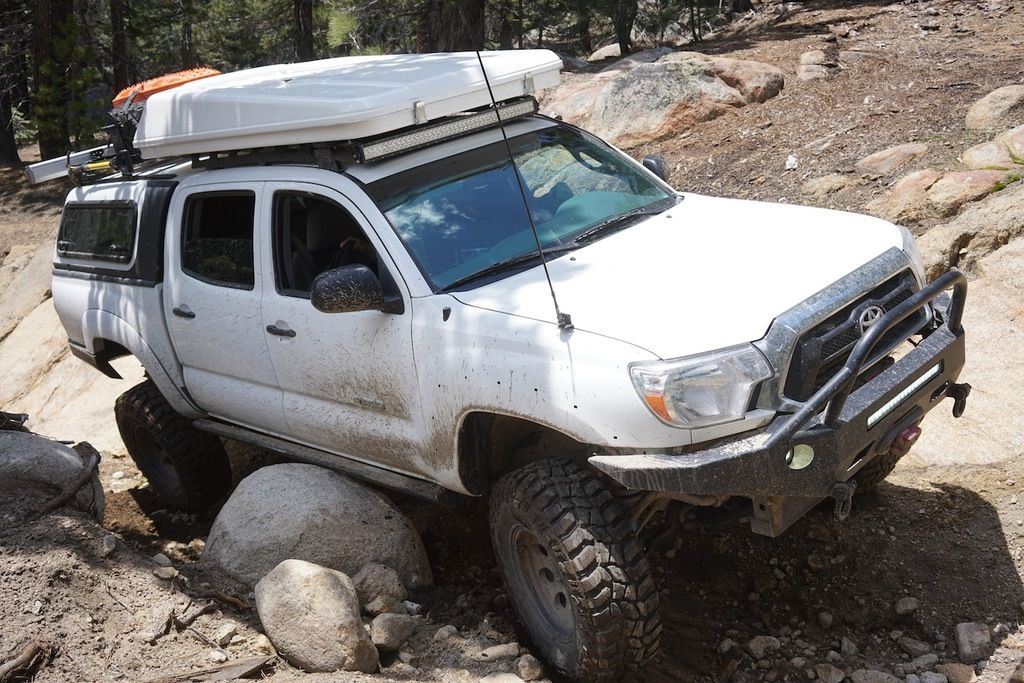
TACOOOOOOOOO
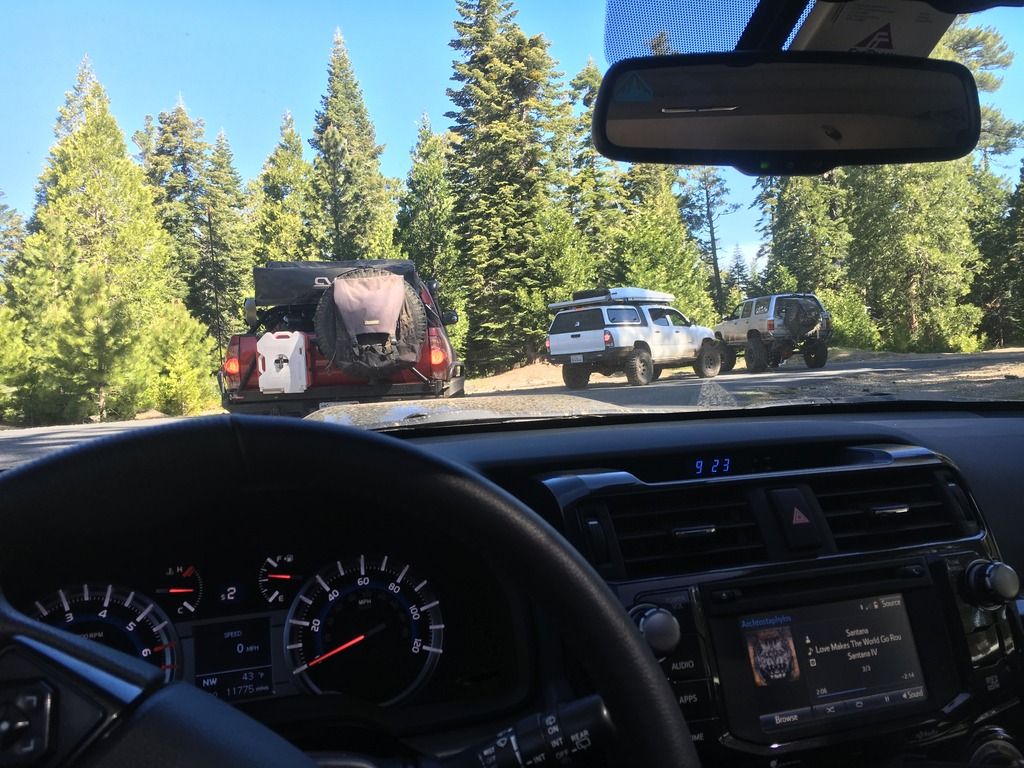
After finishing up a short run of the Deer Valley trail, we headed back down the mountain to the west to check on the Corral Hollow trail. We were stopped by snow at the trail head at the eastern entrance, and met the same story at the western entrance.

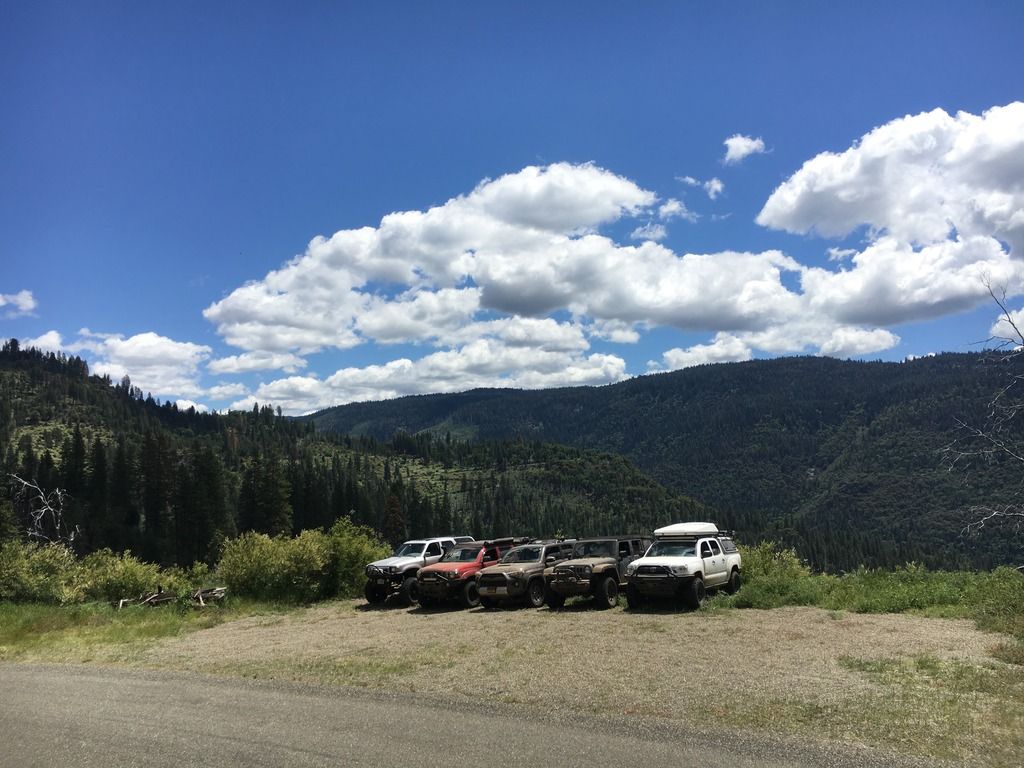
So we moved to lower elevations and made our way to an OHV area around 6000' elevation. We didn't encounter nearly as much snow, and the need for a campsite was approaching. Game on.
PC: Vincent
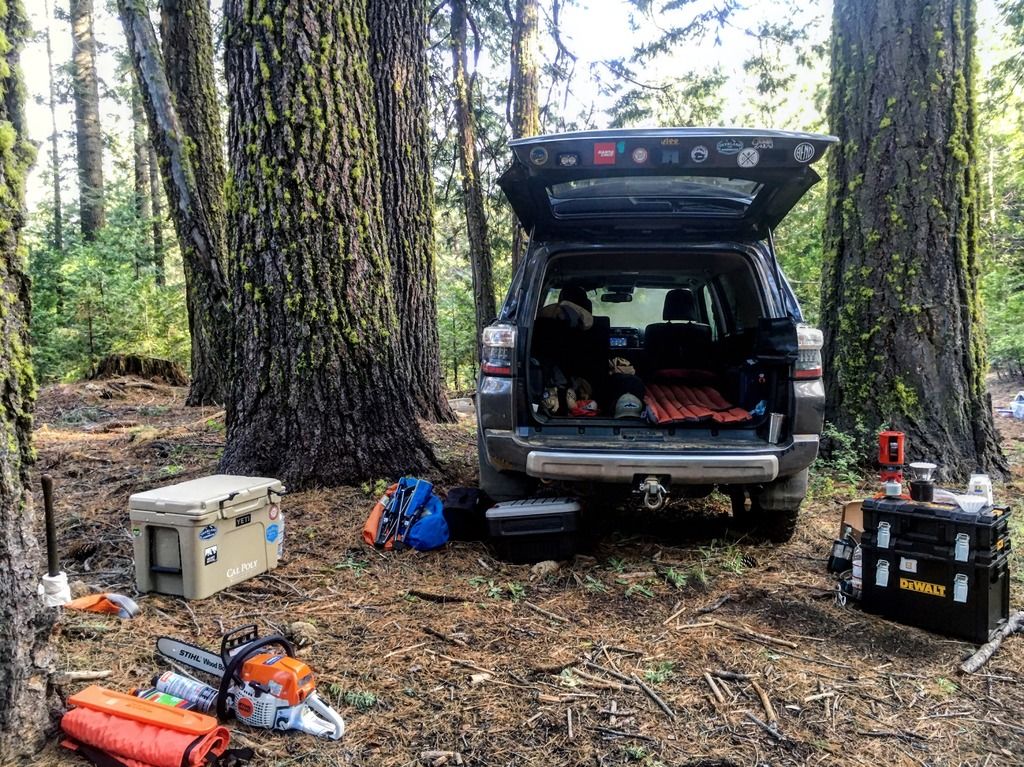
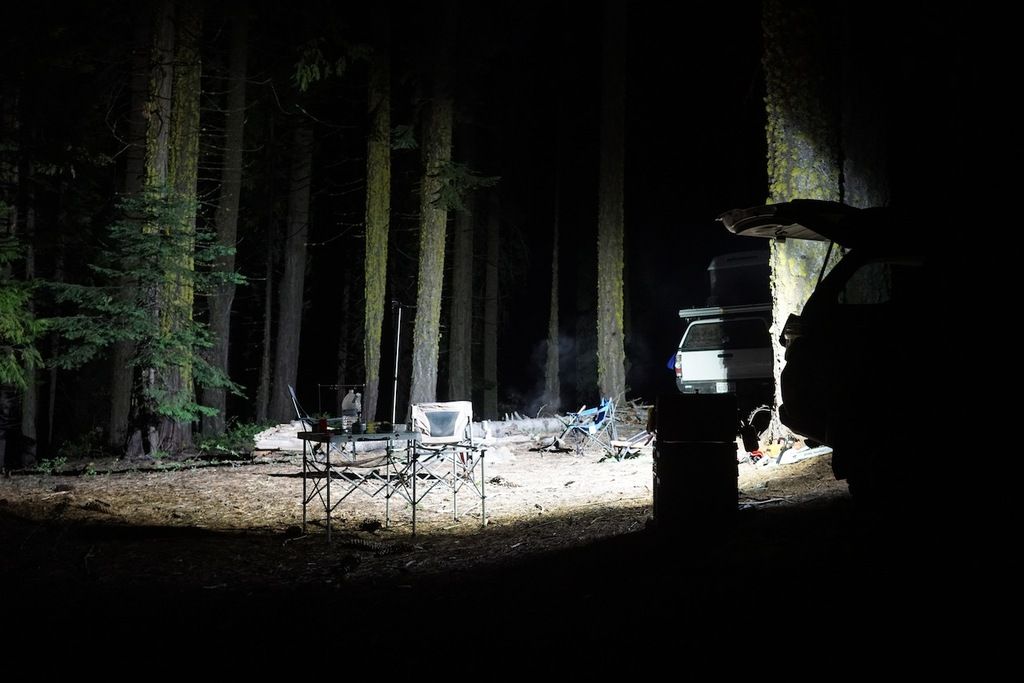
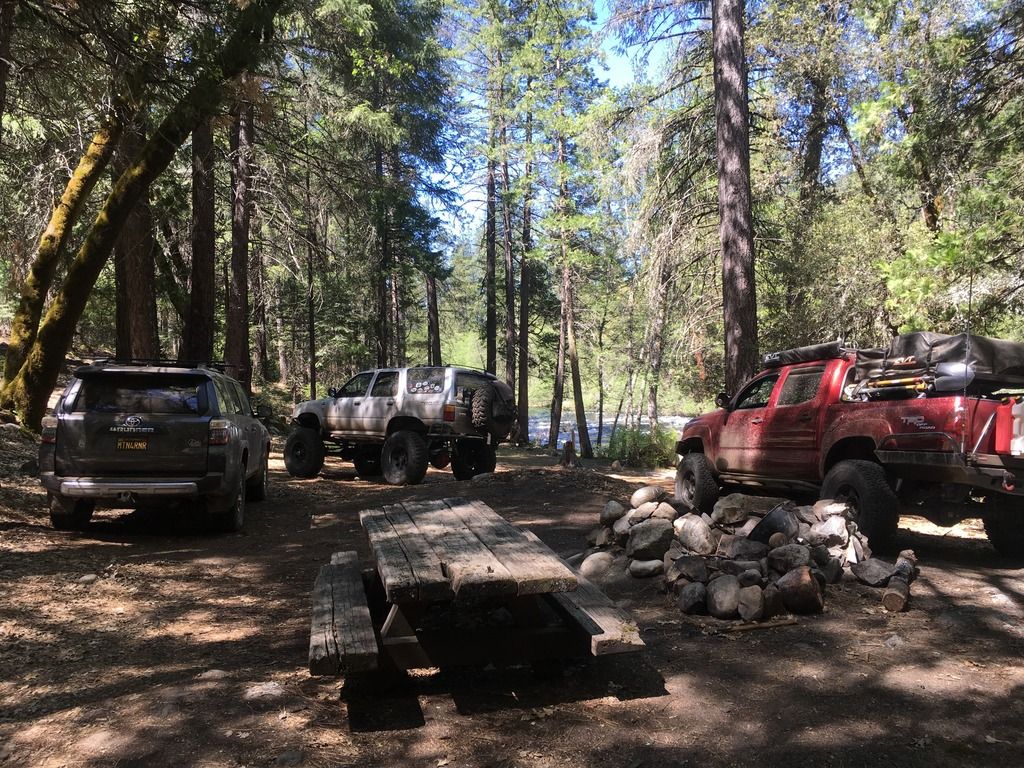
After about 20 miles of slow paced sections and some 40 mph rally stages, we settled on an area next to a creek with a few established fire pits. Set up camp, had some beers, had some conversation around the campfire, and settled in for the night.
I also got a good opportunity to test out the Hatch Light Mod in the wild. I was pretty amazed by the light output of the S2 from @baja designs.
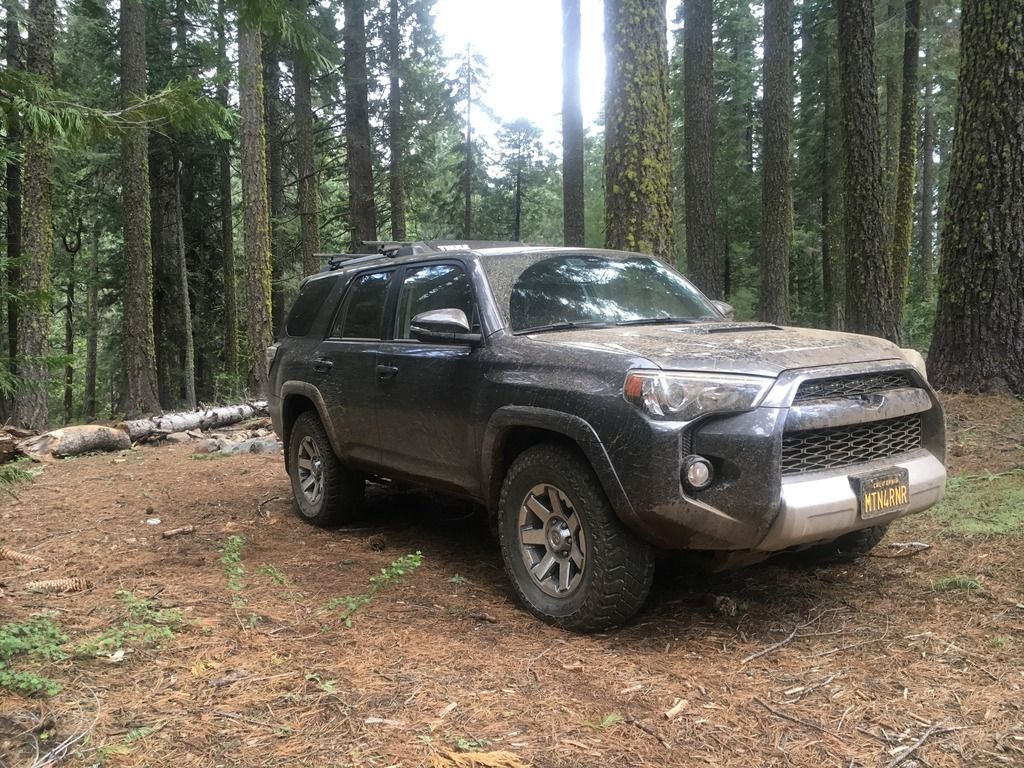
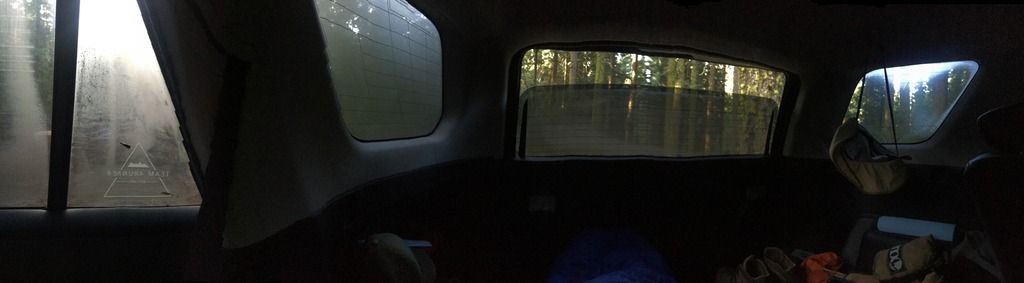
Morning breaks in the campsite.
Hotel 4Runner

PC: Andy

Breakfast on the creek

After finishing up a short run of the Deer Valley trail, we headed back down the mountain to the west to check on the Corral Hollow trail. We were stopped by snow at the trail head at the eastern entrance, and met the same story at the western entrance.
So we moved to lower elevations and made our way to an OHV area around 6000' elevation. We didn't encounter nearly as much snow, and the need for a campsite was approaching. Game on.
PC: Vincent
After about 20 miles of slow paced sections and some 40 mph rally stages, we settled on an area next to a creek with a few established fire pits. Set up camp, had some beers, had some conversation around the campfire, and settled in for the night.
I also got a good opportunity to test out the Hatch Light Mod in the wild. I was pretty amazed by the light output of the S2 from @baja designs.
Morning breaks in the campsite.
Hotel 4Runner
PC: Andy
Breakfast on the creek
See 3 of 3 below
Last edited:
MTN4RNR
Adventurer
Highway 4 to 88 - 3 of 3
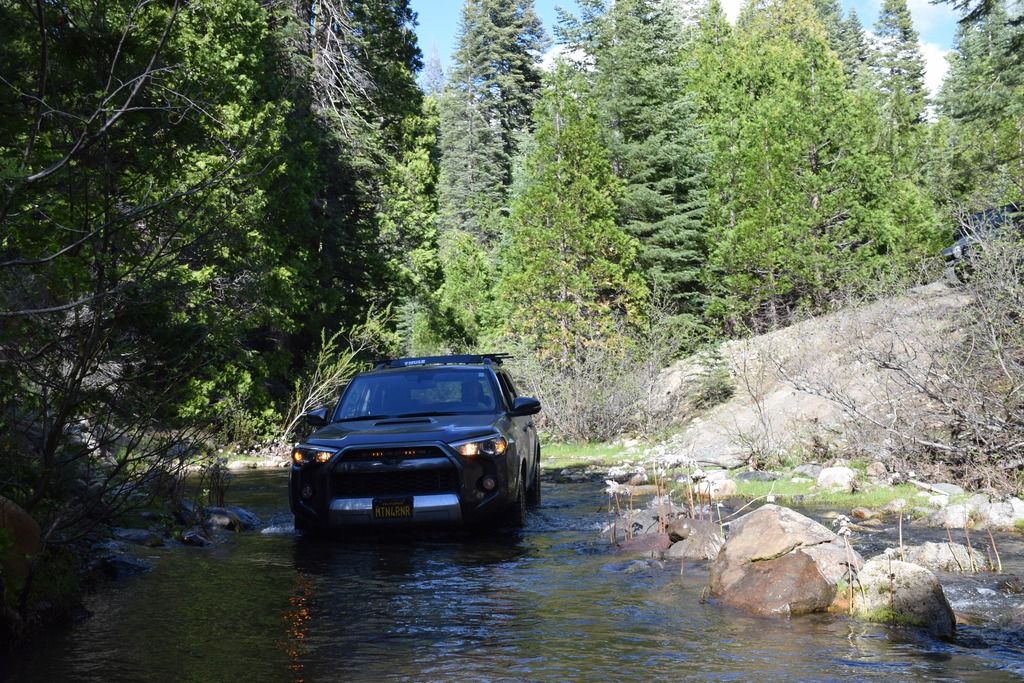
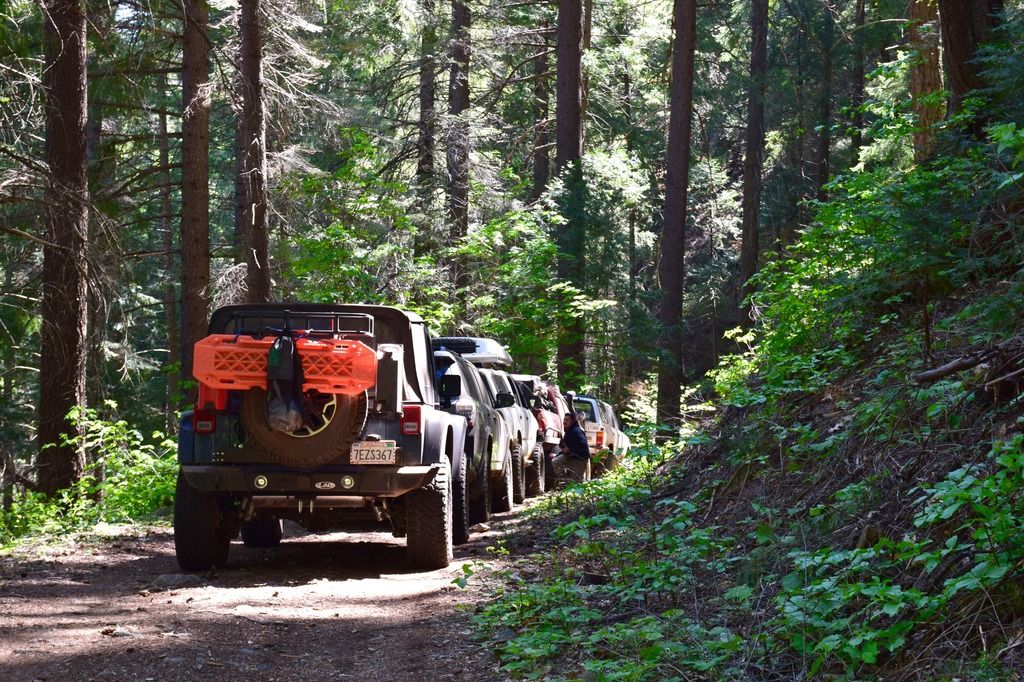
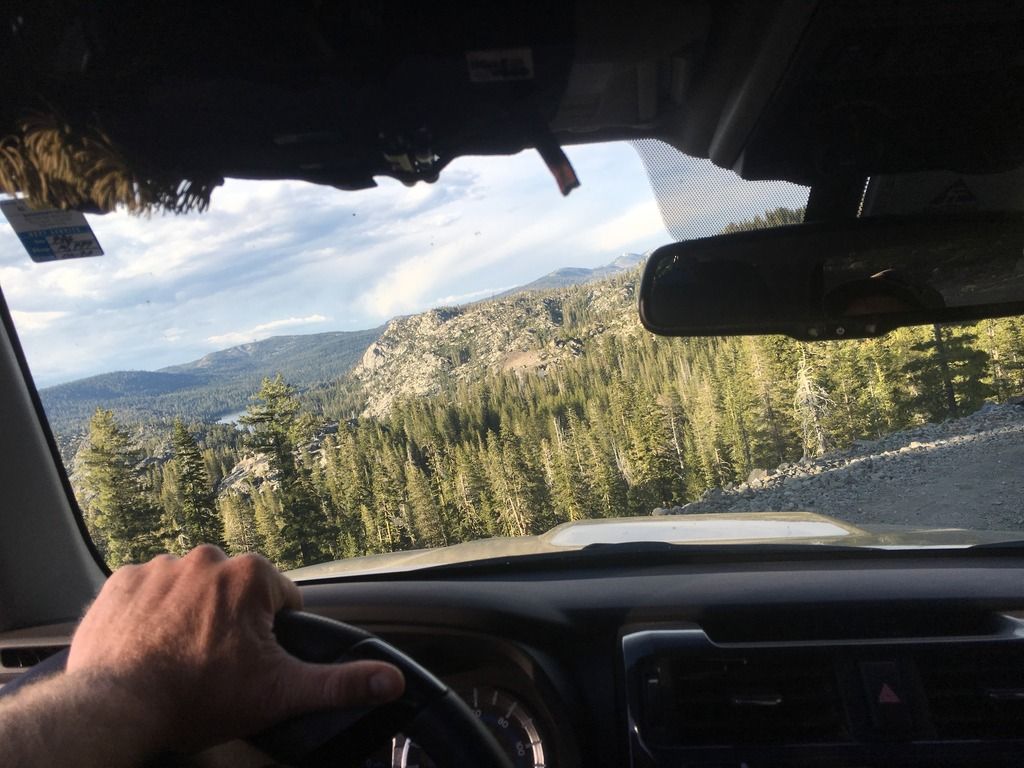
We then dispersed from camp and headed through the National Forest land, with the exit point being Highway 88, north of our location.
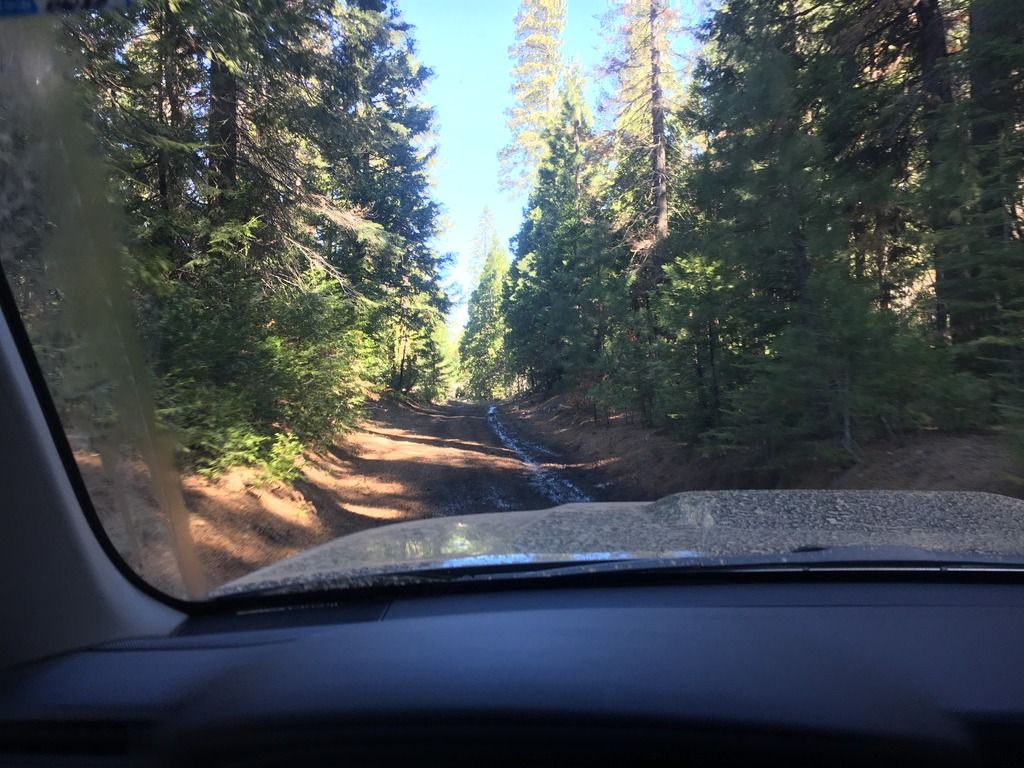
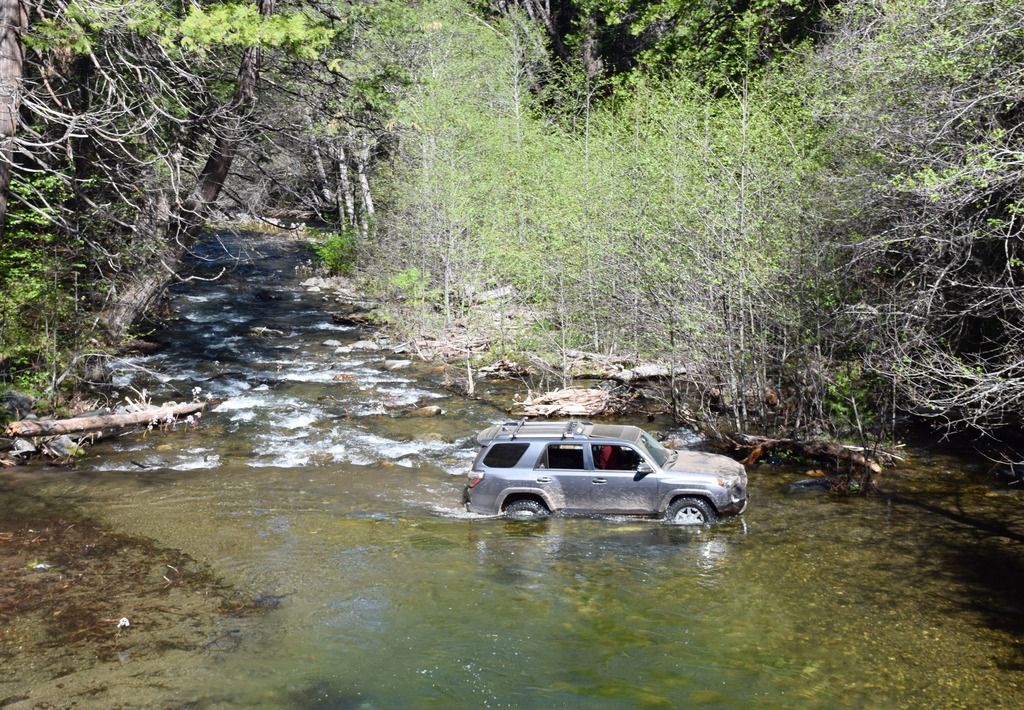
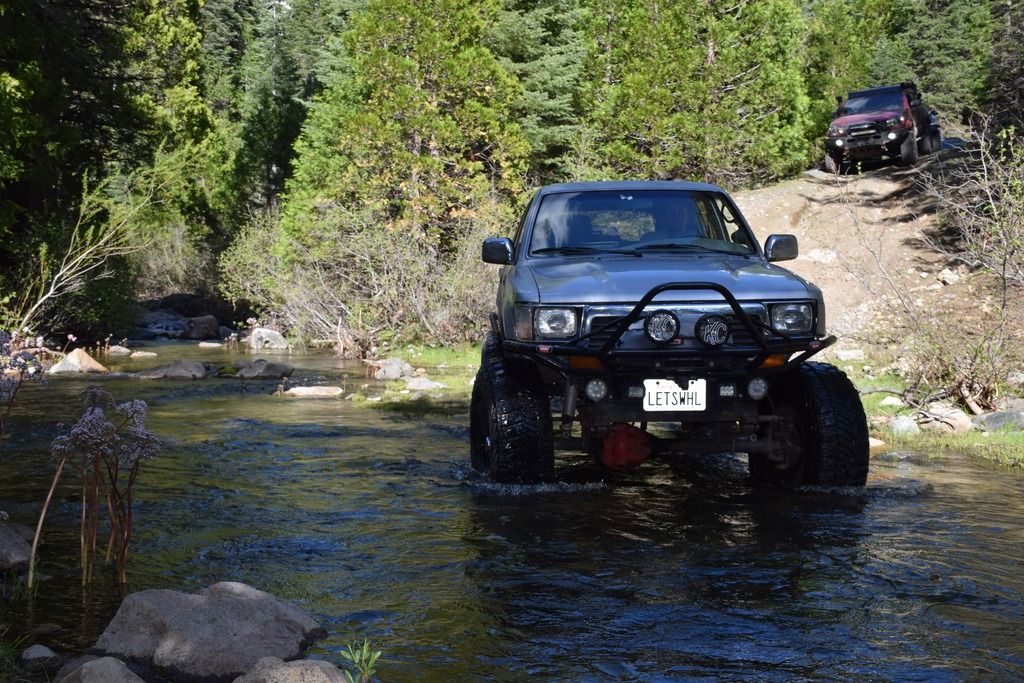
We then came across a river that had an optional river crossing with an overhead bridge. Needless to day, we took the optional route.
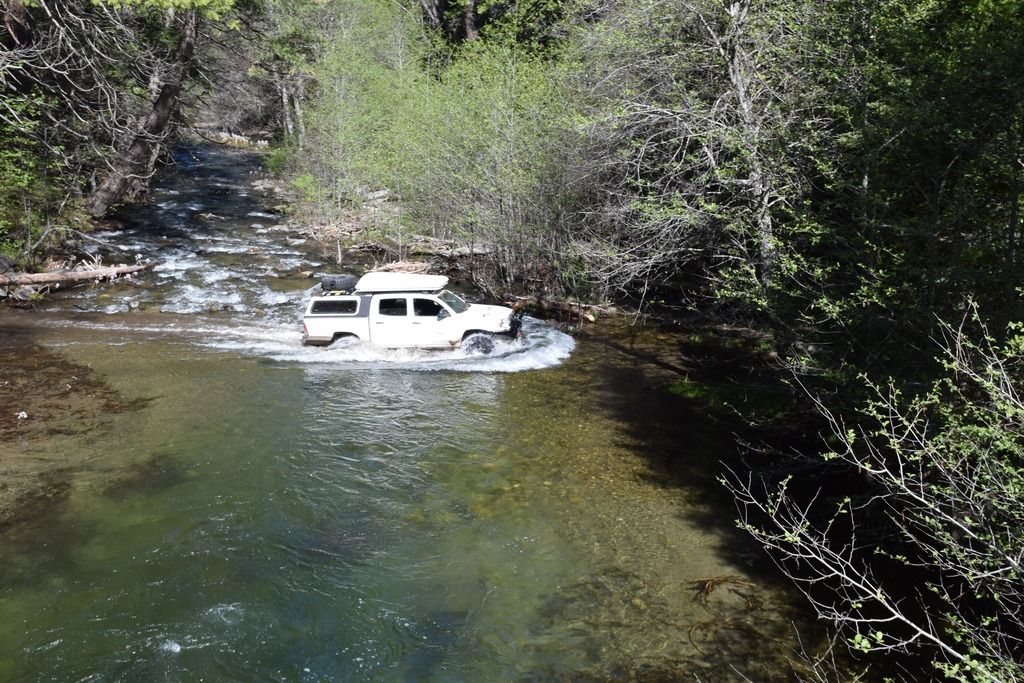
Woo hoo diff breather mod!

PC: Vincent
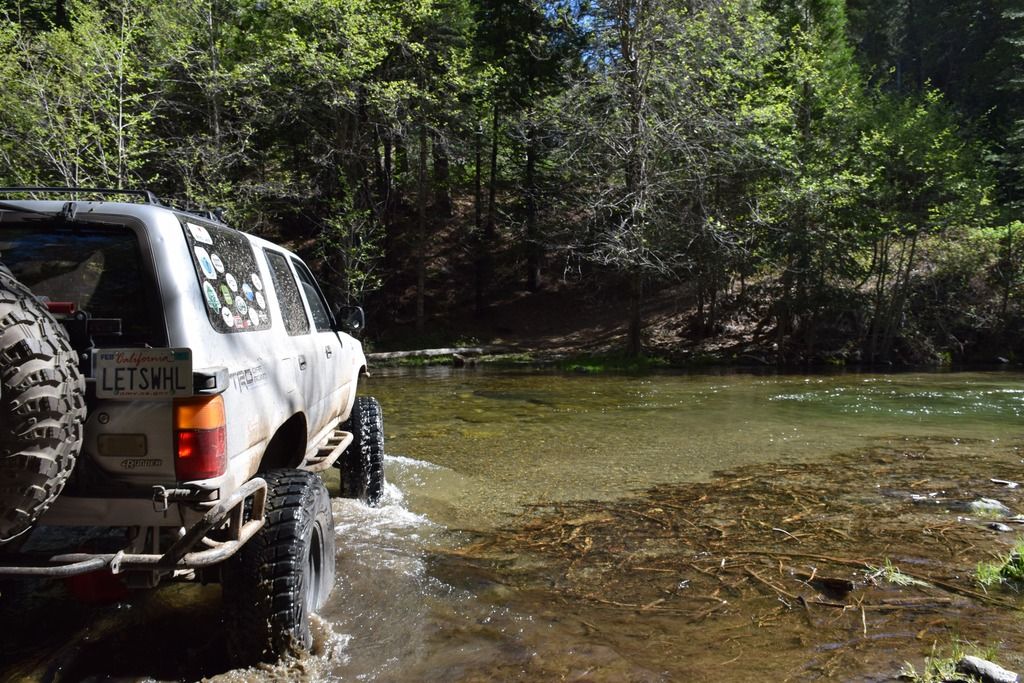
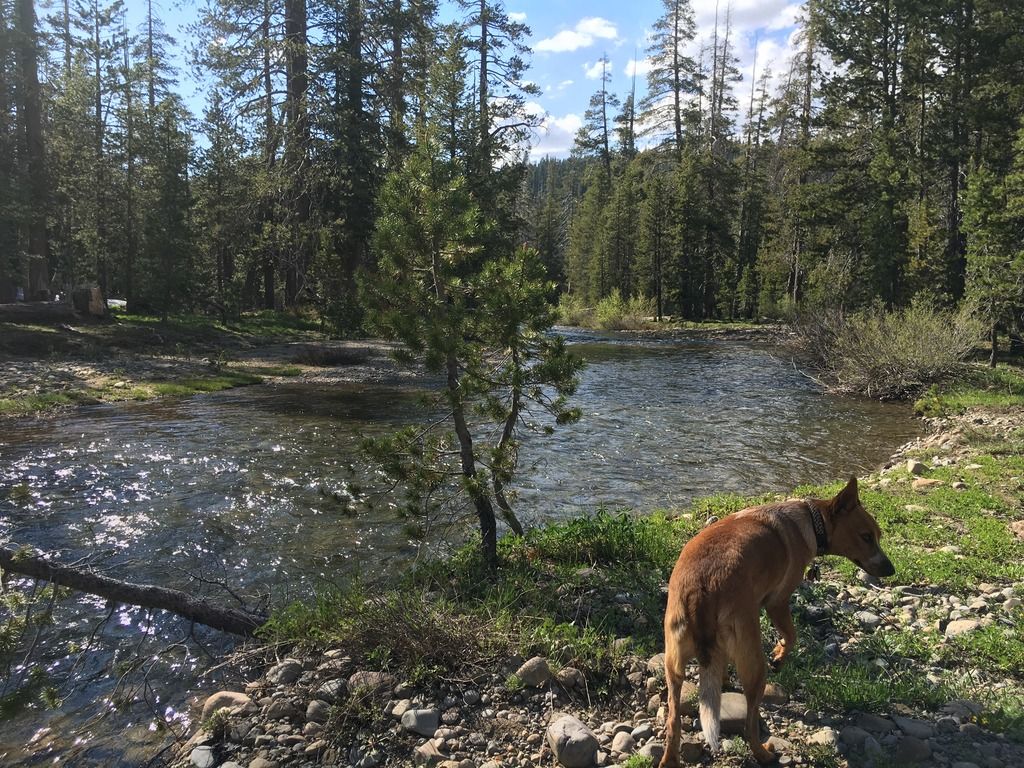
We then found ourselves upon the swollen Mokelumne River and a sweet campsite next to it.
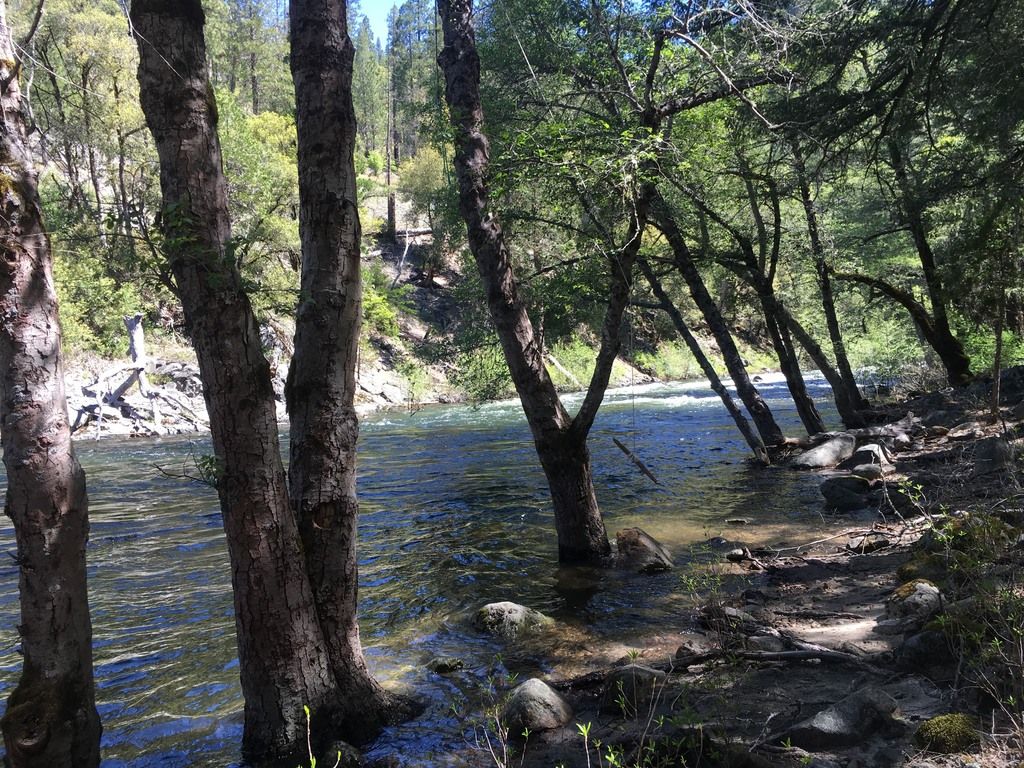
Crossing the river [on a bridge, duh] we headed out of the canyon, towards Highway 88, and to the end of the adventure! 55 miles off road, 2 days, 5 rigs, and an awesome adventure! I can't wait for the next trip!
PC: Vincent
More to come….
We then came across a river that had an optional river crossing with an overhead bridge. Needless to day, we took the optional route.
Woo hoo diff breather mod!
PC: Vincent
We then found ourselves upon the swollen Mokelumne River and a sweet campsite next to it.
Crossing the river [on a bridge, duh] we headed out of the canyon, towards Highway 88, and to the end of the adventure! 55 miles off road, 2 days, 5 rigs, and an awesome adventure! I can't wait for the next trip!
PC: Vincent
More to come….
Last edited:
Comanche Scott
Expedition Leader
Was a great trip!
I was impressed with how well your 4Runner did with just the tires. That is one very capable vehicle. You drove it well! :beer:
I was impressed with how well your 4Runner did with just the tires. That is one very capable vehicle. You drove it well! :beer:


MTN4RNR
Adventurer
Rattlesnake Road - June 2016
This weekend I took some time to head into the Sierras off of I-80. I scheduled to have my sliders installed at 4x4 Labs on Monday in Grass Valley (more on that later) so I decided that I would head up Sunday morning to explore around an area that I had plotted out on a map, but have never driven. I checked last weekend when I was passing through to make sure the gate was open, and it was. So I made my way up I-80 in the morning, hoping maybe I would find a good campsite and maybe a thunderstorm.
On my way up before getting to the Rattlesnake Road area I stopped in another area I have always been curious about to do some preliminary scouting for open/locked gates. That's the fun part about having a loose schedule, you get to say, "hm what's over there" and then just go. Found a few potential places to explore later on.
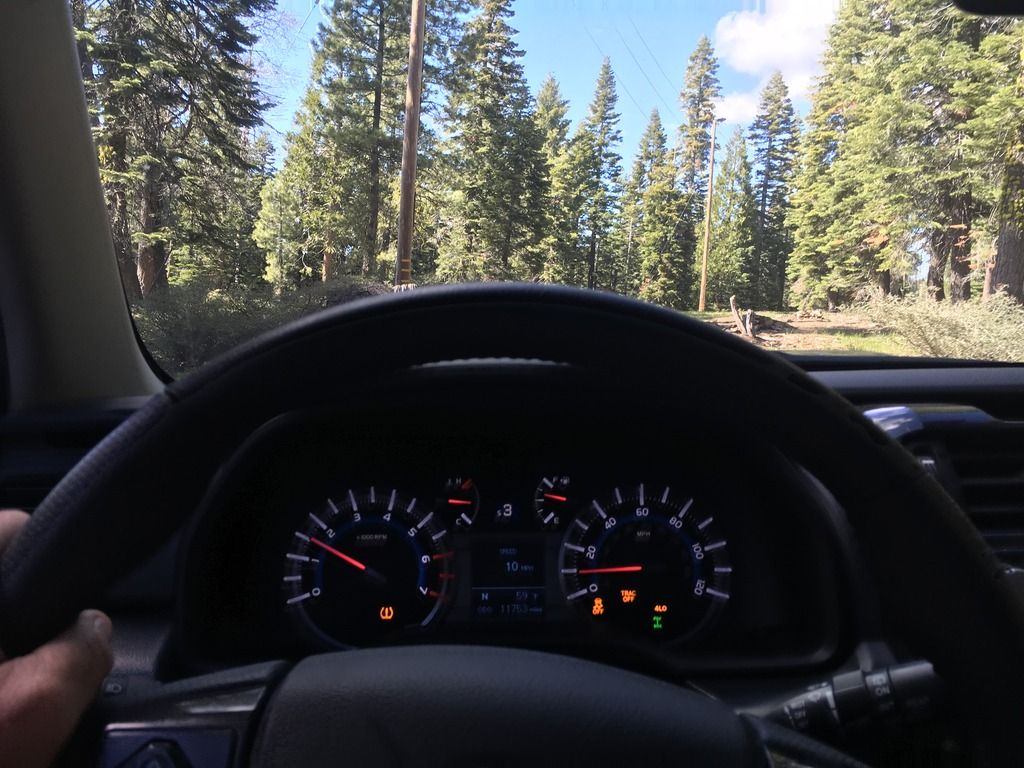
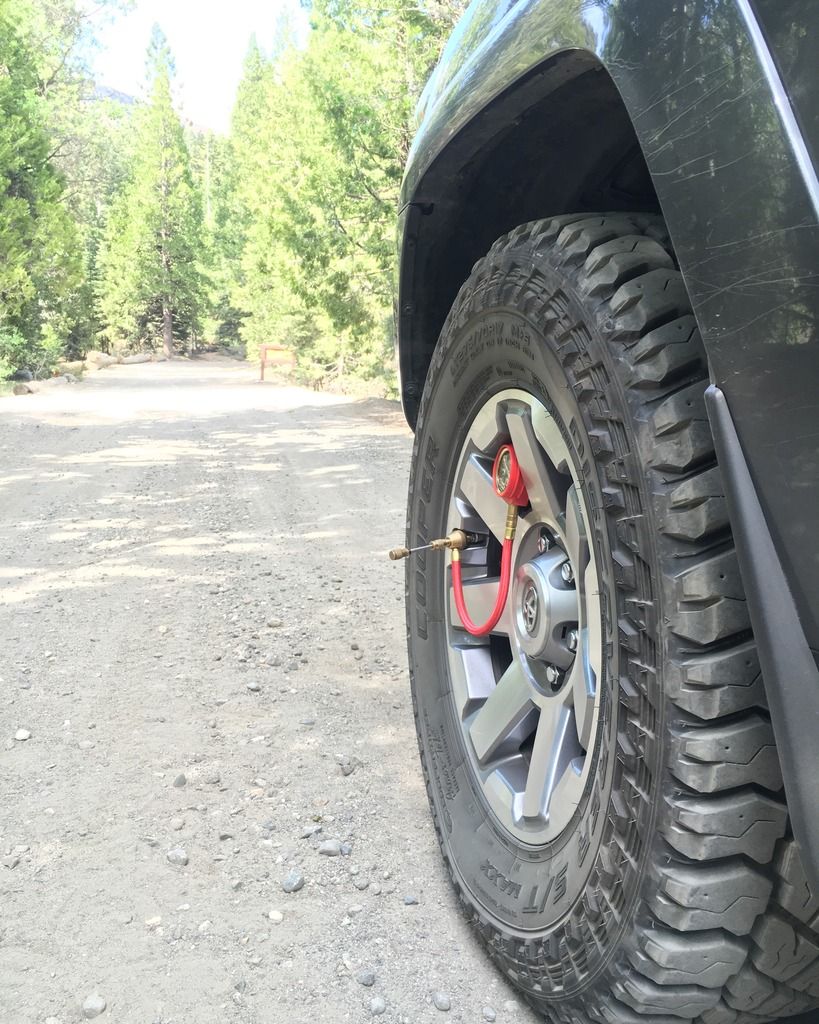
I reached Rattlesnake Road, aired down to 20 in the front, 18 in the rear. When I am packed light, I have found this to be a good forest service road pressure combo.
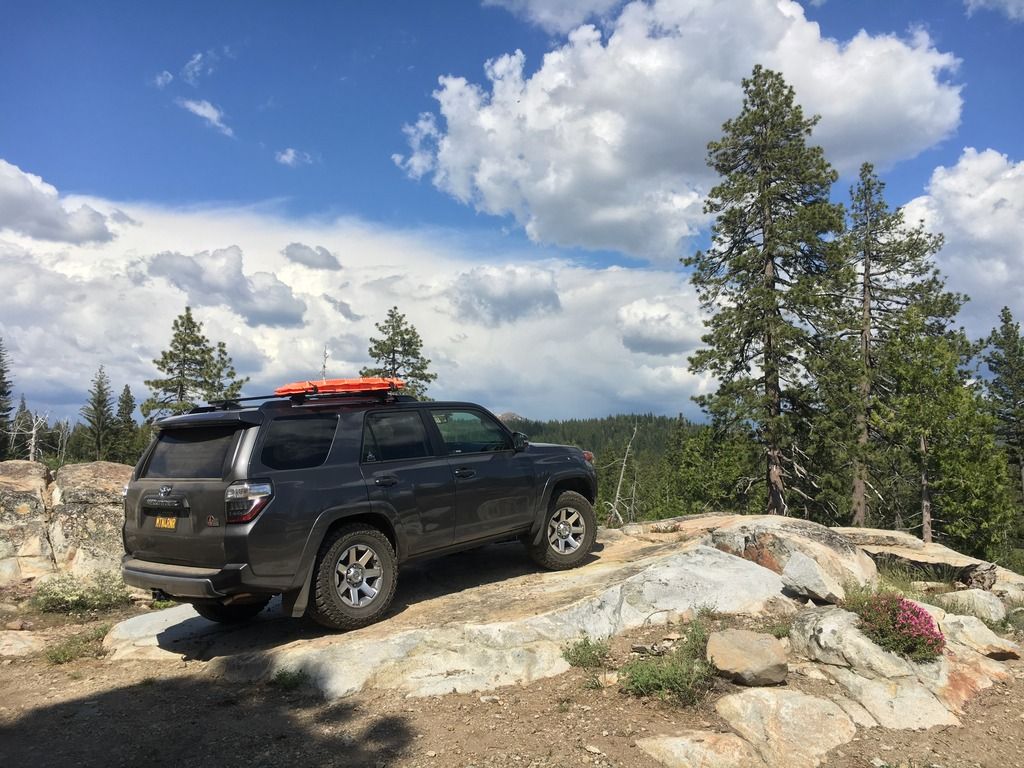
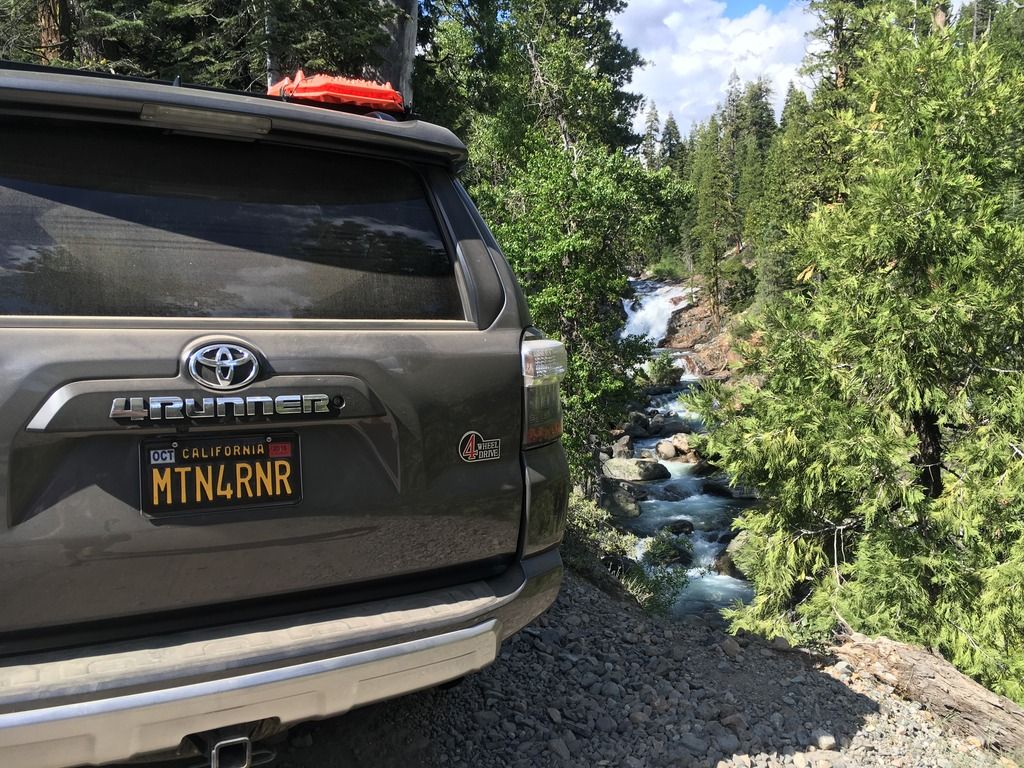
I was immediately met with a cascading creek (that I would later camp by up the mountain).
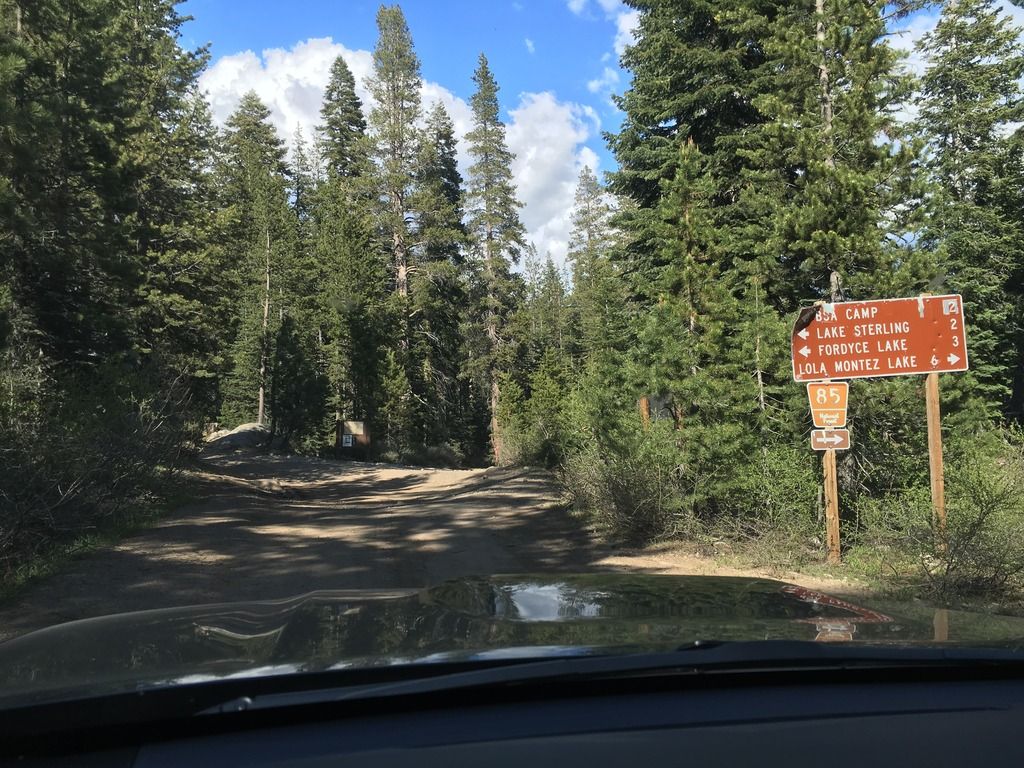
I initially wanted to reach Lola Montez Lake, but snow would stop me, and I would come back to this point, venturing towards Sterling Lake and Fordyce Lake.
I found a locked gate, and a great campground just beyond it on the creek. Saved for a future trip.
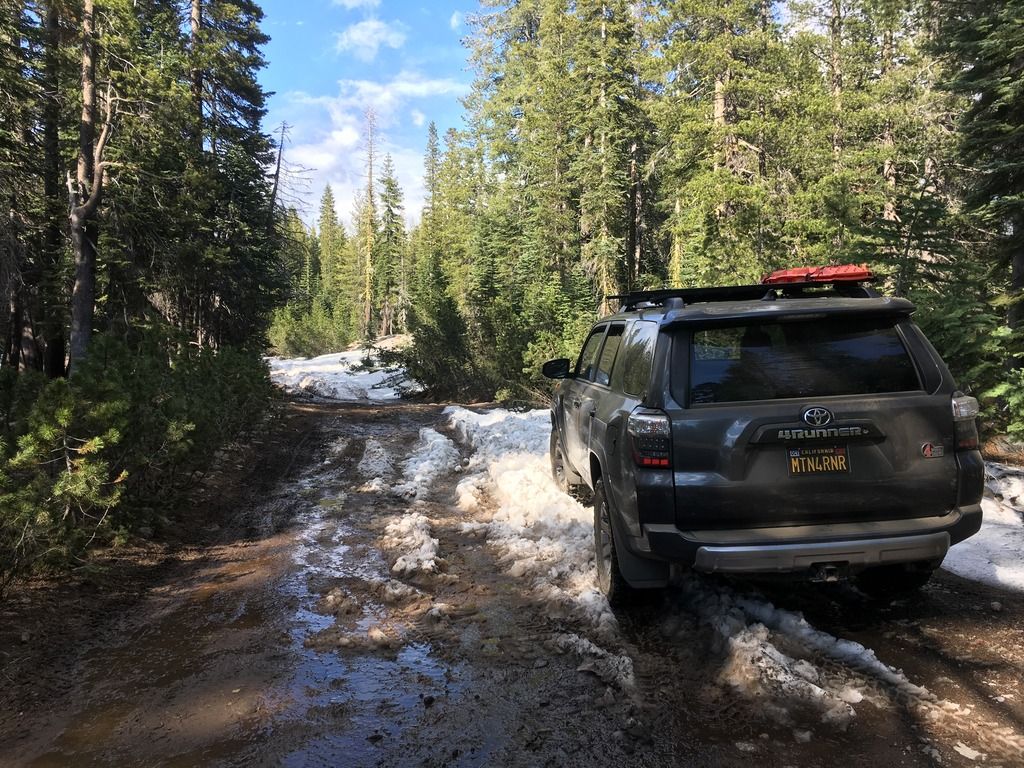
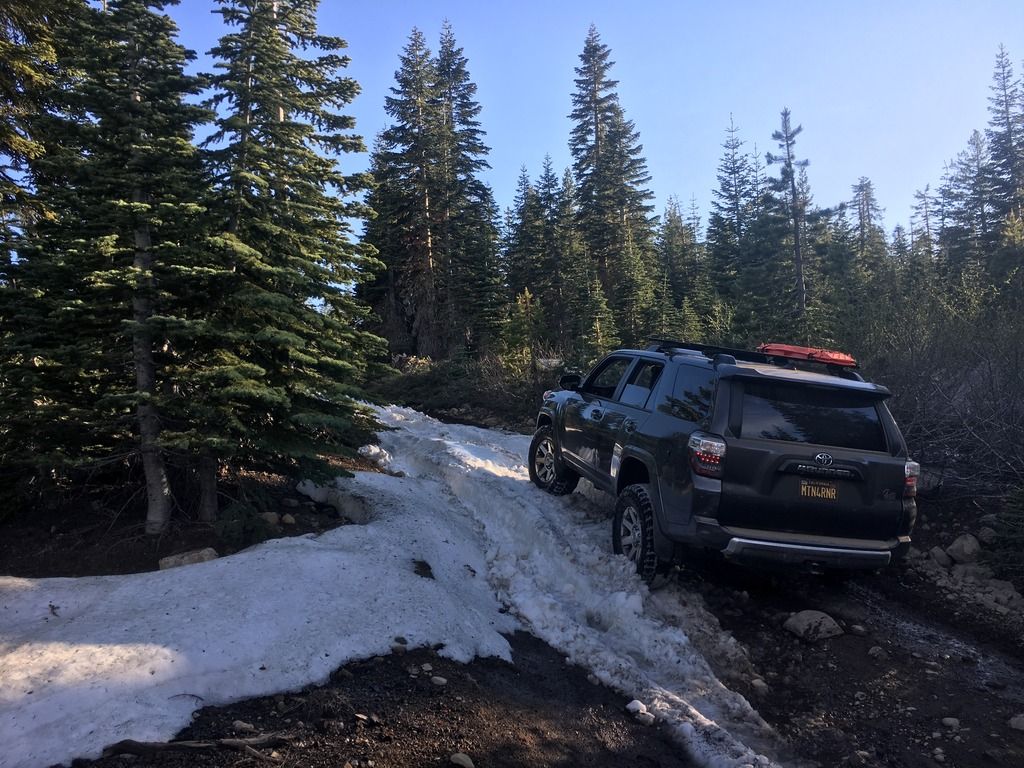
Continued up the road towards Lola Montez Lake, and met some snow which ultimately forced me to turn around. Being solo, there wasn't a point to push getting stuck, even with a shovel and MaxTraxx. Not worth it.
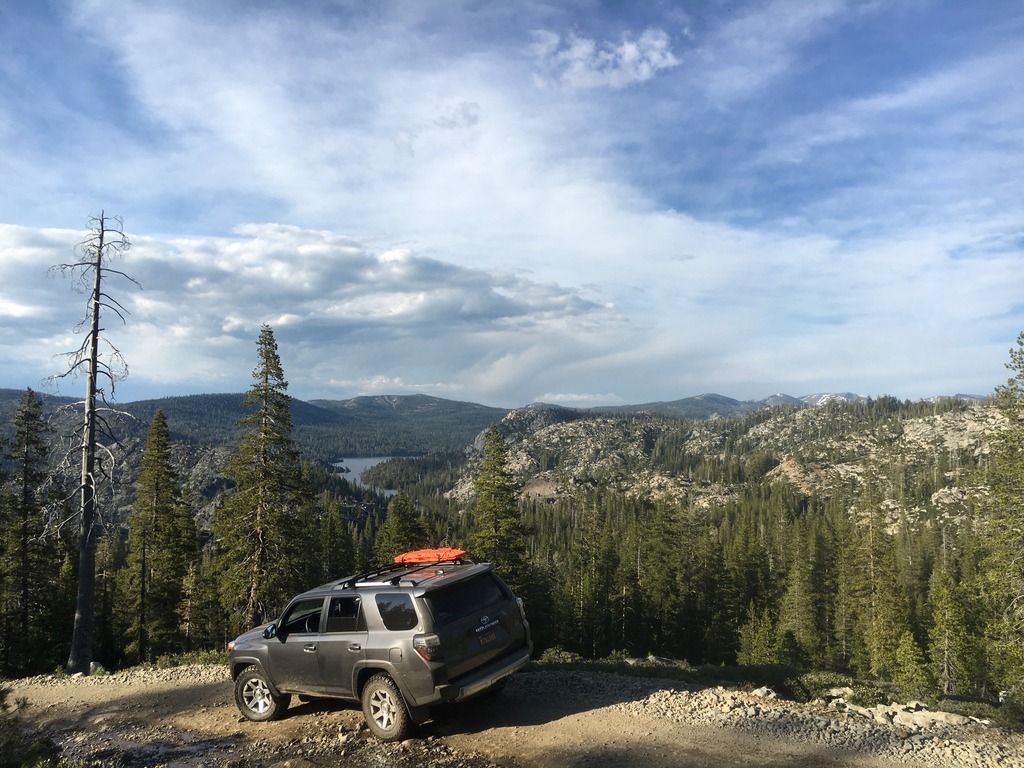
Doubled back to the fork and made it to Fordyce Summit overlooking Fordyce Lake. I didn't venture too far down there because I knew I wanted to stay on the Rattlesnake Creek side of the mountain. Saved for a future trip.

I thought for fun I would try to head up the east side of Signal Peak just to see how the trail was, knowing I would likely need to turn around. Sure enough, snow. Saved for a future trip.
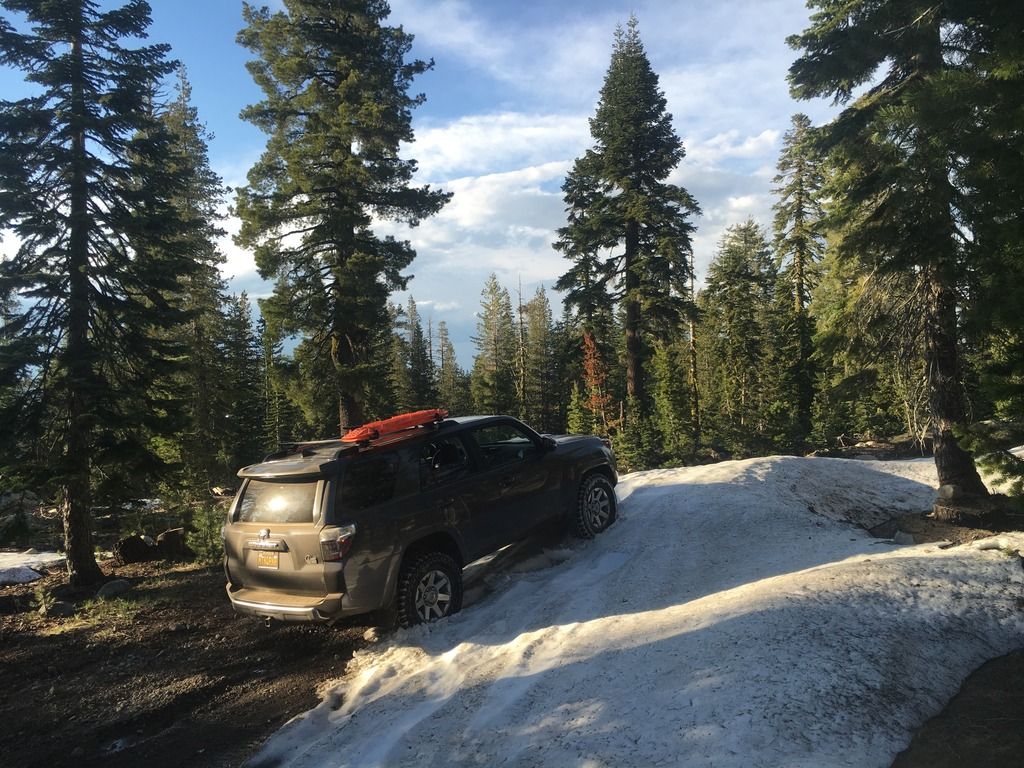
One last exploring attempt to head towards Sterling Lake was stopped by...? You guessed it, snow. I made it through a few smaller drifts, and likely could have humped it over this one, but with it being uphill on the way out, I figured the likelihood of getting stuck was too high. Saved for a future trip.
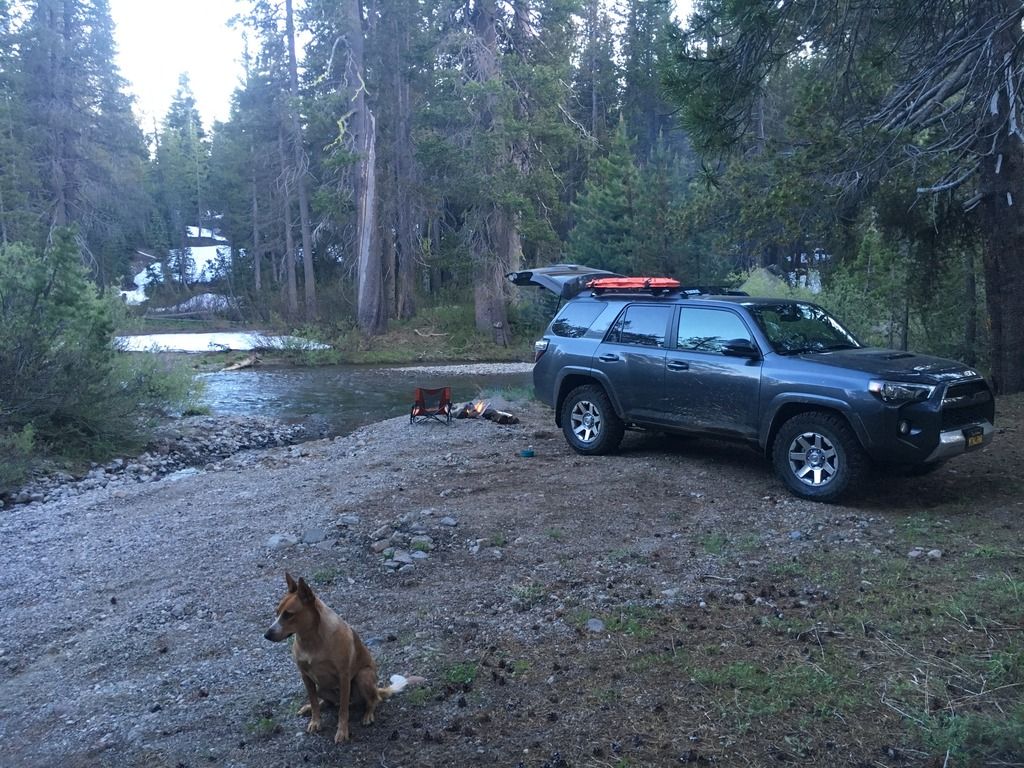
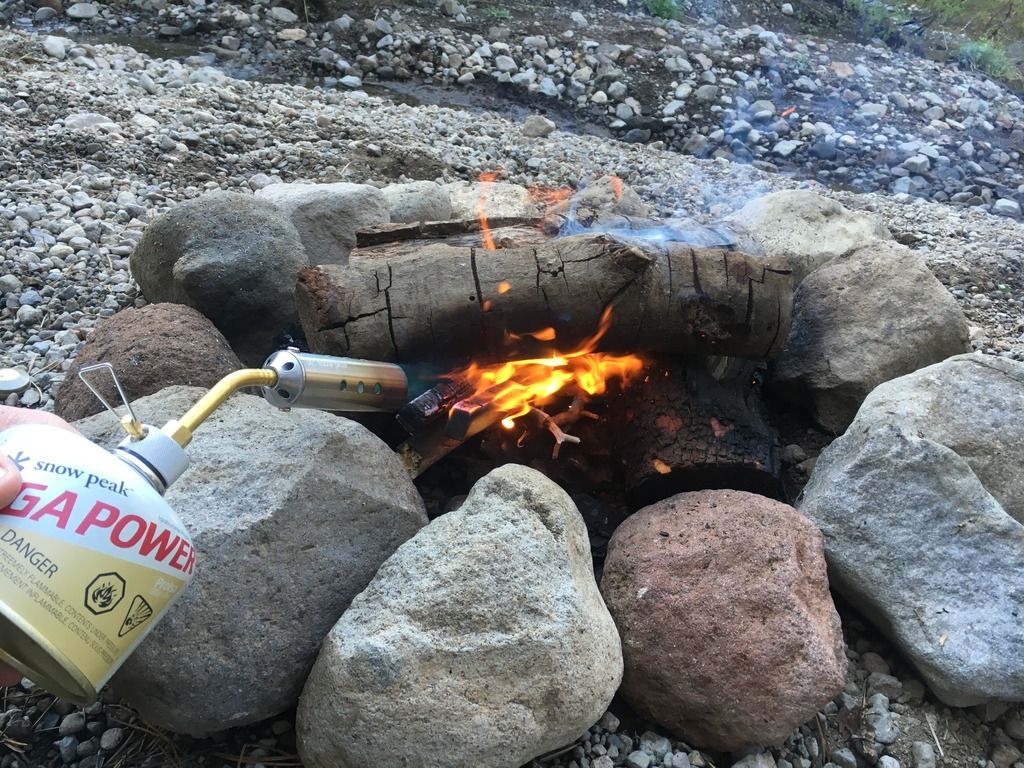
So we came back to a campsite I had spotted earlier in the day on Rattlesnake Creek, tucked away from the road. Set up a small fire and made camp.
I got a chance to try out my Snow Peak torch, which took some practice, but I eventually figured it out and it worked great. Plus who doesn't like things that blow fire!
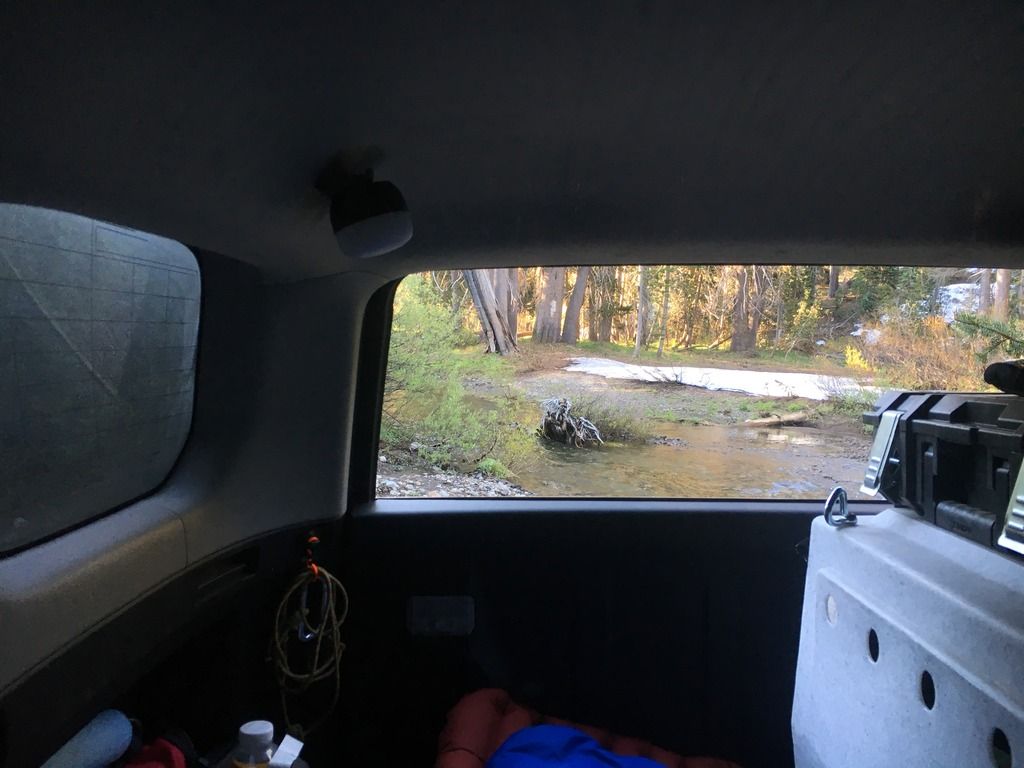
Morning in Hotel 4Runner
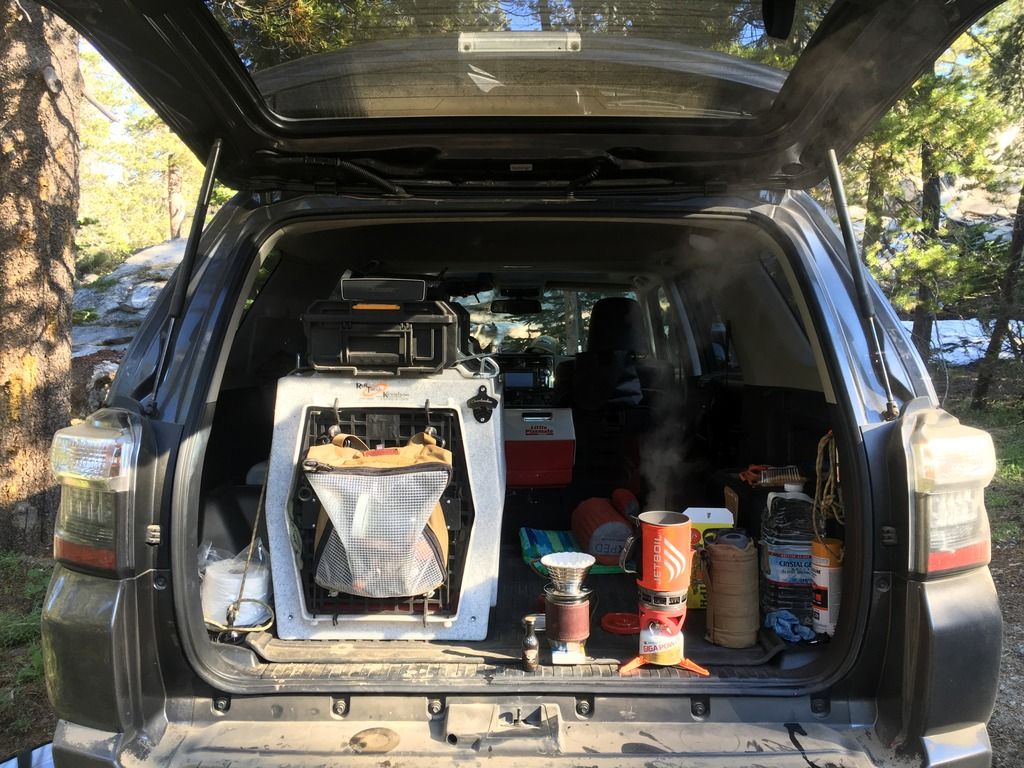
Coffee and dutch apple pie for breakfast
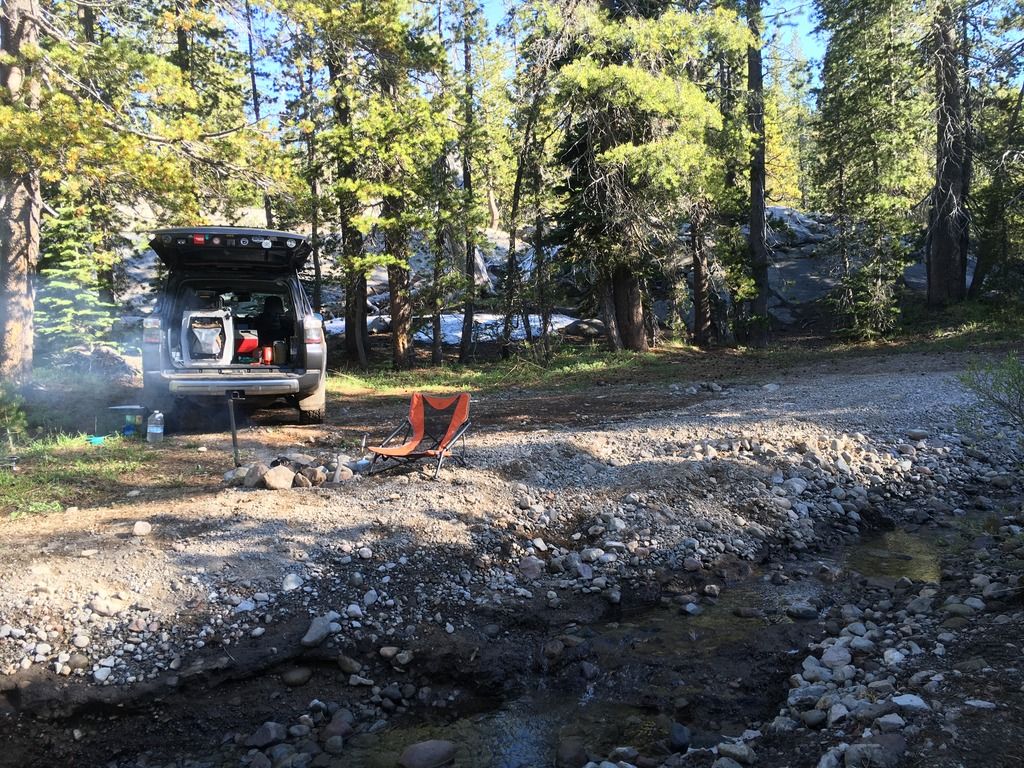
After breakfast we packed up and headed out of camp, and down the mountain to 4x4 Labs just in time for my appointment. Overall a great area, a fun overnight destination, and a place I look forward to exploring more!
More to come...
On my way up before getting to the Rattlesnake Road area I stopped in another area I have always been curious about to do some preliminary scouting for open/locked gates. That's the fun part about having a loose schedule, you get to say, "hm what's over there" and then just go. Found a few potential places to explore later on.
I reached Rattlesnake Road, aired down to 20 in the front, 18 in the rear. When I am packed light, I have found this to be a good forest service road pressure combo.
I was immediately met with a cascading creek (that I would later camp by up the mountain).
I initially wanted to reach Lola Montez Lake, but snow would stop me, and I would come back to this point, venturing towards Sterling Lake and Fordyce Lake.
I found a locked gate, and a great campground just beyond it on the creek. Saved for a future trip.
Continued up the road towards Lola Montez Lake, and met some snow which ultimately forced me to turn around. Being solo, there wasn't a point to push getting stuck, even with a shovel and MaxTraxx. Not worth it.
Doubled back to the fork and made it to Fordyce Summit overlooking Fordyce Lake. I didn't venture too far down there because I knew I wanted to stay on the Rattlesnake Creek side of the mountain. Saved for a future trip.
I thought for fun I would try to head up the east side of Signal Peak just to see how the trail was, knowing I would likely need to turn around. Sure enough, snow. Saved for a future trip.
One last exploring attempt to head towards Sterling Lake was stopped by...? You guessed it, snow. I made it through a few smaller drifts, and likely could have humped it over this one, but with it being uphill on the way out, I figured the likelihood of getting stuck was too high. Saved for a future trip.
So we came back to a campsite I had spotted earlier in the day on Rattlesnake Creek, tucked away from the road. Set up a small fire and made camp.
I got a chance to try out my Snow Peak torch, which took some practice, but I eventually figured it out and it worked great. Plus who doesn't like things that blow fire!
Morning in Hotel 4Runner
Coffee and dutch apple pie for breakfast
After breakfast we packed up and headed out of camp, and down the mountain to 4x4 Labs just in time for my appointment. Overall a great area, a fun overnight destination, and a place I look forward to exploring more!
More to come...
ohanacrusader
Adventurer
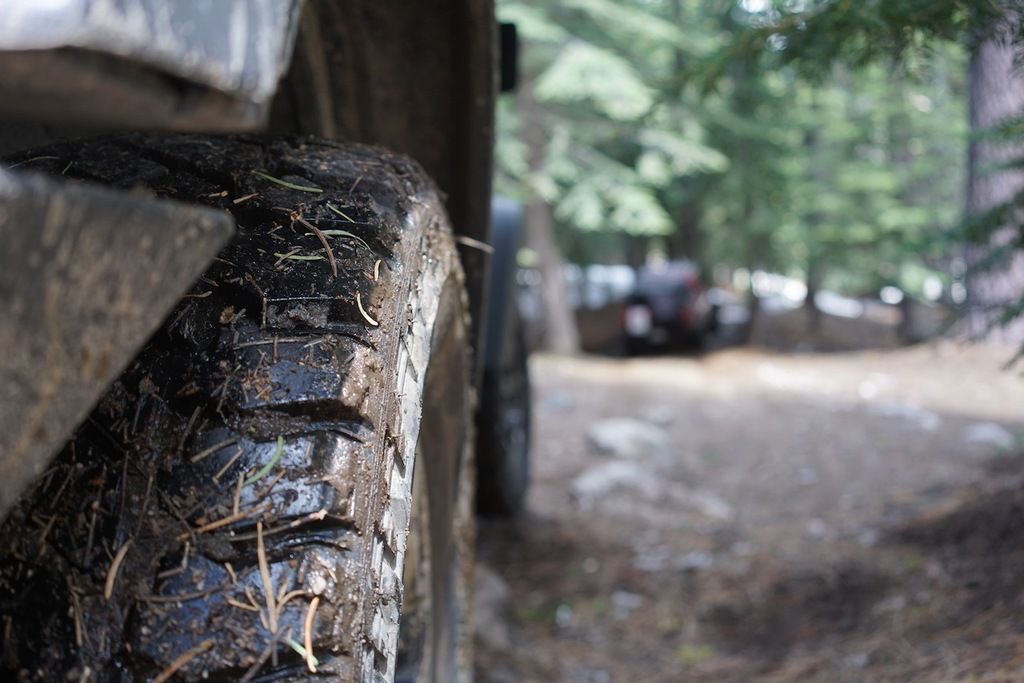
Any rubbing with that size tire?
ohanacrusader
Adventurer
OK thanks for the quick response, I am looking for my next set of shoes and feel that the Duratracs aren't working out with my 4runner. Quick questions do you get any harmonic noise coming through your steering wheel from the cooper's?
MTN4RNR
Adventurer
OK thanks for the quick response, I am looking for my next set of shoes and feel that the Duratracs aren't working out with my 4runner. Quick questions do you get any harmonic noise coming through your steering wheel from the cooper's?
No problem! The Coopers (for their tread pattern) are pretty quiet. And the steering wheel doesn't shimmy or "hum" with them on there, maybe a bit more under hard cornering, but any tire in the ST Maxx's class will do that. Overall I have been very happy with them, and any noise is something that I don't notice or care about anymore as their off-road performance outweighs that aspect for me.
MTN4RNR
Adventurer
4x4 Labs Slider Installation
After heading out on multiple trips, some with others some without, I decided that sliders would be a valuable addition to my 4Runner. Many people think that they're just for rock crawling rigs, but I started counting the number of times that something "could happen" to the rocker panels. On forest service roads, sometimes you come across small downed trees that you need to drive over, or large logs that you have to squeeeeze through, right at rocker height. Even driving in snow, if you drop into a rut and hit some ice, that can be enough to ********** your door. That being said, I do plan on traveling though rocky areas as well, where these are invaluable. So I decided that sliders were a good way to protect my investment. And as many of you know/joke about, I am still on stock suspension, making my ground clearance even lower so these will give plenty of side protection.
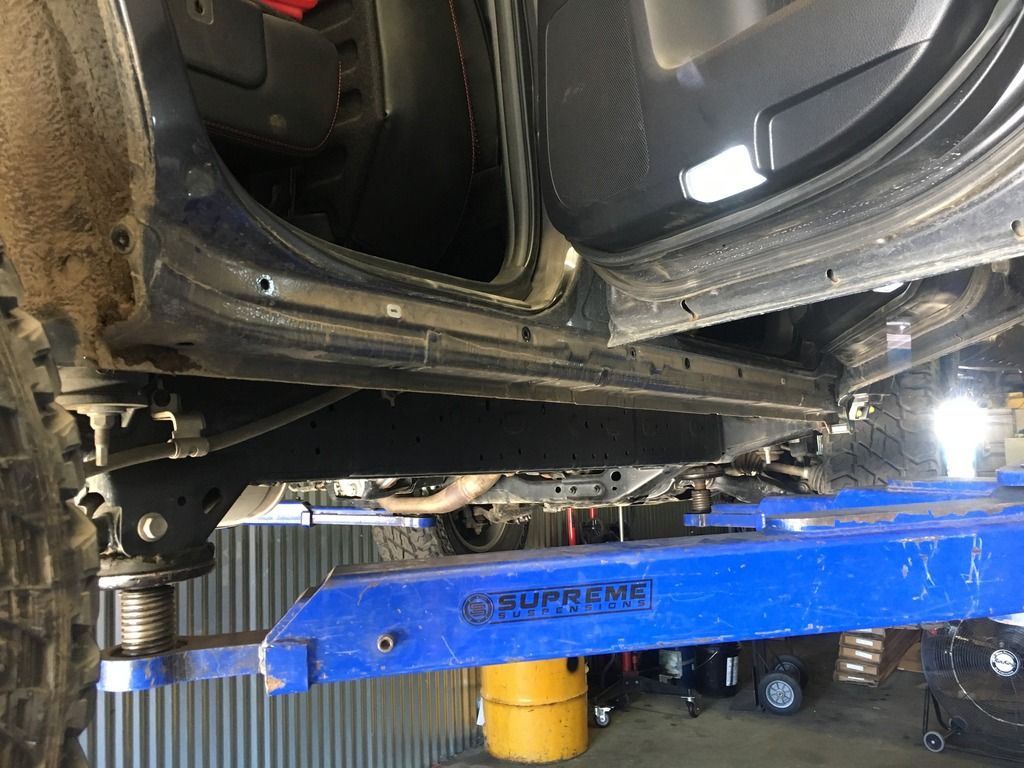
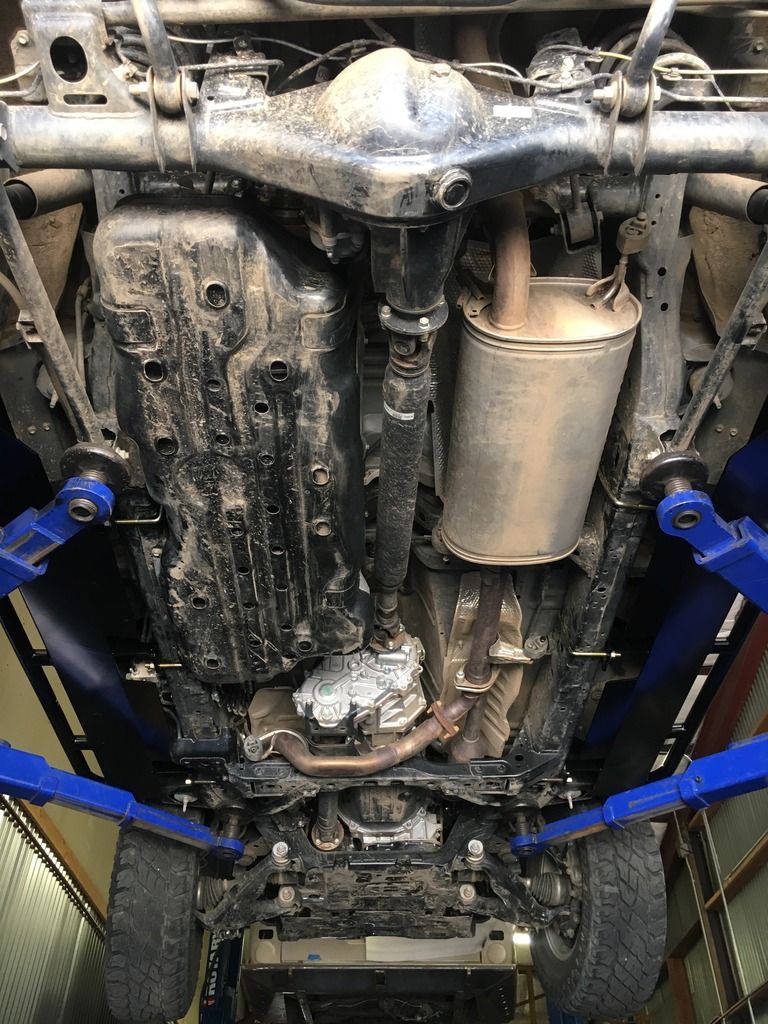
Now, why I went with 4x4 Labs. Simply, from what I could research/see, these are the best fitting sliders available for the 4Runner. Luke designed them to allow for the sliders so come about 3/4" from the bottom of the doors, giving the most amount of clearance on the sides as possible. And they offer the most protection overall, especially underneath. They have a fully plated, "boat-style" skid plate that rolls from the rocker panel to the frame rail. This makes the whole area from the door edge to the frame a big skid plate, protecting the rockers/undercarriage, and allowing larger objects to slide along not just the outside of the slider (on the rails), but underneath as well. A big winner for this design for all of you KDSS guys is it protects all of the KDSS components which, if you haven't looked, sits on the outside of the driver's frame rail. Right in the path of potential objects to impact the main KDSS valve body, as well as the hydraulic lines that run on the outside of the rails front to rear. So covering it all up is a great benefit. On one of my last trips of cruising forest roads, I came home and to my surprise, there was a 1" diameter branch that was wedged between the frame and a KDSS line. YIKES! They are connected to the frame with 3 U-bolts per side, and are extremely sturdy. Now, lets see some photos...
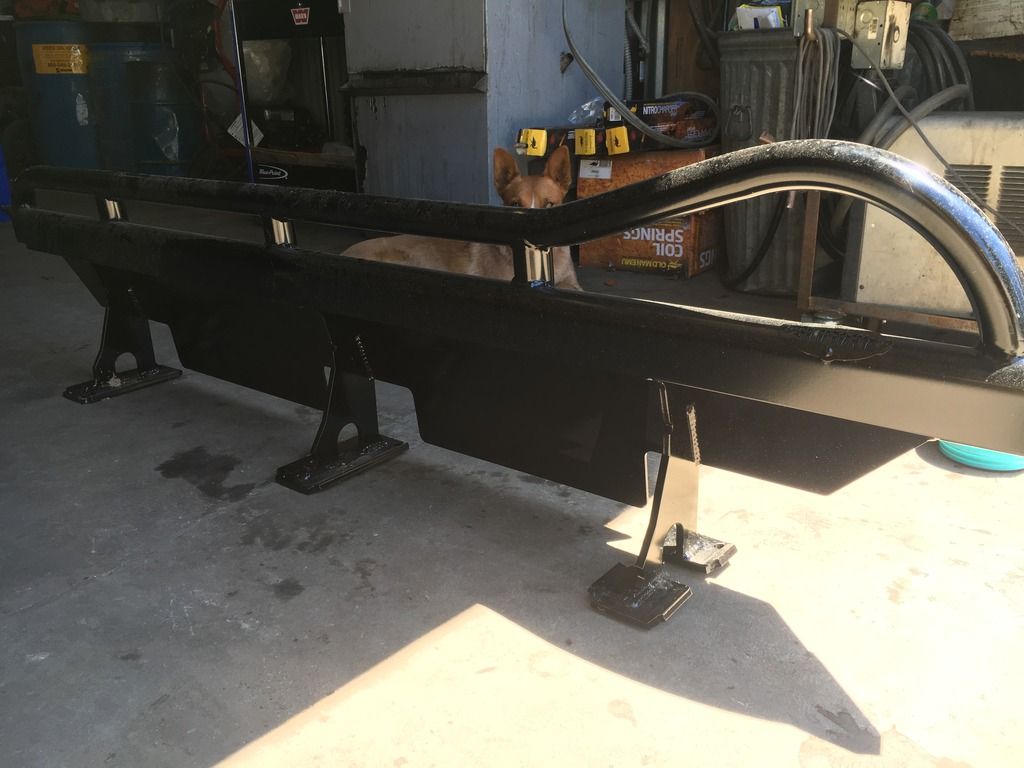
The sliders:
Bottom
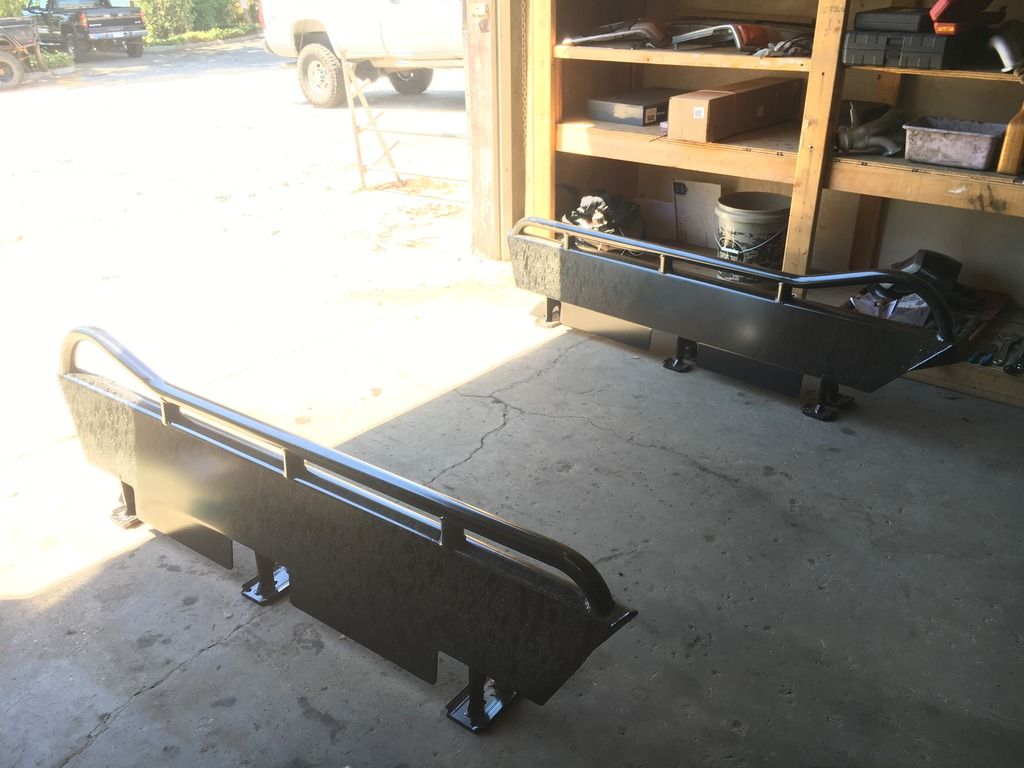
Top (apologies for the shotty photo)
Installation:
Fresh off the trail, into the bay
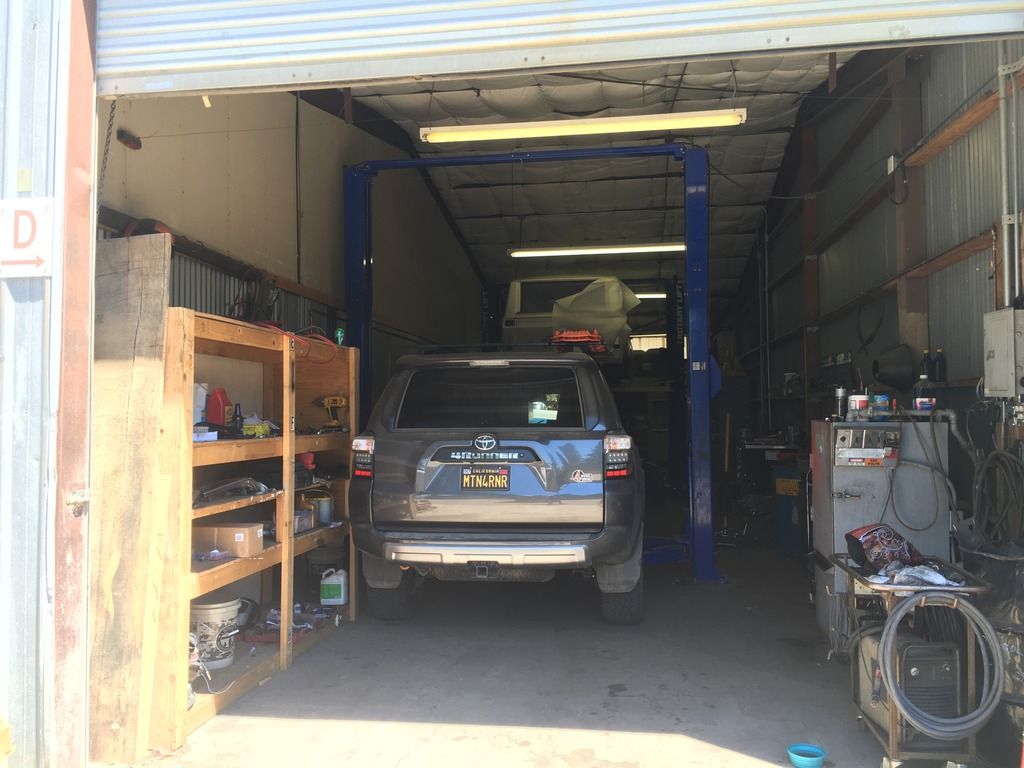
And up it goes!
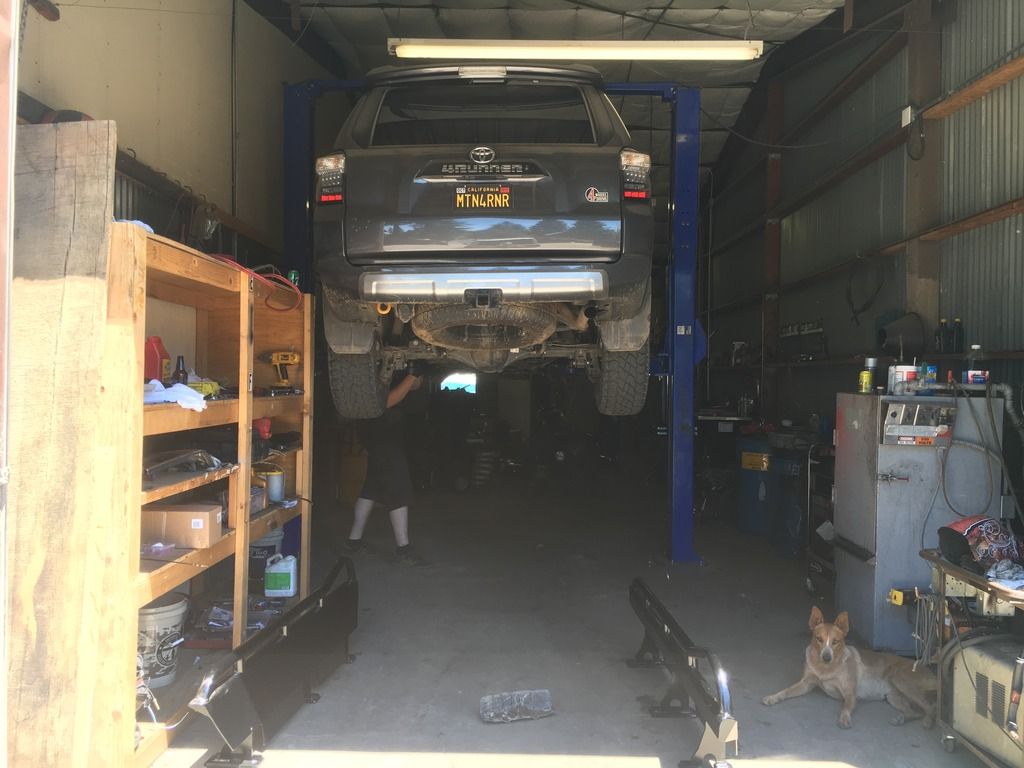
OEM rocker panels come off
Front mud flap and end cap removed (I was nice and sprayed the fresh mud off of the underside before coming to the shop)
Driver's side KDSS skids come off
Before (see what I mean about exposure)
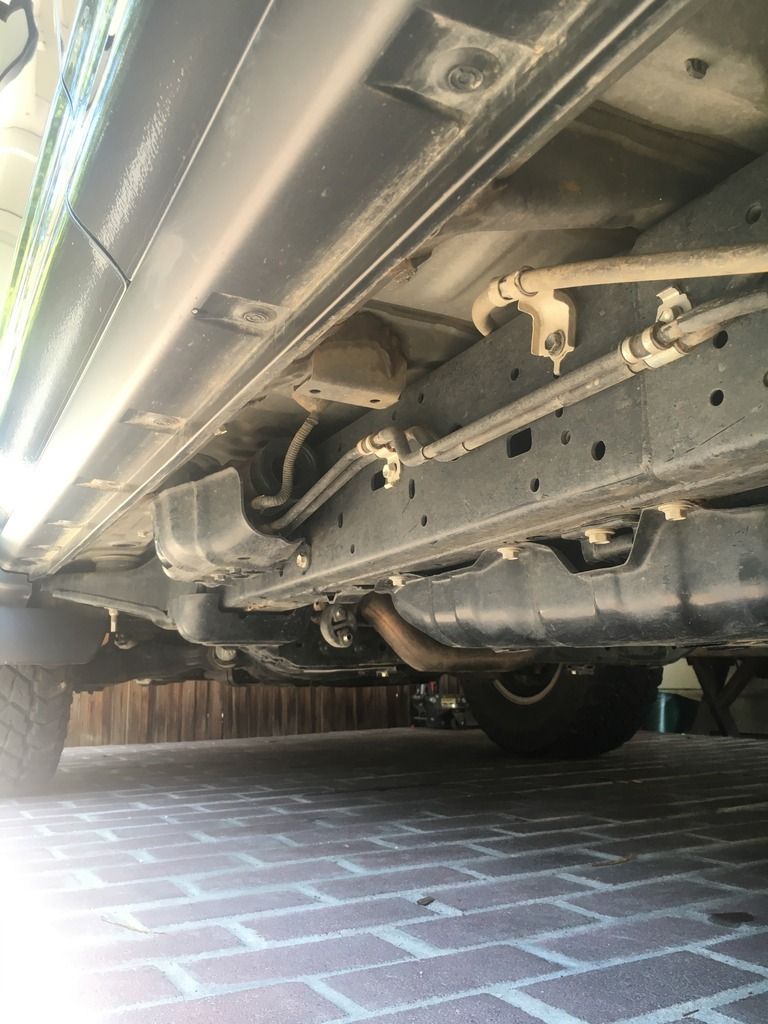
After
Not pictured, the fuel tank skid was loosened, as well as the emergency brake line and the KDSS hydraulic line towards the rear of the frame rail. That is about it for prep work.
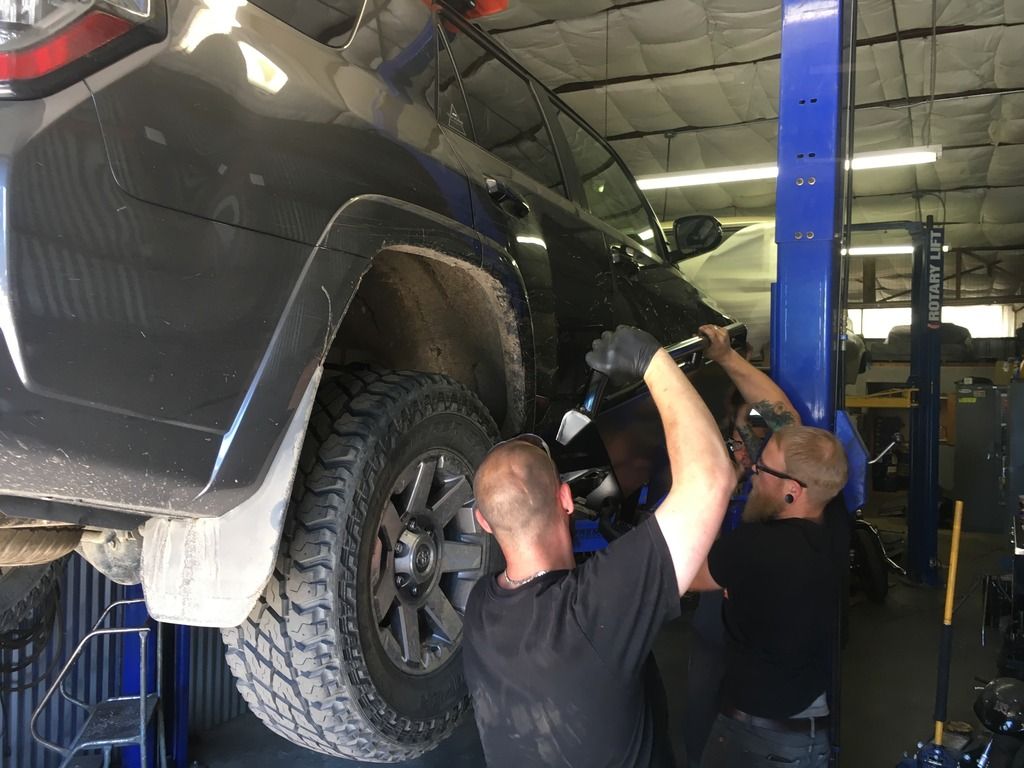
Lifting them up was two guys lifting and one guy with the hardware. It was at this point I was happy I wasn't installing them in my driveway, but it was killing me that I could only watch...
They lifted vertically, and rotated them into position under the rocker panel.
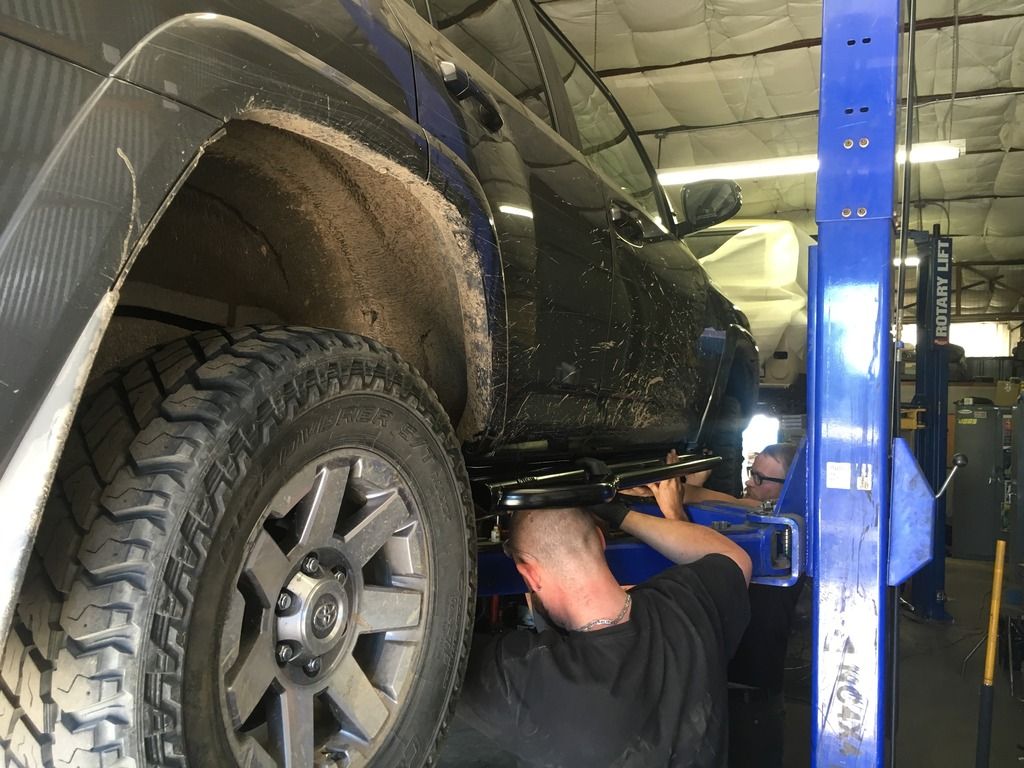
Hardware installed, and the passenger side was on.
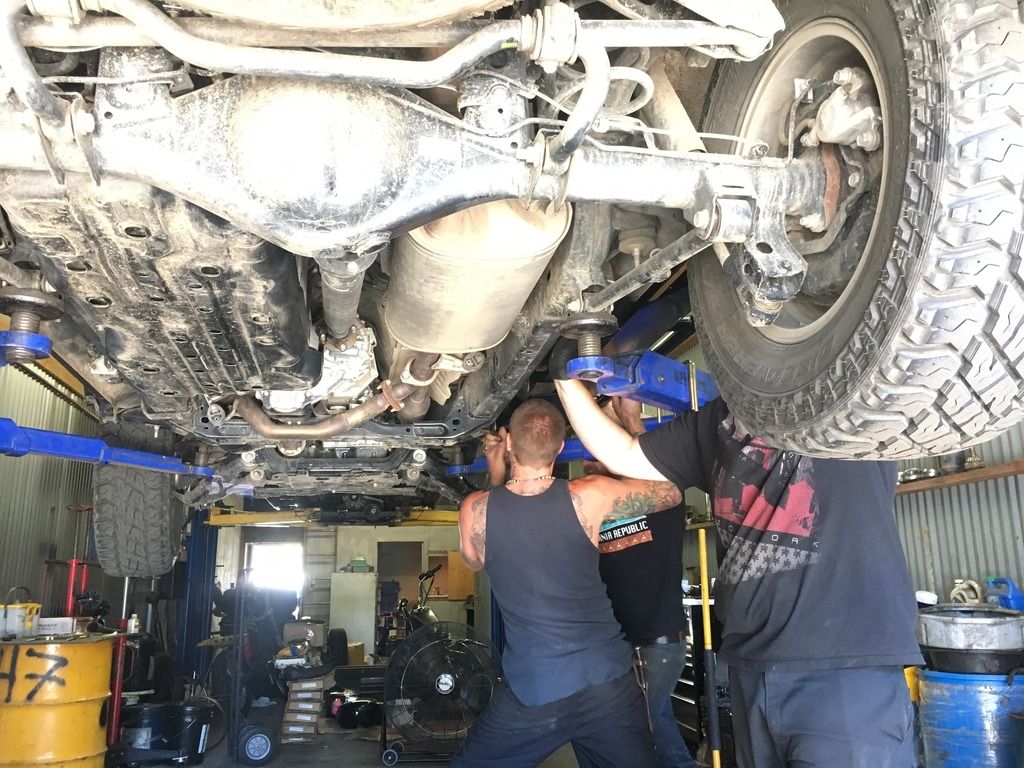
Now, the driver's side (for any with KDSS and sliders, you understand) is much more difficult because you need to move the sliders in and around the hydraulic lines that extend from the rear to the front of the frame rails. The sliders are KDSS specific and have cut outs on the frame attachment points that go around the lines. Because of the size of the shop, and the 'crowded...ness' of the driver's side, I didn't get any photos of this part of the installation, but it was the same method. They started vertically, brought it under by rotating and lining it up the hydraulic lines with the cut outs and brought it to the frame. To get the bolt in next to the fuel tank, it's cramped. This is why the skid needs to be loosened because the 1/4" of movement you get with loosening it is enough to get the bolt in. They evened the sliders front to back and tightened everything up. The last bit to the driver's side is grinding the KDSS crossover plate to fit with the sliders.
[NOTE: I will be taking some more 'after' photos of the driver's side, including the KDSS line routing, and the KDSS crossover that has been modified. Look for updated photos tonight]
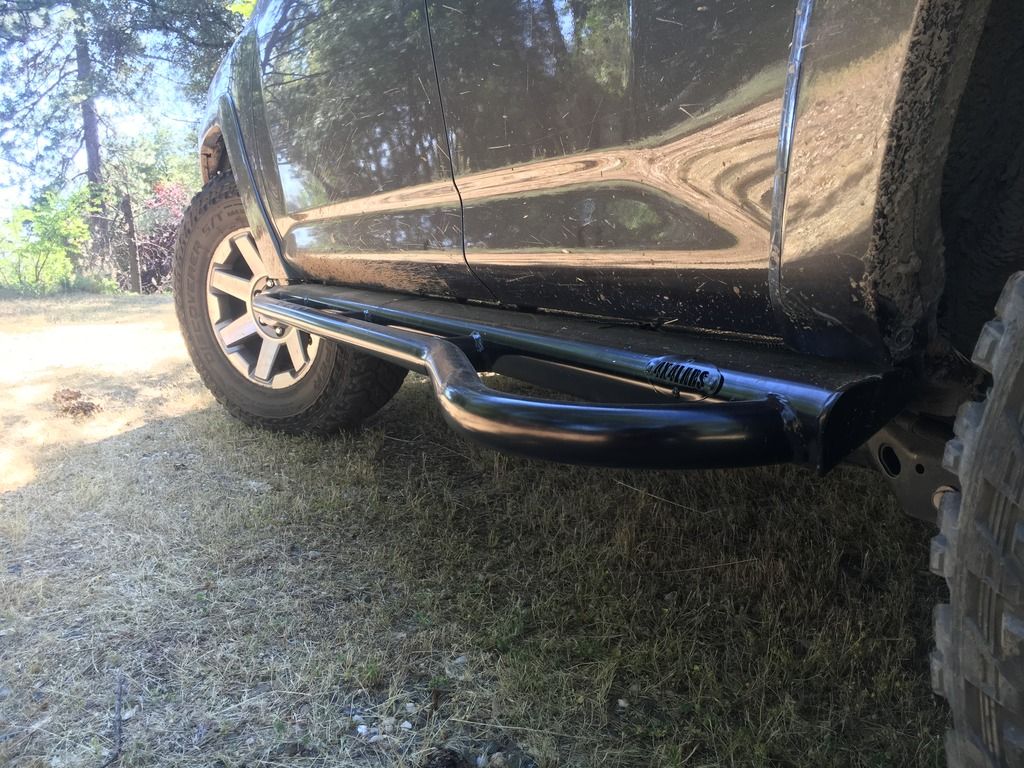
Here are the results:
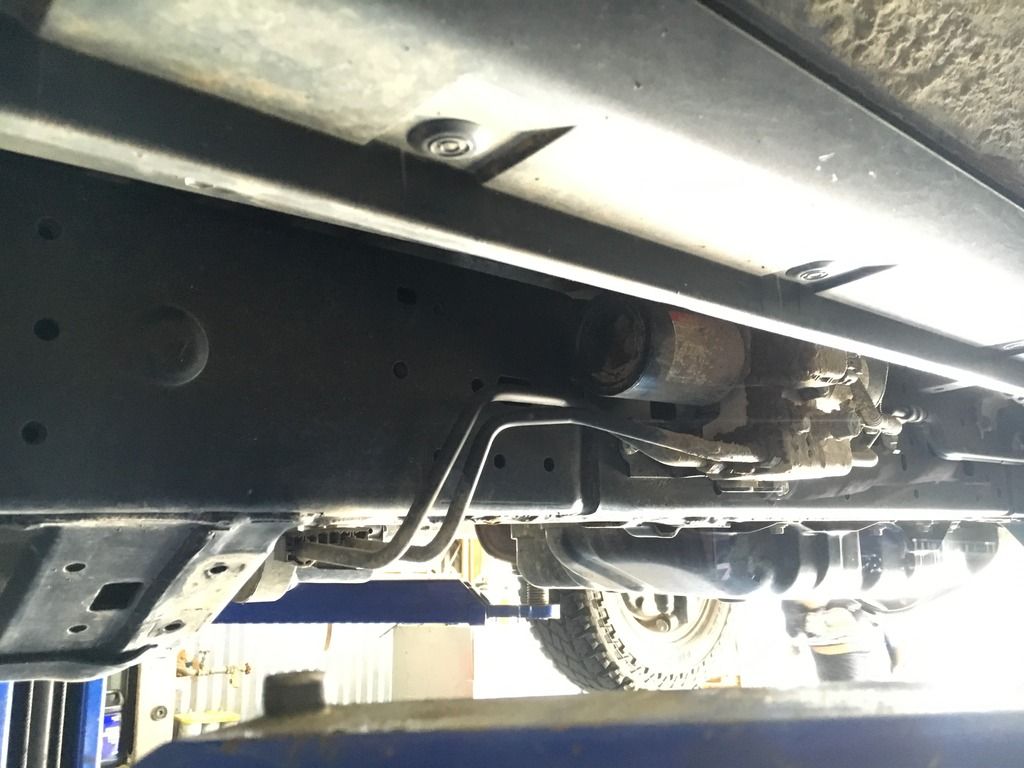
Underneath you can see the skids coming back to the frame and the mounting hardware
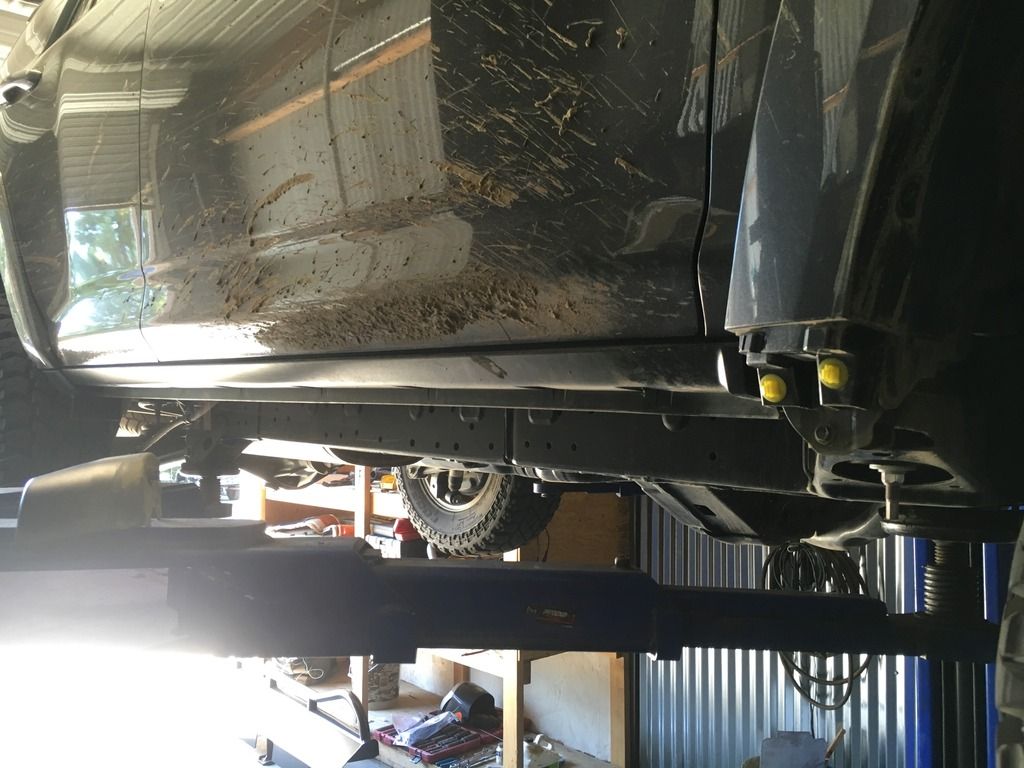
Fresh out of the shop. They are the cleanest thing on the truck right now, but not for long
And a few close ups
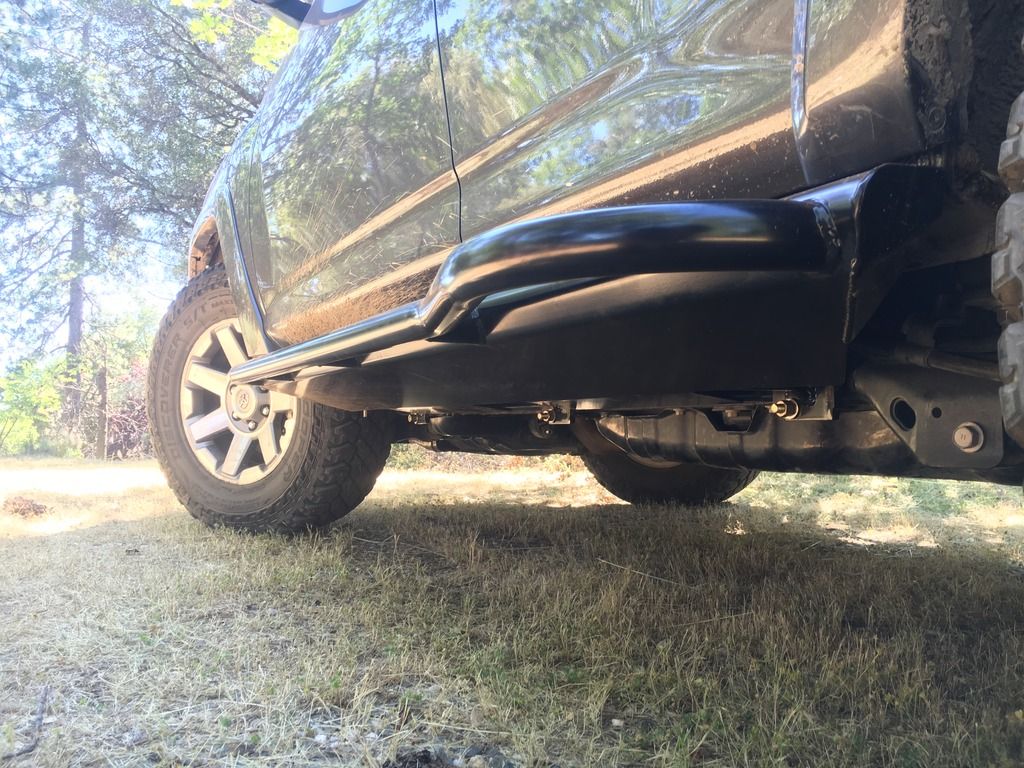
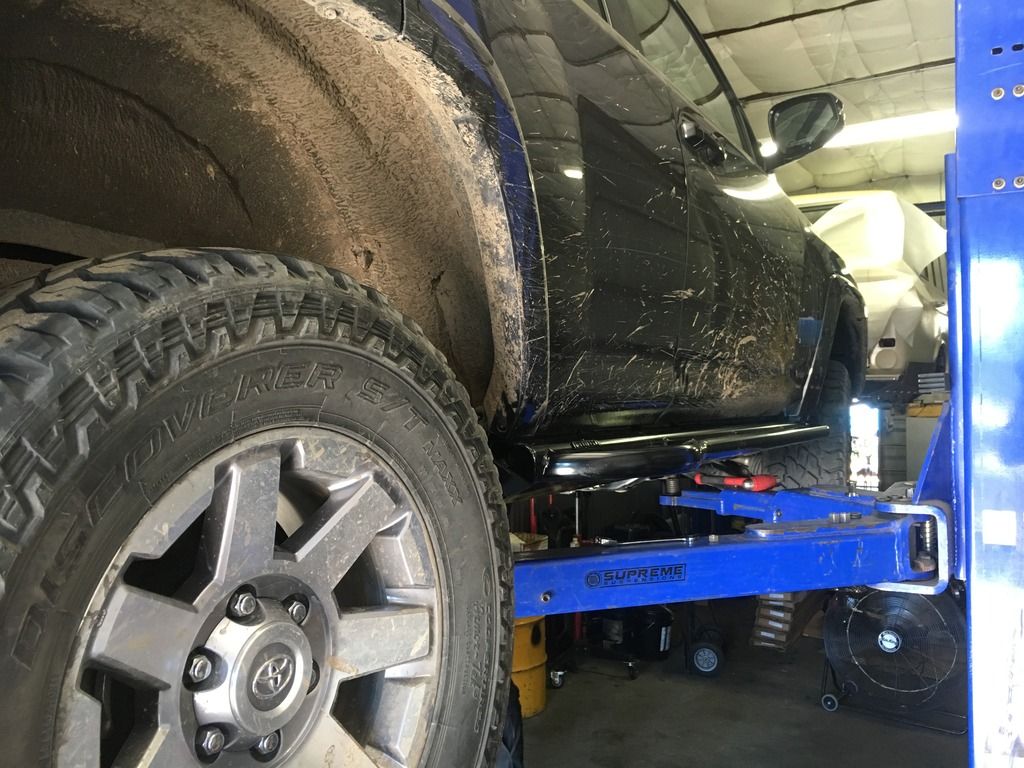
I figured out that the mud flaps will reinstall without any interference with the addition of a zip-tie. I will run with them for now, but if they're ripped off later on, I won't be sad. You can see how close the sliders fit to the body
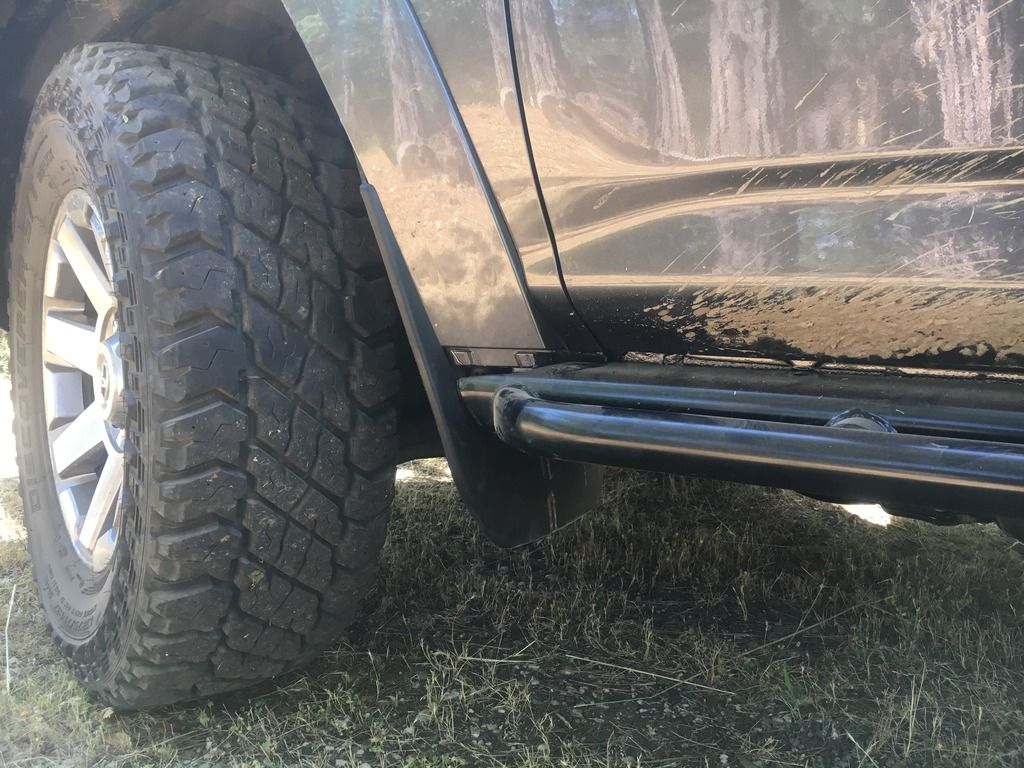
As soon as they get dirty, hopefully this weekend, I promise I will update this post with them being used. And that's about it. They are built like a tank, and they will likely outlive the 4R. Let me know if you have any questions about the sliders, I would be happy to help.
Now, why I went with 4x4 Labs. Simply, from what I could research/see, these are the best fitting sliders available for the 4Runner. Luke designed them to allow for the sliders so come about 3/4" from the bottom of the doors, giving the most amount of clearance on the sides as possible. And they offer the most protection overall, especially underneath. They have a fully plated, "boat-style" skid plate that rolls from the rocker panel to the frame rail. This makes the whole area from the door edge to the frame a big skid plate, protecting the rockers/undercarriage, and allowing larger objects to slide along not just the outside of the slider (on the rails), but underneath as well. A big winner for this design for all of you KDSS guys is it protects all of the KDSS components which, if you haven't looked, sits on the outside of the driver's frame rail. Right in the path of potential objects to impact the main KDSS valve body, as well as the hydraulic lines that run on the outside of the rails front to rear. So covering it all up is a great benefit. On one of my last trips of cruising forest roads, I came home and to my surprise, there was a 1" diameter branch that was wedged between the frame and a KDSS line. YIKES! They are connected to the frame with 3 U-bolts per side, and are extremely sturdy. Now, lets see some photos...
The sliders:
Bottom
Top (apologies for the shotty photo)
Installation:
Fresh off the trail, into the bay
And up it goes!
OEM rocker panels come off
Front mud flap and end cap removed (I was nice and sprayed the fresh mud off of the underside before coming to the shop)
Driver's side KDSS skids come off
Before (see what I mean about exposure)
After
Not pictured, the fuel tank skid was loosened, as well as the emergency brake line and the KDSS hydraulic line towards the rear of the frame rail. That is about it for prep work.
Lifting them up was two guys lifting and one guy with the hardware. It was at this point I was happy I wasn't installing them in my driveway, but it was killing me that I could only watch...
They lifted vertically, and rotated them into position under the rocker panel.
Hardware installed, and the passenger side was on.
Now, the driver's side (for any with KDSS and sliders, you understand) is much more difficult because you need to move the sliders in and around the hydraulic lines that extend from the rear to the front of the frame rails. The sliders are KDSS specific and have cut outs on the frame attachment points that go around the lines. Because of the size of the shop, and the 'crowded...ness' of the driver's side, I didn't get any photos of this part of the installation, but it was the same method. They started vertically, brought it under by rotating and lining it up the hydraulic lines with the cut outs and brought it to the frame. To get the bolt in next to the fuel tank, it's cramped. This is why the skid needs to be loosened because the 1/4" of movement you get with loosening it is enough to get the bolt in. They evened the sliders front to back and tightened everything up. The last bit to the driver's side is grinding the KDSS crossover plate to fit with the sliders.
[NOTE: I will be taking some more 'after' photos of the driver's side, including the KDSS line routing, and the KDSS crossover that has been modified. Look for updated photos tonight]
Here are the results:
Underneath you can see the skids coming back to the frame and the mounting hardware
Fresh out of the shop. They are the cleanest thing on the truck right now, but not for long
And a few close ups
I figured out that the mud flaps will reinstall without any interference with the addition of a zip-tie. I will run with them for now, but if they're ripped off later on, I won't be sad. You can see how close the sliders fit to the body
As soon as they get dirty, hopefully this weekend, I promise I will update this post with them being used. And that's about it. They are built like a tank, and they will likely outlive the 4R. Let me know if you have any questions about the sliders, I would be happy to help.
ohanacrusader
Adventurer
Thanks I will be picking up a set here shortly maybe closer to fall, killer sliders looks real good.
MTN4RNR
Adventurer
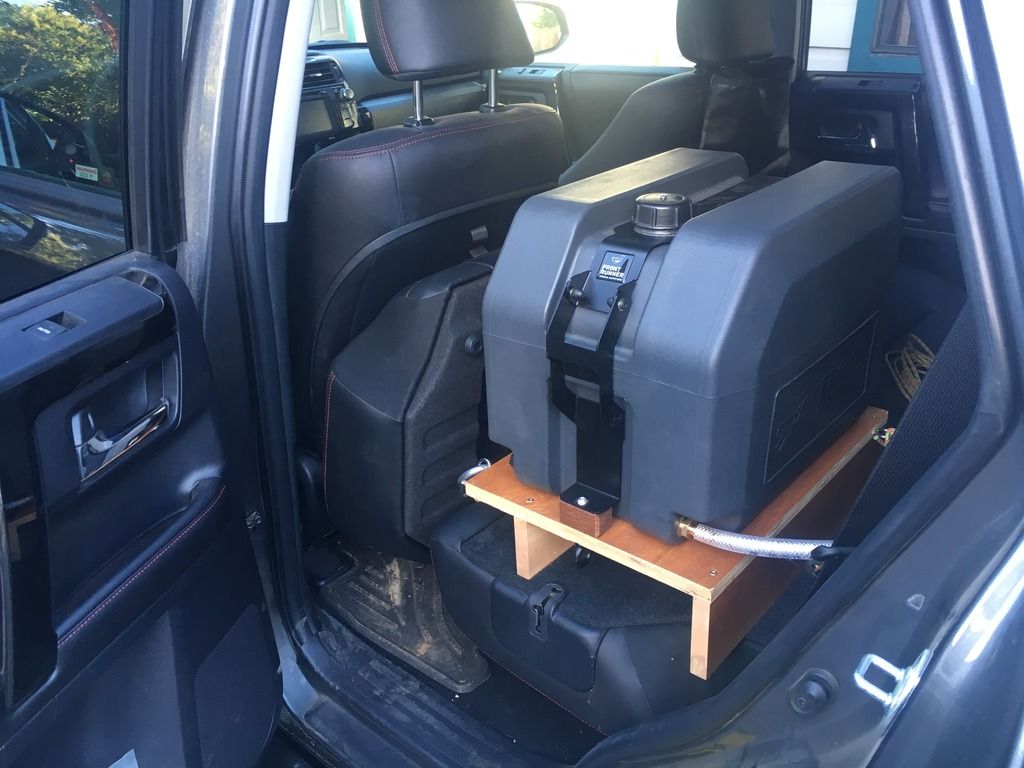
Front Runner 45L water tank
I installed a Front Runner 45L water tank this weekend. Going on longer trips, sometimes in areas where water is less available lead me to wanting to have a reservoir system in the truck. Usually it's me, my girlfriend and dog on these camping trips. If we were less restrictive on water, I figure we use 1-2 gallons per person, per day including cooking/washing dishes. So this tank should last us 3-6 days depending on our usage. Plus dog uses roughly 0.5 gal/day. It might be a bit overkill, but I would rather have more water than not, and I hated buying the gallon containers from the store every time we headed out. I should get many years of use out of this tank, and it can also be mounted to a roof rack later down the road and used for a makeshift shower. I made a wood platform to sit on the driver's rear seat back which is almost always down anyways to let air flow through the dog's crate in the back. I attached it with paracord and an ez-cam to lock it in. This is a first attempt, and like everything else I do, I will see how it works and improve from there. The hose will be routed to the rear with a valve/quick release at the tank and a valve at the end. This way I can remove it without pulling the whole hose out. Anyways, here it is in all of it's glory. I will be adding the valves and quick release today, so I will update photos later on.
Now I need a second one on the passenger side, solely for beer storage...
Now I need a second one on the passenger side, solely for beer storage...