Newbie AWD Astro Overlander Build

nobodyhome

Adventurer
Hey Everyone, CJ "Nobodyhome" here with an overview of my newbie build. I've been an avid explorer of the unknown in various Jeeps for many years now. Although I do still have my trusty YJ, I've found it harder and harder to enjoy the Jeep because of the noise, stiff ride and (dare I say) occasional broken stuff. I was surfing the web one day when I saw an Ad for Colorado Camper Vans where someone had tricked out... an ASTRO?! ******!
After some research, I decided mehh what the hell and bought a 2WD for $500. I was hooked by the idea. Comfortable, Quiet, room to stretch out.. and AIR CONDITIONING?!! WHERE DO I SIGN! Later on, I came across an old, used up AWD Astro and just had to give the poor thing a home. Thanks to many people on this site and a few others, I have combined their ideas with my own to plan the perfect Overland Van for my needs.
I've been receiving many great encouraging messages from our fellow Astro/ Safari fans to post up so here goes. I'm playing catch-up a little, so I will post in order of my little projects.

PLEASE NOTE... I am a complete RUBE with big ideas and very little experience with Astros, overlanding, auto mechanics and posting to forums. I was on a different website/ forum and although there were some great folks there, overall I just didn't have the best experience... but so far everyone here has been great so thank you for that.

That being said... here goes nothing from nobody...


The journey started in Boise, ID. I had just drove there in my 99 2WD Safari, code name "Creeper Van". I ran across an '03 Astro AWD in primo shape.. except for the 216K miles, but what the heck. It's mostly loaded, with rear A/C and Heat and a tow package.

Thus started the long journey home. 860 miles through snow, black ice and hundreds of miles of... dirt... LOTS of dirt. Needless to say the van performed perfectly.:smiley_drive:

Here's the first stop on the journey... my favorite coffee joint in Jordan Valley, OR. Beautiful place...

attachment.php


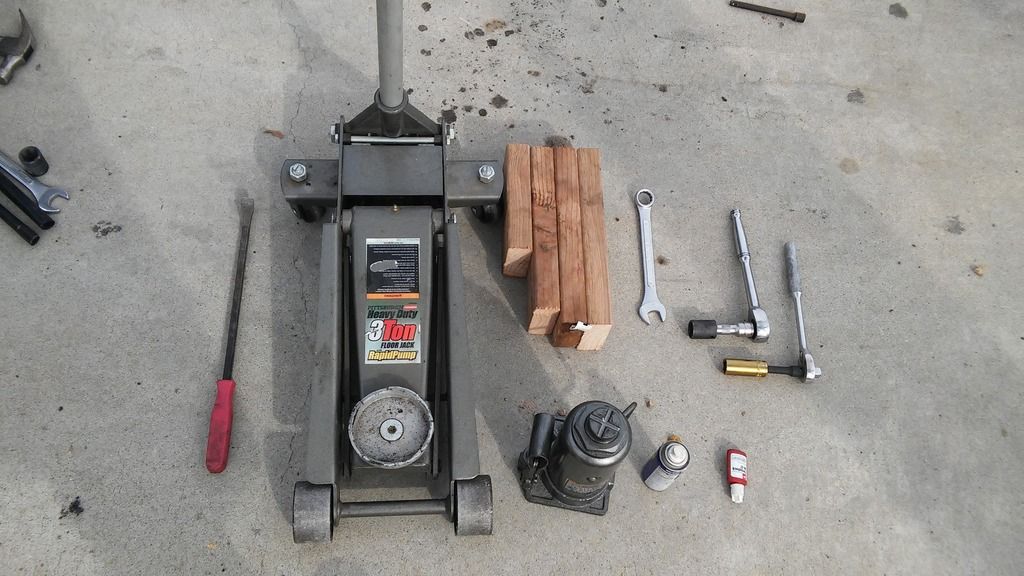
After a few minor tweaks and repairs, it was past time for tires!
Those pitiful 215/70/16's had their last road trip and were on the way to the recycle yard.

Here are the Hankook 235/75/16's going on pre-lift:

attachment.php


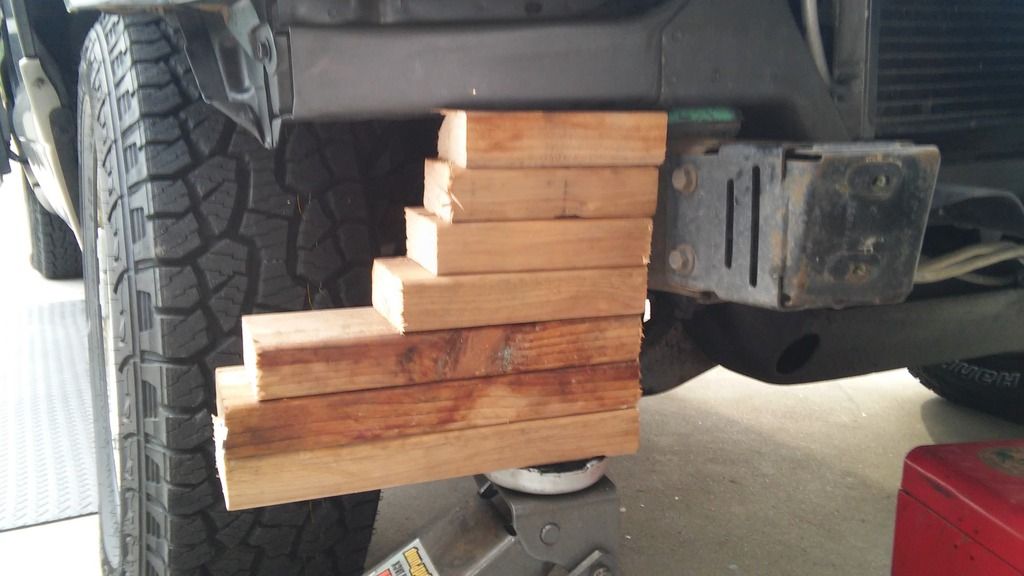
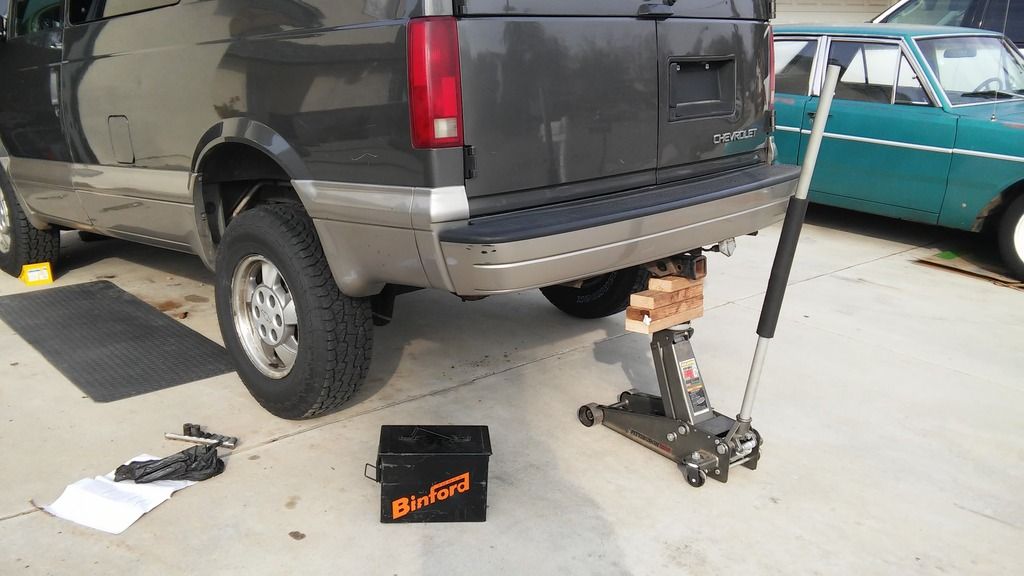
They rub like hell on everything, so off goes the front bumper cover. As many others have said, it rubbed on the bracket and bottom part of the cover. As I was preparing to remove/ trim the cover, I noticed how easy everything was to pull off which gave me hope for the future. Then as I was looking at the sub bumper support, I said.. mehh, good enough. So it got a good sanding and a few coats of flat black:

attachment.php

Sometime after, I hit it with bed liner. The texture was little rougher than I would prefer, but small price to pay for the durability.


Gerald over at our favorite overlandvans.com is sending out their 2" body lift kit which will be installed in the next few weeks.
Stay tuned for more. Always open to words of advice and encouragement!
 
Last edited:

nobodyhome

Adventurer
Update 1: Basic Tune Up

Ok, apparently size does matter. Noticed about a 3mpg drop since putting on the new tires. It's had misfires randomly since I got it so time for a tune up! Cap, rotor, plugs, wires, MAF sensor and O2 sensor just installed. I thought I got it but well heck, here comes the code again... P0305 Cyl5 misfire... again. Ughhh back to the drawing board.
Well, when its all said and done, hopefully all this will get us out of the 13mpg club, crappy club to be in.
 

nobodyhome

Adventurer
Update 2: 2" Lift Install

I slammed in the lift this past Saturday and like everyone said.. easy peasy. Took about 4 hours start to finish, only needed some very basic tools and some wood blocks (pictured below). The OLV kit itself is very basic, some spacers, bolts and some really good adjustable shackles. The instructions are very clear but would benefit from more pictures for a dummy like me. Gerald at overlandvans.com was a big help on my initial journey, so I made sure to order from him. However in all fairness there are other solutions out there, like http://journeysoffroad.com/awd-astro...lift-kits.html ,as well as suggestions to replicate the OLV kit for cheaper.

Here are all the tools I need (not pictured: skilsaw for shroud and tons o wood blocks!)

0116161040_zpsibaby3pe.jpg


Front end install:
(Note- I understand the wood blocks are hokey as hell, but sometimes ya just have to improvise, adapt and overcome. I did screw the blocks together so they wouldn't collapse)

0116160846_zpshziggzet.jpg


Rear end install:

0116160939_zpszkd6ljux.jpg


Regarding tires;

I have noticed 2 things about my lift and tire size selection...

- 235/75/16 was... a wee bit ambitious. They rubbed everywhere, all day long on stock ride height. If I had it to do over, I'd go 225/75/16 and give up the ~1/2 gain in clearance, in favor for better wheel well clearance when flexing over obstacles.

Here is the stock rear wheel well clearance on 235/75/16:

0116160939_zpszkd6ljux.jpg


- The 2 " lift and removing the front bumper cover (running with only the sub-bumper support now) took car of most of the rub, but I still have a problem. When I accelerate, the back of the van dumps down to the point where the wheel well rubs on the tires. I believe this is mostly due to tired springs and shocks. To avoid the pain of installing new springs, and to have adjustable ride height in back for towing, I have decided to go with an air bag assist. Specifically, Firestone Ride-Rite #2361 (fits 99-05) which should work fine for you as well since our vans are almost twins. Ordered it here for $320, + free shipping/ no tax: http://www.truckspring.com/products/...ear__2361.aspx
 

Herbie

Rendezvous Conspirator
I'm guessing you've got 3.42 gears? (Look for RPO code GU6 on your door sticker) Yeah, almost 30" tires with that gearing definitely hurts MPG a bit. Shouldn't be quite that low, though, so follow through with the tuneup.

Subscribed and waiting for more!
 

Mwilliamshs

Explorer
...Cap, rotor, plugs, wires, MAF sensor and O2 sensor just installed. I thought I got it but well heck, here comes the code again... P0305 Cyl5...

Great start! Sounds like you've gone a long way toward solving the misfire. Astros are notorious for going through fuel filters, if you haven't already, replace that. Not sure what year the 4.3 went to individual coils (1 per cylinder) but if that's your situation I'd try swapping coils and see if the misfire stays on cyl 5 or if it follows that coil. If you can't solve the problem with ignition parts and a fuel filter I'd test fuel pressure and if that's in spec then swap injectors. Misfire means the crank position sensor is seeing a slow down at the time when the power stroke of cyl 5 should be speeding it up...could also be that sensor but highly unlikely it'd fail in so narrow a range.
 

nobodyhome

Adventurer
AWESOME! Thanks Herbie! I was going to ask how to verify gearing, thanks for taking the guess work out.


MWilliamshs- Thank you too sir; we did change out the injection manifold (looks like a 6 legged spider) and that had no effect. I didn't think of the fuel filter, which I should just do regardless. We've taken fuel and air out of the equation, which pretty much leaves ignition. I brought it to My Mechanic for further diagnosis so I'll drop that bug in their ears. There appears to be only 1 coil feeding all 6 angry squirrels.
UPDATE: I did also just find out that the cap and rotor were not replaced because they looked newer, so we are changing them out regardless. My money is on a bad cap, however we shall see...

WOW great feedback everyone, very appreciated. More updates in the works (guess I can't post links quite yet).
 
Last edited:

ihatemybike

Explorer
216k miles, might be time to drop in a new distributor.

Also, these van seem to prefer the ACDelco cap/rotors. Most think this is due to the factory spec ones being better able to handle the heat of the van's engine compartment.
 
Last edited:

nobodyhome

Adventurer
Copy that Aaron, thank you. We just swapped the cap/ rotor... made no difference... ughhh.
:confused: :violent-smiley-031:

Open to other ideas. We're going to put it on the Engine Scope next, hopefully we can get some insight. Pleeeease don't be a busted spring!

BTW- I just figured out 2 cool things... First of all, I just found out that that van I saw on CCV that planted the idea in my head like Inception, was Snowgeek135's. Thanks for the inspiration Ryan.
Second, when I searched for AWD Astro videos on YouTube, one of the first videos that caught my attention... was Grumpy at the Quarry.
Small world.
 
Last edited:

nobodyhome

Adventurer
EPISODE 2: LIFTED SPIRITS:

I slammed in the lift this past Saturday and like everyone said.. easy peasy. Took about 4 hours start to finish, only needed some very basic tools and some wood blocks (pictured below). The OLV kit itself is very basic, some spacers, bolts and some really good adjustable shackles. The instructions are very clear but would benefit from more pictures for a dummy like me. Gerald at overlandvans.com was a big help on my initial journey, so I made sure to order from him. However in all fairness there are other solutions out there, like over at journeysoffroad, as well as suggestions to replicate the OLV kit for cheaper.

Here are all the tools I need (not pictured: skilsaw for shroud and tons o wood blocks!)


Front end install:
(Note- I understand the wood blocks are hokey as hell, but sometimes ya just have to improvise, adapt and overcome. I did screw the blocks together so they wouldn't collapse)


Rear end install:

Thank goodnees for those high quality Binford tools! :ylsmoke:


Regarding tires;

I have noticed 2 things about my lift and tire size selection...

- 235/75/16 was... a wee bit ambitious. They rubbed everywhere, all day long on stock ride height. If I had it to do over, I'd go 225/75/16 and give up the minimal gain in ground clearance, in favor for better wheel well clearance when flexing over obstacles.

Here is the rear wheel well clearance on 235/75/16:

I may just end up taking a saw and plasma torch to part of this, but I'll wait and see.


- The 2 " lift and removing the front bumper cover (running with only the sub-bumper support now) took car of most of the rub, but I still have a problem. When I accelerate, the back of the van dumps down to the point where the wheel well rubs on the tires. I believe this is mostly due to tired springs and shocks. To avoid the pain of installing new springs, and to have adjustable ride height in back for towing, I have decided to go with an air bag assist. Specifically, Firestone Ride-Rite #2361 (fits 99-05). Ordered it at the sdtrucksprings website for $320, + free shipping (excellent customer support!)

Here is the van with the lift installed:
0116161052.jpg

While I was under there, I noticed the subframe, various arms and the pumpkin were all just plain dirty. Caked with god knows how many years worth of road grime, oil, mud, blood n beer. So I scraped it off (sorry about the driveway hunny) and what I found wasn't much better... Rust, chipped paint, odd colored...what ever those doo-hickeys were. So about a can and a half of flat black spray paint later, we are looking gooood! I'll post pics when (if) we get the misfire problem licked.

#praying to the blessed mother of auto repair
 
Last edited:

nobodyhome

Adventurer
MISFIRE SAGA

This is fun... STILL have the van throwing a P0305 like it was on sale.2 weeks and $1K later we are no closer to a solution. Anybody have a phantom misfire like this on their 4.3??? Here is what we've done so far:

REPLACED:
NGK plugs/ wires
Injection spyder replaced
new (not acdelco) cap/ rotor
MAF sensor

- Oscilloscoped motor; EVERYTHING appears normal
- ECM STILL throws P0305 with hundreds of misfires in a few minutes.
- code resets at idle and while driving
- distributor confirmed ok with no significant rotational or vertical play

My Mechanic is about to replace the ECM... any other ideas?

THANKS EVERYONE!
 

nobodyhome

Adventurer
Sorry forgot to mention, yes both tests done and passed, around 170 on all cylinders with no surprises in bleed down time/ pressure.
 

nobodyhome

Adventurer
All new spider, so all 6 are new. Fuel pressure good. Replacing fuel filter this weekend.

This is why we are all scratching our heads haha, thanks for sticking with me!
 

Forum statistics

Threads
185,906
Messages
2,879,422
Members
225,497
Latest member
WonaWarrior
Top