Blender, My LX450/FZJ80 + FJ45esk + GM + Land Rover crazy concoction

Metcalf

Expedition Leader
Very nice work, I enjoy watching and learning.

Thank you very much.

Just a reminder to everyone out there. I am just a guy doing this in his garage with mostly lower end tools. It is my opinion that anyone can do this kind of stuff and I encourage it....
 

brushogger

Explorer
Thank you very much.

Just a reminder to everyone out there. I am just a guy doing this in his garage with mostly lower end tools and amazing talent. It is my opinion that anyone can do this kind of stuff and I encourage it....


Fixed it for you!
 

Metcalf

Expedition Leader
Fixed it for you!

Thank you...but again....just a guy in his garage with mostly harbor freight tools ( thought I have a growing collection).
I hope that I inspire some people to try and build things. I really wish people would try building more things. My fear is that a lot of good ideas are not utilized because people are afraid to try. If if you fail you still learn how NOT to do something....learning is learning.
 

Metcalf

Expedition Leader
Just a little bit last night...


The rear floor panel is just about done I think. I am still on the fence about trying to press in some 'bumps' that would match the OEM front floor section. I might have to try a test piece tonight and see how it will effect the panel. I would hate to ruin that panel at this point.


It didn't show up as well as I would like, but since the chassis is still level, I made a few simple plumb bobs to help align the rear of the panel. I just used a little string ( inner strands out of some parachute cord ), a few washers, and some tape. I didn't care about the end of the string, just the reference plane it created, so a washer was just fine. Since the panel is trapped between the body mount sandwich, I was able to tap it around with a hammer until I was happy with the position....front to back, square to the chassis, and side to side also.

Since I had that small incident where one door opening is slightly longer than the other ( from TOYOTA, not me messing with things ), I used the new reference plane at the rear of the belt line tube to set the position. The panel 'tapers' slightly in depth from one side to the other a bit because of all this. It is hidden enough not to be annoying.


Trick for the day. When you need to hold a panel upright on a table to do a little hammer and dolly work, a few small sections of angle iron make a great right angle clamp. These where handy leftovers from holding the square parts of the cage together. I will be keeping a hand full in my clamp drawer....
 

Metcalf

Expedition Leader
Back to making brackets for a little bit....


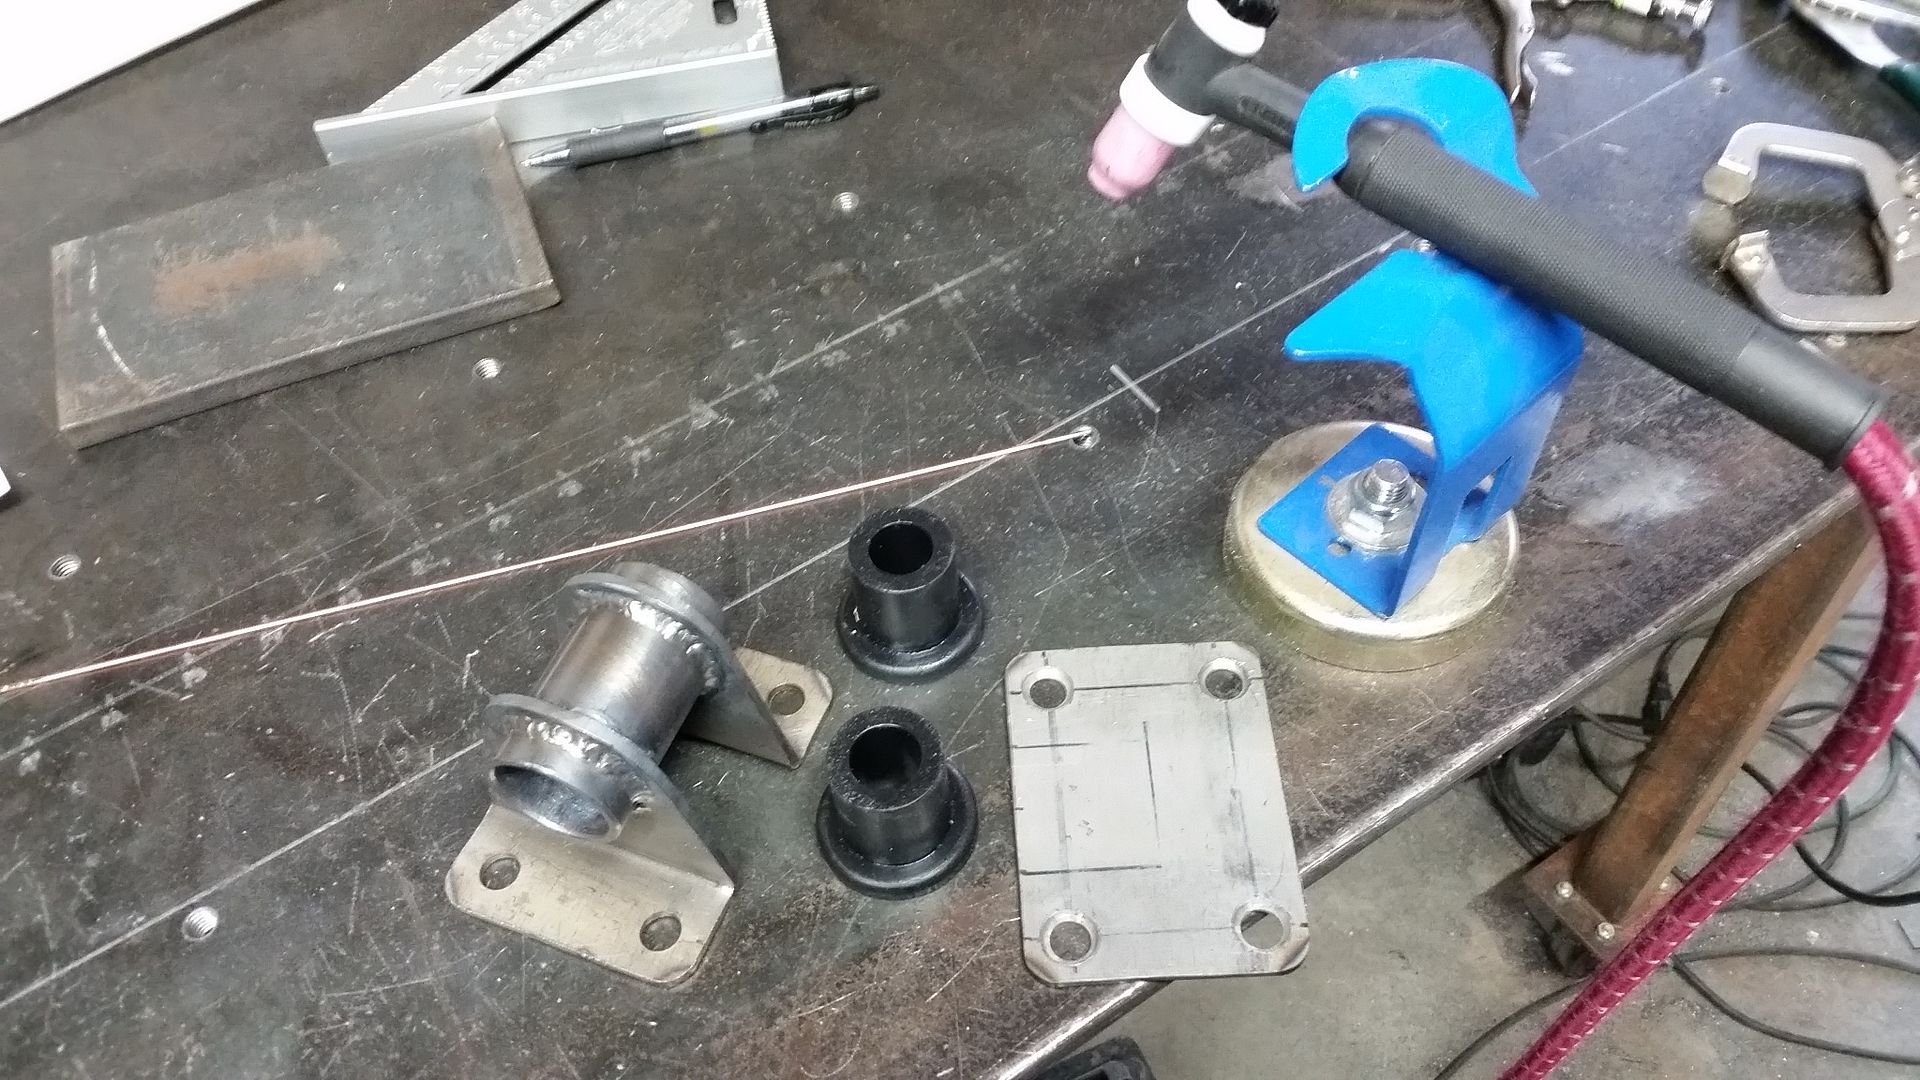
This is the C-pillar 5th body mount that will be on the upright that splits the rear window. It is the same size bushing as all the other body mounts so they can share a common part. This body mount will tie into some of the structure that will be the base of the bed ( which also will be providing the fuel tank mount, mount for the bed tube work, battery mount, light mounts, some bumper structure, and a few things I am probably forgetting ).

Yes, The floor plate is going to have counter sunk hardware. I need the extra clearance in the corner for the modular hard top rear window storage plan. I will likely be welding those fasteners into the bracket to help prevent pull through.

I was even a good boy and tig'd them. I need the practice. I should probably box them in in tonight, but I don't need to do that right now. I just needed to design the floor plate really, but I wanted to weld up the actual mount when bolted to the actual plate so I know it would all fit together.


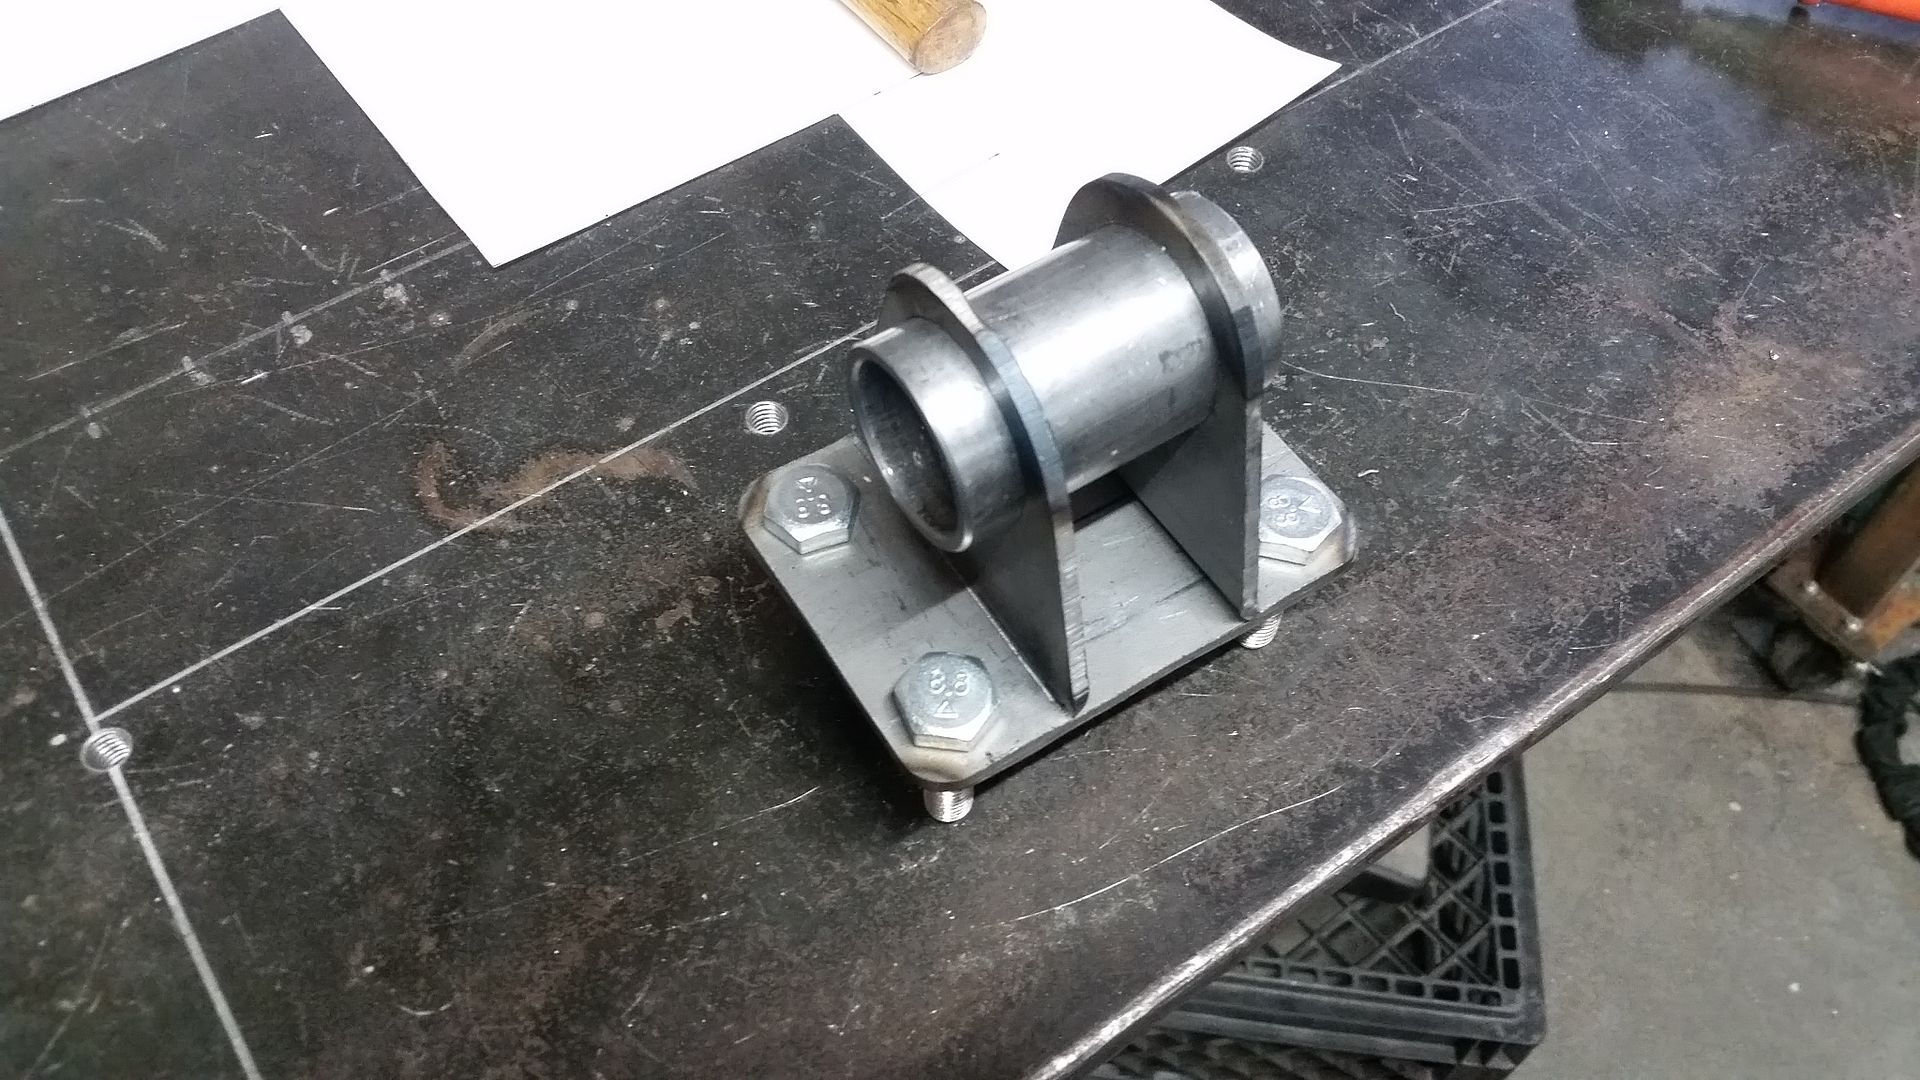
Mocking it up all bracket to bracket lets me make sure it will fit after I pull it apart.


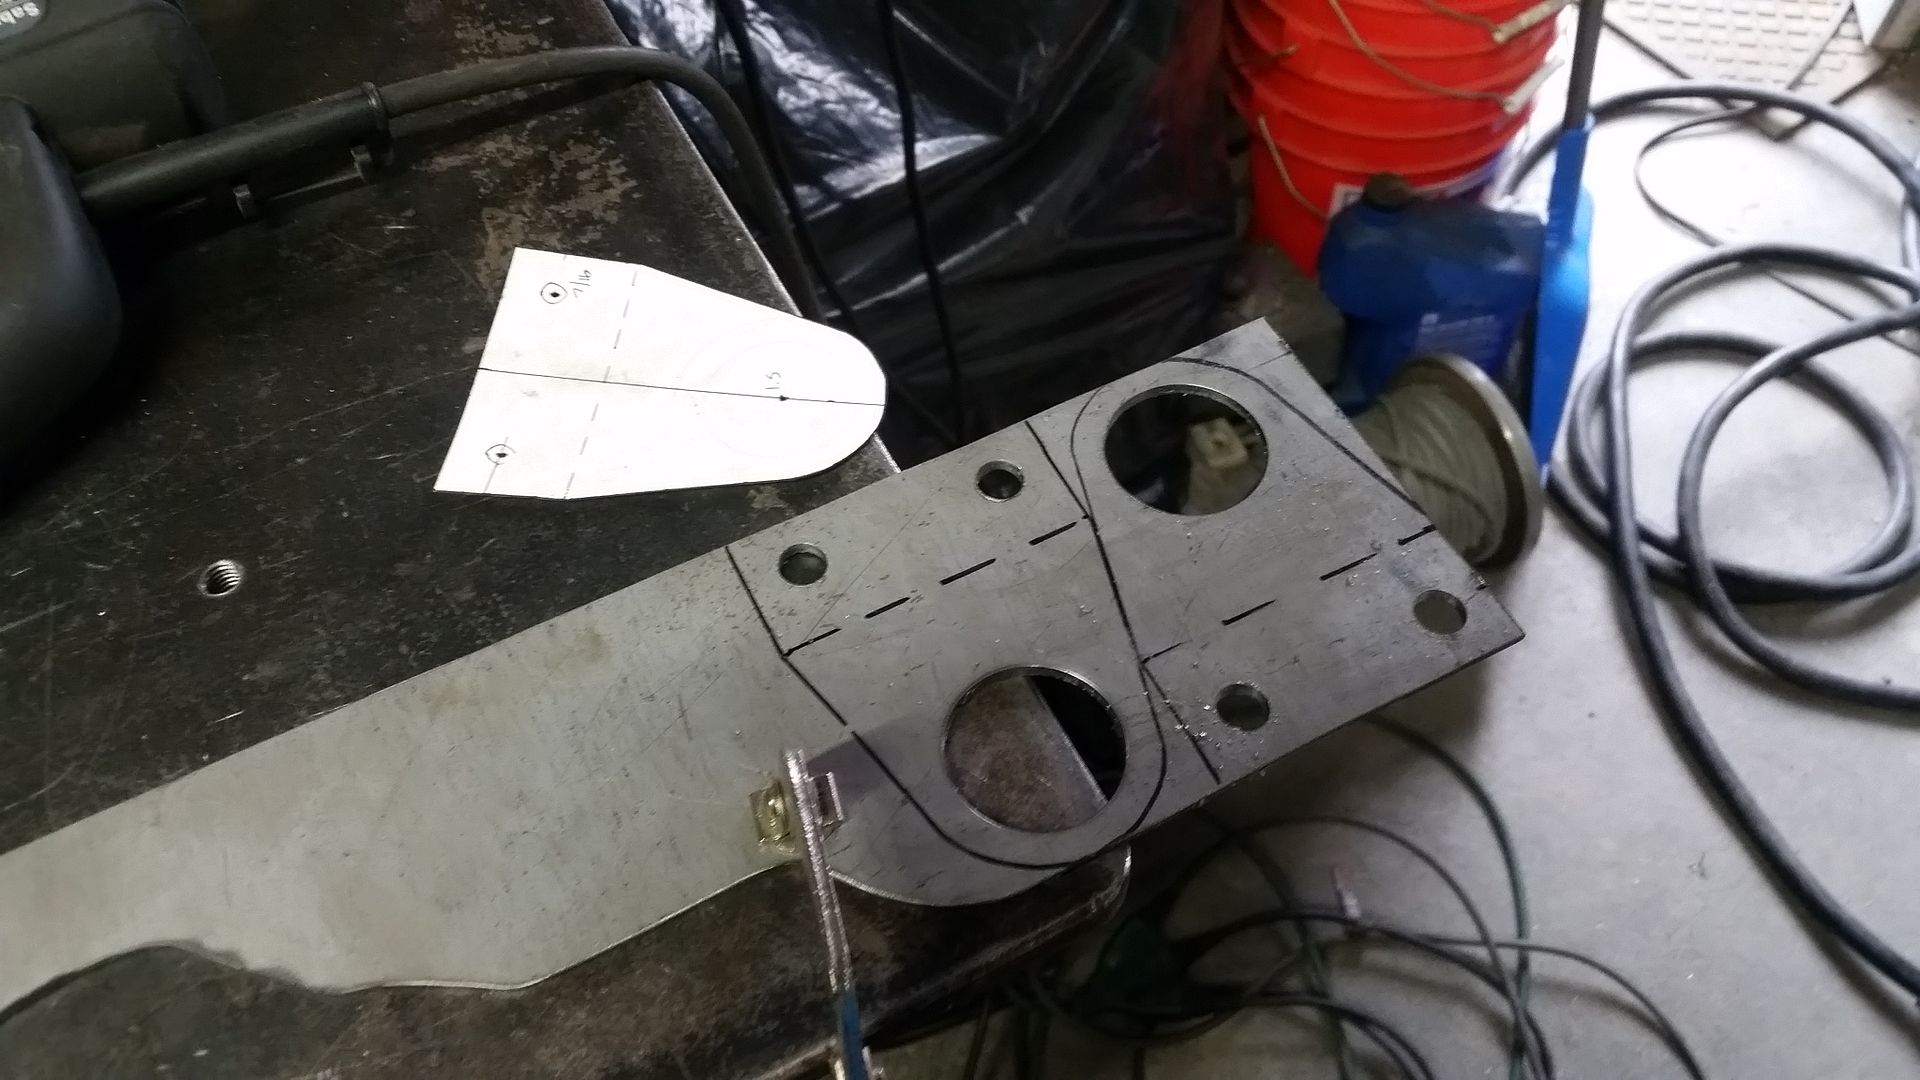
Fab tip of the day. Drill all your holes before the brackets have been cut apart if you can. It sure makes it easier to hold smaller parts. I have a love/hate relationship with those Blair Holcutters. They cut a GREAT hole compared to a hole saw, but I will no longer use them with a hand drill. They are too grabby, aggressive, and fragile for that in my opinion. I am cutting 10 gauge which is at the upper limit. Perhaps on something thinner they would be better with a hand drill.
 

Metcalf

Expedition Leader
Experiment time!


I think I have a way to make a satisfactory flange bend for the rear cabin panels. This is basically a very easy way to make a tight bend in sheetmetal. This is 16 gauge cold roll and it moved like butter. I knew I needed a sharper inside radius so I dug through the scrap bin looking. Angle iron seems to have the sharpest radius in the right place while being the most common to find. This angle iron almost had a sharp corner. There is going to be some material spring back so I don't think the sharper corner is a huge deal.

One of the stumbles with doing this type of bend is that it takes a LOT of hammer work. Typically that hammer work leaves the edge slightly bumpy. You need to hit the material thousands of times to eliminate any high or low spots...or planish it...or run it through a wheel. I decided to 'automate' the process slightly by using an air chisel. It is a hammer that hits with a decent amount of force at a fairly high rate much higher than my little arm can swing a body hammer.

The last piece of the puzzle was the hammer. With a steel hammer form edge, if the hammer is also steel, you run the risk of shearing the material off during the working process. It also leaves those pesky marks. I had played around with this in the past and found some references to a process called 'flow forming' basically this typically uses a 'soft' hammer to form sheet metal into a female mold. The biggest bonus about the slightly 'soft' hammer is that since the crown shape is very low it doesn't leave marks in the working material. This left no visible marks on the material.


Here is how the test bend looks hanging on the tube. You can see how tight the inside radius is by the air gap because of the different radii. I can't believe that a sheet metal brake would be able to do a bend much tighter than that?

There are also no hammer marks on the material and the panel is nice and smooth. I think I will mess it up more when I have to shrink the flange to create the corner radius. I need to play around with that on a test part. I wonder what I will have to do to clean up those jaw marks?


Here is what the test bend looks like from a little further away. I think that will look like once it it done? The flange will be trimmed down a little bit. I need to order up my bulb seal and see where the mounting lip will have to go to flush the rear window panel to the rear of the body. I was thinking that perhaps a touch of inset might look good too? 1/4"? The rear panel will be tack welded to the rear belt line tube and the mounting lip for the seal. With the edge mount bulb mount seal on that lip it should cover up all the welding. I think I should find something to bond the panel to the tube on the vertical surface? Anyone have any ideas for that?

I'm pretty happy I found a solution. Yippee!
 

Memento_Vivere

New member
I know 3M makes a few different panel bonds, I don't have too much experience with it though. But I can do some looking in to it if you'd like, at least get information gathered. I work a one of my local Napa stores, and we still quite a few 3M products so I can easily get access to the necessary information.

Sent from my KYOCERA-C6745 using Tapatalk
 

eaneumann

Adventurer
The 3M 8315 panel bond is an amazing product if you're doing metal on metal and don't want/can't weld. The metal will fail before the glue. Also, U-Pol Weld #2 Copper primer is a much cleaner weld through primer than that zinc stuff. Really cool build! Thanks for sharing.
 

Metcalf

Expedition Leader
I'm sure I missed it, but what method do you use for cutting out your brackets? Bandsaw, plasma, etc.

Thanks,
Ron

I generally use a variable speed jig saw with a Bosch metal cutting blade for most profile cutting. For holes I use a small Harbor Freight bench top 12 speed drill press. For big holes, like for where the tube goes in my last bracket, I use Blair Holcutter's. They are basically a good quality hole saw. I have a HF 4x6 bandsaw that I use in the upright vertical position sometimes also, but I find the jig saw much quicker. Clean up is done with a 12" disc sander for the outside corners, curves, and flats. To clean up inside corners I just use a file most of the time.

Some day I will step up to a plasma perhaps. I would love to have a cnc plasma table at some point.
 

Metcalf

Expedition Leader
Not much this weekend, but at least something! ( I got roped into helping some friends and honey-do stuff )


The C-pillar that splits the rear window is now welded in the tub. I TIG'd on the foot and MIG welded the rest. This was basically designed to provide some additional strength to the rear of the cage because of the somewhat unconventional design. This will mount to some of the bed frame structure and to the frame. I still have one more part to add eventually which will be an A to C-pillar spreader. I will make that to fit the top panel.

I am also going to basically make it more of a thinner overhead center console for the dome light, some map lights, and maybe a switch or two. In order to route all the wiring up into that I made sure to drill a few access holes. I failed to get a picture of the holes through the belt line spreader, but basically I just drilled a 3/4" hole through the top and bottom. Then matching 3/4" holes in the top and bottom of the C-pillar tubes. The bottom one will be hidden down between the seats, and the upper one will likely be covered by the tail of the overhead console.


You can see the upper an lower holes if you look close. I should be able to pass a decent amount of wiring through those if needed. I might also stick a backup light and/or 3rd brakelight on the upright.

Hopefully this week I will be able to make the rear body panels! That should be a decent challenge....
 

Metcalf

Expedition Leader
I am pretty much in experimentation phase....


A few things going on...

The rear floor panel is drilled and bolted in place so it doesn't move around anymore. It is not welded though. I may pull it out again for a few things...

I bent up a double flange test part that was left over when I cut the blanks for the rear cab panels. The air hammer technique is working pretty well but I need more air compressor for sure. I have been using a manual nylon face hammer to help the process along.

The flange bending seems to work pretty well. I need to adjust the bend locations slightly to account for the bending....that is why you do a test part!

I also started playing around with the shrinker to form the rear cab bends, that hasn't been going THAT well.

Functionally it will work, but I have found that you need to be able to 'help' the material in the middle of the panel into the bent shape. I didn't have anything in the shop that was a large enough radius to help. I believe I found some pipe in the scrap bend at work that should do the job. If you don't help bend the middle of the panel it starts to pull into a funny shape. On the test panel I didn't really have enough 'extra' past the bend to leverage it to do what I wanted.

I also learned that I need a foot operated stand for my shrinker. Holding the panel up while trying to operate the handle just isn't going to work. There will be a short commercial break while I fab up something for that....
 

Adventurous

Explorer
Cool! Thanks for the introduction to the metal shrinker and stretcher. I wasn't familiar with those. It's always nice to have the right tool for the job, especially when its something obscure like that.
 

Metcalf

Expedition Leader
Cool! Thanks for the introduction to the metal shrinker and stretcher. I wasn't familiar with those. It's always nice to have the right tool for the job, especially when its something obscure like that.

Sure, no problem. I think subconsciously I seek out projects that let me acquire new tools....

I got most of the stand for the shrinker done last night.


Excuse the mess, I was in fab-rnado mode last night. I need to clean up tonight and stick some legs on the stand. Then I will be ready to play with sheetmetal again....
 

Forum statistics

Threads
185,910
Messages
2,879,496
Members
225,497
Latest member
WonaWarrior
Top