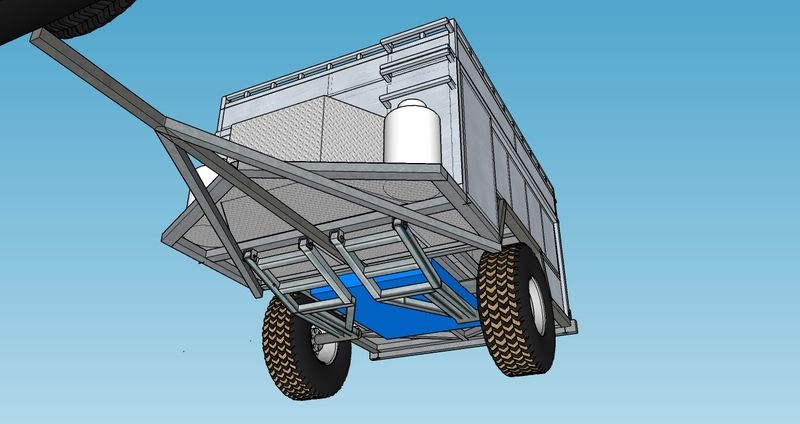
First Trailer Build - Design Phase

Curtis in Texas

Adventurer
I wish I had those computer skills. Would love to be able to show people what I see in my head.
I can visualize something then go into the shop, make a few notes about dimensions and build it.
But, trying to explain it in drawings is tough when people can't read napkin!
*
*
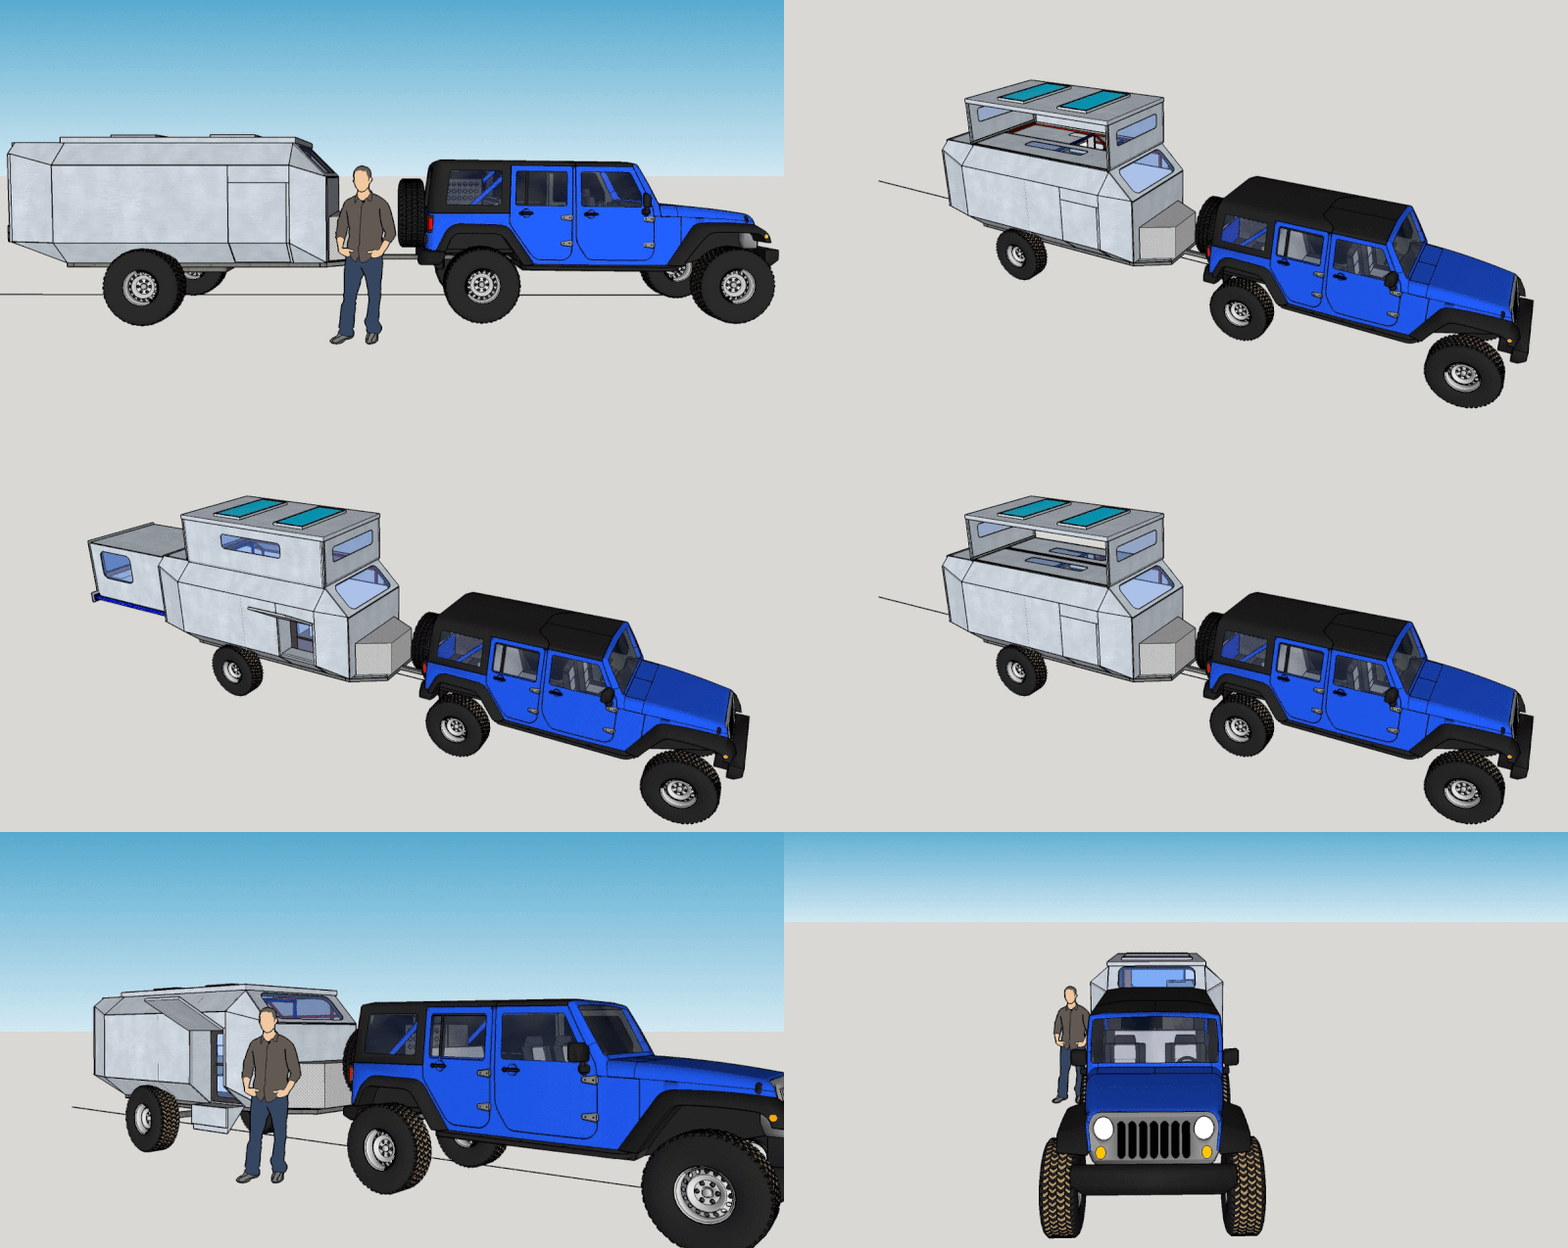
I found a rendering someone posted up on this Forum several years ago that closely represents what I'm planning on my build looking like.
( I don't know who's work it is so if someone recognizes it shout out. I would love to give him credit for the computer drawing. Mainly so he can follow my build and see his idea come together.)
*
*
*

The main difference other than more length and width is it's suspension.
Mt frame has Independent torsion bar "A" arms suspension with electric remote control steering.
I camp in a lot of tight places where just getting there between the tree lined trails is a challenge.
*
*
*

Thinking about adding air shocks to the torsion bar adjusters so I can control ride height in motion.
May add it later if it needs it, since I've already figured out how to make it work.
*
*
*


My frame is done and the remote steering works.
*
*
*


I'm now fitting the floor to the frame. Once I get the body formed out I'll start a thread to catch everyone up with the progress. I'm a slow builder. Mainly life gets in the way. (Children, Grandchildren, friends and other hobbies) (Motorcycles and 4X4 Junky!)
*
*
*


I worked 3 years for Williamscraft Camper and Mobile Home Manufacturing back in the early 70's.
Going to build mine with the skill set they taught me way back when, with some new construction methods that have been developed since then.
*


Going to enjoy watching your build. Aluminum is always a cool material to work with.
*
*
Mine will look somewhat like this one, only more length, width and slightly taller.

NO front storage, because all the tanks are built between the frame fails.
 

Attachments

  • TearDropConceptII-C.jpg
    TearDropConceptII-C.jpg
    69.5 KB · Views: 24
  • DSC02209.jpg
    DSC02209.jpg
    607.3 KB · Views: 25

JCDriller

Adventurer
I wish I had those computer skills. Would love to be able to show people what I see in my head.
I can visualize something then go into the shop, make a few notes about dimensions and build it.
But, trying to explain it in drawings is tough when people can't read napkin!
*
*
I found a rendering someone posted up on this Forum several years ago that closely represents what I'm planning on my build looking like.
( I don't know who's work it is so if someone recognizes it shout out. I would love to give him credit for the computer drawing. Mainly so he can follow my build and see his idea come together.)
*
*
*

The main difference other than more length and width is it's suspension.
Mt frame has Independent torsion bar "A" arms suspension with electric remote control steering.
I camp in a lot of tight places where just getting there between the tree lined trails is a challenge.
*
*
*

Thinking about adding air shocks to the torsion bar adjusters so I can control ride height in motion.
May add it later if it needs it, since I've already figured out how to make it work.
*
*
*


My frame is done and the remote steering works.
*
*
*


I'm now fitting the floor to the frame. Once I get the body formed out I'll start a thread to catch everyone up with the progress. I'm a slow builder. Mainly life gets in the way. (Children, Grandchildren, friends and other hobbies) (Motorcycles and 4X4 Junky!)
*
*
*


I worked 3 years for Williamscraft Camper and Mobile Home Manufacturing back in the early 70's.
Going to build mine with the skill set they taught me way back when, with some new construction methods that have been developed since then.
*


Going to enjoy watching your build. Aluminum is always a cool material to work with.
*
*
Mine will look somewhat like this one, only more length, width and slightly taller.

NO front storage, because all the tanks are built between the frame fails.

Dude, that is going to be awesome! I've never seen a trailer with steering capabilities, that is cool. I'd go the other direction, I'm great on the computer and good with fabrication, but I'm all self taught and don't have the engineering side down which is why I tend to overbuild. I'm really going to have to pick peoples brains about what is truly needed, amount of metal bracing, thickness of the metal, and light weight material choices. My problem is I don't even know what I don't know, so I'm in the process of exploration and learning right now.
 

Ozarker

Pontoon Admiral
I suggest you go as light as possible for its intended purpose, if you're going to drag it off a 4 foot ledge rock climbing then you'll need protection, if not, the lighter the better. Your wall material may add structural stiffness too, depends on what you use.

Your design spiral begins with the intended use, same as building a race car, boat or airplane.

Your slide and pop up needs to be light IMO, failure of lifting and slide rigging can be a real pain so you need to be able to man handle it in a pinch if needed. Secondary operational redundancy is often human power.

The camper pod I have in mind for my trailer will double as the cabin on a catamaran, so it needs to be almost ultra-light, bolts to the hulls and main deck or to the trailer. I don't like doing things twice.

Looks like a great design, jump on it! :)
 

AdventureHare

Outfitting for Adv
Not certain about the size of this, but if the sliding portion is the length of the bed, I'd suggest you start the bed over the angled part, reducing the length of the sliding box by ~18". A 2-piece mattress could than be stored in the slider and unfolded over the angle after extending.
 

JCDriller

Adventurer
I suggest you go as light as possible for its intended purpose, if you're going to drag it off a 4 foot ledge rock climbing then you'll need protection, if not, the lighter the better. Your wall material may add structural stiffness too, depends on what you use.

Your design spiral begins with the intended use, same as building a race car, boat or airplane.

Your slide and pop up needs to be light IMO, failure of lifting and slide rigging can be a real pain so you need to be able to man handle it in a pinch if needed. Secondary operational redundancy is often human power.

The camper pod I have in mind for my trailer will double as the cabin on a catamaran, so it needs to be almost ultra-light, bolts to the hulls and main deck or to the trailer. I don't like doing things twice.

Looks like a great design, jump on it! :)

I'm really looking at ways to lighten it up. I'm thinking about making a large part of the skeleton aluminum and bolting it down. The frame and sliding mechanism would remain steel. I'm also thinking about glassing the sides, it may be the best way to adapt the compound angles and keep them waterproof, plus they would be easily repairable or replicable if they got damaged.

Looks like a very ambitious design. Can't wait to see how it works out!

Thanks, I think its going to be a fun build.

Not certain about the size of this, but if the sliding portion is the length of the bed, I'd suggest you start the bed over the angled part, reducing the length of the sliding box by ~18". A 2-piece mattress could than be stored in the slider and unfolded over the angle after extending.

I have done exactly what you've suggested already. The bed begins above the angled rear, I decided this would make the slide out lighter and protect it should the *** end drag. Again this is a soft road trailer, mostly campsites, logging roads, etc. I'm not trying to drag it across a rock pile.

Please keep the suggestions coming, especially about how to lighten it. Anyone have any input on steel thickness for the frame? I'm going to use 2x3 and 2x2 steel for the frame, I can get it in .12 and .1875. Would .12 be strong enough??
 

tanks

New member
I too am anxious to see how this build comes out. It seem like a fantastic idea. What program are you doing your render/design in? (sorry if you already answered that and I missed it.)
 

JCDriller

Adventurer
I too am anxious to see how this build comes out. It seem like a fantastic idea. What program are you doing your render/design in? (sorry if you already answered that and I missed it.)

Me too, I really hope I can keep the weight under control so it's buildable and I'm using Sketchup, it's free and simple to use.

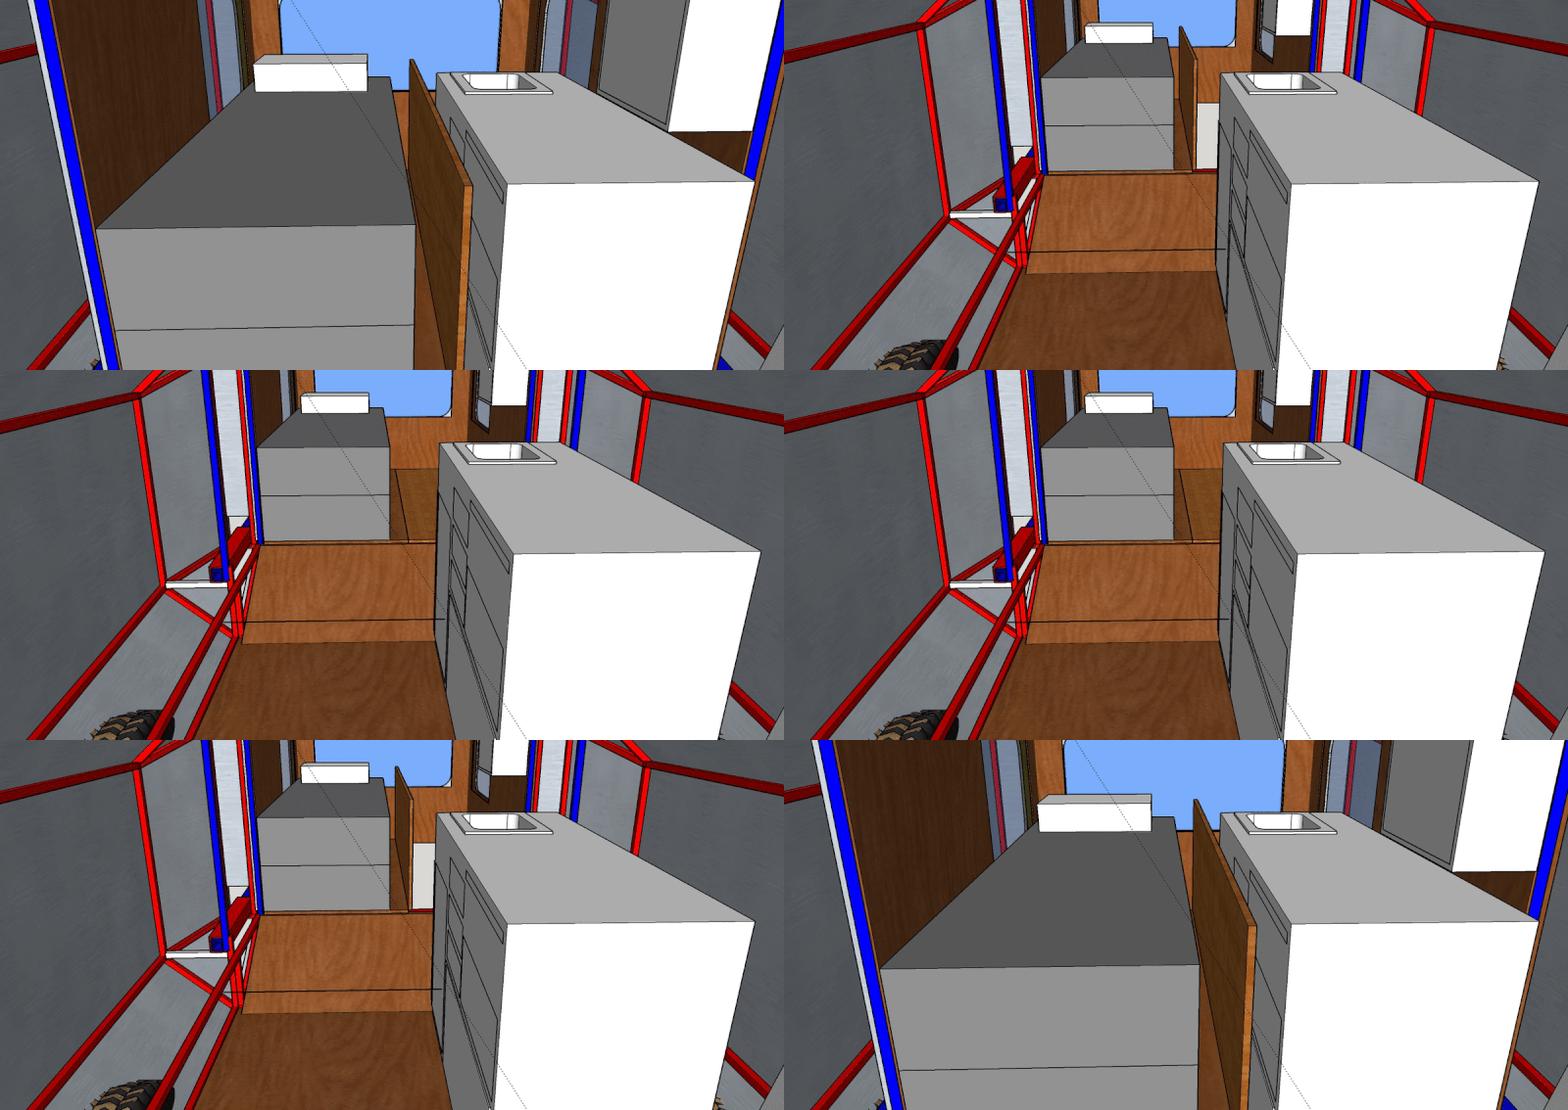
Made a .gif tonight to show off the trailer design progress a little more.


One more showing how the bed and floor of the push out work, it's very simple. There will be a 1" metal lip on the rear and the drivers side of the pop out. Piano hinge in the middle. I moved the kitchenette while making the .gif, it won't move on the trailer.

 
Last edited:

JCDriller

Adventurer
This is an insanely impressive design. I look forward to seeing your progress in constructing it in whatever form it evolves to.

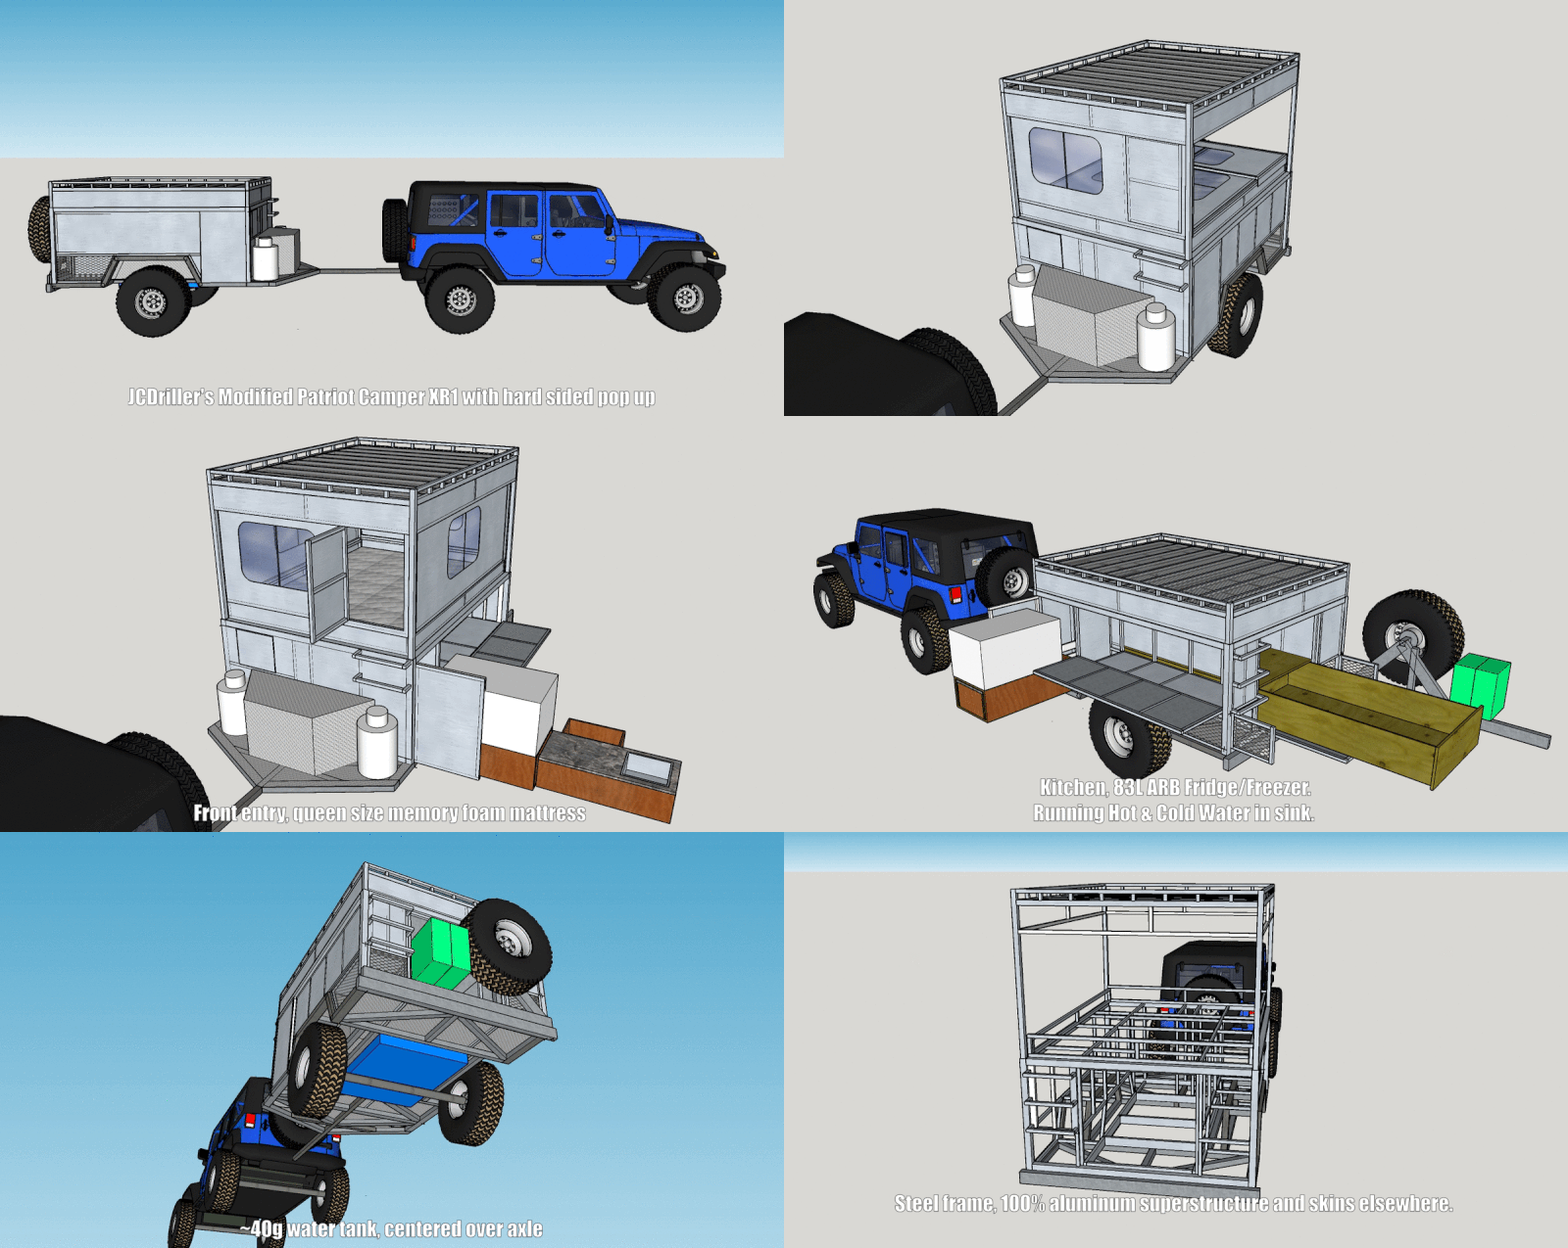
Thanks, I'm not sure I can build it and keep the weight under control. The Slide out is pretty heavy and puts a lot of torque on the overall design. If I had truck to tow it with no problem, but it would likely exceed my 3500 lb tow rating. Today I completed another design based off a modified Austrailian Patriot Camper, basically I added a linear actuator lifted roof rack and a hard sided camper top. I really like this design and think I'll keep messing with this one. It moves all the kitchen and everything outside, but this seems like a better fit for my JKU. Size is 5x8 and ~4' tall when collapsed. Interior of the pop up is 43" allowing me to sit up and easily fits a queen size mattress. 100% aluminum outside the frame.

Tomorrows task is to figure its weight. I'd like to keep it as close to 1500-2000lbs dry as possible, we'll see.

Patriot Campers: http://www.patriotcampers.com.au/patriot-x1-off-road-camper-trailer/

 
Last edited:

DanCooper

Adventurer
Another interesting build concept. I am intrigued by all the folding panels and wonder how you are planning to hinge them and keep them weatherproof. Can you tell us how you plan to do that? And somewhere a welder in aluminum has found their retirement fund.
 

JCDriller

Adventurer
Another interesting build concept. I am intrigued by all the folding panels and wonder how you are planning to hinge them and keep them weatherproof. Can you tell us how you plan to do that? And somewhere a welder in aluminum has found their retirement fund.

Ha, I'll handle all the fab, no issues there. The panels are all overlapped, I know it's impossible to see on the .gif. For instance the panels all open against and compress weather stripping on the inside of the raised roof rack which is solid on it's underside. The front and rear panels open first, they have lips on their sides with weather stripping, the sides when folded up compress the weather stripping. The hinges are going to be continuous piano hinges, the aluminum on the panels will have a lip that overlaps the hinges seams. I'll try to get a screenshot tonight of a good area for example, it's pretty basic, but should work really well.

Here is a similar pop up design.

http://tnttt.com/viewtopic.php?f=39&t=43744
 

JCDriller

Adventurer
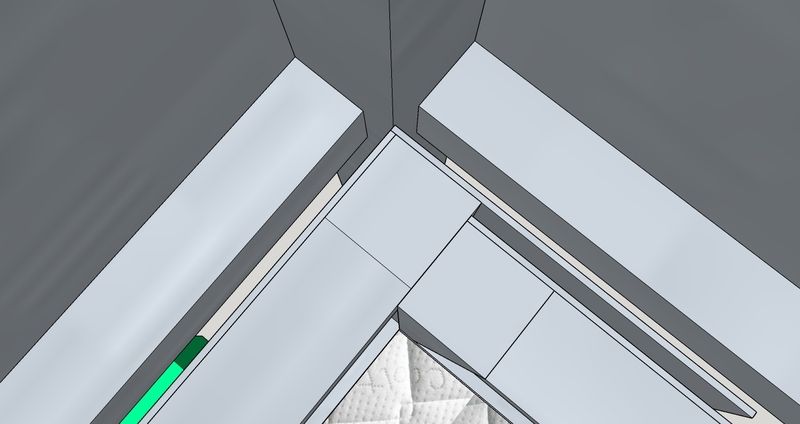
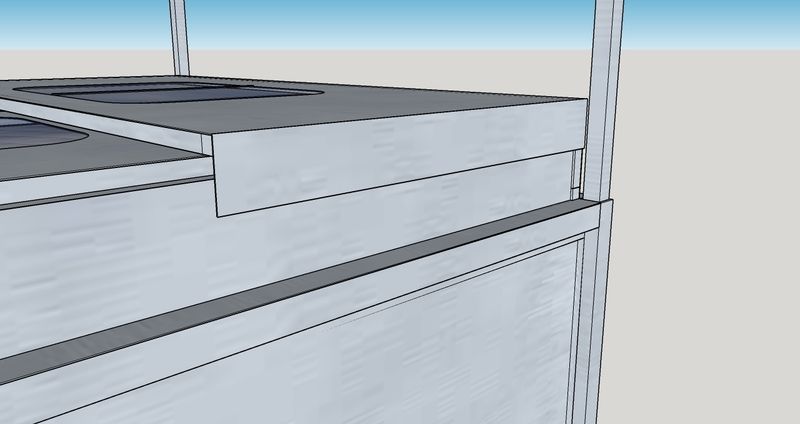
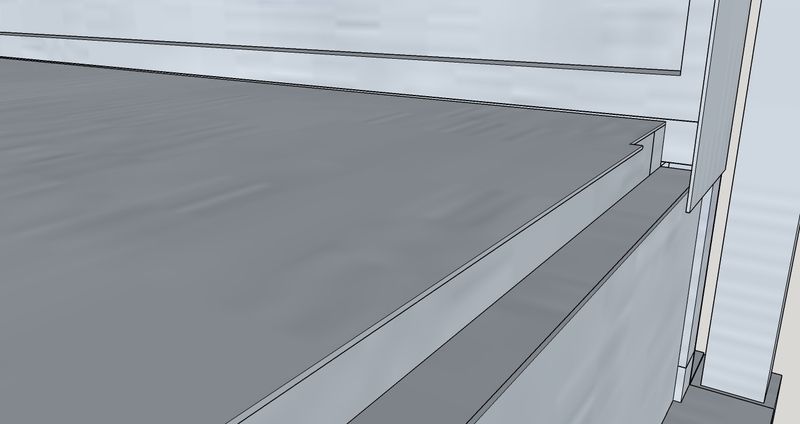
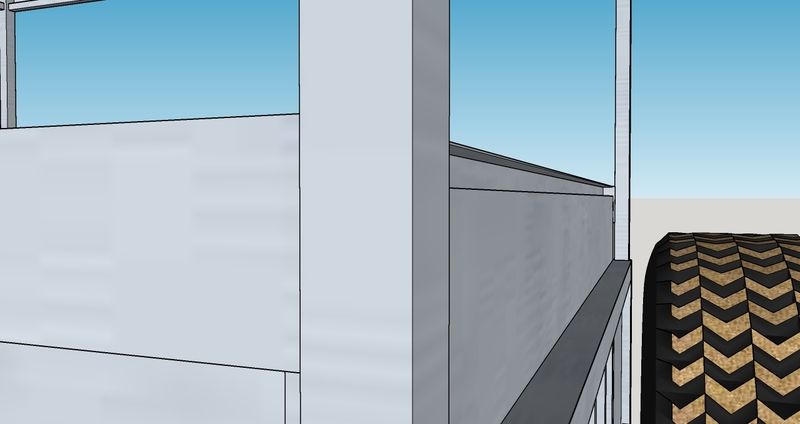
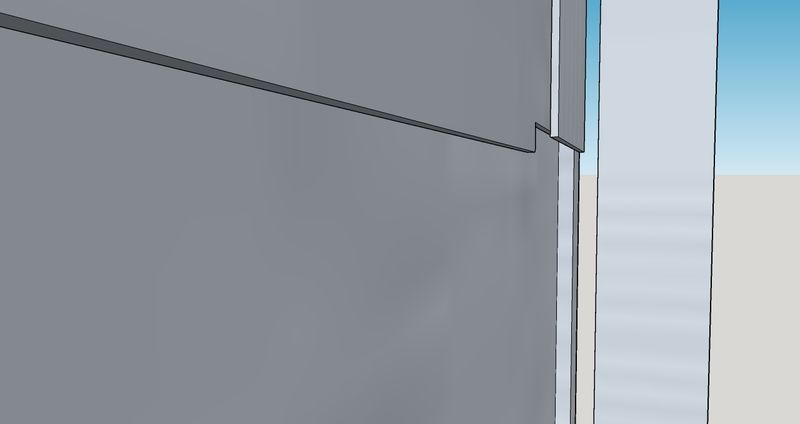
So here you go, I've taken a few screen shots of how the panels become water proof when folded. You'll have to imagine 3M VHB weather stripping applied, I don't have that drawn into the design. Here you can see how the sides sit inside the roof, remember the bottom of the rack is solid and it will be insulated. You can see the corner shot, this shows the rear piece folded up, with its side trim, the side piece folded up with appropriate space for weather stripping between the two. Finally you can see how the top over laps the sides. I'm not sure if I'll seal the sides or leave it open for ventilation, either way the top overlaps the sides by a couple inches so no water will be getting in unless there is a hurricane in which I won't be camping.


The next image shows how the sides folds, you can see the 4" trim on the rear panel that the side panel butts up against. The front looks just like this one.


Here you can see the rear panel folded up with its 4" side trim. You can also see the extended lip on the side panel which covers the piano hinge when open.


This is the extended lip on the rear panel which coves the piano hinge when folded up.


This shows how it looks when folded up, all the hinge is covered.


Also, I've started on the suspension design. Also, I've modified the frame design after some brought up it's inherent weaknesses.

 
Last edited:

DanCooper

Adventurer
That all makes sense, thank you. And having seen your fabrication skills in the drawer system, I know you have what it takes to fabricate all of this. Looking forward to seeing how this develops.
 

AdventureHare

Outfitting for Adv
I started another thread a month ago about ideas around making an OTS trailer with the Patriot concept. The Patriot really resonated with me too. And I'm still toying around with finding the "right" pickup boxes to assemble.

Is there a reason you want hard-sided? Have a look at the Bush Nest Fish Eagle. It's very close to your design.
 

Forum statistics

Threads
185,783
Messages
2,878,184
Members
225,329
Latest member
FranklinDufresne
Top