You are using an out of date browser. It may not display this or other websites correctly.
You should upgrade or use an alternative browser.
You should upgrade or use an alternative browser.
Wood Fuel Firepit/Stove
- Thread starter ETAV8R
- Start date
There is a science to small wood burning stoves...I have made a couple of wood gas stoves. The design will be totally determined but the intended use. Some can be very efficient, using less fuel and emitting less toxic combustion by products. Most of third world cooking is done over wood or other fire. I have one of these: http://www.ebay.com/itm/like/161783011521?lpid=82&chn=ps&ul_noapp=true
It never really gets into the gassifier stage but it does burn nice and hot and fuel can be replaced as it burns. It's better than just an open cooking fire. It will make a 12 cup pot of perked coffee in two refuelings.
Just received this stove in the mail and gave it a try. Compact, light, and functional. Pretty neat. It seemed to go into the gassifier stage for me and boiled 20 ounces of water pretty quickly. For $14, I'd say it is a steal compared to my Solo Stove!
Is that little bowl for catching ashes? If so, I wish it was bit bigger, just to reduce the chances of any ashes falling onto the forest floor. After the first burn, most of the ashes were still in the main section, with a few that had dropped down into the bowl.
Overall, I think the little stove is a winner. I may buy a couple more so I can leave one in my cabin and in my other vehicle.
jeep-N-montero
Expedition Leader
I have been looking at different large pot setups to build one of these and found myself in the right place and time the other day to score a Camp Chef 42 quart fry pot and basket with the 10.5 quart pot set all for $5, details here http://www.outdoorcooking.com/camp-...-basket.html?gclid=COOSsoyrtdECFYKGaQodPTwEGA and here http://www.outdoorcooking.com/camp-...pot-set.html?gclid=CPve6YirtdECFZm6wAoduBAOiA My plan is to build a setup with tunable airflow for cooking on top, a tandoori type pot, and regular wood burning. Most of it is already mapped out in my head and have all of the extra materials in the garage, so I will be sure to start a thread with pictures when I put it all together.
Ordered another variant of the cheapo chinese wood burner from Amazon. Slightly improved fuel feeding, similar to the SoloStove.
https://www.amazon.com/gp/product/B01KJHPOL8/ref=oh_aui_detailpage_o02_s00?ie=UTF8&psc=1
Here is a pic of all three (OUSPOTS, SoloStove Campfire, and Lixada). Knowing what I know now, I'd just order this latest stove...
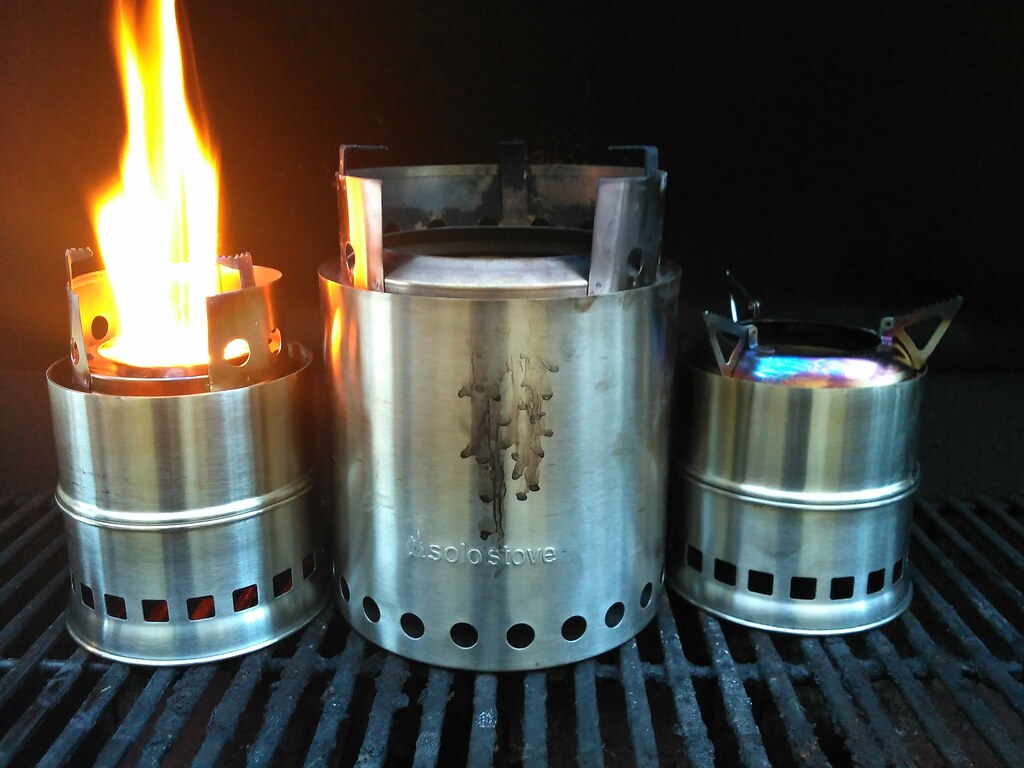 Wood burners by Brad Baker, on Flickr
https://www.amazon.com/gp/product/B01KJHPOL8/ref=oh_aui_detailpage_o02_s00?ie=UTF8&psc=1
Here is a pic of all three (OUSPOTS, SoloStove Campfire, and Lixada). Knowing what I know now, I'd just order this latest stove...
Wood burners by Brad Baker, on FlickrGreetings,
I'm the creator of the Hot-Pot. Thanks for your interest in our product. Since I'm not a Sponsor on this site, I don't know how much I can say about it but maybe I can answer a couple questions.
If you want too make your own Hot-Pot, just go to Walmart and buy the following stock pots:
#553412467 Mainstay 16 qt stainless steel stock pot with metal lid $11.94
#552022569 Mainstay 12 qt stainless steel stock pot with metal lid $8.94
Make sure you get the ones with the stainless lids, not the glass lids. The ring that holds the inner pot is made out of the lid from the larger pot. You'll need a way to cut the center out of the lid to fit snugly around the inner pot. Slide it up till it stops against the handles. Now drill 24 equally spaced 9/16" holes just below the ring. I have a pile of pots with different sizes and numbers of holes that I tried during the development of the Hot-Pot, but the configuration I just described seems to give the best/brightest flame.
When I was making my prototypes, I just cut the slots in the bottom of the inner pot with a hand held plasma cutter. The hand made slots work just as well as the CNC cut ones, but they didn't look uniform or professional enough to sell to the public. Cut slots as close together as you can, but try not to break through to adjacent slots as this will ruin the integrity of the bottom and allow pellets to fall through. The air holes in the outer pot are not critical, as long as they add up to at least 6 square inches of area. They can be drilled, plasma cut, or whatever you want. Keep the bottoms of the holes about 2" above the bottom of the pot so the ashes that fall through will be contained in the outer pot.
The flame concentrator ring is not super-critical. Just make it overhang the inner pot about an inch to inch and a half. This ring helps with the chimney effect and makes the flame more consistent.
That should be all you need to know. Yes, it's a fair amount of work to save a hundred bucks, but if you're anything like me, the satisfaction of making something yourself is worth quite a bit.
As far as cooking goes, a Hot-Pot makes plenty of heat, but as Ragman mentioned, soot build-up makes quite a mess on your cookware. I don't cook over campfires for that reason. If you are used to dealing with the soot, there's no reason you couldn't cook over a Hot-Pot.
If you have any other questions, feel free to PM me and I'll answer as best I can.
Cheers!
SilverBob
Silverbob, thank you for sharing your info with us all. As a result I just placed an order on your site!
SoDakSooner
Adventurer
I know it is exactly what you guys are talking about, but my stove is capable of boiling water, and with a small frying pan, can cook very well. It is not capable of grilling so to speak. I actually bought it just to keep my backpacking/backcountry hunting tent warm, but it is not bad at cooking, and it also keeps the tent warm.
really easy to build as long as you can source the titanium pcs.
The two cables on top are enough to support the pot/pan. the chimney is laying in front in this pic.
really easy to build as long as you can source the titanium pcs.
The two cables on top are enough to support the pot/pan. the chimney is laying in front in this pic.
Attachments

Forum statistics
Members online
- wparkinson97
- deanerbeano
- MTAA
- Westerncamp
- yousername
- Bogie
- FJRanger
- TexasD-90
- kbeefy
- RollingTaco
- Rockymountainhunter
- IdaSHO
- Czechsix
- mark5280
- renottse
- timohardin
- hdflh
- Pierre D
- Trailboss
- DickM
- FJess
- rcintx
- joxeph
- jmt82331
- MartinD
- pat11784
- Roger M.
- baileydog15
- cobb ridge
- SilicaRich
- phenopd
- MP@HOME
- nwoodworth1390
- Golden Hind
- TG2
- Fores
- Yeti Tom
- Velobrew
- Titan_Bow
- Frisman
- Tharnacle
- Pathmaster
- Kamikazee494
- Bigc3031
- claymond
- 1MK
- hbabler
- kwhitham
Total: 815 (members: 53, guests: 762)