Corey
OverCamping Specialist
I have been doing a lot of research as of late, and Martyn from Adventure Trailers has been very helpful in answering my many questions on the subject.
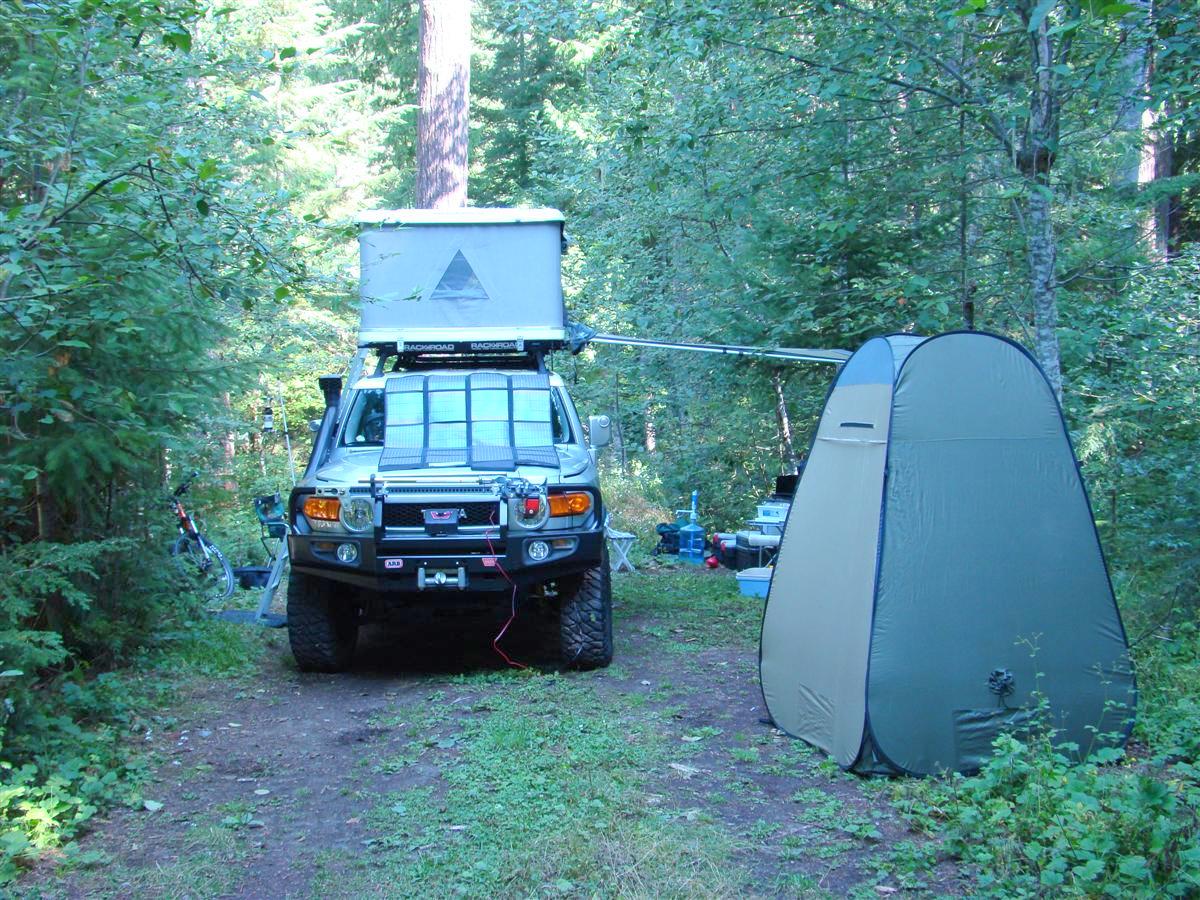
I put together this solar setup mainly for keeping both of my dual batteries charged to full capacity in the FJ Cruiser when out camping.
The ARB fridge, Maggiolina AirLand roof top tents 12v interior light, and occasionally recharging cell phone or laptop batteries can put a drain on the battery.
Not so much just running the fridge for a few days, but you factor in the other voltage requirements and the battery can take a beating if not recharged.
Running the rig for a few minutes a day is not really going to keep it topped off, hence where solar power comes in.
Here is the setup I have gone with:
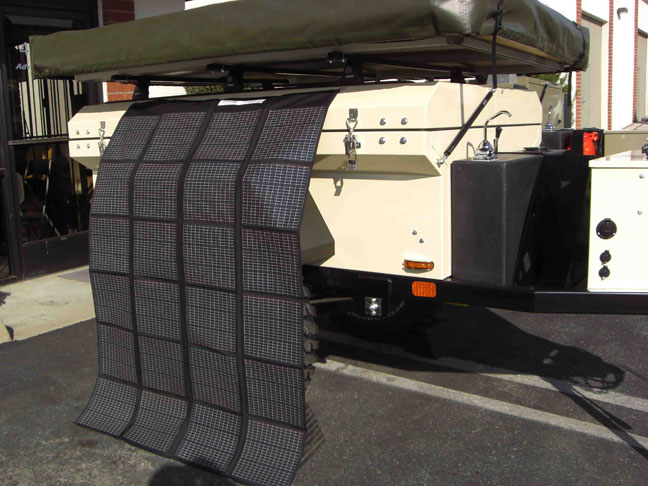
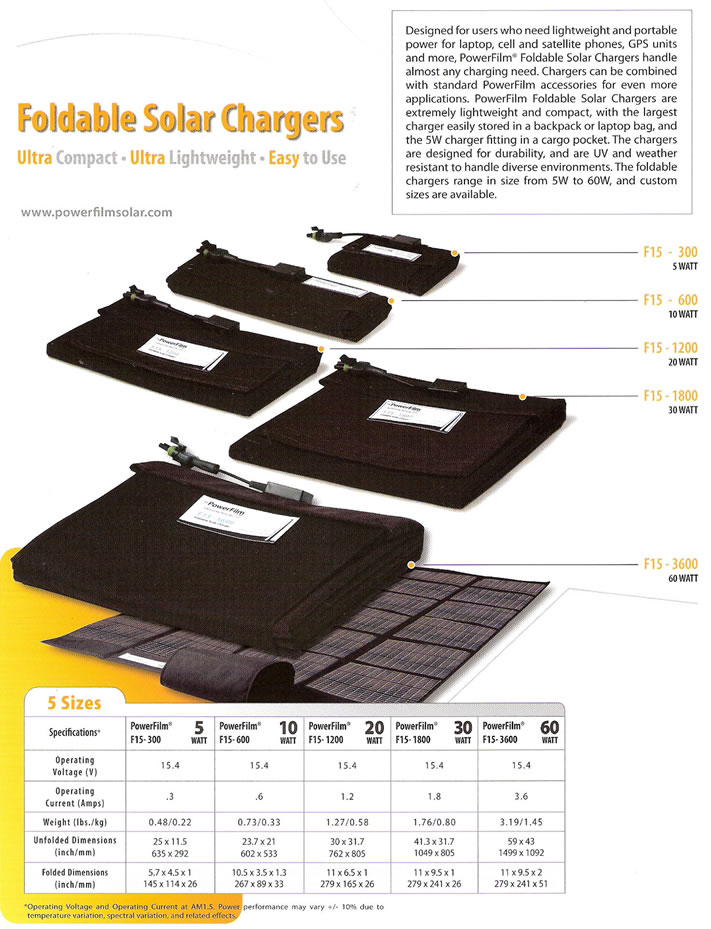
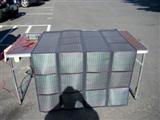
1. PowerFilm F15-3600 60 watt solar panel purchased from Adventure Trailer via Martyn and Mario.
Pictures from Adventure Trailers on one of their Chaser trailers (one of those is in my future plans too when I move and have a garage) and from PowerFilm Solar.
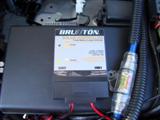
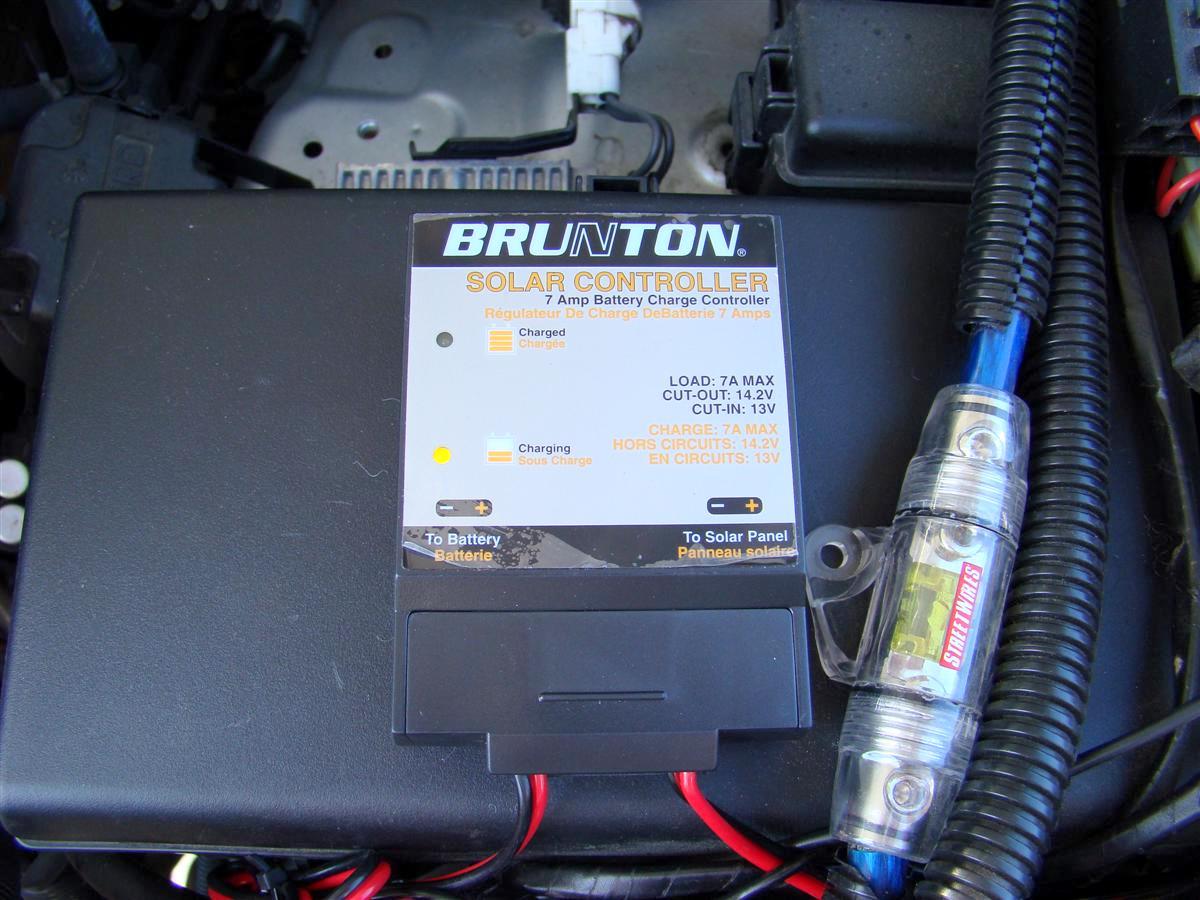
2. Brunton charge controller.
This required unit (if charging your vehicles battery) keeps the solar panel from overcharging your battery/batteries on your rig.
It has LED lights that tell you when it is charging, and when the charge cycle is over.
It can handle up to 100 watts and 7 amps of power.
My solar panel put out 60 watts and 3.6 amps, so it is perfect for my application.
3. 15' PowerFilm extension cable (bought from AT)
part # RA-7 from the solar panel to an Adventure Trailer trailer type plug that is mounted to the grille.
4. Solar RV exterior plug, female with 12 gauge wire (bought from AT)
part # 055-01109
5. Solar RV plug male with 12 gauge wire (bought from AT)
Part # 055-01110
6. Weather pack connector kit (bought from AT)
Adventure Trailer has a way on their website to calculate your wattage requirements when building your solar setup.
Text taken from their site:
The foldable or roll up type of solar panels do cost more, but if you are tight on space like I am and want to keep the weight down or simply like them better than the stationary panels, these are pretty trick.
Also there are many more types of charge controllers out there that you can mount under the hood or inside of your rigs cabin if you have the space.
Some have digital readouts too of how much voltage the battery has and how much it is putting out, and how much voltage is coming from that big shiny yellow thing up in the sky.
I saw that Dave (adventureduo) from Expedition Portals forum had used a Sunsei charge controller, but I could not locate one as most places were out of stock.
Scott Brady (expeditionswest) from Expedition Portal had gone with the Brunton charge controller, and I did some research on it and found some good reviews of it at Amazon, the vendor I bought it through.
Dave had gone with the before mentioned trailer type plug from Adventure Trailers and did a cool installation of the plug being in the "O" of Toyota on the grille of his 1993 Toyota Landcruiser.
Very trick.
And it will work on mine too, I put the plug through the second "O" on the Toyota emblem, but I installed it another way which you will see in the pictures.
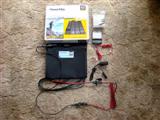
All parts laid out:
You can see the solar panel connected to the 15' extension cable that then goes to the short adapter cable that goes to the plug with the cap on it that you can mount to a bumper or other part of your vehicle.
The wires coming off of the plug/cap goes to the charge controller.
Also seen is the PowerFilm 12v female accessory plug they include with the solar panels.
Installation:
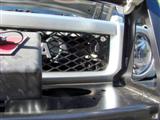
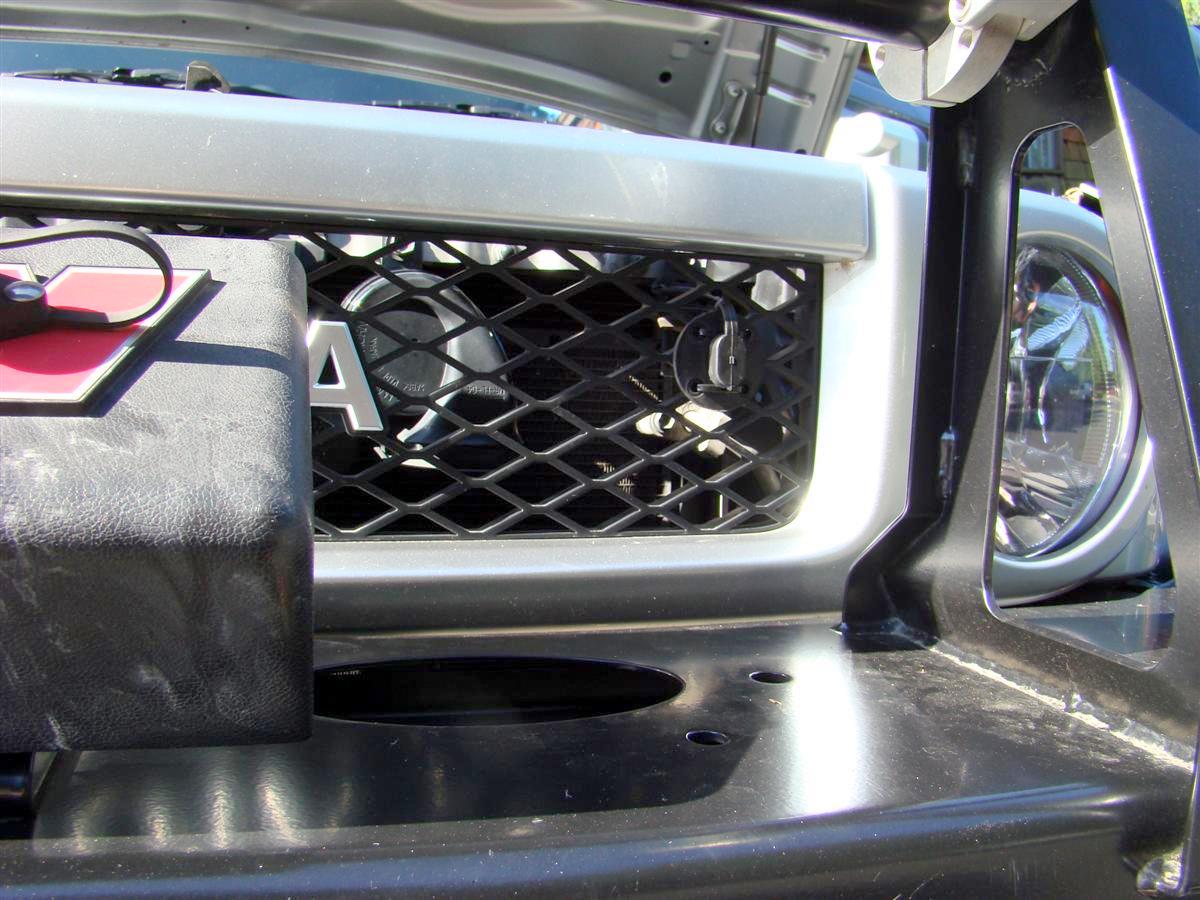
1. Find a suitable location for the trailer plug to hard mount it.
I pushed the wires through the grille, and the plate for the plug matched up very well with the grille.
I secured it with two zip ties.
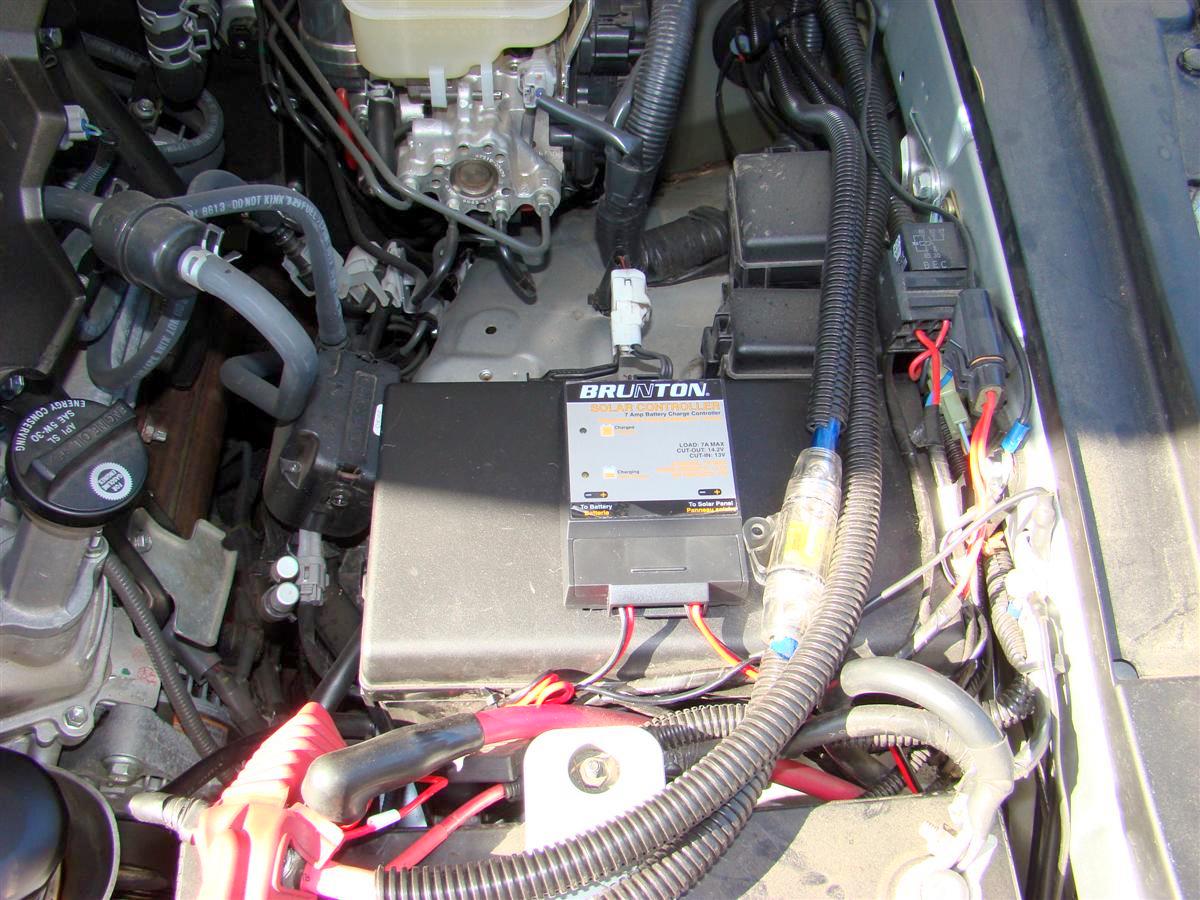
2. Mount the charge controller under the hood near the battery.
I used heavy duty Velcro to mount it to the top of the main fuse box behind the stock battery location.
It has positive/negative wires with battery stud rings to put on your battery.
For the ground wire I ran it off to the side on the fender well where there was another wire grounded from a previous project.
The other red and black wire will be wired to Adventure Trailers "quick plug port" (trailer type connector) which I mounted to the grille.
Run the 15' extension cable from the port on the grille with the AT adapter cable to the solar panel and you are in business.
The solar panel also came with a female 12v socket with a plug on the other end that plugs right into the solar panel so you can use it not hooked up to the vehicles battery.
This way you can plug in a 12v male plug that goes to accessories like cell phones, laptop batteries, two way communication equipment, anything that you would normally plug into the 12v receptacle inside of a vehicle.
Way cool 'huh?
Here are a few pictures of the installation.
I will get better pictures and a complete field review at a later date during a camping trip or when I am on my vacation.


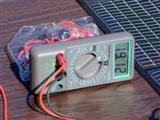

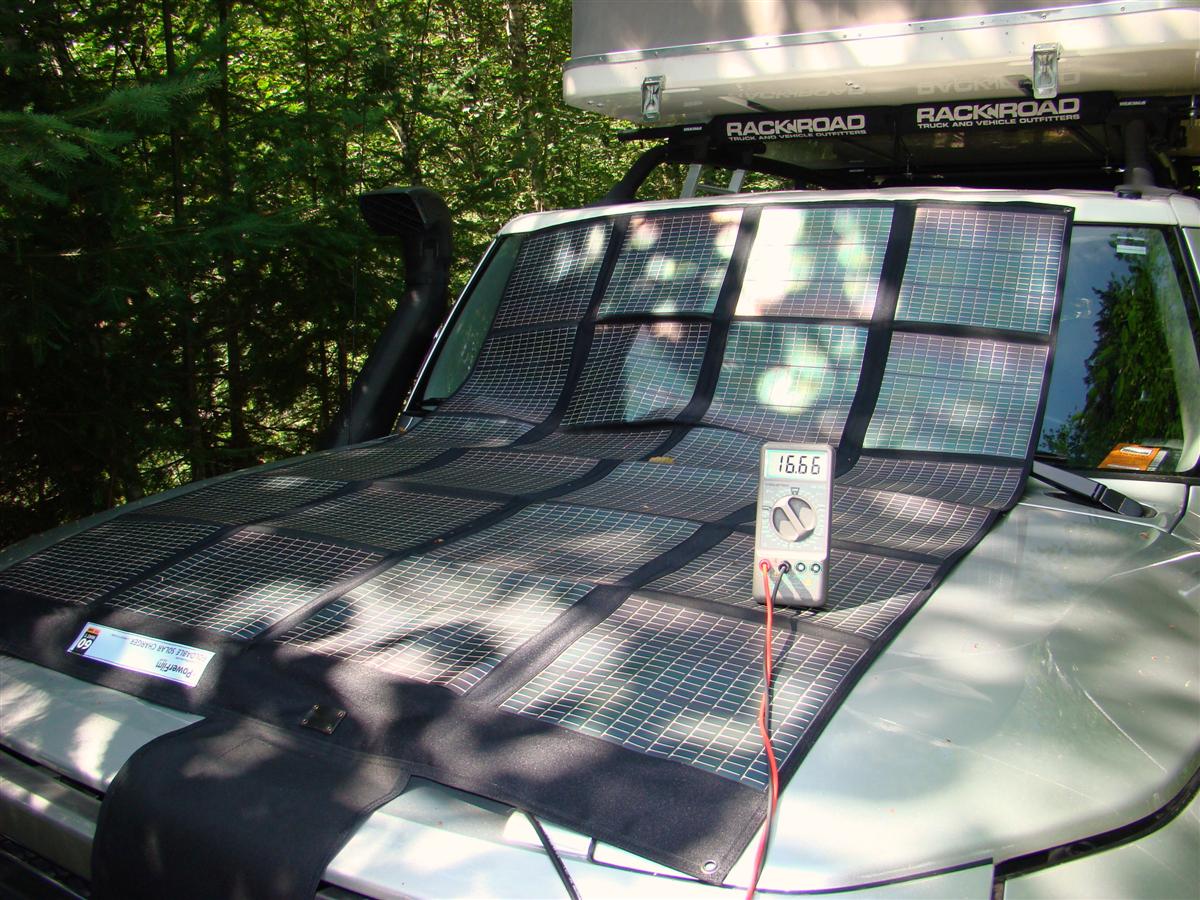
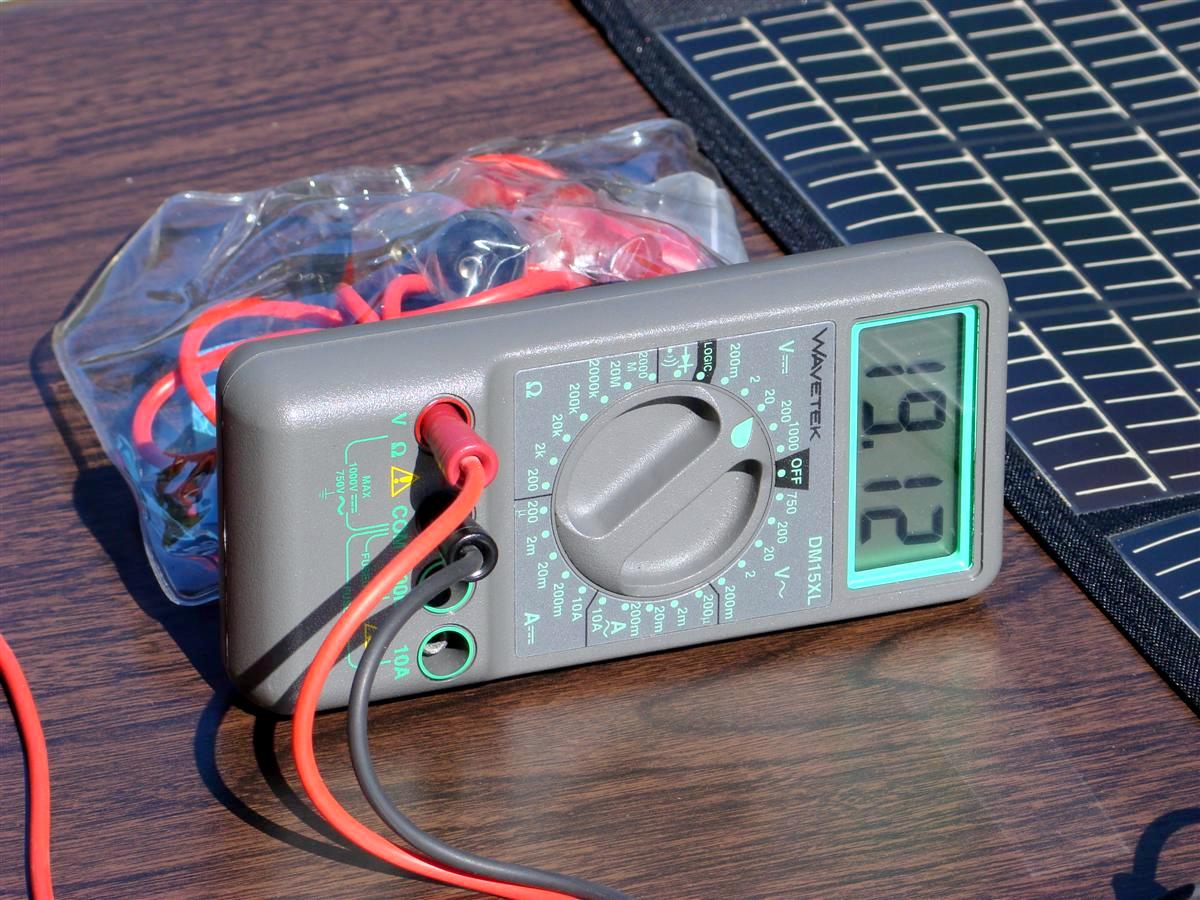
In picture five above I connected my volt meter to the solar panel and it was putting out a healthy 19.03 volts.
I played around by blocking more of the sun with my shadow that what the picture shows above, and I got it down to 18 volts.
In picture six above I was not blocking the sun at all and it was putting out 19.12 volts, I was impressed.
This was around 9:45 am, the sun was not even at its full strength yet.
It can put out more as the panel gets more saturated with sunlight.
Also the panel would have put out maybe more if it was all angled at the sun instead of having the top half laying flat on my old camping table.
In pictures seven and eight you can see the battery charging and then fully charged.
When you unplug the cable from the front trailer plug on the grille, the LED lights shut off on the charge controller, so no worries about having extra draw.
Not that I am worried about that anyways, as my alarm system always has a big blue LED flashing all the time.
Well there you have it, this puts out enough volts/watts/amperage to run an ARB/Engel type fridge on its own if you use the included female receptacle and plugged in your fridge directly to it.
I will just leave my fridge hooked up to the 12v outlets in the rear, and have the solar panel hooked up while camping and never worry about the battery running down.
This will also keep the second battery in my dual setup charged too.
If you have 12v needs like I do when out camping and do not want to run your battery(s) down, take a look into going with a solar panel.
Links:
Adventure Trailers solar page
PowerFilm Solar
F15-3600 60 watt model, also comes with female 12v (cigarette lighter) adapter that plugs into the solar panel, and you plug your 12v devices to it to charge them
Brunton Solar Controller 12-Volt Battery Charge Monitor
Bought Brunton Solar Controller at Amazon
Total investment:
$48.96 charge controller
$55.75 cables, plugs
$961.86 solar panel
______________
$1066.57 total
I put together this solar setup mainly for keeping both of my dual batteries charged to full capacity in the FJ Cruiser when out camping.
The ARB fridge, Maggiolina AirLand roof top tents 12v interior light, and occasionally recharging cell phone or laptop batteries can put a drain on the battery.
Not so much just running the fridge for a few days, but you factor in the other voltage requirements and the battery can take a beating if not recharged.
Running the rig for a few minutes a day is not really going to keep it topped off, hence where solar power comes in.
Here is the setup I have gone with:
1. PowerFilm F15-3600 60 watt solar panel purchased from Adventure Trailer via Martyn and Mario.
Pictures from Adventure Trailers on one of their Chaser trailers (one of those is in my future plans too when I move and have a garage) and from PowerFilm Solar.
2. Brunton charge controller.
This required unit (if charging your vehicles battery) keeps the solar panel from overcharging your battery/batteries on your rig.
It has LED lights that tell you when it is charging, and when the charge cycle is over.
It can handle up to 100 watts and 7 amps of power.
My solar panel put out 60 watts and 3.6 amps, so it is perfect for my application.
3. 15' PowerFilm extension cable (bought from AT)
part # RA-7 from the solar panel to an Adventure Trailer trailer type plug that is mounted to the grille.
4. Solar RV exterior plug, female with 12 gauge wire (bought from AT)
part # 055-01109
5. Solar RV plug male with 12 gauge wire (bought from AT)
Part # 055-01110
6. Weather pack connector kit (bought from AT)
Adventure Trailer has a way on their website to calculate your wattage requirements when building your solar setup.
Text taken from their site:
I mentioned Martyn has helped me a great deal in understanding what size solar panel to go with, and here was his suggestion:Tips for Evaluating 12 Volt Power Requirements
In the same way that we plan our trips revolving around our MPG and miles per tank, we need to do the same for calculating our auxiliary electrical needs.
It’s really quite simple:
The key is Ohms law.
It is a basic equation that can be read a few different ways depending upon what number you need to crunch:
Volts x Amps = Watts
Watts ÷ Amps = Volts
Watts ÷ Volts = Amps
Let’s say you want to know how many Amps an ARB 13Watt, 12V fluorescent light is going to consume per hour.
Your answer is 13 Watts ÷ 12 Volts = 1.08 Amps per hour of usage.
A 60 watt panel will help you stay ahead of the game for longer. The older ARB fridges pulled around 1.2 amps per hour or 28.8 amps in a 24 hour period.
The 60 watt panel produces 3.6 amp and hour during daylight, to at 8 hour of sun it's also producing 28.8 amp.
The foldable or roll up type of solar panels do cost more, but if you are tight on space like I am and want to keep the weight down or simply like them better than the stationary panels, these are pretty trick.
Also there are many more types of charge controllers out there that you can mount under the hood or inside of your rigs cabin if you have the space.
Some have digital readouts too of how much voltage the battery has and how much it is putting out, and how much voltage is coming from that big shiny yellow thing up in the sky.
I saw that Dave (adventureduo) from Expedition Portals forum had used a Sunsei charge controller, but I could not locate one as most places were out of stock.
Scott Brady (expeditionswest) from Expedition Portal had gone with the Brunton charge controller, and I did some research on it and found some good reviews of it at Amazon, the vendor I bought it through.
Dave had gone with the before mentioned trailer type plug from Adventure Trailers and did a cool installation of the plug being in the "O" of Toyota on the grille of his 1993 Toyota Landcruiser.
Very trick.
And it will work on mine too, I put the plug through the second "O" on the Toyota emblem, but I installed it another way which you will see in the pictures.
All parts laid out:
You can see the solar panel connected to the 15' extension cable that then goes to the short adapter cable that goes to the plug with the cap on it that you can mount to a bumper or other part of your vehicle.
The wires coming off of the plug/cap goes to the charge controller.
Also seen is the PowerFilm 12v female accessory plug they include with the solar panels.

Installation:
1. Find a suitable location for the trailer plug to hard mount it.
I pushed the wires through the grille, and the plate for the plug matched up very well with the grille.
I secured it with two zip ties.
2. Mount the charge controller under the hood near the battery.
I used heavy duty Velcro to mount it to the top of the main fuse box behind the stock battery location.
It has positive/negative wires with battery stud rings to put on your battery.
For the ground wire I ran it off to the side on the fender well where there was another wire grounded from a previous project.
The other red and black wire will be wired to Adventure Trailers "quick plug port" (trailer type connector) which I mounted to the grille.
Run the 15' extension cable from the port on the grille with the AT adapter cable to the solar panel and you are in business.
The solar panel also came with a female 12v socket with a plug on the other end that plugs right into the solar panel so you can use it not hooked up to the vehicles battery.
This way you can plug in a 12v male plug that goes to accessories like cell phones, laptop batteries, two way communication equipment, anything that you would normally plug into the 12v receptacle inside of a vehicle.
Way cool 'huh?
Here are a few pictures of the installation.
I will get better pictures and a complete field review at a later date during a camping trip or when I am on my vacation.


In picture five above I connected my volt meter to the solar panel and it was putting out a healthy 19.03 volts.
I played around by blocking more of the sun with my shadow that what the picture shows above, and I got it down to 18 volts.
In picture six above I was not blocking the sun at all and it was putting out 19.12 volts, I was impressed.
This was around 9:45 am, the sun was not even at its full strength yet.
It can put out more as the panel gets more saturated with sunlight.
Also the panel would have put out maybe more if it was all angled at the sun instead of having the top half laying flat on my old camping table.
In pictures seven and eight you can see the battery charging and then fully charged.
When you unplug the cable from the front trailer plug on the grille, the LED lights shut off on the charge controller, so no worries about having extra draw.
Not that I am worried about that anyways, as my alarm system always has a big blue LED flashing all the time.
Well there you have it, this puts out enough volts/watts/amperage to run an ARB/Engel type fridge on its own if you use the included female receptacle and plugged in your fridge directly to it.
I will just leave my fridge hooked up to the 12v outlets in the rear, and have the solar panel hooked up while camping and never worry about the battery running down.
This will also keep the second battery in my dual setup charged too.
If you have 12v needs like I do when out camping and do not want to run your battery(s) down, take a look into going with a solar panel.
Links:
Adventure Trailers solar page
PowerFilm Solar
F15-3600 60 watt model, also comes with female 12v (cigarette lighter) adapter that plugs into the solar panel, and you plug your 12v devices to it to charge them
Brunton Solar Controller 12-Volt Battery Charge Monitor
Bought Brunton Solar Controller at Amazon
Total investment:
$48.96 charge controller
$55.75 cables, plugs
$961.86 solar panel
______________
$1066.57 total
Last edited: