Mobile base camp build

Arya Ebrahimi

Adventurer
Hi all,

I've been lurking here for a while but haven't posted much. I have recently started on what I call my mobile base camp. This will be a cross-post from 'mud.

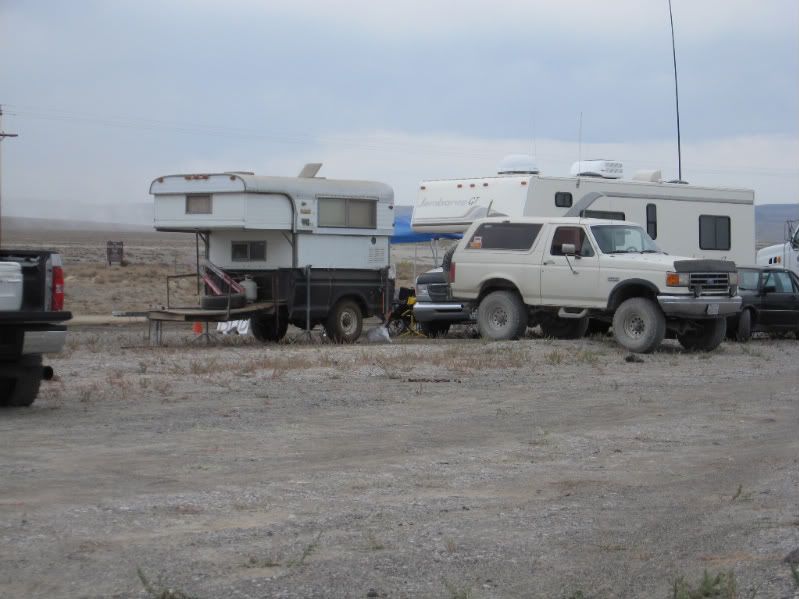
So I really love the concept of an expedition type trailer setup, but I wanted to have the ability to have everything an expo trailer has with the ability to haul cargo/an atv/dirt bikes/etc. The following will document the build from concept to completion of what I have come up with. I'm just getting started but by the end of the thread I hope to have a comprehensive documentation of my build.

So far it's a bit more of a dream than a reality, but I hope to become involved in desert racing in the near future. Even if only in a supportive roll. I believe my 80 as I plan to build it along with this trailer will make an excellent chase platform in addition to being a luxurious back country camping platform.

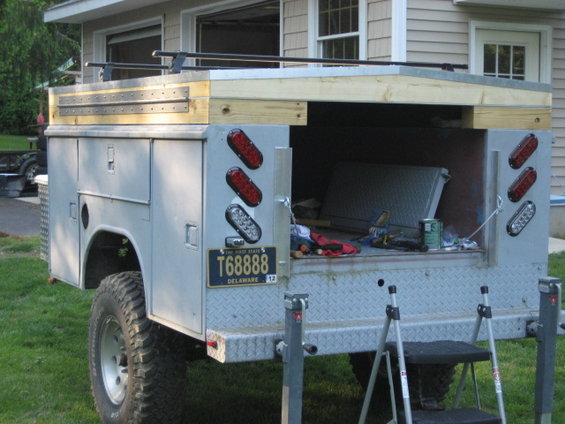
The basis of my trailer is a retired service/utility body that I picked up on Craigslist. It is in my opinion almost perfectly suited to my purposes and will only require modifications to the floor and supporting structure.

I plan to utilize one side of the trailer for a full kitchen including stove, sink, refrigerator and possibly even a microwave, space and electrical permitting.

The opposite side will handle tool storage, shower, and electrical compartments. The trailer will have a full on-board water and electrical system(12/120/220V). I plan to carry approximately 50 gallons of fresh water in tanks under the belly of the trailer. This should allow comfortable showers and plenty of water for drinking/food prep etc. I also plan to carry approximately 30 gallons of fuel. This will serve as the fuel tank for the generator as well as an aux fuel tank for the tow vehicle. A simple fuel transfer pump will be utilized to transfer fuel from the trailer to the tow vehicle. Additionally this will allow for fueling of toys(ATVs/dirtbikes/etc) if necessary.

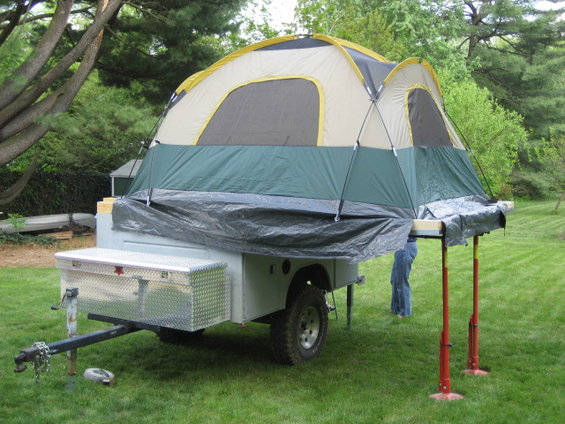
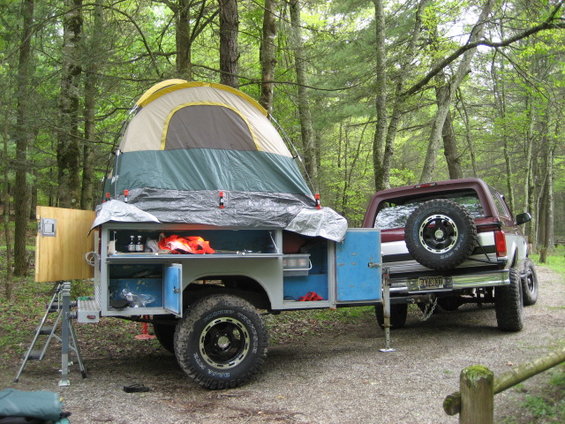
A large RTT will handle sleeping duties while the majority of the bed will remain open below for storage/hauling. Approximately 2' of the front of the bed will have to be sacrified for the fridge and generator to live in.

The entire trailer will sit on a scratch-built frame sitting on a 3500# axle from ABC Trailer Parts - Trailer Axles - Trailer Axle Kits with electric brakes.

A pintle hitch will be used initially for cost reasons, but a lock-n-roll or similar will eventually be installed.

Enough talking. On to the pics.

attachment.php


attachment.php


attachment.php
 

Attachments

  • Camping Trailer Build 005 (Medium).jpg
    Camping Trailer Build 005 (Medium).jpg
    77.5 KB · Views: 8,083
  • Camping Trailer Build 006 (Medium).jpg
    Camping Trailer Build 006 (Medium).jpg
    81.7 KB · Views: 7,980

Arya Ebrahimi

Adventurer
Over the past several days I have gotten the frame tacked together and am in the process of fitting the body to the frame.
attachment.php


Here you can see the frame layed out on the floor and a closeup of the tongue area.
attachment.php


I then threw the axle under there and rolled it up to my Duramax to see how it looked.
attachment.php
 

Attachments

  • Camping Trailer Build 020 (Medium).jpg
    Camping Trailer Build 020 (Medium).jpg
    84.2 KB · Views: 8,003
  • Camping Trailer Build (Medium).jpg
    Camping Trailer Build (Medium).jpg
    59.6 KB · Views: 7,919
  • Camping Trailer Build 026 (Medium).jpg
    Camping Trailer Build 026 (Medium).jpg
    91.4 KB · Views: 7,914

Arya Ebrahimi

Adventurer
Once I got it all mocked up I realized that the axle was offset to one side by about a half inch. I measured and measured and measured and finally it dawned on me to check the axle. The damn perches were welded on from the factory offset to one side by 1/2" :mad: Anyway, not that big a deal, just a PITA to fix.

If you're wondering why the rear of the frame rails hang back so much, its because I hadn't figured out my plan for the rear bumper yet.

Yesterday I stumbled on the perfect solution at Harbor Freight. I picked up a pair of ATV ramps that will serve several purposes. For day to day use they will simply form a platform at the rear of the trailer. This can be used for additional storage/hauling, a bench/table, etc.
attachment.php

When camping I will do up some brackets to allow one of them to sit about 8" lower forming steps to get up into the tent. Lastly they will also serve as ATV ramps and dirtbike ramp/carrier.
attachment.php

attachment.php
 

Attachments

  • Camping Trailer Build 036 (Medium).jpg
    Camping Trailer Build 036 (Medium).jpg
    89.9 KB · Views: 7,860
  • Camping Trailer Build 037 (Medium).jpg
    Camping Trailer Build 037 (Medium).jpg
    96.8 KB · Views: 8,064
  • Camping Trailer Build 034 (Medium).jpg
    Camping Trailer Build 034 (Medium).jpg
    85.8 KB · Views: 7,889

Arya Ebrahimi

Adventurer
That pretty much catches me up to where I am now. My goal is to have the body mounted to the frame by the end of the day today and have this thing wired and towable by Friday.

From there I will focus on the smaller parts and pieces that will turn it from a simple trailer into my mobile base camp.
 

hikingff77

Adventurer
Very interesting. A very useful concept. Probably too heavy for my rig though. Will be neat to see the finished project.
 

StumpXJ

SE Expedition Society
I had planned to do the same thing for my trailer build, and had my eye on an aluminum version of the service beds (craigslist, 200 bucks). It was intended for a mini truck (S-10 or ranger size) and it only weighed about 300 pounds. I hear the steel versions are MUCH heavier.

Is yours steel? With 80 gallons of liquid on there, and everything else, do you think you may be coming close to taxing out the 3500 pound axle?

If you are pulling it with a duramax, then you would have no issues pulling it, but it probably will weigh more than my cherokee!

Looking forward to the progress!

~James
 

ntsqd

Heretic Car Camper
A set-up that I saw while chasing BitD's Vegas to Reno race this August:
IMG_0758-1.jpg

The FSB is the tow rig.
You have a PM
 

Hilldweller

SE Expedition Society
One of my dreambuilds in my head is a 4WC or Flipac on a crewcab diesel with an aluminum jobber bed.

Like Stumpy said, except for the weight, I love it. You could put a big 2200 tent up there, add-a-room, and a deployable awning over the kitchen side.
Instant glamping with so much extra "stuff" at the ready.
 

Arya Ebrahimi

Adventurer
This thing will definitely not be light. The bed alone weighs in the range of 750#'s. I am removing a lot of unnecessary weight by removing the 1/8" steel plate floor and supporting structure. The trailer frame will double as the new support for the floor and I will be replacing the actual floor with aluminum. I'm thinking this will cut about 150#'s out of the equation(4x8 1/8" diamond plate weighs 197#'s by itself). I also cut out about 80lbs worth of crossmembers this afternoon. I will try to get a weight of just the box when I'm done before I put it together.

I'm not too worried about overloading the axle. Although the weights will add up, nothing I'm gonna put on this thing will be that heavy.

I did order the large roof top tent from campinglab on Friday and hope to see it this week sometime. It's the 72x94 unit which will cover the entire top of the bed almost perfectly when deployed.

Keep the comments coming, I love hearing feedback on my sometimes hairbrained ideas :D

Oh, one more thing. The duramax will tow it for simple camping trips, but for any desert chasing/expedition trips it will be towed by my 80-series land cruiser which I'm also building at the moment. A 6.0 LQ4 swap is planned for that rig which should help with any towing power issues ;)
 

elmo_4_vt

Explorer
Very nice build... Similar to what I've done, but with a standard tent on the roof until I can afford a custom job...

Can you elaborate on your plans for the boxes? I can't wait to see how you finish off your compartments. I haven't gotten to that yet and could use some good ideas. I plan to use the front alum. diamond plate box as a pull out sink/stove and use the top long compartment as the rest of the kitchen. The front larger box as the electronics area (radio, speakers, etc.) and the rest will be mechanicals/shower/storage.

img_4137.jpg


img_4157.jpg


img_4203.jpg
 

Arya Ebrahimi

Adventurer
Elmo, I saw your build before I bought my box and it was part of my inspiration to proceed with this concept.

The kitchen is about the only compartment I've really got figured out to any degree.

My stove will mount to the door itself to allow quick and easy setup times(ignore the bungee cord, it was for mockup purposes only). The remainder of the door will get covered in cutting board material and function as a countertop/prep area.

attachment.php


attachment.php


The sink will be stowed until needed and will attach to the back of the box as required. I plan to sink the faucet into the rear of the box with a small access door. This will allow me to have water whenever necessary at the rear of the trailer, but only have to set up the sink if I really need a sink.

attachment.php


I've been busy the past couple days with some other stuff, but am about to get back to work on it this afternoon.

Ary

PS Go Hokies! :D
 

Attachments

  • Camping Trailer Build 011 (Medium).jpg
    Camping Trailer Build 011 (Medium).jpg
    83.7 KB · Views: 4,590
  • Camping Trailer Build 013 (Medium).jpg
    Camping Trailer Build 013 (Medium).jpg
    76.9 KB · Views: 4,549
  • Camping Trailer Build 014 (Medium).jpg
    Camping Trailer Build 014 (Medium).jpg
    85.1 KB · Views: 4,550

Arya Ebrahimi

Adventurer
My tent came!!!

It got here about an hour ago and I quickly drug it inside and unwrapped it in the living room

attachment.php


I ordered the 72x94 camping lab tent and I think it's going to be perfect!

There was some slight shipping damage on part of half of the floor, but nothing too concerning and definitely easily fixed(it's a slight bend in the sandwhiched aluminum which I believe I can pull out once the tent is mounted to the trailer).

Of course with all of this commotion the pooch had to come see ****** dad was up to. She seemed a bit cautious at first.

attachment.php


But then settled in quite nicely.

attachment.php


attachment.php


attachment.php


This tent is Chelsea approved :)
 

Attachments

  • Camping Trailer Build - Tent 008 (Medium).jpg
    Camping Trailer Build - Tent 008 (Medium).jpg
    57 KB · Views: 4,372
  • Camping Trailer Build - Tent 005 (Medium).jpg
    Camping Trailer Build - Tent 005 (Medium).jpg
    64.6 KB · Views: 4,384
  • Camping Trailer Build - Tent 003 (Medium).jpg
    Camping Trailer Build - Tent 003 (Medium).jpg
    50.7 KB · Views: 4,398
  • Camping Trailer Build - Tent 009 (Medium).jpg
    Camping Trailer Build - Tent 009 (Medium).jpg
    56.3 KB · Views: 4,348
  • Camping Trailer Build - Tent 012 (Medium).jpg
    Camping Trailer Build - Tent 012 (Medium).jpg
    56 KB · Views: 4,366

Arya Ebrahimi

Adventurer
I was also pleasantly surprised that I can sit completely upright and I still have about 8" of overhead clearance. This is quite impressive since I'm 6'3" and have a very long torso. I'm happy :)
 

Arya Ebrahimi

Adventurer
Ok, back at it today after a long weekend of downhill mountain biking :bike_rider:

I started off by getting the "body mounts" fabbed up and tacked on. Nothing real complicated, just some angle iron with a couple holes. I intend to hard mount the body to the frame since there's no opposing articulation putting stress on the frame. I will brace these underneath to keep them from bending down, just wanted to make sure they would fit/work before I did all that.

attachment.php


Then I slid the frame back up under the body to make sure it fit and aside from a few necessary tweaks to the body with the grinder, all's well. It's actually a pretty snug fit which I'm happy about.

attachment.php


You can also see that there's quite a bit of room between the frame and the floor above. This is the space where I intend to hide the water and fuel tanks.

attachment.php


No day would be complete with out at least one SNAFU.

I picked up a set of 80-series wheels with some bald 35x12.50 TrXus's yesterday. My intent has always been to put this tire/wheel combo on the trailer. The wheels/tires you saw previously are intended for the cruiser once I start on that build.

Anyway, when I spec'ed this axle, I had these wheels in mind. Unfortunately I also had in mind to relocate the spring perches inwards about 2" on either side. Well I forgot all about that when I built the frame based on the existing perch width.

So....what does all that mean? The tires rub the springs HARD

Fortunately I've got an extra set of wheel spacers kicking around that should fix me right up, but I hate using them on a 'new' build just as a matter of principle.

attachment.php


Now I need some input.

I've been planning to carry two spares since they will also serve as spares for the tow vehicle(same tire/wheel combo). However, I'm wondering if this is just taking redundancy to a ridiculous level. I will also have a spare on the Cruiser which amounts to a total of 3 spare tires.

I also plan to carry 2 propane cylinders and am beginning to question that as well.

What do you guys think? It's really not much more work to make the spare tire carrier for 2 tires as opposed to one, it's just a matter of whether I want to carry that extra weight around all the time.

I did some mockups to see what the two ideas would look like. Obviously in the one with the tire offset to one side there would be another tire in the same position on the other side.

So what say you?

attachment.php


attachment.php


After that I got the axle slung under the trailer. I'm trying to figure out if I have enough fender clearance or if I need to "lift" the trailer a bit more. My wheel spacers are being brought over by my courier(love you mom :smiley_drive: ) to see if they make enough of a difference or not. If I have enough sidewall clearance then my uptravel will be limited by the spring/shackle and not sheetmetal which is good.

I'm not crazy about how the wheel well looks so full with the tire stuffed up in there all the time, but maybe it will grow on me. I really don't want to make this thing any taller.

attachment.php


attachment.php


So what do you guys think? Lots of questions in there, so tell me what you think please!
 

Attachments

  • Camping Trailer Build 040 (Medium).jpg
    Camping Trailer Build 040 (Medium).jpg
    97.9 KB · Views: 4,231
  • Camping Trailer Build 049 (Medium).jpg
    Camping Trailer Build 049 (Medium).jpg
    70.8 KB · Views: 4,192
  • Camping Trailer Build 045 (Medium).jpg
    Camping Trailer Build 045 (Medium).jpg
    64.6 KB · Views: 4,199
  • Camping Trailer Build 039 (Medium).jpg
    Camping Trailer Build 039 (Medium).jpg
    94 KB · Views: 4,191
  • Camping Trailer Build 052 (Medium).jpg
    Camping Trailer Build 052 (Medium).jpg
    77.9 KB · Views: 4,182
  • Camping Trailer Build 053 (Medium).jpg
    Camping Trailer Build 053 (Medium).jpg
    72.7 KB · Views: 4,172
  • Camping Trailer Build 055 (Medium).jpg
    Camping Trailer Build 055 (Medium).jpg
    65 KB · Views: 4,157
  • Camping Trailer Build 056 (Medium).jpg
    Camping Trailer Build 056 (Medium).jpg
    45.9 KB · Views: 4,199

elmo_4_vt

Explorer
I used body lift bushings that I got off of ebay (you can find them cheap for obscure types of trucks) for $5 and cut them down to 2" for a little extra tire clearance. I also had to put on extended shackles when I went with 35s..

Don

-
 

Forum statistics

Threads
185,842
Messages
2,878,770
Members
225,393
Latest member
jgrillz94
Top