Post your Camp Awnings

glamisdude72000

Desert Camper
Thanks! :) It is pretty simple as construction even in original fit. We used alluminium pipes for the arms and the back and i bought the tent canvas from here: http://www.esvocampingshop.com/en/
and then we tailored it. :)
Result is better than expected. I think it is lighter than the Hannibal, behaves exceptionally on wind and is bolted with 6 bolts total (i.e. can be mounted and removed very quickly. I made it so it can fit to my African Outback roofrack. If you are interested, i can make more detailed photos.

Please do with the pictures! I was looking at evldave's $100 awning diy but I like not have upright supports.
 

matthewp

Combat Truck Monkey

Nilton J

Adventurer
My awnings:

Under the car awning is my Ham Shack, having:

the "amazing" sherpa table, japanese Yaesu HF radio / Icoms V/U HT / Icom scanner and portable HF USA Chameleon antenna.

DSC_0181.jpg

DSC_0141.JPG


Under the trailer awning is the Party Room, having:

USA GSI coffee percolator, GSI pot and GSI cookware kitchen and tableware utensils stuff, Eureka cat skill table.

DSC_0180.jpg

DSC_0185.jpg


And this is the complete set of awnings:

DSC_0175.JPG


video of my camping & expedition set: http://www.youtube.com/watch?v=ma5D-JhM498
 
Last edited:

mjmcdowell

Explorer
Awnings…..

Some great setup's posted, living up here in the NE I have to contend w/rain and the gaps between the trucks and awning could let rain spatter/blow in and side mounted would make it hard to get in my truck topper while staying dry. I like to be able to cook, hang out and get to bed while staying out of the weather. I made mine with permanent ties to go to the back of the topper, weather strip to prevent drip's 3 pole's one in the middle, one on each outward corner, 2 quick adjustable guy lines staked out and one in the middle of the rear edge to tension and provide drainage. Since I have all the lines attached to the awning it takes only a few minutes to set up before the big drops start to hit! Sound complicated but it's not….. for sun on my trips out west… shady side of the truck and a big wide brim hat if needed :sombrero: mjmcdowell
 
image.jpg

Here's the standard ARB awning on my 80. I'm very happy with it. An awning with no support legs or tie-downs would have been nice, but they gave up too much shade (size) for my preferences.
 

uscg2008

Explorer
My $4 awning :bike_rider:
3219a5a71581ab5087a3429a0f9a7e7f_zps390c2bf3.jpg

Kept me dry even during an all night rain storm
4145e9b6c43e1ef55134c43547a85122_zps7443fe8d.jpg
 

mtnbike28

Expedition Leader
My Kelty shelter:
With the Flippac on the beach
080913pod_031.jpg

Off the camp FZJ80 in camp mode for just me and my daughter.
101412podN.jpg
 

Nilton J

Adventurer
Some great setup's posted, living up here in the NE I have to contend w/rain and the gaps between the trucks and awning could let rain spatter/blow in and side mounted would make it hard to get in my truck topper while staying dry. I like to be able to cook, hang out and get to bed while staying out of the weather. I made mine with permanent ties to go to the back of the topper, weather strip to prevent drip's 3 pole's one in the middle, one on each outward corner, 2 quick adjustable guy lines staked out and one in the middle of the rear edge to tension and provide drainage. Since I have all the lines attached to the awning it takes only a few minutes to set up before the big drops start to hit! Sound complicated but it's not….. for sun on my trips out west… shady side of the truck and a big wide brim hat if needed :sombrero: mjmcdowell

What truck do you have?

Cld you post somes pics (awning, truck, camping set)?
 

Switch

Observer
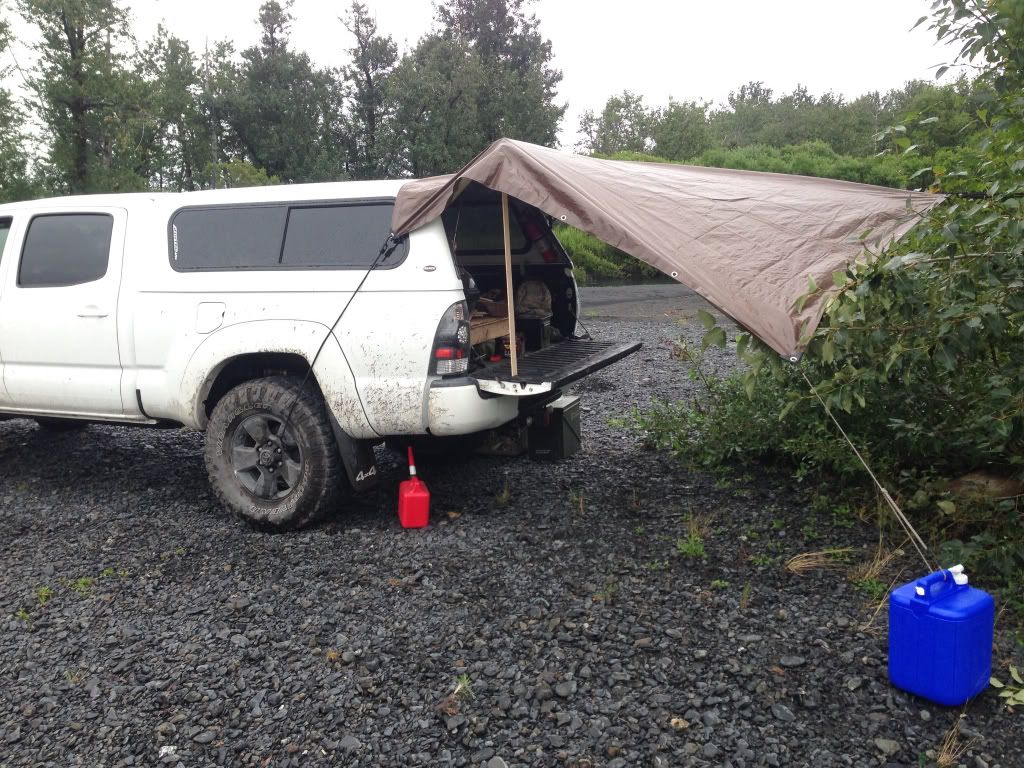
This is a variation of Wildcat’s awning with hand full of minor changes. The main difference is using Bimini hinge mounting brackets to secure the vertical support poles to the truck. This way the poles that hold up the awning also hold it down and the angle can be adjusted for rain and wind. Once I had that in place, I realized that I could add an awesome kitchen counter and shelf.

DSCN8053a.jpg


So far this has only been field tested in fair weather but last week in Death Valley an extremely large and intoxicated visitor to our camp tested the support poles with his full weight when he almost fell onto the counter so I know the setup can take quite a bit of weight and torque but I'm carrying spare parts just in case.

The 1.25" wooden dowel w/ hooks for hanging pots was sitting in my basement from our last house & just happened to fit perfectly below the table. It would be easy enough to add hooks to the horizontal kitchen counter support pole to eliminate this part.


These pics show the Bimini hinge fittings attached to the rock slider and custom rear bumper. The screw post on the hinge mounting brackets were replaced by stainless steel locking pins which required drilling out the threads. Locking pins were used elsewhere as needed.
1ef38fdb-1329-481d-982a-29f5eaa86d38.jpg
DSCN7850a.jpg

Note: I used Taylor Made Bimini hardware for the 3/4" EMT but Sea Dog Bimini hardware fit better (and cost less) for the 1/2" EMT fittings. The Taylor Made hardware had to be ground slightly wider to fit the 3/4" EMT. The back awning uses all fixed length 1/2" EMT & Sea Dog Bimini hardware so was very cheap to build. All set screws were countersunk into the EMT to prevent them from sliding on the EMT except where rotation was desirable. In the case of the sliding jaws on the ¾” EMT attached to the truck, I made groves for the set screws so the sliding jaws could rotate on but not slide along the EMT. The set screws in the sliding jaw hinges were replace by thumb screws where necessary.


This shows how the kitchen counter is supported with cross members The counter can be adjusted level by sliding the jaw hinges. The vertical EMT have set screws at the ends to prevent the jaw hinges from sliding off the ends. The shelf above the counter is supported using 2MM rope and the webbing straps with sliding buckles used to secure the tarp when it is rolled up.
DSCN7868a.jpg


The tarp is attached to the EMT using Hampton Products-Keeper 06345 8" Bungee Cords with plastic toggle balls
71+ZMPWPQwL._SL1500_.jpg

I found these Kapro 240-01 Surface levels on Amazon to be great for both leveling the counter and the whole truck.
41sR9QjSLeL._SL500_AA300_.jpg
No more pancakes spilling out of the frying pan due to tilted stove!

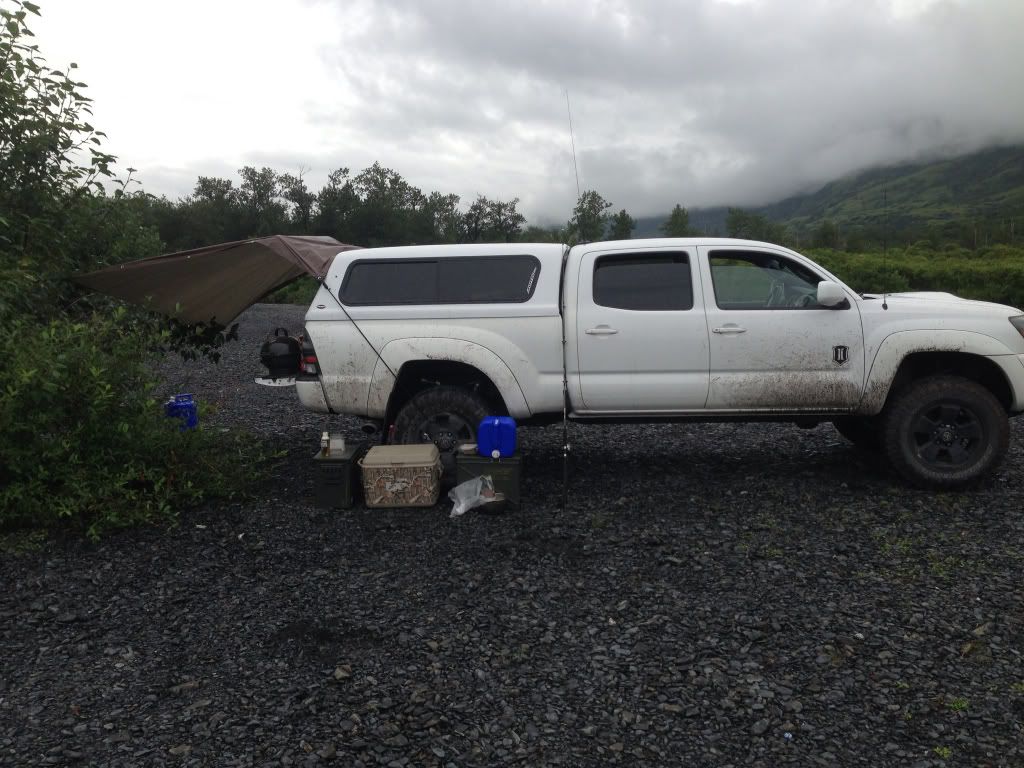
I also used a similar design to have the option of putting a 2nd tarp over the back which is the sleeping platform. Here you can see both tarps deployed.
DSCN7846a.jpg


To make the telescoping poles I used 1/2" and 3/4" EMT and 1/2" Halex EMT couplings from the Home Depot.
5019407e-7296-4e77-8afe-cbbc8e8a755c_1000.jpg


The 1/2" Halex EMT couplings fit very tightly inside the 3/4" EMT (once I removed the lock screw and grind flat one side of the fitting). I also had to grind the inside of the coupling to allow the 1/2" conduit to slide freely. I also replaced the Halex lock screw with a Sea-dog Nylon head-screw.
DSCN7872a.jpg
DSCN7853a.jpg

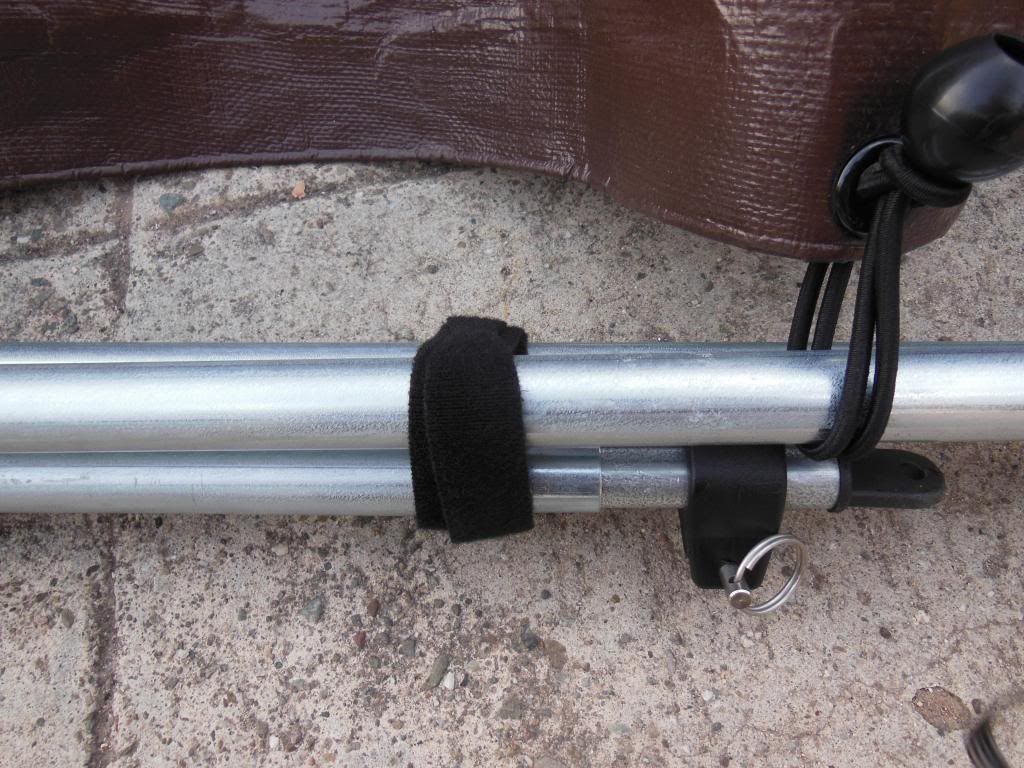
On the photo above you can see where I used painters tape & black spray paint to mark off 1" distances at about the right distance for tightening the horizontal telescoping poles. This way I can adjust both sides of the awning to the same length & get the proper tension.


When the poles are collapsed and folded I use 1” Velcro straps to keep them together and organize which poles get removed first

DSCN7878a.jpg


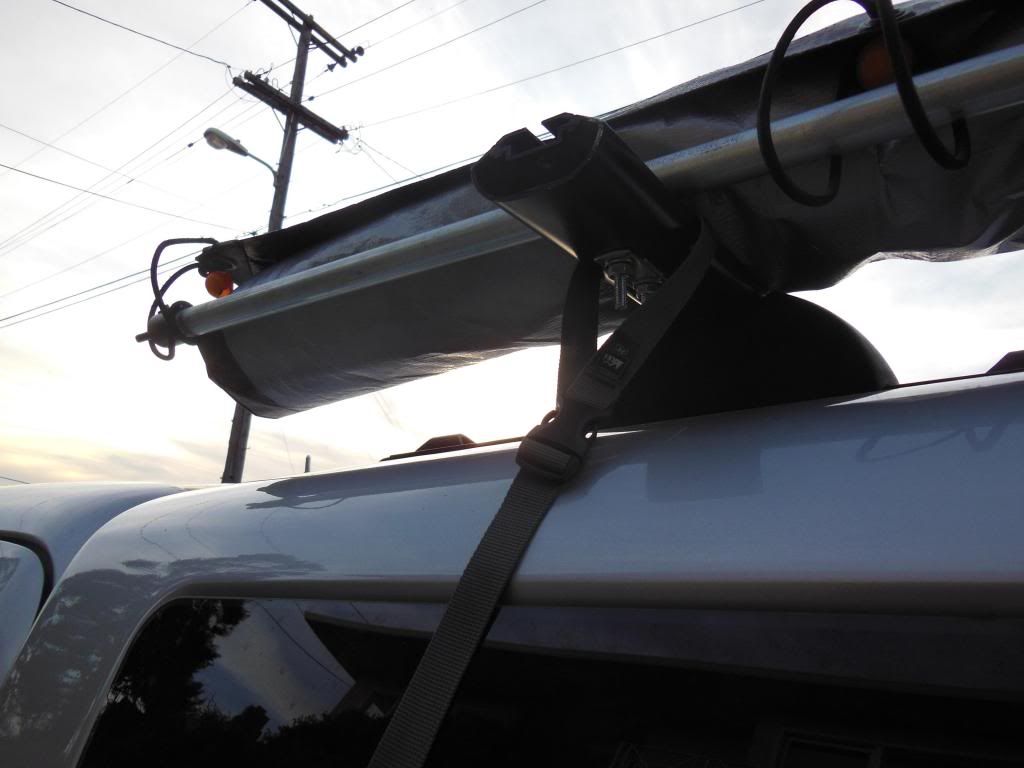
Here you can see the 60” length of ¾” EMT that is secured to the ProRac Utility Roof Rack via Ubolts. The entire tarp rolls up and is secured by the 4 webbing straps with sliding buckles to both the EMT and root rack.

DSCN7879a.jpg


Happy trails...
DSCN8237a.jpg
 
Last edited:

Abitibi

Explorer
Very nice mods and set up on that last one. It's nice to see people thinking outside the box.

Manuchao's retractable awning on his Toyota was also a very clever way to control the shaded area... I guess he could have added a tilt down function on it to get even more shade control?

Way to go guys!

Cheers,
Mr. D
 
Our awnings are standard CampingLab side awning and rear (we call it tailgate awning). Sadly Campinglab is no longer around, but ARB or any chinese made are all about the same. The nice thing about them is they are fairly stout so we add weather protection by attaching silicone tarps wherever we may need them...

It doesn't look pretty, but it works and you can build around as much as you'd like. Here we are under some very heavy rain in Brazil a few weeks ago...

1462976_10152042590577206_1225216656_n.jpg


Here is another way of deploying the 2 awnings and one tarp connecting them.... not quite a Foxwing :p Hanging out with friends in La Gran Sabana, Venezuela a few months ago.
1604574_10152174875327206_1809442944_n.jpg
 

Forum statistics

Threads
185,911
Messages
2,879,539
Members
225,497
Latest member
WonaWarrior
Top