2005 Chevy Colorado Build Up

BCJC

Adventurer
looks like a fun trip. i have very similar complaints about my truck's design, ie, the crossbrackets hanging down and the springs under the axles. i've added skid plates which have helped protects the underbelly, as well as help "slide" over obstacles rather than getting too hung up. the leaf springs, well, other than a SOA (spring over axle) conversion, i guess we'll just have to live with it. i havn't had a problem with my parking brake cables, but i'm curious abou your idea of rerouting. keep me informed if you figure something out! again, looking real good!
 
Recovery Equipment and Emergency Break Cable Hanger Update

Keeping it simple (and cheap). This is the extent of my recovery equipment.

View attachment 7882

Two 20-foot straps. One with looped ends and one with hook ends. One 4 ton come-along. The straps fit behind my back seat and the come-along fits like a glove under the back seat. Am I missing anything basic?

As for the emergency break cable hanger. It’s never a good thing when you hear the parts guy at the Chevy dealership saying on the phone “well that’s a bad design” to the person on the other end. The only way I could get the part I needed was to purchase a new leaf spring. The cable hanger is riveted to the bottom leaf and is not sold separately. I didn’t bother to ask how much and I am going with plan B. Fortunately for me I have a brother that owns a body shop. He is going to bend the broken piece back into shape and weld it back into place. At the same time he is going to drill and tap the broken bolt from my other break cable mishap.
 

eugene

Explorer
Northern Explorer said:
It’s never a good thing when you hear the parts guy at the Chevy dealership saying on the phone “well that’s a bad design” to the person on the other end.

Thats why he designs the parts instead of working in counter, ohh wait :)

How does the door on that trailer work, it looks like its one solid piece so where does it go when the top is down?
 
eugene

eugene said:
Thats why he designs the parts instead of working in counter, ohh wait :)

How does the door on that trailer work, it looks like its one solid piece so where does it go when the top is down?

lol

The door and door frame slide up and attach to the ceiling. It's a clever design. All pop up campers that I have ever seen have the same design. The ridged door frame adds a lot of stability to the structure of the camper when it is in the raised up position.
 
Last edited:

jim65wagon

Well-known member
Northern Explorer said:
Keeping it simple (and cheap). This is the extent of my recovery equipment.

View attachment 7882

Two 20-foot straps. One with looped ends and one with hook ends. One 4 ton come-along. The straps fit behind my back seat and the come-along fits like a glove under the back seat. Am I missing anything basic?

.
How does the dog work the come-along without opposable thumbs?

I've got a three foot pipe that slides over the handle of my come-along to alleviate some of the inevitable muscle strain.
 
jim65wagon said:
How does the dog work the come-along without opposable thumbs?


The wife works the come-along. The dog is for traction under the tires. We usually pick up a half dozen from the pound before we head out. I sit in the drives seat and give orders. I don't like to get mud on my Italian leather boots......Just Kidding
 
Last edited:
My latest downgrade

I’m posting this here instead of the trailer section because what I am doing with my camper doesn’t warrant a thread of it’s own.:(

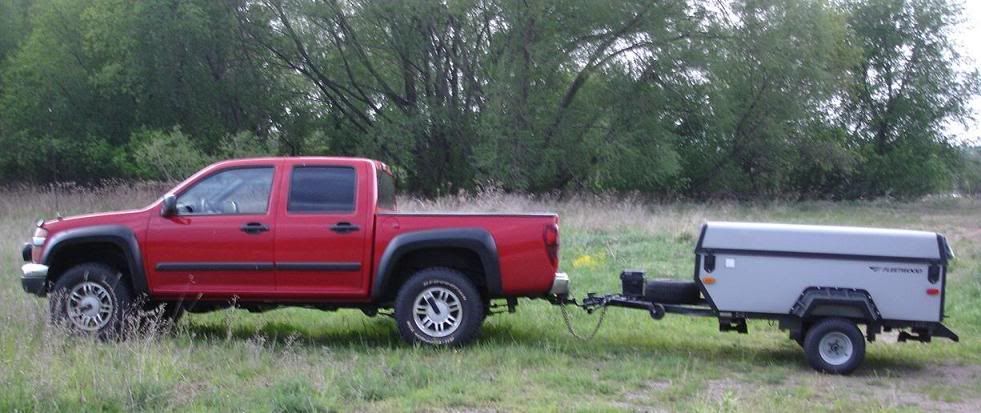
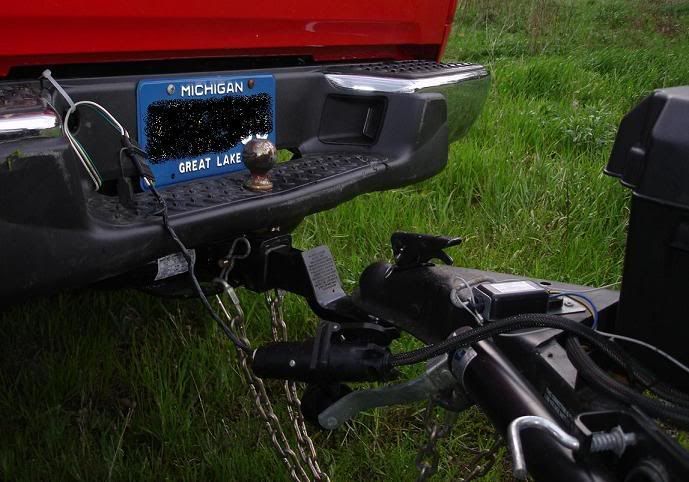
My original plan with my Fleetwood Neon was to install my old tires and rims in order to lift the camper up to the height of my bumper mounted ball hitch. By not installing a receiver hitch under the bumper I would be able to retain as much departure angle as possible. My bumper is rated to 2000 pounds for towing with 200 pounds of tongue weight. The Neon weights only 950 pounds and has a tongue weight of only 90 pounds. So there would have been plenty of capacity. In addition to the departure angle issue I thought it would be a good idea if all of my truck and camper tires were interchangeable for the purpose needing to carry just one sized spare tire.

I ran into a few problems with this idea. First of all the bolt pattern wasn’t interchangeable. This could have been corrected by installing new hubs on the camper. The second problem was that my truck tires wouldn’t fit under the fenders. This probably could have been corrected but I would have had to hack saw off the fender mounts that attach to the frame and then have new ones fabricated and welded on. The third problem (and the nail in the coffin) was the fact that the truck rims had way too much backspacing. The tires would have been right up against the side of the camper and even then the lug nuts wouldn’t have been able to be tightened all the way.

I thought about doing a spring over axle conversion but that wouldn’t have done anything for axle clearance anyways. So in the end I just broke down and ordered a receiver hitch. Side note…The camper comes with 205/65-10 sized tires. 20.5 inch diameter.

sitting level with new hitch
truck20and20camper.jpg


showing the height difference between the bumper hitch and new hitch
hitch20close20up.jpg


I still need to install the seven lead connecter with the break controller.
 
Last edited:
High Beam Kit

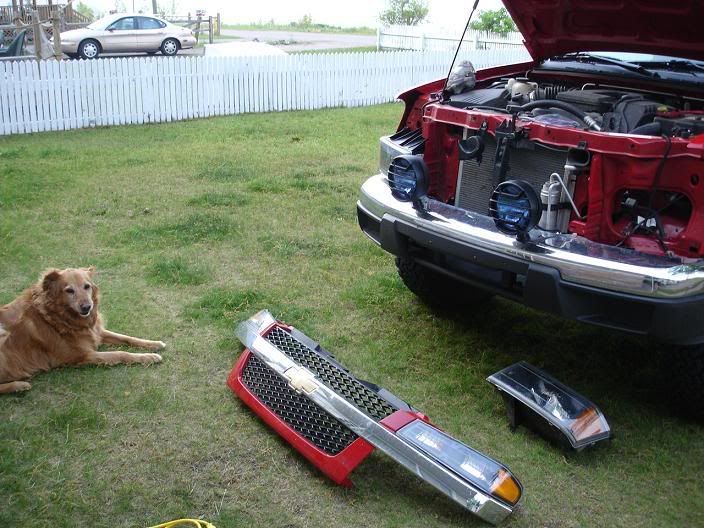
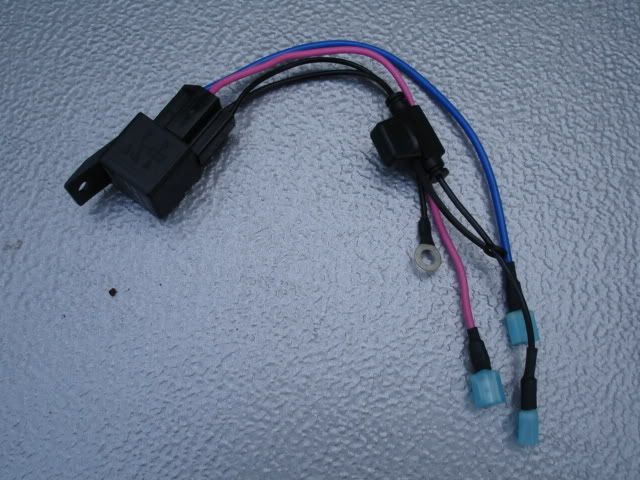
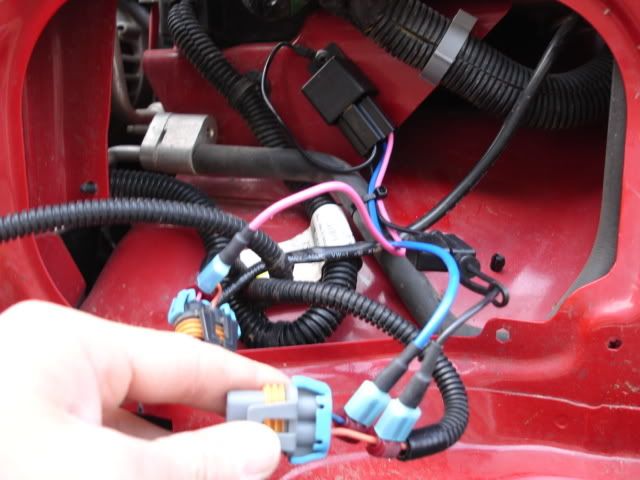
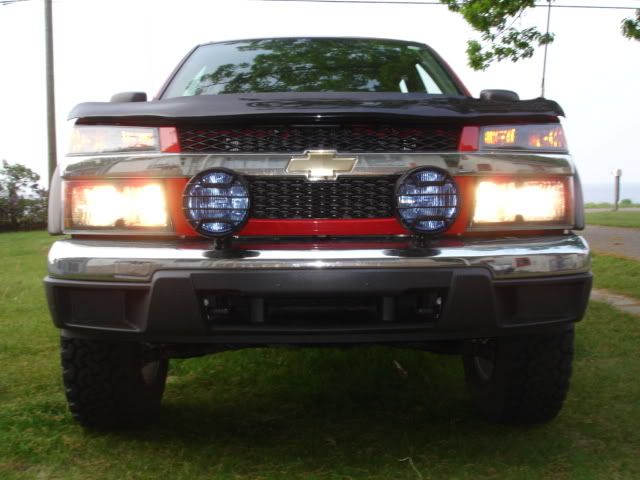
I installed my high beam kit tonight. I purchased it from www.highbeamkits.com A fairly easy installation. For those that don't know...the high beam kit enables both the low beam and high beam to be on at the same time when you have the brights on. The components of the kit consist basically of a relay and some wiring harnesses. It's well put together and it's a really cheap upgrade.

april20282C20200720006.jpg


april20282C20200720008.jpg


april20282C20200720009.jpg


april20282C20200720010.jpg
 
Last edited:

BCJC

Adventurer
setting a good pace there! just thought i'd let you know that i swapped out my shackles for a skyjacker AAL and am very pleased. i have approx. 350-400 lbs in the rear at all times, plus more on trips, and didn't like the stock leaf springs. the AAL feels firm but not harsh, doesn't sag under weight, and still flexes well. just thought you might be interested in my findings.:)
 
BCJC said:
setting a good pace there! just thought i'd let you know that i swapped out my shackles for a skyjacker AAL and am very pleased. i have approx. 350-400 lbs in the rear at all times, plus more on trips, and didn't like the stock leaf springs. the AAL feels firm but not harsh, doesn't sag under weight, and still flexes well. just thought you might be interested in my findings.:)

Sounds like a really good alternative if you are going to be carrying a lot of weight. Was the installation very difficult? I read someones' posting on Coloradofans.com who did the same thing just because they didn't like how the extended shackles hung down.

By the way...Did you make your skid plates yourself. I just ordered the front skid plate from a guy in Canada last week. I will let you know what they look like.
 
Ac/dc

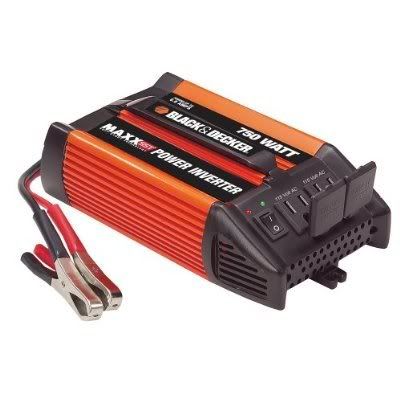
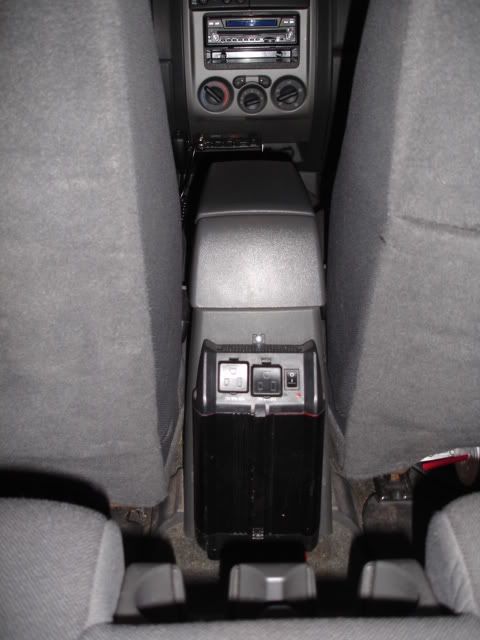
This one took F.O.R.E.V.E.R. I installed a Black and Decker 750 watt inverter. More then enough power to charge things like my digital camera and laptop. I also wanted enough reserve power to run my electric impact wrench or anything else that may need that much power. Since I am not running a duel battery setup, I will be keeping the truck running during most inverter uses. I used 4-gauge wire and installed a 100-amp, dc, waterproof circuit breaker right next to the battery. I also made sure to solder all wire connectors. I still need to upgrade my main ground wire, from the battery to the frame, with 4-gauge wire. I also need to replace a few of the cheap wire connectors with the better ones that I ended up using as soon as they are in stock.

Started with this
blackanddeckerinverter.jpg


Showing circuit breaker
View attachment 8324

I painted it black to make it look a little better. Located on back of center counsel.
liftbags009.jpg

View attachment 8325
View attachment 8326
 
Last edited:

kcowyo

ExPo Original
Northern Explorer said:
The wife works the come-along. The dog is for traction under the tires. We usually pick up a half dozen from the pound before we head out.

Ok, I'm not the biggest dog fan in the world, so this had me rolling in hysterics. I'm not a big fan of wives either, but I'm sure yours is great.

Nice updates and upgrades - :beer:
 

upcruiser

Perpetual Transient
The truck is coming along nicely. I ride by your house practically every day on my bike and I'm yet to catch you outside by your truck. We should do a trail run one of these days though. I've got the cruiser back in action on the road and my schedule is completely flexible for most of the month.
 
Trip Announcement

I will post this in the Planned Expeditions: North America section but I wanted to post it here first.

Date: June 23, 2007 through July 1, 2007
Location: James Bay Road and as much of the Trans-Taiga Road that time will allow
Things to do: Take a guided tour of the hydroelectric generating plant, Kayak in James Bay (if we get our Kayaks in time), drive, drive, drive, and then finally drive. I’m sure there will be some hiking involved too.
These are the web sites that I found most helpful

http://jamesbayroad.com/
Scroll down to where you see “A REMOTE WILD LAND OF EXTREME DISTANCES…” and click on the two links there. This web site has just about all the information you would need for a trip up there.

http://www.davidrose.us/DavidWebPage/MINICooperS/HudsonsBay/JamesBayTrip.html
David and Jay’s Excellent Adventure These two guys did the James Bay Road part of the trip in a Mini Cooper. I don’t think there will be too much technical driving involved. My truck should be ok.

And finally from our own Expedition Portal
http://www.purplelizard.com/james bay.htm
Lots of great pictures and information. And they did it in the winter!!!:bowdown:

This is my route.

Mileage involved
Marquette, Michigan (home) to Matagami 722 miles
Matagami to Radisson 384 miles
Radisson to James Bay/Chisasibi 66 miles
James Bay/Chisasibi to Radisson 66 miles
Radisson to Caniapiscau 461 miles
Caniapiscau to Radisson 461 miles
Radisson to Matagami 384 miles
Matagami to Marquette, Michigan (home) 722 miles

Total miles = 3266:truck:

My map (not all locations shown)
View attachment 8469

Trip Report Thread http://expeditionportal.com/forum/showthread.php?t=6599
 
Last edited:
Break controller and 7-way plug

When I first drove my camper home from Pennsylvania I only had the break and tail lights working on the camper. It was Easter weekend and the roads were still very icy in spots. In fact, all six lanes of highway 23 near Fenton Michigan were being routed around a major pileup. I could definitely feel the camper pushing me when I had to apply the breaks on the snow-covered roads.

Today I installed the break controller along with the 7-way plug. I don’t like how I see a lot of people installing the plug on a bracket hanging down from the bumper. Based on how much my bumper dragged on my last outing, the plug would surely be ripped off. I used a 2 1/8 inch hole saw to cut/drill a hole in my bumper so I could mount the plug flush without it hanging down.

View attachment 8484

I then mounted the break controller in an easy to reach but out of the way spot.

View attachment 8485
 

Forum statistics

Threads
185,815
Messages
2,878,494
Members
225,378
Latest member
norcalmaier
Top