EarthRoamer XV-JP "Northwest Edition"

PaulJensen

Custom Builder
23 - Roof Connection and Rear Door Fix...

The weather is good, I have some time and materials aplenty...
P1140242.JPG

(above) Ready for a seam of fiberglass tape and epoxy,,,

P1140244.JPG

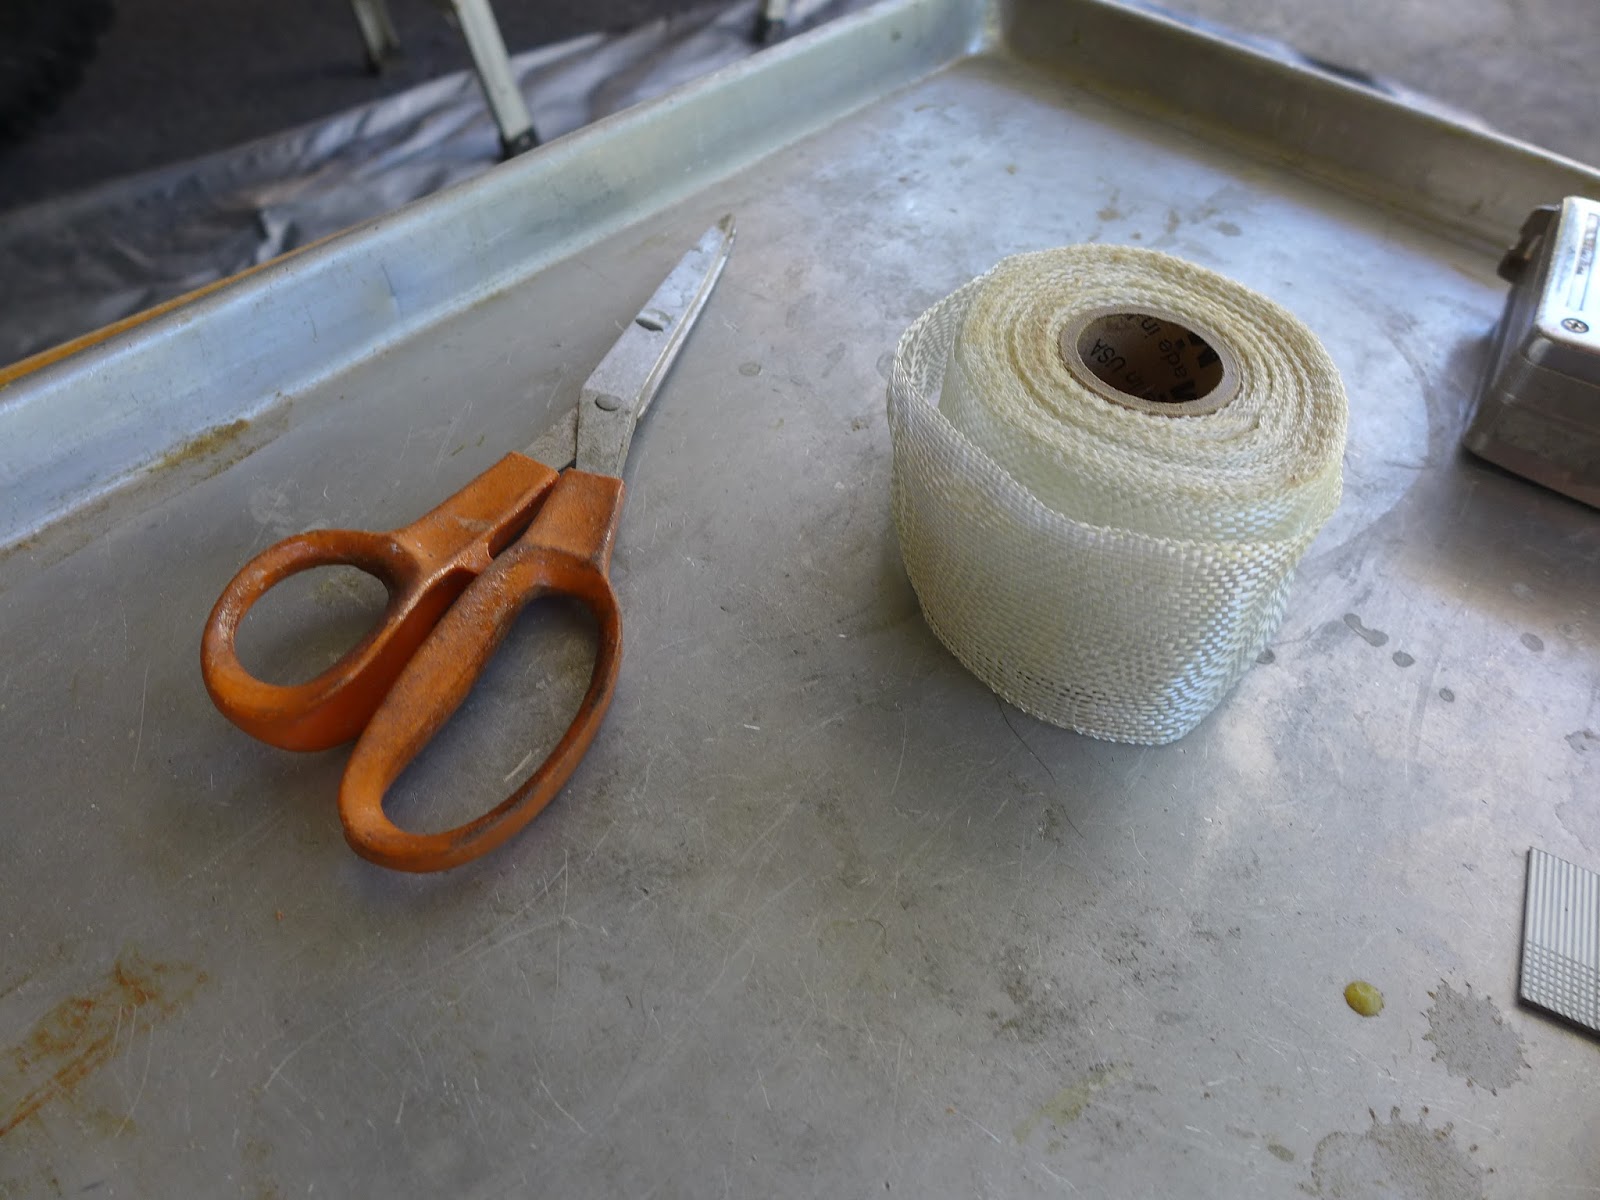
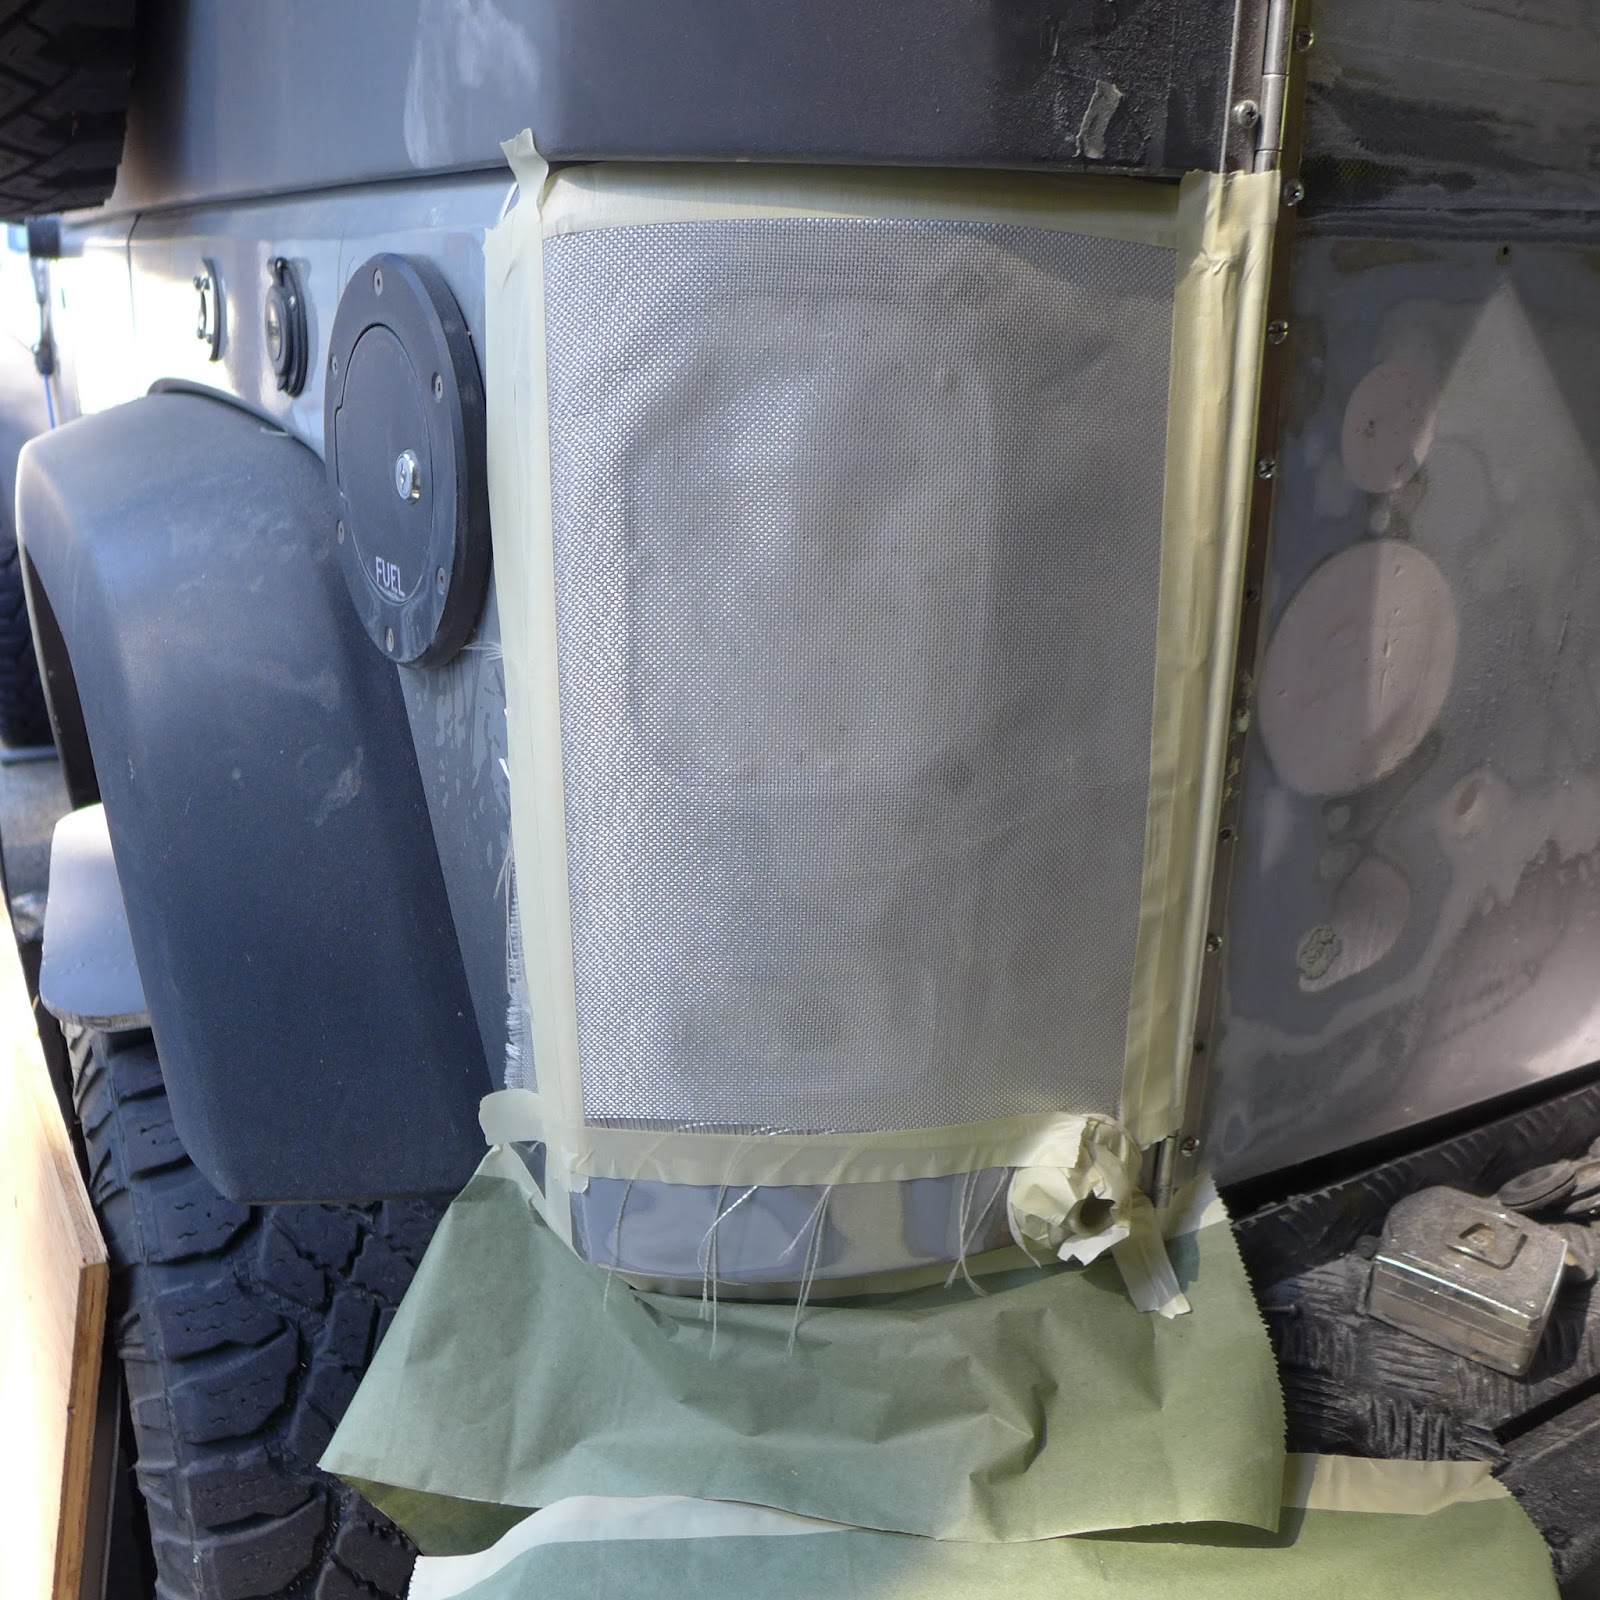
)above) 2" wide 6oz. Volan tape...

P1140249.JPG

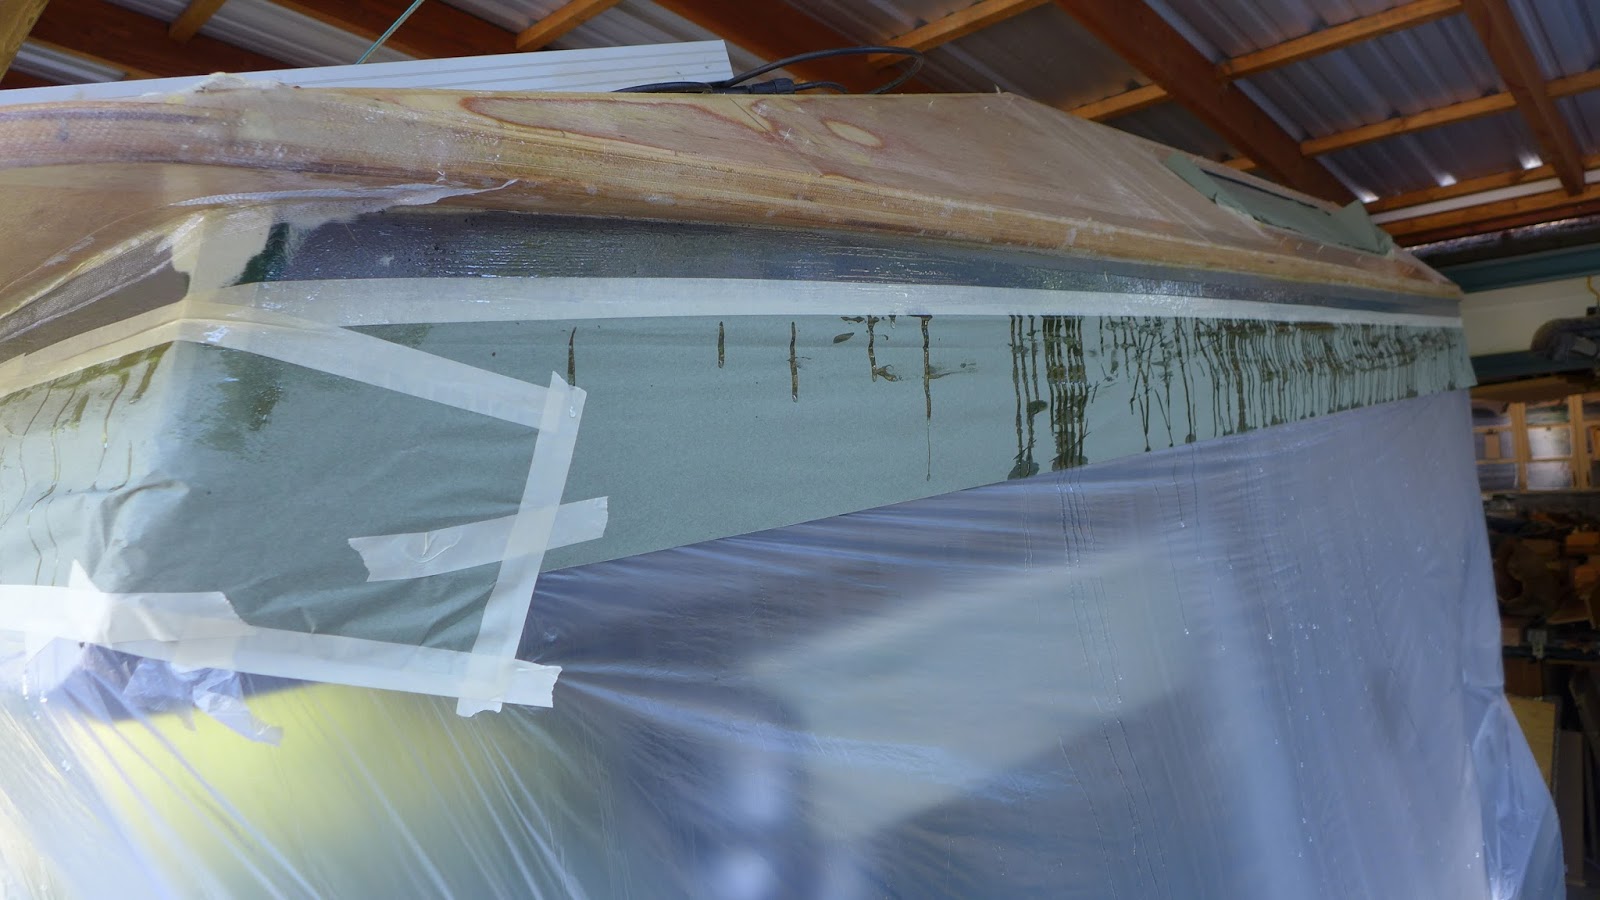
(above) The seam has been brushed with epoxy, the tape was laid and a couple more coats of brush on epoxy fill the weave...

P1140250.JPG

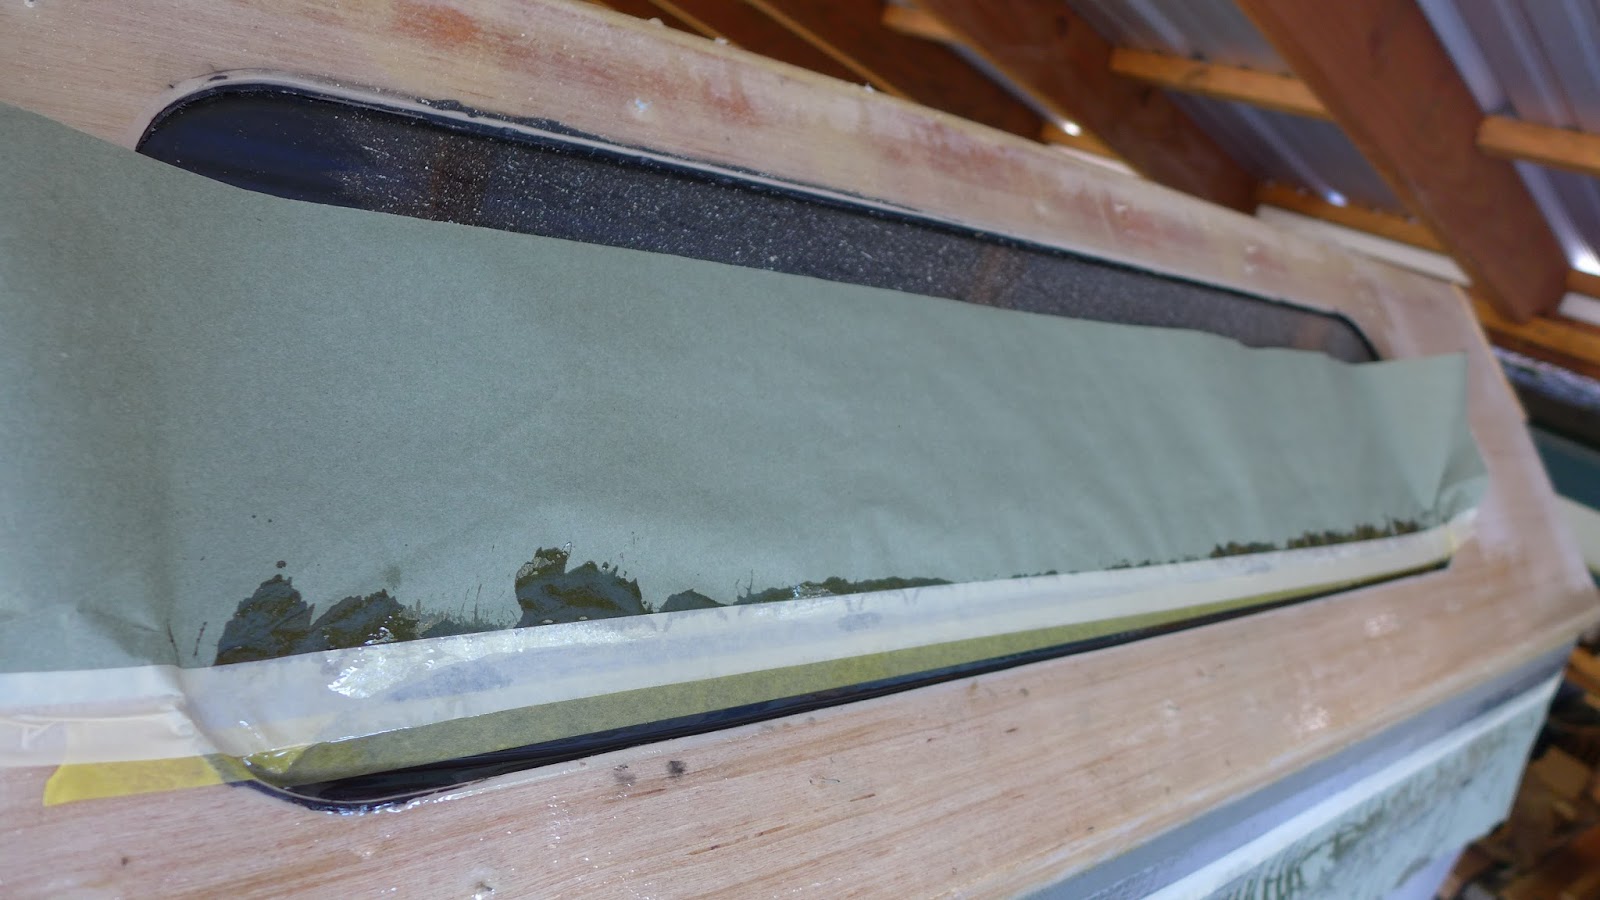
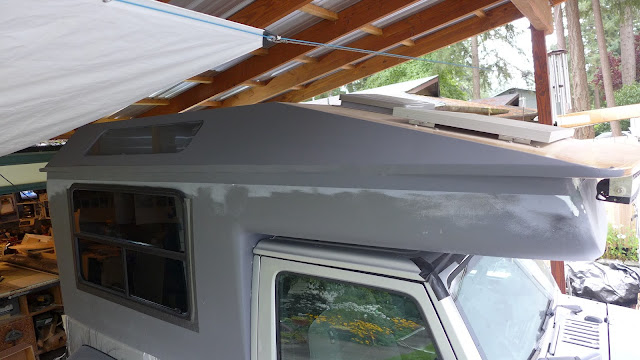
(above) The roof window sill edges were filled flush with epoxy to eliminate a rain water dam...

P1140251.JPG

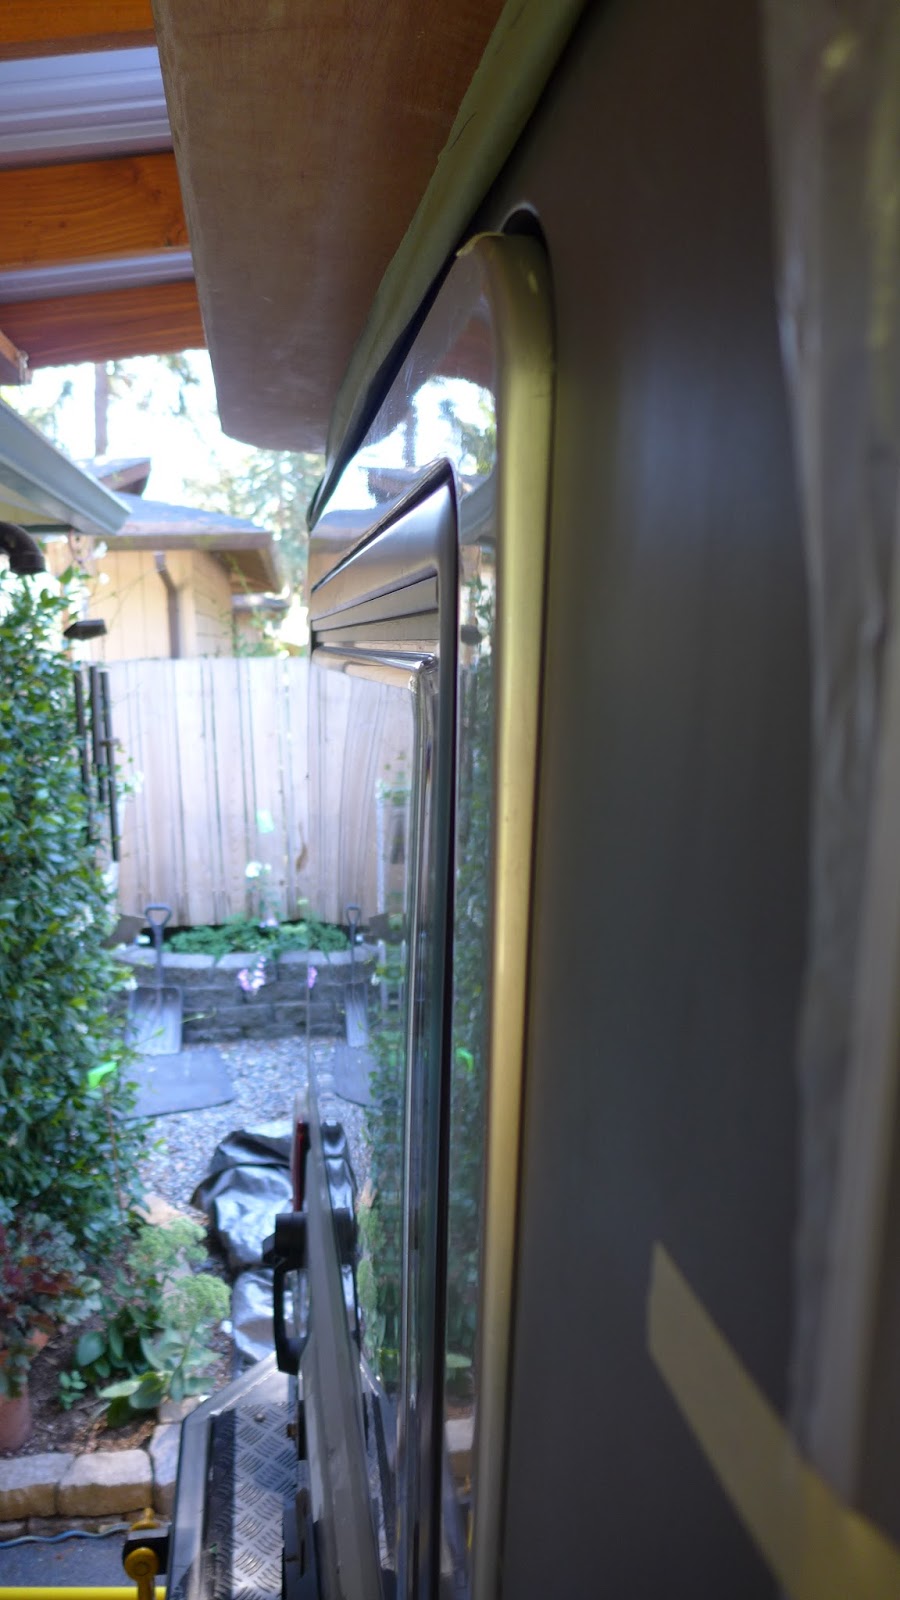
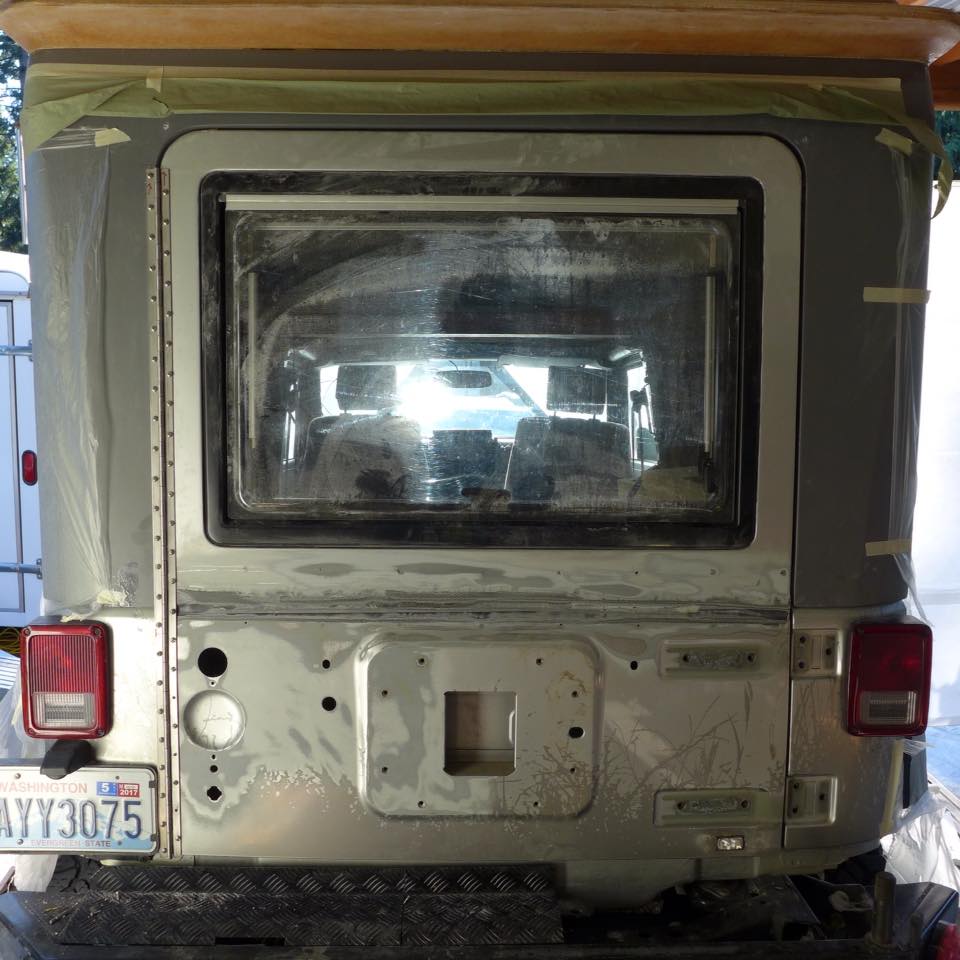
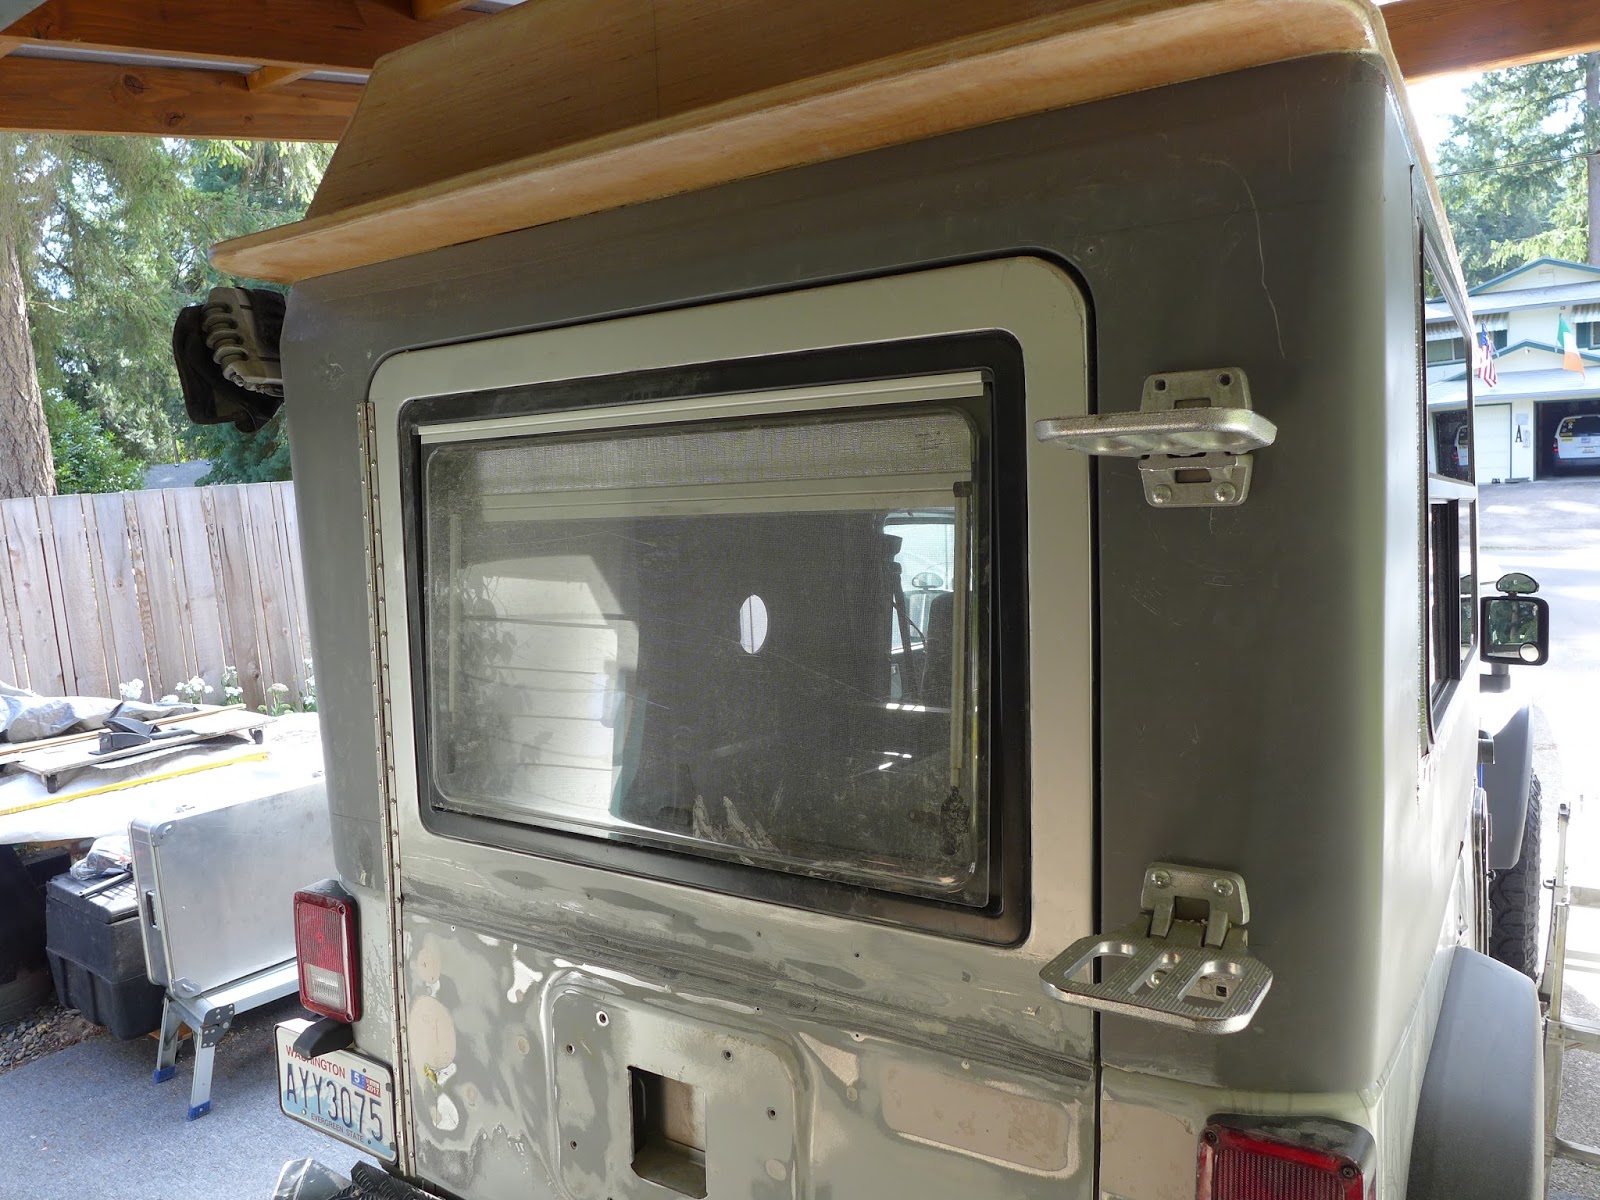
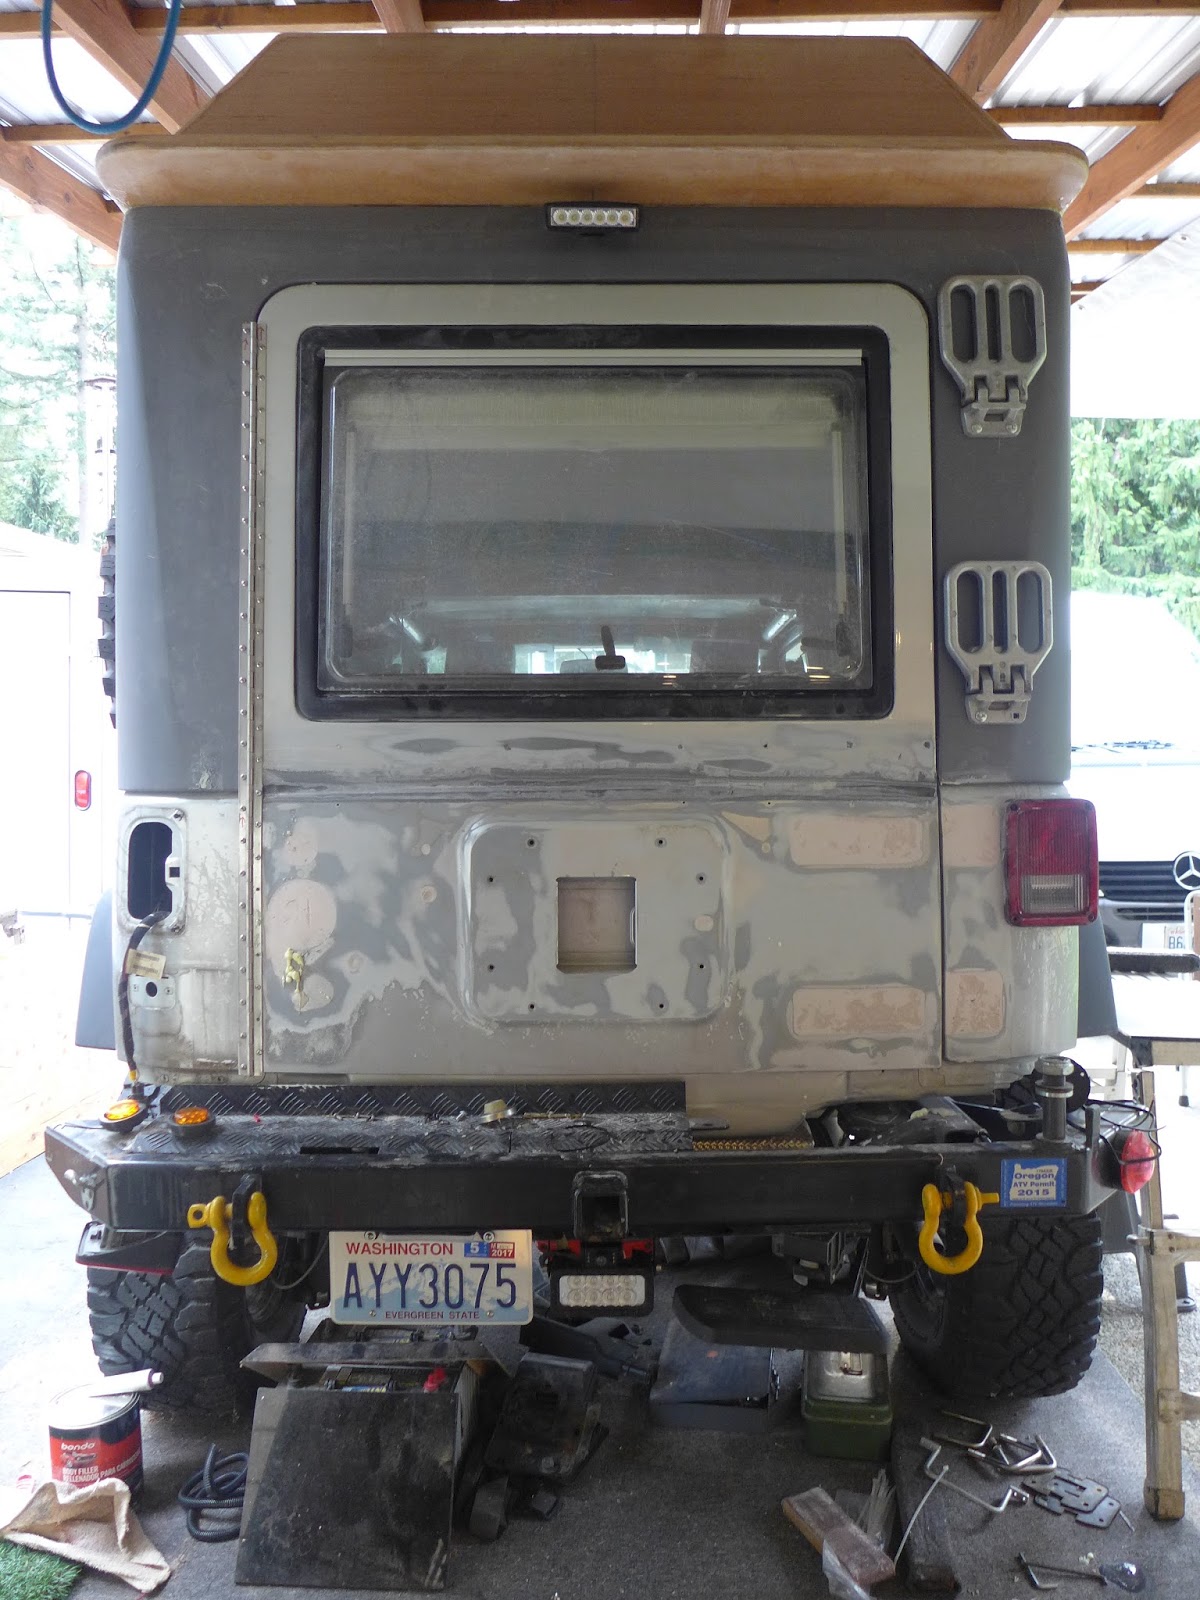
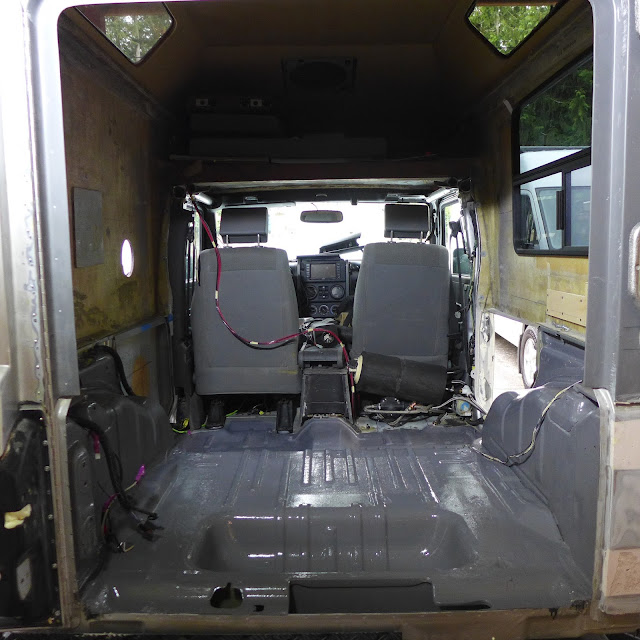
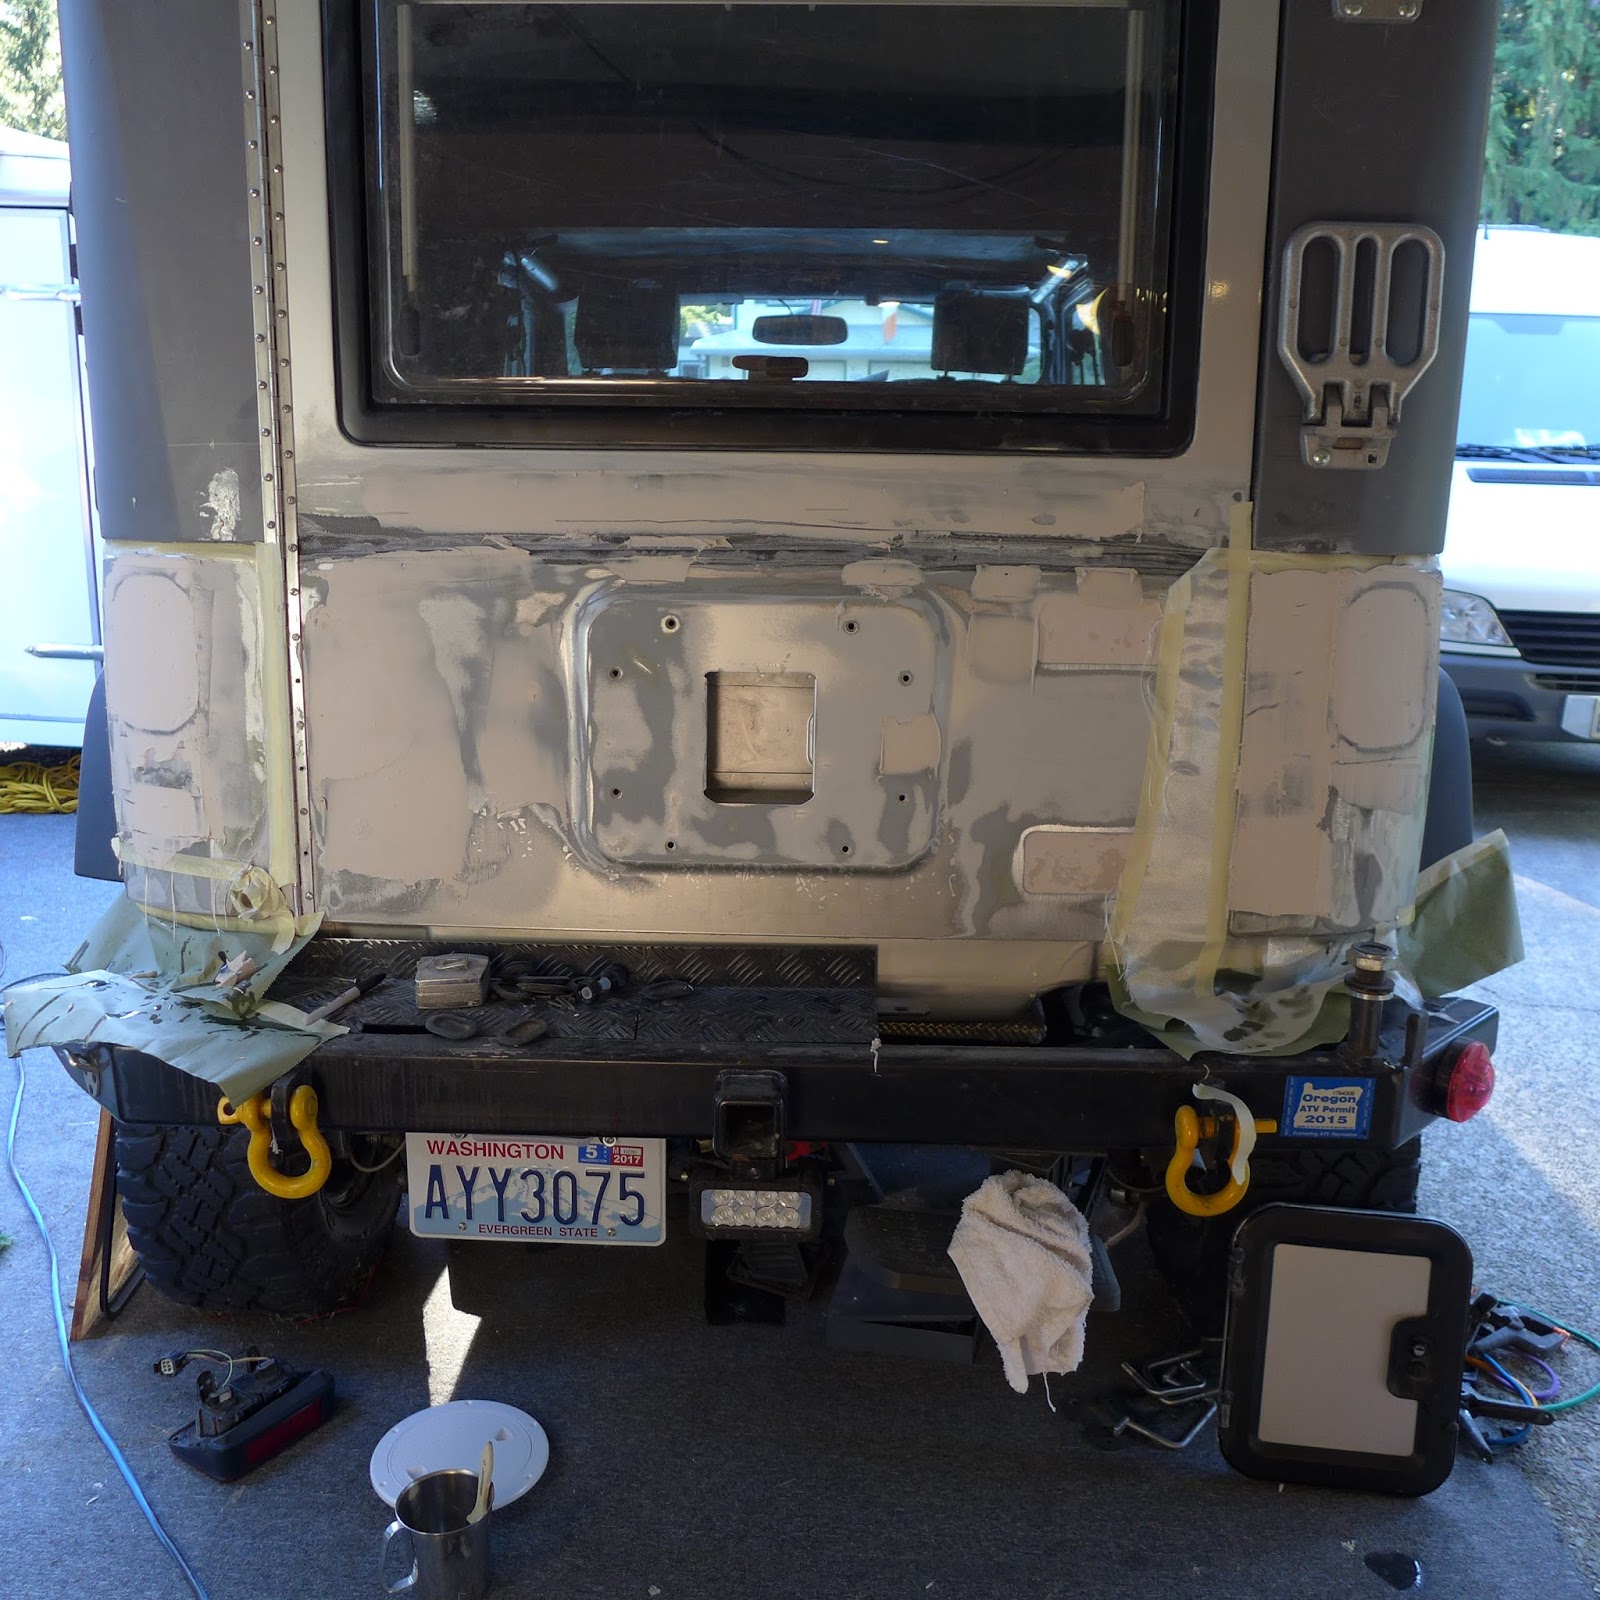
(above) The rear door never fit right... Time to fix the loosely attached upper window that has been forever out of plumb...

P1140253.JPG

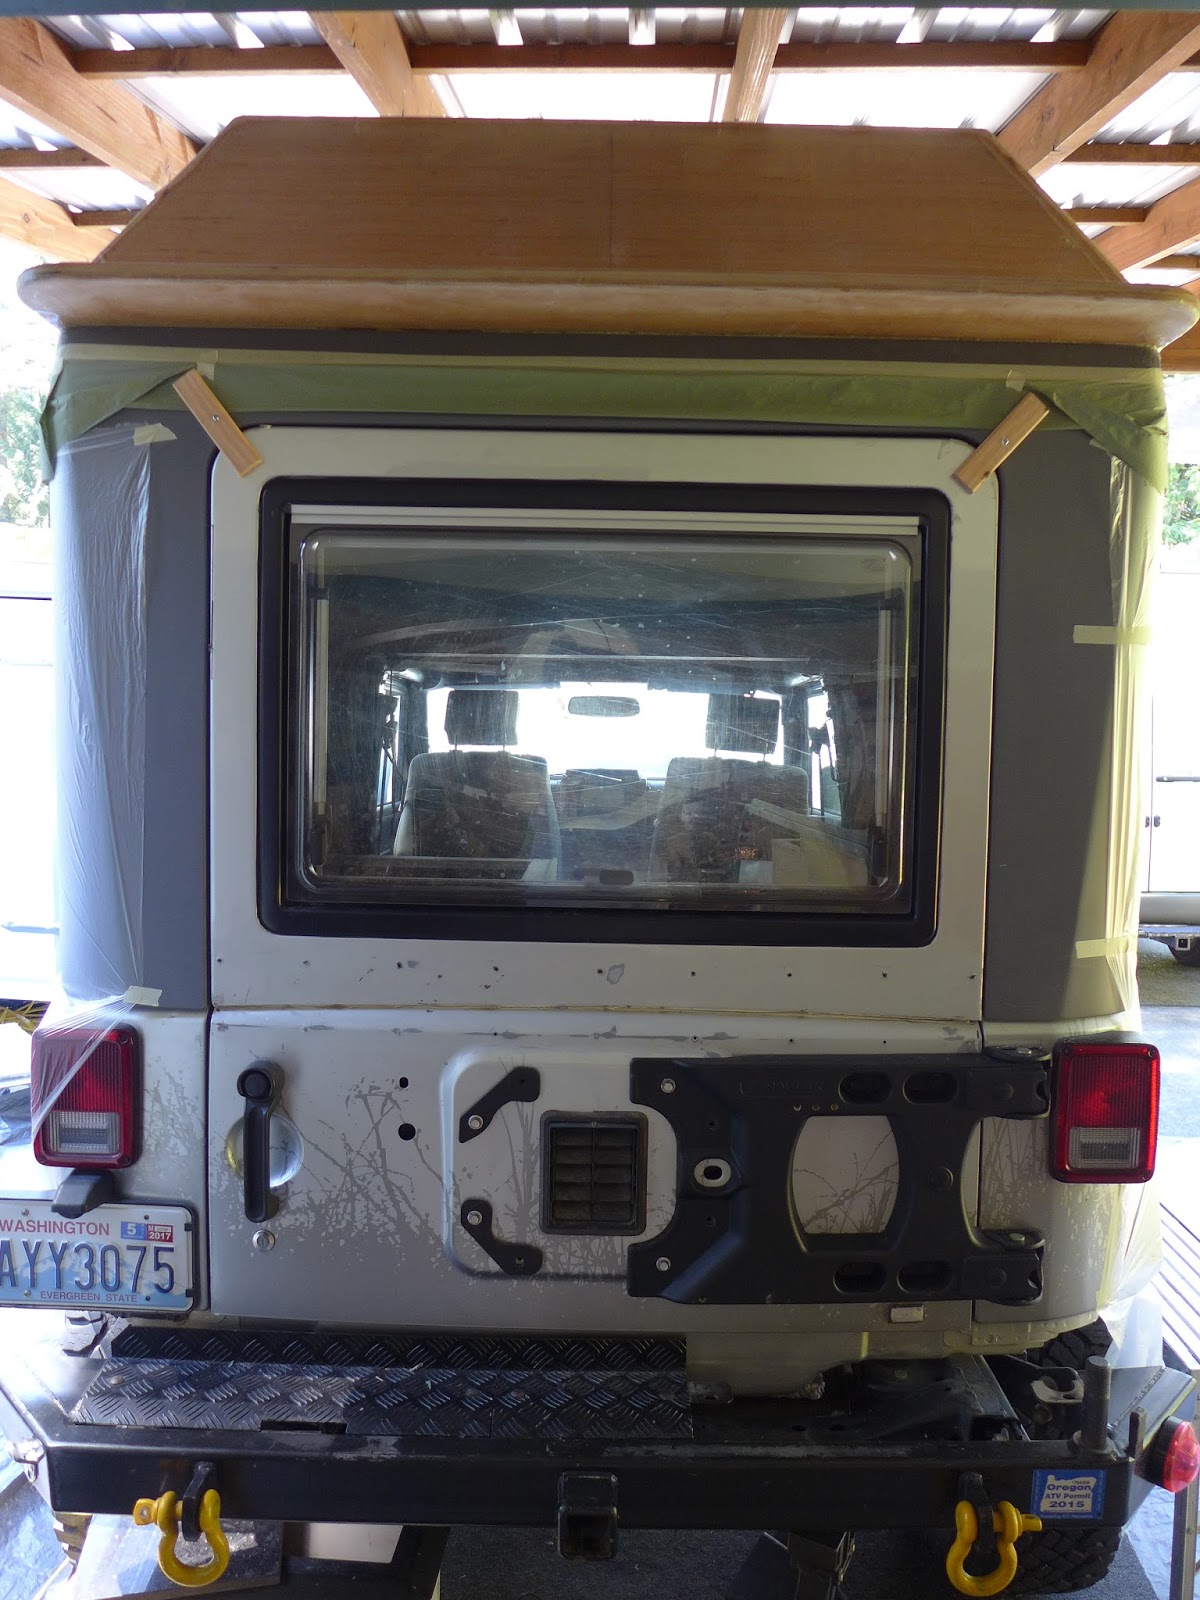
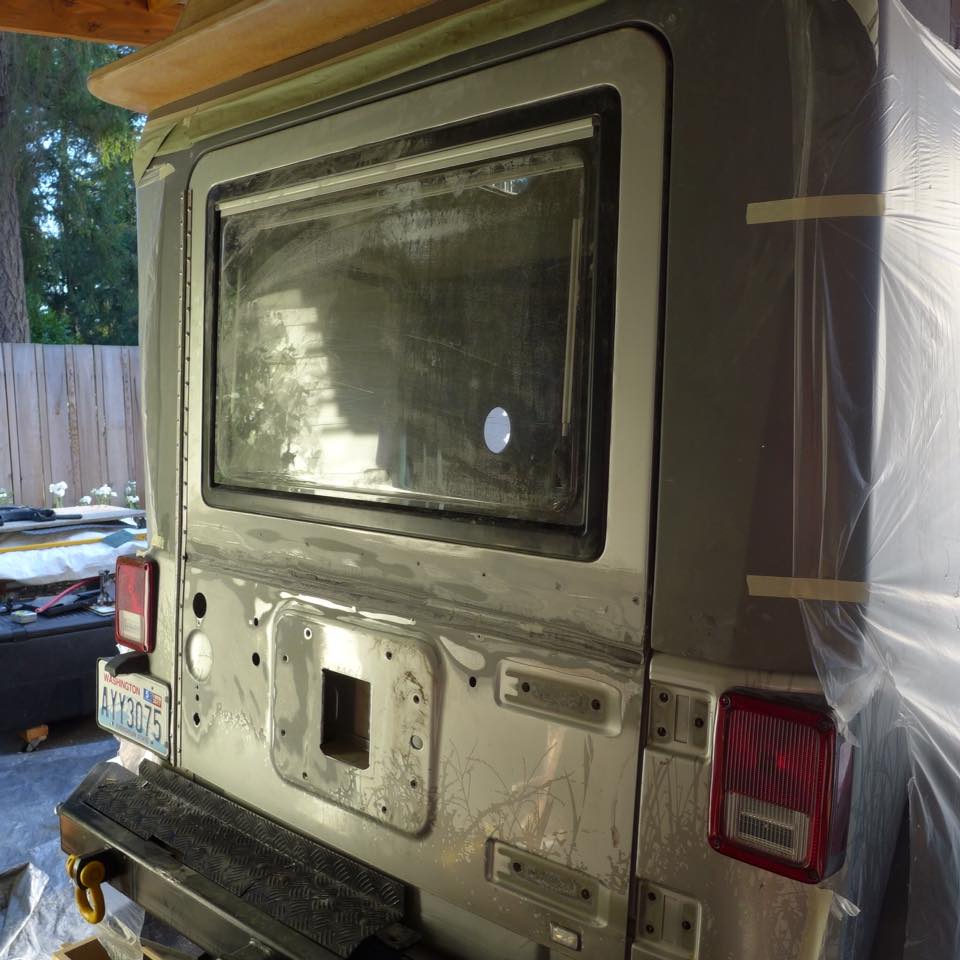
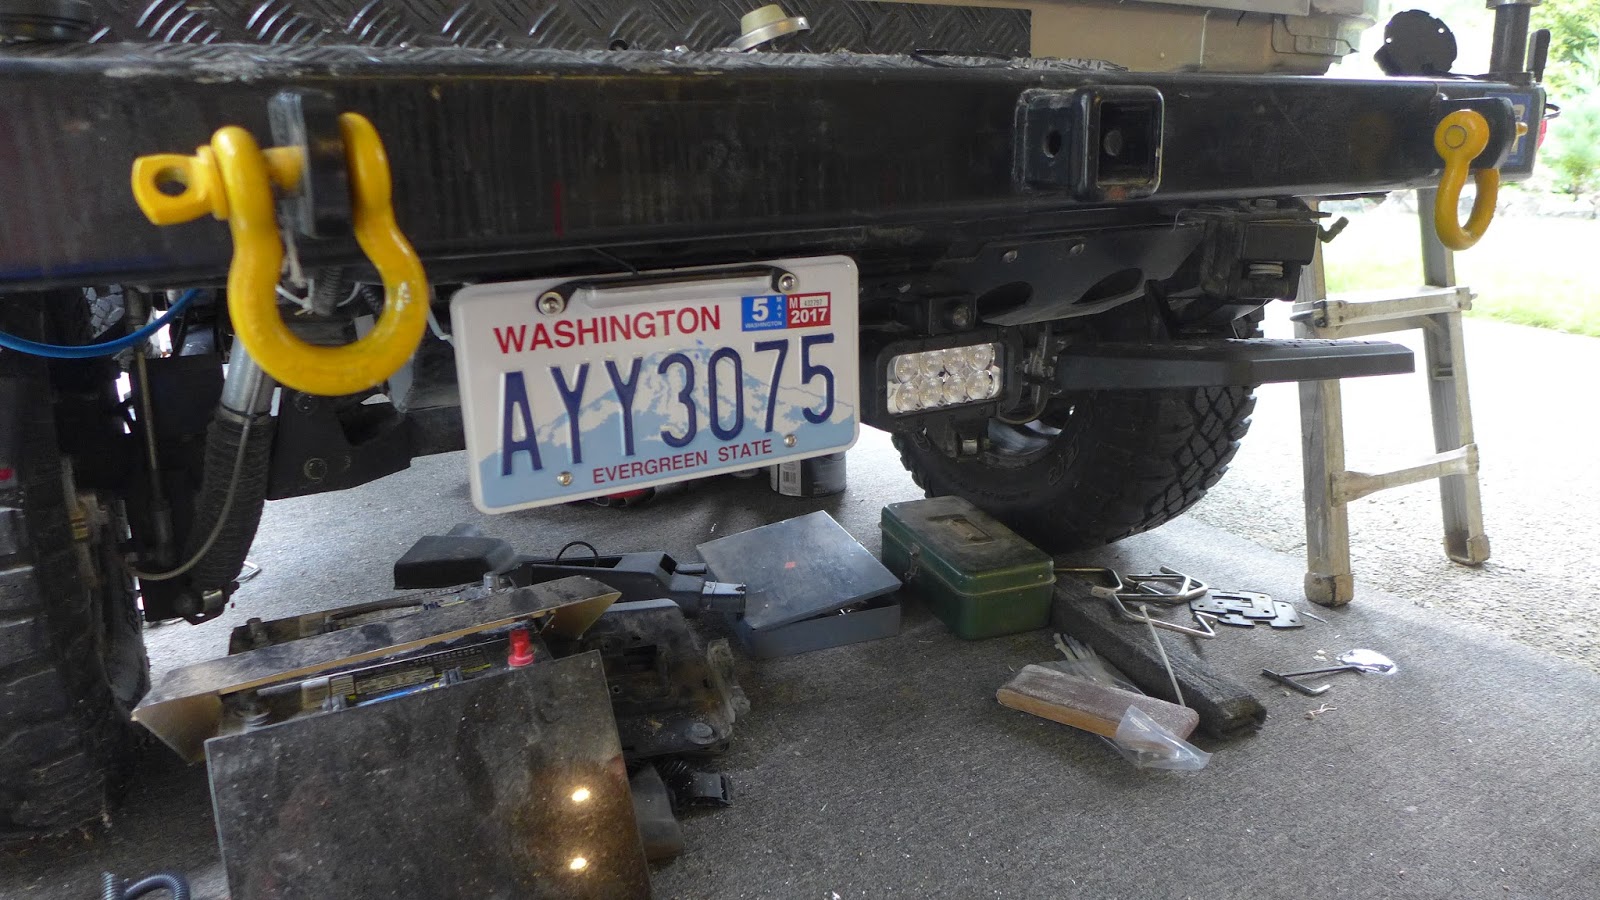
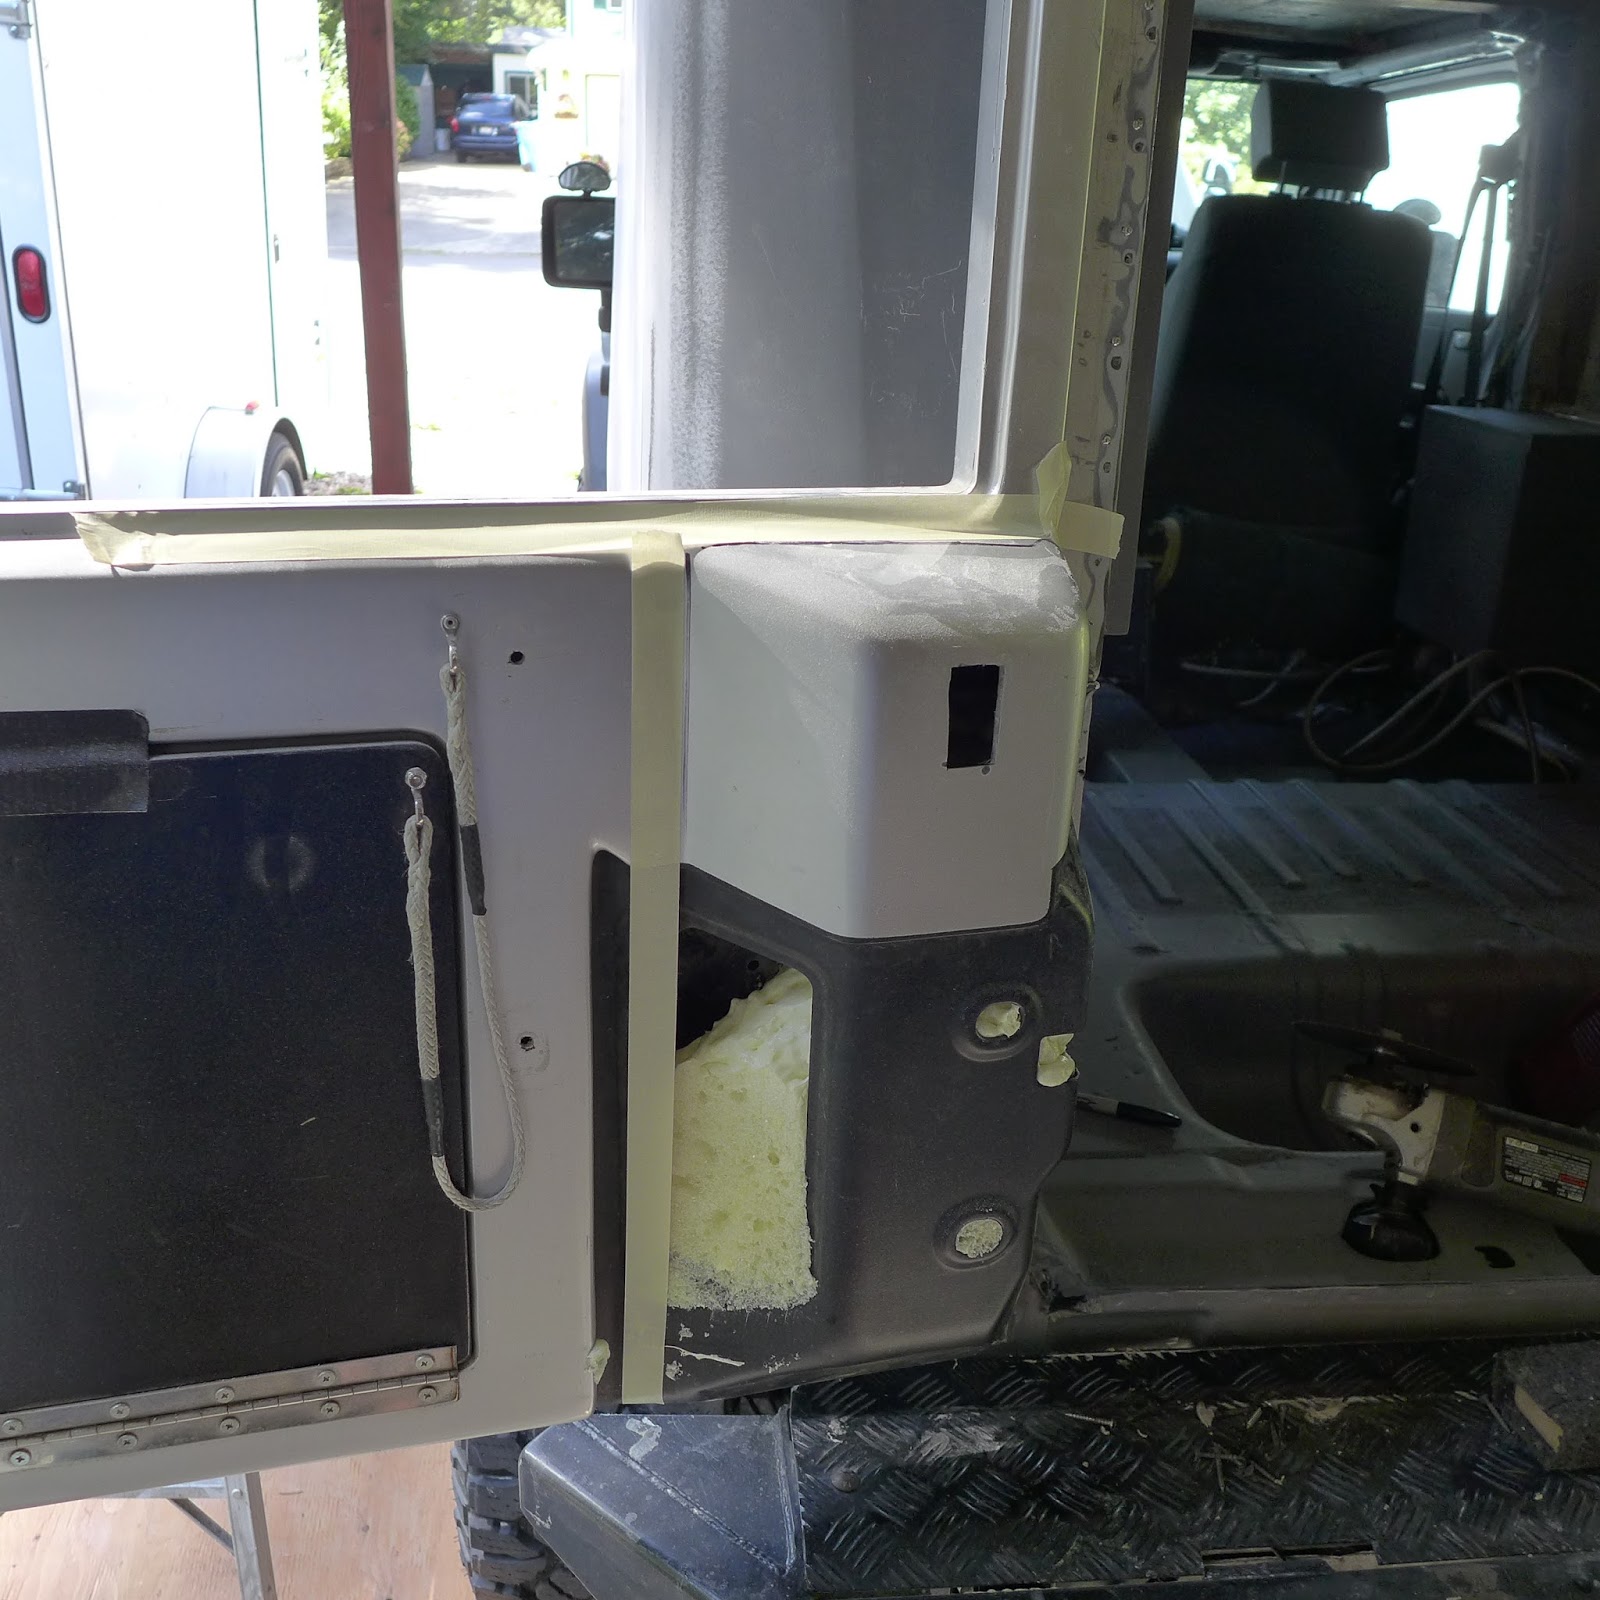
(above) Two blocks, two screws...

P1140255.JPG

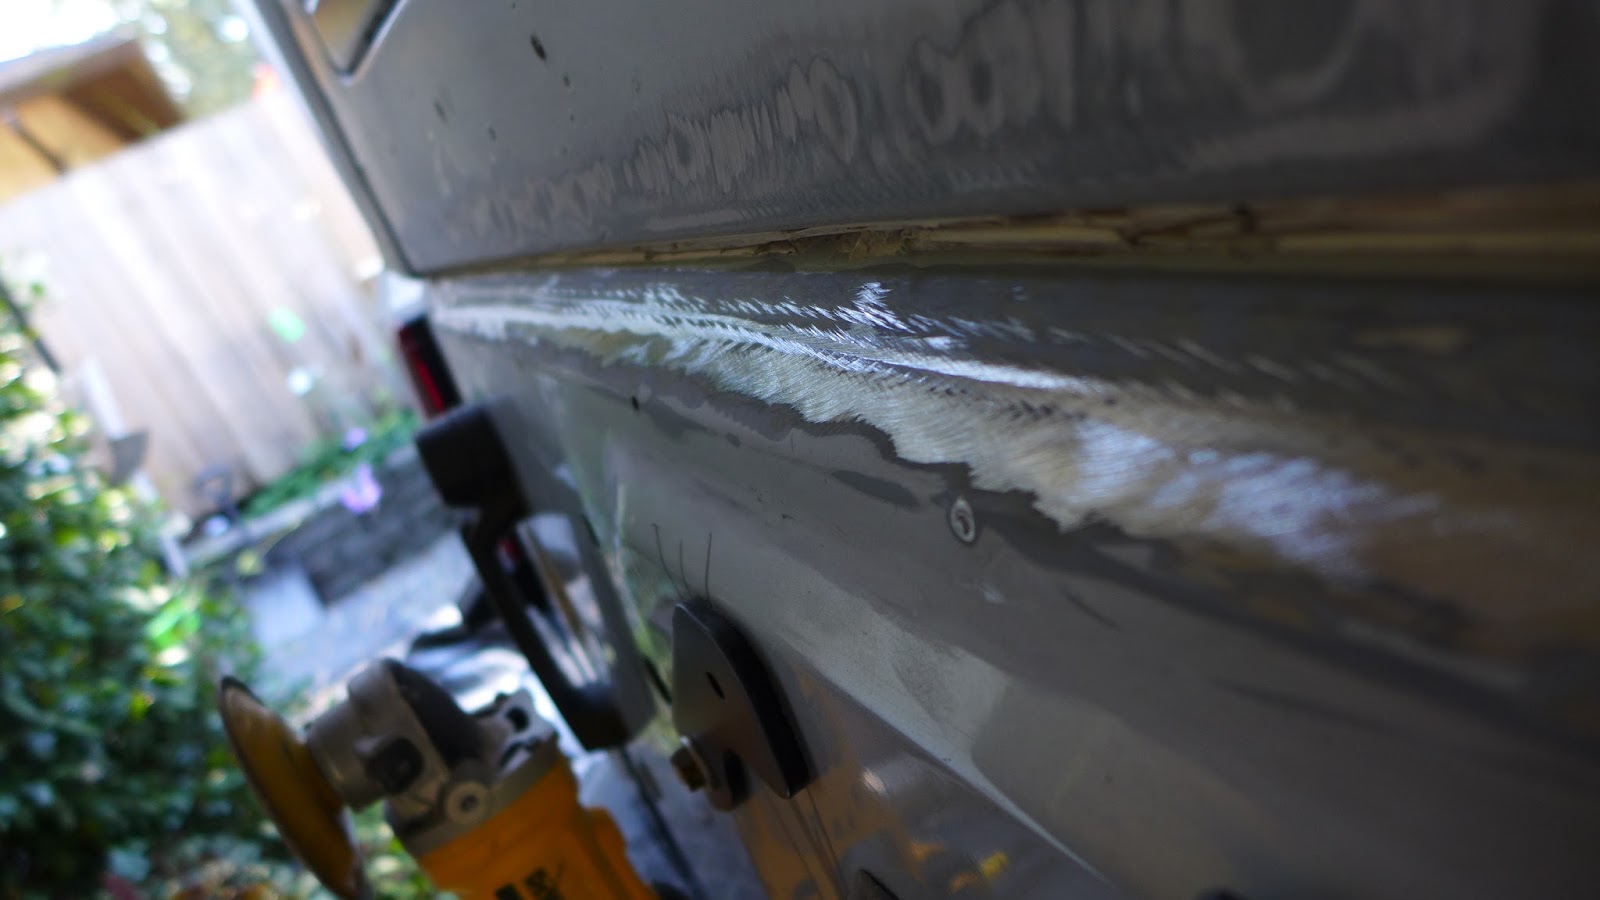
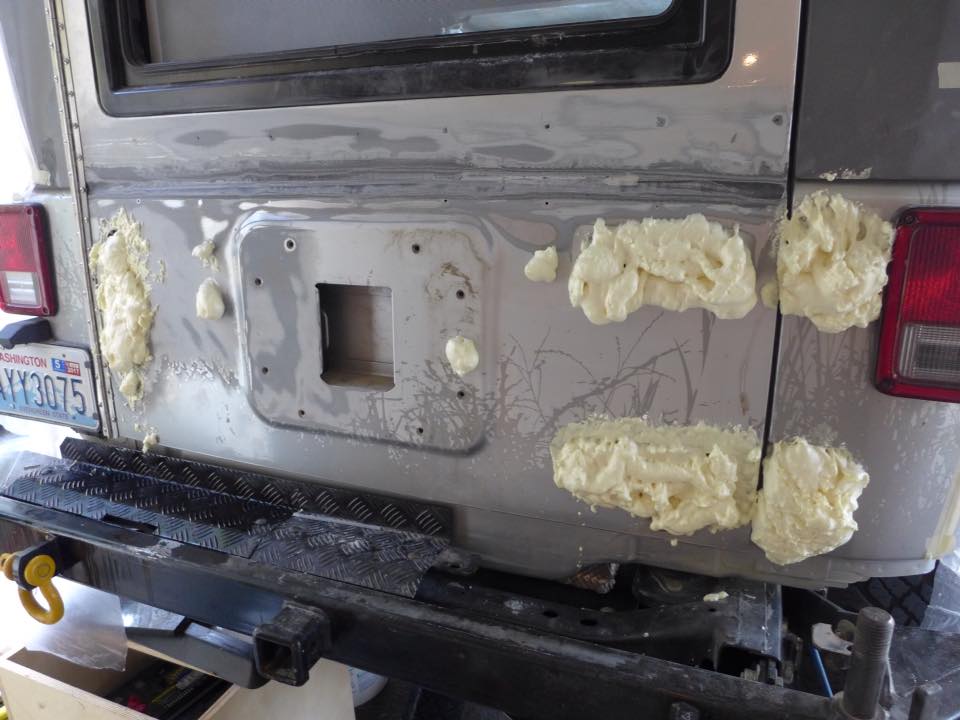
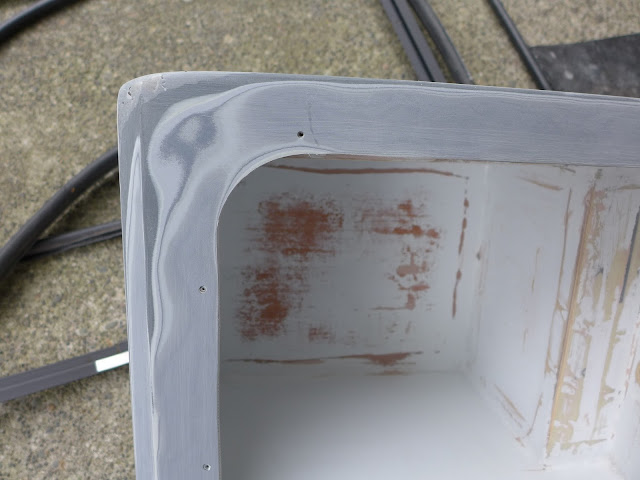
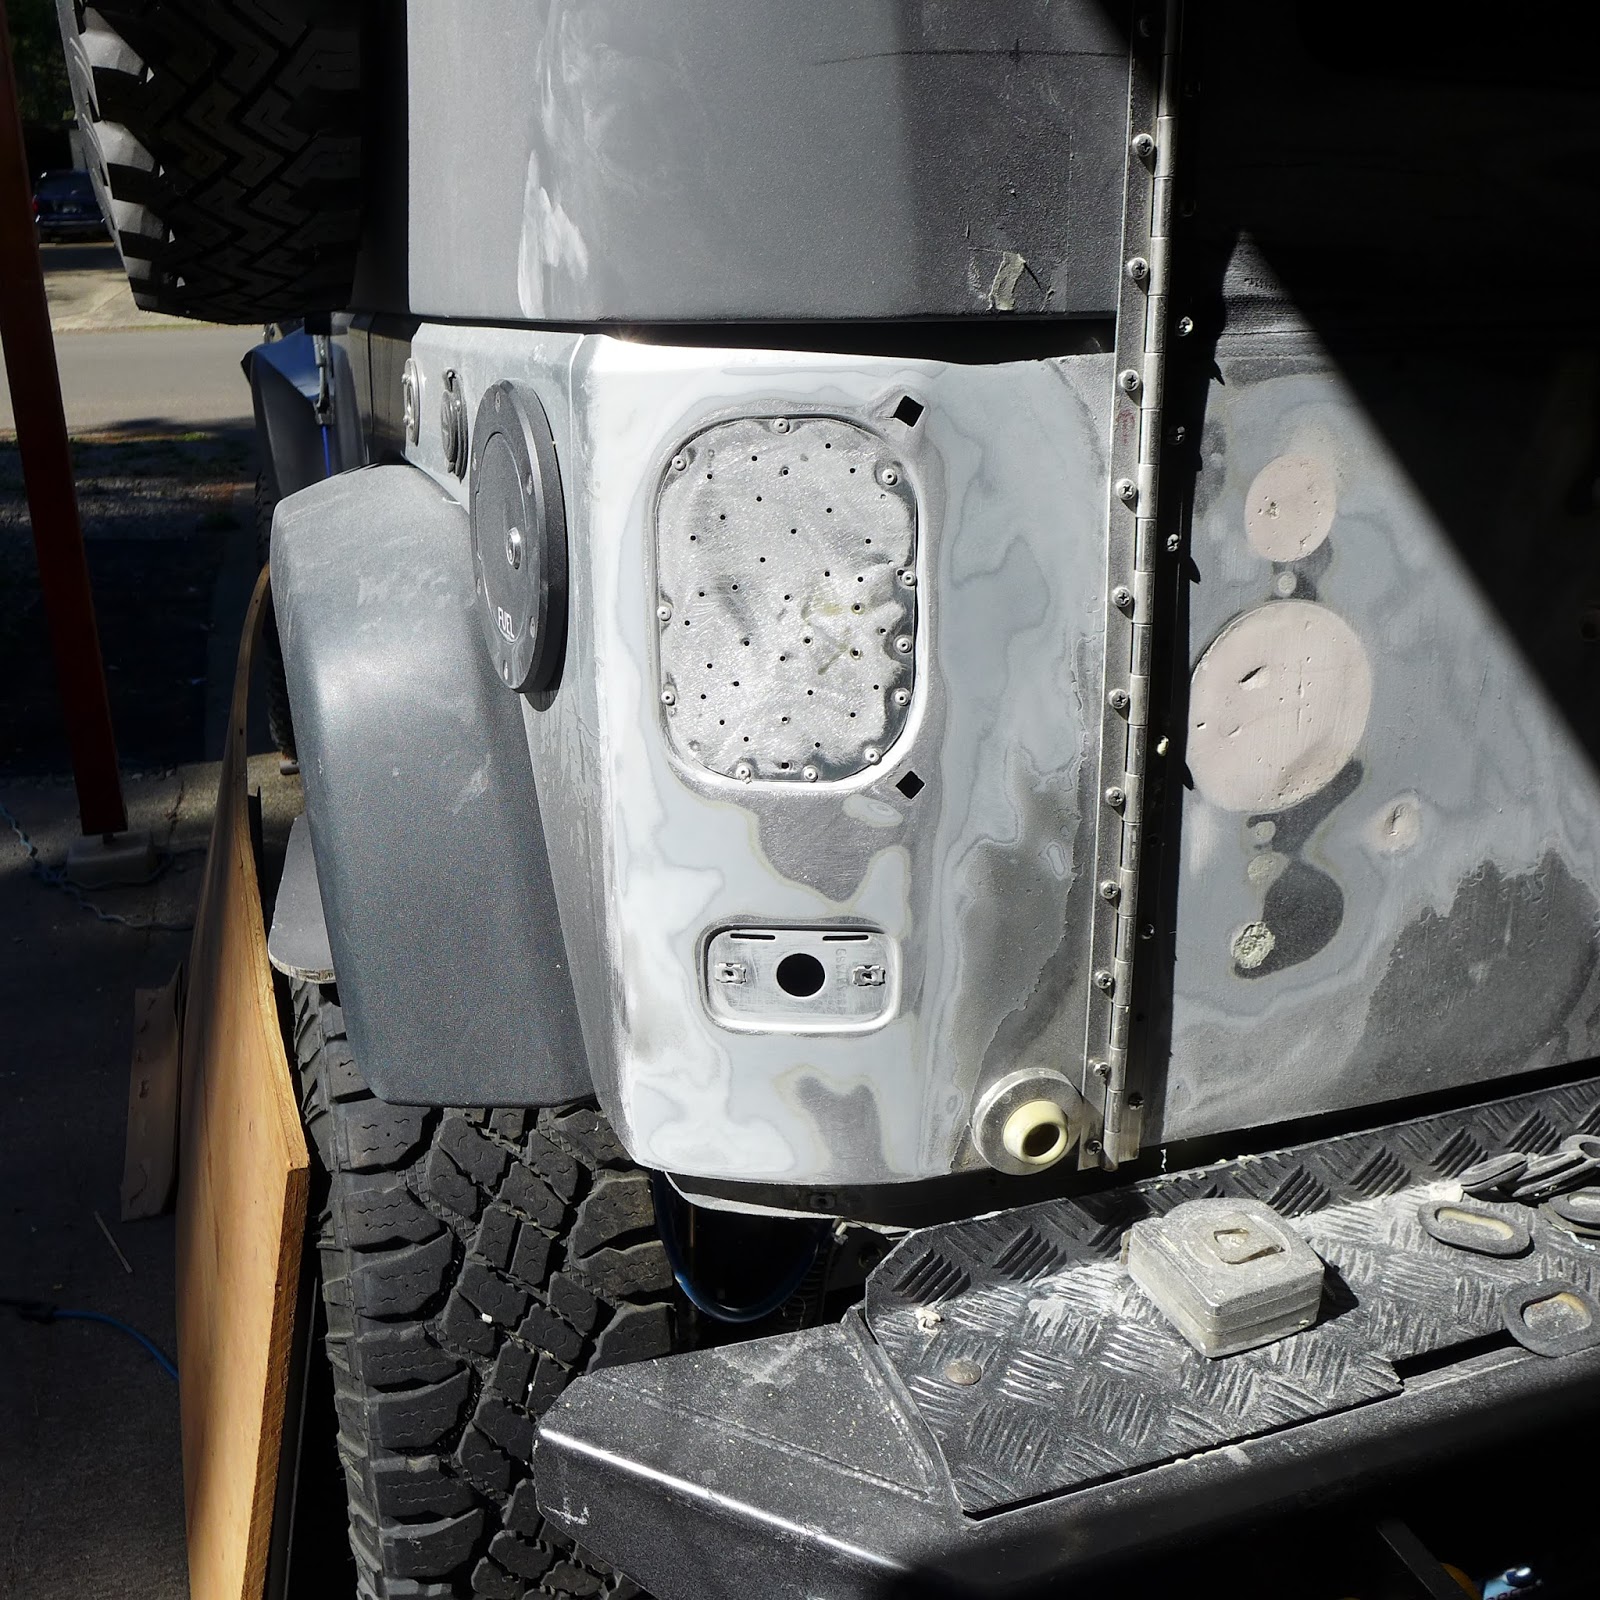
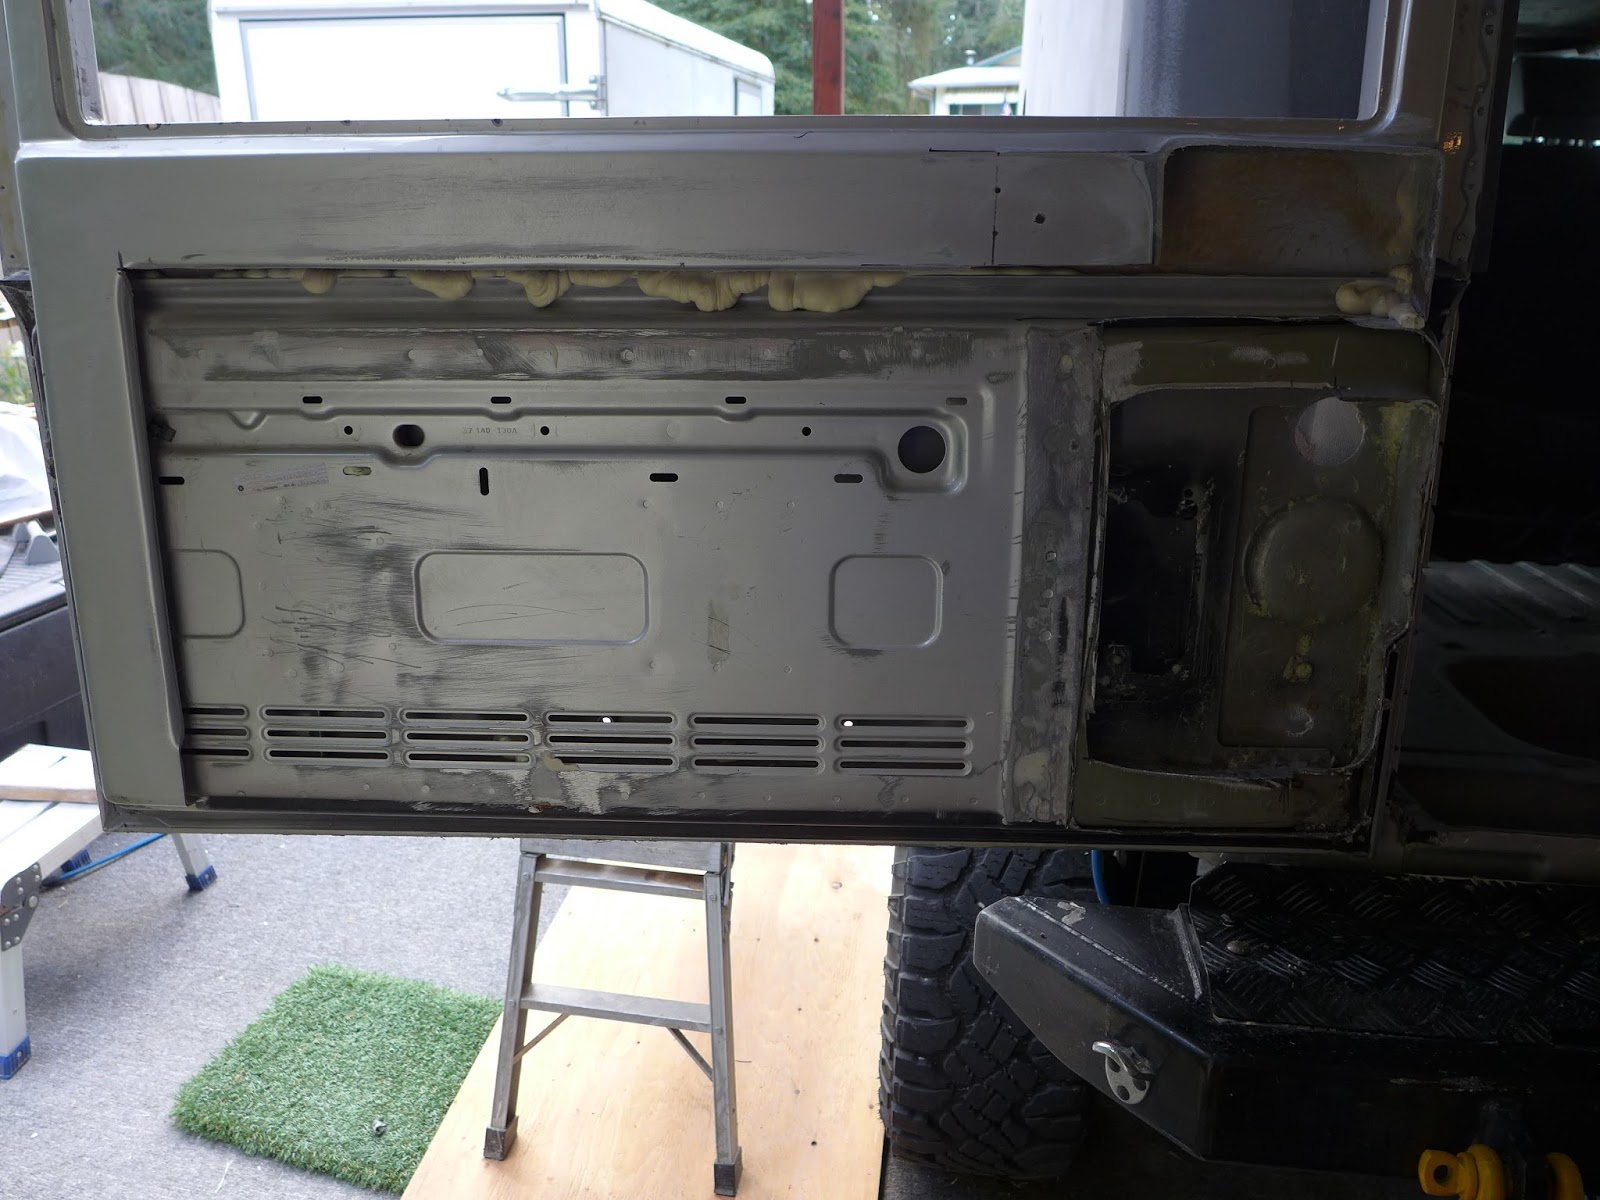
(above) The existing paint was scratched out with a 4" grinder and a 40 grit disc...

P1140257.JPG

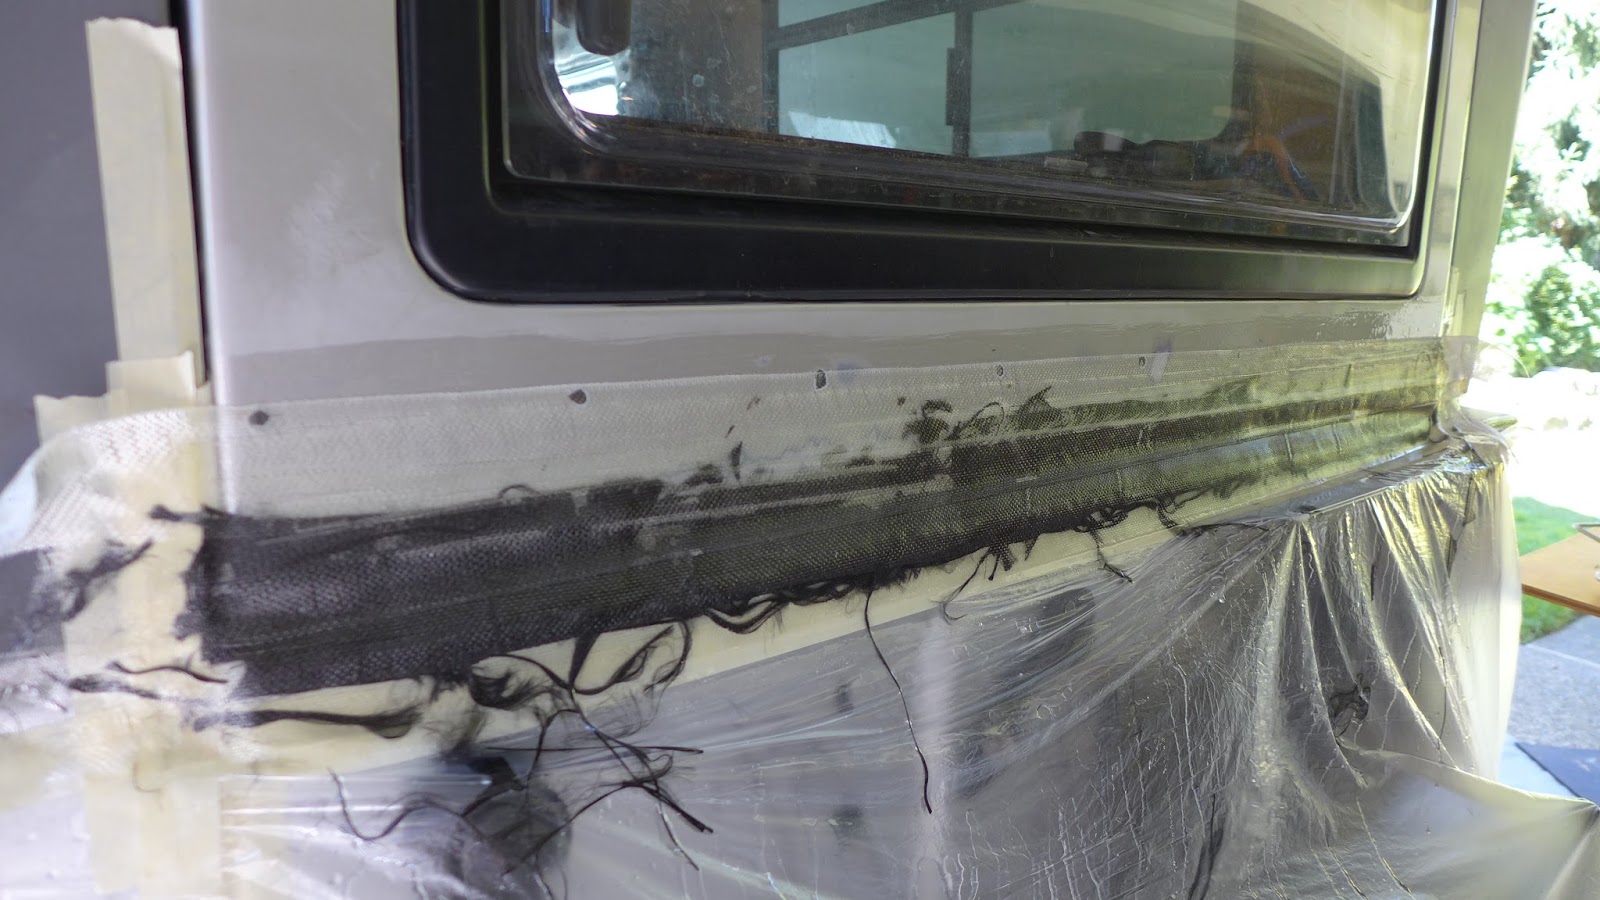
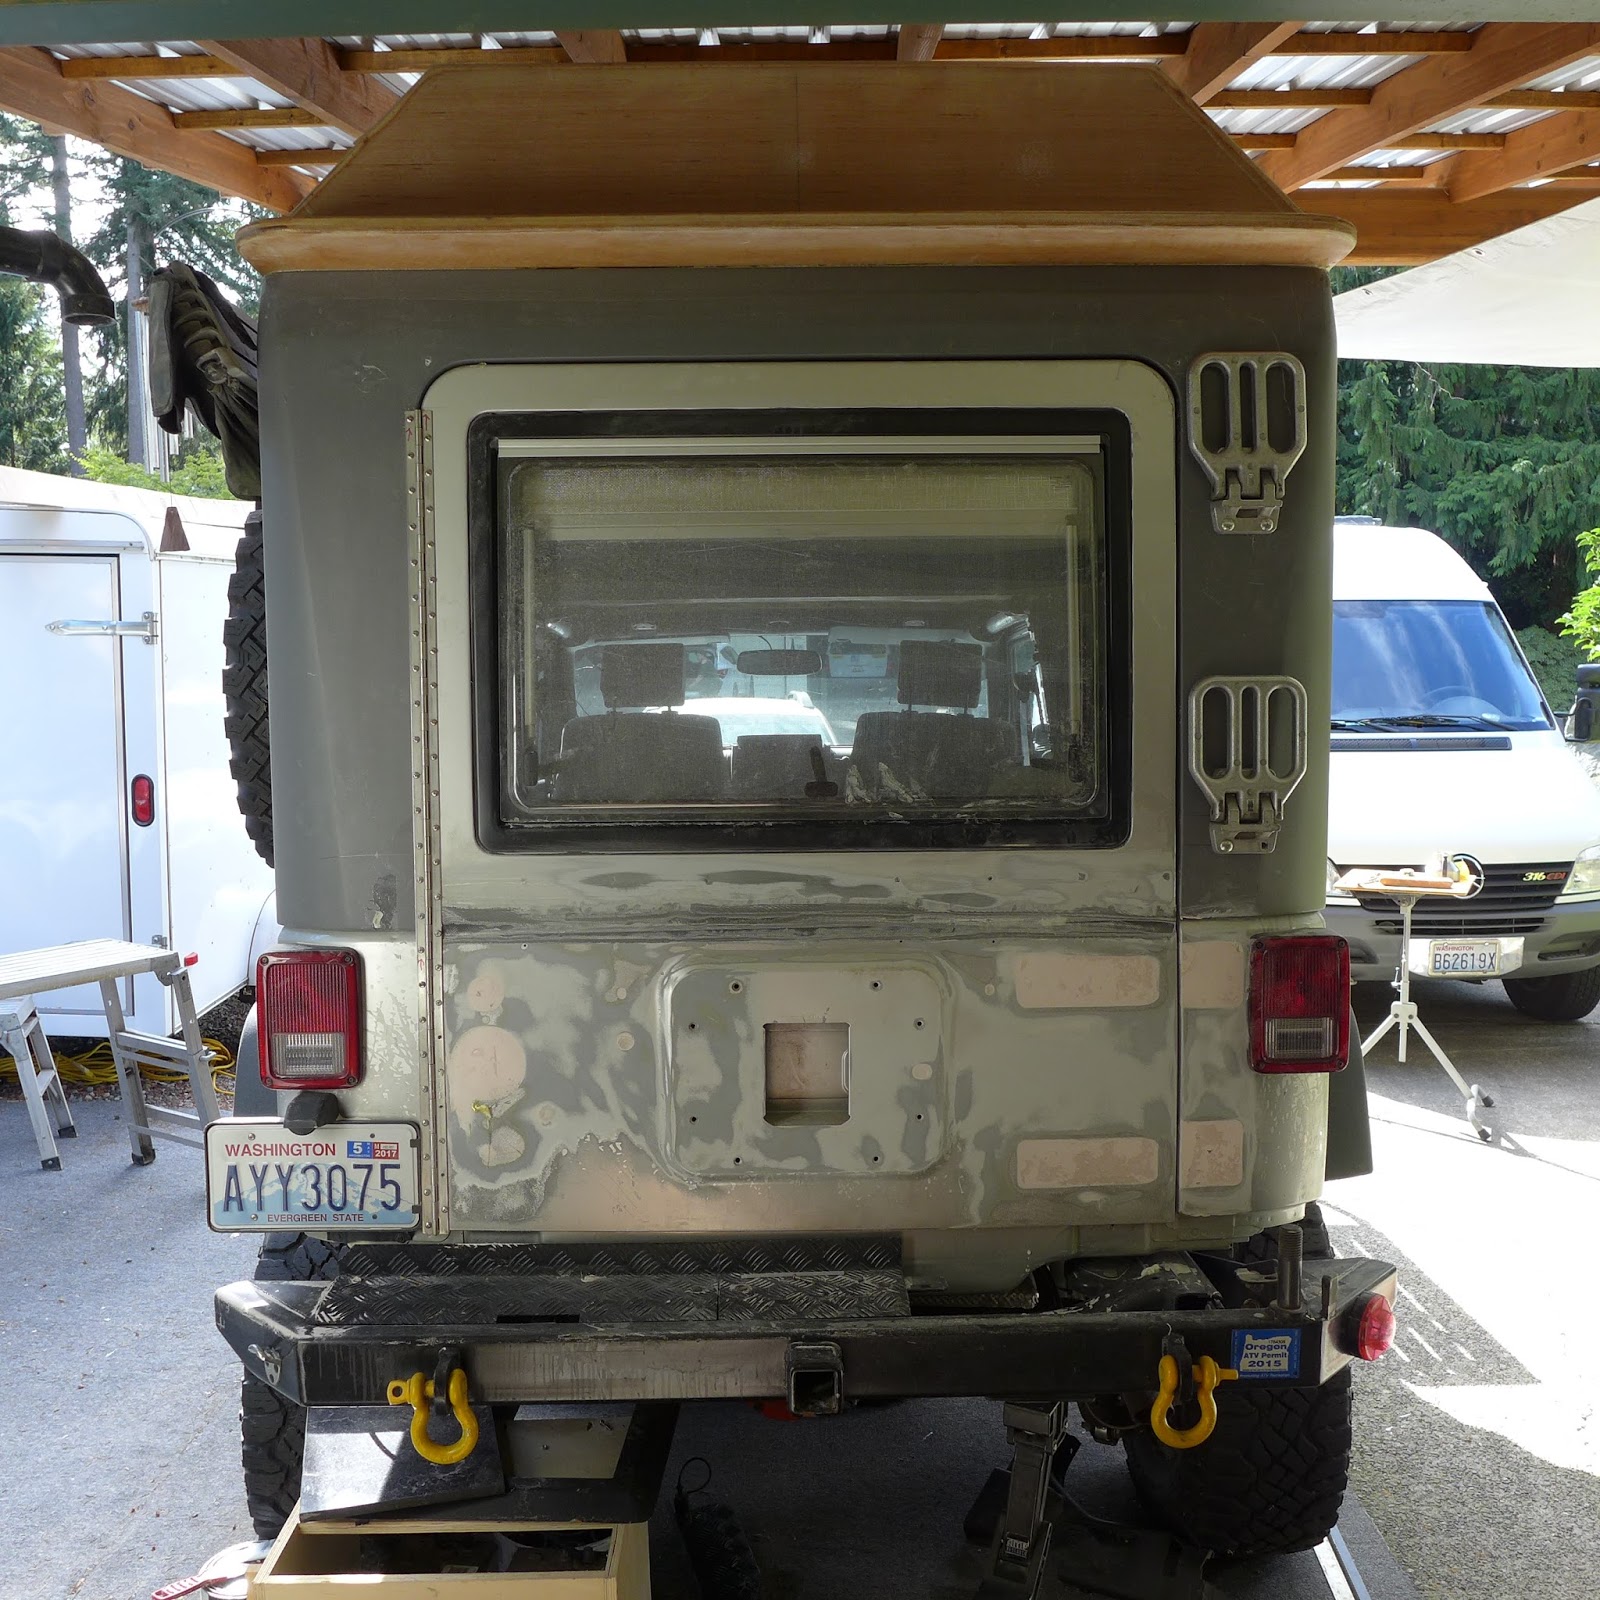
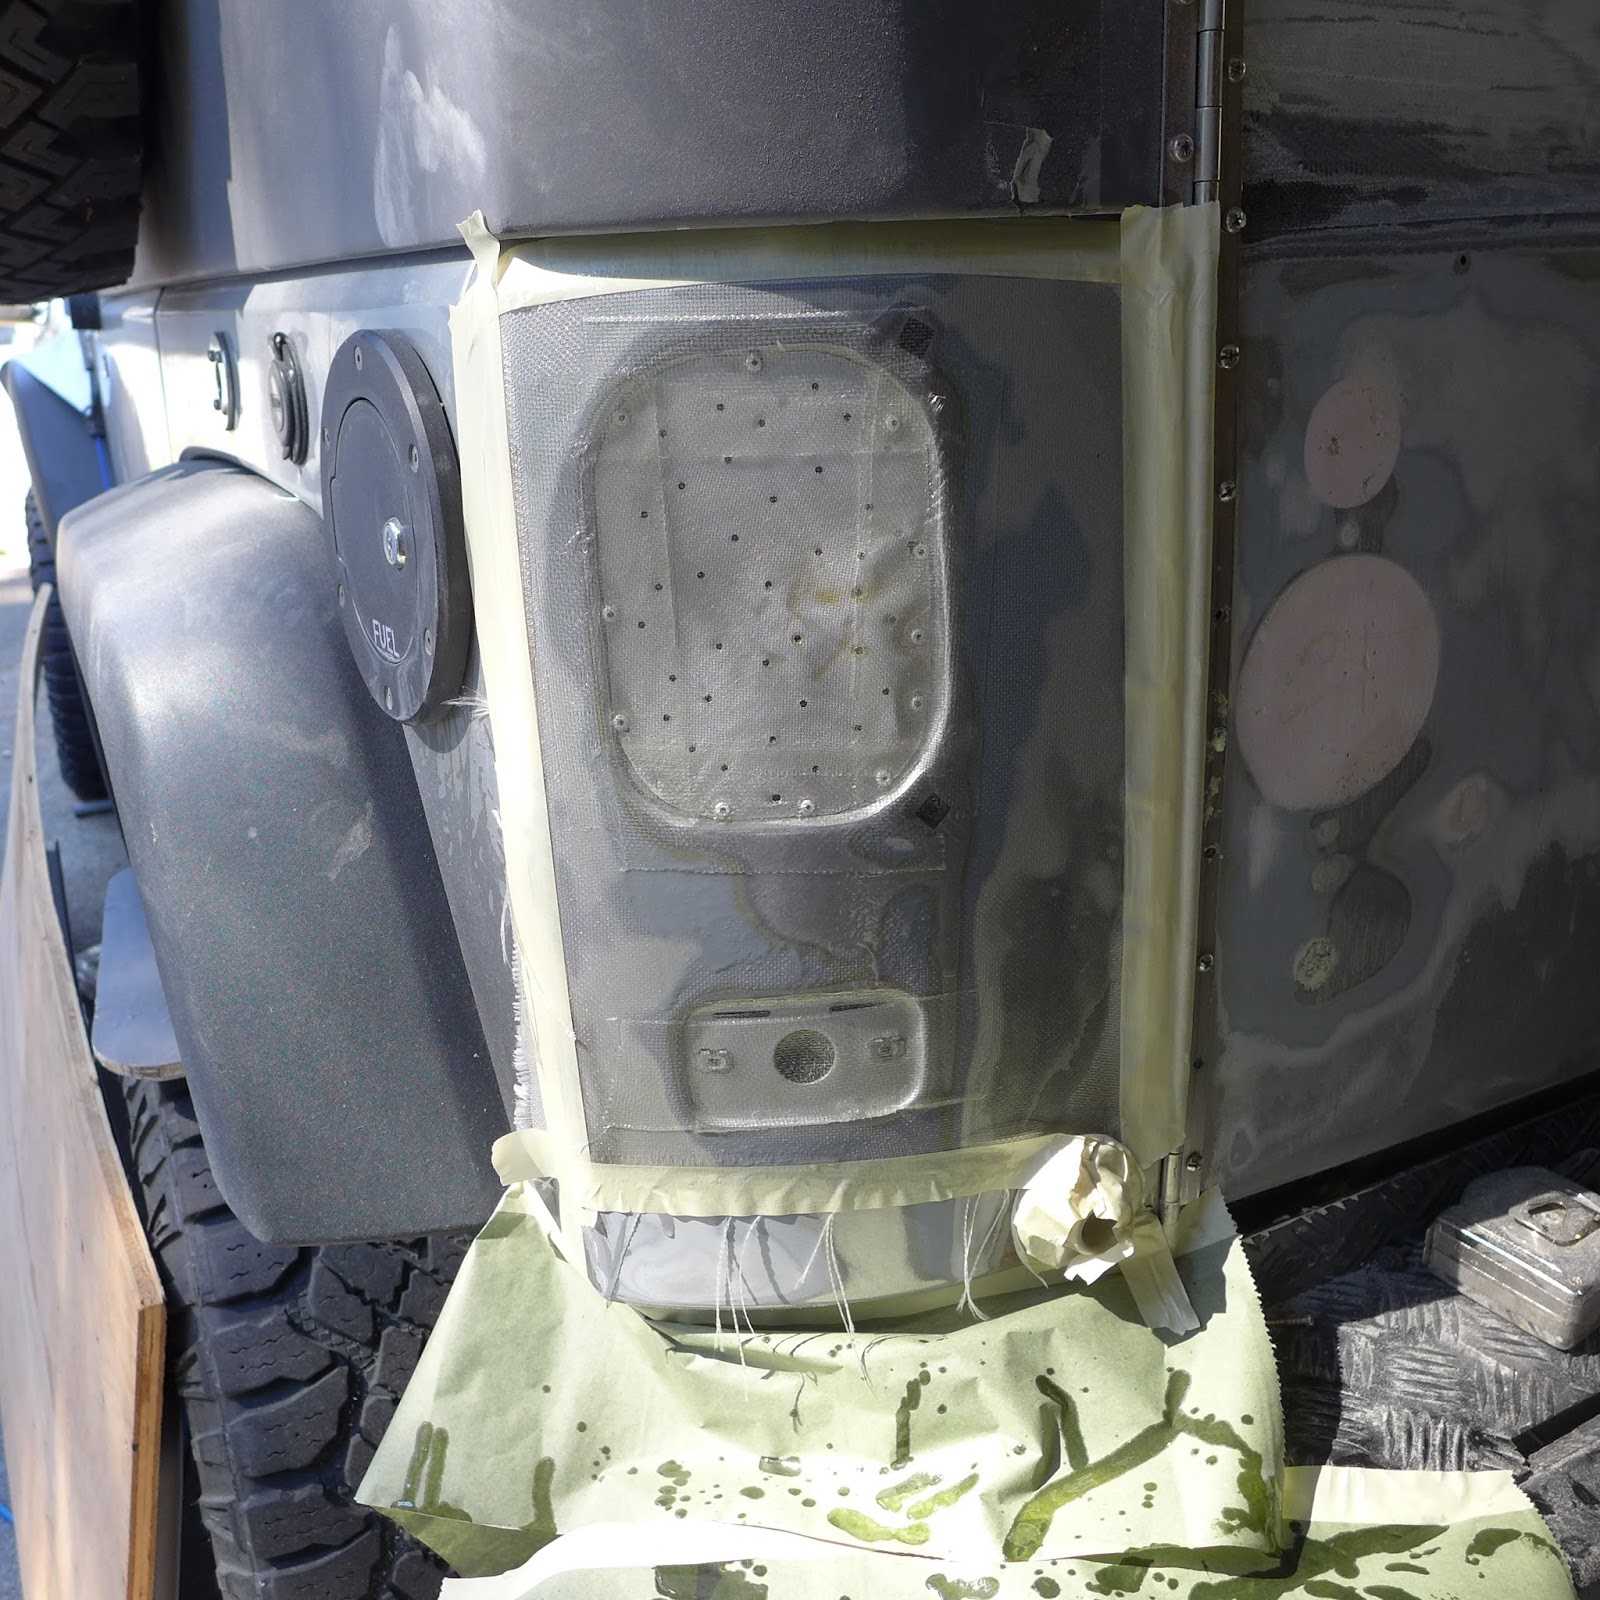
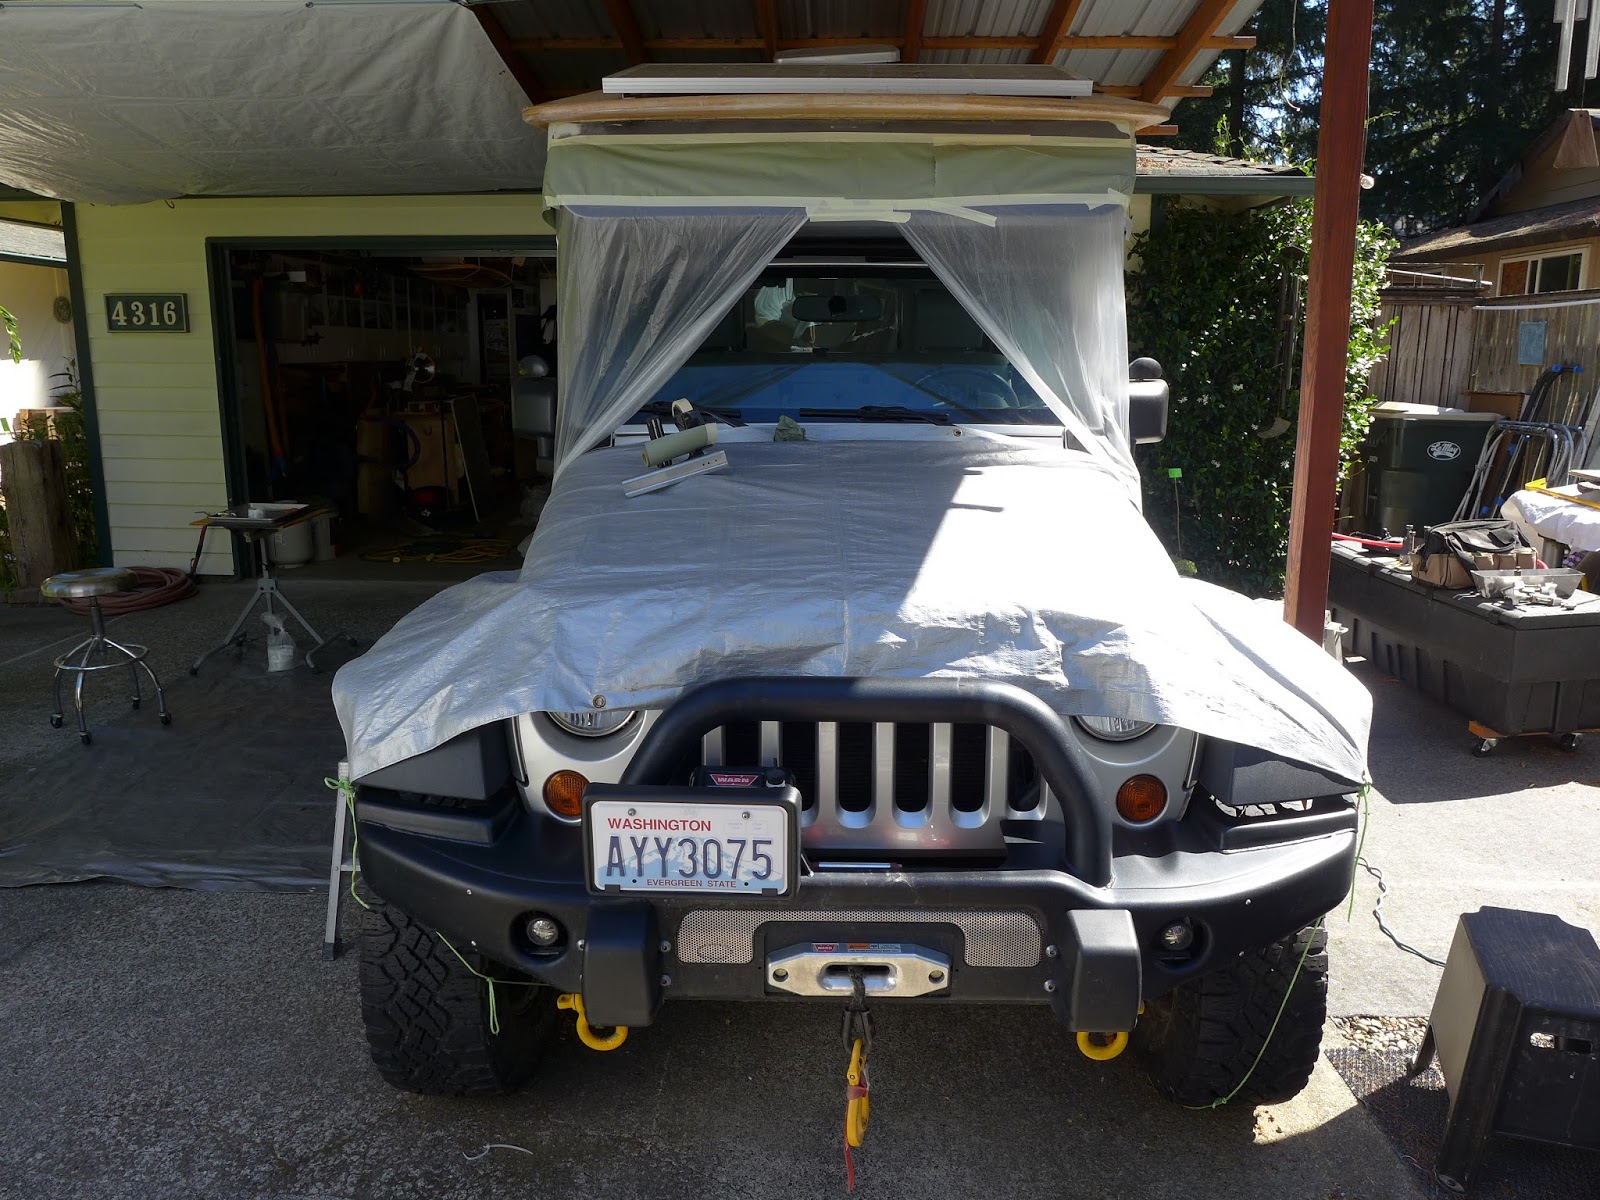
(above) Close to ten layers of fiberglass tape and carbon fiber cloth later... Should cure rigid... The door stays closed for at least a week...
 

PaulJensen

Custom Builder
24 Rear Door Hinge Change...

14095893_10154429502702398_7459183531784094543_n.jpg

(above) The stock and upgraded hinges were on the wrong side and not suited for a door like this... The handing of the door wasn't what I want, so the factory hinge from the roof/cabin was cut to hinge height and screwed in place... I tried the hinges with the sleeves concealed but the door was just too ight that way.... This way the hinge is also less likely to stretch...

14064304_10154429502617398_1952001571324926043_n.jpg

(above) This way when the door is opened, you step into the galley, not into the bed...

14055121_10154429502687398_4170557044443257318_n.jpg

(above) When finished it will have more of a Land Rover than Jeep feel back here...

14064261_10154429502607398_5646794879623333869_n.jpg

(above) Areas that will get fiberglassed over get a fill coat of spray foam... A suitcase size aluminum box will bolt to the remaining bolt holes...
 

PaulJensen

Custom Builder
25 - Exterior Bolt Ons...

P1140262.JPG

(above) For accessing the roof rack, a pair of fold down, fire truck style steps are added to the rear wall...

P1140263.JPG

(above) They can also be used as a grab bar for getting up and in...

P1140264.JPG

(above) Up front. the light bar is now in the final position...

P1140265.JPG

(above) On the driver side, the Foxwing Awning is mounted and the spare wheel is bolted to the cabin...

P1140267.JPG

(above) And surprisingly, the view from the side mirror is minimally obstructed... Still planning on getting a mirror extension...
 

GR8ADV

Explorer
P1140262.JPG

(above) For accessing the roof rack, a pair of fold down, fire truck style steps are added to the rear wall...

P1140263.JPG

(above) They can also be used as a grab bar for getting up and in...

P1140264.JPG

(above) Up front. the light bar is now in the final position...

P1140265.JPG

(above) On the driver side, the Foxwing Awning is mounted and the spare wheel is bolted to the cabin...

P1140267.JPG

(above) And surprisingly, the view from the side mirror is minimally obstructed... Still planning on getting a mirror extension...

huge light bar. It's official... I will never be as bright as you. Must admit I have not seen the side mounted spare before, but I don't get out much. This is going to be a well thought out rig in the end. Thanks for the updates Paul.

A special thank you for driving all the way up to 'clean up' the woodwork in theFUSO after the dealer awning install. Nice, very nice.
 

762X39

Explorer
This way when the door is opened, you step into the galley, not into the bed...
I have never understood why a left hand drive vehicle would have the rear access door hinged on the sidewalk (passenger) side rather than the street side. It just seems better the way you have done it.:coffee:
 

PaulJensen

Custom Builder
26 - Rear Lights...

P1140268.JPG

(above) The license plate was relocated to under the rear bumper... A super bright LED license plate light is bolted to the top of it...

The former roof rack LED light (and back up cam) is also bolted to the underside of the bumper...

Above the rear door is a new Hella LED light, switched independently from the inside of the rear cabin...

P1140270.JPG

(above) A closer look...

P1140269.JPG

(above) The new ARB "Touring" awning arrived... Roughly 8'x8'... It will go up high on the curb side wall... Combined with the Foxwing awning, I got the coverage covered...
 

PaulJensen

Custom Builder
27 - Painting Started...

P1140273.JPG

(above) The primary and possibly final rear cabin color is dull flat grey, like the primer... "Nothing to see here, move on" high on the desired quality list... Got a gallon of premium acrylic paint... Gonna roll it on thick...

P1140272.JPG

(above) The propane locker panel is sanded and ready for paint...

P1140271.JPG

(above) Random oribtal sander to 80 grit is good enough for me...

P1140274.JPG

(above) With a bonanza of paint, I decided to give the lower inside the Navy Jeep treatment... First the old screw holes and other water access points were epoxied and fiberglassed...

All for now, off to Canada for a few days for our daughter's weddding...
 

PaulJensen

Custom Builder
My thoughts were that if I was at a West Coast beach watching and waiting, the solar panel should face south... The view from the bench seat should be out of the curb side window and the door should be behind you and out of the way... Road traffic is a very small consideration... I also plan to have a swing limiting stop of some kind on the door...
 

fog cutter

Adventurer
A rear door hinged on the drivers side, that will stop in 90 degree angel (like the Gwagon), will not swing into traffic and hence give you safe and easy access from the sidewalk...

neither will a hatch, but that wasn't the question. the design is based on manufacturer liability, not user friendliness.
 

PaulJensen

Custom Builder
28 - Rear Panel Work

Been out of town a lot lately... Was gone for half a week for our daughter's wedding up in Canada, then three days out of town building trailers near Seattle... Glad to be home again and able to make some more progess on the Jeep...

P1140536.JPG

(above) Keeping with the overall changes that are happening, the rear marker/brake/turn light will be something different than stock... The prep work started with riveting a perforated piece of sheet metal to the opening...

P1140537.JPG

(above) Next a piece of fiberglass cloth is taped to the panel...

P1140540.JPG

(above) Then the cloth was wet-out with epoxy...

P1140541.JPG

(above) After the epoxy cured, the low points got a few coats of Bondo... Later the entire panels will be covered with fiberglass and epoxy again...

P1140542.JPG

(above) The rear door was re-hinged on the other side, so the former latch/lock zone is not needed as it was... I want to make the full width of the rear door become a drop down table... Another benefit is a couple more inches of bed/seat area when the door is closed...

P1140543.JPG

(above) Fifteen minutes with a cut-off wheel on a grinder later, the door is ready for the re-build...
 

Forum statistics

Threads
185,823
Messages
2,878,599
Members
225,378
Latest member
norcalmaier
Top