My 1989 Suburban overland/expedition project

shovelbill

Observer
with all these deep water fording snorkel equipped vehicles i read about, only once so far have i hear anything mentioned about the fan :Wow1:.........nobody ever mentions the breathers down under either, why is that? :snorkel:
 

shovelbill

Observer
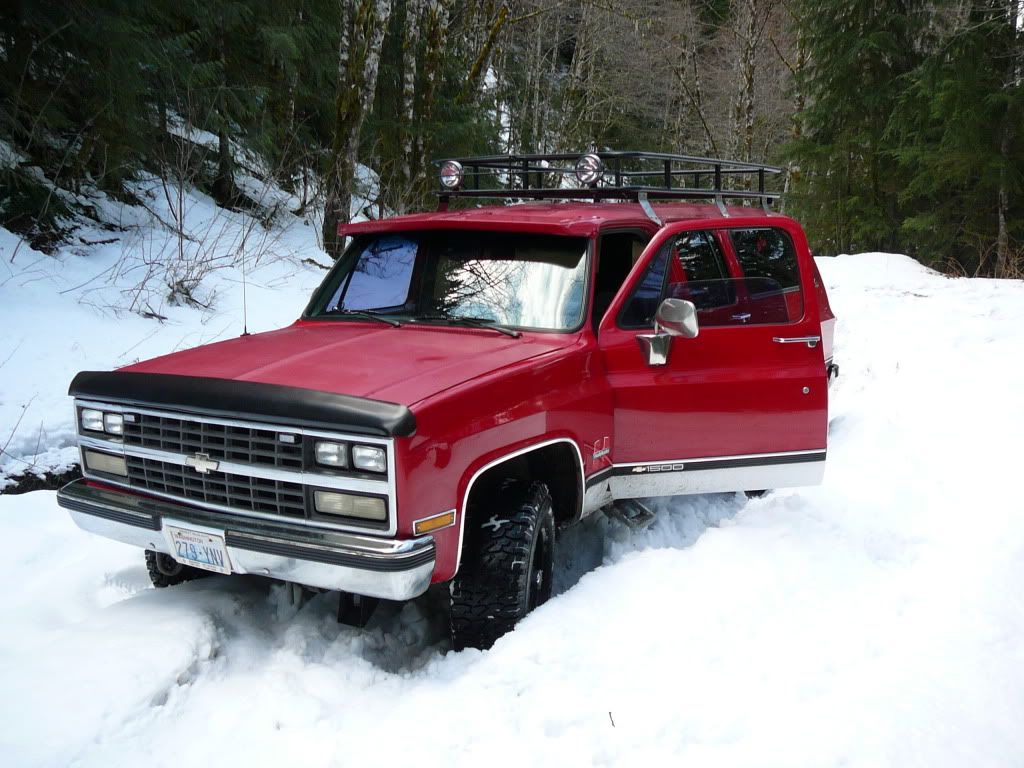
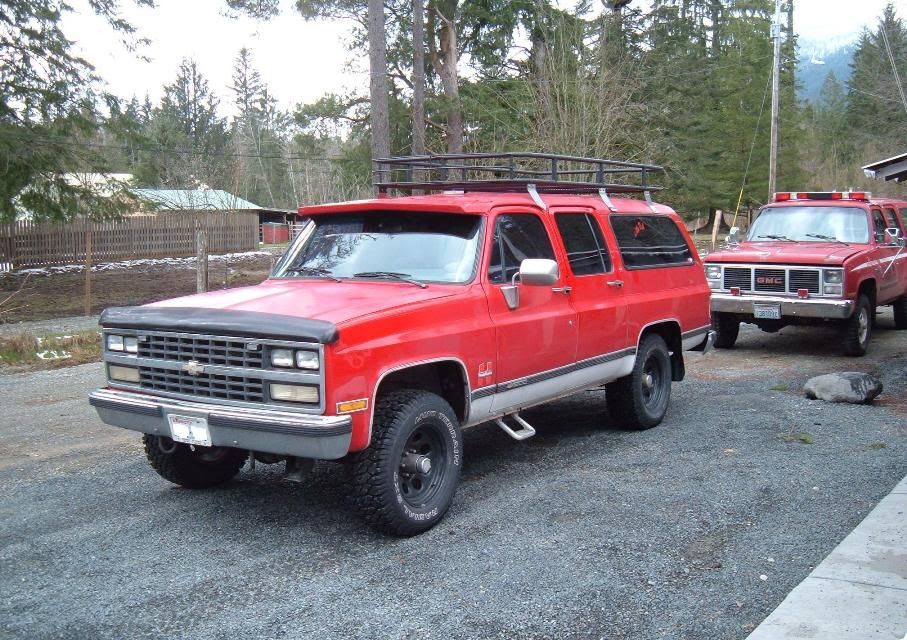
I bought this Suburban early January on Craigslist.
It’s an 1989 half ton with a 350 engine (5.7L V8) 4 speed auto with overdrive and TBI
I wanted to get a ¾ ton but got a good deal on this one, because it has a rebuilt engine and transmission both with less than 30k miles on them. Maybe doing an axle swap in the feature? Also I wanted a red one with grey interior.

I have owned a 2000 Dodge Durango before that I modified as my overland vehicle but used it as a trade in to buy a Dodge challenger. I have been to Yellowstone with it and many other camping and road trips. However it was a little too small to sleep 2 people and haul all our gear (I am 6’7”).
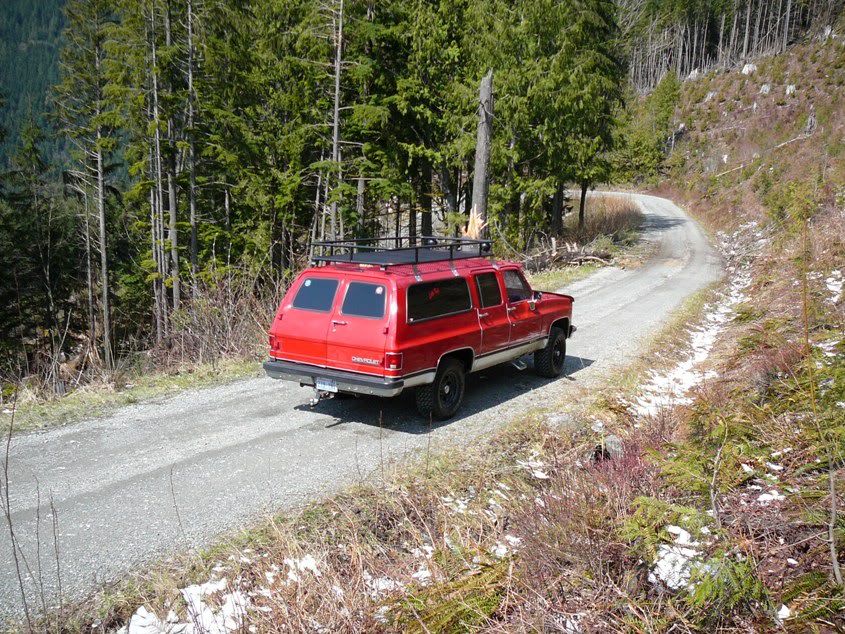
I always liked the older body style Suburbans (1973-1991) and have had an 86 ¾ ton suburban that I just sold. I used that one mainly for hauling fire wood and large materials.
I chose the 89 to 91 model suburbans above any other year because it has TBI (the fuel injection gets me about 2 to 4 miles more than my 86), has overdrive and has the newer grille and some newer interior and these are the last years with solid axels.


before_small.jpg

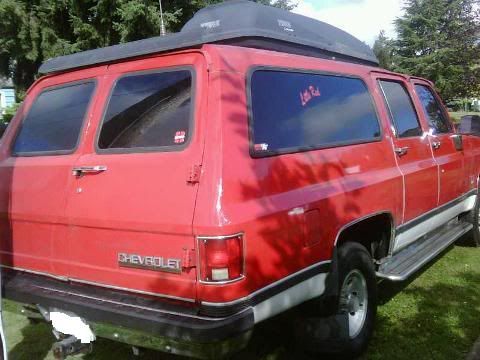
Here is a picture from when I bought it.


Step2_small.jpg

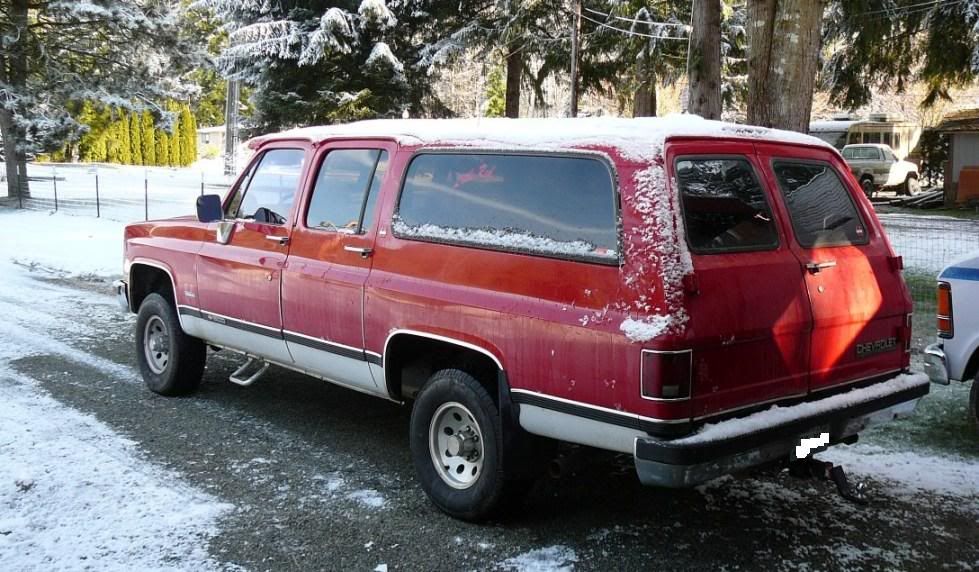
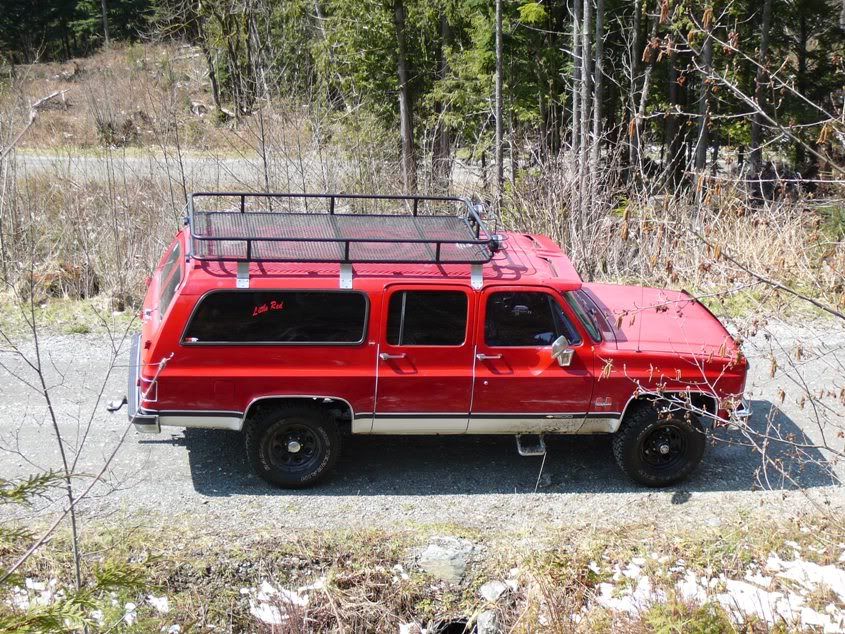
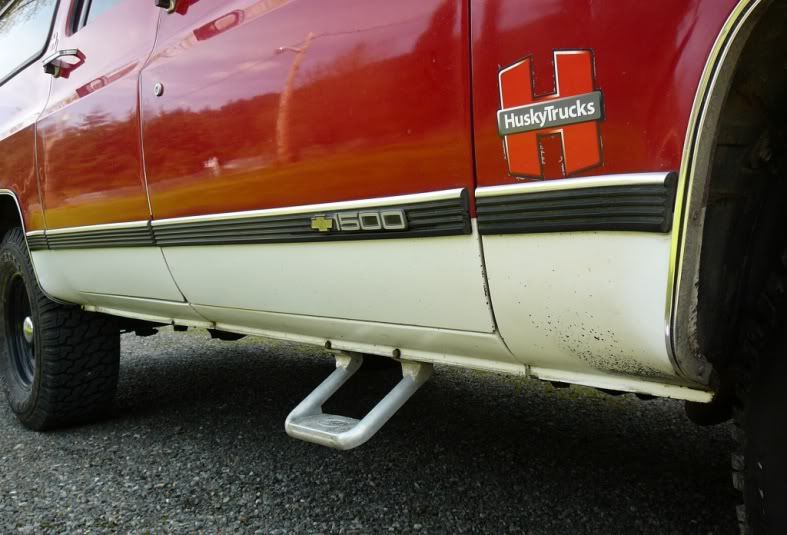
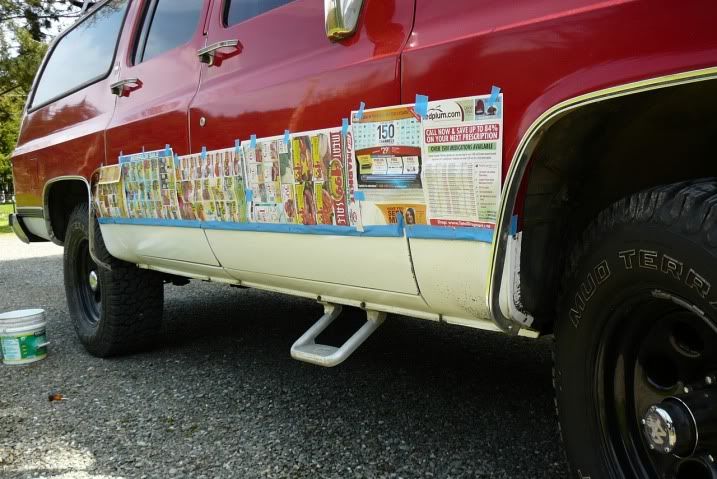
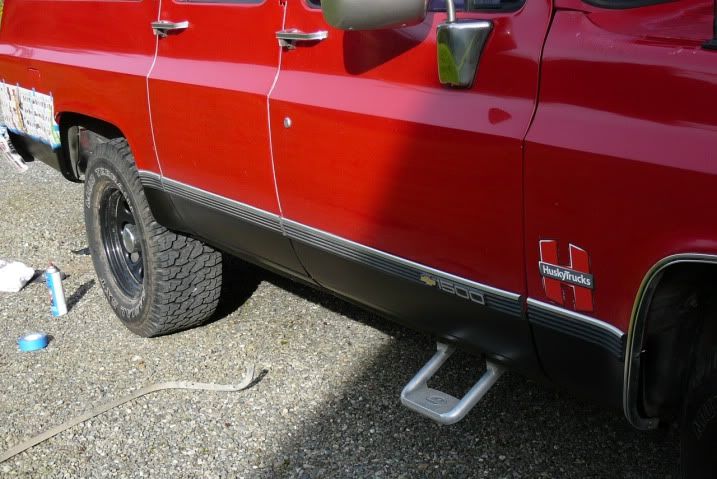
This is after I did some modifications.

I took the ski box off, took the running boards off (better clearance) and installed 2 Bully aluminum steps up front so my wife can get in. Took off the ugly spoiler and installed a LED 3rd brake light.


Mainbig.jpg

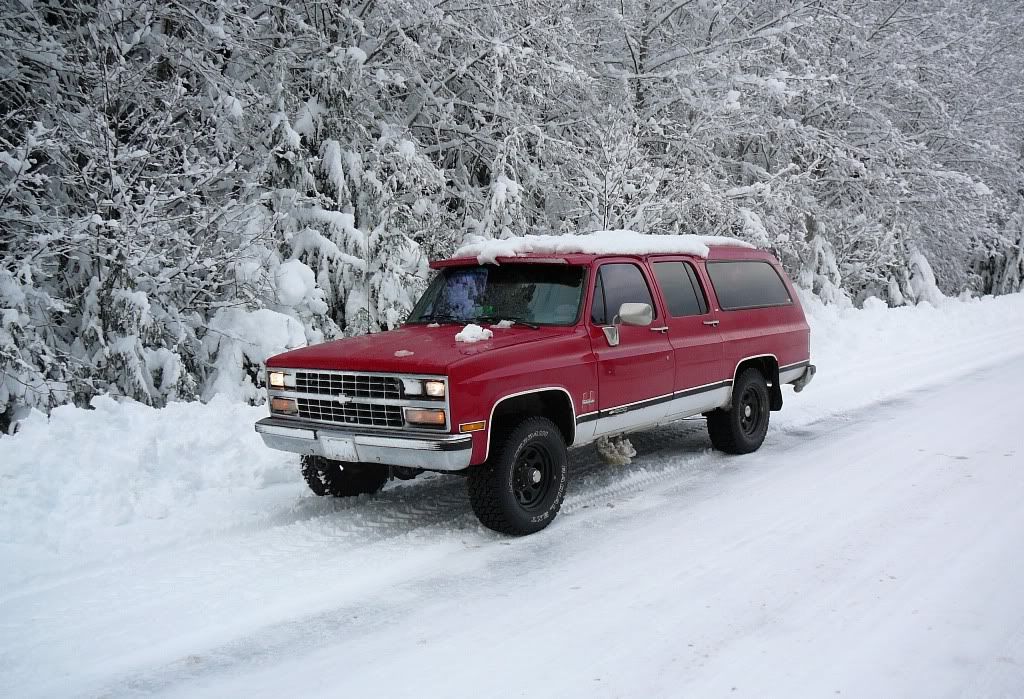
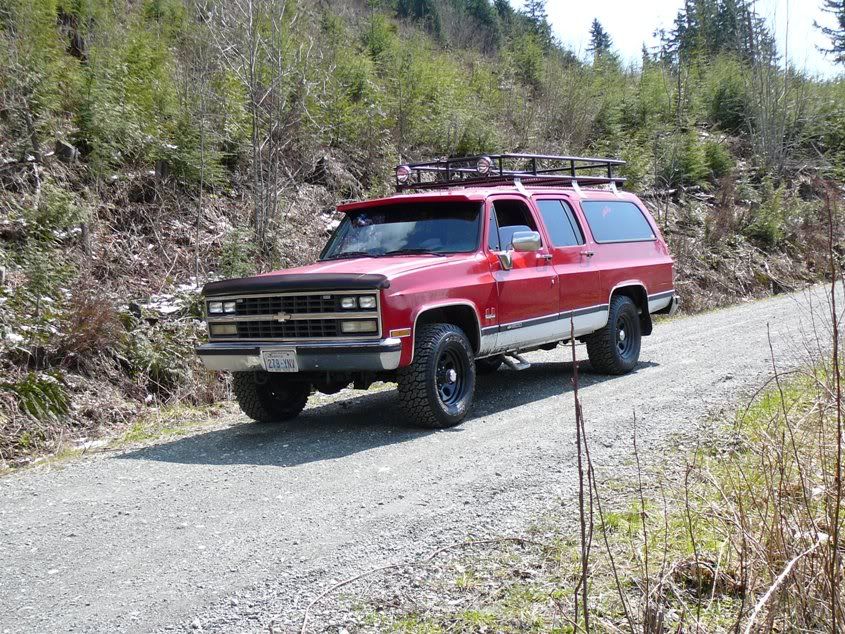
This picture is from late January

I bought black 17” rims and 33”Dean mud terrain tires (just in time before the snow), also got a 2nd battery for dual battery set up. (still have to get everything hooked up and decide what system to use)

Future modification I plan on doing:

-finish dual battery setup
-winch bumper with brush guard
-12000 pound winch
-rear bumper with gas can mount and tire carrier
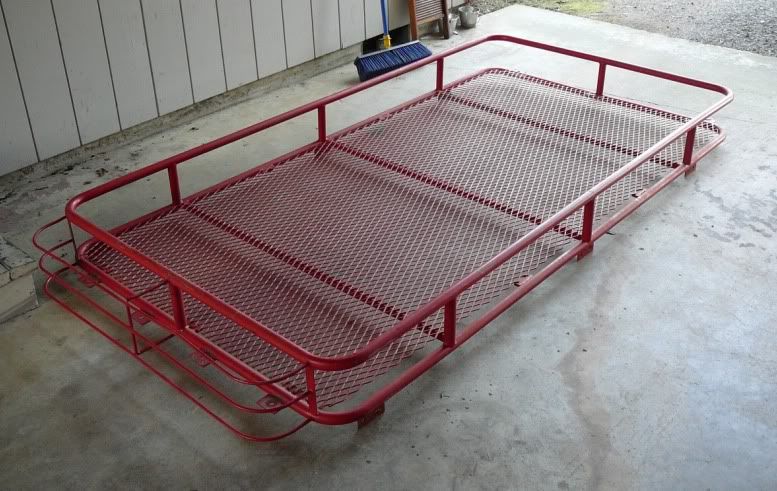
-custom full size roof rack
-4” suspension lift
-Snorkel (like the Suburban in Dante's Peak)
-Fog lights, spot lights and backup lights
-emergency lights (as I am a volunteer fire fighter and will be using this as a rescue rig also)
-upgrade the front bench seat to bucket seats
-and who knows what else

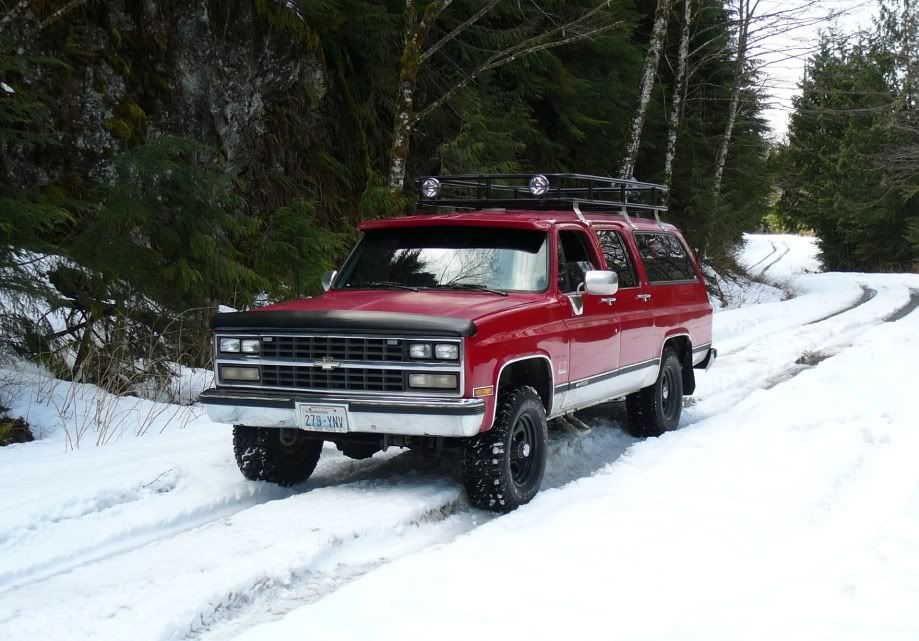
I will post pictures and keep you guys updated of the progress.
It will be slow as I have limited money and time to work on it.

There is lots of great info on this site and I am glad I found it, (I wish I knew all this when I build my Durango) thanks to everyone for sharing this…

it all sounds good so far, but i would be more concered with upgrading to a 1 ton (not 3/4 ton) axle setup sooner than later.....all the weight you want to add will snap those 10 bolts at the worst possible time. all the goo-gaz are nice, but a bullet proof drivetrain would be my first choice if i was going where i couldn't expect help in short order.
 

Skratch

New member
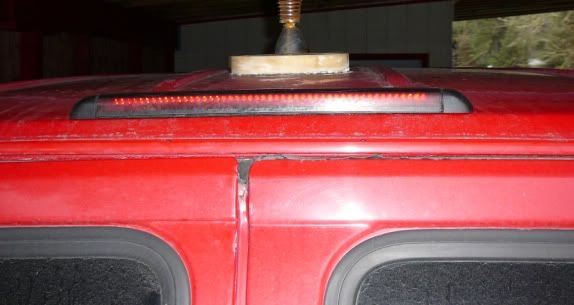
So here is the 3rd brake light I installed it is nothing fancy but works great and looks like it is supposed to be there.
It is an LED light, that I took it off an 92-99 model Suburban at pull-a-part and paid only 2 dollars for it. This light can also be found on some other GM vehicles, so pretty much every junk yard will have one.
The installation was fairly easy, I drilled 3 holes, one for the wires and one on each side of the light for the mounting screws. On the bottom of the light is a gasket to seal it to the roof, I coated that and the screws with some silicone sealant to make sure it does not leak around the holes.
Then I grounded the negative wire to the frame and the positive to the right brake light wire. Right now it works but it will flash when you turn on the right blinker because there is only one wire for both the brakes and blinker so I have to find out where the brake light switch is located and then wire it to there instead of the light.

2011_0207.jpg

I use the same third brake light on my Burbs, I tied the light in off the actual brake light switch at the pedal.
The light comes on with the brakes and not one of the turn signals that way.
Unfortunately the way GM set up the hazard lights, it will blink when those are turned on, without installing a logic circuit there is no way around this.
 

Little Red

Adventurer
Update

So I finally got around to painting the roof rack black (a couple weeks ago, when it was finally not raining) and today I mounted it on my suburban.

Here is a picture off the roof rack before I painted it.

roofrack02.jpg


I cleaned it, sanded it down and then used spray on bedliner to paint it black.

And here it is on my suburban (and that is the fire dept suburban in the back)

2011_0407003.jpg


Next I will install 4 off road lights on the front and 2 work lights on the back.
(maybe 2 work lights on each side also)
Than I am thinking of putting on an axe and shovel, 2 gas cans and 2 mud ramps

I also have my snorkel ready to be putt on but I need to have someone cut a hole in my fender (since I don’t have the right equipment to do it). A welding shop can do it for me perhaps?
 

chilliwak

Expedition Leader
Nice looking Burb, Red. It seems like everything is coming along nicely. The fire department Burb looks nice too.:victory:
 

FellowTraveler

Explorer
Your right little or no info

with all these deep water fording snorkel equipped vehicles i read about, only once so far have i hear anything mentioned about the fan :Wow1:.........nobody ever mentions the breathers down under either, why is that? :snorkel:

I'm guessing you already know a snorkel is not all that is needed for fording, or heavy dust environment.

Anyway, many modern vehicles have electric fans or a fan clutch assembly, the electric type can be submerged for a short spell w/o damage because vent is on bottom of fan motor (keep in mind salt water can cause lots of damage), the clutch type when submerged the clutch gets cold a the fan barely rotates in the water so blades stay attached. However, some thin blade fans in theory could act like prop bending forward into radiator, never seen this happen only hear it has happened a few times.

Rule one: don't mount a direct drive fan too close to the radiator.

All drive-train vents, engine, power steering-hydro boost-master cylinder need to be vented up next to snorkel. However, any bad seals will allow water to seep into drive-train components.

Military fording modifications are the way to go for any serious snorkel system. Hummer database has detailed fording facts that apply to any vehicle with a few changes.

Snorkel great for that 1% you really ever need it.
 

Little Red

Adventurer
I got the Safari snorkel for the FJ80. I know I will have to do a lot more modifications for it to be useful but at least it will look cool until I get that all done.

I'm guessing you already know a snorkel is not all that is needed for fording, or heavy dust environment.

I do, but thanks for the info.

Once I saw the price on the Safari snorkels I was no longer going to buy one but than I came along one for less than half the price on CL so I had to get it.
I just think they look really cool, but at some point I do want to make it fully functional and I live near the river and already had to evacuate last year during the floods and the water on the road I had to drive trough was just touching the tailpipe. So I may actually get to use it for its intended purpose at some time. I am also a volunteer Fire Fighter and it would come in handy to help evacuate people during a flood.

I hope to get it mounted in the next couple weeks but I don’t have any money right now to spend on all the other required modifications. Hoping to get it done before fall though when the flooding season starts again.
 

Little Red

Adventurer
trail pics

Finally a couple days without rain here in WA and it was even sunny so I hit the trails

Here are some pictures

2011_0422036.jpg


2011_0422033.jpg


2011_0422042.jpg
 

Little Red

Adventurer
and here are some more

snow01.jpg


snow02.jpg


and here is where I decided to turn around, as the snow was getting too deep. (I looked at my Forest Service map and the elevation was about 3000 feet)
 

my1stcummins

Adventurer
Little Red,

I am pretty jealous of your travels. I hail from Bellingham and miss those forest service roads so much. Keep the pictures coming.
 

Little Red

Adventurer
Got another project done

The weather was nice out yesterday so I took advantage of the nice weather and painted the lower section of my car with spray on bedliner. (it is raining again today and so far sunny days have been few and far between here in WA, so glad I finished this yesterday)

Here is a picture of what it looked like before:

2011_0504002.jpg


I don’t know who thought white was a good color for the lower part of a car but I never liked it as you could see every spot of dirt on it.

Here is a picture of the prep, before painting:

2011_0504003.jpg


I washed it, lightly sanded it and then covered all the areas around it with old newspaper to protect them.

And this is what it looks like now:

2011_0504004.jpg


I am very satisfied with the results, the black looks so much better than the white.

For those that are interested I used 2 cans of Duplicolor spray on bedliner that is available at any automotive store. (AutoZone, Oreily, Napa, etc)
At the end I still had a little left in the 2nd can, should be enough for some touchups later on.

When it stops raining again I will post some more pics.
 

bldeagle10

Explorer
NICE! love the bedliner it looks alot cleaner. im about to bedline the crap out of my jeep! fender flares end caps bumpers spotlight/foglight housings and some interior panels that are all scatched up from cargo/ passengers not knowing how to pick up their feet when they get in...
 

Forum statistics

Threads
185,795
Messages
2,878,267
Members
225,352
Latest member
ritabooke
Top