Bolt-together fiberglass Jeep-tub trailer kit

jscherb

Expedition Leader
I haven't showed you too many construction photos so far in this thread, so here are some...

For the first phase of this project, I've been working on making 5 molds:

- tub side panel
- tub end panel with tailgate opening
- tub end panel with no opening
- tailgate outer skin
- tailgate inner skin

I'll also be making inner fender molds, but I'll do them after I've made the first set of tub sides and ends.

The mold-making process begins with a "master", often called a "plug", which is a complete version of the part to be molded. Usually the master part will have extra wide flanges to facilitate trimming the final part to the exact size. Once the masters are complete, molds are made from the masters. The masters need to be as perfect as possible, since even the tiniest imperfections will be reproduced in the mold and then carried to the final parts.

Here's how I'm making the master for the end panel with the tailgate opening. To get a start on this master, I picked up two OMIX tub repair panels:
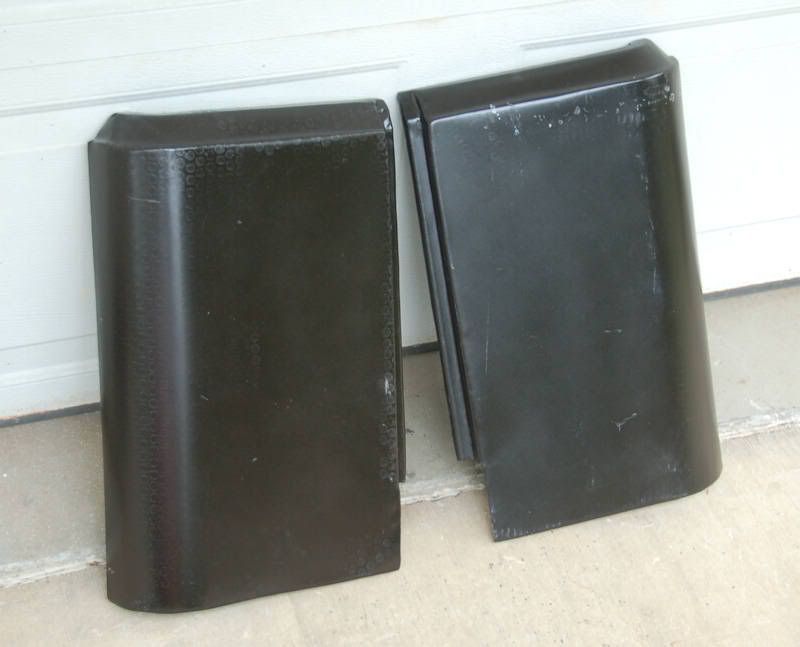
TubCornerPanels1.jpg


They look ok in this photo, but they're really low quality parts. (Side note: Crown also makes rear corner panels, and they're higher quality than the OMIX parts, but the Crown parts have all the holes pre-cut in them. I got the OMIX parts because I didn't want to have to fill the holes).

I think the OMIX parts may have been beaten to shape by hand in the Phillipines, rather than being made with accurate dies on a press. I had to spend quite a few hours making them accurate. First, the corner wasn't 90 degrees, I'd guess it only curved around 80 or 85 degrees. So first I fixed the curve to make it 90, and that resulted in the parts being too narrow. If I set the tailgate opening to the factory 36", the tub would end up being 1/4" too narrow. So I had to build up the tailgate jamb opening 1/8" on each side to get to the factory tub width. Once I had made the corner panels accurate, I mounted them on a board so I could make the entire end panel accurate. Being accurate to the factory dimensions in this project is important, so factory parts will fit these tub properly.
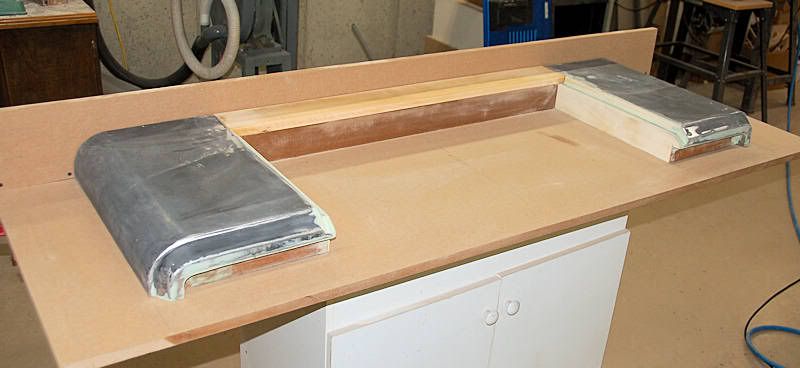
EndPanel4.jpg


I connected to two corner panels with wood to make up the panel below the tailgate. The material I added to the jamb goes all the way to the base board; it will be trimmed on the final fiberglass part.

One of the nice things about making masters for molds is that you can use whatever material you like as long as the end result is a smooth surface. I'm using a mix of sheet metal parts and wood for these masters, sometimes wood is easier to work when building a master part. Once the bodywork is done and everything is sealed, smoothed and primed, the fiberglass molding process won't care whether the master was metal, wood or whatever.

This next photo shows a difference between making a mold master and making a final part - I made the inside of the tailgate opening extend all the way to the base board using wood (BTW, this was also part of making the tailgate opening size accurate because of the bad OMIX parts). Having these extend all the way will make the molding process easier, and the excess fiberglass will be trimmed off the final part.
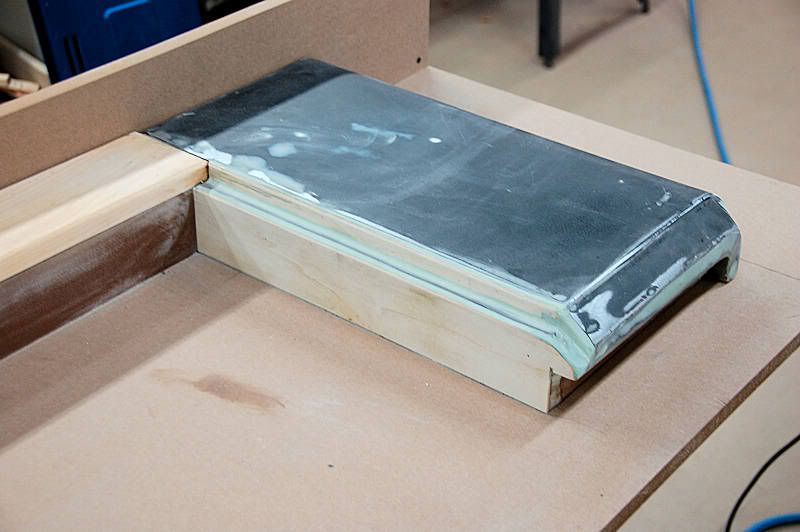
EndPanel6.jpg
>>>>

Now the part is accurate and faithful to the dimensions of the factory tub; a bit more bodywork is yet to be done to smooth everything together seamlessly, more photos to come.
 

jscherb

Expedition Leader
Here's a couple of photos showing a TJ tailgate being test-fit in the tailgate opening...

EndPanel16.jpg


EndPanel15.jpg


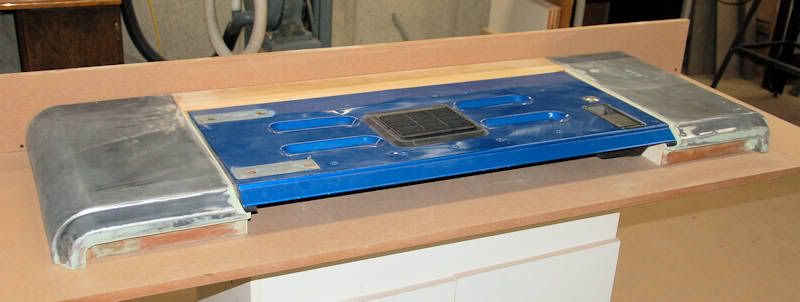
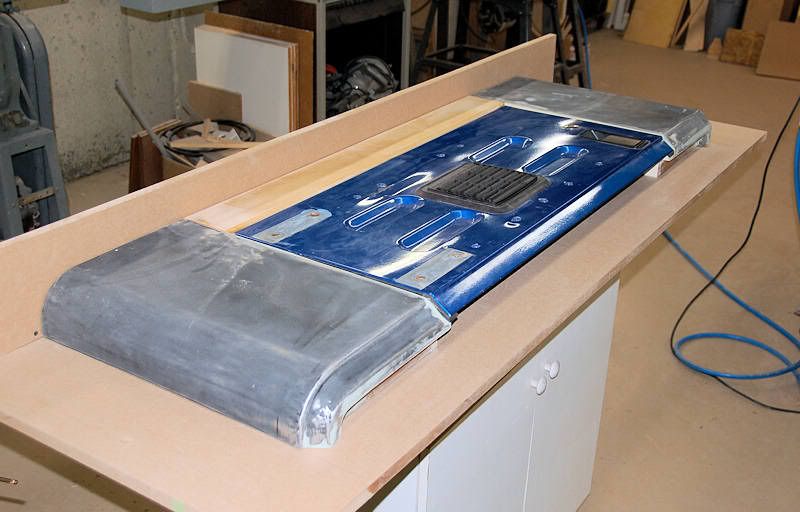
Continuing the work on the end panel, in the photo below I've done the bodywork necessary to smoothly join the center panel to the corner panels:

EndPanel10.jpg


Also in the shot above you can see a clamp-on "bottom" for the mold; this will be a two-piece mold to facilitate removing the part from the mold.

The next step for this master is shooting it with high-build primer, followed by fine sanding, then shooting it with epoxy primer (which is impervious to resin), but I'll wait and shoot all of the masters at the same time. I'll finish the metal work/woodworking/bodywork on all of the other masters before going to the primer step.
 

jscherb

Expedition Leader
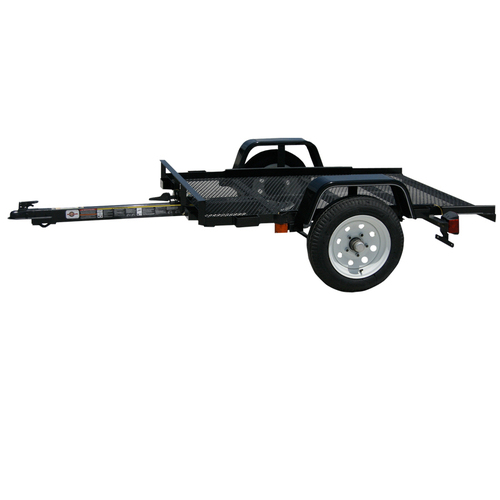
Here's a frame that could work well for a 4x6 trailer tub; I found it at Lowes. It's got a 2000-lb. axle with 5 on 4.5 bolt circle, so the same bolt pattern as the Wrangler. The axle seems wide enough so that Jeep-sized wheels/tires could fit without interfering with the frame, so probably no modification required there (unlike the HF frame). The axle is assembled spring-under, so you could reassemble it spring-over to get more ground clearance.

654102425010xl.jpg


The fenders are welded on, so a little work with a grinder or hacksaw would be required, but other than that it should work fine.
 

jscherb

Expedition Leader
More construction photos...

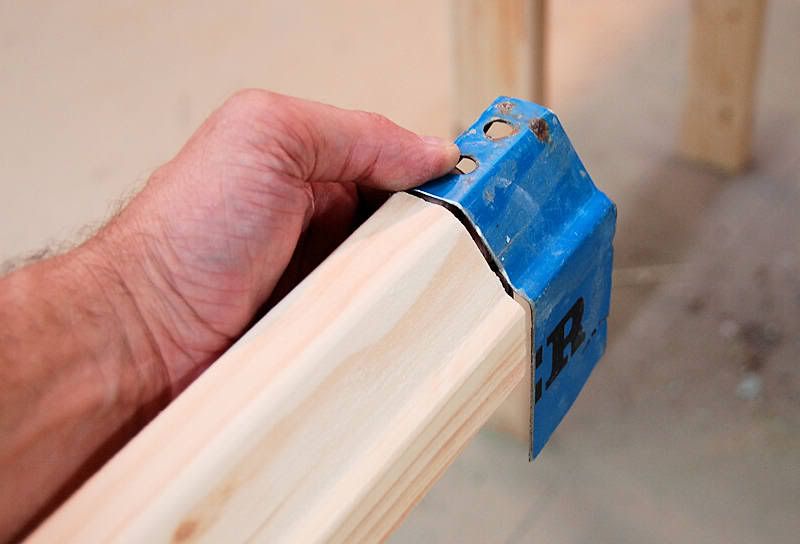
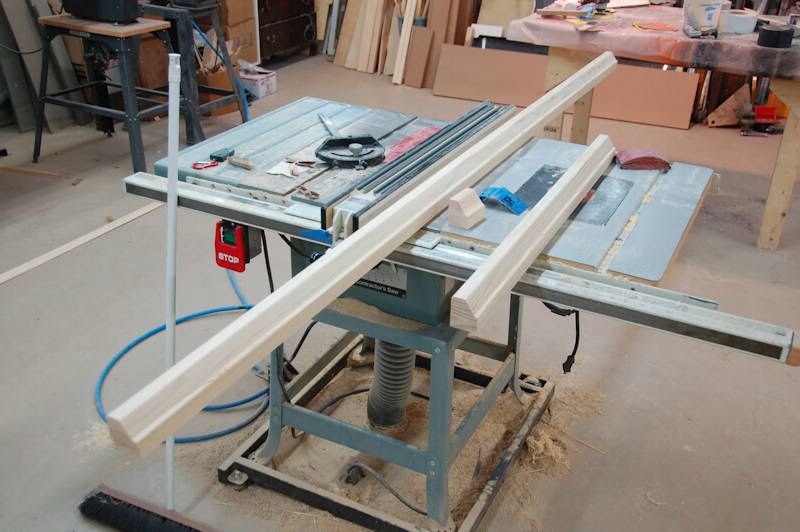
To build the side panel masters, some "top rail" stock is needed to match the shape of the top of the Jeep tub. This was fairly easy to make using the the table saw and the router table. Here's a closeup of the profile next to a little clip from a factory tub:

TopRail1.jpg


I made two pieces - one is the width of the tailgate opening and the other is 8' long. The way I'm making the tub front end panel without the tailgate opening is to reuse the master I made for the back tailgate opening end; I'll just make up a filler panel for the tailgate hole. The short piece will top off that filler panel to match the profile on the top edges of the corner panels. The 8' piece will be used for the tub side panel master.

TopRail2.jpg


More photos later today...
 

The Swiss

Expedition Leader
Here's a frame that could work well for a 4x6 trailer tub; I found it at Lowes. It's got a 2000-lb. axle with 5 on 4.5 bolt circle, so the same bolt pattern as the Wrangler. The axle seems wide enough so that Jeep-sized wheels/tires could fit without interfering with the frame, so probably no modification required there (unlike the HF frame). The axle is assembled spring-under, so you could reassemble it spring-over to get more ground clearance.

654102425010xl.jpg


The fenders are welded on, so a little work with a grinder or hacksaw would be required, but other than that it should work fine.
I used exactly this carry-on trailer for several years. Did the SOA lift and fitted 13" tires with the stock fenders. Worked well in most conditions. Sold the trailer to a fellow Expo Portal member, who still uses it in PA.

I replaced the Carry-on with this very similar custom made 4x6 utility trailer. It's a little bit heavier duty, still has 2000lbs springs but a 3500lbs axle.

Trailer-03.jpg


This is how the trailer looks now:

100_0715.jpg


The suspension of these trailers, leaf springs without shocks, are rugged and easy to fix if something goes wrong. They work decently well on smooth roads and slow off-road, but definitely have its limits on washboard and bumpy roads, especially concrete slab interstates, which causes the trailer to bounce uncontrollably, making coke cans in the cooler explode, taking a toll on all the trailer and trailer content. The ride of the trailer is getting better with increased load, but is never great. My next step will be adding shocks to the suspension.
 
Last edited:

jscherb

Expedition Leader
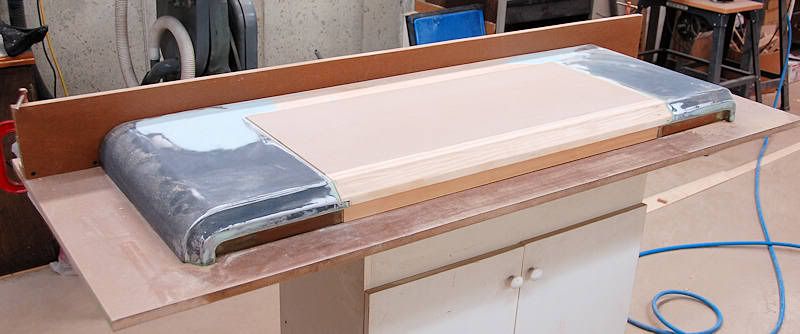
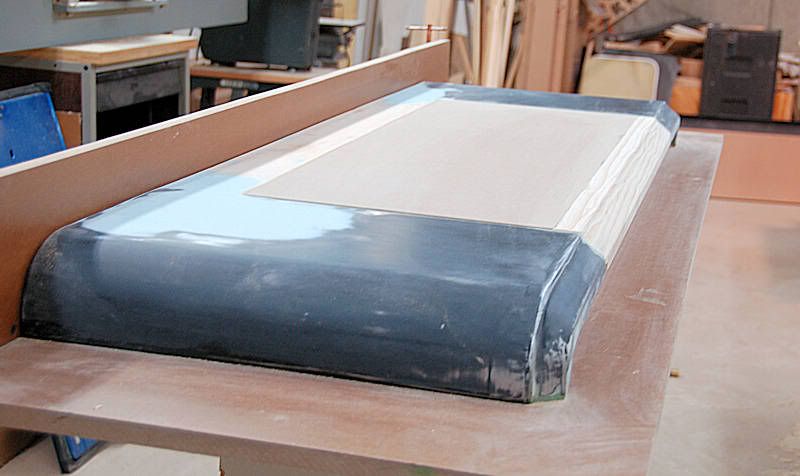
I made up a filler panel for the tailgate opening using some MDF sheet and the top rail I showed earlier. Here's a few photos:

TailgateFiller1.jpg


Here you can see how nicely the profile of the wooden top rail matches the profile of the top of the corner panels:

TailgateFiller2.jpg


The gap between the filler panel and the end panel will be filled with modeling clay before molding; the result will be a mold for a solid tub end panel with no tailgate opening.

BTW, a mold could be made of just this filler panel, and that could serve as a mold for a different style outer skin for the tailgate - it would provide a smooth and flush look tailgate instead of the standard CJ-style tailgate with the lettering panel. Kind of like those custom smooth tailgate panels you find on hot rod and custom pickups :)
 

jscherb

Expedition Leader
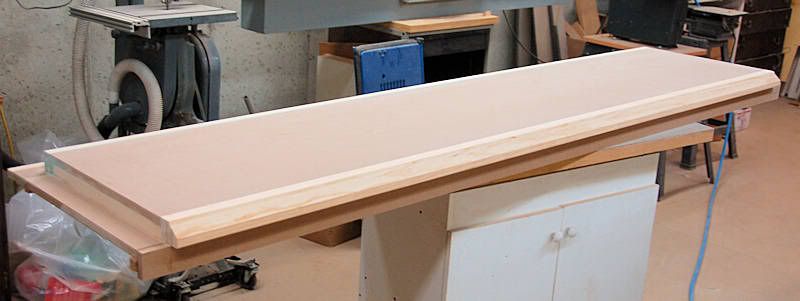
The next master part to be made is the side panel. I've made this one 8' long, which is the maximum length side panel I've planned for the trailer tub. Here's a few photos of the master for the side panel:

SidePanel1.jpg


SidePanel2.jpg


Once the mold is made of this side panel, using "dams" inside the mold will allow any length side panel up to 8' to be molded. To make a 4' long tub, for example, a dam would be placed 3' 5" from one end (the curves on the two tub end panels totals 7"). Without any dams inserted, a full 8' side panel can be molded, resulting in a tub that's 8' 7" long, plenty long enough to carry 4x8 sheets laying down on the floor of the tub.


The other thing about this master is I've made the side 2 1/4" taller than the height of the tailgate end panel. If you look at a Jeep tub, the height of the side panel just behind the door is greater than the height of the tub at the tailgate (the bottom of the tub slopes up behind the rear wheelwells). I made this master taller like this so it can be used to mold sides for a pickup bed that would match the height of the body tub just behind the doors. When molding trailer tub side panels, a dam will be used to shorten the height of the panel by that 2 1/4" so it is the height of the rear of the tub at the tailgate. I'll post more on the pickup bed application soon.
 
Last edited:

jscherb

Expedition Leader
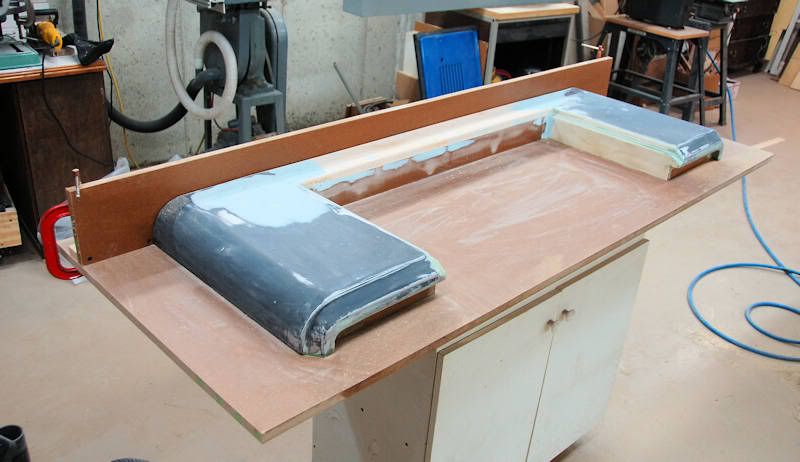
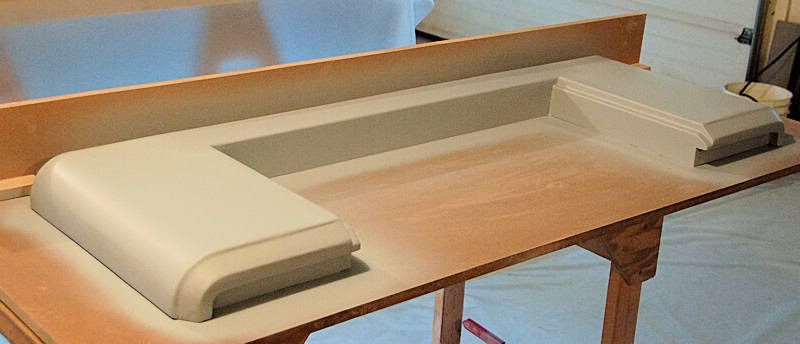
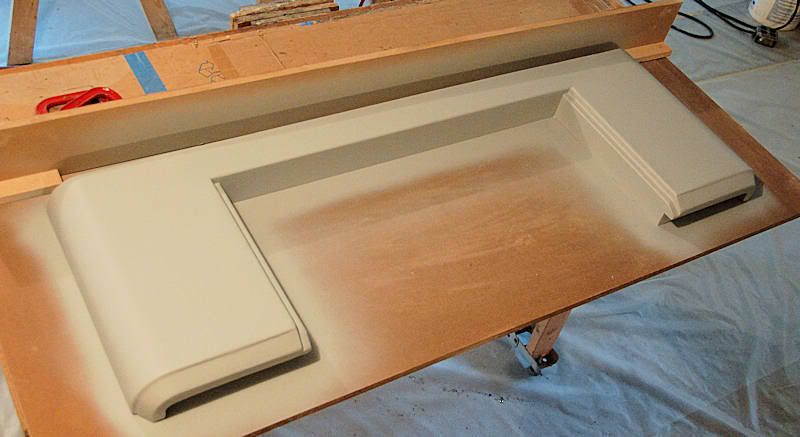
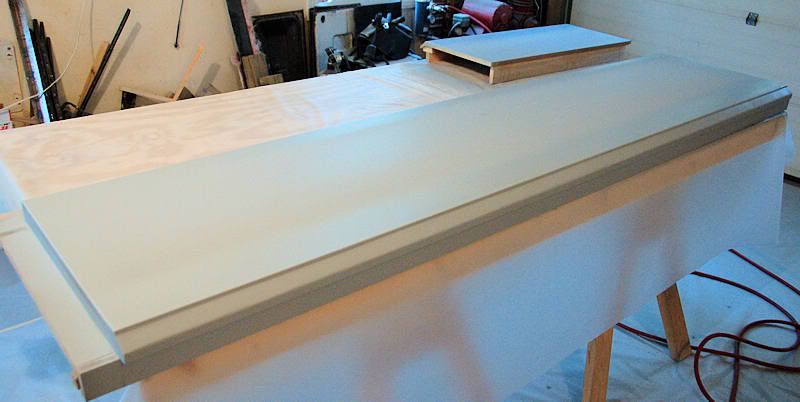
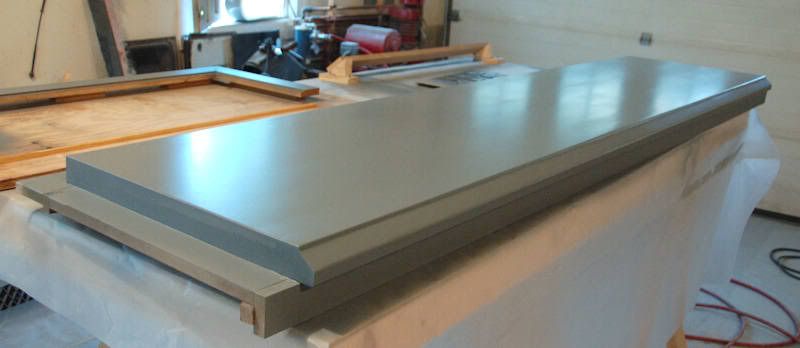
Now they're starting to look like actual parts... here are some photos of the tailgate end panel master and the side panel master in high-build primer.

HighBuild1.jpg


HighBuild2.jpg


Here's the side panel, and in the background is the filler piece for the solid end panel:

HighBuild3.jpg


High-build primer is a special 2-part catalyzed primer with high percentage of solids in it. It "builds" thickness well and sands very easily, so it's great for smoothing minor imperfections in a surface, a few thousandths of an inch or so. I usually hand sand the part smooth with 320 grit before applying the finishing coats.

All that's left is to fix the few minor imperfections that spraying something a single color always highlights, then a 320-grit sanding followed by spraying them with epoxy primer. Once that's done they're basically ready to mold.
 

jscherb

Expedition Leader
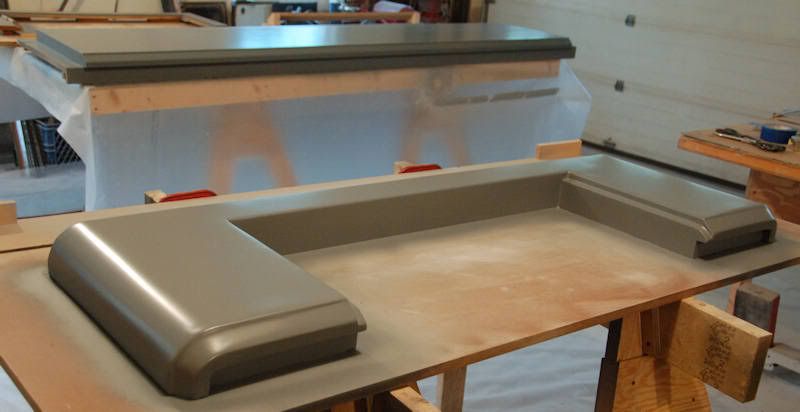
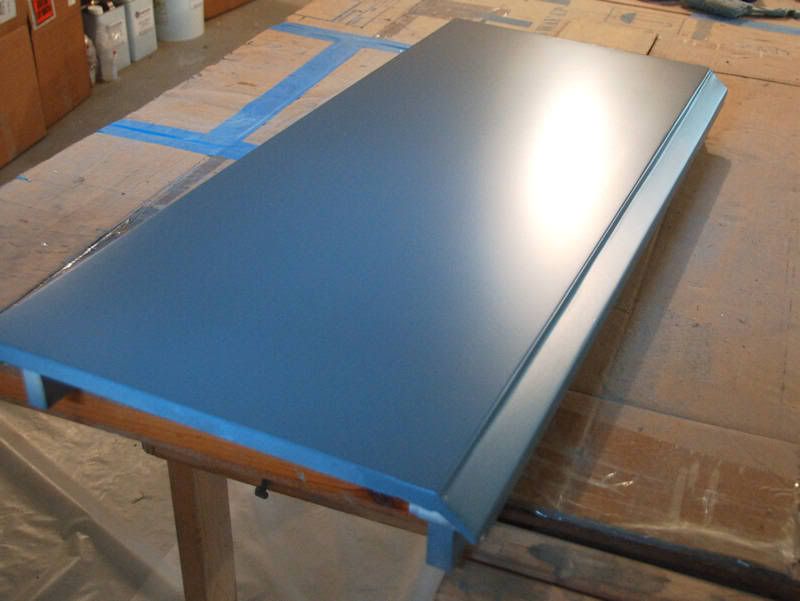
The masters have been sanded with 320 and shot with epoxy primer. now they're be prepped with mold release and molded. I'll be doing prep work today, molding tomorrow.

Epoxy3.jpg


Epoxy2.jpg


I'll post details on the prep work later today.

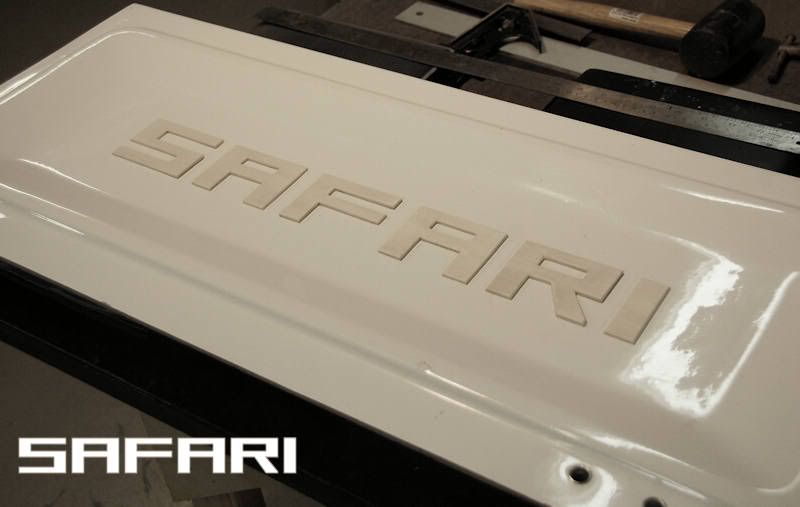
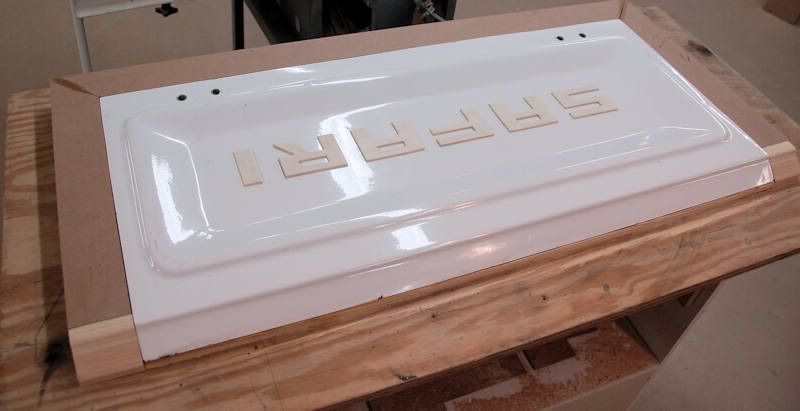
I'm also going to mold a tailgate... since the tub has the same dimensions as the stock Jeep tub, any CJ or Wrangler tailgate could be used, but I decided it would be fun to make a tailgate with embossed "SAFARI" letters on it. I called my last big fiberglass project the Safari Cab hardtop, and I used those parts to make the Safari Overland Camper top for my yellow trailer as well, so it just seemed right that this should be called the Safari Trailer Kit. Anyway, I thought it would be fun to try to mold the letters into the tailgate.

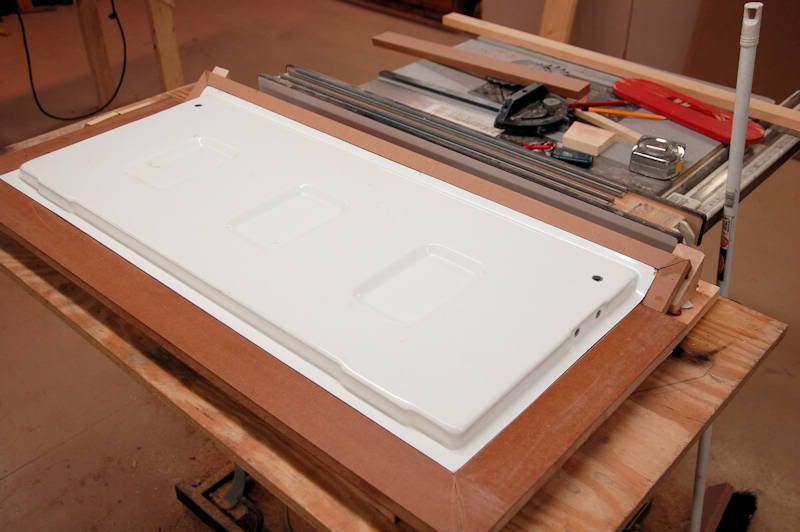
The tailgate will be CJ-style, and as a starter for the mold master I'm using an aftermarket fiberglass tailgate I picked up on eBay. I'm not sure who manufactured it. Using the same font I've been using all along for the Safari Cab project, I cut letters out of 1/8" plywood, sealed the grain with sanding sealer, and primed them with epoxy primer to make them impervious to resin. These will be attached to the tailgate with double-sided tape, and then the edges will be smoothed into the surface of the tailgate with modeling clay before molding. Here's what the letters looked like before priming and clay:

SafariTailgate3.jpg


Usually you want the mold to be larger than the part, so the rough part can be trimmed to the exact size, so I built a frame to set the tailgate in which enlarges the edges of the part. Here are photos of both the outer and inner skin in the frame:

SafariTailgate6.jpg


SafariTailgate7.jpg


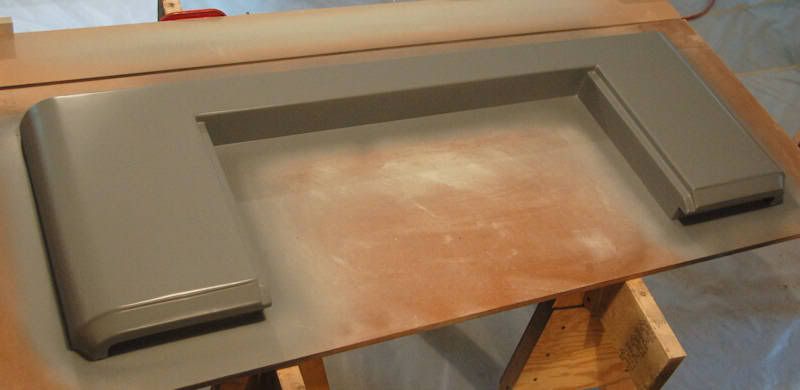
Also here's a photo of the tailgate insert master, this fits snugly in the tailgate opening of the end panel master so I can use that same master to mold a solid end panel with no tailgate opening (or it could be used as the master for the outer skin of a custom-look smooth tailgate):

Epoxy4.jpg


Epoxy1.jpg
 

Zeep

Adventurer
I've been following this project on the Jeep Forum as well. Awesome work! I am curious as to how you plan to encorparate the stake pockets, that were mentioned earlier?
 

jscherb

Expedition Leader
I've been following this project on the Jeep Forum as well. Awesome work! I am curious as to how you plan to encorparate the stake pockets, that were mentioned earlier?

I've got two different designs for them, I haven't decided which one I'll go with yet.

In both cases they'd be optional, separately molded pieces that would be bonded to the inside wall of the tub side panel. One of the designs has them made entirely of fiberglass; the other design has a fiberglass base the gets bonded to the inside tub wall that forms a mounting point for a bolt-on metal stake pocket.
 

Forum statistics

Threads
185,783
Messages
2,878,182
Members
225,329
Latest member
FranklinDufresne

Members online

Top