98 Jeep ZJ "SHTFV"

Recce01

Adventurer
Welding and more Fab on Front bumper

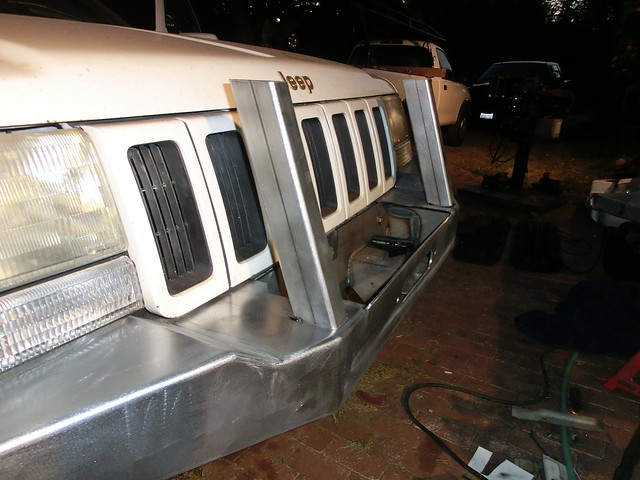
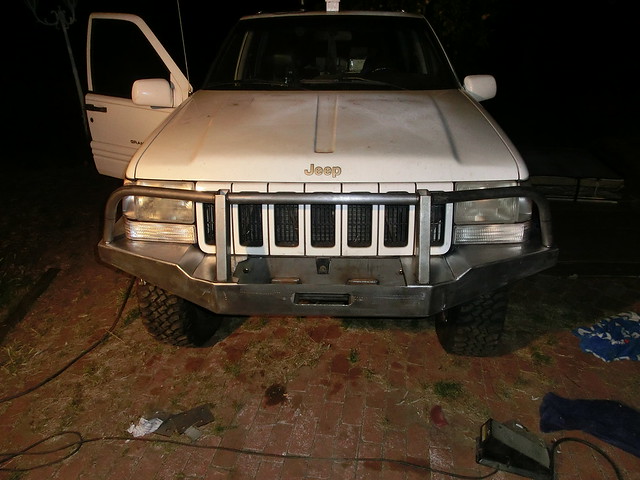
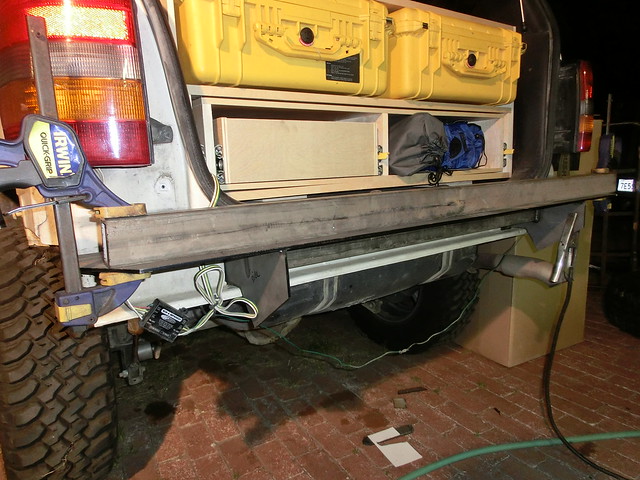
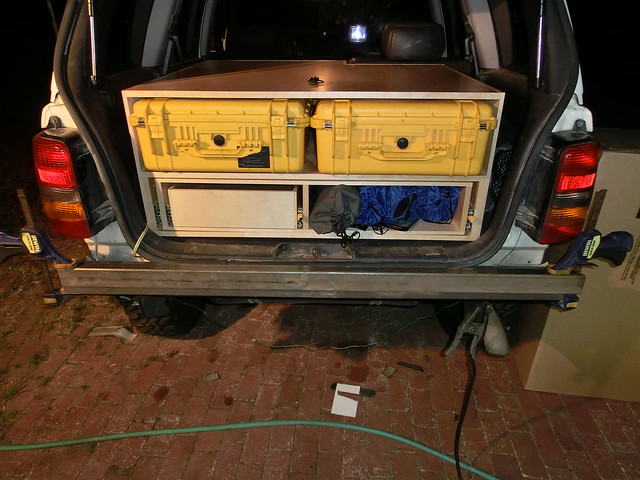
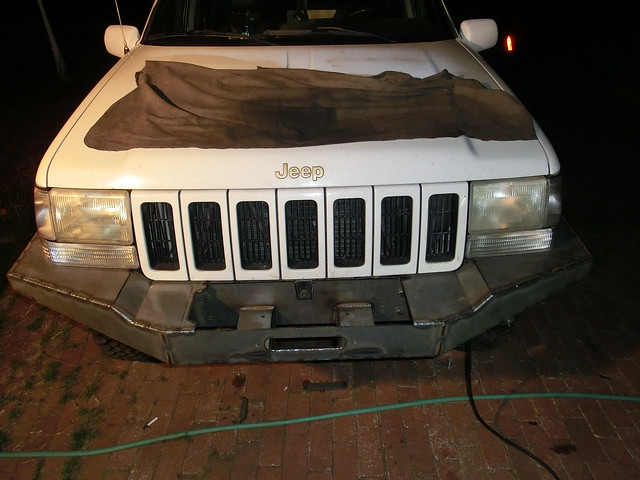
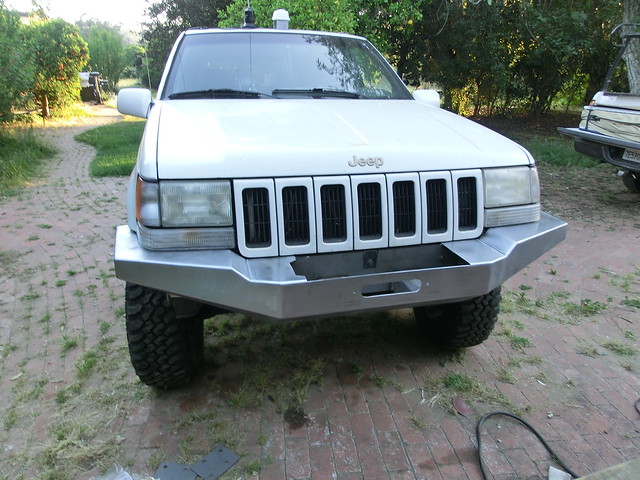
Due to the fact that I do not have a "fixture" for the bumper, I had a decision to make. You see, a fixture would help to keep it squared up and straight during the welding process. Those of you that have welded before probably know that welding and excessive heat will warp and tweak the object being constructed. I elected to put a cover on the front of the Jeep and do most of the welding in place. This would do a few things for me, first, it would allow me to keep track of the warping, and strategically add weld to areas to counter the warping. It would also allow the bumper to come up to temperature then cool while bolted in place which should help it to retain its accurate mountings. The only issue with this is the fact that I can only stitch areas opposite to each other, thus adding a lot of moving around to evenly disperse heat, and add significant time to the welding process.
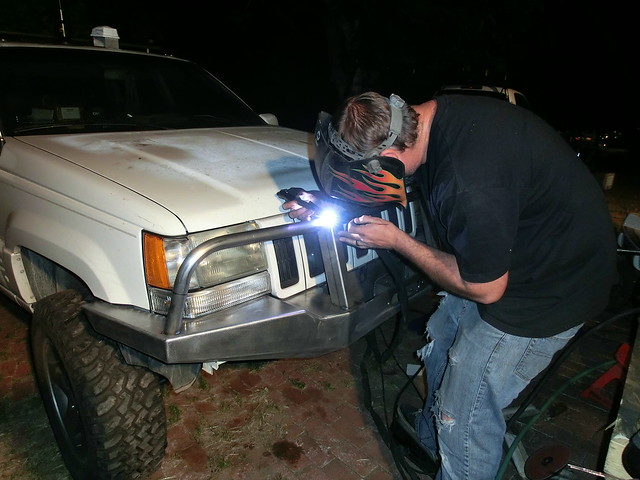
Off to work!

7169296532_539f054696_z.jpg


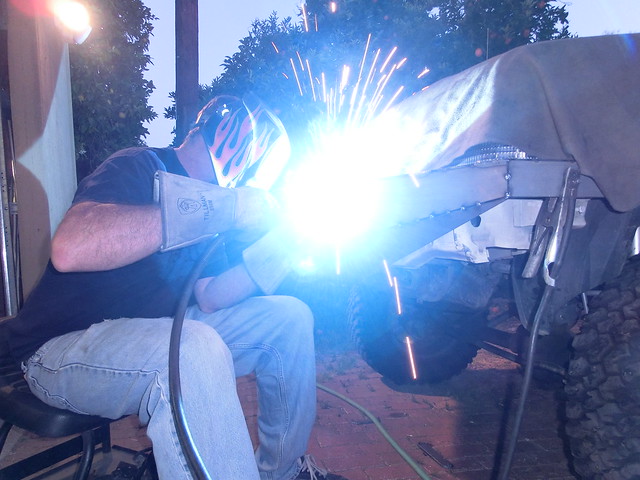
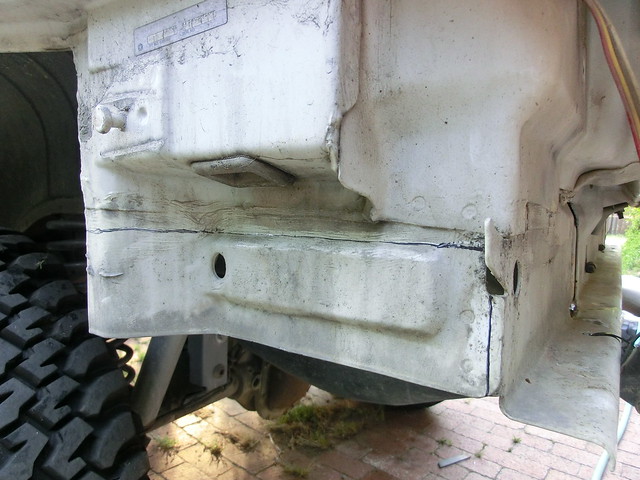
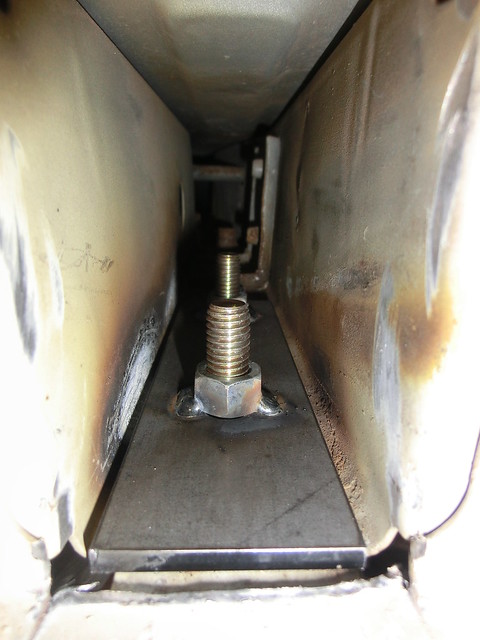
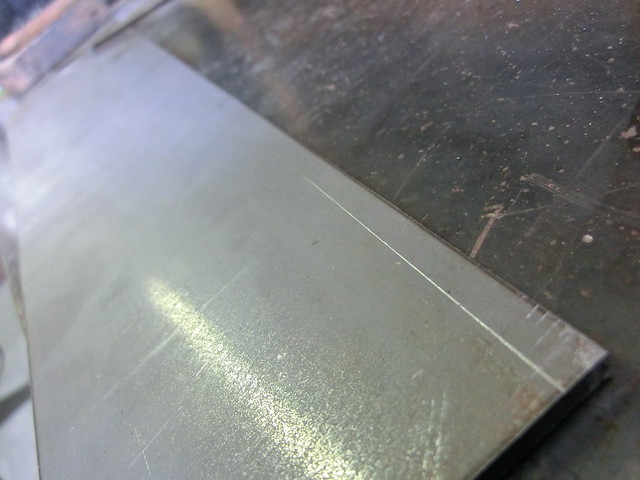
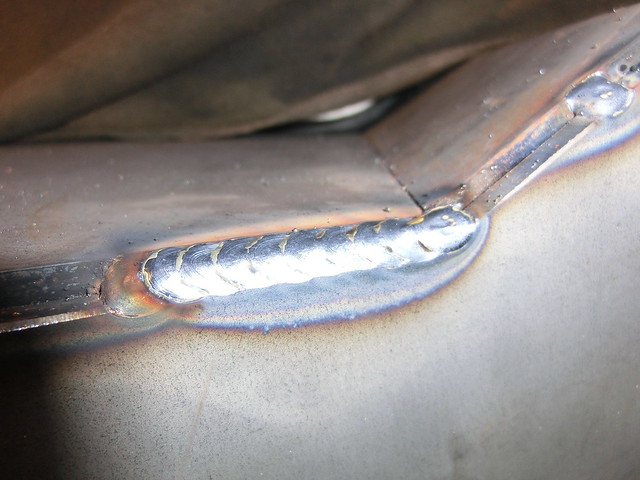
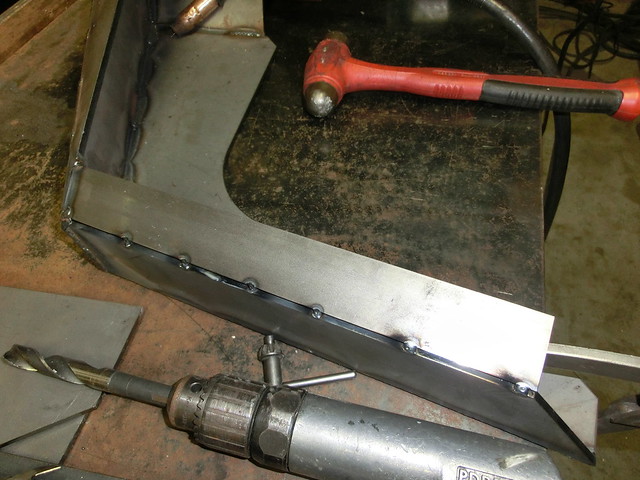
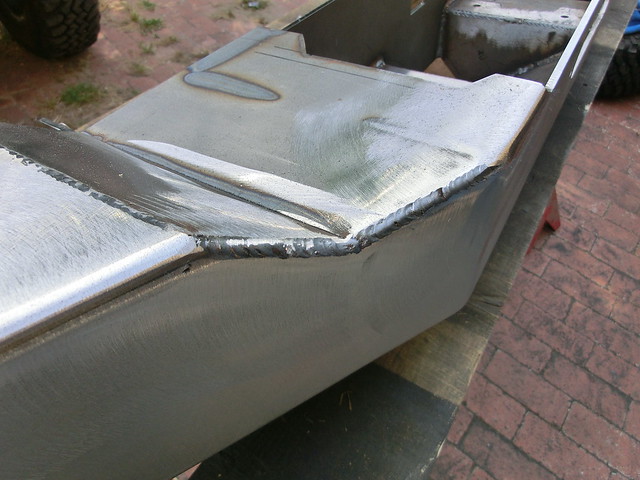
This took forever, but the strategy worked out quite well, I ended up with very slight warping, and to my advantage :) Here is a shot of one of the stitches

7169300132_155a0be5ba_z.jpg


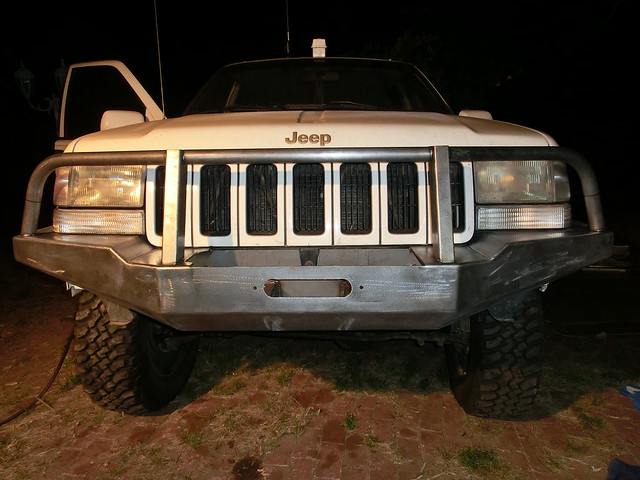
At last, the majority of the blade was welded up and ready to be removed

7169351172_9928a1dc6a_z.jpg


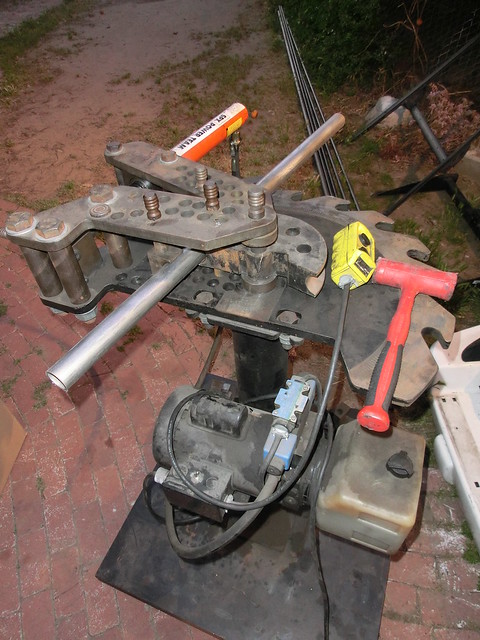
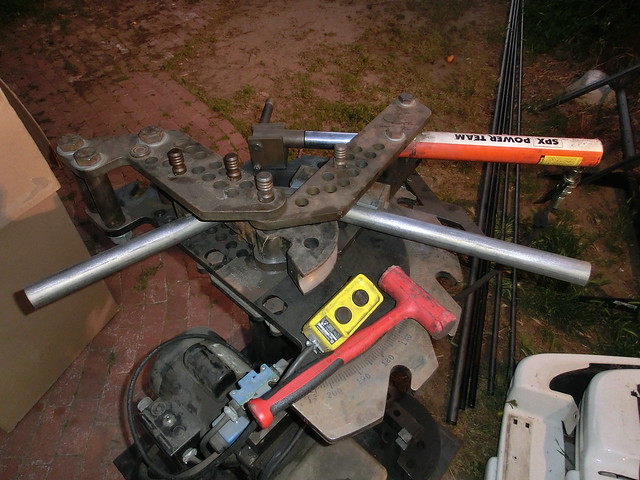
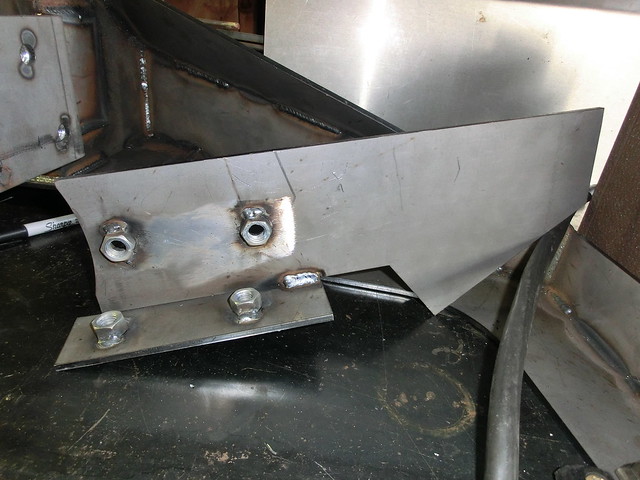
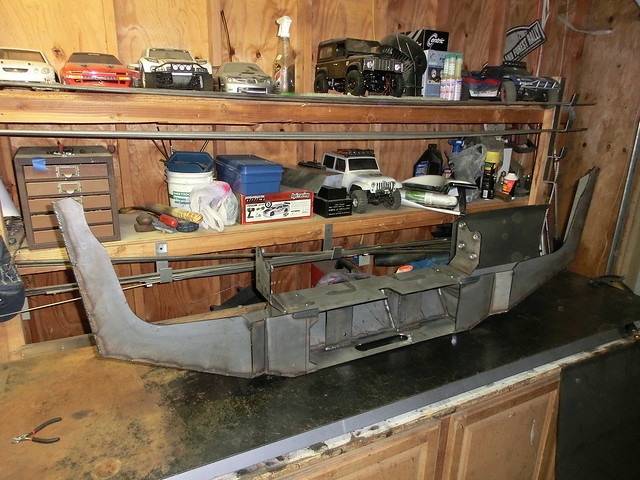
The next step was to take it into the garage and do some more welding and a little fab. I had to also weld the backside to strengthen up the joined material, as I would be grinding the front face to make it look like it was never welded. I did only stitch it on the backside, as I did not want excessive warping, and I have experience that leads me to believe it will be enough. Here it is on the bench, and ready to go!

7169307966_1de387d751_z.jpg


When I roll it onto its top face, I actually clamp it to the table in effort to keep it level and square

7169303626_72be317db4_z.jpg


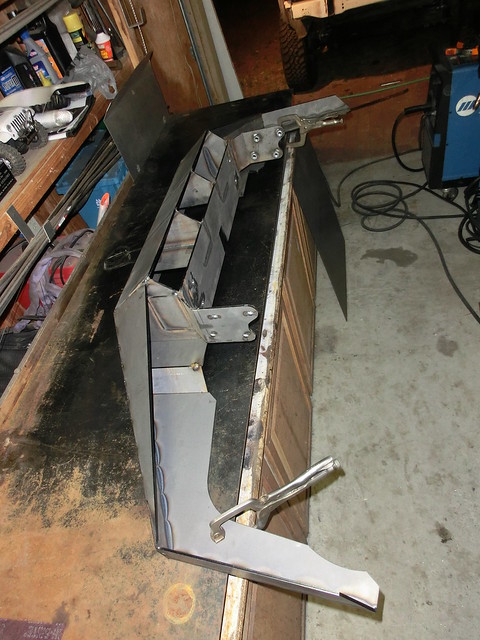
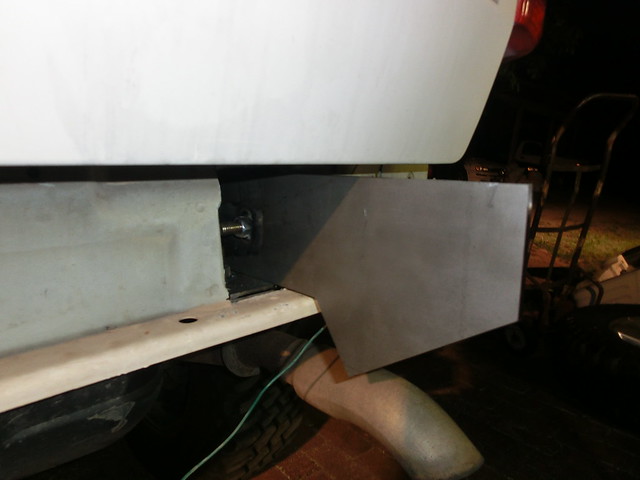
I am pretty sure it was late when I did the next process, as I can't seem to find many pictures of it, but I made a plate to cap the bottom outside of the front bumper as well as the back nearest the tire

7257606008_21c0f8db7f_z.jpg


The next stage of this operation is by far my least favorite. I rolled over to visit Greg Jevne, the OG owner of Safari Gard, and requested to borrow his 7" grinder. It is the only way to remove some material in a timely fashion. But after a few hours of running this grinder, I am beat! Here is what it looks like in rough form

7257609064_a0ba69cf78_z.jpg


7257618658_21274f8afa_z.jpg


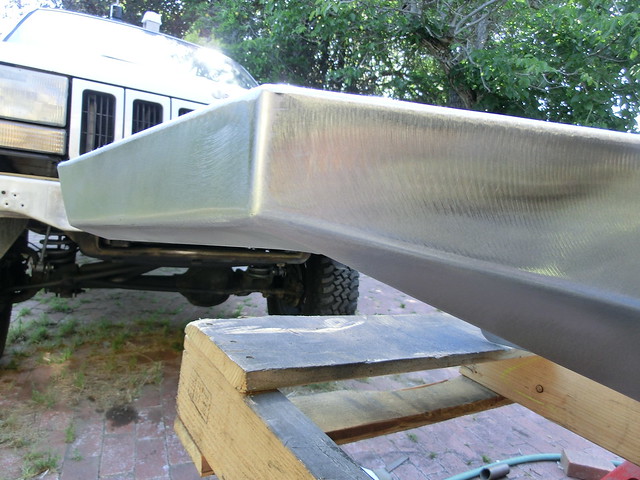
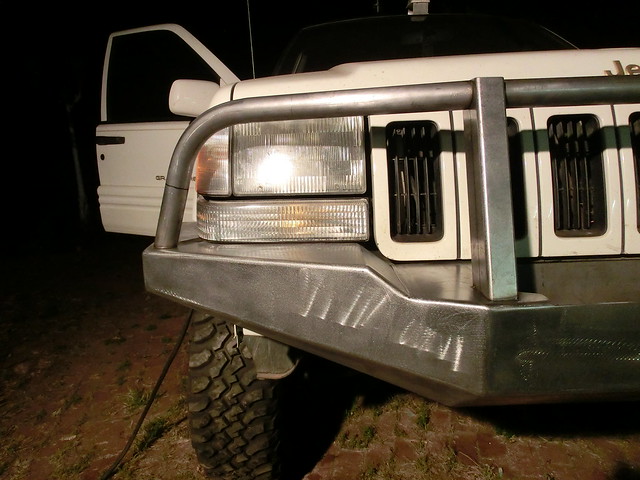
I have to literally do every single seam to make the bumper seamless. This involves moving the grinder at a very rapid pace back and forth at every angle from 0 degrees to 90 degrees. This makes a nice radius, at least thats the plan! Then I use a flap wheel on a 4.5" makita grinder to knock the rough sanding marks off. Finally I use a DA sander to smooth out the radius and clean up any slightly high spots. The result looks pretty damn cool!

7257636010_4226e52baf_z.jpg


7257631754_e1b17daf8a_z.jpg


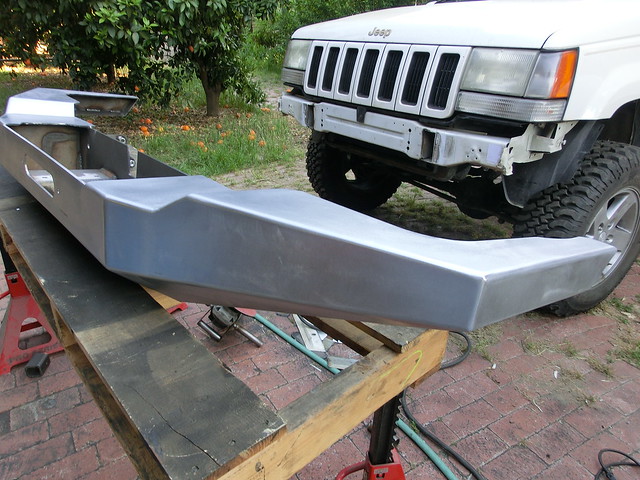
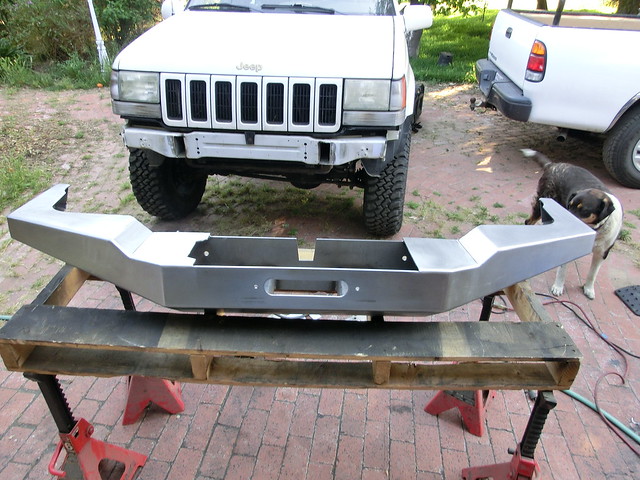
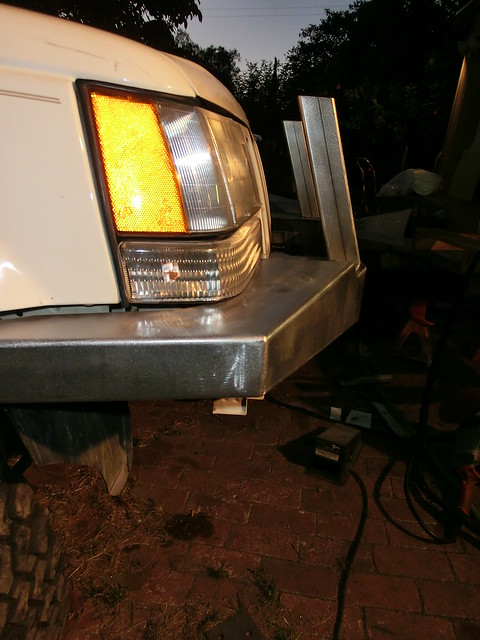
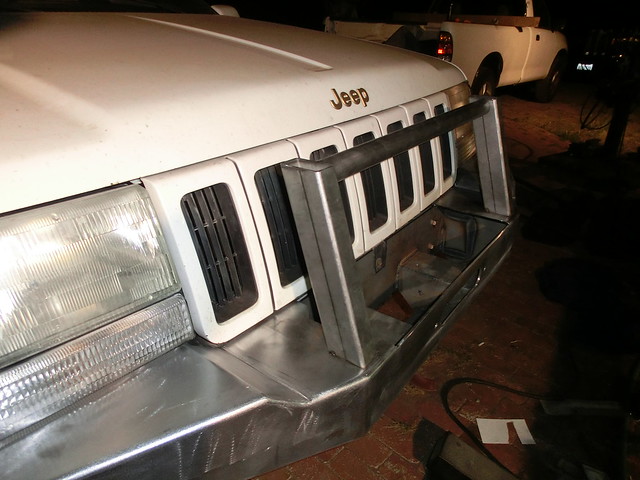
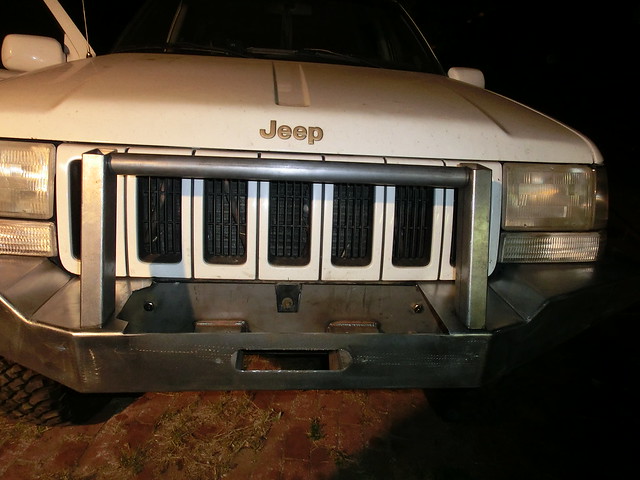
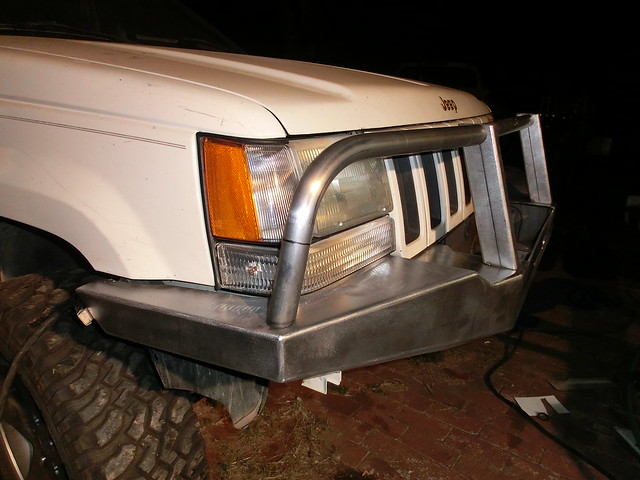
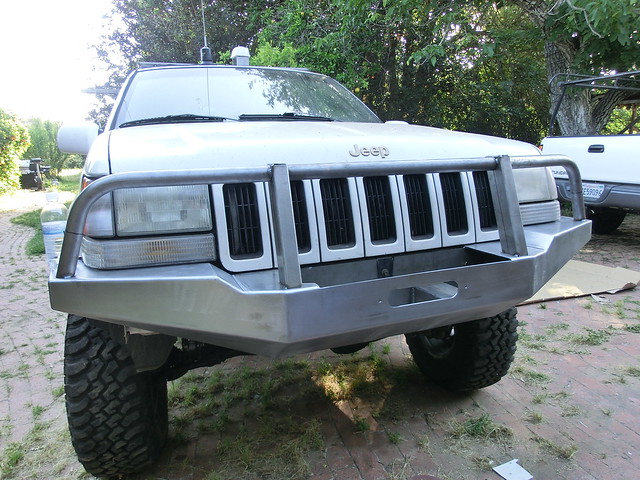
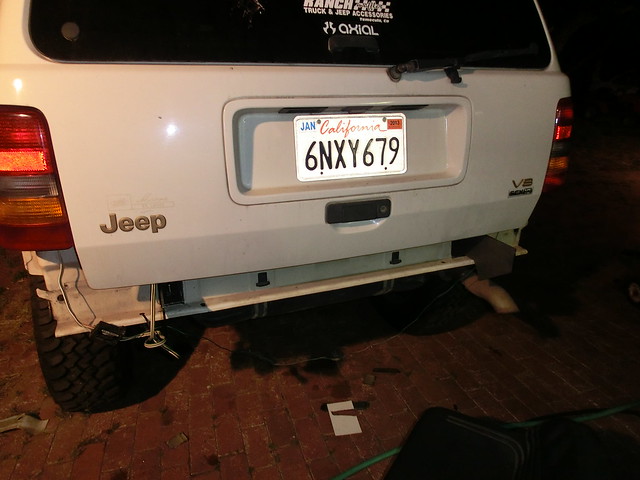
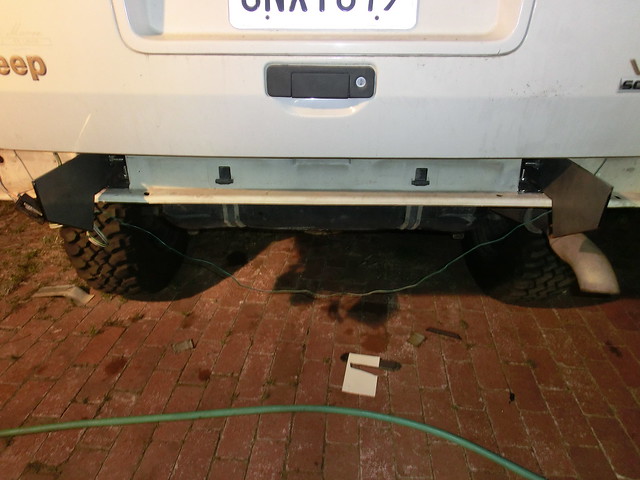
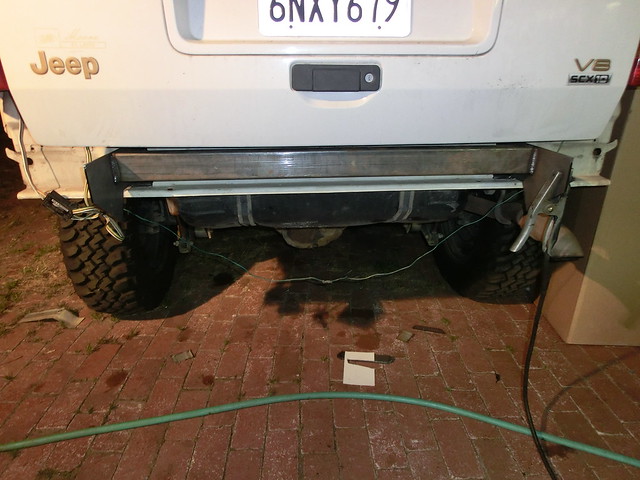
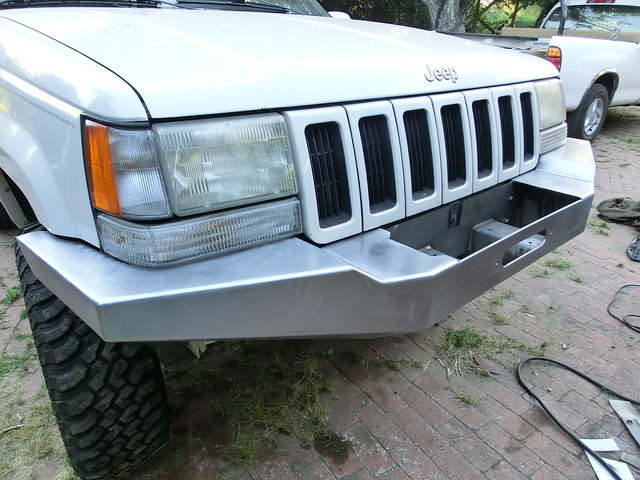
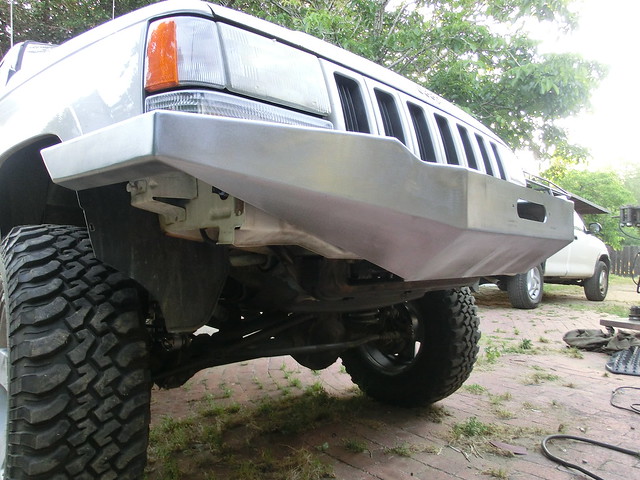
My next step was to mount the bumper back on the rig, and see how it fit

7257643526_63ab0febd2_z.jpg


7257658906_57387ebb58_z.jpg


7257662722_1420bc78f6_z.jpg


Next step, time to add a grill guard. Stay Tuned! Thanks for checking it out!
 

Recce01

Adventurer
Ya know, I have to say.... I need a different lense. Looking at these pictures, it makes the bumper look like it sticks out a mile!! In reality it only sticks out past the tires by less than 1/2" Crazy wide angle effect I guess...
 

tizzdizz

Geologist
That looks so clean and well done. I wish the big companies would put out stuff like this. All your hard work and attention to detail definitely seems to have paid off.
 

Recce01

Adventurer
That looks so clean and well done. I wish the big companies would put out stuff like this. All your hard work and attention to detail definitely seems to have paid off.

I very much appreciate your compliment. Building a bumper like this is very rewarding. However, it is far from cost effective!
 

Recce01

Adventurer
The front bumper Grill guard

I spent quite a bit of time messing around with different grill guard designs for this bumper. I had quite a few different tubes that were already bent at different angles to hang off the blade to imagine how it could look. In the end I decided to employ some rectangle tubing for the center section. I found that angling the rectangle tube back at the same angle of the grill seemed to look different and really grew on me.

This was one of those late night operations, so the pics are not that good, but should get the general idea accross

7257677958_dc4f32f3f6_z.jpg


I really thought the rectangle tubes were too high, so I cut them down about an inch and a half and re-welded them on

7257691540_370f4851ef_z.jpg


The next tube I added was 1.5" .120 wall and connected the 2 uprights

7257694306_90cdf475c3_z.jpg


7257705342_132520caa8_z.jpg


I finally got to break out the old tubing bender. It has been a while since I used it, so it took me a minute to remember the tricks :)

7257587738_bf59b58eab_z.jpg


I decided to make the side tubes hit the bumper at an angle instead of going a full 90 degrees. I thought it looked cooler this way

7257574124_4be6ec40cf_z.jpg


After a little trimming and fitting, the tubes were ready to tack weld in

7257710514_a57b02d275_z.jpg


I was really starting to like this effect!

7257698812_01494c6514_z.jpg


Not sure if you can see it in this picture, but the moisture at my house around the 2 am hour is pretty substantial. Note to self, wear gloves when welding in the moisture. I lit myself up a few times trying to tack weld the tubes in. It acted like I was a better ground than the clamp!

7257713714_7756da8342_z.jpg


I am fairly happy with the grill guard, and it should do its job just fine! :D

7257723214_05d08e3514_z.jpg


All I had left was to tack weld some caps on the rectangular tubes, a little more electrocution couldn't hurt

7257765928_bdf634ef16_z.jpg


I came out the next morning just before work to see how it looked, as sometimes those middle of the night missions don't work out so well. It looked to be square, maybe not as cool as I remembered lol, but I'll run it!

7257763206_17552a1e7f_z.jpg
 

VanIsle_Greg

I think I need a bigger truck!
Looks good to me man... I like the angle of the square tubes, follows the lines of the Jeep well. VERY nice fab work my man, nice finishing on the welds.

I so need to learn to weld!!
 

mekcanix

Camper
That is some amazing work and attention to detail. Thanks for posting all this! You are a very talented Person.
 

Recce01

Adventurer
Looks good to me man... I like the angle of the square tubes, follows the lines of the Jeep well. VERY nice fab work my man, nice finishing on the welds.

I so need to learn to weld!!

I wanted to do something different with the squared tubes. I lined them up with the 2nd bar each side of the grill, trying to avoid air blockage. Learning to weld is worth every minute. I didn't save a lot of money building my own stuff, maybe even lost money after you add the time into it.... but, I have unique parts :) Thanks for reading my thread!

That is some amazing work and attention to detail. Thanks for posting all this! You are a very talented Person.

I appreciate you taking the time to read through it! I thank you for your compliment. I have been a fabricator for a lot of years, and making parts square and straight is still very hard to do :) As far as being talented is concerned, having the right tools for the job is just as, if not more important. Thanks again!
 

GCRad1

Adventurer
More attention = more dead presidents. Big companies get big by catering to the bigger market of mass. If you want awesome stuff like the bumper Recce01 built, it is expensive! Its a small percentage of people who will actually pay for such attention to detail. And you have not even seen his TIG work!!!

That looks so clean and well done. I wish the big companies would put out stuff like this. All your hard work and attention to detail definitely seems to have paid off.
 

jeep-N-montero

Expedition Leader
More attention = more dead presidents. Big companies get big by catering to the bigger market of mass. If you want awesome stuff like the bumper Recce01 built, it is expensive! Its a small percentage of people who will actually pay for such attention to detail. And you have not even seen his TIG work!!!

It's because I cannot weld this well that I could easily buy another Jeep for what I spent on my bumpers, but after a few hard hits on rocks they have paid for themselves many times over.
 

jeep-N-montero

Expedition Leader
And Recce, be prepared to build 2 rear bumpers, because if the rear is as nice as the front you might have to build me one.
 

Recce01

Adventurer
More attention = more dead presidents. Big companies get big by catering to the bigger market of mass. If you want awesome stuff like the bumper Recce01 built, it is expensive! Its a small percentage of people who will actually pay for such attention to detail. And you have not even seen his TIG work!!!

HAHA, thanks Rodney! For the record, I don't accept dead presidents, I get paid in silver ounces. Proper Troy ounces only :)

It's because I cannot weld this well that I could easily buy another Jeep for what I spent on my bumpers, but after a few hard hits on rocks they have paid for themselves many times over.

Oh ya, a proper bumper keeps the body shop away. Good investments!

And Recce, be prepared to build 2 rear bumpers, because if the rear is as nice as the front you might have to build me one.

Ha! Thanks for the kind words.....hmmmmmm, get your silver rounds and bars together :) I really like the rear bumper, matter of fact. lets get started on that......
 

Recce01

Adventurer
Rear Bumper Build process

The start of the rear bumper didnt go as smooth as I had hoped. Like all things in life, when you are flowing really well, you get lazy and make assumptions. Well I assumed that because almost every pattern on the front bumper was perfect, then the rear would be the same.

My frist step was to break out the plazma and remove some "Excess" sheet metal

7169333838_4e9ed4352b_z.jpg


Of course I didnt take a shot with it all ground up nice, but here is the hack job version photo :)

7169325700_126c1dfba6_z.jpg


Then I installed the lower or lateral bumper brackets and tack welded nuts to them

7169339330_e6787ca0fa_z.jpg


Then I drilled holes in the side of the frame, and slid the vertical plates in place, bolted them in, and tack welded the nuts

7168985258_ce8ca443c1_z.jpg


This is where it went sideways....I got caught out by using my foam core patterns. The rear brackets consist of a flat plate in the bottom of the frame, and a vertical plate up the side inside of the frame. Well, somehow the verticle pattern slid down next to flat pattern on the bottom, instead of sitting on top of it like it was meant to. So the pattern ended up about 1/4" too tall. This meant that when I put the top plate on the bumper, it would barely clear the gate, and that is if I am lucky, see the photo... not much clearance between bracket and the gate, especially for a 3/16 top plate....

7168983396_1ff8d188a3_z.jpg


Of course I was feeling good about it and welded it up before doing proper measurements, and was forced to rebuild them :( This was one of those weird moments in life, for some reason when I ordered the rear bumper brackets I doubled up on the parts. This makes me think of the Matrix movie where the Oracle tells Neo not to worry abour the Vase, then he breaks it, then she says... well just watch


So the question is, if I had only ordered 2 brackets instead of 4, would I have screwed up? ;) That type of stuff happens to me all the time LOL. After a quick inventory of parts, it looked as though I had the proper amount of plates left, so hopefully smooth sailing from here!

I promptly made that adjustment to the second set of brackets and welded them up. The rear brackets themselves had me fairly concerned. I had to do the vertical plates to add some strength on a different plane. With the extra weight of fuel cans, spare tire rack and spare tire, I figured the standard bumper mounts would be stressed, and likely stretch and the bumper would droop with the weight. That is part of the reason the bumper is designed with such tight tolerences to the back of the rig, thus decreasing leverage on the ZJ mountings.

7169343304_79e267e0ab_z.jpg


Here are the new brackets tack welded

7168979458_2a26839620_z.jpg


Finally, back to where I was 3 hours earlier :(

7168999866_9b39796c80_z.jpg


I planned to add a 2" reciever tube to the bumper at some point so I decided to do a cross tube between brackets, this should also help to strengthen the overall package significantly

7168997648_7141c843f8_z.jpg


At last it was time to start on the plate work. Unfortunetly when working with very long sheets of material, you will find that they are not perfectly flat. And unlucky for me, the top plate had a significant bow in it :mad:

7168977250_f31128ac86_z.jpg


So I had to break out some material to make it flat while tack welding it together. I tried to just space the center down, but it gave me some rolling hill effect I was not pleased with... So out came the big clamps and rectangle tubing!

7168992822_cfbd3fbcac_z.jpg


In order to try to get it to retain its shape I welded up the cross tube and stitch welded the top plate to the tube as well

7168995448_aaae12edd1_z.jpg


Ok, I have to run... Son has Hockey, more later. Have a great day all, thanks for looking!!
 
Last edited:

K2ZJ

Explorer

I am ten plates ahead of you this picture right now. It started to rain and we need lunch! Looks smaller than mine, but I am keeping the hitch and welding off of that. Keep up the god work.

Custom takes so much more time and energy than the ones on the market.
 

Recce01

Adventurer
I am ten plates ahead of you this picture right now. It started to rain and we need lunch! Looks smaller than mine, but I am keeping the hitch and welding off of that. Keep up the god work.

Custom takes so much more time and energy than the ones on the market.

HAHA! I didn't know we were racing!! Rain...? What's that? Man, it never rains in San Diego :) I thought about attaching it to the hitch, but I was afraid it was going to hang down too far. You should post up some pics! And yes, Custom requires a significant amount of resources, even if it isn't all monetary.
 

Forum statistics

Threads
185,815
Messages
2,878,493
Members
225,378
Latest member
norcalmaier
Top