New Guy Trailer Build Thread

HuskerJeep

Adventurer
Hello everyone. I am Shawn from Nebraska and have been browsing this forum while getting some great ideas for my build. The desire to build a trailer all started from a friend of mine who purchased this trailer recently.

477673_10151570859160121_529390120_24128546_323804338_o.jpg
469375_10151570864305121_529390120_24128581_2070810996_o.jpg

After seeing how fast he had it set up and the potential of what you could have readily available at any time camping, the urge to do something similar got the best of me and I haven't looked back since. :ylsmoke:

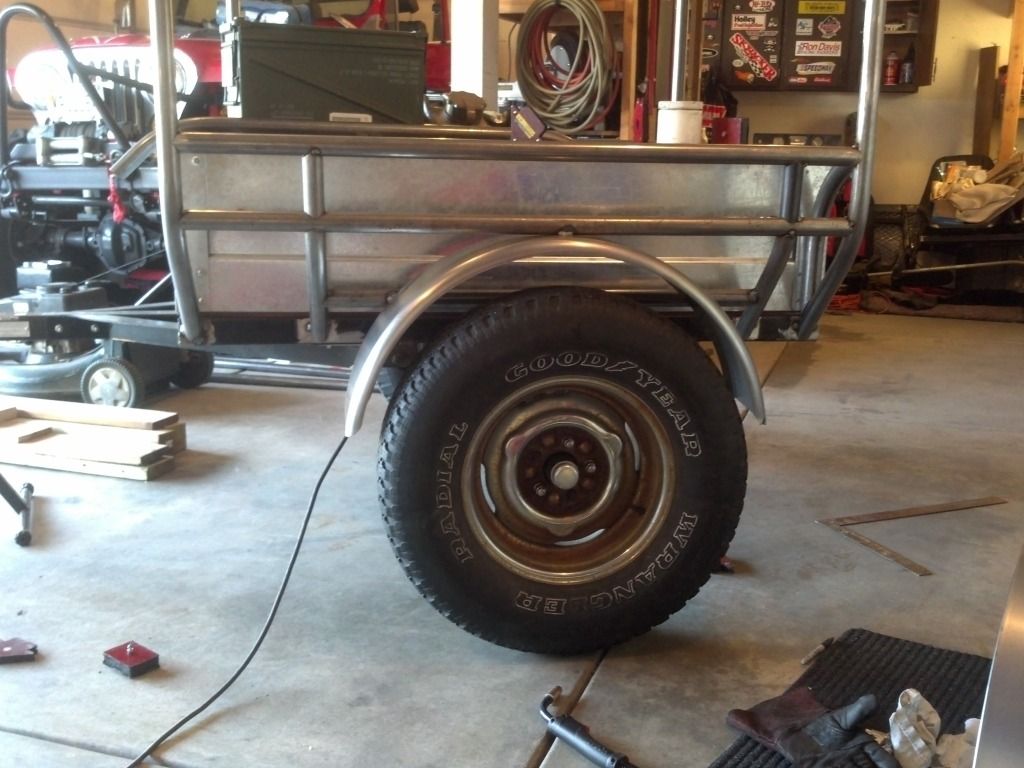
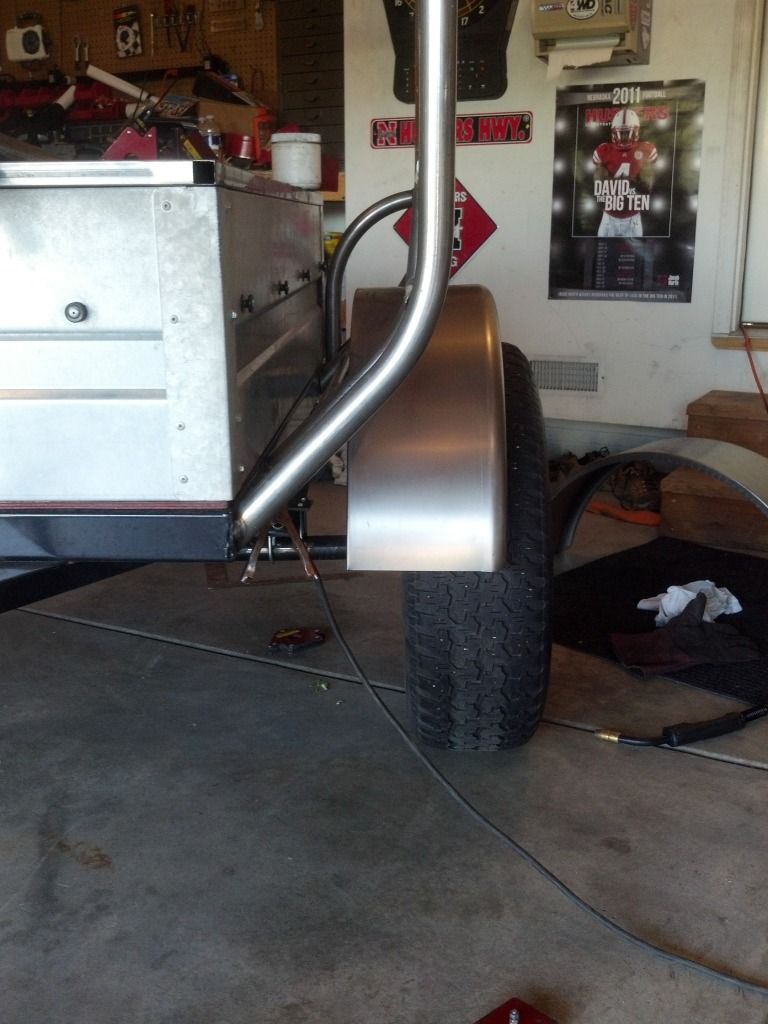
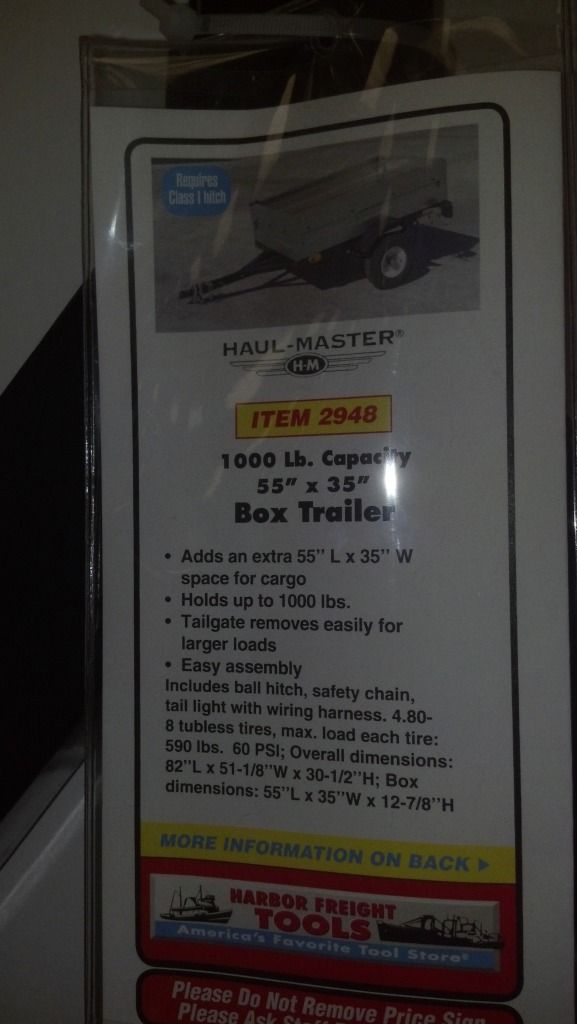
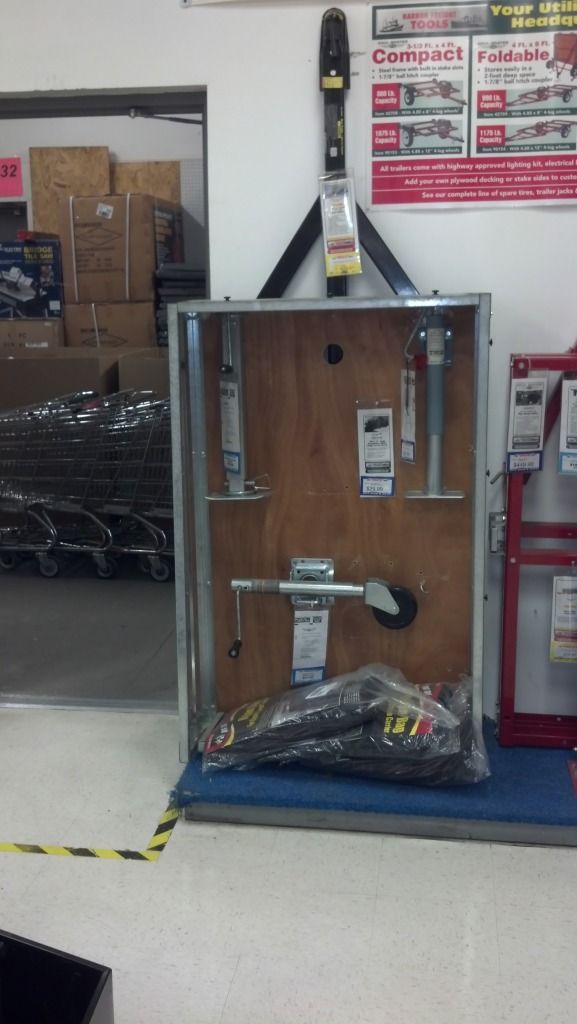
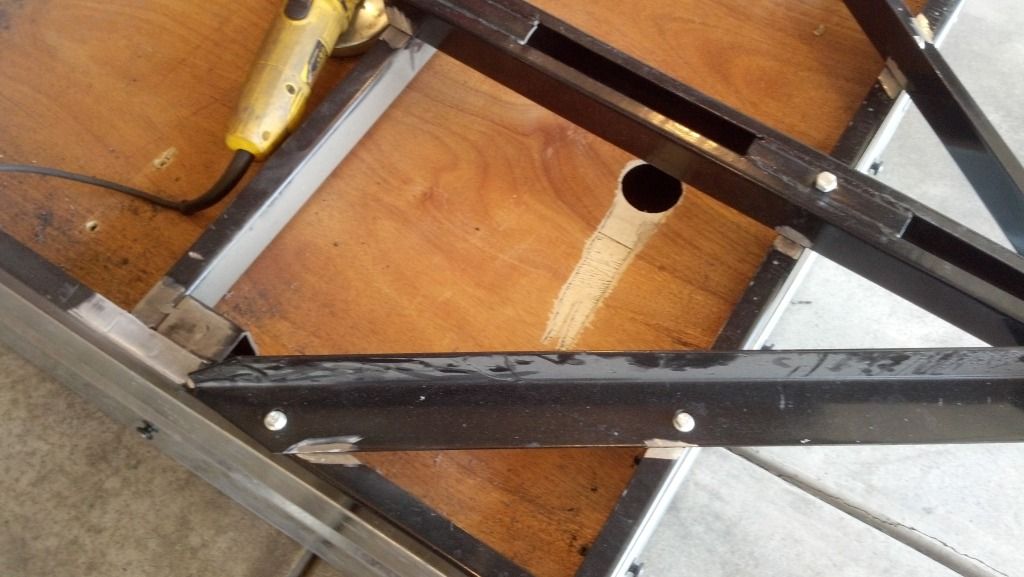
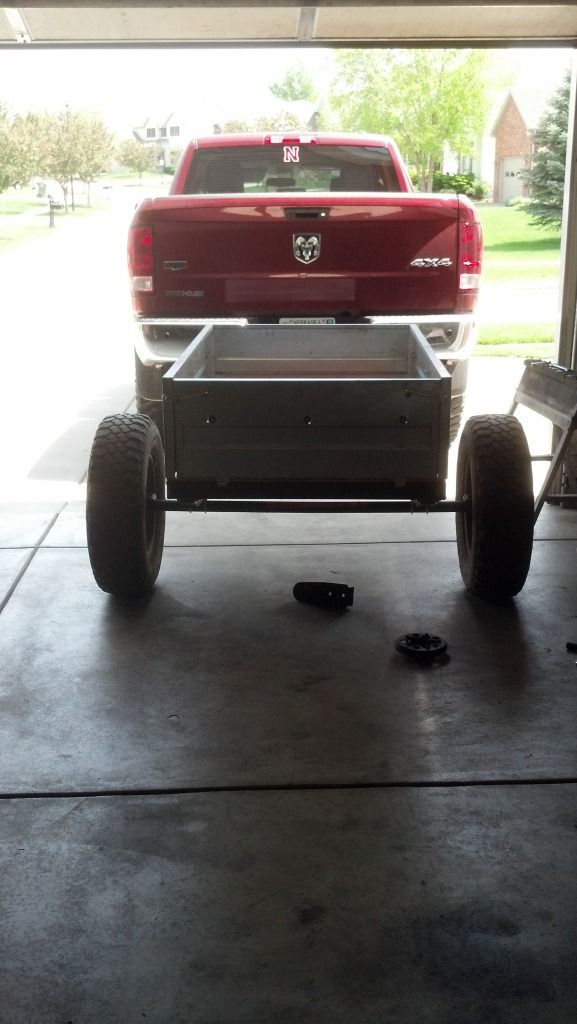
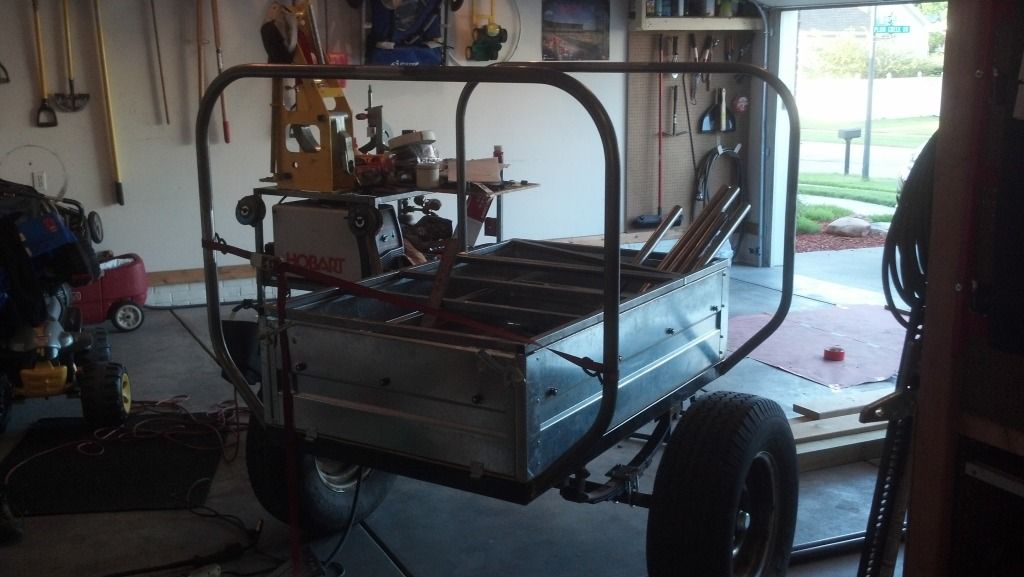
Since I have owned an older Appleby camper for a coupe years now, the thought of building something off of that crossed my mind, but that would have been too easy. After browsing the Harbor Freight website late at night, I did find a trailer that I thought would be great to use. It listed for $329 and was rated for 1000 lbs. The next day I drove to the store and saw it was on clearance for $229. That made the decision to by it pretty easy, BUT it was on backorder and they had no idea if they were even going to get any more in. Long story short, I bought the floor model minus the axle, wheels, tires, wiring, and tongue jack for $125. No biggie to me since I wasn't going to be using most of the stuff any way, and the stuff I would be using is cheap enough to buy separate.

2012-04-27_10-56-47_153.jpg

2012-04-27_10-54-54_451.jpg


After pricing stuff out at Tractor Supply and Orschlens I found out TS was pretty proud of what they had, so the drive all the way across town to Orchelns was pretty easy considering I would be saving myself $50-$60 on the exact same products.

More to come......
 

HuskerJeep

Adventurer
After getting the goodies home, here is what another $250 got me.

A 2000 lb axle the measures 58" WMS to WMS. New perches welded on with the old ones yet to taken off yet. Bolt pattern is 5 on 4-1/2 which is the same as the trailer I haul my Jeep on, so spares won't be an issue since I will be running the same tires too.
2012-04-30_14-47-17_875.jpg

2012-04-30_14-47-10_224.jpg


2500 lb springs and an axles mounting kit.
2012-04-30_12-47-10_443.jpg


Off with the old...
2012-04-30_13-09-13_991.jpg


On with the new...
2012-04-30_14-20-46_865.jpg


Since the trailer was all bolt together I decided to weld up everything instead. This is it unwelded, but the areas of where I welded have the paint ground off for a reference.
2012-04-30_13-30-11_662.jpg
 

HuskerJeep

Adventurer
A friend of mine was nice enough o give me wheels that were on a Jeep he was going to scrap, so I cleaned them up real nice and painted them with the hammer paint which I have had really good luck with.
2012-05-07_21-49-14_913.jpg


These are not the size of tires I am running, but here is what it looks like with the wheels I am using....
2012-05-01_13-17-06_676.jpg


Now the tires size, but not the wheels with 2 more inches of backspacing...
2012-05-01_20-51-17_324.jpg


This is the actual width.
2012-05-01_13-18-15_796.jpg


Next up was the lid to cover the box. I made it two separate lids with the smaller one being for easier access to hook up the inverter, turn on propane, or to get to my TJM air compressor.
2012-05-09_21-23-58_146.jpg


The smaller lid will have a piece of angle iron welded so it overlaps the bigger side. That way I can get in to it easier without having to lift the other side, and when the other side does need to be gotten into, they will both lift up at the same time, unlike it is in this picture. It will be skinned with 16-20 gauge, depending on what the company some friends work for have as drop.
2012-05-09_22-28-38_439.jpg
 
Last edited:

HuskerJeep

Adventurer
For those whom may be wondering, my plans for the floor are to remove the 1/4 inch wood that is currently in it, mount the sides directly to the frame and then overlay it with some heavier gauge steel or diamond plate.

Since the sides are not water tight as of now, I plan on finding some aluminum silicone to seal up the gaps and hopefully won't have to worry about water once the lid and separate tops are weatherstripped.

My wife was kind enough to buy me a tube bender for my birthday/Christmas present, so the fun of learning how to use it got tested on this build. For those wanting to know the trick, don't ask me, but Google "tube bending 101" and a great link from pirate4x4 will make it easier to understand. My first attempt using some rosin paper as the blueprint. It's hard to see, but the paper has the exact dimensions of the hoop, trailer box, and frame drawn out on it so I can copy and replicate to exact shape I need.
2012-05-10_17-19-41_673.jpg


After trying to bend the hoop as one, my 12' garage ceiling determined that that was not possible, which is why I have each side cut in half and then slugged the tubing. The first hoop FINALLY done.
2012-05-10_20-15-58_327.jpg


Another day in the garage later....
2012-05-12_19-21-46_35.jpg

2012-05-12_19-22-08_289.jpg

2012-05-12_19-22-21_266.jpg
 

HuskerJeep

Adventurer
The Harbor Freight tube notcher is a life saver when you need to notch tubing. The trick I found to getting both end straight was to eyeball down the notch so it lines up with the shaft of the notcher itself.
2012-05-12_19-45-40_439.jpg


It worked out good for me too since I had the notcher offset a little more so the top spreader tubes would plane out above the hoops. I did that for potential clearance issues and I thought that it would look cleaner from the side you actually can see it.

Somehow, someway, everything is the exact measurement, angle, and square as much as they can be. The main cage work is done, and the wife and kids are glad that dad was able to be around on Mothers Day instead of working in the garage all day again.
2012-05-12_23-32-36_273.jpg

2012-05-12_23-33-02_795.jpg


Finish height is approx 5-6" to the top of the cage. I will be adding a front and back bar to span across at back height. That way I will be able to fabricate some tables to mount or pivot on for food, grill, or whatever. The tailgate will be getting a tube bent up much like a rear bumper but will mostly be for it to rest on, and can be used as another table since the back side will be getting skinned too. Jerry Can mounts and ammo box mounts will be incorporated on the hinged side of the lid, and the ideas are flowing in my head on how to do the fenders.


In the next couple of weeks, I will be purchasing a Tepui Tent Kukenam model to mount on the top. Thanks to this forum and the great reviews on the Tepui Tents, it solidified my decision to buy one. Since there is a Bass Pro Shops about 60 miles from me, it can be ordered through them and the cost of diesel will be the only expense that I will have instead of the $150 flat rate shipping charge I would have had to pay to my door.

Other things that have already been purchased are an 800 watt inverter, tail lights, wiring harness, solar panel, exterior 12 volt plug ins, 12v electric fan that can be clipped inside the tent for those warm nights. Since I already own a spare Optima battery, propane bottle, and portable air compressor, those expense will go towards other goodies.

That is all for now, but I am looking forward to hearing some feedback since this is all new to me. The thought of rolling up to a camping site with everything but the kitchen sink is pretty exciting to me, and this will be my definition of tent camping. :)
 

Titanpat57

Expedition Leader
Looks good Shawn form Nebraska!!

you guys need some mountains out there..!:ylsmoke:

Looking forward to progress.

Pat
 

HuskerJeep

Adventurer
Thanks everyone, and I agree we need some mountains around here. It would sure beat driving 13 hours to Moab like I did over Easter, or another 9 to Holy Cross (which I have planned for the beginning of August). The beach camping I do at Lake McConaughy every summer now seems like a short 4 hour and 15 minute trip any more. Google it if you've never heard of it. You'd never believe that that lake was located in Nebraska. :Wow1:

I wouldn't say mad fab skills.....yet. :D After almost 20 years of carpentry, I know enough to get me by with metal work. My goal is to master the tube bender by the end of this project so I can back half the frame on my CJ and 4 link it. This trailer is definitely going to help me figure it out. After having some repair work done on my welder recently, it sure made a difference on how the welds turned out too.

Any tips would be welcome on what works for water supply (doesn't even have to be drinking water), or some input on what works good for stabilizing the trailer for when it is unhooked from the truck. I've seen some pictures where the Hi Lift jacks are used for that but am not sure if that is the route I want to go yet. Making some drop down legs that pivot off the back of the trailer is what I am leaning towards now. It is a pretty simple design that is used on my old Appleby camper and would be a matter of just unclipping a couple of hitch pins to drop them down, and to set them at the height needed.

I've got another 5 hours planned in the garage so I'll work on getting more pictures posted up later tonight once the family heads to bed.
 

HuskerJeep

Adventurer
Awesome. Those would tuck up real nice the way my tubing is taking shape. Thanks.

I put more hours into the trailer last night then originally planned, but it sure doesn't look like I got much done.

To keep things exact and true, all the spreader bars were made to fit the first one welded in.
2012-05-14_12-50-55_541.jpg


The fender will butt up to the lower spread bar and should have plenty of clearance since those springs don't flex that much.
2012-05-14_16-59-40_292.jpg


I was going back and forth whether to leave enough room to run 40s like what are on my Jeep, but it isn't practical enough since the trailer will be pulled by something other then the Jeep when it is going down the road.

To get the small tubing the same on both sides, I pre bent 3 others...
2012-05-14_16-02-26_435.jpg


marked them....
2012-05-14_16-03-03_607.jpg


and set two of them in the trailer for when I finalize the design on the one side. One trick I figured out to do to make it easy was to mark the die so the angles are true.
2012-05-14_15-59-32_640.jpg


6" LEDs should fit nicely in here....
2012-05-14_19-15-30_325.jpg


It wasn't a fun piece to fit either.
2012-05-14_19-15-52_411.jpg


I stared at the progress for over an hour last night trying to figure out the fenders. The upper bar and the back bar are where they need to be. Spending a bunch of time bending up tube that I may not like the look of is making me lean towards something like this.
12693_lg.jpg

It's going to be a few days before any more work gets done. Thanks for the motivation and input.
 

HuskerJeep

Adventurer
Thanks. :ylsmoke:

Before I start on the other side or finish welding everything, I want to make sure the design is to my liking. I was real close to tearing everything off that I got done yesterday since the original fender design wasn't working out the way I wanted it to because of the offset of the axle on the trailer front to rear, and because where I would return it to the frame would still be on the radius bend of the upper fender returning to the back hoop, it would make the front and back slightly different. Make sense? :elkgrin: Those fenders should tuck right under the upper hoop and the spreader bar I added off of the leg pieces that go up. From there the back could be plated to finish it off and some bracing or more tubing could be added if needed without it looking too busy.
2012-05-15_18-34-52_66.jpg

2012-05-15_18-35-12_247.jpg


Being picky like I am, the little 4" return pieces that are between the two spreader bars might not stay there, just because they are cut straight and don't match the hoop which has a radius on it. :p One thought is to have some plate steel in that area so it is solid and could hide some of what is mounted behind it. The other option is to just leave it and not be so picky. :) Regardless, I will probably add a hoop that run the whole length of the trailer from front to back so there is some fender protection and a place to set things once that is plated too.

Oh yeah, those U-bolts are temporary since the ones that I bought for the suspension kit weren't long enough. How does that make sense. Tomorrow I will be returning them after having a local suspension shop make up some to length.

Edit: I forgot to mention that the hoops bent of for the taillight will most likely have something built off the top side so I can bolt the box sides to it since the bracing I originally had planned to do on the inside would take up some space if I wanted to load something without opening the lid.
 
Last edited:

HuskerJeep

Adventurer
A quick trip to Orschelns got me motivated to do some more work last night. The rounded fender wasn't my initial choice, but the finished look is probably better my favorite now and the price of $16 per fender was a pleasant surprise too. I was expecting at least $25-$30. Getting them squared and plumb was some work, but nothing that a square, tape measure, and small level couldn't handle.
2012-05-16_18-59-11_96.jpg


The inner fenders need to be skinning once fenders get trimmed up to my liking. The square corners on the inner part and the desired height off the ground are all that need to be determined. Once I get some tires mounted on the other wheels, the tire should only be sticking out an inch or so.
2012-05-16_18-59-38_973.jpg
 

loren85022

Explorer
Looking sweet. I'm not sure you needed the original tub at all. Your exo-skeleton is plenty enough. Keep on bending!


Sent from my iToaster
 

Forum statistics

Threads
185,911
Messages
2,879,535
Members
225,497
Latest member
WonaWarrior
Top