I have been lurking around here for a while getting ideas for this build.
With a toddler and 2 dogs, our FJ cruiser can get pretty cramped on longer trips. I started looking for a fixer upper for a simple budget build. I have an M101, but that is a bit large for what we needed.
Just calling it Patchwork because of all of the welds running across the body.
Starting Point
This was advertised on craigslist as an 'M416HD'. It was basically someone's unfinished project. The seller had found a ‘real’ M416 and opted to sell this one. When I saw it in person it was a bit rough, but also unique. To me unique = cool.
As near as I can tell, this thing actually started out as an M103 or M105 1.5 ton military trailer. The guy I bought it from had cut and sectioned it down to about ¼ ton size & dumped a bunch of steel. The inside had a roll in liner. Most of the rust had been removed and it was painted in fashionable primer brown.

At the time it was being towed behind an older lifted 4 cyl Toyota, so I figured it was light enough for the FJ.
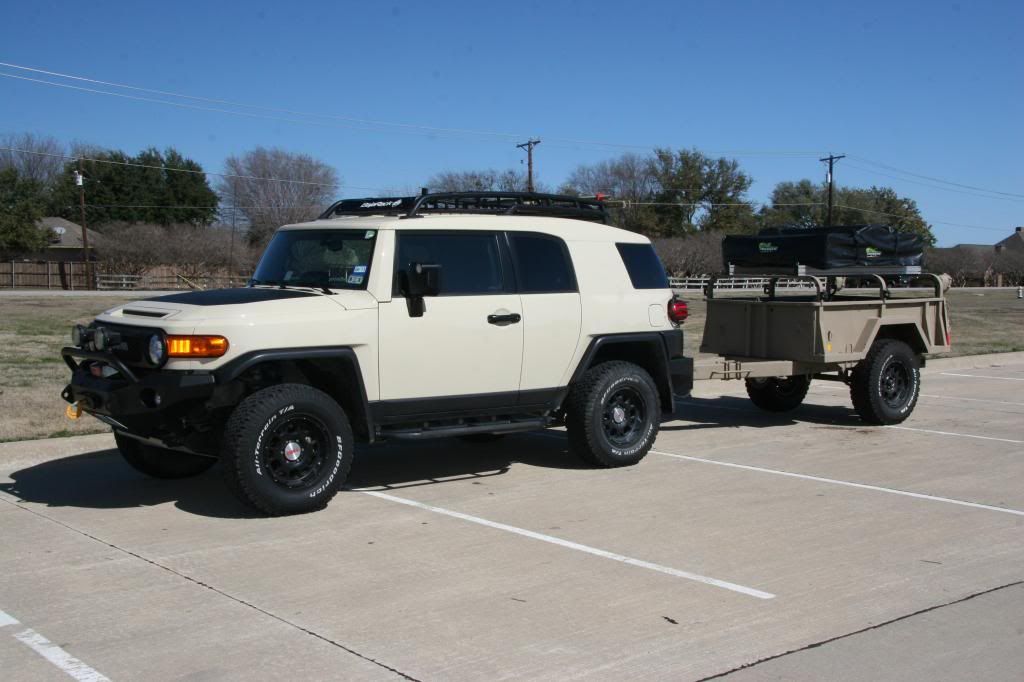
I liked the fact that it was unique, but still military looking, was cheap, has a working tailgate, and the FJ rear door opens with room to spare.
The frame is 6 inch c-channel, boxed in some places. This is overkill and adds weight, but I will not have to worry about it breaking!
Axle & Wheels
The original axle was way too wide & wrong bolt pattern. The tires were almost entirely outside of the wheel wells. I replaced it with a custom (Dexter) axle with electric brakes. I had a much better welder than me attach the suspension so everything would be reasonably straight. I scored some FJ spare wheels and got a set of used A/T tires that matched my stock tire diameter. This will allow for the FJ spares to be used on the trailer.

I initially had the springs overslung. The issue is that the frame is so thick that it kept things a bit high. I flipped the axle to the underslung position and it looked like it was made for a 3-inch lifted FJ.
Utility & Cargo
A trip to the junk yard yielded a hitch receiver from a suburban for $20. I notched the trailer frame in the back and welded it in. Since I am a newb at welding, I also put in a few bolts for good measure. This acts as a bumper, stiffens up the frame (not that it needed it), and allows us to haul our hitch box or bicycle carrier.
I had some lockable wheel well boxes in storage from my Dodge Dakota. Something from a full size pickup might have fit better, but these were free. They fit well enough and there is just enough room to squeeze a Jerry can in at the front trailer corners.
I got a couple of plastic water jugs from REI that fit good between the wheel wells and the tailgate.

The ‘rack hoops’ were originally wood, but were starting to show some age. I removed these and welded in some steel tubing. These are strong enough to support the trailer flipped over.
Quick fists were added to the rails for camp tools.
I put in some basic brackets and tie downs for fuel and water cans & added some rope rings at strategic points.
The trailer already has a bunch of built in tie downs, but most are on the outside. I put in a track tie down system on the wheel wells for inside cargo control.
Electrical & Lighting
The aluminum military lights seemed to work, so I just refurbished them a bit and mounted them up top to keep them reasonably safe from being crunched. A new wiring harness was fabricated and hooked to a standard 7-blade RV setup.
Finishing Touches
A blank M416 data plate from ebay was acquired for another $20. I stamped in the serial number and mounted it up.
Northern tool had a good sale for a trailer tongue jack. So I picked those up too. This thing turned out to be a little cheesy, so I cut off the plastic wheel and replaced it with a ball bearing caster.

I had enough things attached to justify a paint job. I turned my carport into a paint booth for a day and sprayed Parker’s sand tan duck boat paint over everything. Most of it went where I wanted it to. This is marine paint, so it should be fairly durable. It also comes in spray cans, which will help with touch ups. I was not going for an exact match to the FJ, just wanted something that went well with the military theme. The paint is extremely close to my M101.


There are some higher ticket items like the axle, but most things tended to be in the $20-$40 range. In the end it could have been a bit wider lighter. I did not see an economical way to get there.

Future work
I am pretty much done for now, but I have a short list of potential upgrades:
A set of TRD TT wheels to match the truck.
Solar panel, battery, and inverter.
There is plenty of room for a tongue box as well.
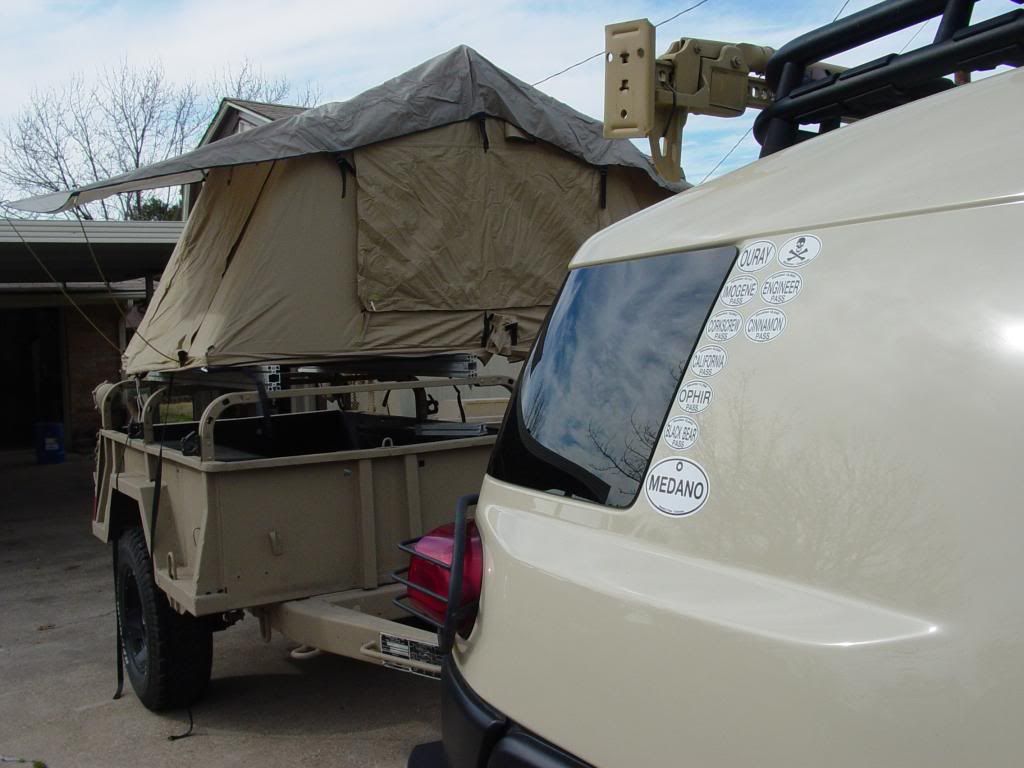
Maybe a roof top tent once my daughter can climb up into one.
With a toddler and 2 dogs, our FJ cruiser can get pretty cramped on longer trips. I started looking for a fixer upper for a simple budget build. I have an M101, but that is a bit large for what we needed.
Just calling it Patchwork because of all of the welds running across the body.
Starting Point
This was advertised on craigslist as an 'M416HD'. It was basically someone's unfinished project. The seller had found a ‘real’ M416 and opted to sell this one. When I saw it in person it was a bit rough, but also unique. To me unique = cool.
As near as I can tell, this thing actually started out as an M103 or M105 1.5 ton military trailer. The guy I bought it from had cut and sectioned it down to about ¼ ton size & dumped a bunch of steel. The inside had a roll in liner. Most of the rust had been removed and it was painted in fashionable primer brown.
At the time it was being towed behind an older lifted 4 cyl Toyota, so I figured it was light enough for the FJ.
I liked the fact that it was unique, but still military looking, was cheap, has a working tailgate, and the FJ rear door opens with room to spare.
The frame is 6 inch c-channel, boxed in some places. This is overkill and adds weight, but I will not have to worry about it breaking!
Axle & Wheels
The original axle was way too wide & wrong bolt pattern. The tires were almost entirely outside of the wheel wells. I replaced it with a custom (Dexter) axle with electric brakes. I had a much better welder than me attach the suspension so everything would be reasonably straight. I scored some FJ spare wheels and got a set of used A/T tires that matched my stock tire diameter. This will allow for the FJ spares to be used on the trailer.
I initially had the springs overslung. The issue is that the frame is so thick that it kept things a bit high. I flipped the axle to the underslung position and it looked like it was made for a 3-inch lifted FJ.
Utility & Cargo
A trip to the junk yard yielded a hitch receiver from a suburban for $20. I notched the trailer frame in the back and welded it in. Since I am a newb at welding, I also put in a few bolts for good measure. This acts as a bumper, stiffens up the frame (not that it needed it), and allows us to haul our hitch box or bicycle carrier.
I had some lockable wheel well boxes in storage from my Dodge Dakota. Something from a full size pickup might have fit better, but these were free. They fit well enough and there is just enough room to squeeze a Jerry can in at the front trailer corners.
I got a couple of plastic water jugs from REI that fit good between the wheel wells and the tailgate.
The ‘rack hoops’ were originally wood, but were starting to show some age. I removed these and welded in some steel tubing. These are strong enough to support the trailer flipped over.
Quick fists were added to the rails for camp tools.
I put in some basic brackets and tie downs for fuel and water cans & added some rope rings at strategic points.
The trailer already has a bunch of built in tie downs, but most are on the outside. I put in a track tie down system on the wheel wells for inside cargo control.
Electrical & Lighting
The aluminum military lights seemed to work, so I just refurbished them a bit and mounted them up top to keep them reasonably safe from being crunched. A new wiring harness was fabricated and hooked to a standard 7-blade RV setup.
Finishing Touches
A blank M416 data plate from ebay was acquired for another $20. I stamped in the serial number and mounted it up.
Northern tool had a good sale for a trailer tongue jack. So I picked those up too. This thing turned out to be a little cheesy, so I cut off the plastic wheel and replaced it with a ball bearing caster.
I had enough things attached to justify a paint job. I turned my carport into a paint booth for a day and sprayed Parker’s sand tan duck boat paint over everything. Most of it went where I wanted it to. This is marine paint, so it should be fairly durable. It also comes in spray cans, which will help with touch ups. I was not going for an exact match to the FJ, just wanted something that went well with the military theme. The paint is extremely close to my M101.
There are some higher ticket items like the axle, but most things tended to be in the $20-$40 range. In the end it could have been a bit wider lighter. I did not see an economical way to get there.
Future work
I am pretty much done for now, but I have a short list of potential upgrades:
A set of TRD TT wheels to match the truck.
Solar panel, battery, and inverter.
There is plenty of room for a tongue box as well.
Maybe a roof top tent once my daughter can climb up into one.


")