NBS GMC rebuild/repair/alteration/project thread

Bushcoat

one trail at a time
Hello Everyone.

I guess its time for a build thread. I dont post too much as I have limited internet access.

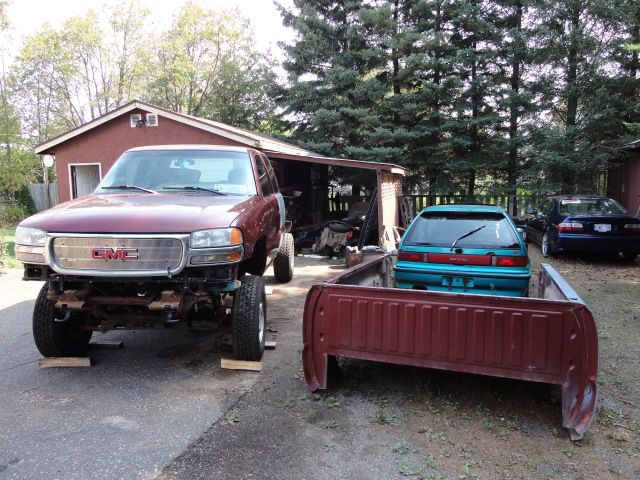
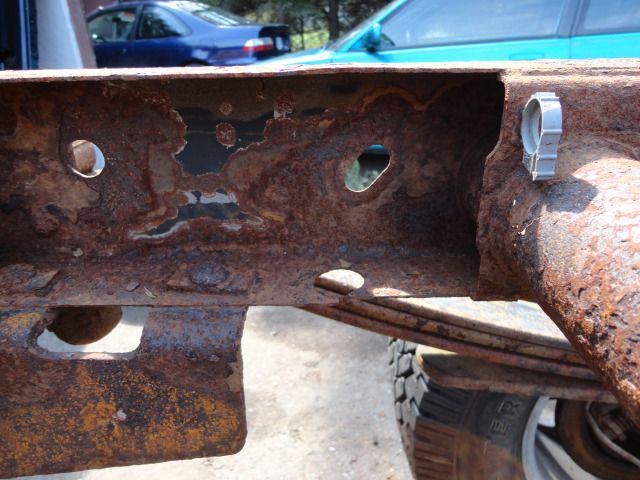
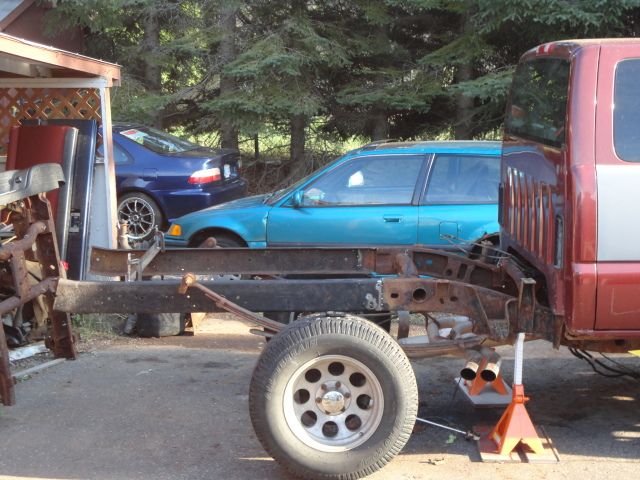
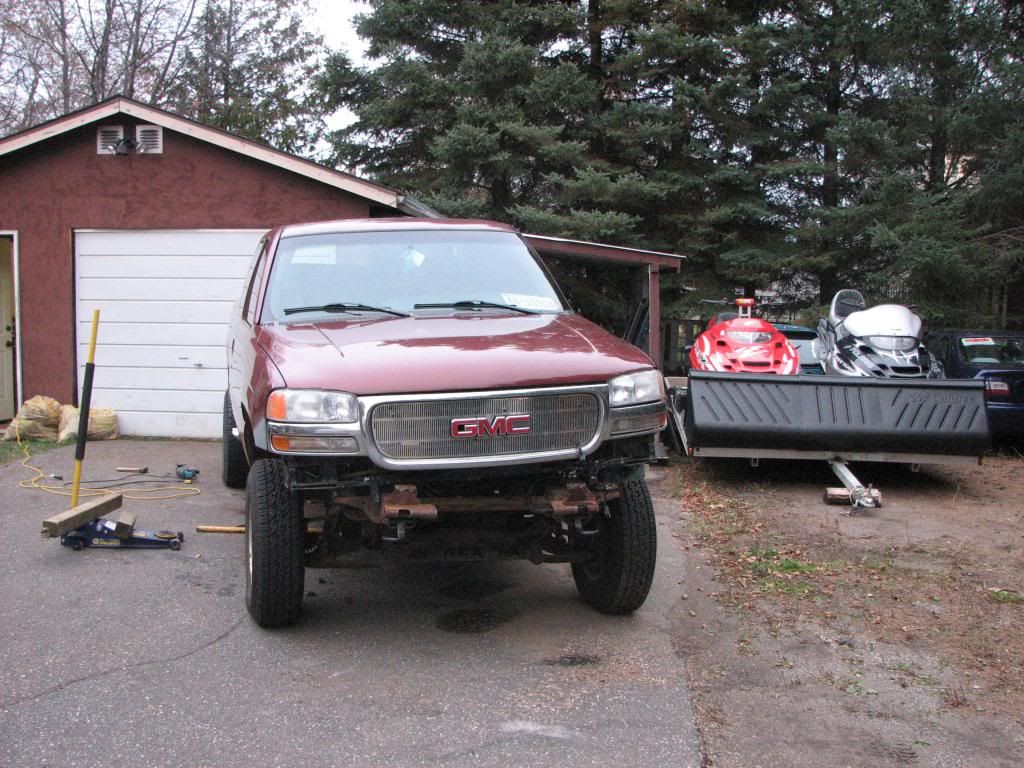
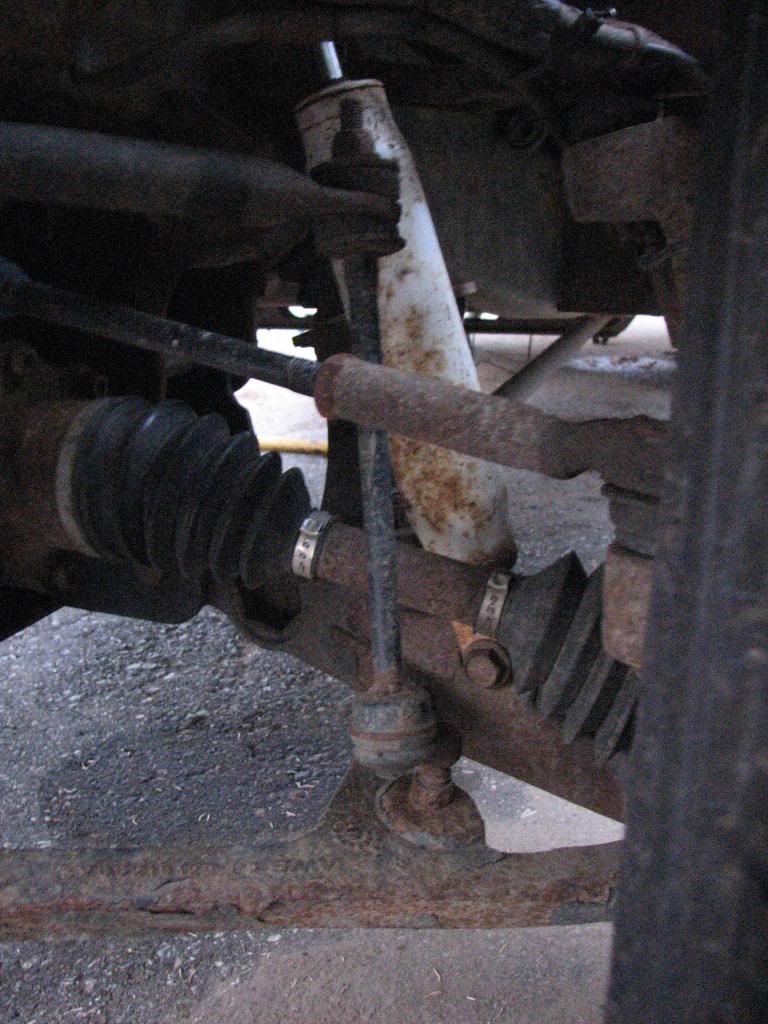
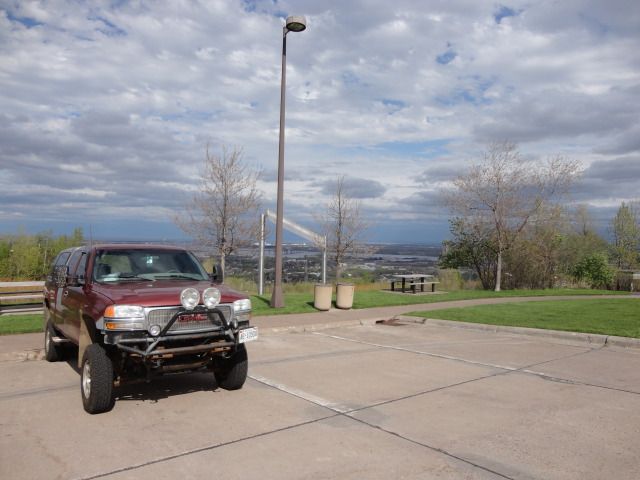
Ive owned this truck for about a year now, bought it because I needed a temporary truck while my diesel was down for repairs. In the meantime, my wife and I have come to expect our first child so my initial plan to sell this truck when I had the diesel back up and running has evolved into "fixing this truck up because it has a back seat". Initially it breezed through a "flexible" safety check, but now ill be doing the repairs that need to be done and will be getting it re-inspected.

The facts:

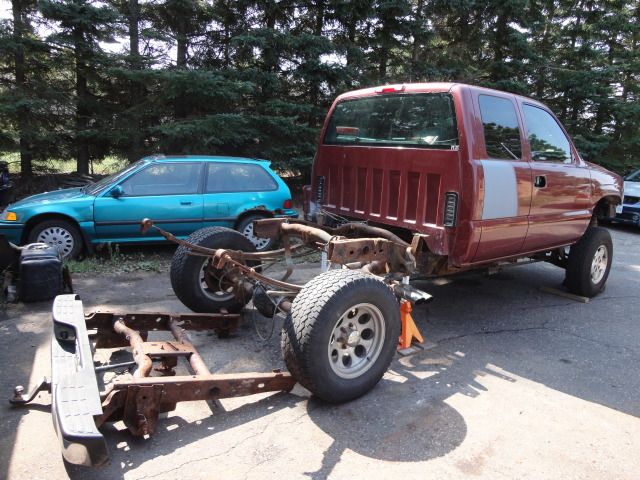
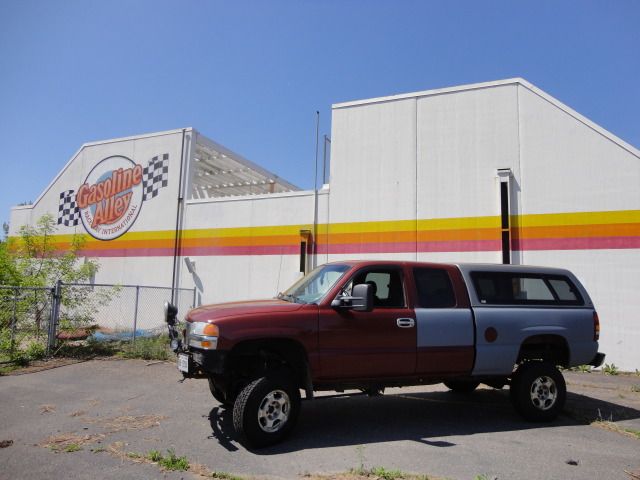
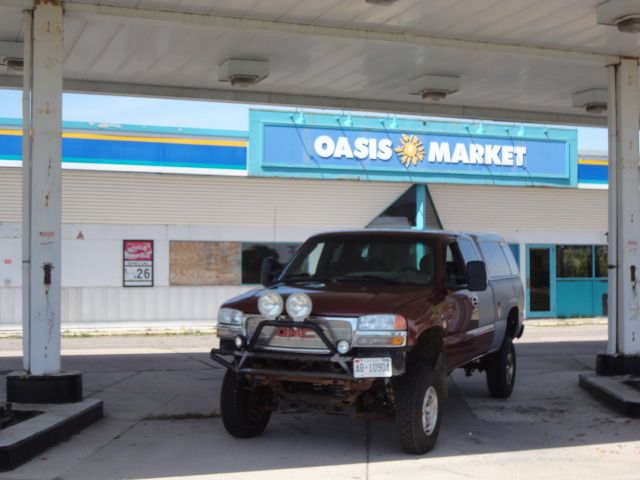
-99 1500 143.5" wheel base
-4.8L V8, auto trans, floor shift 4x4
-3.73 gears with G80
-194,569 km on it when I acquired it
-6" Rough country lift
-3" P.A body lift
-Paid $2400.00 CDN (AS-IS)


Entire photobucket album on this build is at:

http://s148.photobucket.com/albums/s10/bubblegumbucket/NBS project/

I will not be putting ALL of the pics up in this build thread, only a portion of them.


DSC00984_zps1e60281f.jpg


DSC00980_zpsbdcdd97e.jpg


DSC00959_zpscaef672d.jpg
 
Last edited:

Bushcoat

one trail at a time
Once I get onto a real computer, I will show pics of what Im up against.

After I bought it I purchased/acquired these items that are on the truck that did not come with it.
-topper shell
-pro comp driving lights (9" x2)
-utility tractor lights (4" x2)
-stock chevy alloy wheels and new 235/85R16s
-tow mirrors
-side exit flowmaster cat back exhaust system

Ive since removed the nasty sch 40 pipe front bumper device thing. I have a few 03-06 GMC bumper/air dams sitting around and I may mke brackets to install one and maybe a hidden winch, or just a winch bumper.
When I bought the truck the back of the box on drivers side was caved in due to a collision with an ice shack so I got that fixed up, cleaned up surface rust and other bedside dents and primed the entire bedside, also fixed the drivers cab corner above bodyline, and replaced lower cab corner rust damaged. The third door was a bit beaten up so I repaired that damage and primed it.
 

Bushcoat

one trail at a time
Plans:

This truck will be mostly used for day/overnight trips and mostly local-ish. Ive driven the truck down to minneapolis a few times and winnipeg once, it seems to be reliable enough and I know the previous two owners and it was always reliable to them.

-Repair frame damages (cracks and rust through)
-lose the nasty lift blocks-do shackle flip
-finish bodywork (change pass cab corner, fix a few dings, remove rust)
-PAINT! likely close to stock colour and possibly boxliner lower sections.
-black out grill
-lose the ugly chrome handles for some stock ones/ possibly colour match
-Rearend-change rotors and inspection cover, OR swap to a 14 bolt.
-rear shocks-add shock mounts and mount new skyjacker shocks
-front shocks-need to be painted and changed with new skyjacker shocks
-make and/or mount front bumper
-mount 8500# superwinch up front
-make rear bumper/tow points and tire carrier
-build some LONG sliders/running boards
-aux lighting for front/rear/sides
-cold air intake
-replace rear glass in topper shell
-replace winsdhield
-install tinted rear slider
-replace front end links


Wow thats a long list, and Id like to have it ready for spring 2013
 

Bushcoat

one trail at a time
I knew there was at least one large crack in the frame that needed to be addressed so I pulled the box and got started. Anyone living in the rust belt should check their 99-02 GM frame for cracks or rot.


DSC02658.jpg


A good pressure wash reveals cracks/rot/rust and issues


DSC02660.jpg

DSC02661.jpg


more cracks/holes and paper thin frame. Now im not sure to repair or replace. GM sells the rear frame section for $1700 U.S.


DSC02665.jpg


DSC02666.jpg


DSC02668.jpg


So I went out on a limb and said "replace"... I had some frame sections from an old suburban I had, they were going to be used to build a bumper or 2 but now Im having a plan change. Im just going to wing it and see where it goes. The frame takes a jog inward, i decided to keep the rails straight and just resolve things with a shckle flip and lose the large lift blocks.


DSC02672.jpg


DSC02674.jpg


Grabbed some 6 ton stands from harbour freight for $29...


DSC02677.jpg
 

Bushcoat

one trail at a time
I cut the suburban frame rails exactly the same so that the frame could be measured with hanging gauges down the road if it ever had to..... Now ill start the precision sawzall cuts haha...Remember, this is all just a thought out guessing game... By the way, moms driveways are great for these types of projects!


DSC02679.jpg


DSC02681.jpg


DSC02685.jpg


So now the truck wil be part 99 nbs gmc, part 85 oobs 3/4 ton burb lol

DSC02686.jpg


DSC02687.jpg


DSC02698.jpg


cleaned up, ready to make their donation


DSC02699.jpg


DSC02703.jpg


DSC02705.jpg


DSC02706.jpg


Looking accurate and straight....... I think??? I hope!!!


DSC02707.jpg
 

Bushcoat

one trail at a time
I was going to fishplate the outside, but thought id be better to use these plates inside... may still fishplate outside later


DSC02712.jpg


Now starting drivers side. Ive only tacked so far so I can square everything up after and make sure Ive got the proper height.

DSC02713.jpg


DSC02714.jpg


Squared up, good height, ready to solid weld


DSC02719.jpg


DSC02720.jpg


Decided id make a crossmember and shackle flip brackets before I burned anything in permanently... The hangers are from DIY4x.com and heavy duty! And Ive added a long tow tube so I can ditch out on the receiver hitch that I had. Ill be tying it in more later. Ive left lots of overhang so I have enough to mount the box, and I can move the crossmember around till Im happy with shackle/hanger location, then ill lop off the rest later and use it for boxing the sectioned area

DSC02722.jpg


DSC02723.jpg


Thats it for now...... Ran out of welding gas mix
 

Bushcoat

one trail at a time
Time lapse, bottle refilled, start burning wire haha

DSC02727.jpg


gussets maybe?

DSC02729.jpg


went and got some parts... Might just use stock shackles, these were cheaper and will lift 1 or 2" or I can redrill them to stock

IMG_2083_zpsb8139681.jpg


getting these gone will be great:

DSC02727.jpg


much better:

IMG_2086_zps1cf23548.jpg


The other issue that needs fixing:

IMG_2082_zps75f09285.jpg


welding this guy up:

IMG_2091_zps86545df2.jpg


IMG_2093_zps692f07ab.jpg


hehehehehe! :p

IMG_2095_zpsd802f8ec.jpg
 
Last edited:

Bushcoat

one trail at a time
Decided the other gussets would be too small so I made these up, now everything will be burned in place after ive measured and checked and remeasured and rechecked several times

IMG_2096_zpsfb26d66d.jpg


Good shackle angle as a base I think, it can still be adjusted

IMG_2098_zpsb5515f4f.jpg


IMG_2099_zpsf9ab95e8.jpg


IMG_2100_zps5403d079.jpg


So heres what I lopped off the back, Ill reinforce/box the spliced in rails with

IMG_2101_zpsecc0f625.jpg


IMG_2103_zpsd5bac1b2.jpg


IMG_2104_zpse4bd3fd0.jpg


IMG_2105_zps1f409130.jpg


A buddy came by yesterday and we placed the box back on. Its rainy today so no progress, but I have to bolt the front 4 mounts down for the box then Ill make something to mount the 4 rear box bolts, and the supports to the box crossmember inside the wheelwell. After that Ill have to close in the underside of the framerails where Ive made the splice, and a bit of reinforcing and plating at the front gas tank crossmember (yes its cracked and rotten there also). After i make progress, I will post pics!
 

AA1PR

Disabled Explorer
nice work so far

before you get the box back on I would get out the 4" angle grinder with a stainless steel wire brush & take all the exposed rusty rails down to as near bare metal as possible & give them all a coat of POR15 or something similiar to help preserve all your hard work
 

Larry

Bigassgas Explorer
WOW, Tough work! :eek: If they used roadsalt where I lived I think I would move….Actually, I did! Got out of Michigan 12 years ago and do not miss roadsalt one bit. At the time I had a 3 year old GMT400 Z71 that was already sprouting rust like crazy on the hood lip and extended cab rocker panels. Traded that sucker off a few months after moving West. I give you a lot of credit for saving that one from the crusher. Very nice repair work and clean frame splice! That is going to be a cool rig when you are all done.

What is NBS? New Body Style? I’ve seen that acronym on a few websites and never understood the purpose (NBS, OBS, NNBS, NNNNNNNBS, BS, LOL, etc). I think those horrible acronyms started at fullsizechevy.com. I never understood why they don’t just indentify the rigs by what they are (67-72, 73-87, GMT400, GMT800, GMT900, etc) instead of creating confusion with acronyms that will never hold time.
 

Bushcoat

one trail at a time
Thanks ALOT guys!


I put the box back on for now so I could make the last of the box mount bracketry. Ill be removing it again, cleaning up all the welds and whatnot and either clean it up with a wire wheel and fiber disc or just take it to a buddys place and sandblast. Its getting too cold too fast, and my wife is in the hospital in Toronto(1300km or so away) so I might have to slow things or put a hold on it until spring... Funny thing is that the donor frame rails were sand blasted and por15'd when it was still a suburban frame, but I will be coating everything thouroughly and keeping it well oiled!

Larry,
Ive thought of moving many times.... Just dont really know where/when/how or any of those details lol... Ive often thought to myself, If I had all the time that I spent maintaining these vehicles from the constant battle of winter elements to do work Id actually like doing on these vehicles, well, I might actually be getting somewhere. Working on other peoples vehicles 50-60 hrs a week or more dosent help either lol.
And Ill have to see about changing the title, I dont know how, but I would like to include my 99 GMT400 in this same build thread.


So speaking of GMT400, I think Im going to get sidetracked with the GMT800 project, slide this old gal into the garage this weekend....


DSC02562_zpsf7430395.jpg


DSC02563_zpsf25be5aa.jpg


Ill be picking up some steel and build some sliders/camper tie downs and maybe a bumper out back. That way if I do find a decent deal on a camper, Ill be able to pick it up and safely tie it down. Ive been watching craigslist and kijiji and keeping my fingers crossed.
 
Last edited:

Bushcoat

one trail at a time
Well Ive slowed down on this. My wife has been in the hospital for a few weeks almost 1400 km away. Due to complications she had to deliver our baby 3 months early so she will be there for another couple months and Ive been travelling to and from because work is too busy to take too much time off...


Tonight I got a chance to do a little work on the ol gal. Started pulling the bodylift out and Im happy with how it will sit after losing 3" there and doing a few suspension adjustments. I will be signing it over to my wife so she can take her old car off insurance and insure this truck so we can save a few bucks there. In order to insure it, due to the trucks age we have to get an inspection and pictures and since they are so against "modified vehicles", losing the bodylift should help.

Going to pick up the dirty diesel from a buddy's shop tomorrow (problems with injection pump-AGAIN), so I should be able to go get some steel for these side projects Ive been wanting to do on both trucks (sliders, tire carrier, bumpers, boat rack maybe?)


IMG_0192_zps0e109c19.jpg


IMG_0190_zpsb23a54b6.jpg


IMG_0194_zps5ed0e256.jpg


IMG_0196_zpsfd4fca81.jpg


I guess I need some new end links, Does anyone know if these are rough country only items, or will something else work also?

IMG_0200_zps65c32aa6.jpg


Also pulled out the winter toys this week to get them ready, and put some new winter rollers on the daily beater!


IMG_0199_zps094ea8c7.jpg


IMG_0191_zps15976c15.jpg
 
Last edited:

Saiyan66

Adventurer
Good work on the truck, looks like you did a great job on the back part of the frame. Thats pretty brave of you to start with a truck that already has that much rust on it. I can't believe how bad things get with road salt. Good luck on the restoration. Hope your wife and child are doing well.
 

Bushcoat

one trail at a time
Thank you very much sir. I usually end up starting the projects that are cheap to buy, or that other people dont want. Road salt is the devil, and here in orthern ontario we are now using a liquid salt which seems to be worse on everything, but they claim better on the environment and more effective on the ice.

No real progress as I am down in Toronto again, but when I return home I should have an 06 14 bolt rearend sitting in the driveway that is going into the half ton. Giving the eagle alloy 17x9s with two 33s plus $100 for that.
 

Forum statistics

Threads
185,842
Messages
2,878,766
Members
225,393
Latest member
jgrillz94
Top