Multi-Purpose Subaru Trailer

MadMax11

New member
A little background on this build first. I was planning on moving from AK to CO with my girlfriend, and wanted to drive my Subaru down with all of our stuff. Problem is, even with a small amount of stuff, the Suby is simply not big enough to haul everything down by itself, so I planned a trailer build.

Requirements:
- Cheapish (~$500)
- Lightweight so the Suby can haul it (~500#)
- Enough space to pack quite a few boxes + spare tires + a couple spare parts
- Room to sleep 2
- Smaller than my car for aerodynamics sake
- Ability to convert to flatbed easily
- Repairability
- Offroading capability (& general toughness for the ~3700 mile trip)


I realized that that list had quite a few ideal characteristics, but I didn't want to sacrifice too much in any category. So i planned. And schemed.


1.jpg


It turns out that I had a spare 91 Subaru Legacy laying around (with a missing engine and dead tranny), so I decided to cannibalize it to tackle a few items on my list (cheapness, spare tires, spare parts, repairability, offroading capability).

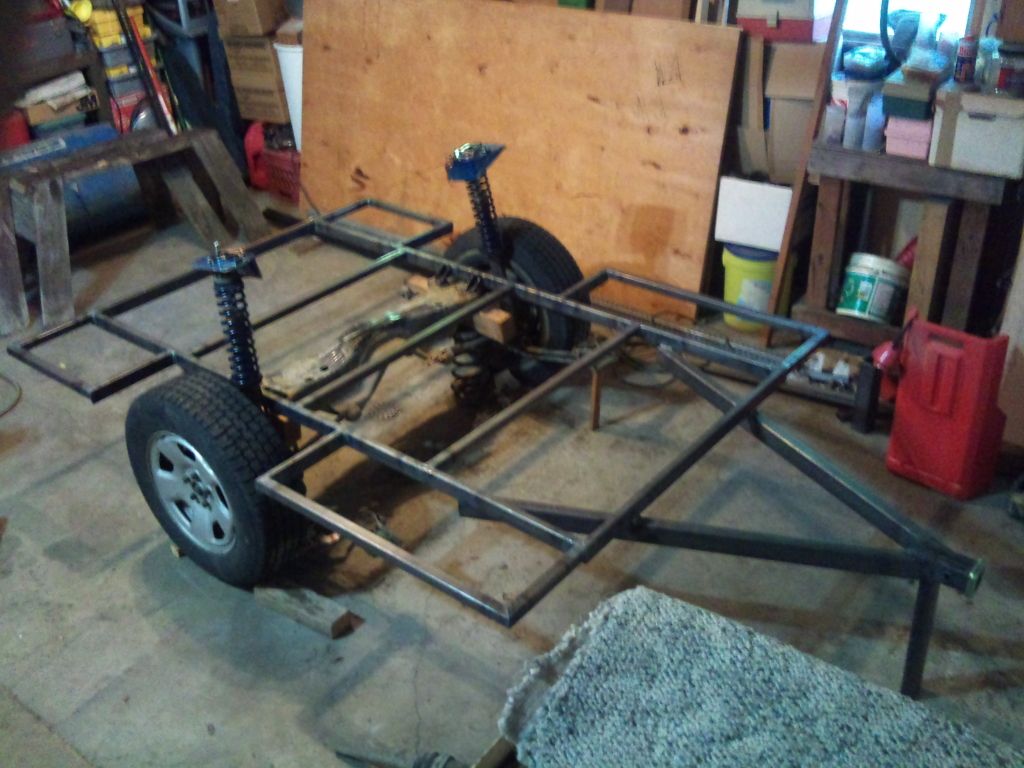
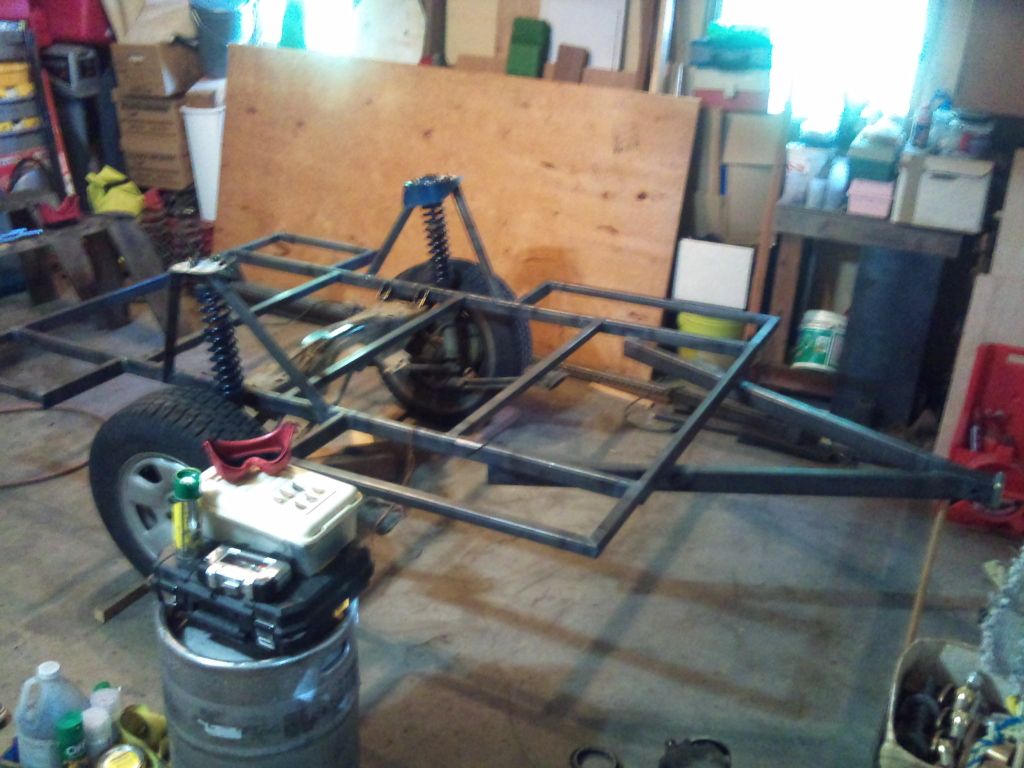
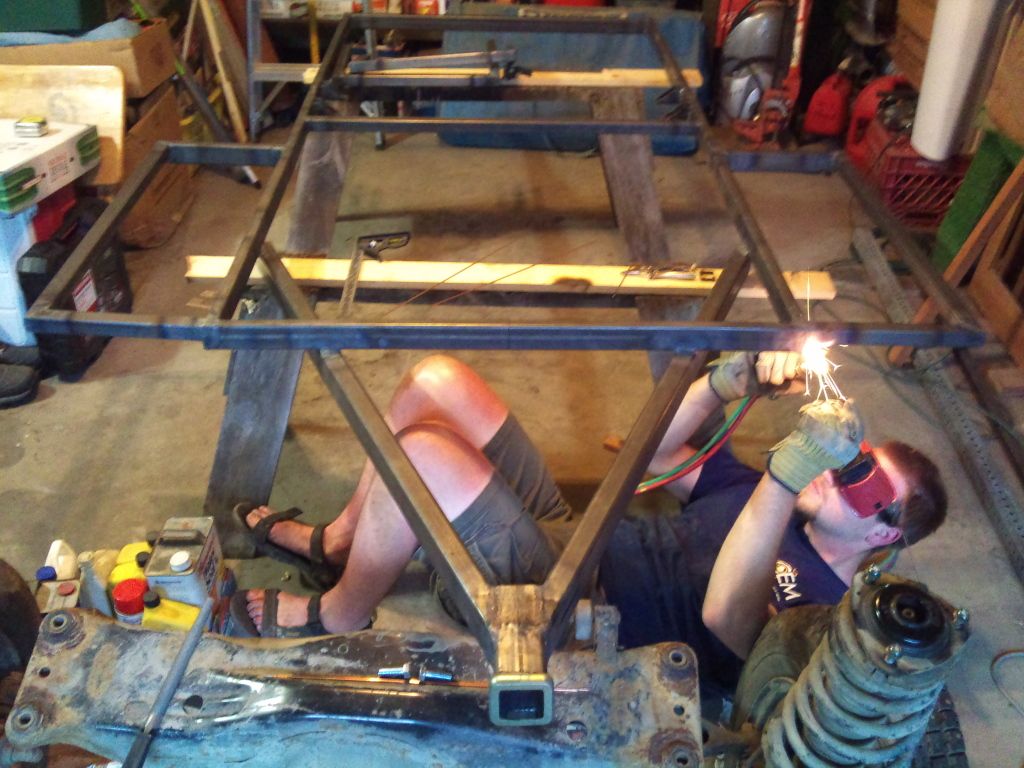
I pulled the rear subframe to use as the base for the trailer. It had all of the drivetrain parts necessary for the trailer, and all of the parts could be used as spares on my car. I loved that it had so many interchangeable parts in case of disastrous failure in the middle of nowhere (quite a possibility with an untested design on a fresh trailer).


DSC_0308.jpg


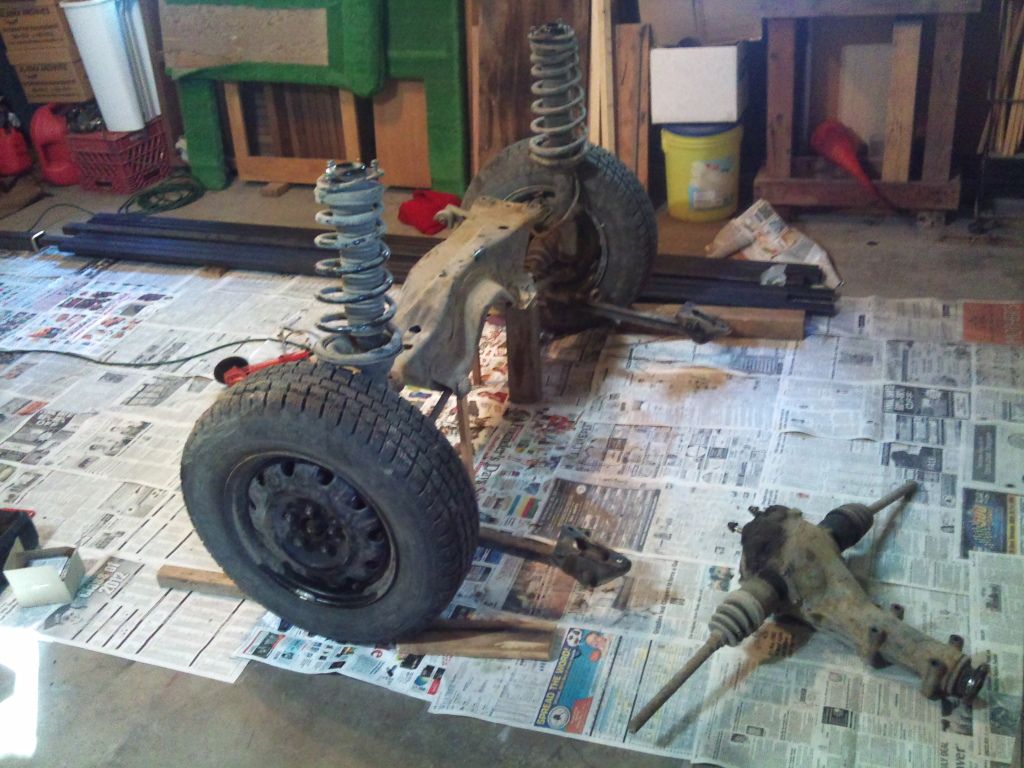
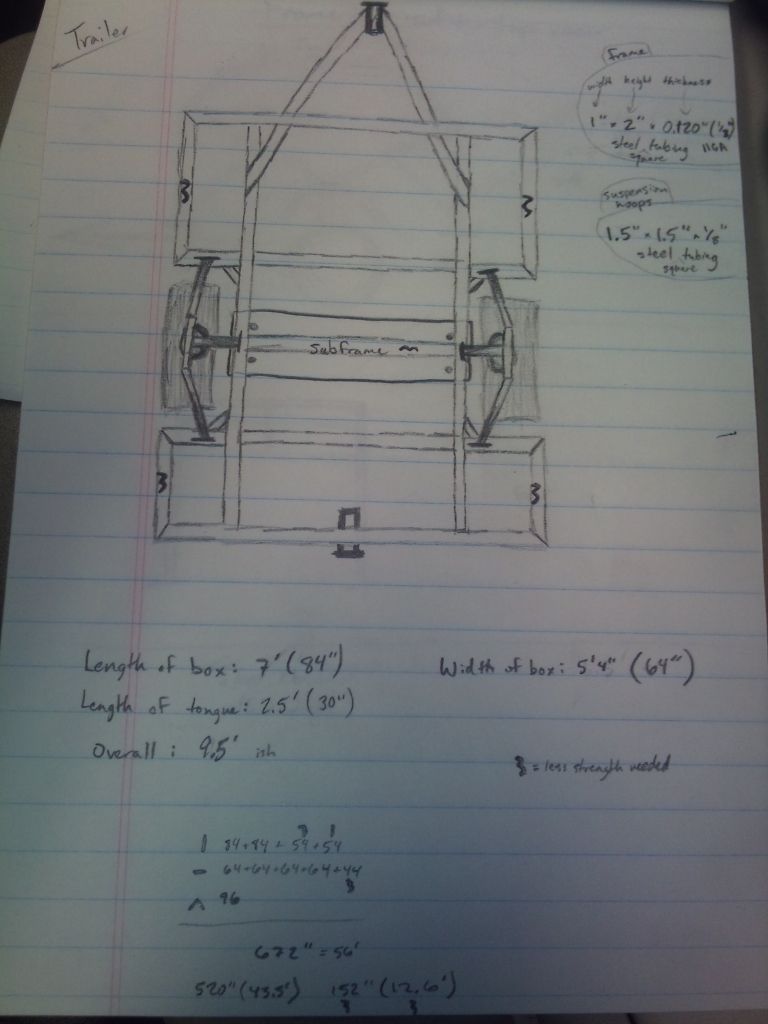
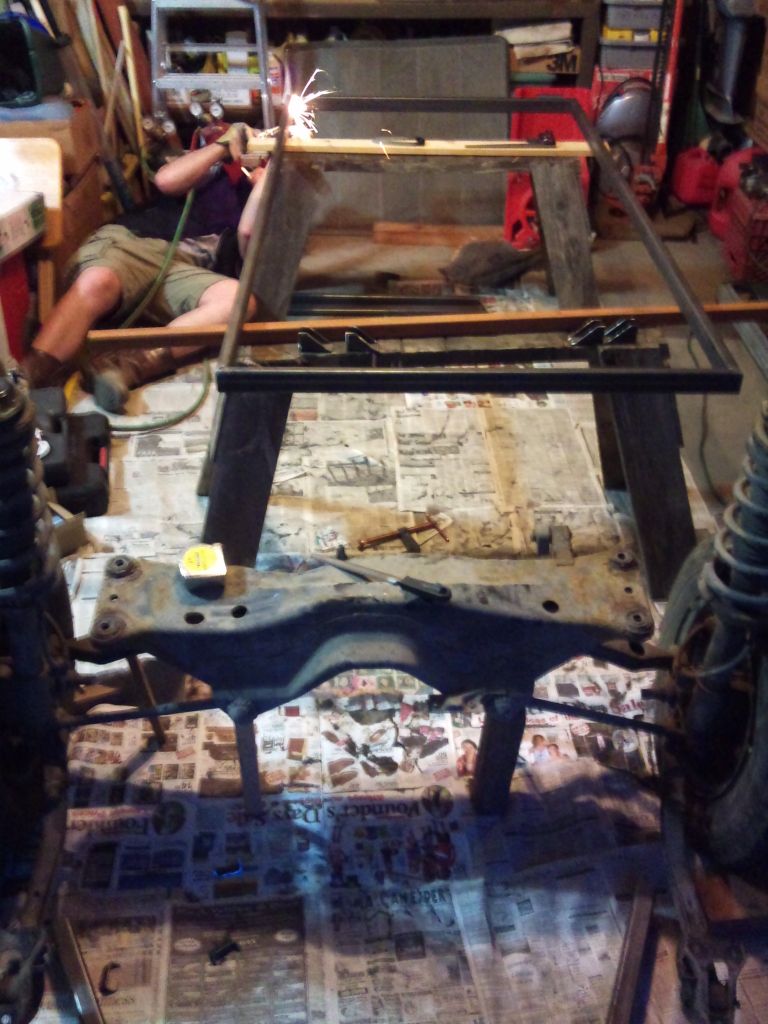
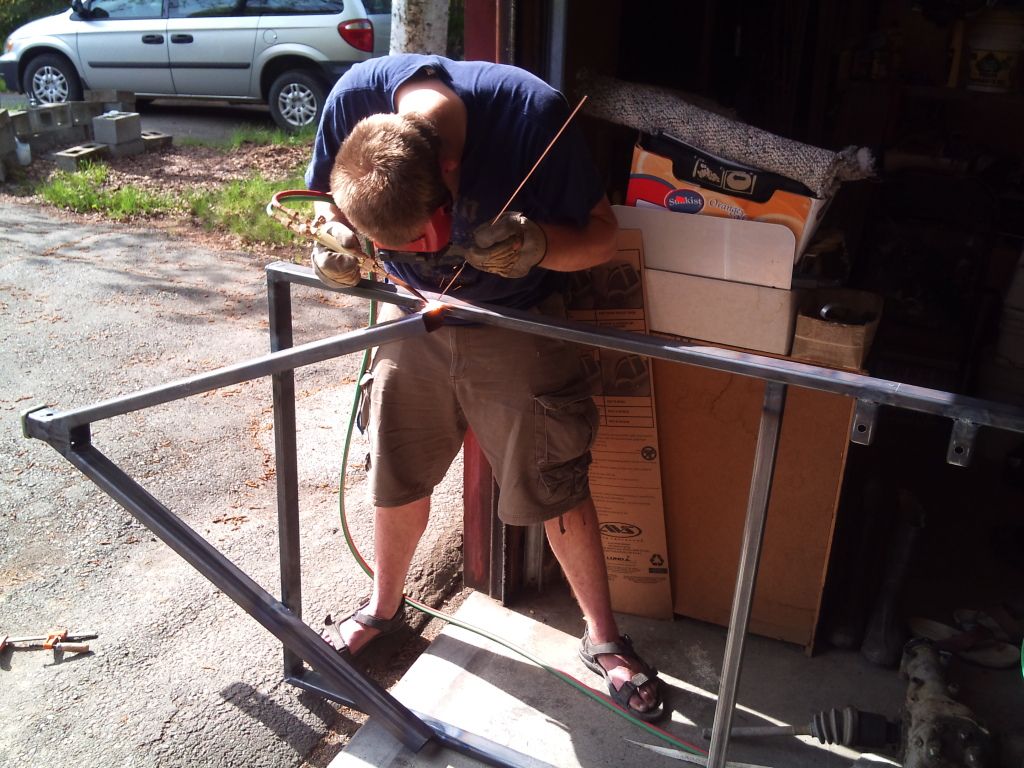
I scoured the internet to see if anyone had done a Subaru trailer build that I could learn from before jumping into building the frame. I found one awesome dude who had used an old torsion subframe from an 80's Subaru, but my Macpherson strut subframe was a whole different animal. I thought through many different designs using pencil and paper, yet it always seems that reinforcements and modifications constantly reshape and evolve my designs, which I consider a key part of my building process!

.
 

Attachments

  • 1.jpg
    1.jpg
    498.7 KB · Views: 7
  • DSC_0308.jpg
    DSC_0308.jpg
    549 KB · Views: 10

MadMax11

New member
I recruited my welding/machinist buddy to help me with this project, as two people would make this build much easier and more fun. I think I should note here that the tools that we used for this build were probably the most basic metalworking/woodworking tools possible. And it was all done in a single car garage.

For the metalwork, we ended up using:
- 4.5” Angle grinder (from the 80s)
- Corded drill w/ wood bits (also from the 80s)
- Oxy-acetylene welder (portable, with tiny tanks)
- An assortment of melted plastic/metal clamps
- Mini-Sledge Hammer
- Beer

Yep.

So, after reading through about a million of the awesome trailer builds on this site, I was semi-prepped to start building!

We started by cutting up some 1”x2”x0.120” steel to use as the main box of the frame. 45 degree cuts on the corners of the frame sealed the insides away from the elements.


DSC_0315.jpg


After that, some 1.25”x2.5”x0.120” steel for an A-frame tongue + a premade receiver hitch up front would give strength and options of swapping out coupler devices in the future. You can also see the brackets I cut up for mounting the Subaru subframe to the trailer frame.


DSC_0314.jpg


No jigs for us! A level and some scrap metal for leveling should do it.


DSC_0327.jpg


Just look at those sexy welds…


DSC_0334.jpg


Next up, some rope, some measuring, and lots of eyeballing led to the A-frame tongue being tacked and welded to the bottom of the frame. This was the most intense part of the build, as we did not want to mis-align the tongue.


DSC_0351.jpg


Which then led to the most boring part of the build, the cutting and fitting of the ‘wings'. Must've taken two days of beer and exhaustion.


DSC_0352.jpg


DSC_0358.jpg


Stay tuned for the next installment!

.
 
Last edited:

Woods

Explorer
Inverted torch welding... NICE WORK.

Are you going to extend the hitch receiver tube, back to the bottom of the A-frame?

Are you going to keep the coil overs?
 

MadMax11

New member
Inverted torch welding... NICE WORK.

Are you going to extend the hitch receiver tube, back to the bottom of the A-frame?

Are you going to keep the coil overs?

Haha, I'll tell my buddy that he's getting some props for his torch skills.

The hitch receiver tube was not extended to the frame, as we thought that the extra weight and cost would not be worth it. We did some minor reinforcing (gussets) on the tongue later, which I'll detail.

And about the coilovers... well that'll be covered thoroughly in the next installment tonight :ylsmoke: A little foreshadowing: my tires wouldn't fit under the spring perches on the struts, but I wanted the coilovers intact as they could be used as spares for my car..

P.S. Your trailer build was a HUGE inspiration for me, as I wanted to keep mine as light and yet strong as possible!
 

M35A2

Tinkerer
Very impressed seeing someone gas welding. And a young person, at that. Everything today is MIG. Nice to see someone keeping an old school skill alive.
 

BIGdaddy

Expedition Leader
I'm not familiar with Oxy-acetalene welding. What kind of electrode is that? Also, what is the strength comparison to sheilding gas mig welding or flux-core mig welding for that matter?

Is prepping the metal as big a deal with torch welding as it is with mig?

Thanks!

-B
 

M35A2

Tinkerer
I'm not familiar with Oxy-acetalene welding. What kind of electrode is that? Also, what is the strength comparison to sheilding gas mig welding or flux-core mig welding for that matter?

Is prepping the metal as big a deal with torch welding as it is with mig?

Thanks!

-B

There is no electrode in gas welding. Just a flame (acetylene and oxygen, hence oxyacetylene welding) and a filler rod.

Cleanliness is important. No rust, grease or paint.

Without the shielding gas used in MIG and other methods, oxidation is possible and so good technique is important.

The mix of oxygen and acetylene is also important, as are the gas pressures used. To much oxygen provides an oxidizing environment. Too much acetylene puts too much carbon into the weld, causing other problems.

Done properly, gas welded joints are as strong as any other method.

It is a low-cost option in terms of the equipment needed. Two tanks, regulators, a hose, some tips and goggles. But it also requires more skill and training to master.

Right-side up gas welding is not too hard to learn. Vertical or upside-down gas welding is no small feat. The kid doing the work on this build seems to have the technique down pat. :) :) :)
 

AFSOC

Explorer
Gas welding, very cool. That's how it was attempted to teach me to weld. I had a difficult time properly welding anything .125 or larger and certainly never had inverted oxy/acc success. Keep up the good work!
 

MadMax11

New member
Now the fun part, dealing with the coilovers!

So the shocks on the subframe wouldn't fit my tires under them, but I wanted those shocks and those tires, so I decided to build some custom coilovers with the help of ebay..

I bought 2 no-name 12"x2.5" 200lb/in coilover springs off ebay for $40. It turns out that they each fit a beer glass perfectly. Excellent.


DSC_0349.jpg


Then I bought 4 used hockey pucks and trimmed them down to adapt the 2.5" springs to my strut. After trimming off the excess spring perch, I had just over a half inch of clearance between the side of my tires and the struts! That'll do pig!


DSC_0394.jpg


DSC_0396.jpg


DSC_0397.jpg


So after cutting the spring perches out of the rear of the donor car, It was time to set up everything to figure out how to weld up some strut hoops.


DSC_0399.jpg


I figured that if the hoops came off of the outside edge of the inner frame, and had a couple gussets welded on... let me just show the pictures!


DSC_0423.jpg


Then after 2 coats of white rustoleum primer and 3 coats of white rustoleum paint (all rolled on), it looked like this! (And a quick fab of a bolt on coupler from 2"x2"x0.120" steel and a nasty old ball coupler.


DSC_0514.jpg


Finally, its on its feet and looking like a legit trailer!!

So of course we had to take it for a test drive, with my buddy riding on the bare frame.. no pictures of that sadly, haha. This was basically the only test ride that this trailer was ever taken on, mainly to test the coilover ride and their mounting hoops, and to make sure all of the other parts were solidly attached.

At this point, I believe the trailer weighed 400# ish.
 

INSAYN

Adventurer
Interesting build. I love to see someone tackling gas welding in all directions, as it really shows some skill.

The strut towers have me scratching my head though. I'm going out on a limb here and would like to offer a suggestion that could reduce a failure.
The hoops alone are not enough for the struts. Yes, they will support the trailer and probably some load from a packed trailer while sitting still, or even traveling on the smoothest of roads, however miles of bumps, any off road and weight shift on corners will fatigue the joints of the hoops where they are attached to the trailer. It's not really an IF they will, it is more of a WHEN they will.

You can remedy this by adding a strut bar across the top of the struts and tie them together to help keep the lower mounts from giving up. There is a stronger way, but probably more in the way for loading the trailer, and that would be to triangulate from the strut hoop top, down to the center of the trailer. Doing this on both struts. This gives the strut tops nowhere to go in any condition.

Good luck on the rest of the build, very cool idea.
 

MadMax11

New member
Interesting build. I love to see someone tackling gas welding in all directions, as it really shows some skill.

The strut towers have me scratching my head though. I'm going out on a limb here and would like to offer a suggestion that could reduce a failure.
The hoops alone are not enough for the struts. Yes, they will support the trailer and probably some load from a packed trailer while sitting still, or even traveling on the smoothest of roads, however miles of bumps, any off road and weight shift on corners will fatigue the joints of the hoops where they are attached to the trailer. It's not really an IF they will, it is more of a WHEN they will.

You can remedy this by adding a strut bar across the top of the struts and tie them together to help keep the lower mounts from giving up. There is a stronger way, but probably more in the way for loading the trailer, and that would be to triangulate from the strut hoop top, down to the center of the trailer. Doing this on both struts. This gives the strut tops nowhere to go in any condition.

Good luck on the rest of the build, very cool idea.

I don't have a closeup of the shock hoops at the moment, but how the attach to the frame is fairly solid. It took me a couple days to do some strange angles and tons of mockups with those bars. Basically, they are welded down the outside of the frame AND across the top. This way with a load on the trailer, the vertical side weld is in tension and the horizontal top weld is in compression.. it works in my head, haha.

And since it made an almost 4000 mile trip loaded with >1000 pounds of stuff through some minor offroading, nasty sections of main roads, and mountain passes with zero failures, my thoughts on its strength were confirmed! :smiley_drive: Though it definitely could have used some load testing before loading up and leaving, but where's the fun in that!


But I do agree that a bit of triangulation never hurts. I'd rather not put a bar across the usable space, but I could see triangulating the hoops to the wings of the trailer to help.
 

TACO721

Observer
nice little trailer. got any more pic?


i hope i can start a build on a trailer next fall/winter. all tho mine will be a bit bigger since i have a truck. (prob about 5' or 5'.6” wide x 6'6” to maybe 7' long) but unlike most most on here with full beds/tents kitchens. mine wont have most of that. for sleeping i'll use a cot or air bed, some fold down tables on the walls.

and not long after i finish i want to drive to AK i love road trips. i'll tow trailer to sleep in and all.
 

MadMax11

New member
nice little trailer. got any more pic?


i hope i can start a build on a trailer next fall/winter. all tho mine will be a bit bigger since i have a truck. (prob about 5' or 5'.6” wide x 6'6” to maybe 7' long) but unlike most most on here with full beds/tents kitchens. mine wont have most of that. for sleeping i'll use a cot or air bed, some fold down tables on the walls.

and not long after i finish i want to drive to AK i love road trips. i'll tow trailer to sleep in and all.

Oh, I've got more build photos that I'll post here once I stop being lazy. And by the way, my trailer box is 5'4" wide and 7' long, which in my opinion was the perfect size. Easy to weave through dense traffic while passing through cities to visit breweries, small enough for easily navigating offroad trails, but big enough to sleep a couple people with room for gear.

Also, you may want to stay tuned for the pop-up tent that I built on top of my trailer, it was cheap and absolutely perfect for my uses.
 

Forum statistics

Threads
185,812
Messages
2,878,462
Members
225,352
Latest member
ritabooke
Top