You are using an out of date browser. It may not display this or other websites correctly.
You should upgrade or use an alternative browser.
You should upgrade or use an alternative browser.
Post up your drawer/storage system
- Thread starter neliconcept
- Start date
I've finally got around to completing my rear hatch area storage platform in my LR3. The goals for this platform were:
(1) Had to be light weight (the LR3 already weighs a lot, especially with the ARB bumper, Rover Specialties Sliders, roof rack, etc)
(2) Had to be easily removable...think under 5 mins.
(3) Had to have an OEM look/feel too it
(4) Had to be modular enough to allow for the platform to be expanded for when the 2nd row of seats is folded flat to be used as a sleeping platform (this bit is still left on the to-do list).
(5) Had to be strong enough to support a fridge and slide plus cargo or the weight of two people (for sleeping platform when needed).
The approach I took was based on a platform build by someone in Australia: http://www.aulro.com/afvb/projects-t...ng-area-2.html . Qubeloks weren't available in the US, so after some searching I found a company call eztube (www.eztube.com). The big advantage eztube has over others like Qubelok is that they offer connectors with a steel core verse glass filled nylon. Why are the steel core important? Because they will be a heck of a lot stronger and won't ever break. The only down side is they are about double the cost of the glass filled nylon connectors. I'm sure the glass filled nylon would have been up to the task, but I opted to over build it for piece of mind.
With that said, on to the build.
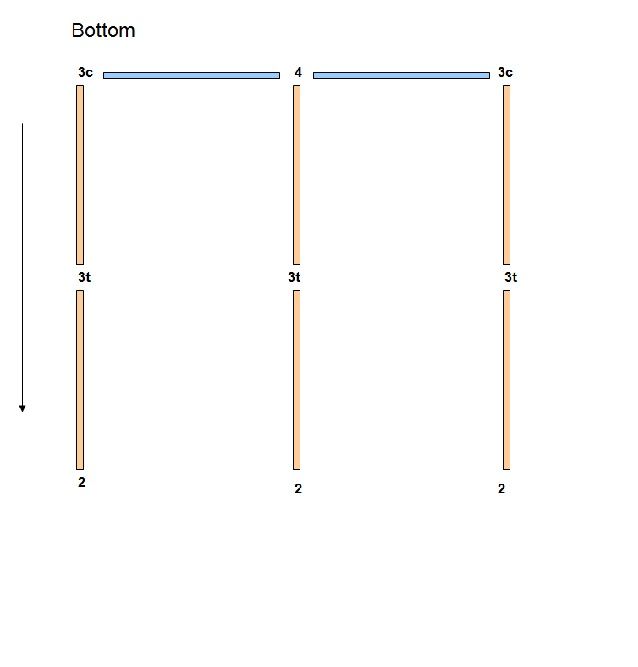
The first step was just to put a quick frame design on paper:

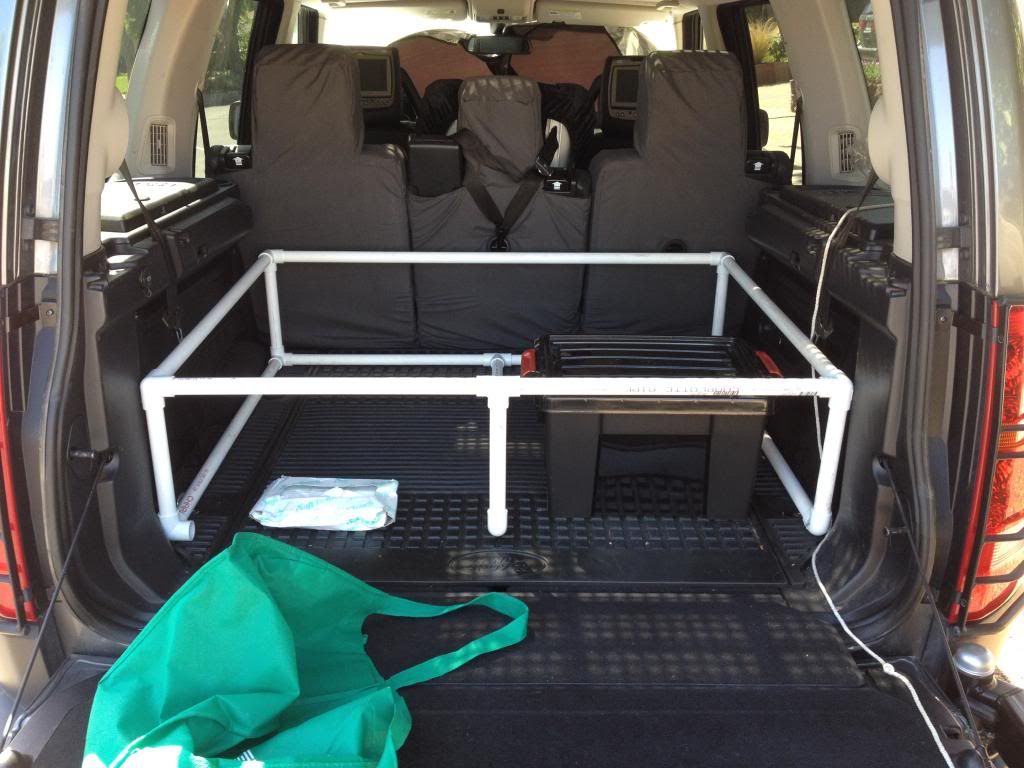
The next step was to semi mock up the frame with PVC pipe and joints. Why did I do this? Two reasons (1) to ensure I get all the right measurements, etc for a perfect fit and (2) PVC piping is ultra cheap compared to the tubing cost, so best to make all the mistakes with the PVC before cutting the expensive tubing.
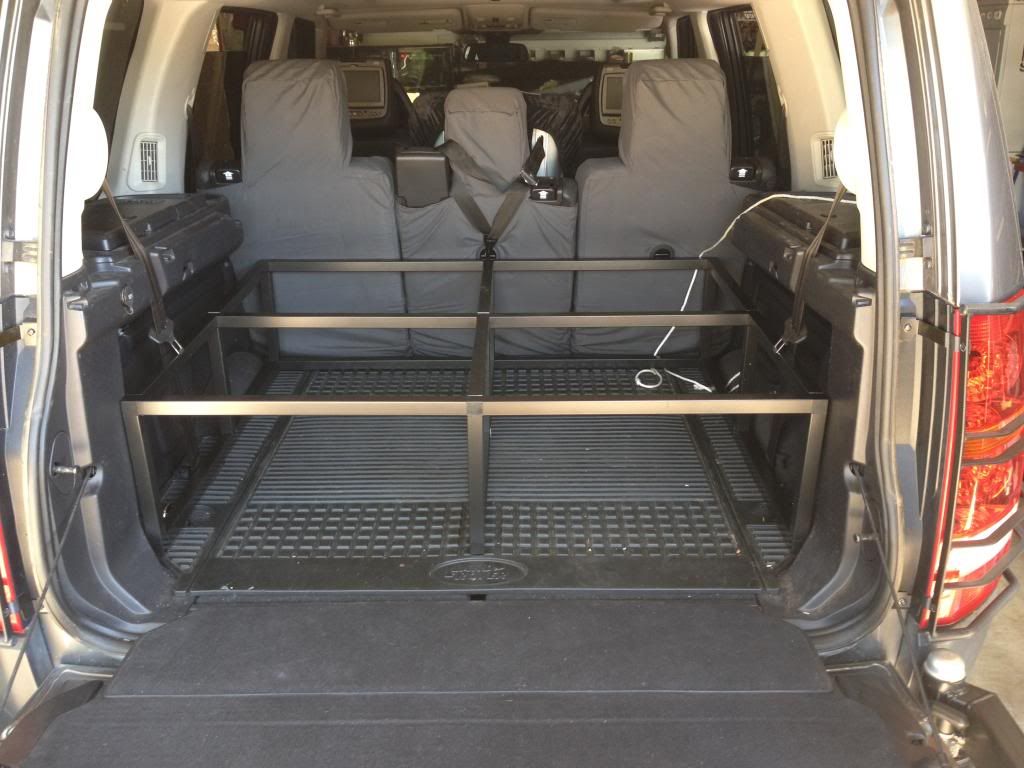
Next was to cut the aluminum tubing and build the frame:
Then add the plywood. Note I split the plywood in half width wise to allow me to remove half in case I wanted the fridge on one side but thenhad some tall items to carry on the other side:

Then add the plywood. Note I split the plywood in half width wise to allow removal of half in case I wanted the fridge on one side but then had some taller items to carry on the other side:
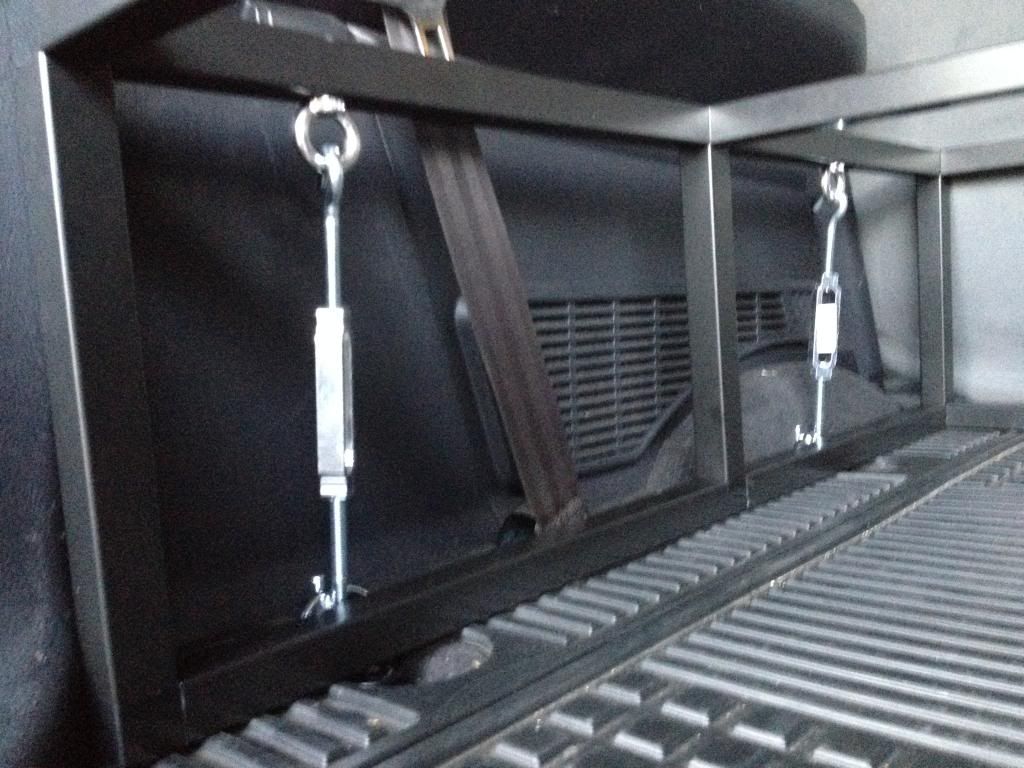
Next step was to attach the frame to the LR3's tie-down d-rings with some turn buckles. I used nut rivets to mount the eye bolts one the frame to keep the "nut" internal to the tubing:
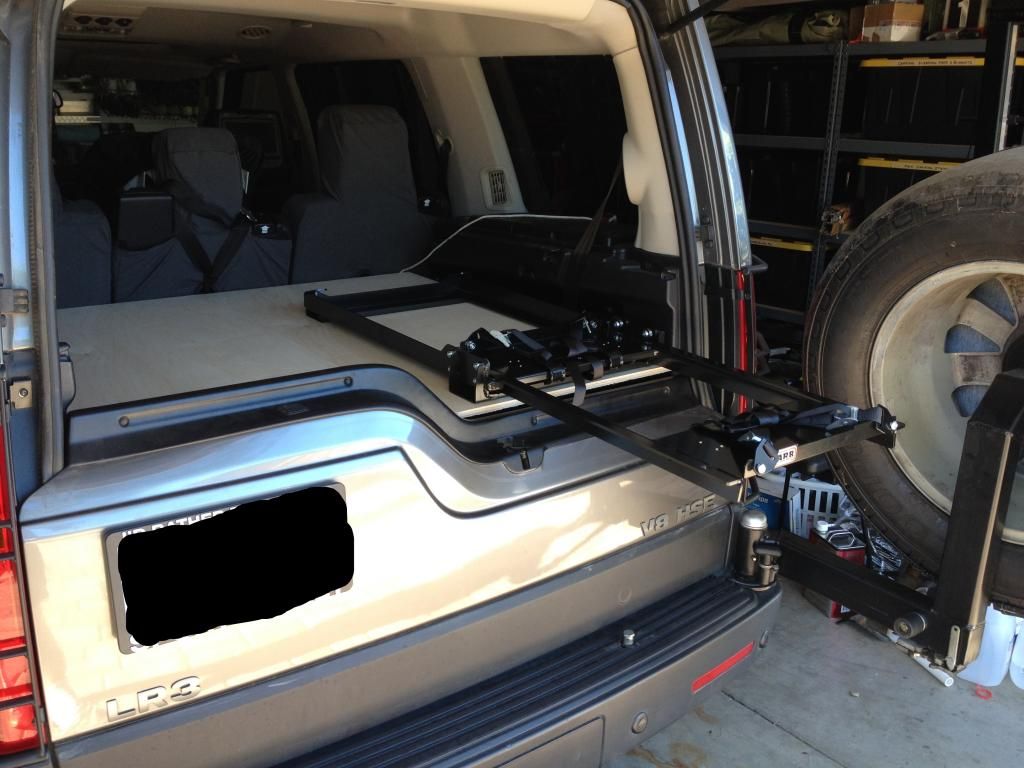
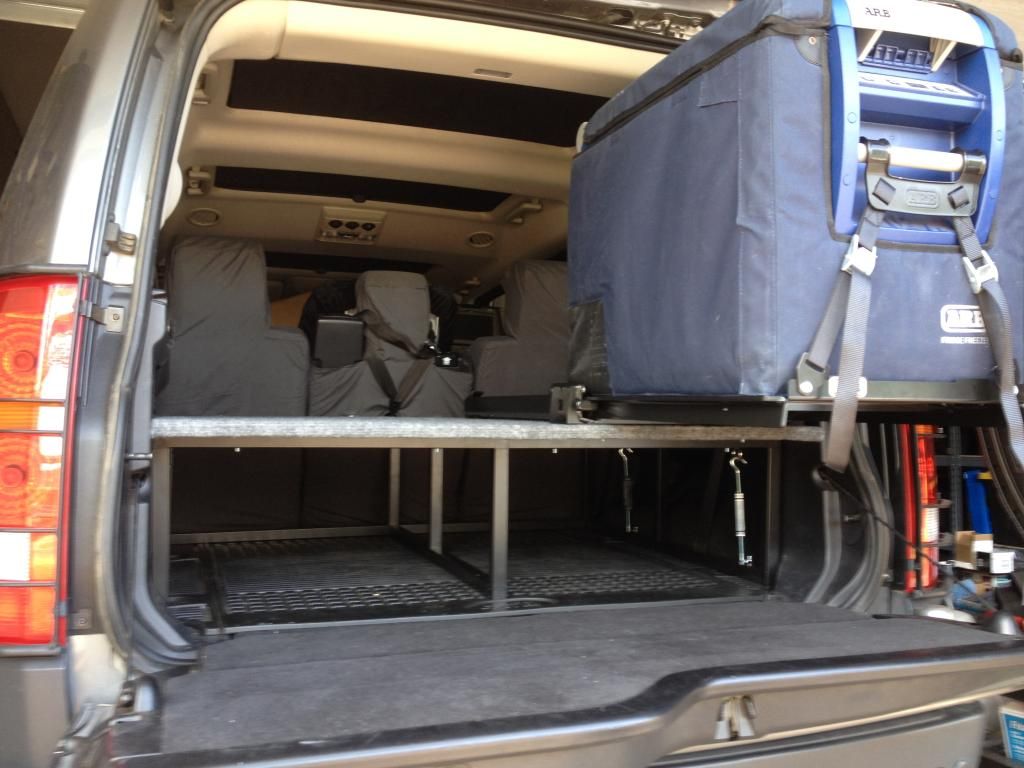
Final step was to carpet the plywood and then mount the plywood to the frame (with fanged elevator bolts...I've got shorter ones on the way so they will no longer hang below the tubing line as you can just barely see in some of the pics below) and the fridge slide to the plywood:
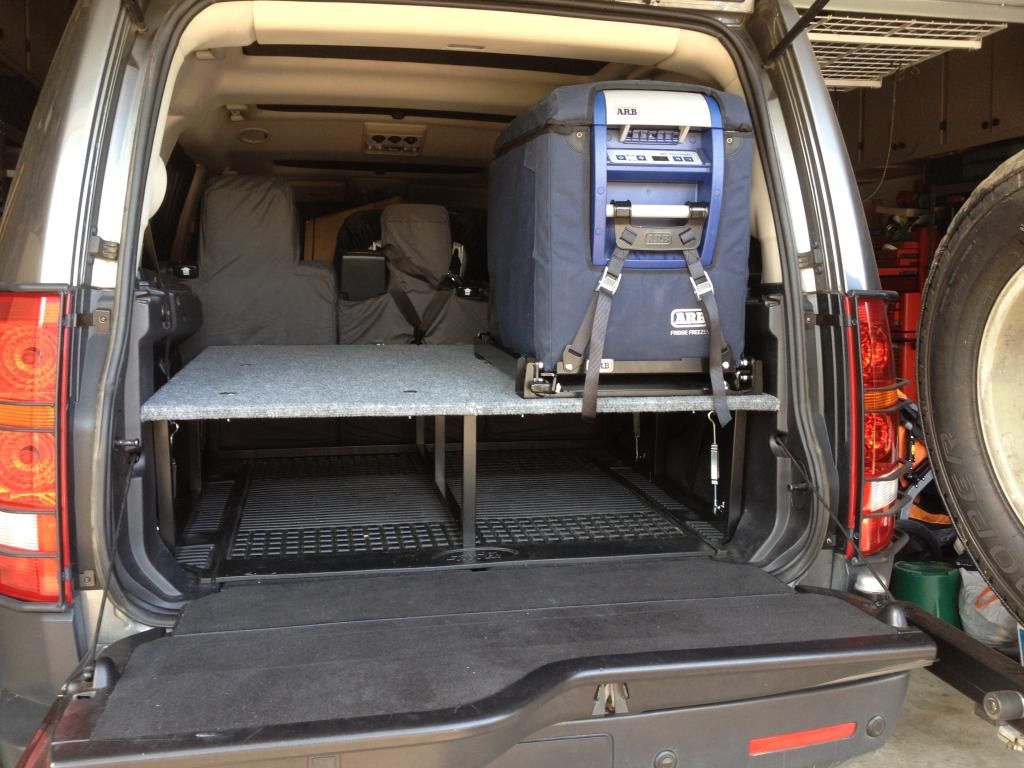
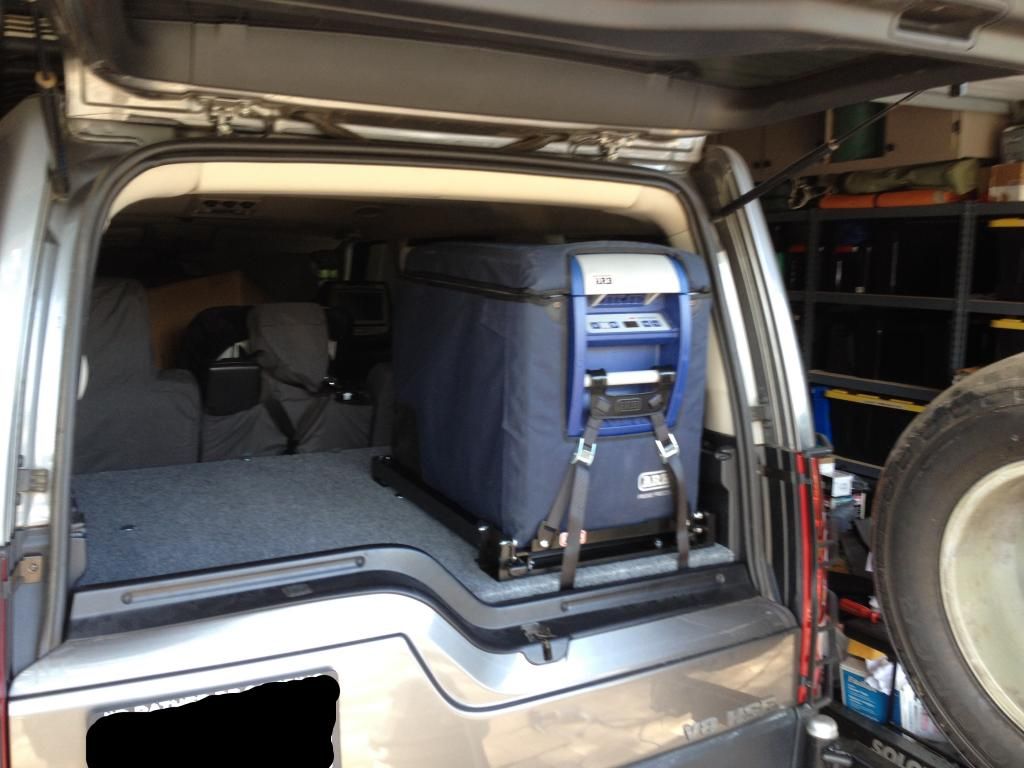
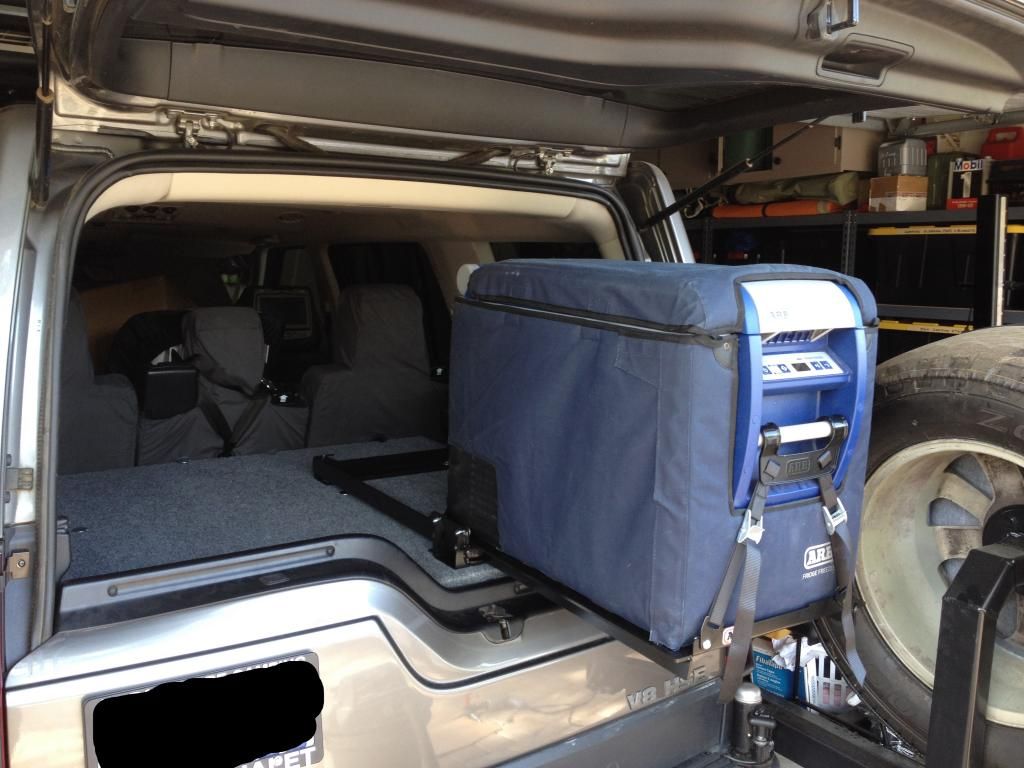
Overall I'm really happy with how it turned out. I can remove the platform in well under 5 mins...about 3 and a half to be exact. The frame itself is only 11.7 lbs. I used 1/2 plywood (Russian Birch) to keep the plywood light as well vs going with 3/4. Haven't weighed the frame with the wood attached yet, but I can easily lift it out on my own. Its little heavier with the ARB fridge slide attached, but expected given that the ARB fridge slide is very heavy and stout. If you wanted to, you could easily add draw slides and drawers to the lower frame. I'm opting not to to keep it light and will just use totes underneath.
Next will be to add a similar frame and platform for when the 2nd row of seats are folded down, but that is a bit on the back burner for now.
Jason
(1) Had to be light weight (the LR3 already weighs a lot, especially with the ARB bumper, Rover Specialties Sliders, roof rack, etc)
(2) Had to be easily removable...think under 5 mins.
(3) Had to have an OEM look/feel too it
(4) Had to be modular enough to allow for the platform to be expanded for when the 2nd row of seats is folded flat to be used as a sleeping platform (this bit is still left on the to-do list).
(5) Had to be strong enough to support a fridge and slide plus cargo or the weight of two people (for sleeping platform when needed).
The approach I took was based on a platform build by someone in Australia: http://www.aulro.com/afvb/projects-t...ng-area-2.html . Qubeloks weren't available in the US, so after some searching I found a company call eztube (www.eztube.com). The big advantage eztube has over others like Qubelok is that they offer connectors with a steel core verse glass filled nylon. Why are the steel core important? Because they will be a heck of a lot stronger and won't ever break. The only down side is they are about double the cost of the glass filled nylon connectors. I'm sure the glass filled nylon would have been up to the task, but I opted to over build it for piece of mind.
With that said, on to the build.
The first step was just to put a quick frame design on paper:


The next step was to semi mock up the frame with PVC pipe and joints. Why did I do this? Two reasons (1) to ensure I get all the right measurements, etc for a perfect fit and (2) PVC piping is ultra cheap compared to the tubing cost, so best to make all the mistakes with the PVC before cutting the expensive tubing.

Next was to cut the aluminum tubing and build the frame:

Then add the plywood. Note I split the plywood in half width wise to allow me to remove half in case I wanted the fridge on one side but thenhad some tall items to carry on the other side:


Then add the plywood. Note I split the plywood in half width wise to allow removal of half in case I wanted the fridge on one side but then had some taller items to carry on the other side:

Next step was to attach the frame to the LR3's tie-down d-rings with some turn buckles. I used nut rivets to mount the eye bolts one the frame to keep the "nut" internal to the tubing:
Final step was to carpet the plywood and then mount the plywood to the frame (with fanged elevator bolts...I've got shorter ones on the way so they will no longer hang below the tubing line as you can just barely see in some of the pics below) and the fridge slide to the plywood:


Overall I'm really happy with how it turned out. I can remove the platform in well under 5 mins...about 3 and a half to be exact. The frame itself is only 11.7 lbs. I used 1/2 plywood (Russian Birch) to keep the plywood light as well vs going with 3/4. Haven't weighed the frame with the wood attached yet, but I can easily lift it out on my own. Its little heavier with the ARB fridge slide attached, but expected given that the ARB fridge slide is very heavy and stout. If you wanted to, you could easily add draw slides and drawers to the lower frame. I'm opting not to to keep it light and will just use totes underneath.
Next will be to add a similar frame and platform for when the 2nd row of seats are folded down, but that is a bit on the back burner for now.
Jason
headhunter247
New member
For those of you with a camper shell, Im looking for a solution to a water leak. Ive spent countless hours trying to fix the leak and have given up on it.
With that being said, I still want to put some kind of drawer system in. Ive thought about putting the drawer box up on small stilts (maybe 1/2") so it wont be effected by the water. Thoughts?
With that being said, I still want to put some kind of drawer system in. Ive thought about putting the drawer box up on small stilts (maybe 1/2") so it wont be effected by the water. Thoughts?
Last edited:

Jason (perkj), that frame tubing looks great, and the platform height looks really smart. Nice job. Now if you add some Tuffy tie downs fore and aft on the platform, you'll have an uber system!
Still debating what type of tie down system I want for the platform. since part of its duty will be as a sleeping platform (once I finish the second frame for the 2nd row seat area), I don't want anything protruding upwards on the fore/aft on the platform...though maybe the sides. I have been kicking around the idea of just adding some of the stock LR3 mounting drings to the platform since they lay pretty flat and they'll make it look factory....down side is they run $15-18 a piece pre-tax and makes it an expensive path. I'll post with whatever I end up going with.
TemboTusk
Rendezvous Con
Perkj
Check out Expedition Exchange for Land Rover tie downs. LR3 Mounting D-rings Still painful, but less so.
Check out Expedition Exchange for Land Rover tie downs. LR3 Mounting D-rings Still painful, but less so.
Bmcmanus1161
New member
Know I just stuffed it all in there tight and for the top I just throw some rags to take up any extra space I had left. It doesn't make a lot of noise and it's a handy place to keep your rags that has a duel purpose. I also put it up on some 2x4's so I have some storage under the box as well
MANUCHAO
Aventurero
I bought this a long time ago at costco...

I anchor them flush to my cargo area...
Amazon has them for cheap....
http://www.amazon.com/Pit-Posse-ALUMINUM-S-TRACK/dp/B004SIE4YI/ref=pd_bxgy_auto_img_y
I also use this bolt hanger from metolius (climbing equipment...) cant go wrong for $4

One is bolted to my tire carrier..for when there is no trees and I want to use the hammock...... works great !!!
I anchor them flush to my cargo area...
Amazon has them for cheap....
http://www.amazon.com/Pit-Posse-ALUMINUM-S-TRACK/dp/B004SIE4YI/ref=pd_bxgy_auto_img_y
I also use this bolt hanger from metolius (climbing equipment...) cant go wrong for $4
One is bolted to my tire carrier..for when there is no trees and I want to use the hammock...... works great !!!


Yuman Desert Rat
Expedition Leader
very nice!!

Forum statistics
Members online
- FJRanger
- Pathmaster
- Kamikazee494
- Bigc3031
- Tharnacle
- Czechsix
- timohardin
- claymond
- 1MK
- hbabler
- kwhitham
- (none)
- Trailboss
- MP@HOME
- ARDOR
- osukj04
- SeattleRunner
- rcintx
- HuskyRider
- drudru
- Goatdog
- 4cruzer
- ocex
- LikeABoss
- Golden Hind
- hankgs
- whith
- joxeph
- rawtoxic
- Dougnuts
- phasenine
- Michael Crouch
- tlin
- LordExplorer
- Hotshotliving
- rdrop
- McCarthy
- scottwstevenson
- Bnickelson
- Red90
- murryconst
- Geared4adventure
- yondermountain
- Raul
- Delsh
- webfoots
- bigsam
Total: 855 (members: 54, guests: 801)