You are using an out of date browser. It may not display this or other websites correctly.
You should upgrade or use an alternative browser.
You should upgrade or use an alternative browser.
Post up your drawer/storage system
- Thread starter neliconcept
- Start date
60Dan
Explorer
They're in production for the 100...
View attachment 232559
Sorry I meant to say production of the 80 series - can't wait to see what you come up with!
Herbie
Rendezvous Conspirator
Any one considering a purchase of a drawer system has to consider the TrekBoxx. I've seen the system in field testing and as a ARB / Outback Solutions drawer owner I'm seriously considering switching to TrekBoxx - They are that nice!
They sure are proud of those. Look very functional, but nearly $2k for a pair of drawers is beyond my budget.
Every Miles A Memory
Expedition Leader
Cool Link to a guys van set-up! I thought a few of you might get some ideas off of it
http://cornishben.smugmug.com/General/The-Van-Conversion/
http://cornishben.smugmug.com/General/The-Van-Conversion/
MOAK
Adventurer
Finally finished my drawers. Added the sides, on the lower left is our 800 watt inverter, and on the lower right a 350 watt powered sub,, I thought about adding carpeting but so far, no one has twisted my arm to do so.. The second row seats come up level to the drawers, with the aid of a wood spacer beneath the rear of each seat..
Attachments

southpier
Expedition Leader
Cool Link to a guys van....
good one; thanks
Perkj- super cool. I have been thinking about something just like this. I have a setup I built from 1x10s and 3/4" ply int he back of my 4runner, but it's heavy. Looking forward to seeing the rest of the build out. Have you weighed the top yet? Any idea how much all the tubing and fittings cost?
I've finally got around to completing my rear hatch area storage platform in my LR3. The goals for this platform were:
(1) Had to be light weight (the LR3 already weighs a lot, especially with the ARB bumper, Rover Specialties Sliders, roof rack, etc)
(2) Had to be easily removable...think under 5 mins.
(3) Had to have an OEM look/feel too it
(4) Had to be modular enough to allow for the platform to be expanded for when the 2nd row of seats is folded flat to be used as a sleeping platform (this bit is still left on the to-do list).
(5) Had to be strong enough to support a fridge and slide plus cargo or the weight of two people (for sleeping platform when needed).
The approach I took was based on a platform build by someone in Australia: http://www.aulro.com/afvb/projects-t...ng-area-2.html . Qubeloks weren't available in the US, so after some searching I found a company call eztube (www.eztube.com). The big advantage eztube has over others like Qubelok is that they offer connectors with a steel core verse glass filled nylon. Why are the steel core important? Because they will be a heck of a lot stronger and won't ever break. The only down side is they are about double the cost of the glass filled nylon connectors. I'm sure the glass filled nylon would have been up to the task, but I opted to over build it for piece of mind.
With that said, on to the build.
The first step was just to put a quick frame design on paper:


The next step was to semi mock up the frame with PVC pipe and joints. Why did I do this? Two reasons (1) to ensure I get all the right measurements, etc for a perfect fit and (2) PVC piping is ultra cheap compared to the tubing cost, so best to make all the mistakes with the PVC before cutting the expensive tubing.
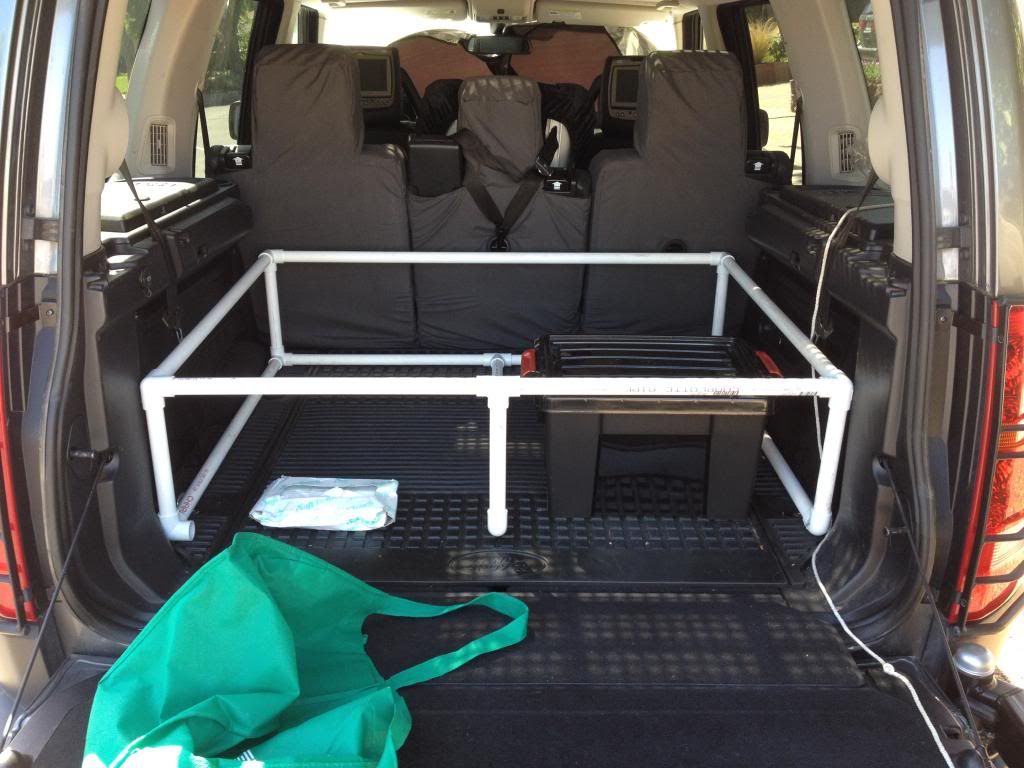
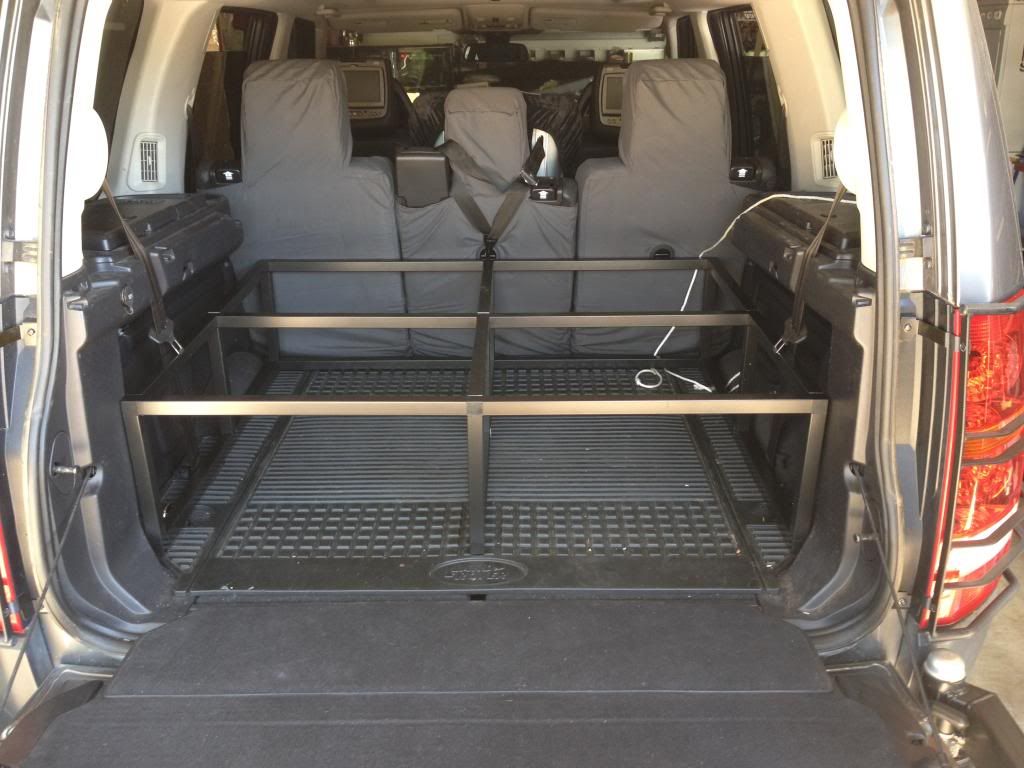
Next was to cut the aluminum tubing and build the frame:
Then add the plywood. Note I split the plywood in half width wise to allow me to remove half in case I wanted the fridge on one side but thenhad some tall items to carry on the other side:

Then add the plywood. Note I split the plywood in half width wise to allow removal of half in case I wanted the fridge on one side but then had some taller items to carry on the other side:
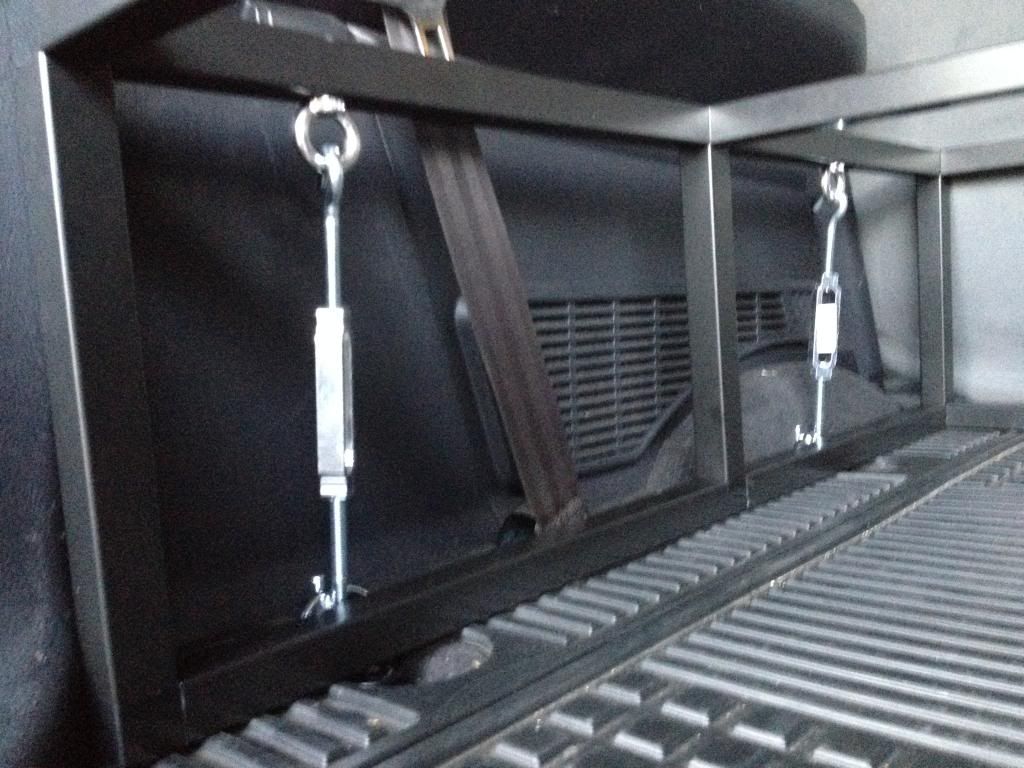
Next step was to attach the frame to the LR3's tie-down d-rings with some turn buckles. I used nut rivets to mount the eye bolts one the frame to keep the "nut" internal to the tubing:
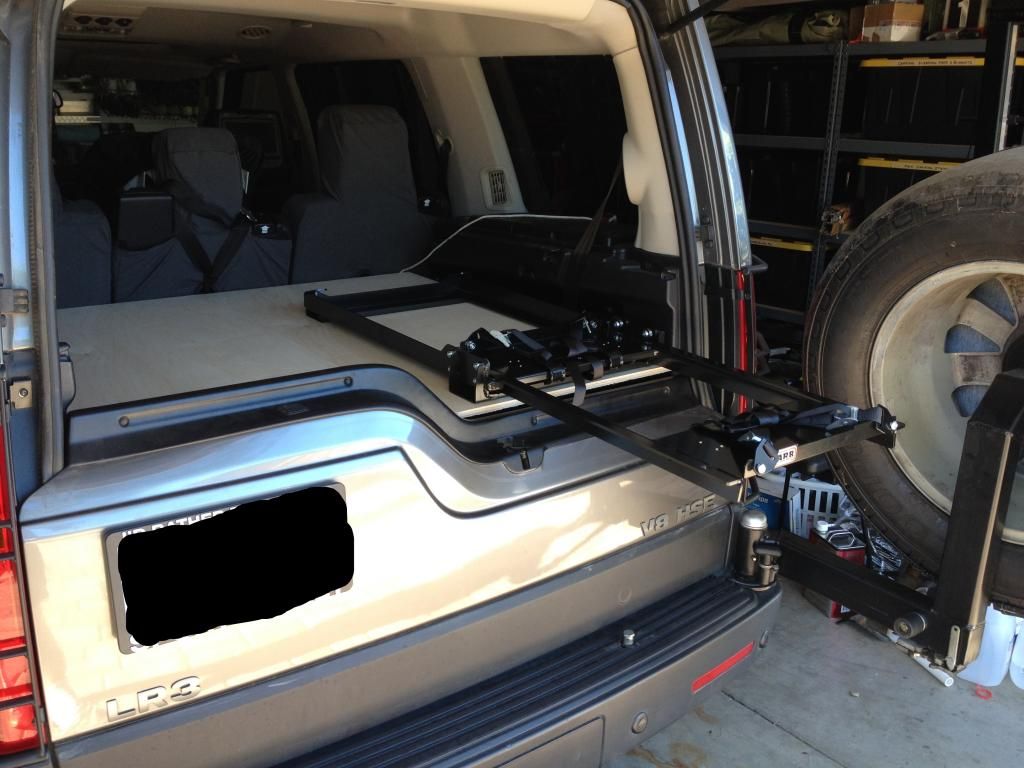
Final step was to carpet the plywood and then mount the plywood to the frame (with fanged elevator bolts...I've got shorter ones on the way so they will no longer hang below the tubing line as you can just barely see in some of the pics below) and the fridge slide to the plywood:
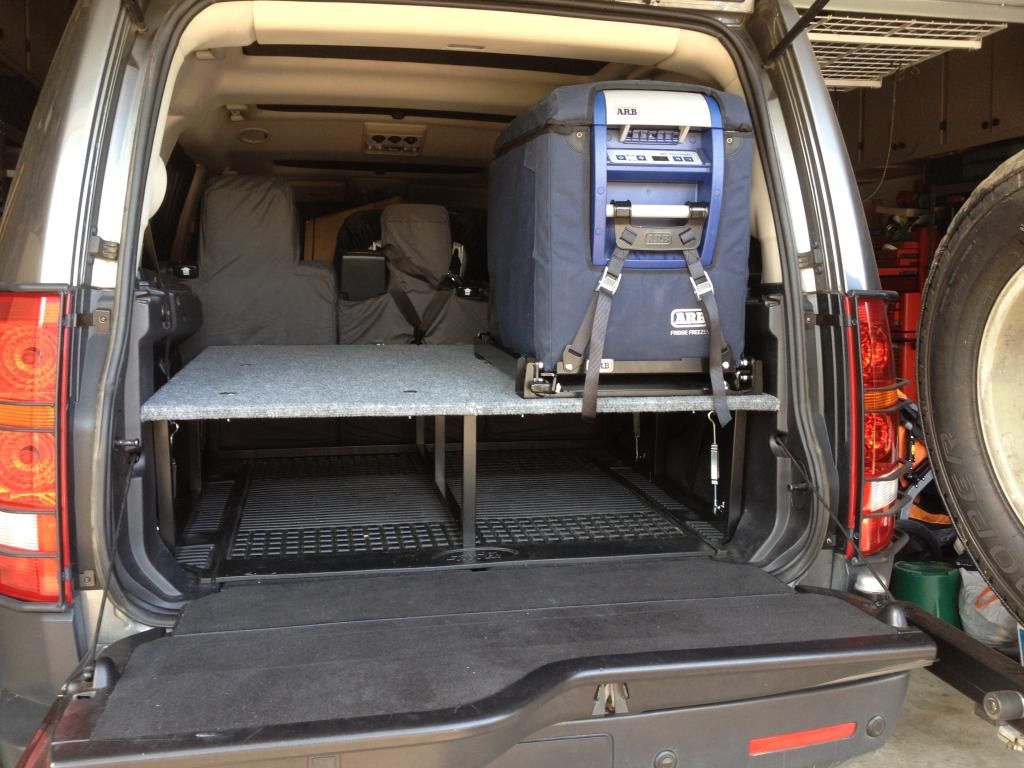
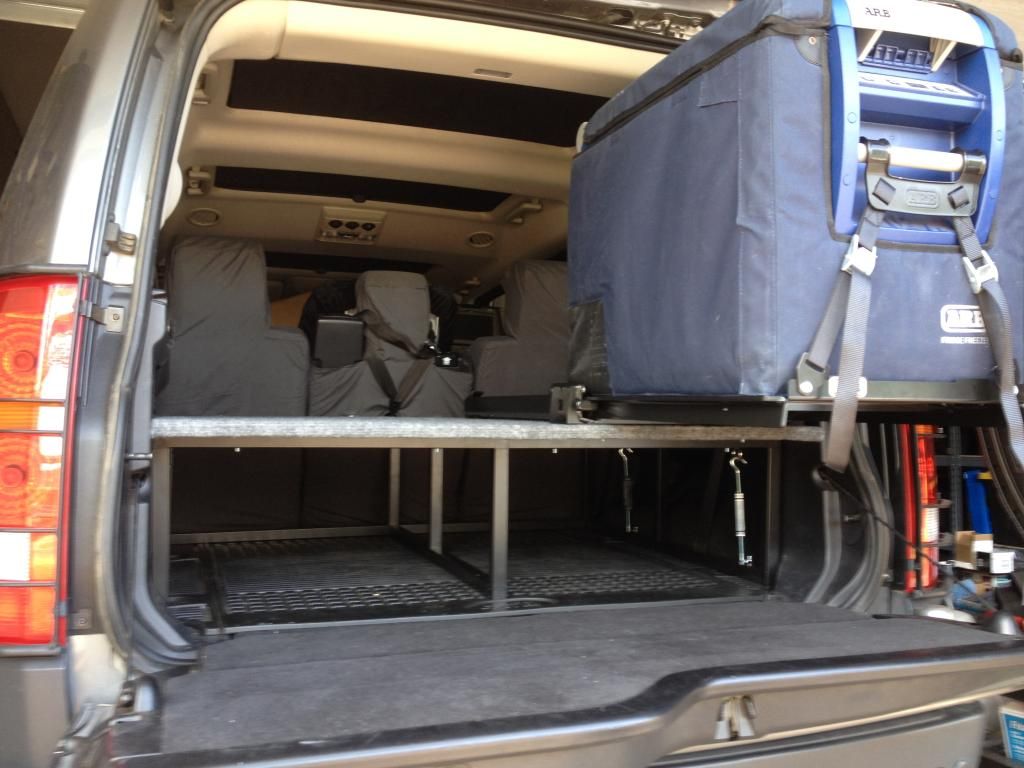
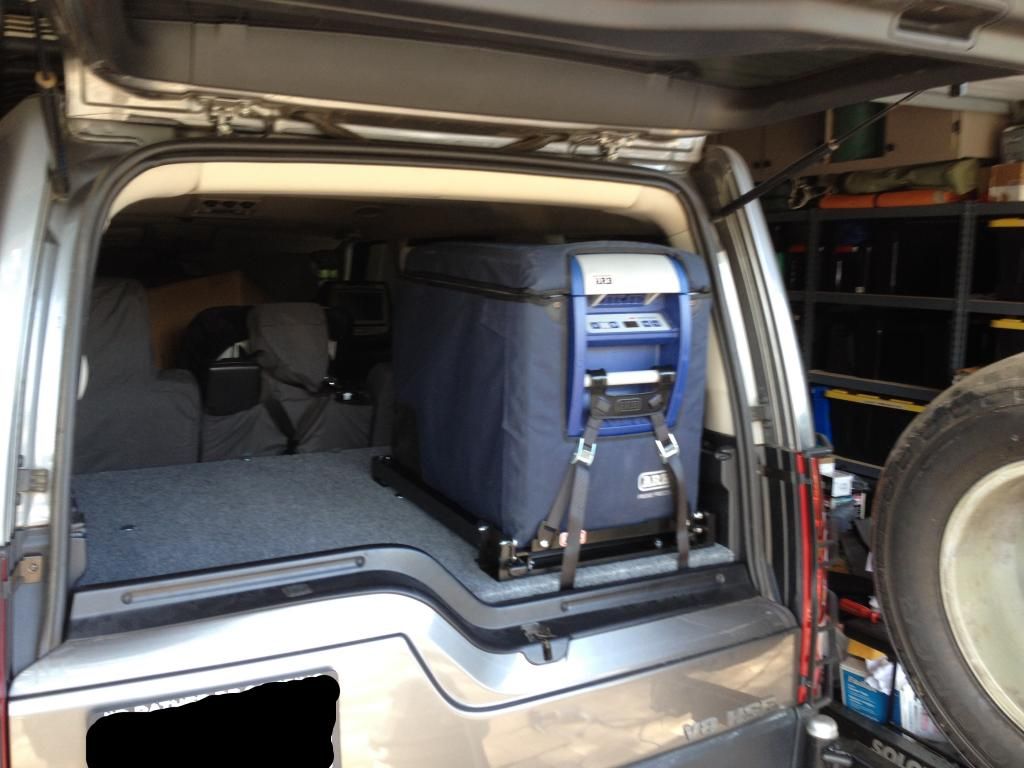
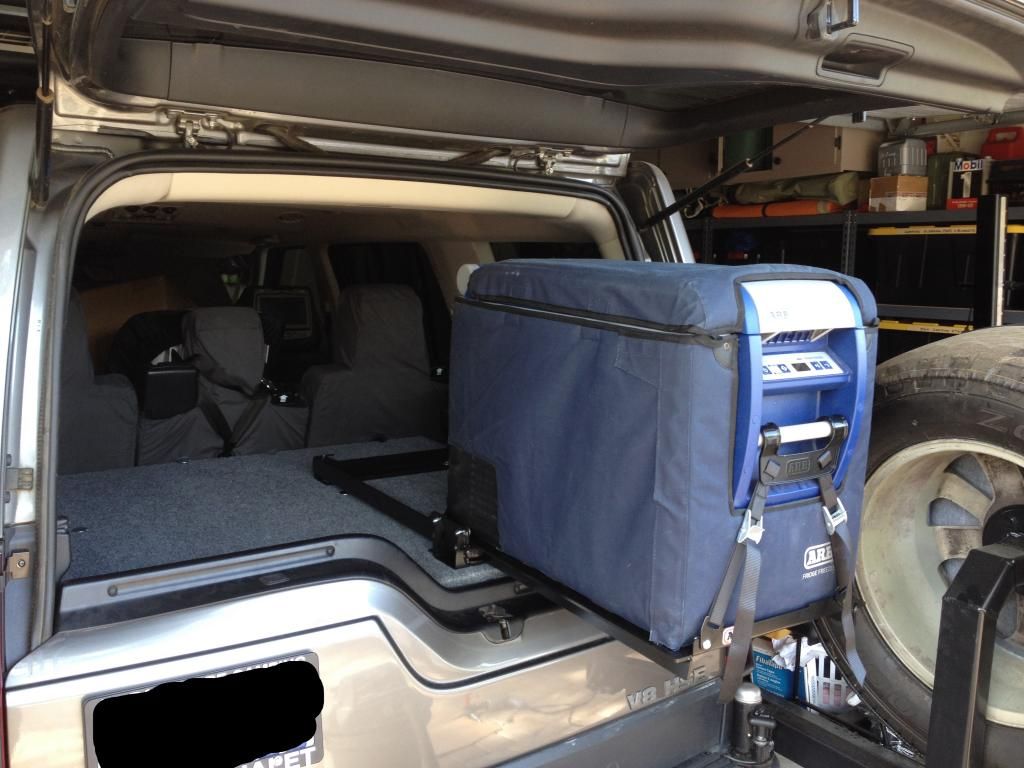
Overall I'm really happy with how it turned out. I can remove the platform in well under 5 mins...about 3 and a half to be exact. The frame itself is only 11.7 lbs. I used 1/2 plywood (Russian Birch) to keep the plywood light as well vs going with 3/4. Haven't weighed the frame with the wood attached yet, but I can easily lift it out on my own. Its little heavier with the ARB fridge slide attached, but expected given that the ARB fridge slide is very heavy and stout. If you wanted to, you could easily add draw slides and drawers to the lower frame. I'm opting not to to keep it light and will just use totes underneath.
Next will be to add a similar frame and platform for when the 2nd row of seats are folded down, but that is a bit on the back burner for now.
Jason


So that's why the Disco's rear hatch is that way. I always wondered. Never would have thought if was for a fridge slide.
")
sharalds
Montana
1990 Land Cruiser FJ62
All scrap lumber with about $15 worth of hardware to hold it all together. Sleeping platform is 75" deep by 53" wide, has room for an 11" tall storage container below and provides about 28" of clearance to the ceiling. Design allows for the back seat to be either folded down or upright for passengers without requiring removal of the entire platform.
I built this as a prototype to see if my wife and I like this style of sleeping. I'm 6'-3" so I require a platform that reaches into the front of the cab, over the folded-up seat. If this system works I may re-build using lighter lumber (or steel) and more refined, space-saving techniques to maximize headroom and cargo capacity.
Beamer pilot
Explorer
View attachment 233939[/QUOTE]
Now that's what I call "solid" and no need for air freshener with all that spruce. Lol.
I had a similar set up in my Cherokee, a word of advice...don't sit up too quickly in the middle of the night !!!
Now that's what I call "solid" and no need for air freshener with all that spruce. Lol.
I had a similar set up in my Cherokee, a word of advice...don't sit up too quickly in the middle of the night !!!
sharalds
Montana
...don't sit up too quickly in the middle of the night !!!
28" of clearance as built - add in a mattress and it's going to start getting a little bit tight in there.
Hondarepairman
New member


Playing around with sketchup, but I think I like the design. Im sure the 100 series guys will understand the reason for the sub.
I really wish I could figure out sketchup
Amen to that!
I can't seem to get anywhere with it and I'm a bloody software developer! Some parts of my brain are apparently not interconnected.
Hondarepairman
New member
YouTube and a weekend. That's what I did. Just remember "groups" are your best friend.
Forum statistics
Members online
- Clrussell
- Mud Dawg
- terry4130
- sabjku
- Kevint888
- obi-1 kenobi
- gator70
- g_m
- JCAnthony
- ChrisCosta416
- yamaha225
- Alwaysstranded
- FreedomRides
- gglockner
- MisterSmith
- jeep-geek
- Rudy13
- marcantoine77
- Deleted Member 183
- sterlryu
- JdubyaConcepts
- Homer Crimson
- Rolo1738
- DriftingOverland
- Ikarus
- mcgovski
- Imgoingonanadvencha
- lithium1330
- mark5280
- timtyler
- Pool0202
- dizzydom
- smokeysevin
- EW6
- Windaroo
- White Dog
- tyler.armijo
- Geoyota82
- ATXLandr
- wfv56
- svmaple
- BlueRidgeRunner
- Montero_cruz
- LivinAnAdvntr
- wazzubob
- Bergger
- red87
Total: 913 (members: 51, guests: 862)