You are using an out of date browser. It may not display this or other websites correctly.
You should upgrade or use an alternative browser.
You should upgrade or use an alternative browser.
Post up your drawer/storage system
- Thread starter neliconcept
- Start date


Accessory Man
New member
I love the window grates, wanting to do something similiar in my bronco eventually, but I want to incorporate the rear panels for long storage of fishing rods and rifles... very nice!
fireball
Explorer
View attachment 235149View attachment 235142
Playing around with sketchup, but I think I like the design. Im sure the 100 series guys will understand the reason for the sub. View attachment 235149
lostworldexpedition
Explorer
Genius MANUCHAO!I anchor them flush to my cargo area...
Amazon has them for cheap....
http://www.amazon.com/Pit-Posse-ALUMINUM-S-TRACK/dp/B004SIE4YI/ref=pd_bxgy_auto_img_y
I also use this bolt hanger from metolius (climbing equipment...) cant go wrong for $4

One is bolted to my tire carrier..for when there is no trees and I want to use the hammock...... works great !!!
YouTube and a weekend. That's what I did. Just remember "groups" are your best friend.
I would recommend - depending on what you are doing - that you use components rather than groups.
Basically - if you have duplicate pieces (say a left and right side of a drawer) those could be the same component - that way if you needed to make the drawer depth longer or height taller you only edit the component once and all the instances change.
The other benefit of components is that SketchUp only has to "remember" the geometry once, whereas when using groups, each instance is unique and adds to the model weight.
Hondarepairman
New member
⬆️ This is true. My build had little use for compoinets. Maybe I should have said "GOOD" friends:sombrero:
Chris Cordes
Expedition Leader
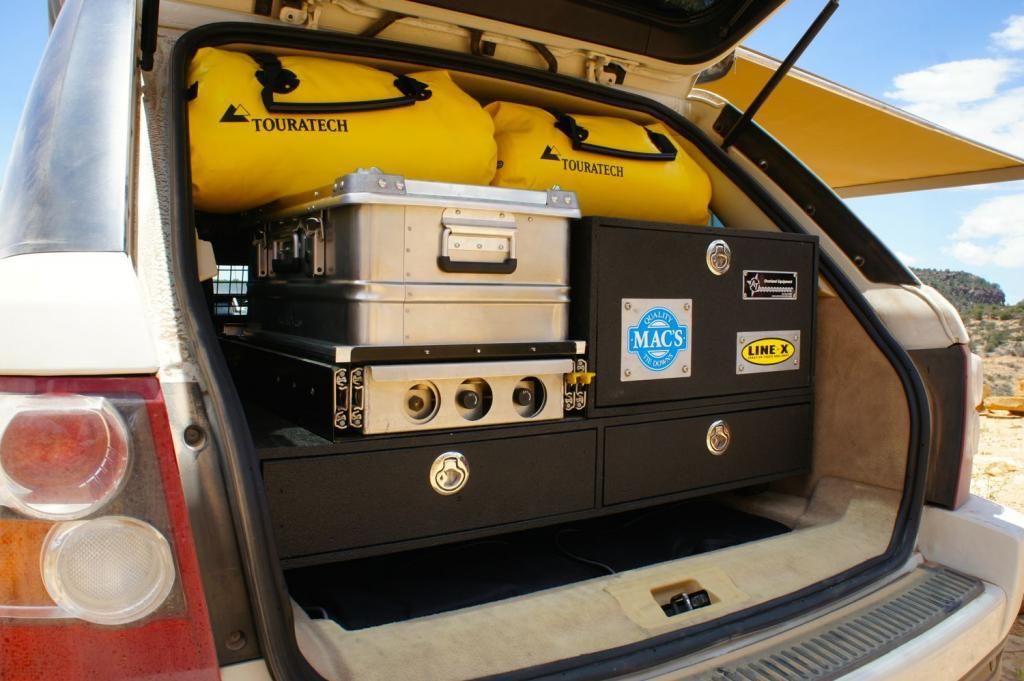
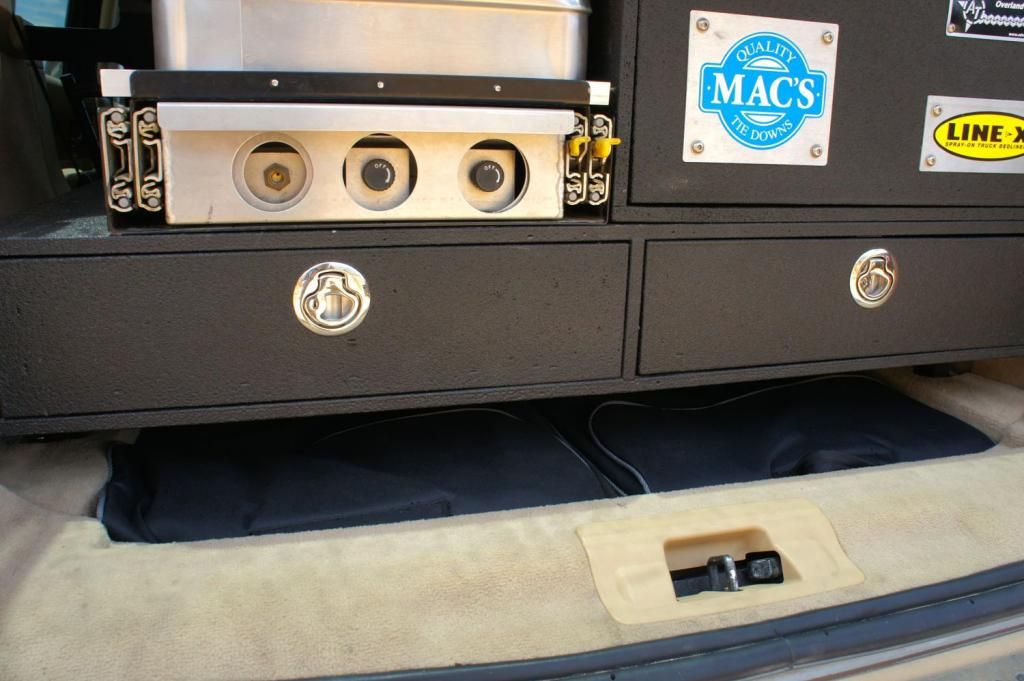
Heres my latest version. Used a set of prototype AT drawers which were cut down to be a little short on the large right side one. We then removed all the spare crud covering the empty space under the cargo panel (mostly where the stock LR tool set should be if it was there) to create more storage space. Then we built cross bars to hold the drawers up for extra storage underneath and bolted those crossbars to the stock tie down points for easy removal and no body modification. I can fit two camp chairs, a table, and a few other things under the drawers. The Alubox mounted to my stove slide is my kitchen box and works quite well.


Yuman Desert Rat
Expedition Leader
its a partner steel stove. custom made for Adventure Trailers for their slide out. its on their website.
chrisyleigh
New member
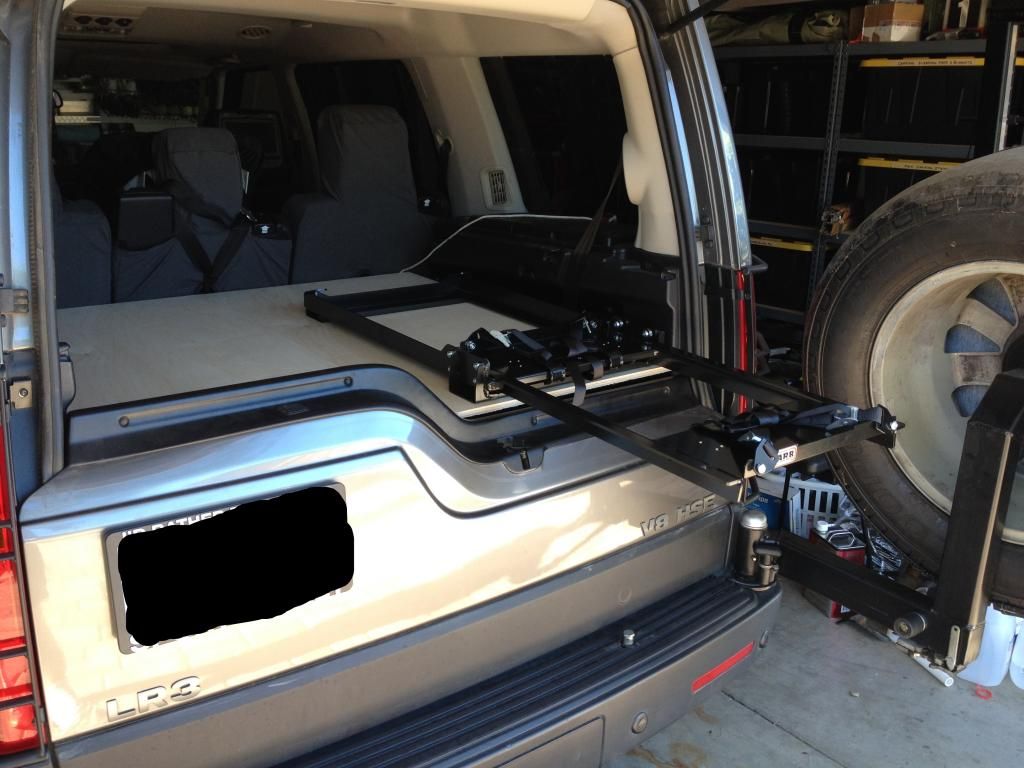
Seeing this a few weeks ago an thought it was a great idea so I started messing around and planningI've finally got around to completing my rear hatch area storage platform in my LR3. The goals for this platform were:
(1) Had to be light weight (the LR3 already weighs a lot, especially with the ARB bumper, Rover Specialties Sliders, roof rack, etc)
(2) Had to be easily removable...think under 5 mins.
(3) Had to have an OEM look/feel too it
(4) Had to be modular enough to allow for the platform to be expanded for when the 2nd row of seats is folded flat to be used as a sleeping platform (this bit is still left on the to-do list).
(5) Had to be strong enough to support a fridge and slide plus cargo or the weight of two people (for sleeping platform when needed).
The approach I took was based on a platform build by someone in Australia: http://www.aulro.com/afvb/projects-t...ng-area-2.html . Qubeloks weren't available in the US, so after some searching I found a company call eztube (www.eztube.com). The big advantage eztube has over others like Qubelok is that they offer connectors with a steel core verse glass filled nylon. Why are the steel core important? Because they will be a heck of a lot stronger and won't ever break. The only down side is they are about double the cost of the glass filled nylon connectors. I'm sure the glass filled nylon would have been up to the task, but I opted to over build it for piece of mind.
With that said, on to the build.
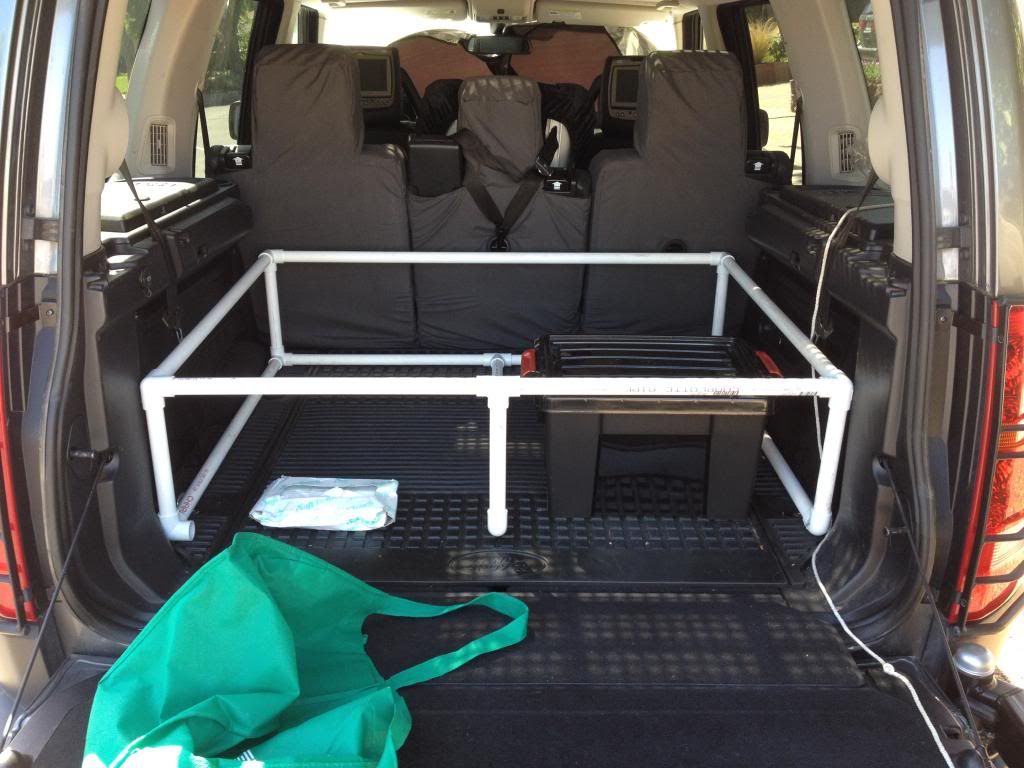
The first step was just to put a quick frame design on paper:


The next step was to semi mock up the frame with PVC pipe and joints. Why did I do this? Two reasons (1) to ensure I get all the right measurements, etc for a perfect fit and (2) PVC piping is ultra cheap compared to the tubing cost, so best to make all the mistakes with the PVC before cutting the expensive tubing.
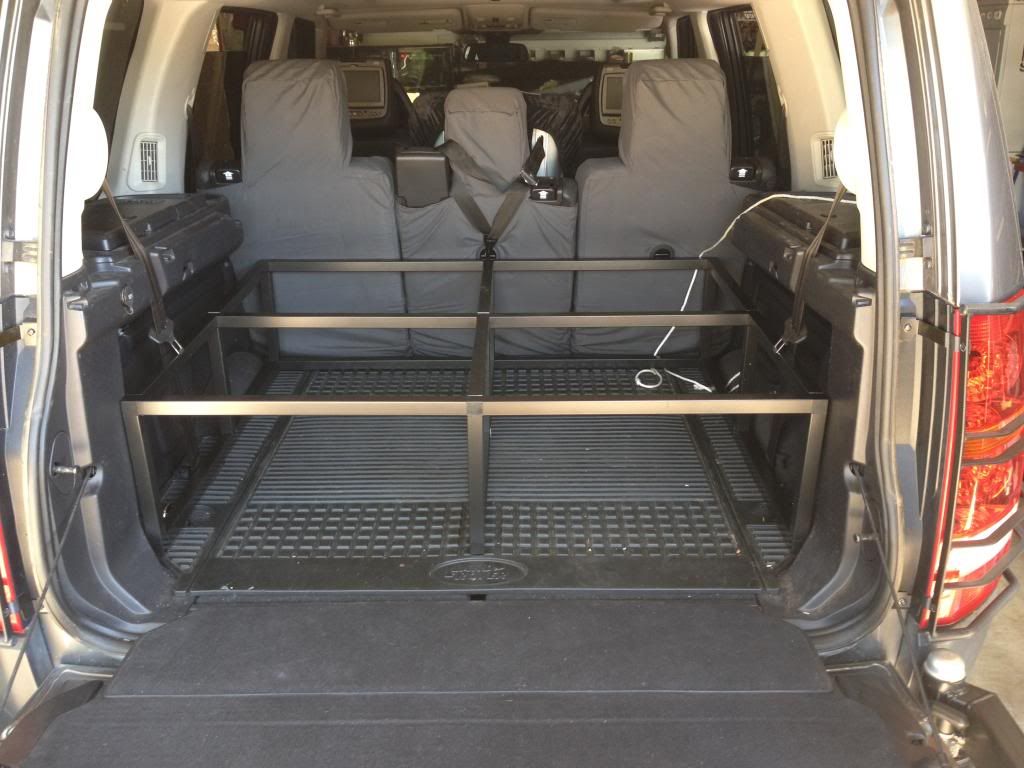
Next was to cut the aluminum tubing and build the frame:
Then add the plywood. Note I split the plywood in half width wise to allow me to remove half in case I wanted the fridge on one side but thenhad some tall items to carry on the other side:

Then add the plywood. Note I split the plywood in half width wise to allow removal of half in case I wanted the fridge on one side but then had some taller items to carry on the other side:
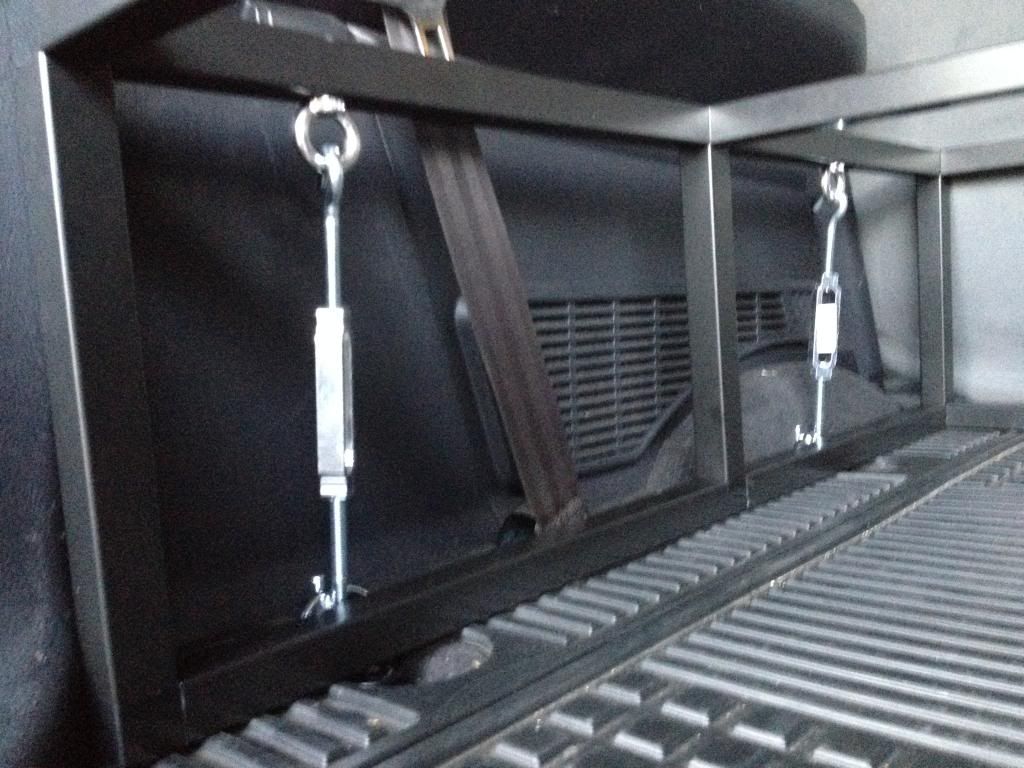
Next step was to attach the frame to the LR3's tie-down d-rings with some turn buckles. I used nut rivets to mount the eye bolts one the frame to keep the "nut" internal to the tubing:
Final step was to carpet the plywood and then mount the plywood to the frame (with fanged elevator bolts...I've got shorter ones on the way so they will no longer hang below the tubing line as you can just barely see in some of the pics below) and the fridge slide to the plywood:
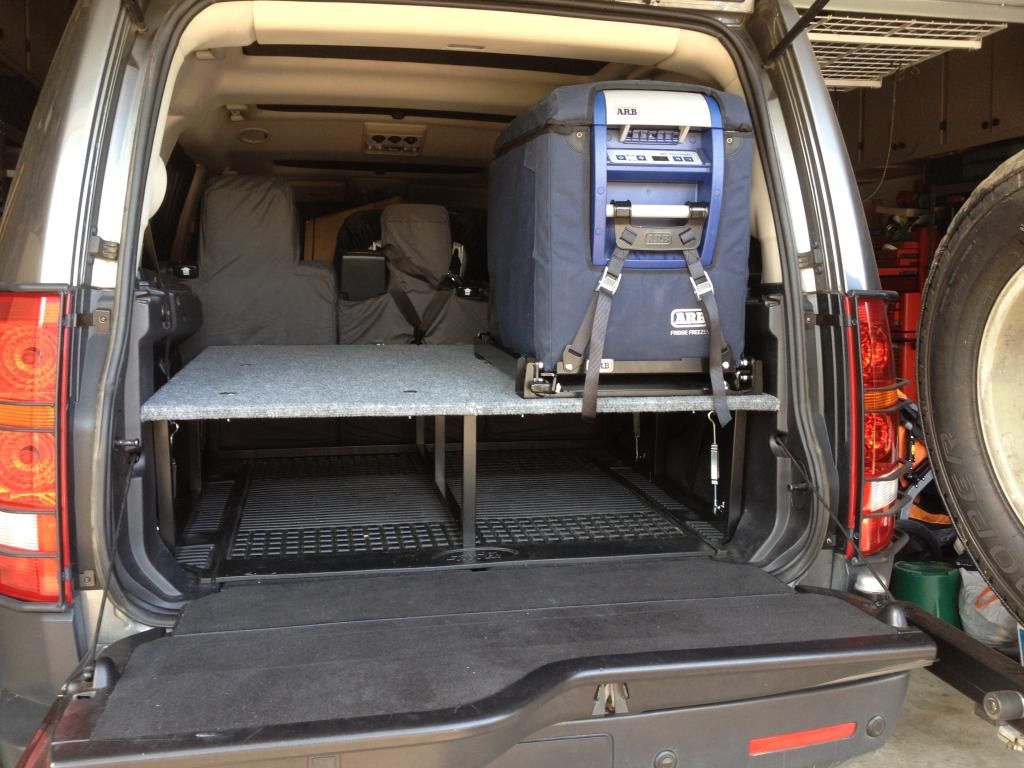
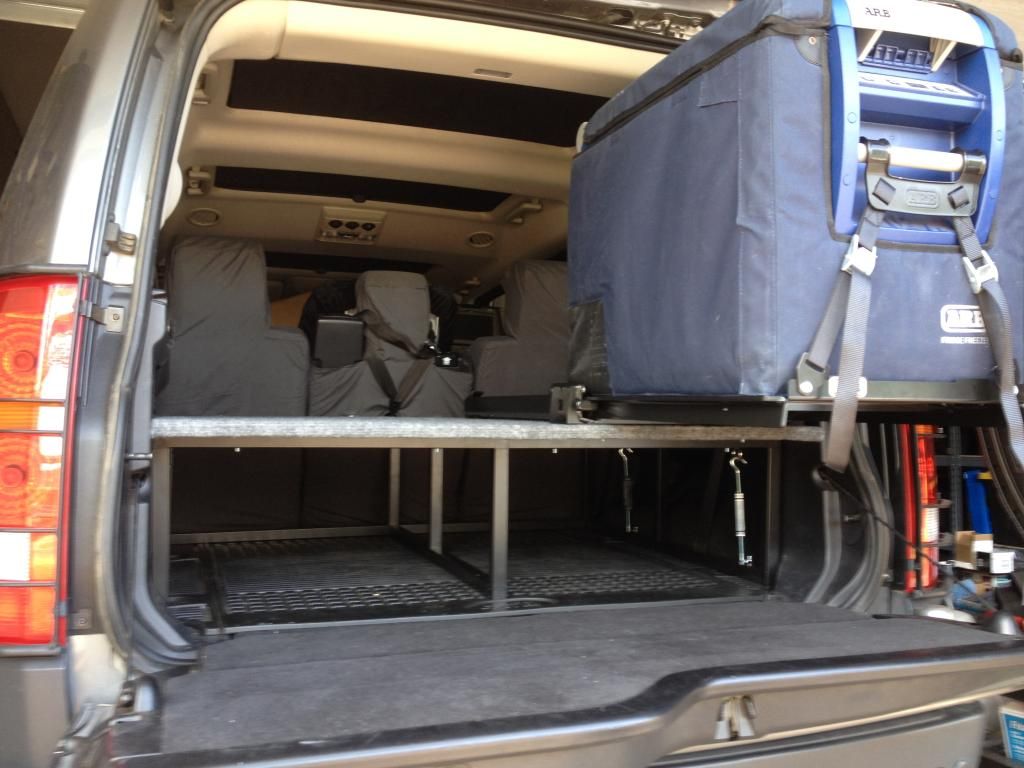
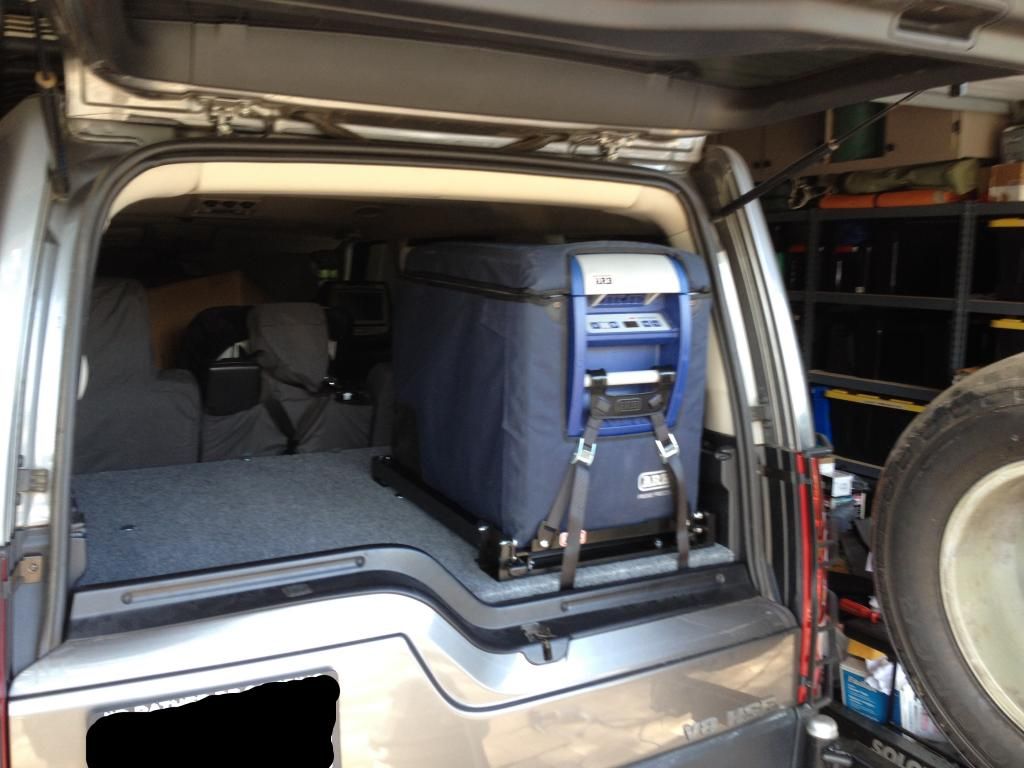
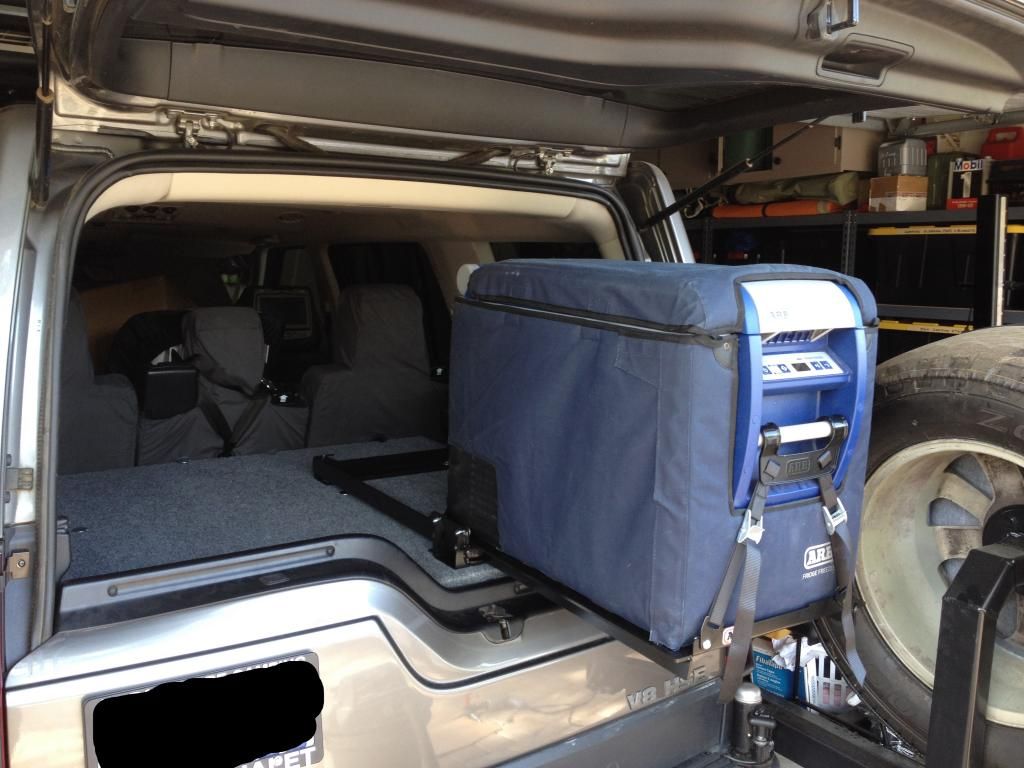
Overall I'm really happy with how it turned out. I can remove the platform in well under 5 mins...about 3 and a half to be exact. The frame itself is only 11.7 lbs. I used 1/2 plywood (Russian Birch) to keep the plywood light as well vs going with 3/4. Haven't weighed the frame with the wood attached yet, but I can easily lift it out on my own. Its little heavier with the ARB fridge slide attached, but expected given that the ARB fridge slide is very heavy and stout. If you wanted to, you could easily add draw slides and drawers to the lower frame. I'm opting not to to keep it light and will just use totes underneath.
Next will be to add a similar frame and platform for when the 2nd row of seats are folded down, but that is a bit on the back burner for now.
Jason


and only just started it this weekend the frame is so light and brilliant idea .

basicly on one side up to the window theres going to be a storage box type thing the other side is going to be flat but able to lift up to access underneath , wanting to keep the middle seats so the rest will fold onto the seats when there folded down and the dog guard is easily removed
measures 6ft by 4ft when folded out
chrisyleigh
New member
Yer sure this company http://www.tradesystems.co.uk/
In the uk think for the frame its cost about £120 4x3meter lengths and all the connections that are steel core , reason I did the frame is malny weight and because its in a 110 ,water haha
In the uk think for the frame its cost about £120 4x3meter lengths and all the connections that are steel core , reason I did the frame is malny weight and because its in a 110 ,water haha
Shaun.h.123
New member
Made this this weekend first project turning the Liberty into a dd/ mild expo rig. I would have loved to do the fram with square alum but just wasnt in the budget. Most of the materials I had on hand. Has single front drawer with 2 small cubbys on the sides and lockable storage in the center that runs the whole width, and a cubby behid rear seats.
Before, during, and after


Before, during, and after
Forum statistics
Members online
- TonyCatmandu
- tjbrubi
- One shot
- forty5thparallel
- npstone
- Hyde
- Pntyrmvr
- TKM101
- jaxyaks
- Hopson
- sndohio89
- BlueLeader
- JdubyaConcepts
- marmotguy
- ccrly
- CoryQuackenbush
- Rebuilder
- highwest
- DorB
- jcreswell
- Adventr.us
- ChrisCosta416
- halseyt
- Mules
- gfmale
- Mac95
- Taran Egner
- Todd34
- Robbus
- MrGrodskyi
- al415
- swanyo
- nwoodworth1390
- Roger M.
- gabrielef
- rainroger
- jsandefu
- Cjground
- Verkstad
- matttahoe53
- Deleted Member 183
- jeventures
- topofpalomar
- toddjordan22
- discodisco
- ebrabaek
- blacklbzbeauty
- Martin480
- Spatch
- McTJ
Total: 994 (members: 56, guests: 938)