Well, Update #1 from a couple posts up commenced on 4/16/16. We were all loaded up and headed out of town toward out first camping spot in CT on our way to North Carolina without too much issue.
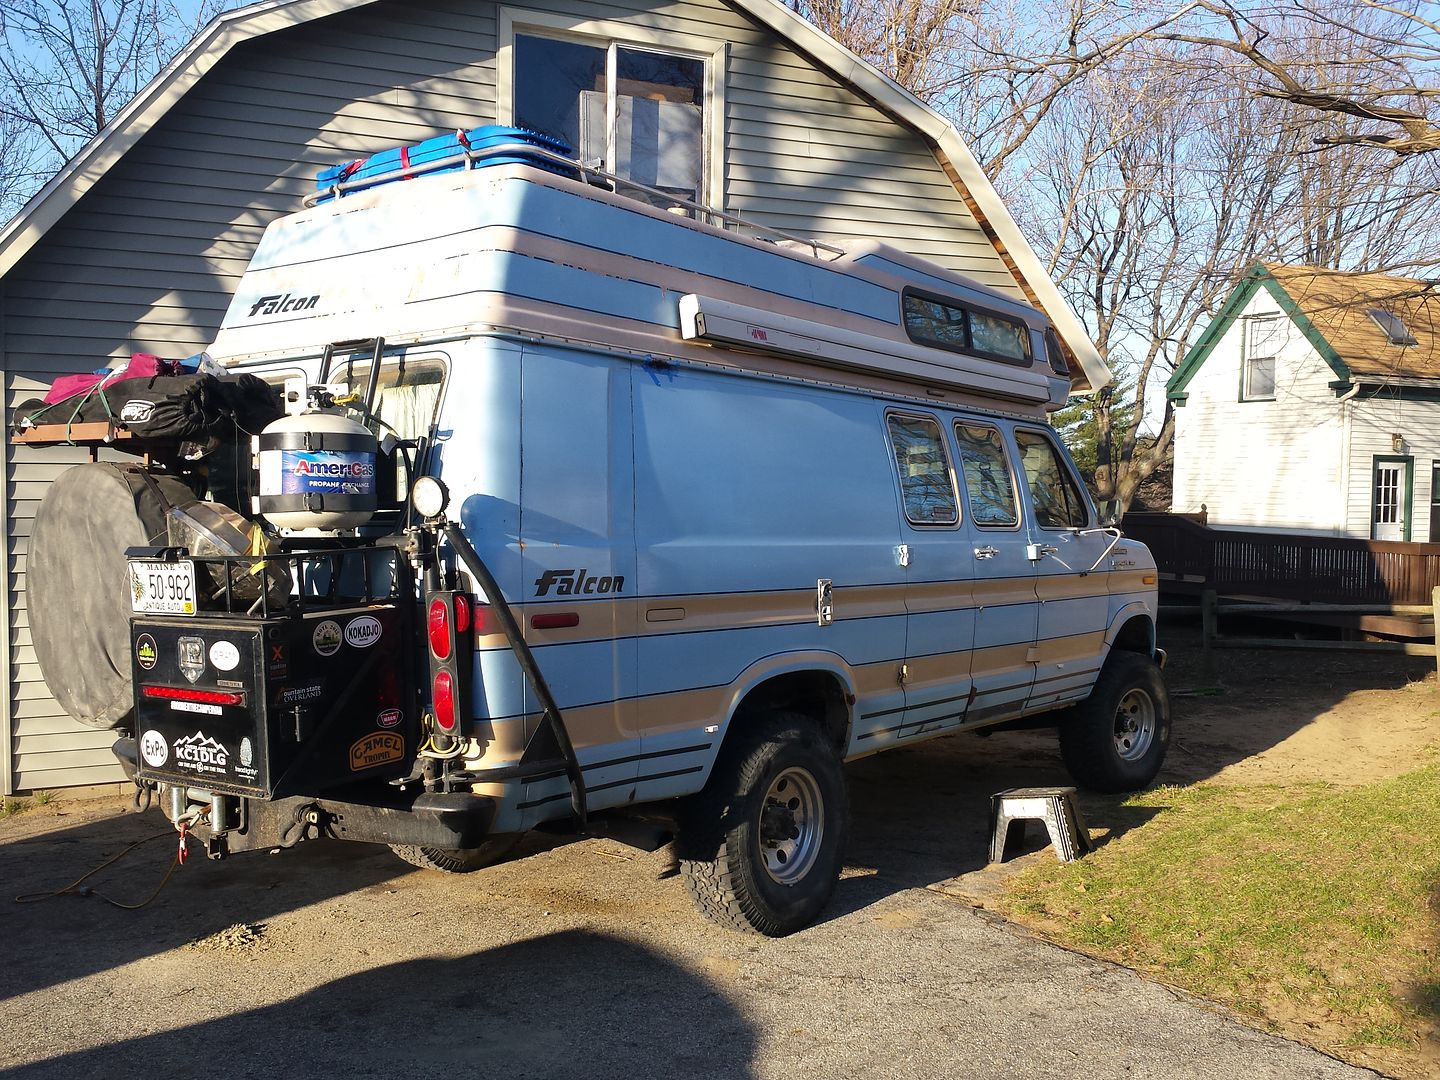
Before leaving town we topped up the fuel and immediately 2 issues cropped up, both of which were already "known" but had been "addressed" prior to leaving...
#1 Upper radiator hose leak which first reared its head during the DRAM3 trip. I replaced the hose this spring and assumed it was a fixed problem. With Boomer warming up, the leak appeared again and there was coolant dripping from the upper hose once again.
#2 Rear fuel tank leak. I tightened the retaining ring on the sending unit where the leak was coming from but this apparently didn't fix the problem.
So right out the gate we're rolling down the road leaking diesel fuel and coolant. Awesome.
I knew that the coolant would stop leaking after the engine warmed up (for whatever reason!), and the diesel only leaked when the rear tank was full. After 5 or so gallons were consumed the leak stopped as the level was below the sending unit seal.
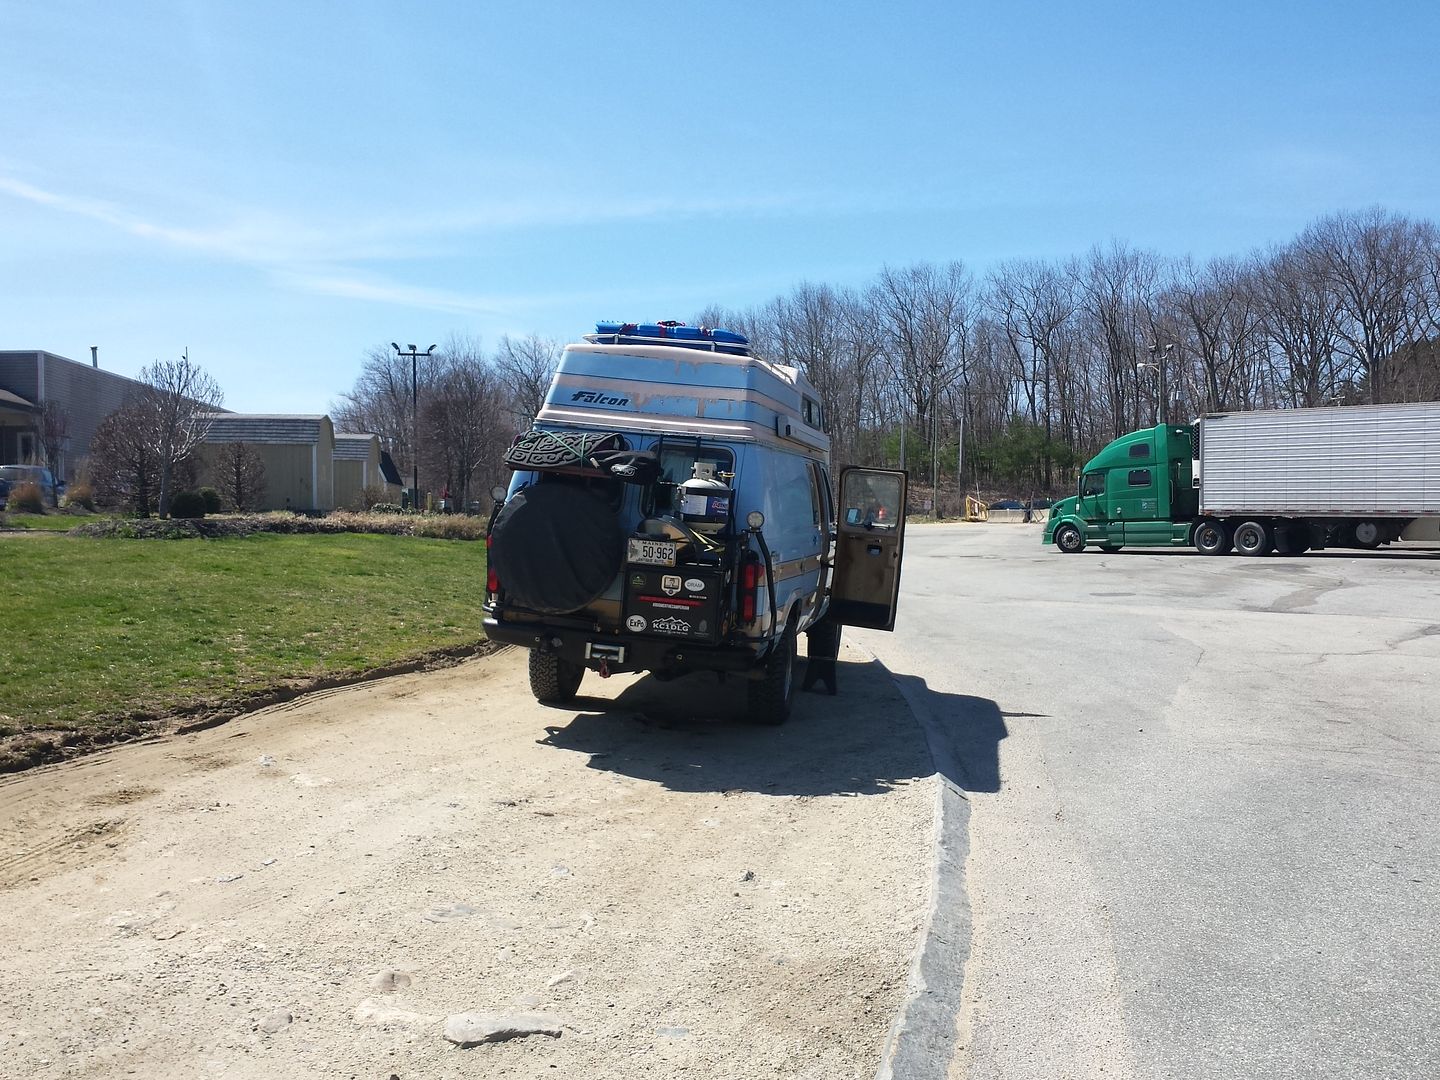
Onward. The trip to CT was relatively uneventful. I of course forgot to draw off the rear tank for the first 150 miles, so the rear of Boomer was covered in diesel fuel when we stopped for lunch off I90.
You can see the diesel puddle in the dirt.
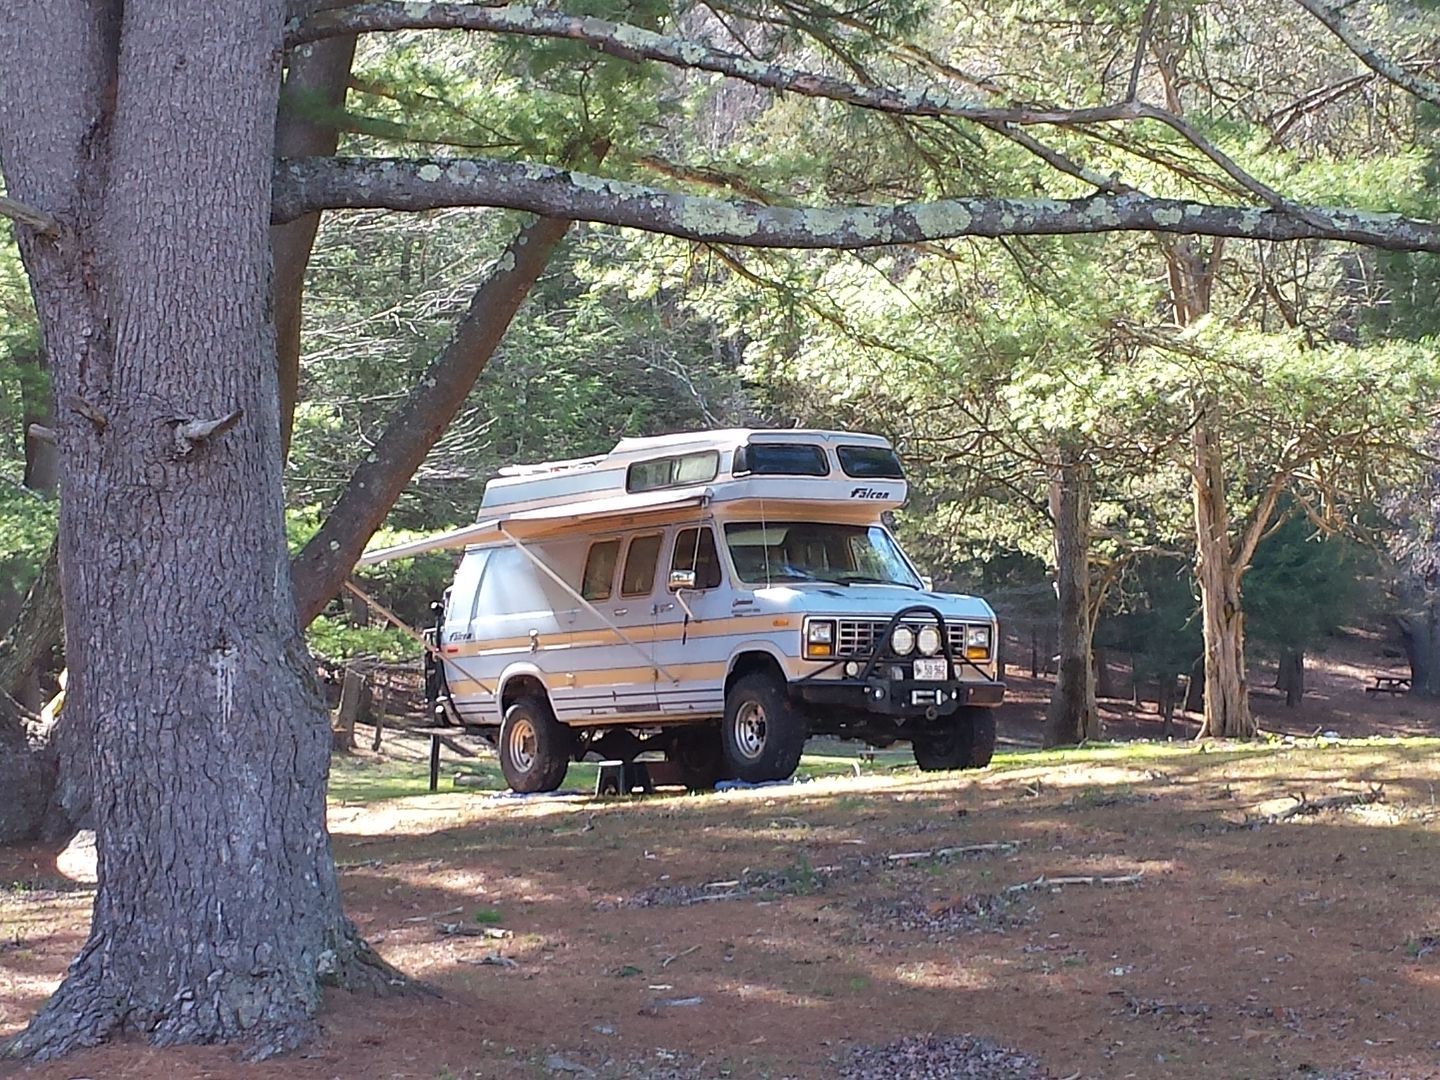
We eventually got to our campsite in the middle of the afternoon of the 16th. It was a nice enough place just outside of Hartford. Maybe a little sketchy being that the "city folk" called this their country retreat, so there was a bit more rowdy behavior than I'd normally tolerate when family camping.
Regardless, we set up shop and explored the streams and ponds around the state park until it was dinner and bed time.
We called it a night around 8:30 in anticipation of an early start. We'd be traveling thru NYC in the morning and I wanted to give us plenty of time. Additionally, I felt the rear brake shoes needed some adjustment and wanted to move down to a paved area in the morning to do the deed.
10:15pm my oldest daughter wakes us up puking her guts out. All over herself, all over me, all over our bedding. We literally had no options here. My first thought was to find a motel/hotel and set up shop for the night but a few calls around indicated that everything was booked. So by 11:00pm the same day we left, I had everybody packed up and we headed home. My daughter proceeded to puke the entire way back and we arrived back at the mother ship around 3am.
So that was awesome. Luckily Boomer really did well on the interstate and we maintained around 65MPH the whole way back.
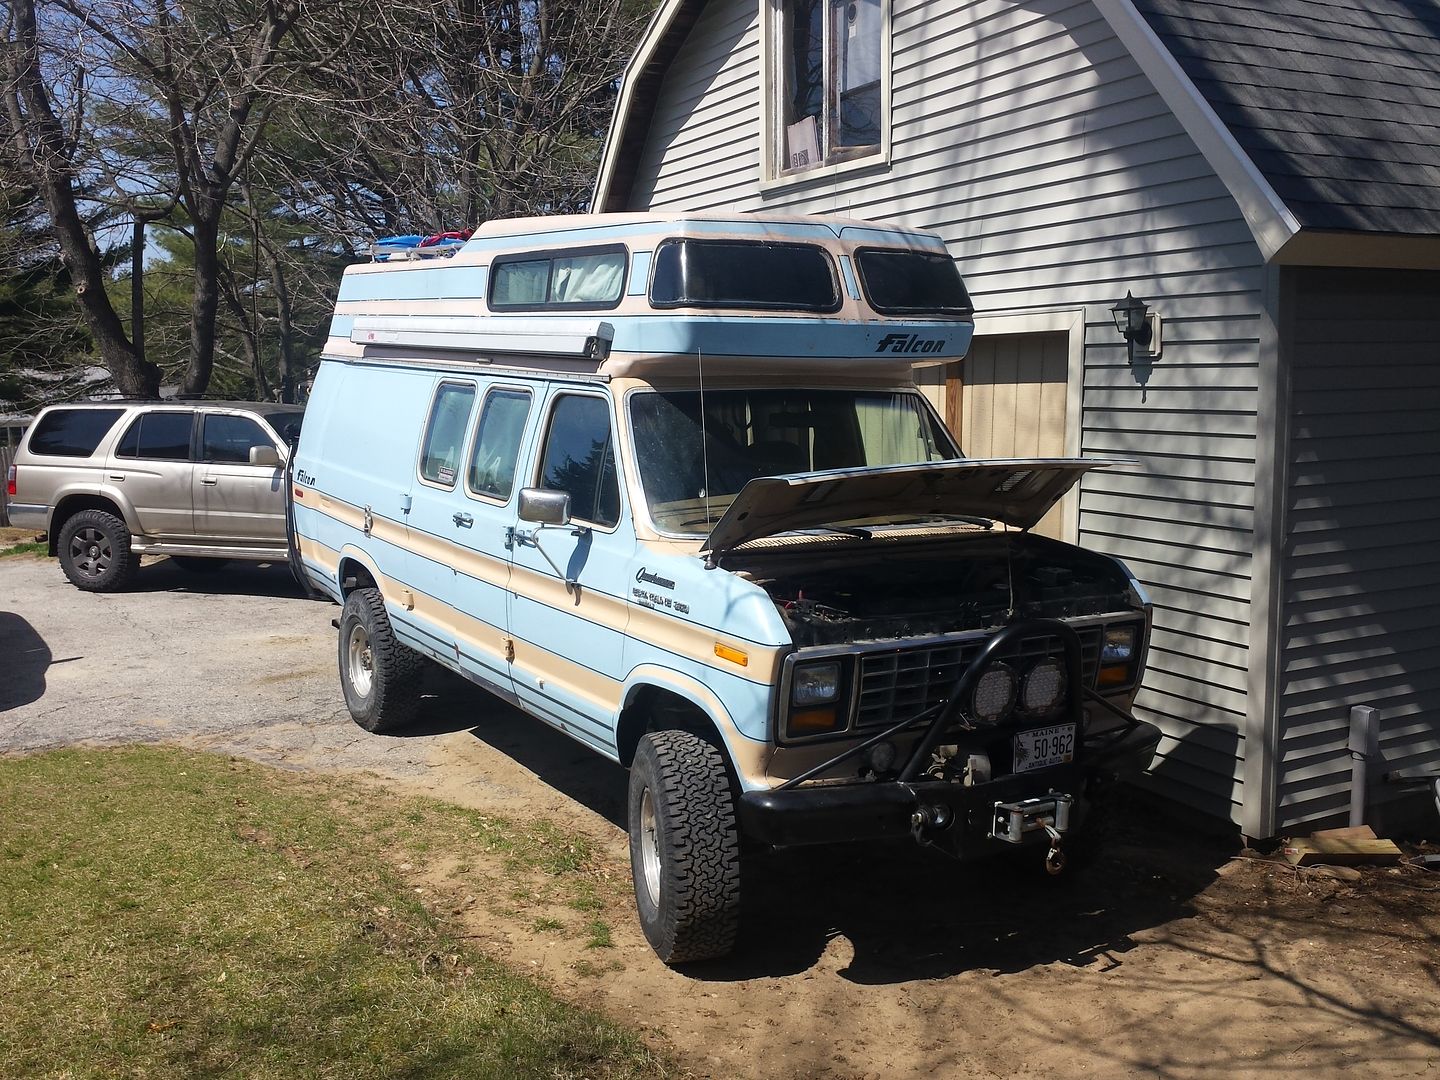
After getting a bit of sleep and making sure everybody was going to live, I headed back out to the driveway to address the annoying diesel leak as well as fix the pesky coolant leak.
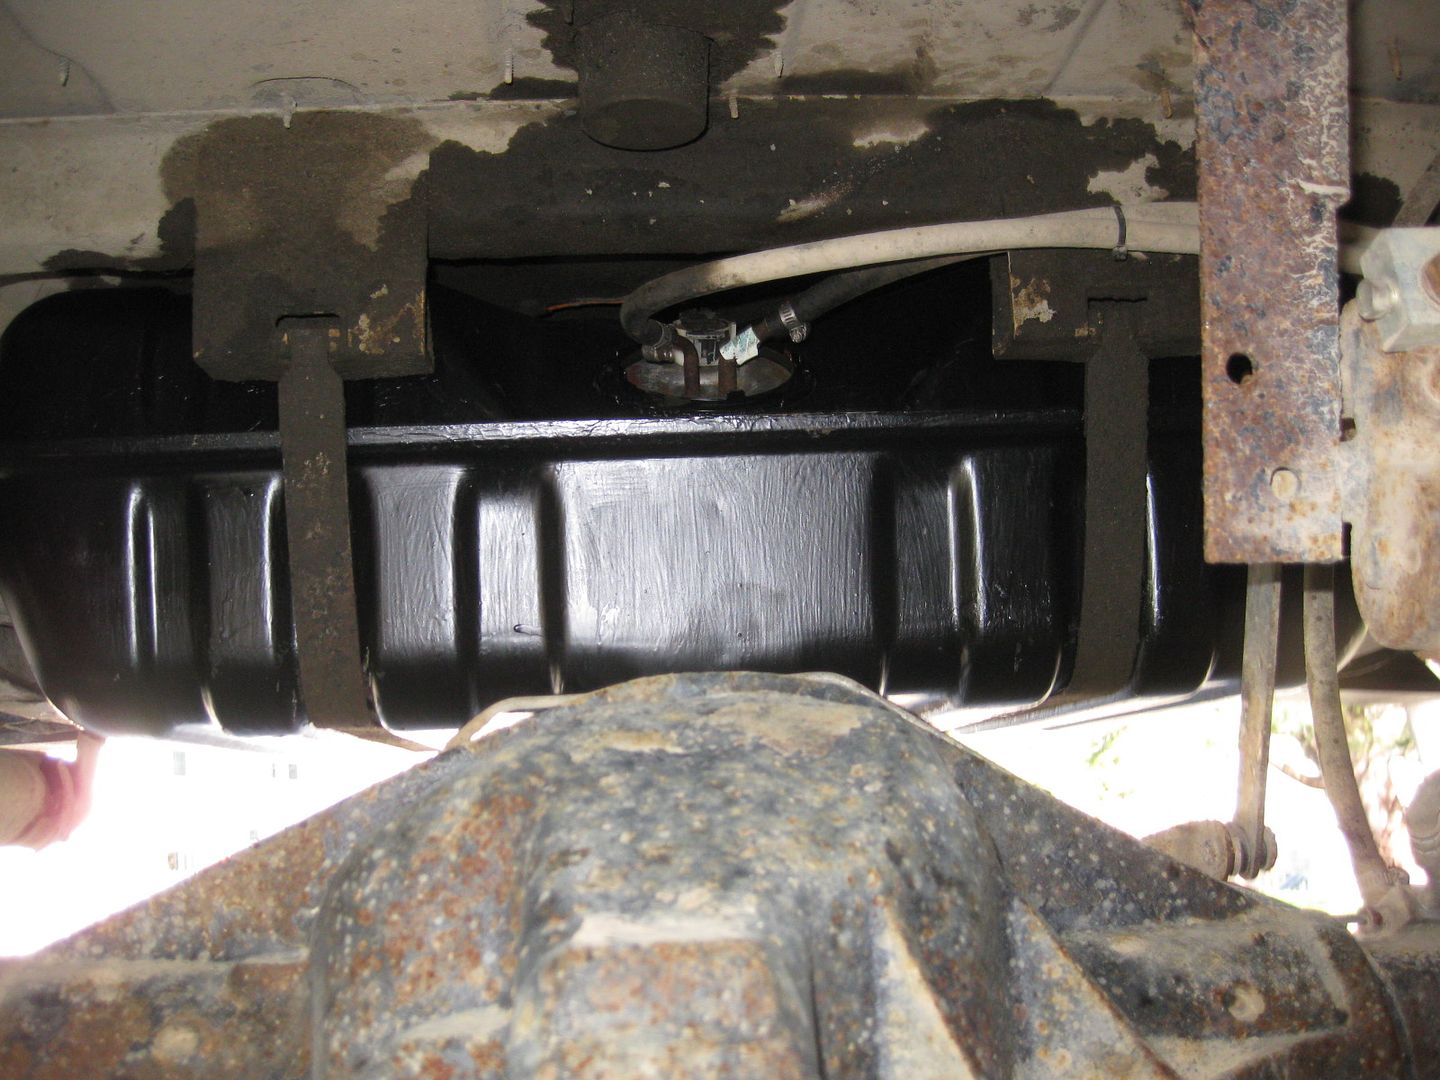
The fix for the rear tank was easy enough. I pulled out the tank (ran it empty on the run home the night/morning before), pressure washed it, painted it and bedded the new sending unit seal in Permatex #2 gasket maker. Tightened everything down with a new lock ring and put it all back together. Filled the tank a day later and no leaks whatsoever. Fixed.
The radiator leak was a bit of a different story. I popped the radiator cap to find a thick skim of engine oil in the coolant. The last time I found this I had to pull the engine and do head gaskets. I checked the engine oil and found no coolant so it seemed the right place to start looking for problems was the oil cooler than is bolted to the side of the engine. I'd rebuilt the cooler with new rings and gaskets back 4 or 5 years ago and it didn't seem likely that it had blown, but it was the "easiest" thing to check.
Step 1. Drain 5 gallons of coolant
Step 2. Remove lower radiator hose
Step 3. Remove front driveshaft
Step 4. Remove exhaust
Step 5. Remove cooler
Step 6. Wrestle with cooler for 2 hours trying to snake it out of an impossibly tight opening
Step 7. Pull cooler apart to find no problems with the rings
Step 8. Reassemble with new o-rings
Step 9. Put everything back together
Step 10. Flush cooling system w/ simple green and water
Step 11. Flush overflow tank with degreaser after remember that you'd never flushed it before and it was full of engine oil from 5 years ago....likely where the oil came from in the radiator since the cold-engine leak forced the system to consume coolant from the overflow.
Step 12. Refill w/ coolant
Step 13. Test Drive
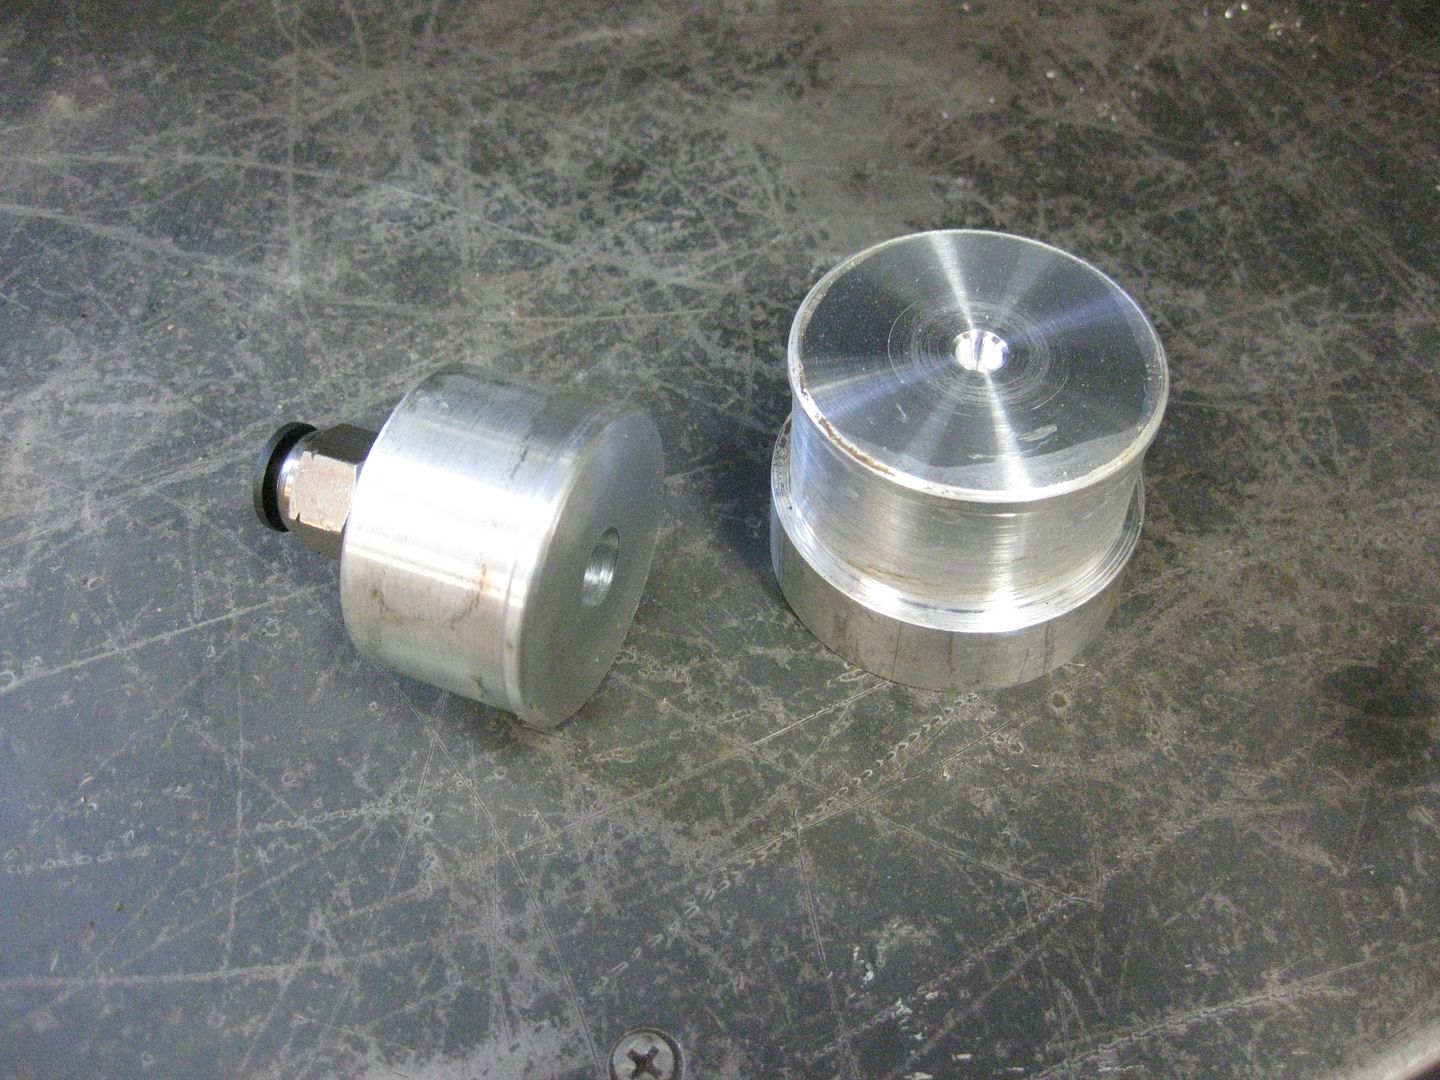
While I had the oil cooler out I pressure tested the radiator and didn't find a single leak. I have no idea. At all. To pressure test I banged out a couple test plugs and ran 13psi of air into the upper plug with the radiator cap on. The cap purged at 13psi so I set the regulator to a level where the cap was just starting to leak air.
Upon reassembling and flushing, I didn't get any leaking from the upper radiator hose area.
So that was about 12 hours of work total to basically realize that I'd only topped off the overflow tank with coolant for the first time in 5 years just a few days prior and that the oil likely came in with the coolant. I did a hot run down the interstate for about a 50 mile round trip and didn't have any oil in the coolant upon my return. I'm about 95% confident that the issue (which was never really an issue) is now fixed.
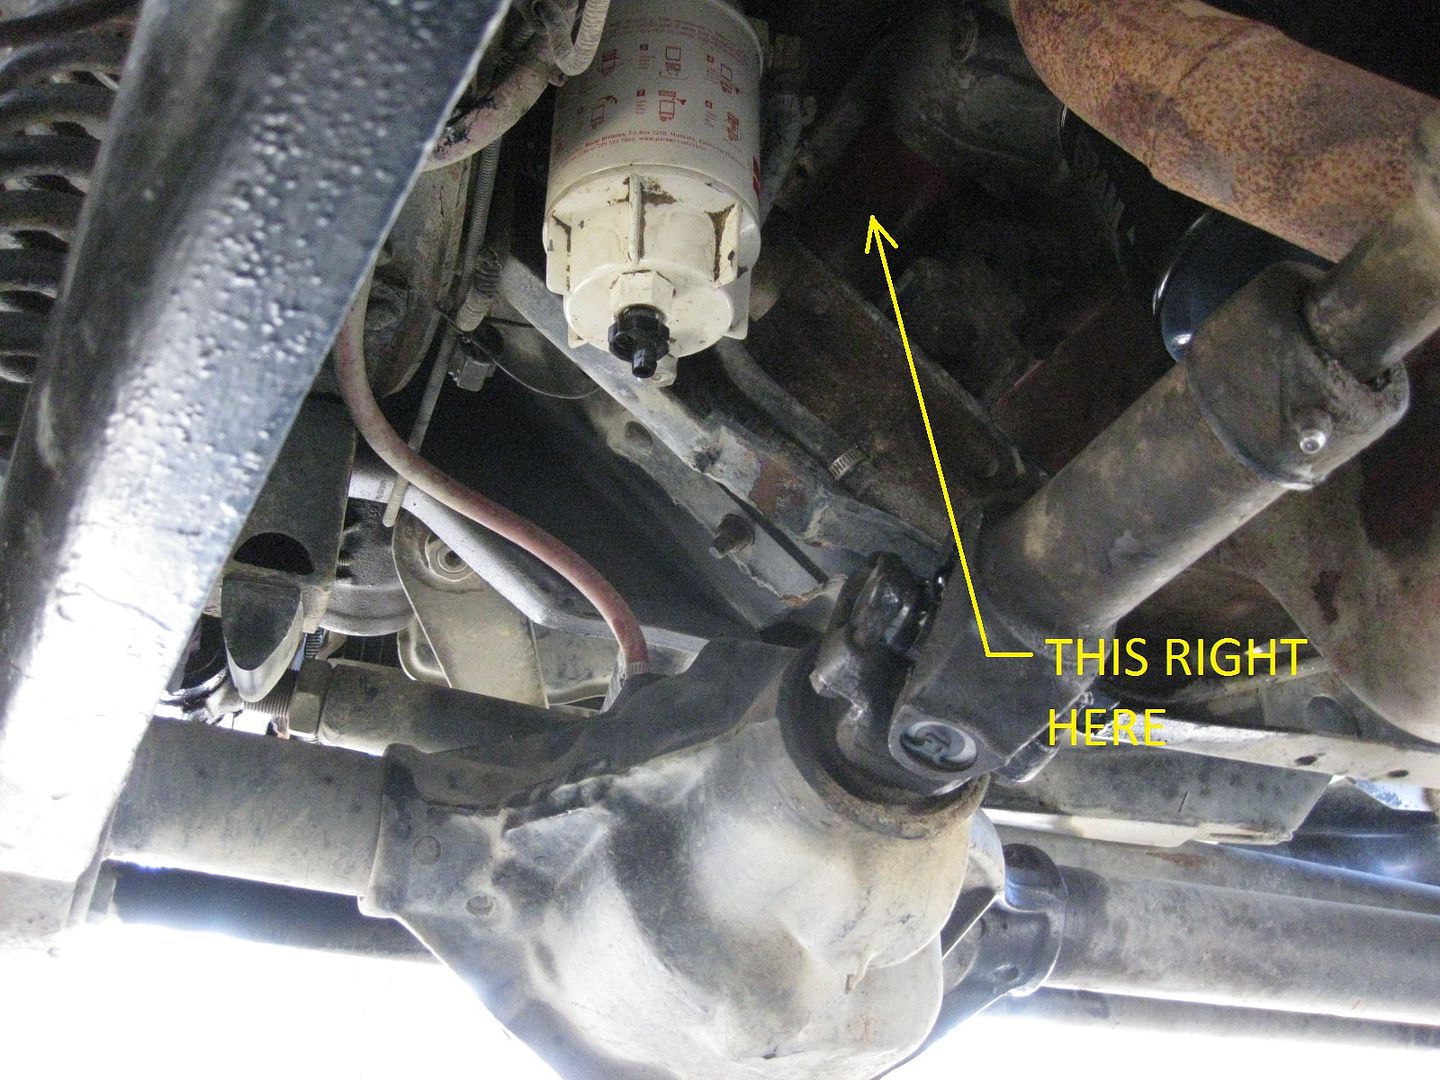
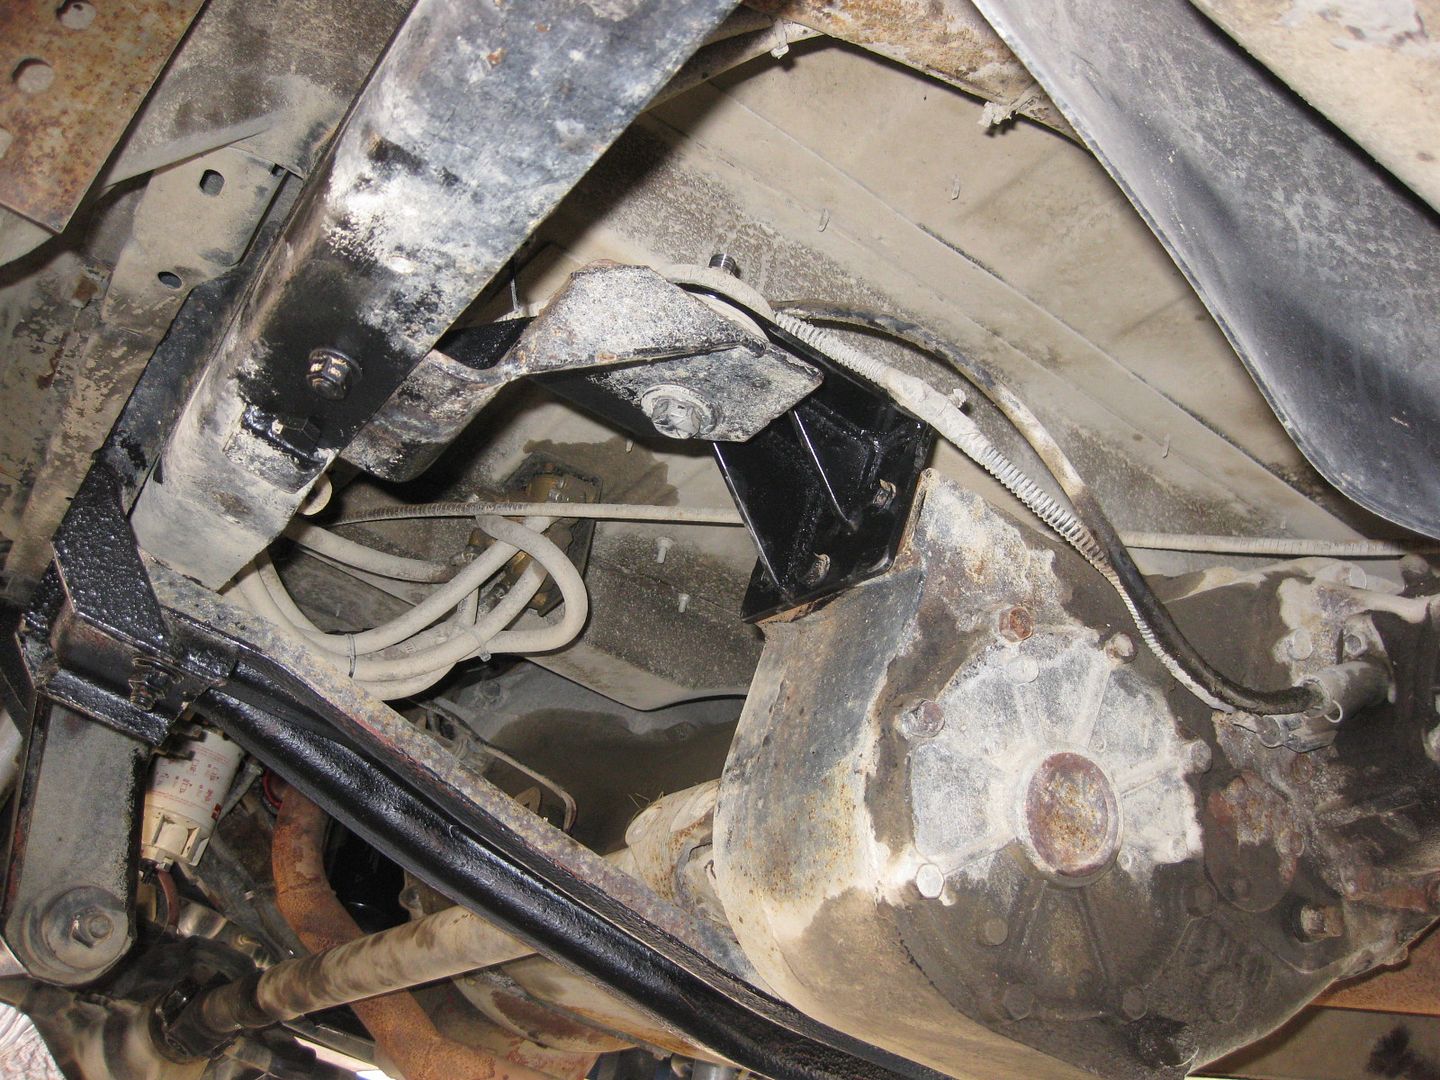
Of course, while removing the front driveshaft I lost a few of the needle rollers in the u-joint, so I then had to replace that as well. While under the truck I also found a very cracked transfer case mount. The original was made out of some strange steel which was brittle....you don't see A36 or 1018 crack like this. It was also made out of 1/8" material which seemed far too wimpy. In typical Boomer fashion, the new one is...beefier.
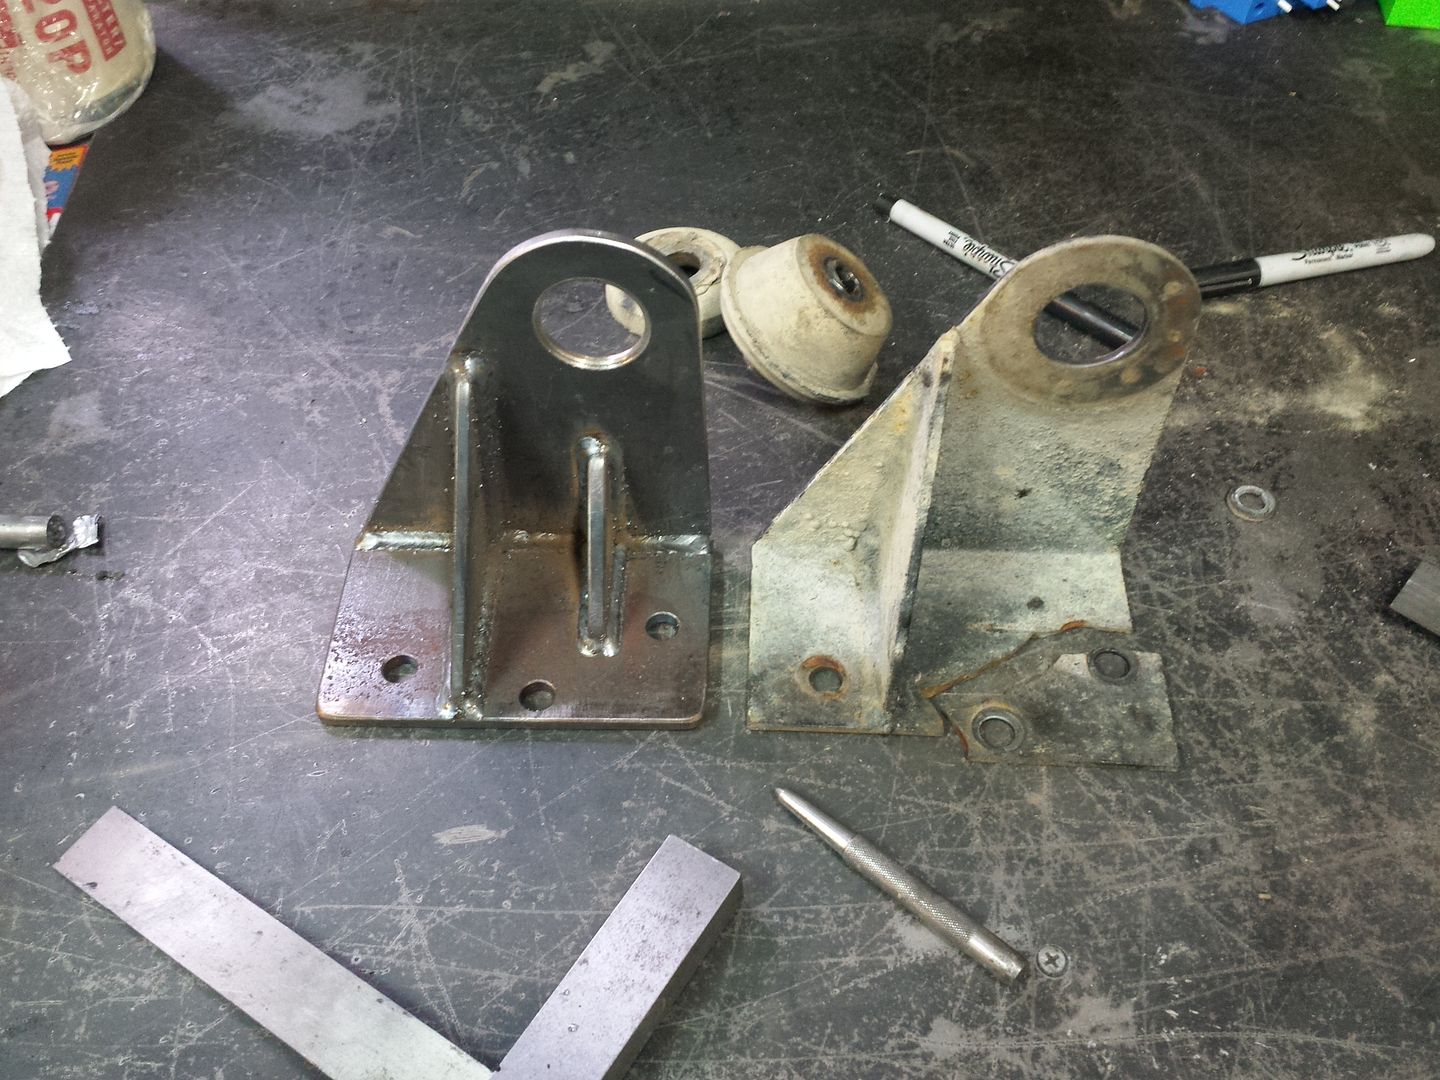
The intention of this mount seems to only be to counter the torque of the front shaft when in 4WD. The assembly seemed stable even without the mount in place, but I like the idea of countering any additional forces so it is all back together in better-than-factory configuration. The mount the attaches to the frame was also beefed up while everything was apart.
Unfortunately, the vacation week is now half over and the kid still isn't quite right, so I'm afraid we're toast for any more adventures in April. It is all so disappointing, but this "shakedown" was good to find some lingering issues and get them addressed before the big adventure with Mountain State Overland next month.
There is lots more to do in the next 6 or so weeks so stay tuned. I have a roof rack build which needs to happen, and a few other odds and ends which have been on the list for a few years.
SG

Before leaving town we topped up the fuel and immediately 2 issues cropped up, both of which were already "known" but had been "addressed" prior to leaving...
#1 Upper radiator hose leak which first reared its head during the DRAM3 trip. I replaced the hose this spring and assumed it was a fixed problem. With Boomer warming up, the leak appeared again and there was coolant dripping from the upper hose once again.
#2 Rear fuel tank leak. I tightened the retaining ring on the sending unit where the leak was coming from but this apparently didn't fix the problem.
So right out the gate we're rolling down the road leaking diesel fuel and coolant. Awesome.
I knew that the coolant would stop leaking after the engine warmed up (for whatever reason!), and the diesel only leaked when the rear tank was full. After 5 or so gallons were consumed the leak stopped as the level was below the sending unit seal.
Onward. The trip to CT was relatively uneventful. I of course forgot to draw off the rear tank for the first 150 miles, so the rear of Boomer was covered in diesel fuel when we stopped for lunch off I90.
You can see the diesel puddle in the dirt.

We eventually got to our campsite in the middle of the afternoon of the 16th. It was a nice enough place just outside of Hartford. Maybe a little sketchy being that the "city folk" called this their country retreat, so there was a bit more rowdy behavior than I'd normally tolerate when family camping.
Regardless, we set up shop and explored the streams and ponds around the state park until it was dinner and bed time.

We called it a night around 8:30 in anticipation of an early start. We'd be traveling thru NYC in the morning and I wanted to give us plenty of time. Additionally, I felt the rear brake shoes needed some adjustment and wanted to move down to a paved area in the morning to do the deed.
10:15pm my oldest daughter wakes us up puking her guts out. All over herself, all over me, all over our bedding. We literally had no options here. My first thought was to find a motel/hotel and set up shop for the night but a few calls around indicated that everything was booked. So by 11:00pm the same day we left, I had everybody packed up and we headed home. My daughter proceeded to puke the entire way back and we arrived back at the mother ship around 3am.
So that was awesome. Luckily Boomer really did well on the interstate and we maintained around 65MPH the whole way back.
After getting a bit of sleep and making sure everybody was going to live, I headed back out to the driveway to address the annoying diesel leak as well as fix the pesky coolant leak.

The fix for the rear tank was easy enough. I pulled out the tank (ran it empty on the run home the night/morning before), pressure washed it, painted it and bedded the new sending unit seal in Permatex #2 gasket maker. Tightened everything down with a new lock ring and put it all back together. Filled the tank a day later and no leaks whatsoever. Fixed.

The radiator leak was a bit of a different story. I popped the radiator cap to find a thick skim of engine oil in the coolant. The last time I found this I had to pull the engine and do head gaskets. I checked the engine oil and found no coolant so it seemed the right place to start looking for problems was the oil cooler than is bolted to the side of the engine. I'd rebuilt the cooler with new rings and gaskets back 4 or 5 years ago and it didn't seem likely that it had blown, but it was the "easiest" thing to check.

Step 1. Drain 5 gallons of coolant
Step 2. Remove lower radiator hose
Step 3. Remove front driveshaft
Step 4. Remove exhaust
Step 5. Remove cooler
Step 6. Wrestle with cooler for 2 hours trying to snake it out of an impossibly tight opening
Step 7. Pull cooler apart to find no problems with the rings
Step 8. Reassemble with new o-rings
Step 9. Put everything back together
Step 10. Flush cooling system w/ simple green and water
Step 11. Flush overflow tank with degreaser after remember that you'd never flushed it before and it was full of engine oil from 5 years ago....likely where the oil came from in the radiator since the cold-engine leak forced the system to consume coolant from the overflow.
Step 12. Refill w/ coolant
Step 13. Test Drive
While I had the oil cooler out I pressure tested the radiator and didn't find a single leak. I have no idea. At all. To pressure test I banged out a couple test plugs and ran 13psi of air into the upper plug with the radiator cap on. The cap purged at 13psi so I set the regulator to a level where the cap was just starting to leak air.

Upon reassembling and flushing, I didn't get any leaking from the upper radiator hose area.
So that was about 12 hours of work total to basically realize that I'd only topped off the overflow tank with coolant for the first time in 5 years just a few days prior and that the oil likely came in with the coolant. I did a hot run down the interstate for about a 50 mile round trip and didn't have any oil in the coolant upon my return. I'm about 95% confident that the issue (which was never really an issue) is now fixed.
Of course, while removing the front driveshaft I lost a few of the needle rollers in the u-joint, so I then had to replace that as well. While under the truck I also found a very cracked transfer case mount. The original was made out of some strange steel which was brittle....you don't see A36 or 1018 crack like this. It was also made out of 1/8" material which seemed far too wimpy. In typical Boomer fashion, the new one is...beefier.

The intention of this mount seems to only be to counter the torque of the front shaft when in 4WD. The assembly seemed stable even without the mount in place, but I like the idea of countering any additional forces so it is all back together in better-than-factory configuration. The mount the attaches to the frame was also beefed up while everything was apart.

Unfortunately, the vacation week is now half over and the kid still isn't quite right, so I'm afraid we're toast for any more adventures in April. It is all so disappointing, but this "shakedown" was good to find some lingering issues and get them addressed before the big adventure with Mountain State Overland next month.
There is lots more to do in the next 6 or so weeks so stay tuned. I have a roof rack build which needs to happen, and a few other odds and ends which have been on the list for a few years.
SG


