"The Wombat" 04 GMC Sierra Z71

mizeide

Michael - Owner Wanderlust Overland
Sorry it has been a long time since an update: large post coming very pic heavy with some major renovations including:
- Rear axle swap with E locker and Disc Brake swap.
- Gears front and rear.
- Front and rear Powerstop Brake Full Replacements.

Some teaser shots-


mizeide

Michael - Owner Wanderlust Overland
Also, the camper setup is gone. Gets too hot in the California sun. Cooked anything inside including my wife, myself and the dog when we tried to camp in it.

And so I don't get blasted, yes there are jack stands holding up the front just outside of the camera in that last photo.
 

mizeide

Michael - Owner Wanderlust Overland
Nice work. bummer on the camper set up. I have slept in mine in very hot weather but I have an RV air vent with fan, it really helps to keep things cool.... also I don't go in there when the sun is out. What are you going with instead currently, RTT?

Here is an example:

http://www.ebay.com/itm/Fantastic-V...Parts_Accessories&hash=item1c3670e061&vxp=mtr

I looked into doing one of those but I also having the availability of my pickup bed. A few times a year I take trips to Mexico to build houses for those in need and need all the tool space I can get. Also, they pretty much automatically send you into secondary inspection if you have a camper packed full of tools. Adds an extra couple of hours to the trip unfortunately.
 

mizeide

Michael - Owner Wanderlust Overland
Finally the big update!

Started with this issue...


No, it is not the camera or an optical illusion, the original 10 bolt is smiling at you. It was causing uneven wear on my tires and I'm sure it was only a matter of time before other major issues would come up internally. Scouring Craigslist I sourced a 14 bolt sf out of an obs Chevy.

It had an auburn limited slip and 4.10 gears installed along with the original drum brakes. Installed it and ran it for a little while to see how I would like the 4.10 gears. Needless to say I loved the lower gears but not the limited slip.


With a real locker I probably would have just driven out of this situation. I was out looking at a jobsite and making note of utilities, glanced down at my map and turned early and down into the sandy ditch.
No pictures but not long after, I had some springs break in my driver side drum brake and lunch the whole thing. The parking brake cables didn't match up to my nbs so I figured it was time to swap out to the discs and get my parking brake back. Plus who really enjoys working on drums? Not me!
 

mizeide

Michael - Owner Wanderlust Overland
So out came the axle so I could break it down and start over.

Ordered up a front and rear complete powerstop kit, figured there was no use in going back in with the 200k mile calipers. Plus they look so nice!

Paired them with all new stainless lines for the same 200k mile reason.
When I pulled the original gears and limited slip carrier out I saw something in the oil channel under the pinion carrier, thought there was a broken off bolt in there!


Turned out to be a plastic cap. The joys of buying used parts! No harm no foul. Pulled all the bearings, seals, races and started from scratch with all new stuff.


mizeide

Michael - Owner Wanderlust Overland
These axles are beefy, i've heard of people running 37"+ tires on fullsizes with no problems. However, the stock diff cover is a joke! I'm pretty sure it was thinner than my ten bolt cover. The mating surface was already bent in a few places when I bought it and I added a few more of my own using only a stiff putty knife to pull it. Along with the locker and full install kit, I ordered up a Blue Torch Fab Replacement cover. This thing is beef!!

Comparison between the new and old. (Really no comparison in my opinion.)

Just a word if anyone does this for themselves, there might have been a change in the diff cover bolts at some point. The ones that came with the BTF cover were SAE but my axle has metric bolts, found that out the hard way later AFTER I had already done the RTV sealant.
 

mizeide

Michael - Owner Wanderlust Overland
A couple other differences between the obs axles and the new ones:
1. the spring perch width is approx. 47" for the obs and 49" for nbs so those need to be cut off and new ones welded on.
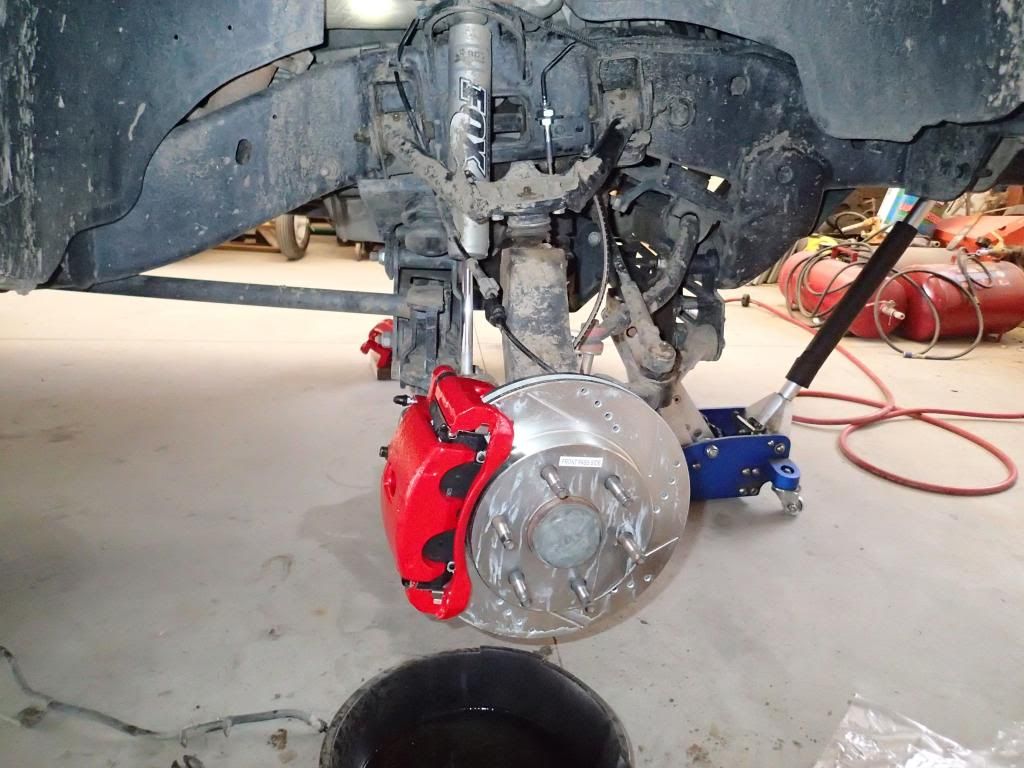
2. the brake mounts for the backing plates need to be moved outward on the axle and clocked 45 degrees for the calipers to mount and orient correctly
3. some of the brake line tabs etc. don't match but are for the most part useable with a little modification
4. the shock mounts on the obs are shorter than the nbs. great for ground clearance but could cause issues with uptravel in some suspension setups. (I added a zero rate aal to my pack while I was at it which left my shocks right in the middle of their travel at ride height)

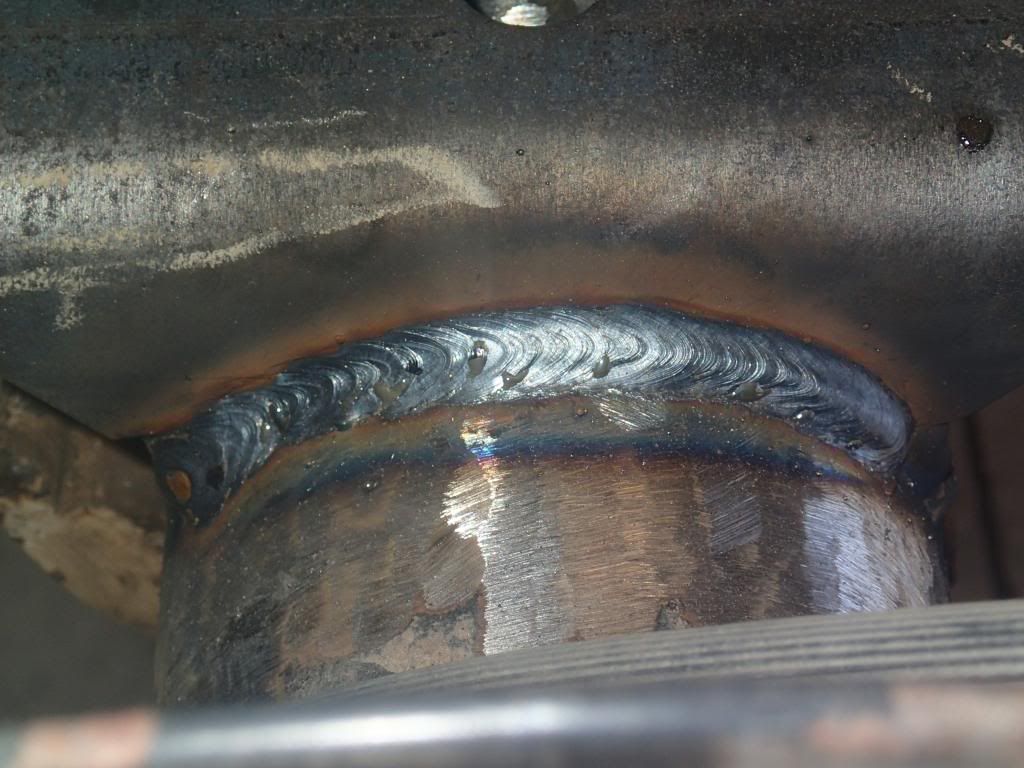
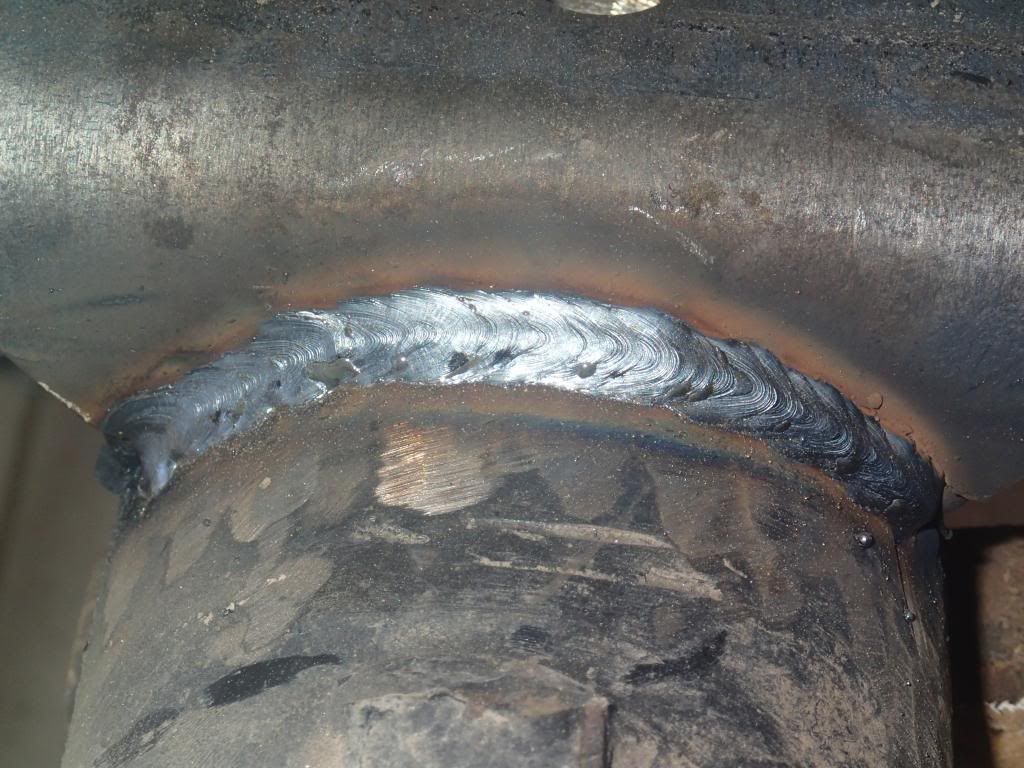
Here are the obligatory weld closeups of some of my mount changes:


After replacing all the bearings etc... set up the old gears on the new carrier and went back together with the same shim setup as a start on the new carrier. Luckily it turned out perfect for the new carrier as well! 7 thousandths backlash and same contact patch on the gears! Did have to pull it back out and start over with a new crush sleeve after I over tightened the first one... :oops::Mechanic:

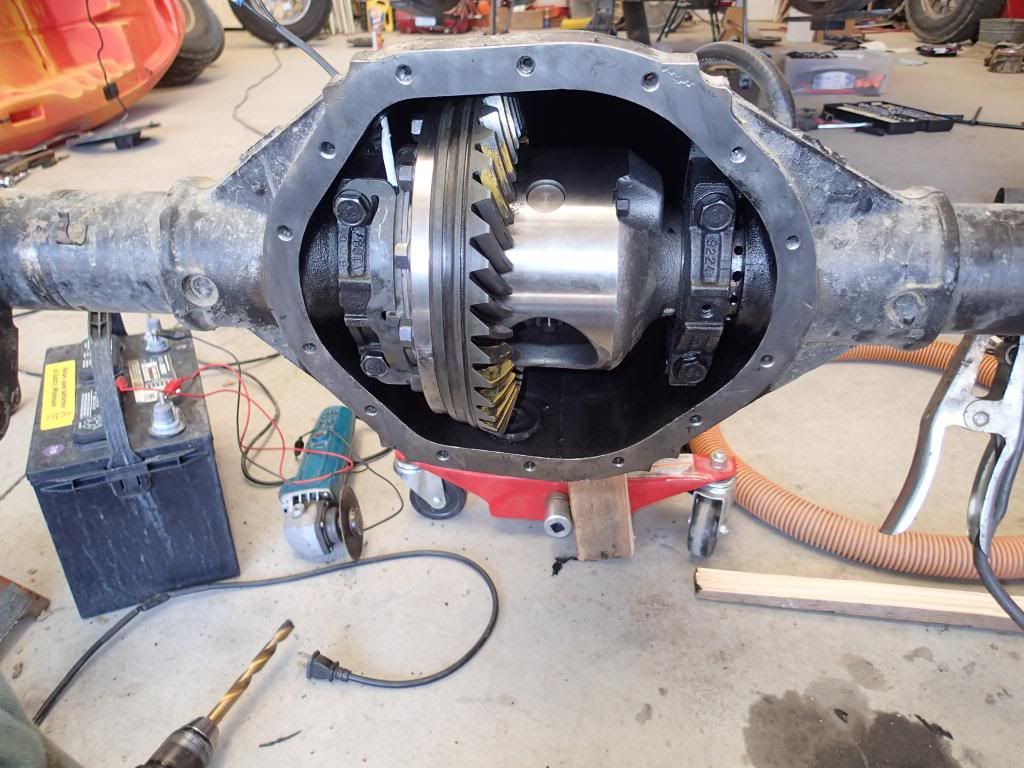
Sorry, didn't get a good pic of the gear mesh, this one was after spinning the diff and reinstalling a few times.
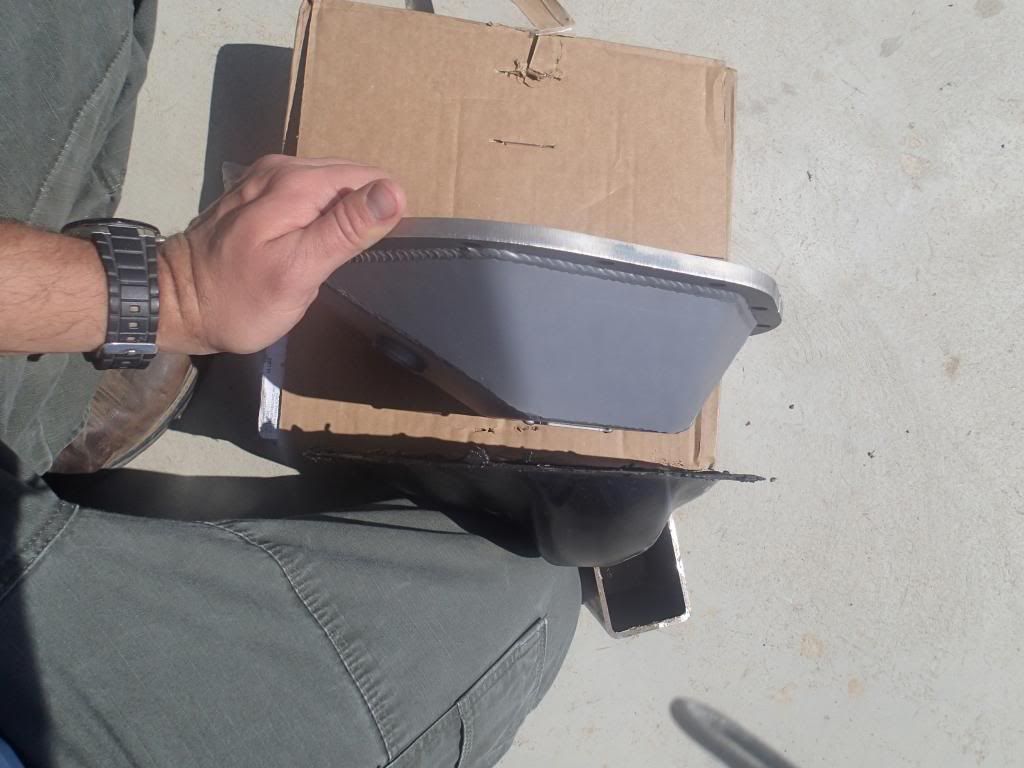
Had to also drill a hole in the pumpkin to run the plug out through.

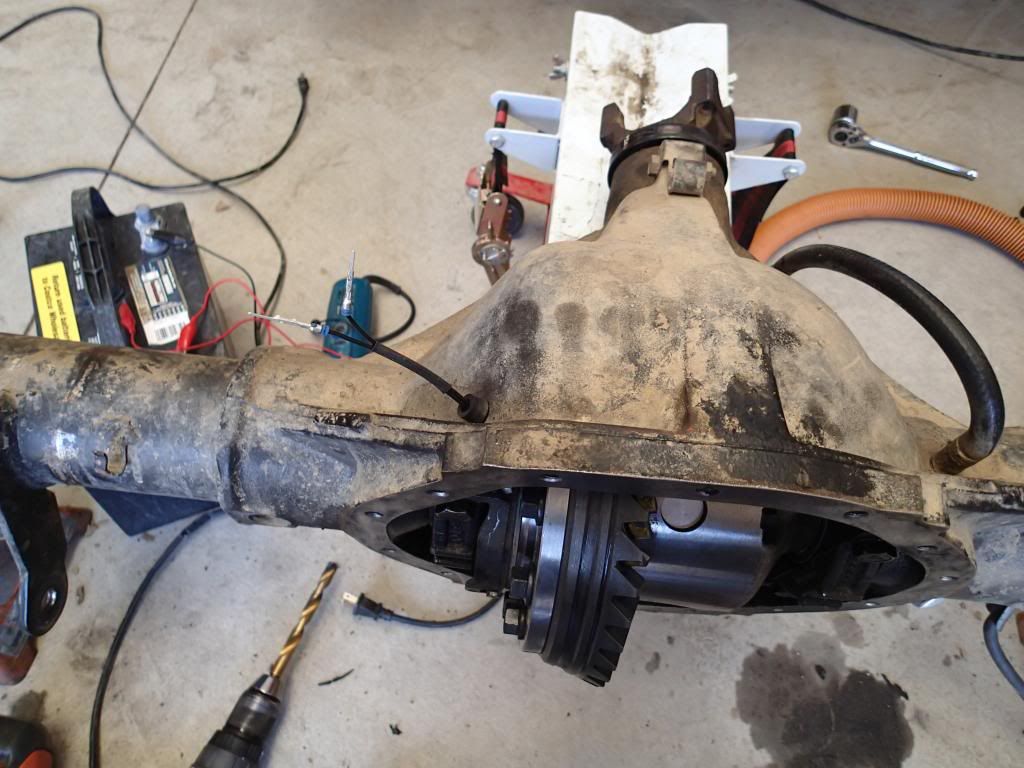
After making sure everything was in working order I sealed that plug and hole up with plenty of RTV.
 

mizeide

Michael - Owner Wanderlust Overland
Just a heads up! Measure once, twice, three times! Test fit test fit test fit before welding things permanently! grr
I measured four times and made sure my brake mount flanges were perfect (using dimensions pulled from the internet...big mistake...) before welding them on solid. Welded them, painted them, completely reinstalled the axle into the truck BEFORE I mounted up the new brakes. :mad:
Installed the brakes and the rotors were dragging on the backing plates...no problem, I'll just cut the backing plates off!


Bolted everything back up and hmm still dragging on this portion...


where the little dimple section is...some is good, more must be better!

and? Nope! Now dragging the inside of the rotor on the parking brake shoe... (tools thrown, curses cursed, beer break taken) :friday:
And pulled the axle back out yet again...on that note, I highly recommend the harbor freight transmission jack for doing axle work, makes it so much easier to do it by yourself!
 

mizeide

Michael - Owner Wanderlust Overland
Pulled the axle, cut off the flanges, built new ones and this time I mounted everything up including new backing plates (since I completely mutilated the old ones) to the flanges without tacking them in place. I then had a helper activate the calipers against the mounted rotors with compressed air and I THEN tacked the flanges into place after quadruple checking everything was squared and in alignment. Pulled everything back off, welded the flanges solid and shot some coats of primer and paint over the bare metal. Installed new axle seals and rolled the axle back under the truck once more!


mizeide

Michael - Owner Wanderlust Overland
Did I mention the BlueTorchFab diff cover is beefy? It takes a 9/16" allen just to pull the fill plug! :Wow1:

Filled it all up with Royal Purple full synthetic and finally got to take it for the first drive in weeks to break in the brakes. Sweet! Drove it home (was working in my Dad's shop).
Next morning? Puddles running down both sides through my brakes, onto the wheels, down the tires to the tarmac. :confused:
Got the truck back to the shop, pulled the wheels and brakes, both axle seals leaking around the axle tube! Apparently the second set up axle seals, Timken brand, that went in easier than the first set, National brand, went in easier for a reason. Went down to the auto parts store to get the nationals again, opened the box, what the?! These nationals are exactly like the Timkens that leaked (thinner steel, different design). Apparently they were the same part # but old stock, so off to another location to pick up the "new" stock and reinstall.
Been driving a few days now and no leaks! Brakes feel great and stop the truck much better!


mizeide

Michael - Owner Wanderlust Overland
Some pics of what I got to drive while my truck was down... :smiley_drive:


Have I mentioned I'm a lucky man? That is my wife's daily driven TJ named "Elvira"
Some quick stats:
98 Wrangler Sahara, 4.0l, 5 speed, BDS Suspension, few other odds and ends
The answers to the important questions:
Yes, she prefers driving it topless most of the year.
Yes, she loves it and would only drive something else if it was a four door Rubicon (room for our future babies).
Yes, she prefers her hand rowing gears, has only owned one automatic in her life and hated it.
Yes, she loves getting dirty and greasy with me.
No, she does not have a sister.
 

mizeide

Michael - Owner Wanderlust Overland
Back to my truck, sorry, I know not as sexy as the previous post :ylsmoke:
Got an oem 4.10 complete low mileage complete from axle assembly and installed it to match the rear

Locker switch will go here (the black rectangular hole)

Where I pulled this out

Because it was no longer needed due to this


There is nothing more satisfying than going from pushing a button and crossing your fingers and toes hoping that the transfer case will switch (it didn't...a lot...) to reaching down and feeling the signature *thunk* as a smile broadens across your facing KNOWING you have 4wd. That was worth all the sweat to do the swap. Yes even the background lighting and 4wd indicator light is wired and working on the shifter. Will get a picture of that soon.

Let me know if there's anything I can do better for future posts! Thanks for checking the build out!
 
Last edited:

BradyD

Observer
looking good buddy. Looks like you have put a lot of work into the wombat! thanks for sharing
 

Forum statistics

Threads
185,842
Messages
2,878,776
Members
225,393
Latest member
jgrillz94
Top