Building Camper for Small Pickups

Jfet

Adventurer
What type of hoops if any did you have to go through registering your camper?

I am in Washington state USA and nearing completion of our camper. I called the state patrol office to see about getting a VIN (for getting a tag and getting insurance) and they mentioned needing labor and industries signoffs. This seems like BS though since the labor and industries website says you need a VIN before you get labor and industries inspection and also says you only need labor and industries inspection if you plant to sell or lease in WA state.

If they give me too much BS I am just going to move to another state :ylsmoke:
 

Goober

Adventurer
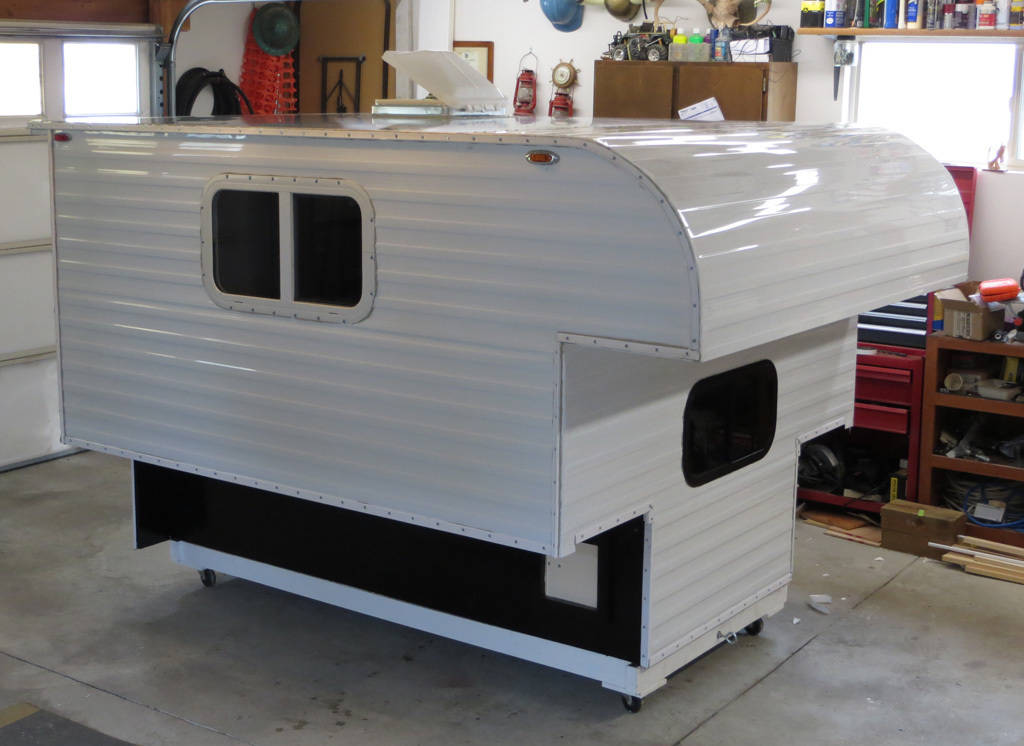
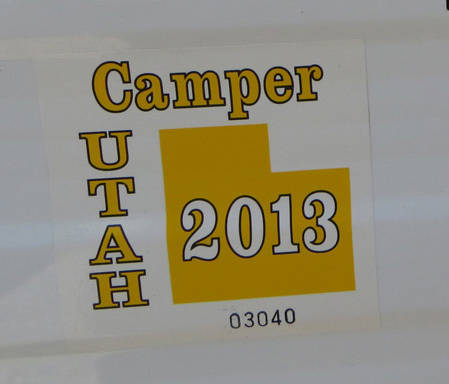
Camper registration is different with each state. In Utah registration is required if it's a slide-in camper. You can call your local DMV to find out. I had a couple forms, found online, to fill out. The DMV said I would need to bring all of my receipts for materials in to insure I paid sales tax on anything sourced outside the state, but when I went in, with camper on truck, they only asked how much it cost to build and never checked my receipts. They issued a vin number and had a DMV employee witness me putting it on the camper and also to check that there wasn't a vin tag already on the camper (like it was stolen out of state). They then issued a registration tag/sticker and printed registration to keep in my truck. Cost me $70. I renewed this year for another $70, suppose to go down as the camper ages.
IMG_1686b.jpg
 
Last edited:

Goober

Adventurer
What type of hoops if any did you have to go through registering your camper?

I am in Washington state USA and nearing completion of our camper. I called the state patrol office to see about getting a VIN (for getting a tag and getting insurance) and they mentioned needing labor and industries signoffs. This seems like BS though since the labor and industries website says you need a VIN before you get labor and industries inspection and also says you only need labor and industries inspection if you plant to sell or lease in WA state.

If they give me too much BS I am just going to move to another state :ylsmoke:
What's labor and industry got to do with home built campers? jeeze
 

jeep-N-montero

Expedition Leader
Hey Goober, I just read the entire thread and must say I admire your skills. Have you noticed any issues with VOC's or other smells/fumes from the paint/glue? And where in Utah are you, I might need a hand with the Callen camper shell I just picked up.
 

Goober

Adventurer
Haven't noticed any issues with voc's. I used interior grade glues inside and the paint I used inside was exterior but water based latex. I'm in the Salt Lake Valley. Like to see your Callen camper.
 

ripperj

Explorer
Dude , great job, looks awesome. Can you share two things? One- tips for bending the cabover roof around the radius and nailing to the sides, did it split at all? Did you just use a mallet to bend it over?
The second - was all the trim for the roof and corners pre painted? How easy did it bend around the roof curve?
I am doing similar with an Alaskan , I built basically a new upper section and got all new sheet metal from Steve at Hemet. The roof is on, but the ends are not done.
Thanks a lot
Keithimage.jpgimage.jpg
 

Goober

Adventurer
For this front sheet I attached it at the front first then rolled it up and attached it to the top (overlayed on top of the rear section). The front edge was pre bent by Bestway Trailer Repair, my supplier, so it's stapled under the over hang. I used screws at the top every 2 inches. I'll post the size of those later as I don't have the info right now (I'm at work). I'll also list the seam sealer Bestway sold me with the sheet metal. Next I hammered (yes, mallet) the sides over the edge and stapled those. The rain gutter molding was pre-painted. Started at one end, bending it and putting screws in as I went. Bends easier than one would think. Bestway instructed me on how to do the whole process. Told me to use 2 layers of butyl, putty tape.(that was chore picking off all the excess)

attachment.php


IMG_1630a.jpg
 

Goober

Adventurer
I used 19 gauge 3/16" x 3/4" galvanized staples. This is what Bestway uses. Not a common size, I had to shop around to find the gun and staples. I thought 18 gauge might be prone to splitting the wood. Seam sealer for the joint across the top was Schnee-Morehead 5504 Acryl-R Seam Sealer.
 

ripperj

Explorer
Hey thanks a lot . I will consider staples , I had bought small stainless nails, but staples would go quicker and hold better probably.
Did the roof split at any of the kinks at the corner?
 

Goober

Adventurer
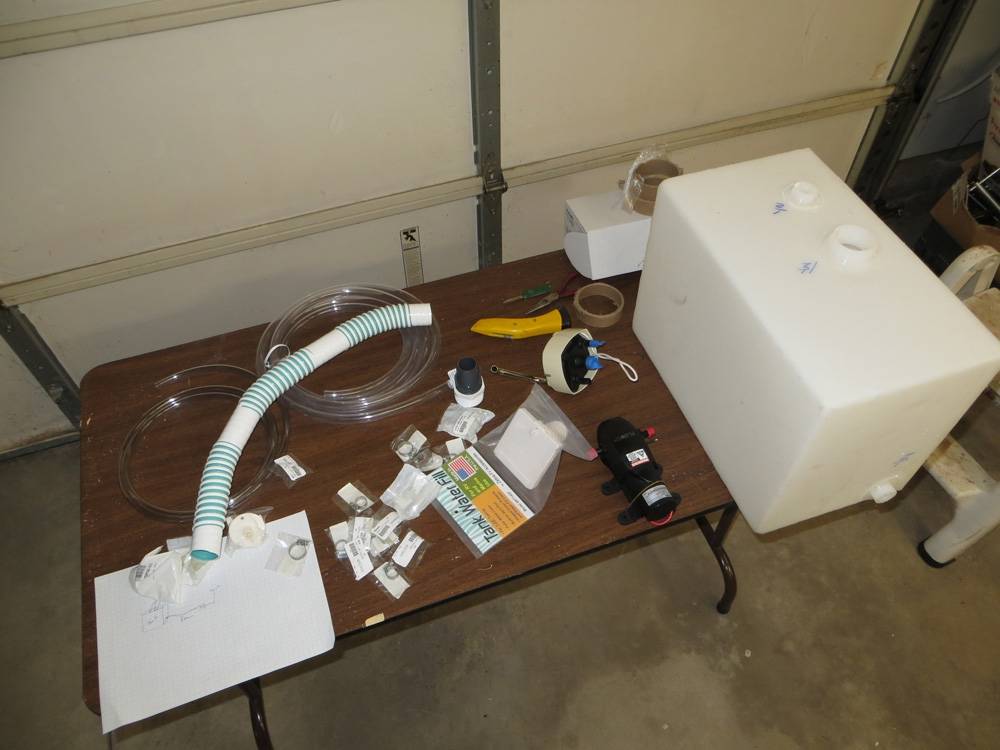
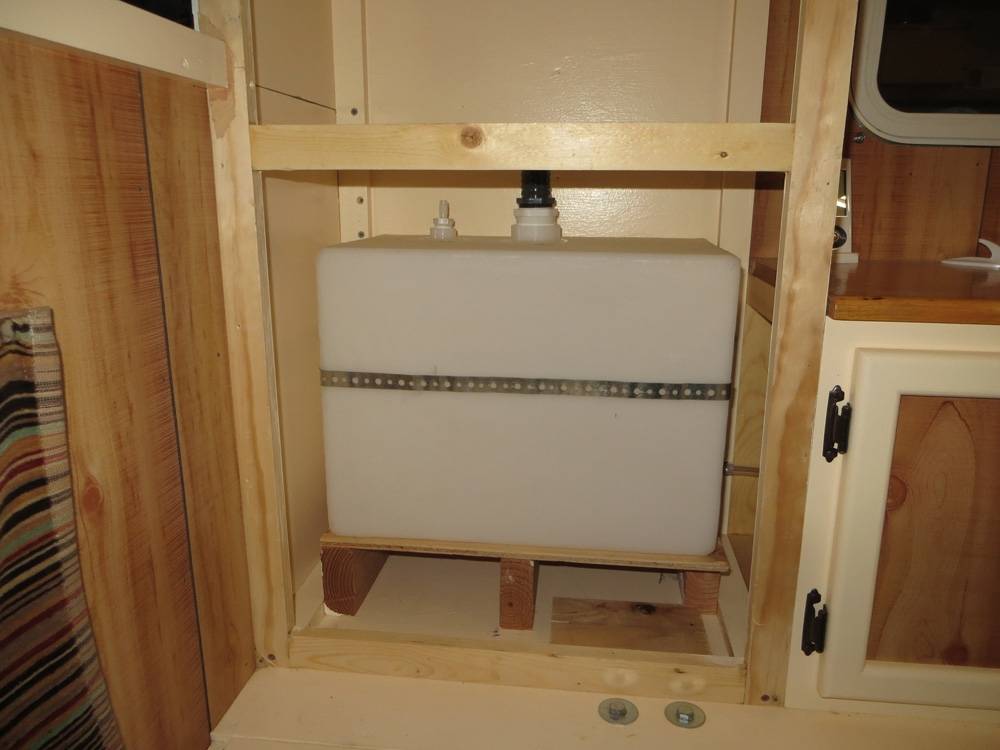
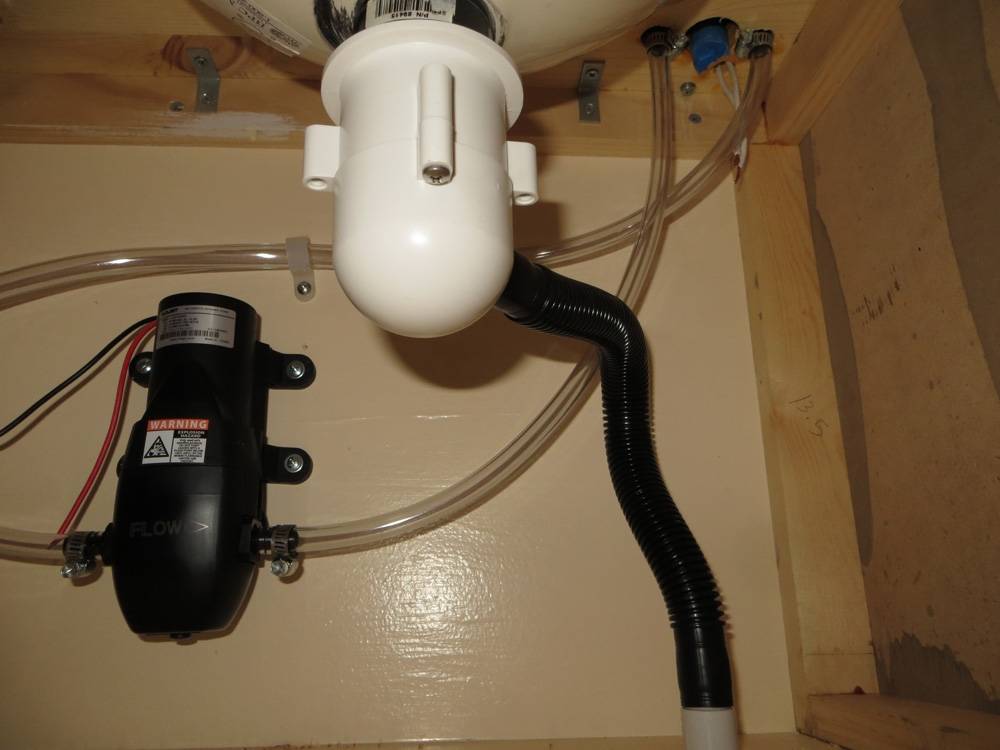
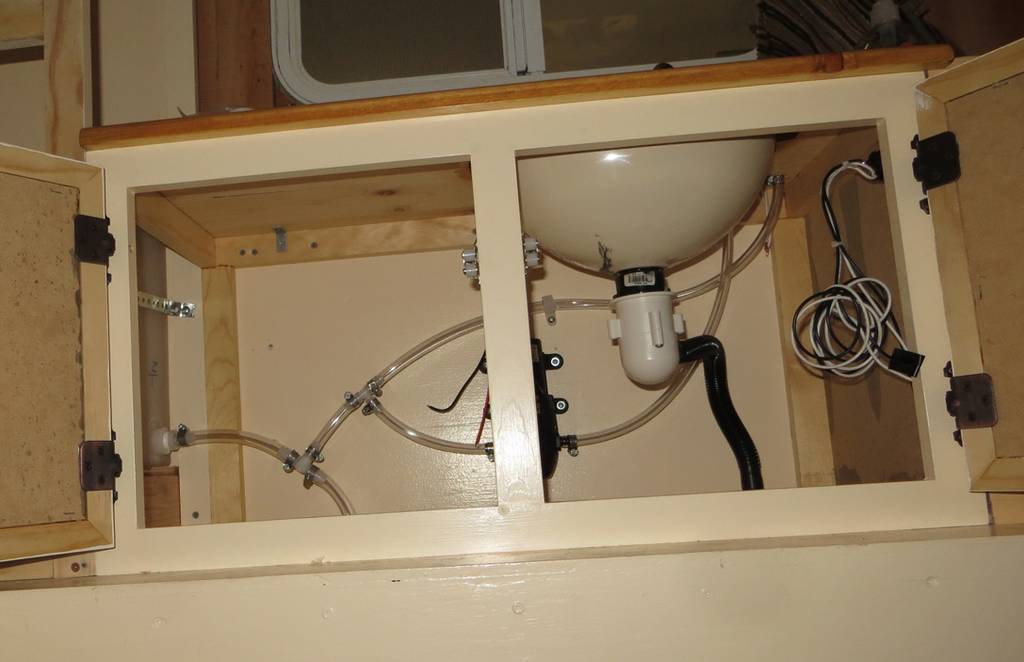
Got the tank Friday. Spent the day chasing parts and putting the water system together. I'll hook up the power tomorrow and test it for leaks.

IMG_4259a.jpg


IMG_4264a.jpg


IMG_4260a.jpg


IMG_4263a.jpg
 

Goober

Adventurer
Care to explain the plumbing?

Im lost :snorkel:

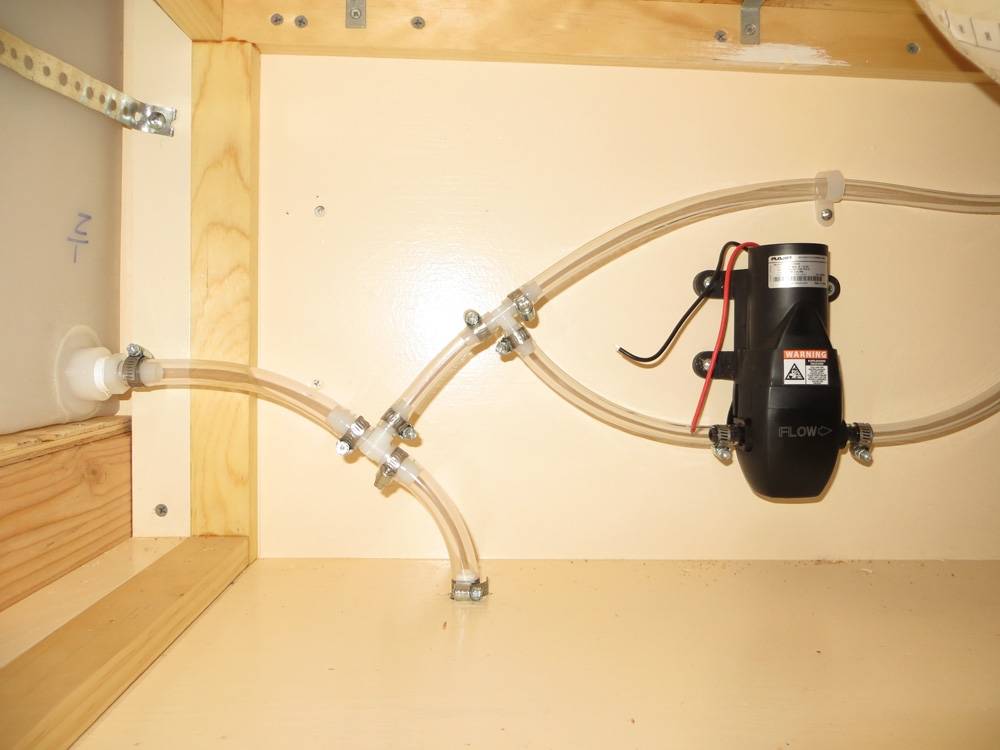
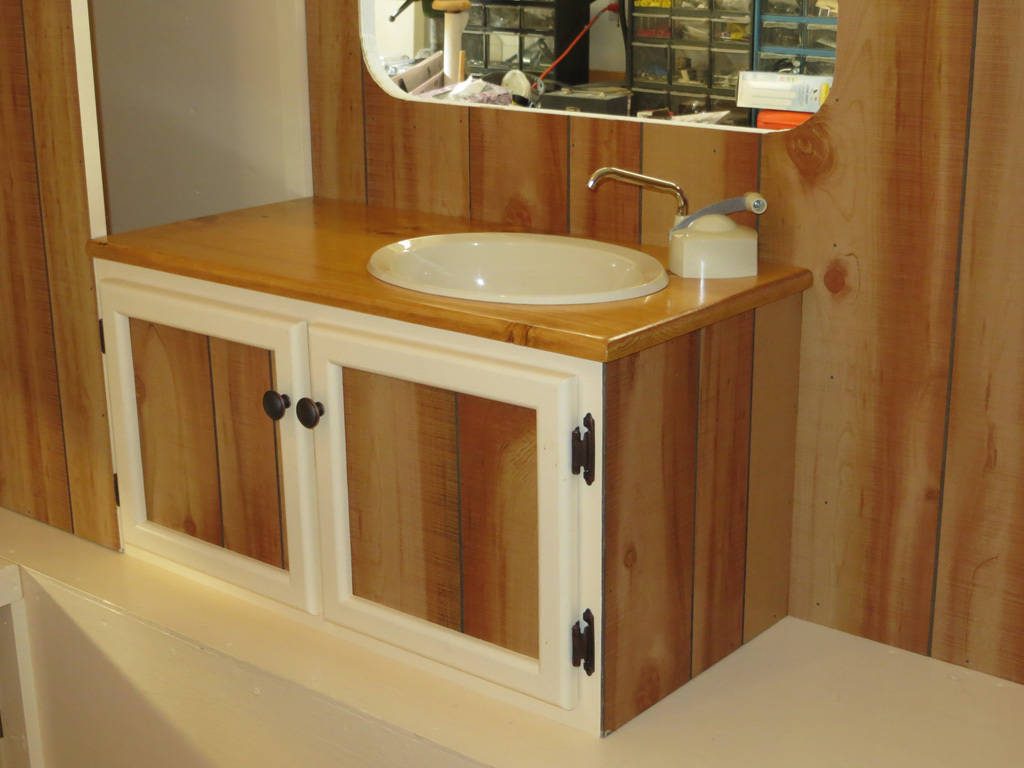
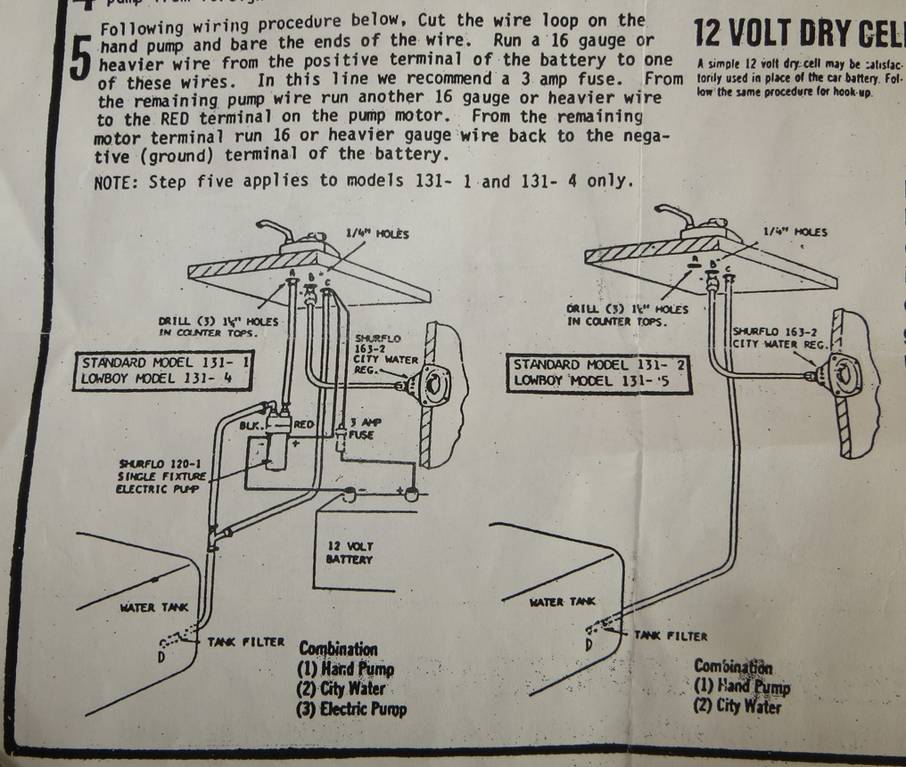
Tube coming out of tank to first Tee, which goes down to drain spigot, located under camper wing and up to second Tee which goes to electric pump inlet and to the manual pump port on faucet. The pump outlet goes to electric pump input on faucet. The faucet "Hand Pump and Water Fixture" is a 3-way allowing for hand pump, electric pump, and city water (which I haven't install). To operate the electric pump just pull up on the hand pump lever to actuate built in switch. I need to get a tank filter as shown in the schematic.

IMG_4268a.jpg


IMG_4267a.jpg


IMG_1332a.jpg


IMG_4269a.jpg
 
Last edited:

IdaSHO

IDACAMPER
gatcha

I was worried about the line to the manual hand pump.

Thought it might have been a vent line. :sombrero:


Carry on!
 

Forum statistics

Threads
185,835
Messages
2,878,710
Members
225,393
Latest member
jgrillz94
Top