You are using an out of date browser. It may not display this or other websites correctly.
You should upgrade or use an alternative browser.
You should upgrade or use an alternative browser.
Blender, My LX450/FZJ80 + FJ45esk + GM + Land Rover crazy concoction
- Thread starter Metcalf
- Start date


Metcalf
Expedition Leader
Time to move onto something pretty challenging, the construction of a custom aluminum top panel. The idea is that the top panel will bolt onto the halo cage structure and be generally shaped to follow the curve of the windshield frame without adding much additional height to the vehicle if any....
To move forward I had to do a few things....
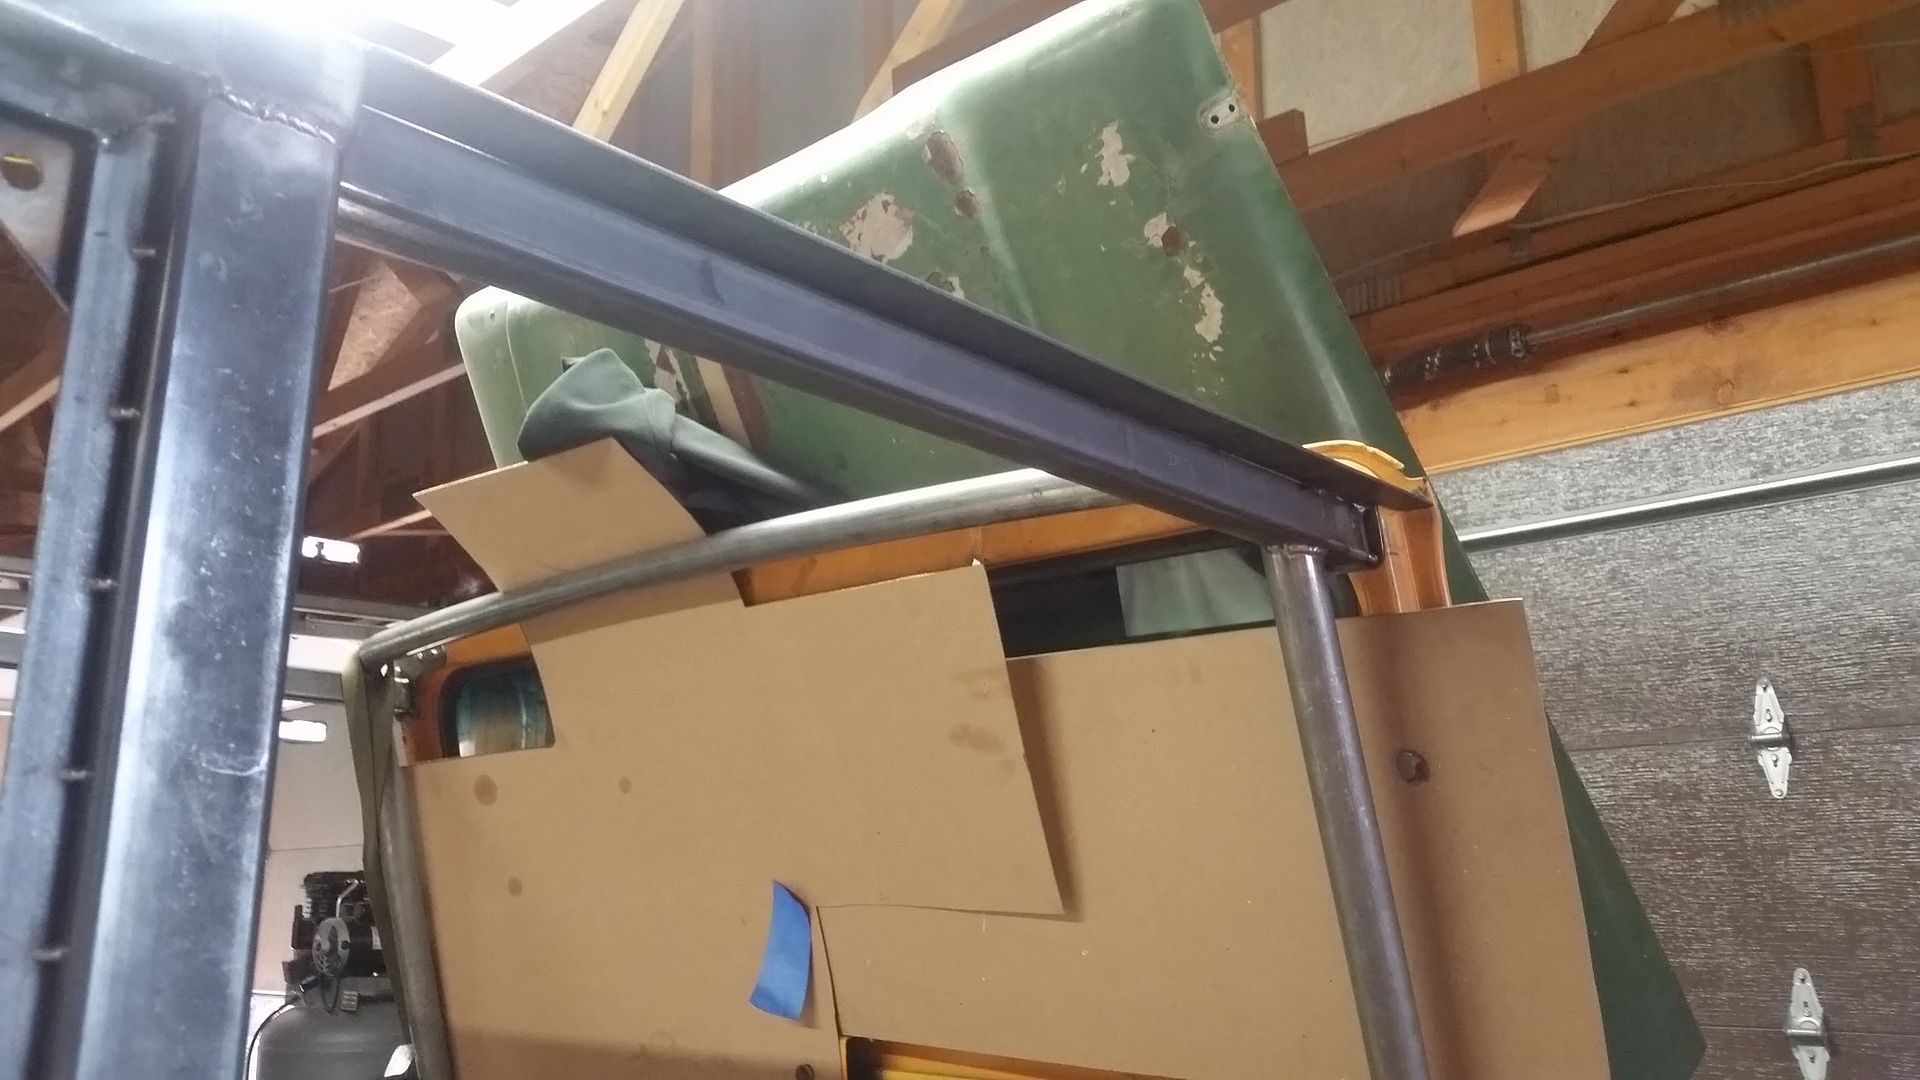
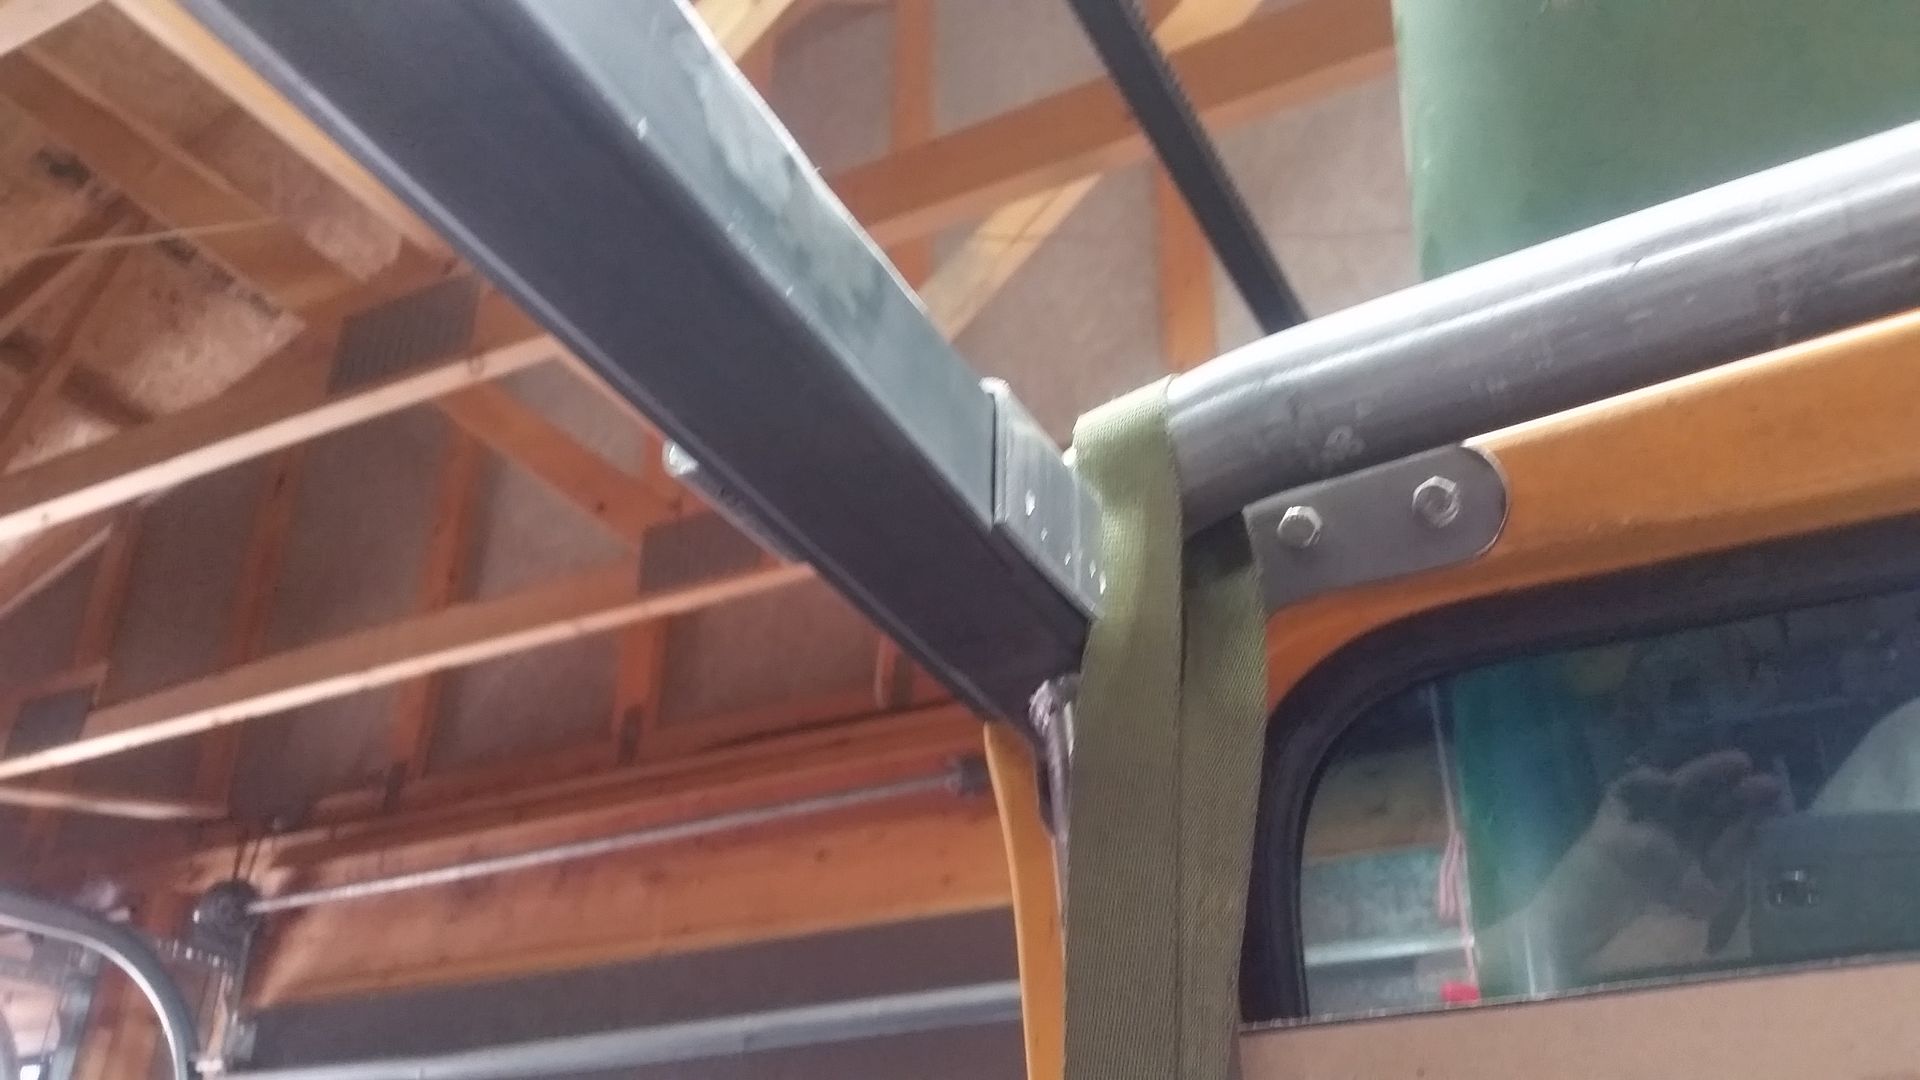
I needed to add this flat bar into the door pocket offset of the halo. This is set in plane with the top of the halo and fills the gap to the windshield frame also. There will be another sheetmetal section to this that will provide the surface for the door sealing, but I don't need that just yet. This bar basically helps set the offset for the drip rails that will go around the edge of the top.

These bars also allowed me to figure out where the halo intersects the windshield frame. On the stock FJ40 the door surround bolted to that hood and the top panel as about 1" above the horizontal black line. That little section of the corner of the windshield frame needs to be trimmed out of the way to make the shape of the top more uniform and at a smoother radius.
This change is kinda like pulling down your hat a little further. It should make the chassis look like it is chopped about 1"....but without having to chop the windshield. I still probably should have chopped the windshield frame down, but I really didn't want to.....

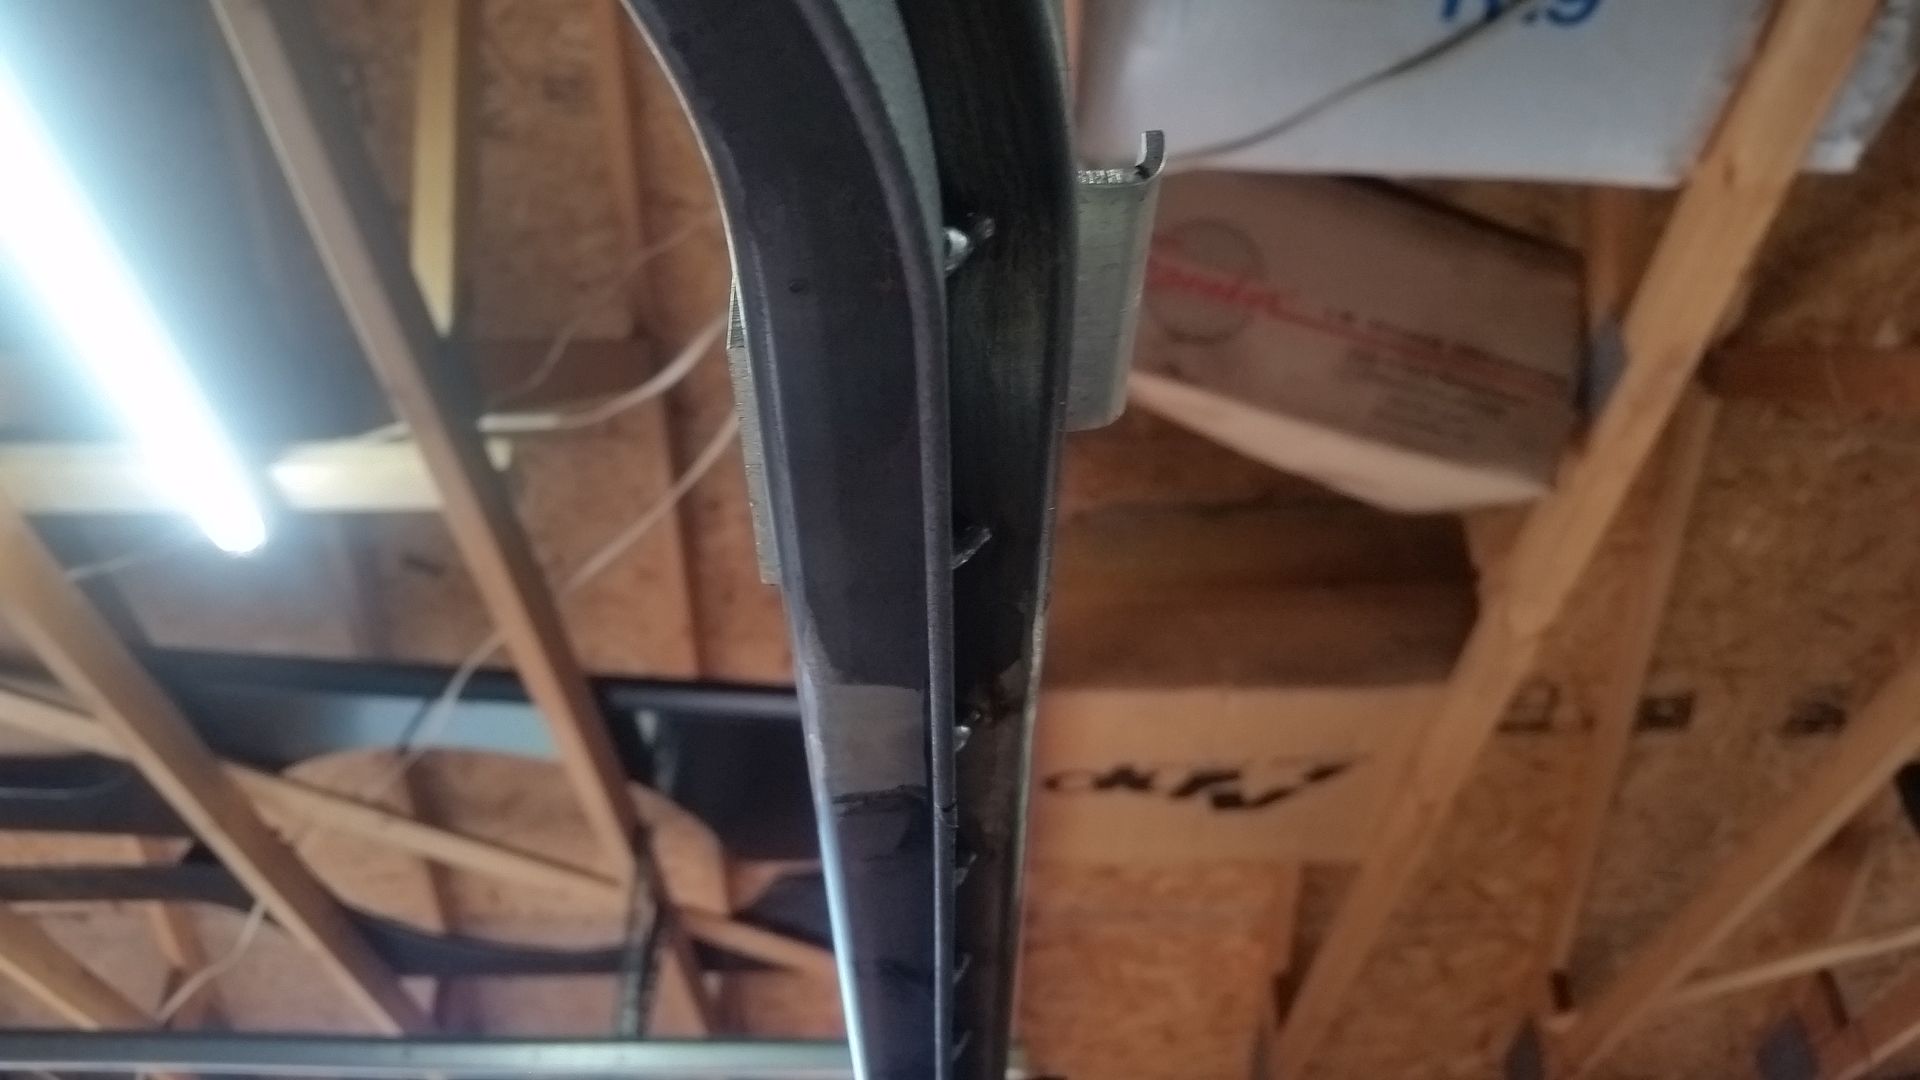
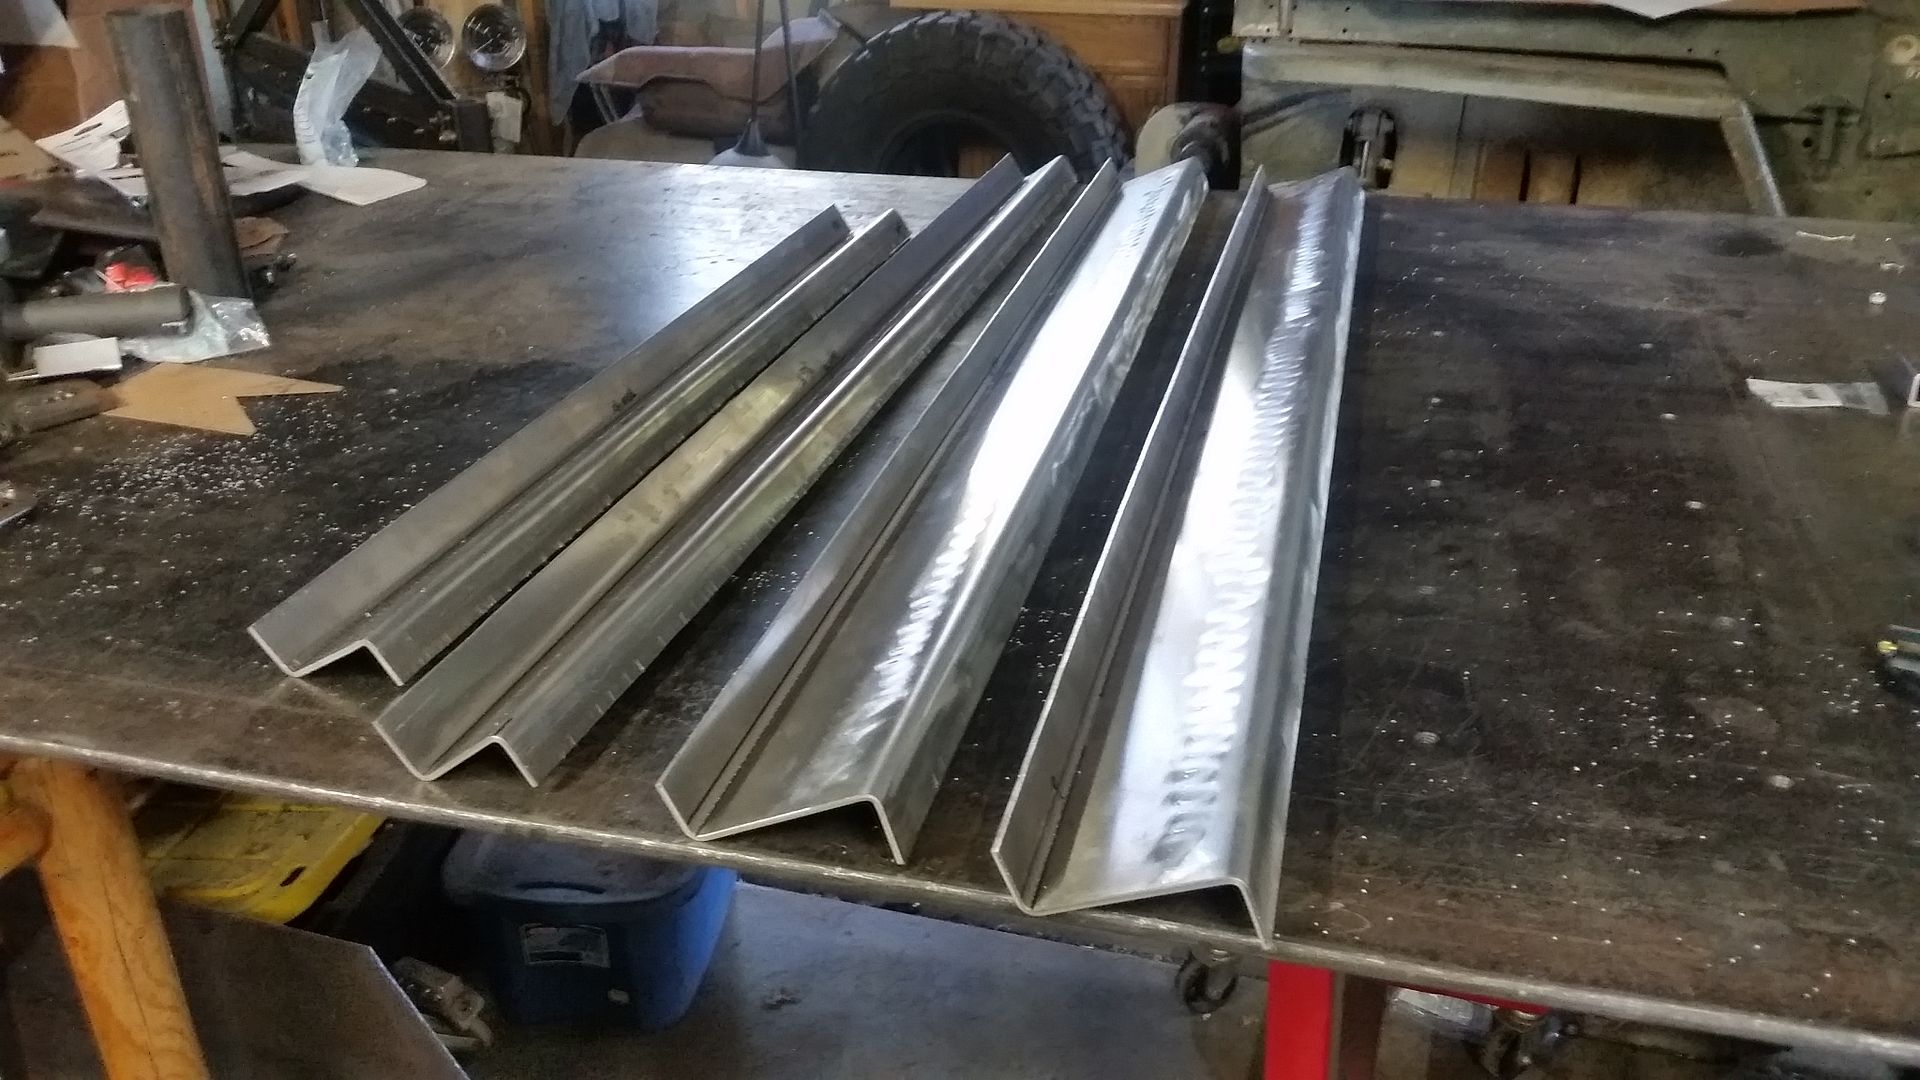
I made up these little test bends out of 1/8" 5052_H32 for the drip rails. I am going to try and retain a factory looking 1970s-ish drip rail around the sides and back of the top panel. My hope is that this will keep the water out of the cabin if the vehicle is caught with the rear panels and upper section of the door removed. It also makes the outer edge of the bend much stronger.
The inside of the drip rail section has a flange that will bolt to the inside of the halo. I will be using some 8mm rivet nuts in the cage structure to attach everything. It should be fairly easy to remove the top panel if needed, but I plan on just leaving it in place generally. It will be painted a different color than the body however so it will be nice to have it be a separate piece.
This is the section that sits on the top of the halo ( and that door bar ). This is what the other parts of the top will weld onto....
The rear channel was done much the same way, but does not have to extend over the door opening offset. The distance from the edge to rail is the same to keep things uniform on the exterior.
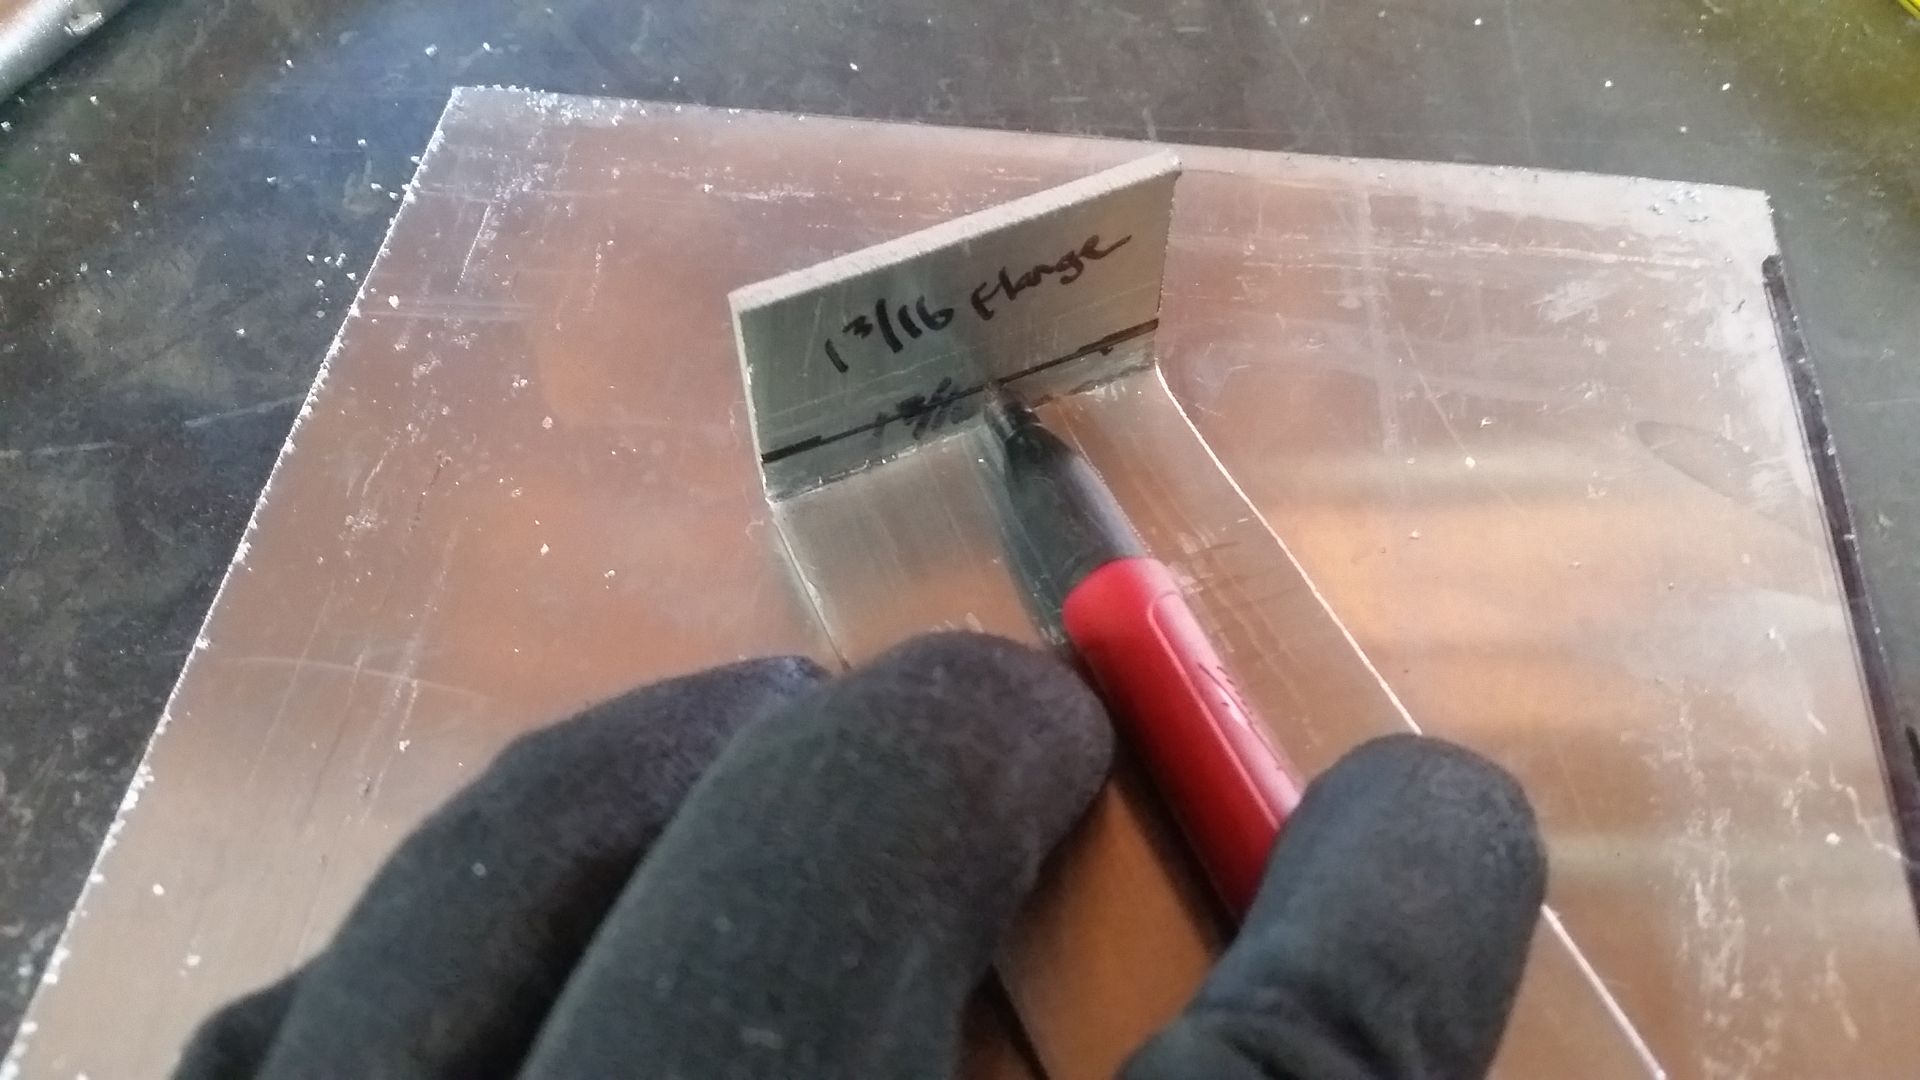
The outer drip rail flange needed to be formed with more length and then trimmed down to form the shape I wanted. I am basically trimming the flange off right after the bend. I did this by marking the offset using the width of the marker body. This makes it quick and easy to run over an entire panel, or multiple panels later, so they can all be trimmed the same.
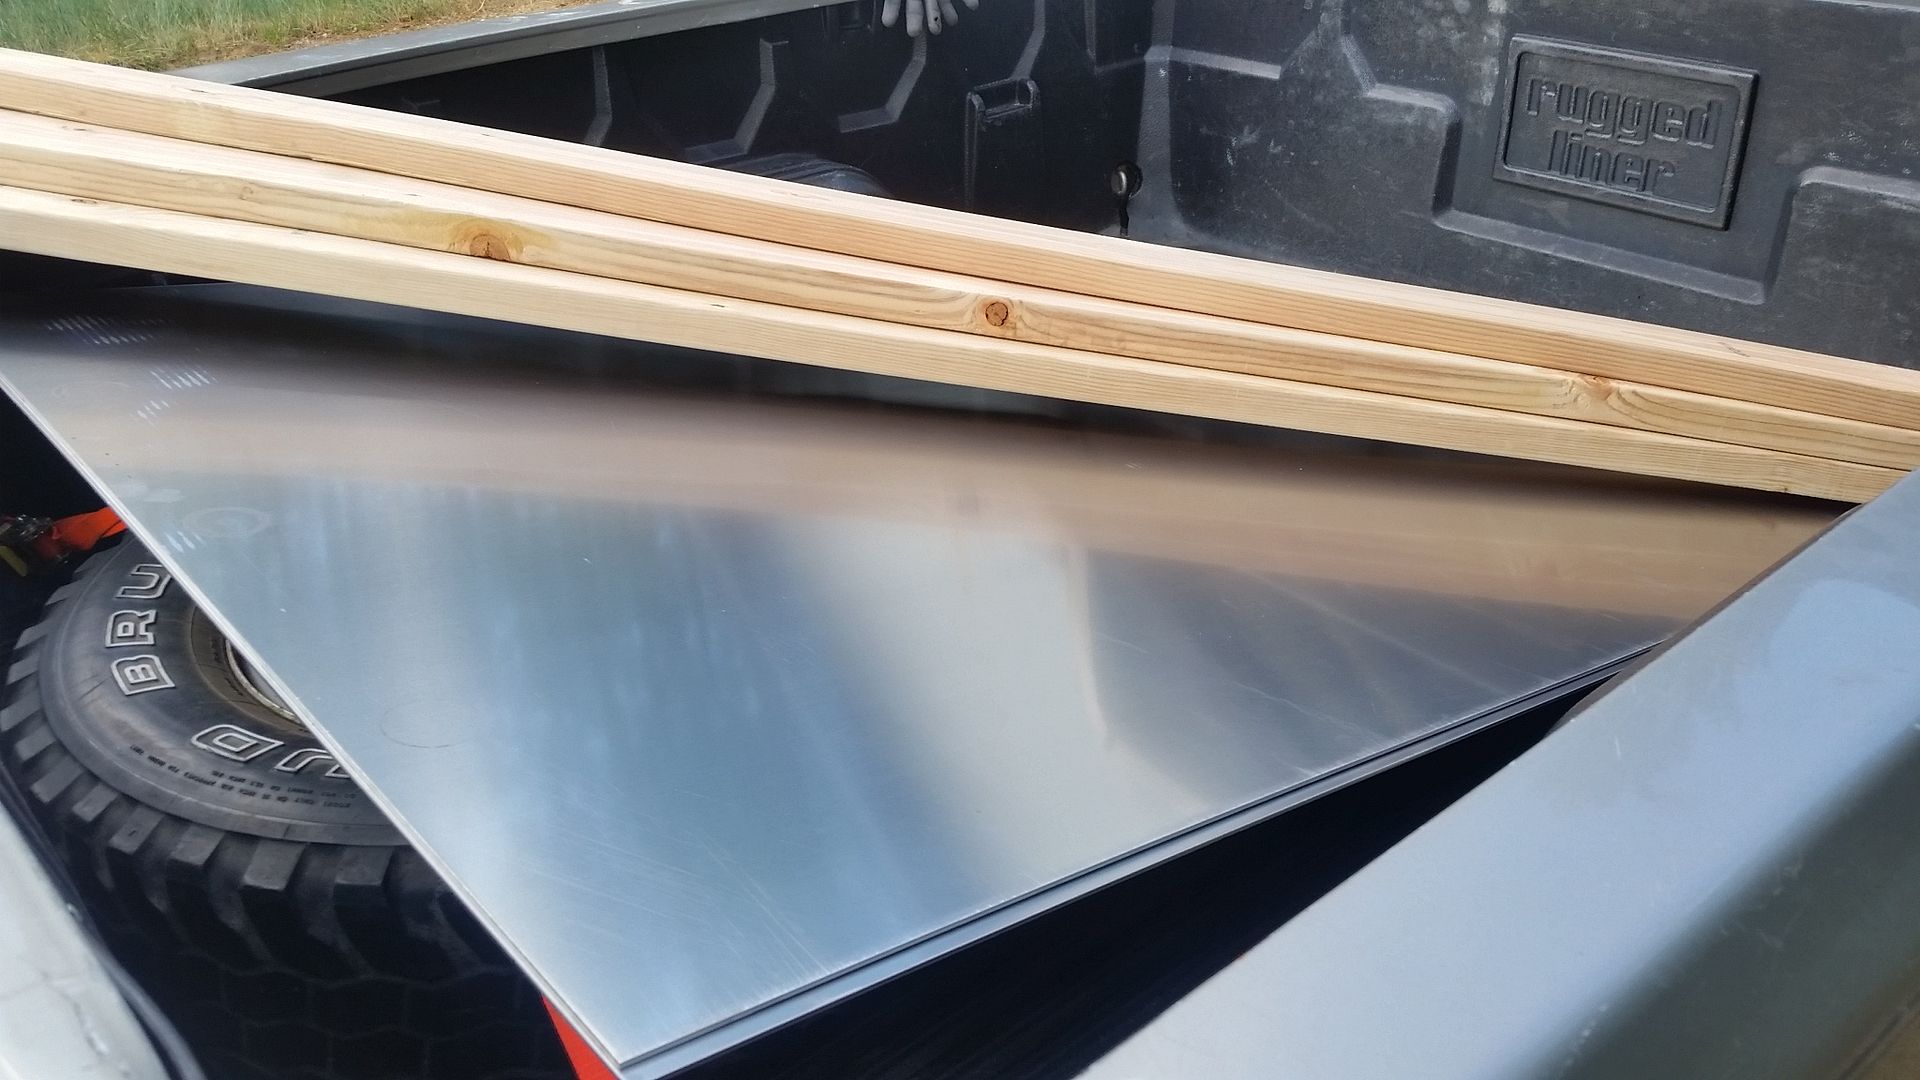
Once I had a plan I needed to stop by the aluminum store....and to get some wood which will come in handy later.
To move forward I had to do a few things....

I needed to add this flat bar into the door pocket offset of the halo. This is set in plane with the top of the halo and fills the gap to the windshield frame also. There will be another sheetmetal section to this that will provide the surface for the door sealing, but I don't need that just yet. This bar basically helps set the offset for the drip rails that will go around the edge of the top.

These bars also allowed me to figure out where the halo intersects the windshield frame. On the stock FJ40 the door surround bolted to that hood and the top panel as about 1" above the horizontal black line. That little section of the corner of the windshield frame needs to be trimmed out of the way to make the shape of the top more uniform and at a smoother radius.
This change is kinda like pulling down your hat a little further. It should make the chassis look like it is chopped about 1"....but without having to chop the windshield. I still probably should have chopped the windshield frame down, but I really didn't want to.....

I made up these little test bends out of 1/8" 5052_H32 for the drip rails. I am going to try and retain a factory looking 1970s-ish drip rail around the sides and back of the top panel. My hope is that this will keep the water out of the cabin if the vehicle is caught with the rear panels and upper section of the door removed. It also makes the outer edge of the bend much stronger.

The inside of the drip rail section has a flange that will bolt to the inside of the halo. I will be using some 8mm rivet nuts in the cage structure to attach everything. It should be fairly easy to remove the top panel if needed, but I plan on just leaving it in place generally. It will be painted a different color than the body however so it will be nice to have it be a separate piece.
This is the section that sits on the top of the halo ( and that door bar ). This is what the other parts of the top will weld onto....

The rear channel was done much the same way, but does not have to extend over the door opening offset. The distance from the edge to rail is the same to keep things uniform on the exterior.

The outer drip rail flange needed to be formed with more length and then trimmed down to form the shape I wanted. I am basically trimming the flange off right after the bend. I did this by marking the offset using the width of the marker body. This makes it quick and easy to run over an entire panel, or multiple panels later, so they can all be trimmed the same.

Once I had a plan I needed to stop by the aluminum store....and to get some wood which will come in handy later.
Metcalf
Expedition Leader
Onto the next part of the top project.
Once I had the test bends done I could move onto making full size parts. That new press brake I made a few month back sure does come in handy for it's size/weight. The only real hitch is that the steel dies mark up aluminum a little more than I would like. Those marks buffed out for the most part. This aluminum is 1/8" thick so there is a little margin to play with. I found that and 80 grit sanding disc followed by a red scotch pad seems to give a pretty good surface finish.
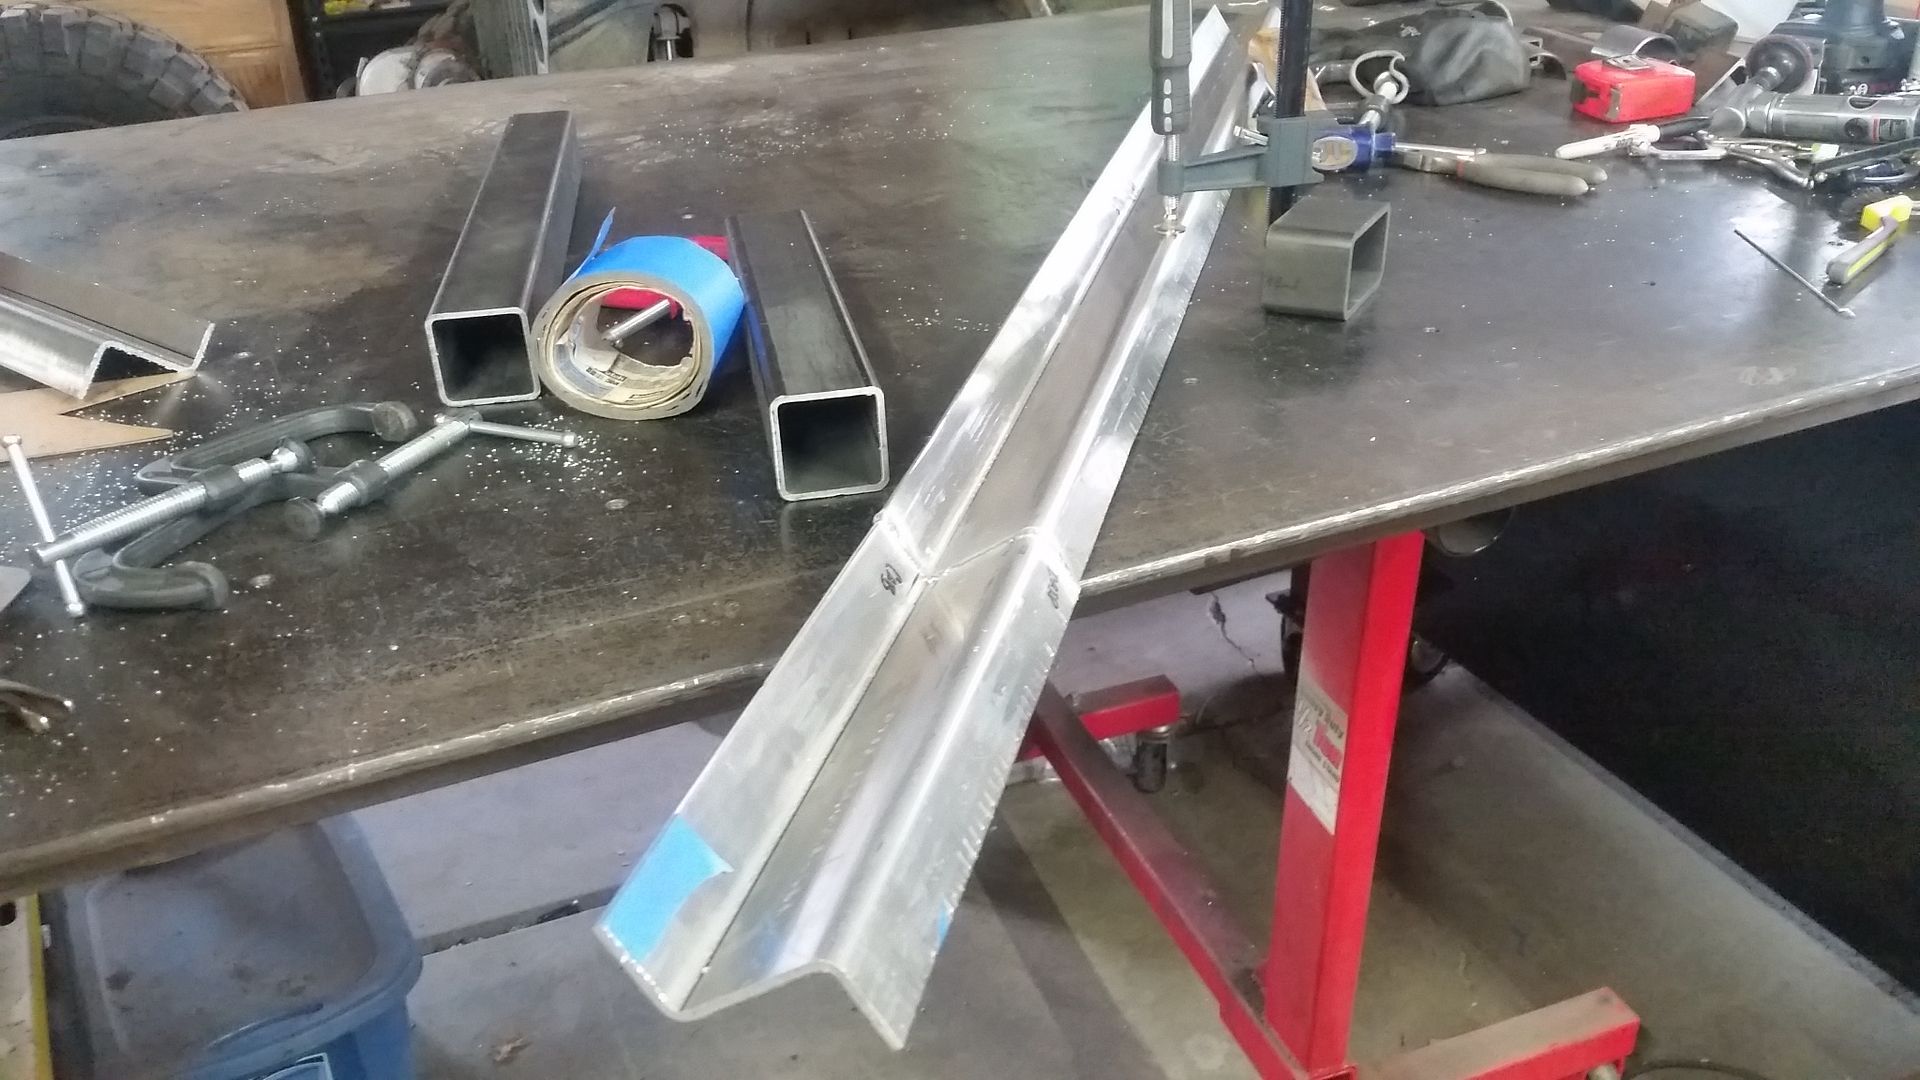
I didn't want to cut a length wise section out of my new sheets of aluminum. I ended up having to add a 10" section to the rear rail in order to have enough length to span the width of the body. The ends will be trimmed off, but I wanted a bit of extra to play with...
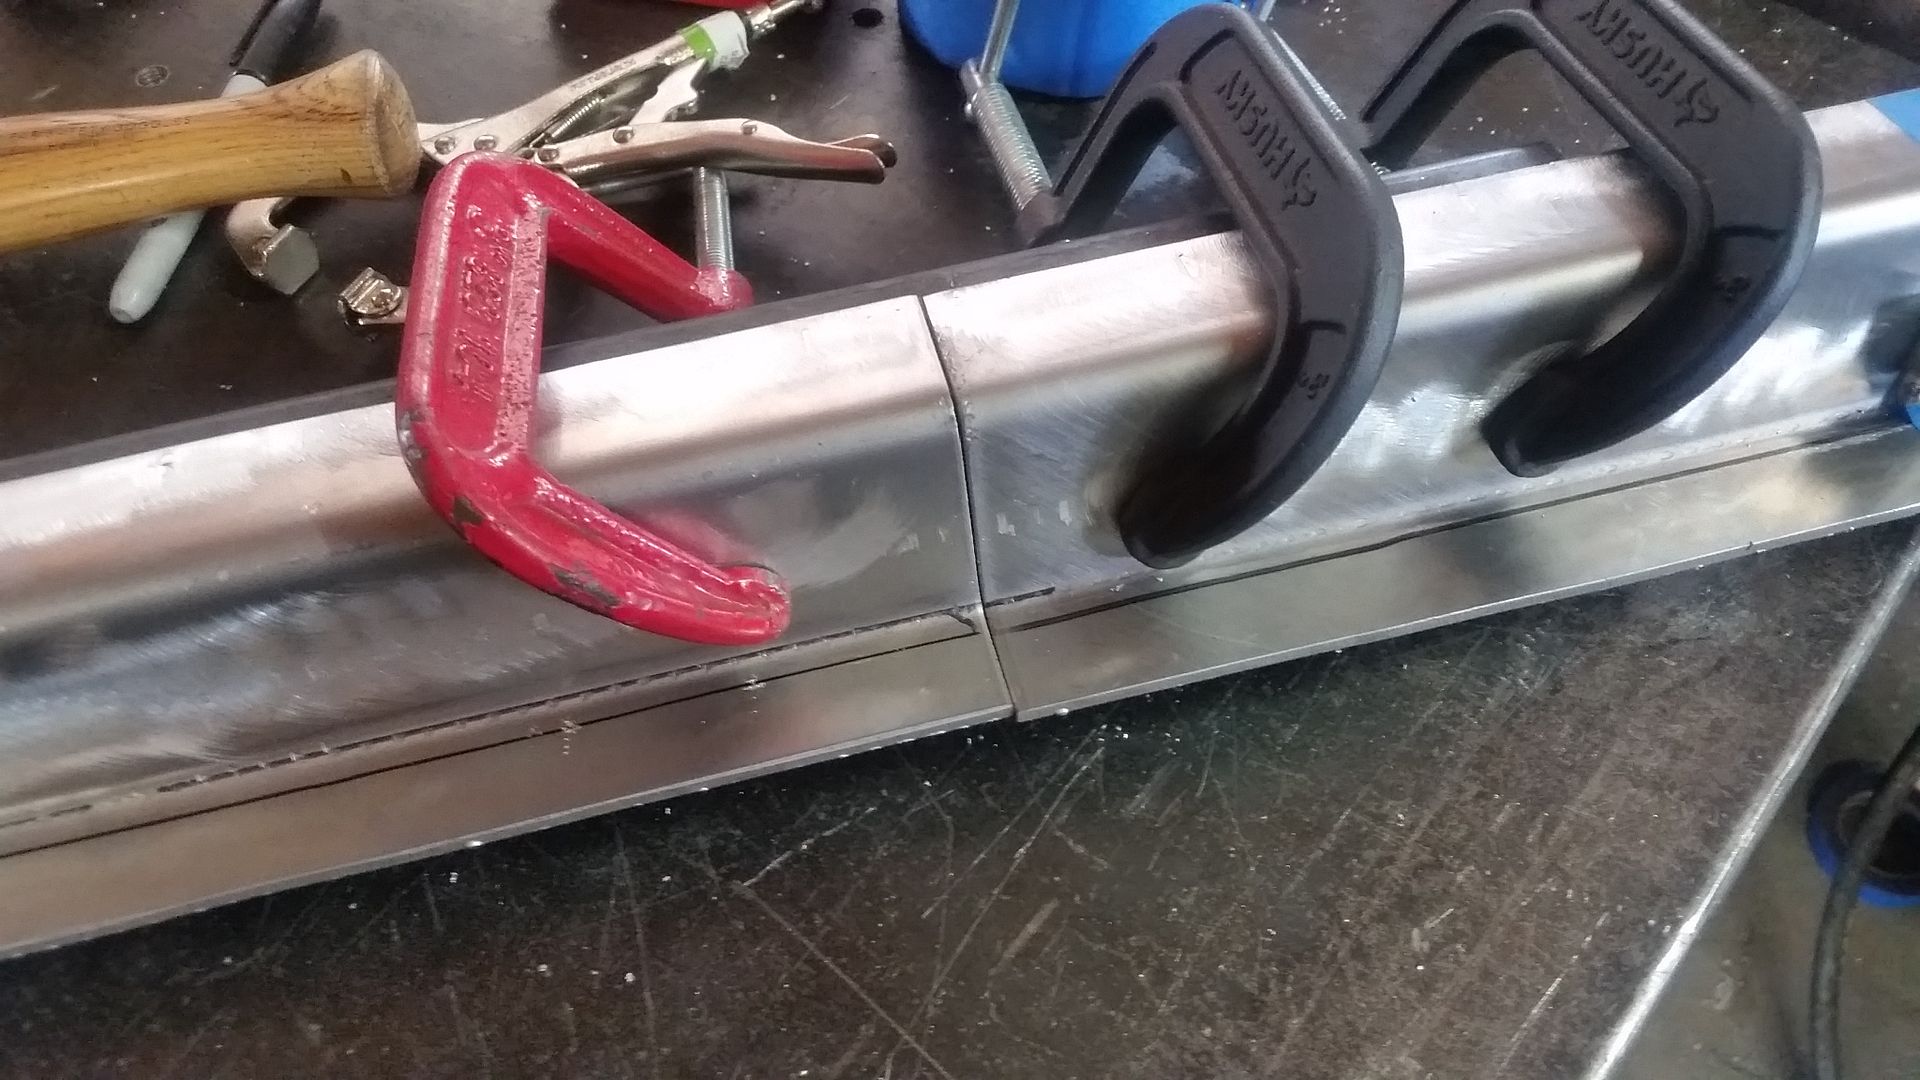
I tig welded both sides and dressed it all back down. I don't think it turned out half bad.
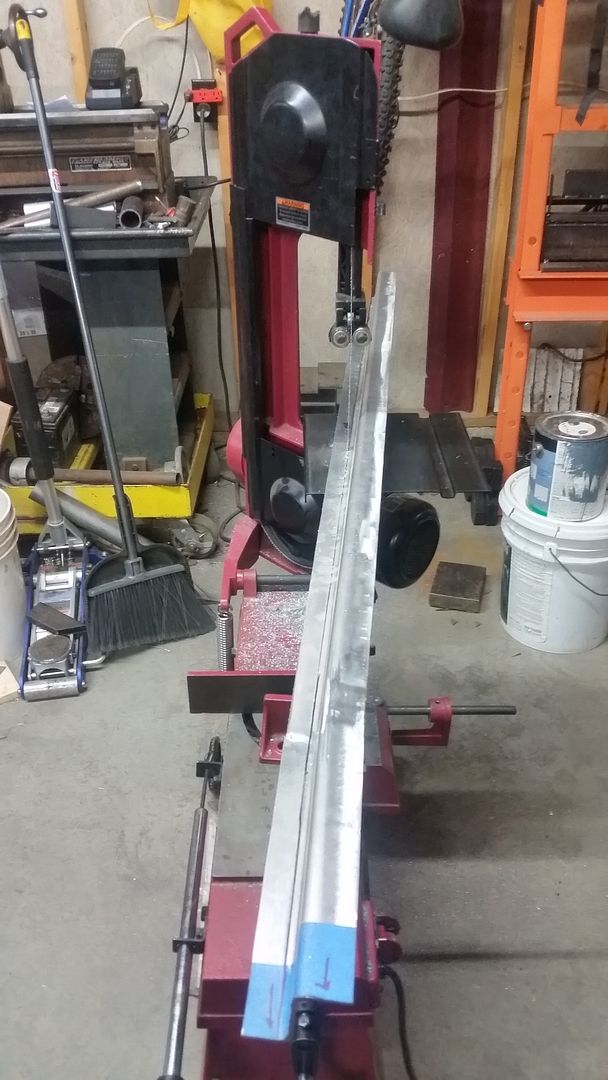
The next challenge was to trim down the trip rail flange like I did on my test part. I ended up pulling the saw away from the wall in order to be able to feed the longest 58" channel through. I even had to pull the last 10" of the parts from the back side of the saw to keep things balanced since I couldn't round up a helper.

The next step was to develop a template in order to trim the drip rails to fit around the A-pillar spreader up to the front edge of the windshield frame. I used a bit of chipboard, a ruler, and some offset geometry to figure this out. Once I was happy with the fit I used that template to trim the aluminum parts.
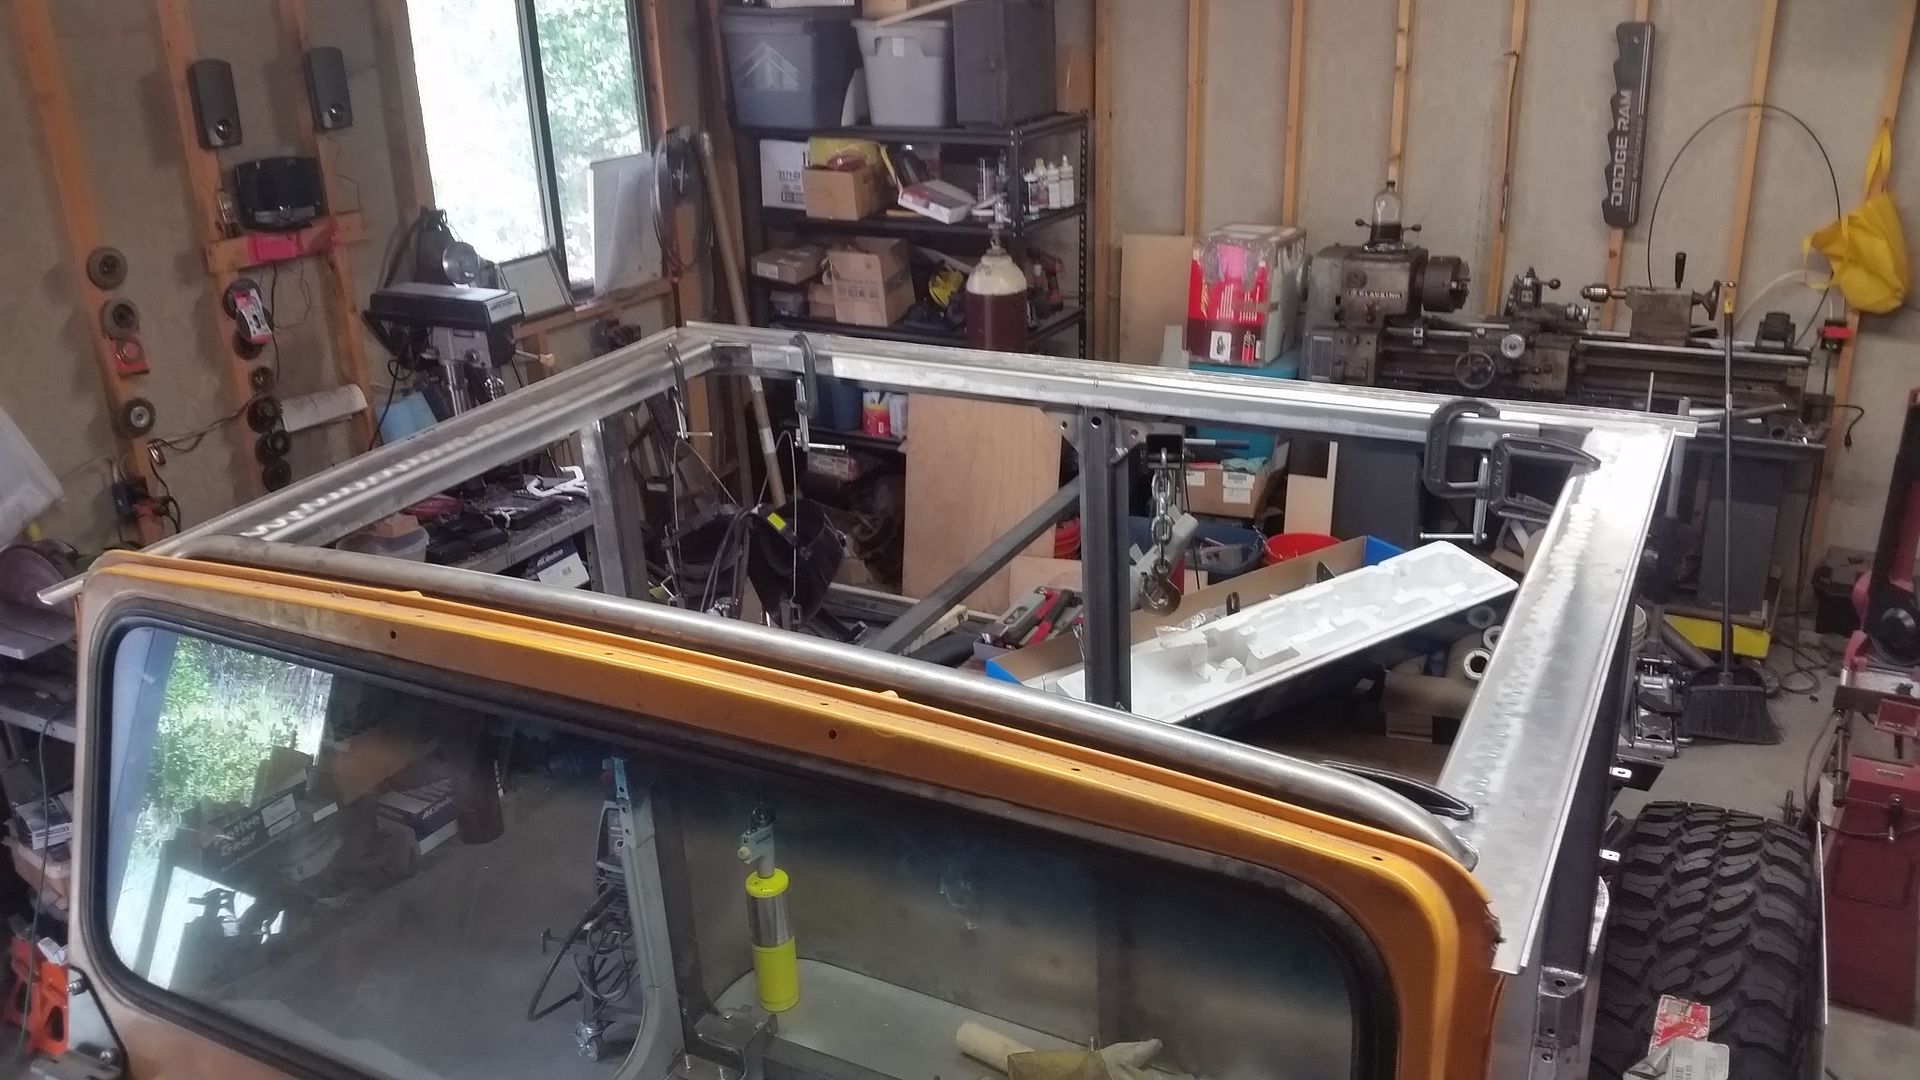
After much trimming and fitting the rails where clamped onto the halo and welded together with the TIG. The rear corner will be trimmed to match the radius of the halo bars and the drip rail added back in eventually. I'm not sure when the right time to do that will be.
Now I need to think about how I am going to form the curved top panel shape. I think I am going to make a new die for the press.....

Once I had the test bends done I could move onto making full size parts. That new press brake I made a few month back sure does come in handy for it's size/weight. The only real hitch is that the steel dies mark up aluminum a little more than I would like. Those marks buffed out for the most part. This aluminum is 1/8" thick so there is a little margin to play with. I found that and 80 grit sanding disc followed by a red scotch pad seems to give a pretty good surface finish.


I didn't want to cut a length wise section out of my new sheets of aluminum. I ended up having to add a 10" section to the rear rail in order to have enough length to span the width of the body. The ends will be trimmed off, but I wanted a bit of extra to play with...
I tig welded both sides and dressed it all back down. I don't think it turned out half bad.

The next challenge was to trim down the trip rail flange like I did on my test part. I ended up pulling the saw away from the wall in order to be able to feed the longest 58" channel through. I even had to pull the last 10" of the parts from the back side of the saw to keep things balanced since I couldn't round up a helper.

The next step was to develop a template in order to trim the drip rails to fit around the A-pillar spreader up to the front edge of the windshield frame. I used a bit of chipboard, a ruler, and some offset geometry to figure this out. Once I was happy with the fit I used that template to trim the aluminum parts.

After much trimming and fitting the rails where clamped onto the halo and welded together with the TIG. The rear corner will be trimmed to match the radius of the halo bars and the drip rail added back in eventually. I'm not sure when the right time to do that will be.
Now I need to think about how I am going to form the curved top panel shape. I think I am going to make a new die for the press.....
Stoffregen Motorsports
Explorer
Curious to see what you come up with.
Metcalf
Expedition Leader
Curious to see what you come up with.
Me too!
I think it is going to involve a larger radius die and some bump forming according to my tests today.
redthies
Renaissance Redneck
You should get some copper, a bean bag and rubber hammer and hand hammer it like a Mexican copper plate. Very arts and crafts! And it would eventually turn that cool shade of green like the late 60s and early 70s cruisers. By know you should have realized I'm kidding.
I'm sure you'll work something out. Aluminum should stretch enough to form the corners. You could get a slab of wood and form the shape you want, and then mount it in your press. How tall will the bubble need to be? 3-4"? A piece of 4x12 would give you enough to get a decent way around the corners. 40 grit flap wheels for your grinder would shape it really quickly. Once you have the wooden die the shape you want, you could pour a concrete mold for the opposite side of the press.
I'm sure you'll work something out. Aluminum should stretch enough to form the corners. You could get a slab of wood and form the shape you want, and then mount it in your press. How tall will the bubble need to be? 3-4"? A piece of 4x12 would give you enough to get a decent way around the corners. 40 grit flap wheels for your grinder would shape it really quickly. Once you have the wooden die the shape you want, you could pour a concrete mold for the opposite side of the press.
Possible inspiration:
http://www.ausjeepoffroad.com/forum/showthread.php?t=97856
This guy is a magician... Long, Long, long but interesting thread. Somewhere around post #1330 is the roof work...
Sent from an evil pocket calculator with a flashy screen
http://www.ausjeepoffroad.com/forum/showthread.php?t=97856
This guy is a magician... Long, Long, long but interesting thread. Somewhere around post #1330 is the roof work...
Sent from an evil pocket calculator with a flashy screen
redthies
Renaissance Redneck
Possible inspiration:
http://www.ausjeepoffroad.com/forum/showthread.php?t=97856
This guy is a magician... Long, Long, long but interesting thread. Somewhere around post #1330 is the roof work...
Page 147 of the thread is where it starts, but he's already got the corners somewhat formed. I agree, he looks to have mad skills. There must be more info earlier in the 147 pages... Hope their search function is good!
Thanks.
The only part of the dash that seems to have pulled annoyingly is the upper left of the radio hole where it was close to the other weld. I think a little hammer and dolly in that area and it will be ok.
In general, I am not patient enough to chase a no body filler flat panel. I am going to put a table mount in the middle of the upper part of the dash. All the switches will be in the lower rail section I think.
Do you do any planishing on your welds before your final pass with the grinder?
Metcalf
Expedition Leader
Do you do any planishing on your welds before your final pass with the grinder?
Other than doing it with a hammer and dolly by hand, I don't have the ability to planish mechanically with like an air driven unit. Stretching the weld back out a little bit probably isn't a bad idea. I think that need is minimized to a degree by using the TIG welder and going slower with heat input. For the amount of welding I did on that panel patching so many holes, I was actually surprised it moved as little as it did.
Stoffregen Motorsports
Explorer
TIG welding seams produces a softer, more malleable weld vs MIG, making it easier to planish without as much of a fear of cracking or over hardening the weld. I have been trying to TIG weld panels exclusively for the past few years and it does make a lot less finish work.
Other than doing it with a hammer and dolly by hand, I don't have the ability to planish mechanically with like an air driven unit. Stretching the weld back out a little bit probably isn't a bad idea. I think that need is minimized to a degree by using the TIG welder and going slower with heat input. For the amount of welding I did on that panel patching so many holes, I was actually surprised it moved as little as it did.
Ya.. hammer and dolly to correct the low spot around the weld is what I was referring to. Did you do this or just grind after weld?
Metcalf
Expedition Leader
Ya.. hammer and dolly to correct the low spot around the weld is what I was referring to. Did you do this or just grind after weld?
I went over the problem spot a bit, it came up enough to make me happy. Other than that one area everything didn't move much with the TIG welding. I was rather easy to dress out the little bit of extra well.
NCFJ
Adventurer
I really like sheet metal work (for myself). I am not nearly as skilled at it as you two guys are. Keeping the heat out of the surrounding metal is always first in my mind when prepping to weld. The patience required is what puts me over the edge if I am under the gun in the shop, my mind goes to all the other stuff I could be getting done while farting around getting a panel welded up.
I like watching the OP's forming methods, creative and then some. Truly inspiring. We are talking about expanding the shop and a couple sheet metal tools are on the radar. I have a hand bead roller but a powered model would be great. Have you ever checked out this guy?
https://www.youtube.com/user/lazzemetalshaping/videos
Metcalf
Expedition Leader
I really like sheet metal work (for myself). I am not nearly as skilled at it as you two guys are. Keeping the heat out of the surrounding metal is always first in my mind when prepping to weld. The patience required is what puts me over the edge if I am under the gun in the shop, my mind goes to all the other stuff I could be getting done while farting around getting a panel welded up.
I like watching the OP's forming methods, creative and then some. Truly inspiring. We are talking about expanding the shop and a couple sheet metal tools are on the radar. I have a hand bead roller but a powered model would be great. Have you ever checked out this guy?
https://www.youtube.com/user/lazzemetalshaping/videos
Lazze is a quiet metal shaping master. I love watching his videos, I just can't afford his tools!