Redeth's Overland Trailer Build

JandDGreens

Adventurer
I don't know why but I the updates for these thread was going to my spam?? I just happened across it searching for something else. Nice that your getting everything buttoned up and have been using it. Now's the time you will be able to travel all over Spring is here!! We have plans to see the Grand Canyon and I am going to explore the Alpine Loop trails (my wife hates shelf roads) in southern Colorado this summer. Do you have ant extended trips planned for this year? Love following your build!!
 

Redeth005

Adventurer
I did tons of research and i got loads of wiring done this week. Have fun reading. Hear is what i got done this past weekend.
I wanted to test out the multi-switch switch panel that i bought off amazon as well for a lot of other things such as Master ON/OFF switch 100amp breaker which i may have to return for a different one, relays, wire, plastic conduit etc etc....

Here i was testing out the panel with one of the 10 lights I plan to run on the trailer.


This is a short video of what i was doing in that picture. Click on the link for the youtube video...

My Relays:


Wire diagram for switch board. And my own notes on which color goes where for the relay wires.


Also I just realized that the LED lights i plan to run are 20watts(1.66amps) each. I plan to run 10 in total. That's 200 watts(16.66amps) if all the lights are turned on. Luckily i will only need to have all the lights on at once for the camp set up. once my camp is set up i will run 2 of these Christmas LED lights that you guys have previously seen in my night time pix. Those lights are 19.5 feet long and they only take up 7.2 watts or 0.06amps. Lucky for me these are still just bright enough to light up my campground. And i have 2 of them. So i'll most likely use these lights once the camp is set up so i can save on battery usage.


Here's a sketch of how i want my electrical panel to look. As you can see i want it to have a drop down option so i can keep the relays and fuse block behind the wood board.


Sunday i got around to installing 2 flex pro all4offroad.com rock lights under the trailer. It's hella good for just one pair. I'm also installing one light in each of the 2 compartments to light up my storage spaces. The remaining 6 are going higher up on the trailer and will be used to light up the entire surrounding of my campground for those days that i gotta set up camp in the pitch black night. I should be getting to the rest of these lights by the end of the week. My truck uses 8 of these bad boys. But 2 should do just fine for the trailer because I am going to have all the exterior lights as well.

Here i have the front most rock light mounted on the transmission crossmember


Here i have the rear light mounted on another crossmember that is located in front of the tires. I have the light pointed toward the floor/rear at a 45° angle.


Close up of the rear light.


Side view


----------------------------------------------------------------------------------------------------------------------------------------------

On a side note my wife bought me 2 mini skillets from ROSS. I've been wanting to buy some for attempting to cook cookies or cinnamon buns in my grill.


Unfortunately i overcooked the cookie mix the skillets came with. But at least i know i can bake in my coleman grill if i really wanted to now. *thumbsUp*


I've also been telling my wife that it's funny that i now have an installed and fully working heater and now the weather is beginning to heat up. And i told her we most likely wont get to use the heater till winter or late fall lol She bought us this battery powered fan with an LED on it for the tent to help circulate the air. Good thing is that it uses 2 D batteries and since my heated EccoTemp shower runs off D batteries i will always have that size in hand.


Redeth005

Adventurer
I spent all day yesterday and today getting the wires for the exterior LED's cut to size and running them through the new roof cable gland and placed into the wire loom.

This is 3 sets of wires coming out of this waterproof cable gland. One for passenger, Front, and driver side lights.


Better view


This is how that Cable gland passes the wires into the front compartment. totally waterproof.


Ran all 3 sets up and away from everything to keep it from getting snagged on anything.


ALWAYS LABEL YOUR WIRE GROUPS! I'm glad i didn't forget this time. Working with many colors is simple. But when everything is black and red then you gotta go around with a tester and seeing which wires go where. Do it before hand and save yourself a lot of time.


Here are the set of 3 lights Daisy chained for the driver side. You'll see how they will mount onto the trailer in a bit.


Exterior (Driver, Front, & Passenger) LED's are now installed.


This one single light goes a long way... You'll see.


Still had to create some mounts for the dangling 2 LEDs on the side.


I used some 1"x1" L-Tube to create some 45 degree angle light mounts.


Sha-BOOOM! LET THERE BE LIGHT!!!! Mind you all my home, garage and shop lights are all off. All the lighting you see is from the trailer lights.


PLENTY OF LIGHT!


Told ya that single light goes really far. This is about 20ft away. and the light still reached a bit further then where i was standing.


So bright!


Here you can see the lighting even reached my neighbor's house Haha! This trailer definitely will not have any issues lighting up the campground in the middle of the night. This is gonna be perfect for when we arrive late to camp and gotta set up when the sun has gone down.


Better view of how they are mounted with the lights turned off


There you can see how the 45 degree angle mounts worked out perfectly.
 

Redeth005

Adventurer
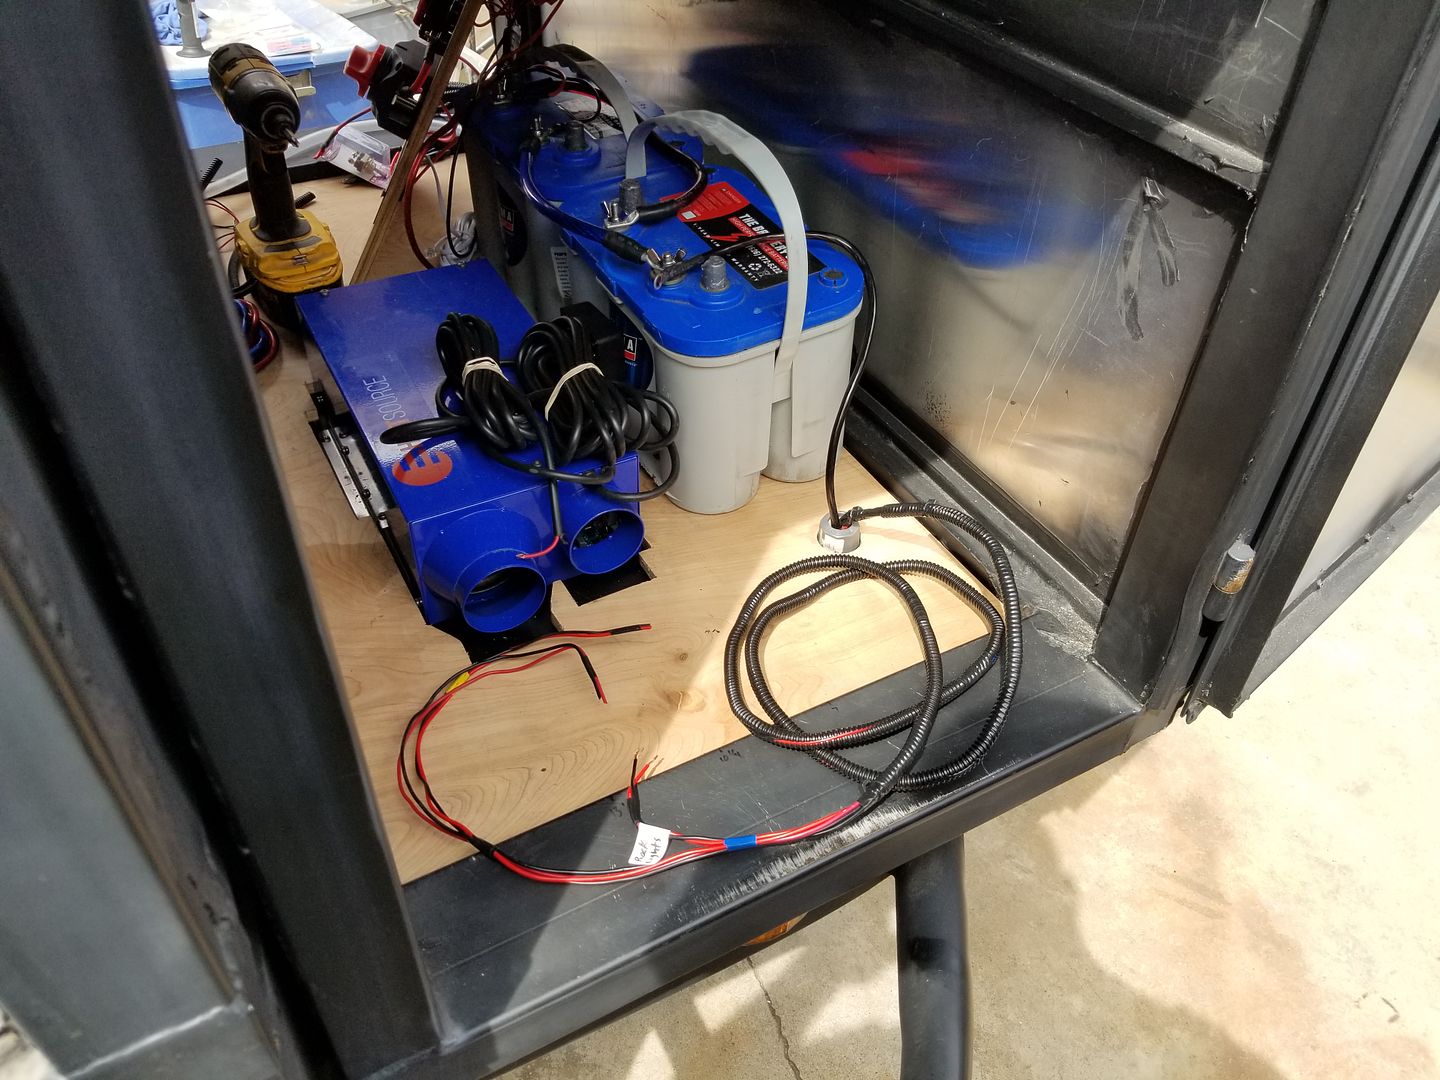
So i have finally finished running all the wires for lights and installing those LEDs now. All that is left to do is make a cabinet for the front compartment to house all the electronics and switch panel stuff.

Drilled the hole through the wood and metal floor. And installed a cable gland to protect the wires and waterproof the area it passes through.


A little trick i learned when i did an apprenticeship for being a Low-Voltage electrician.


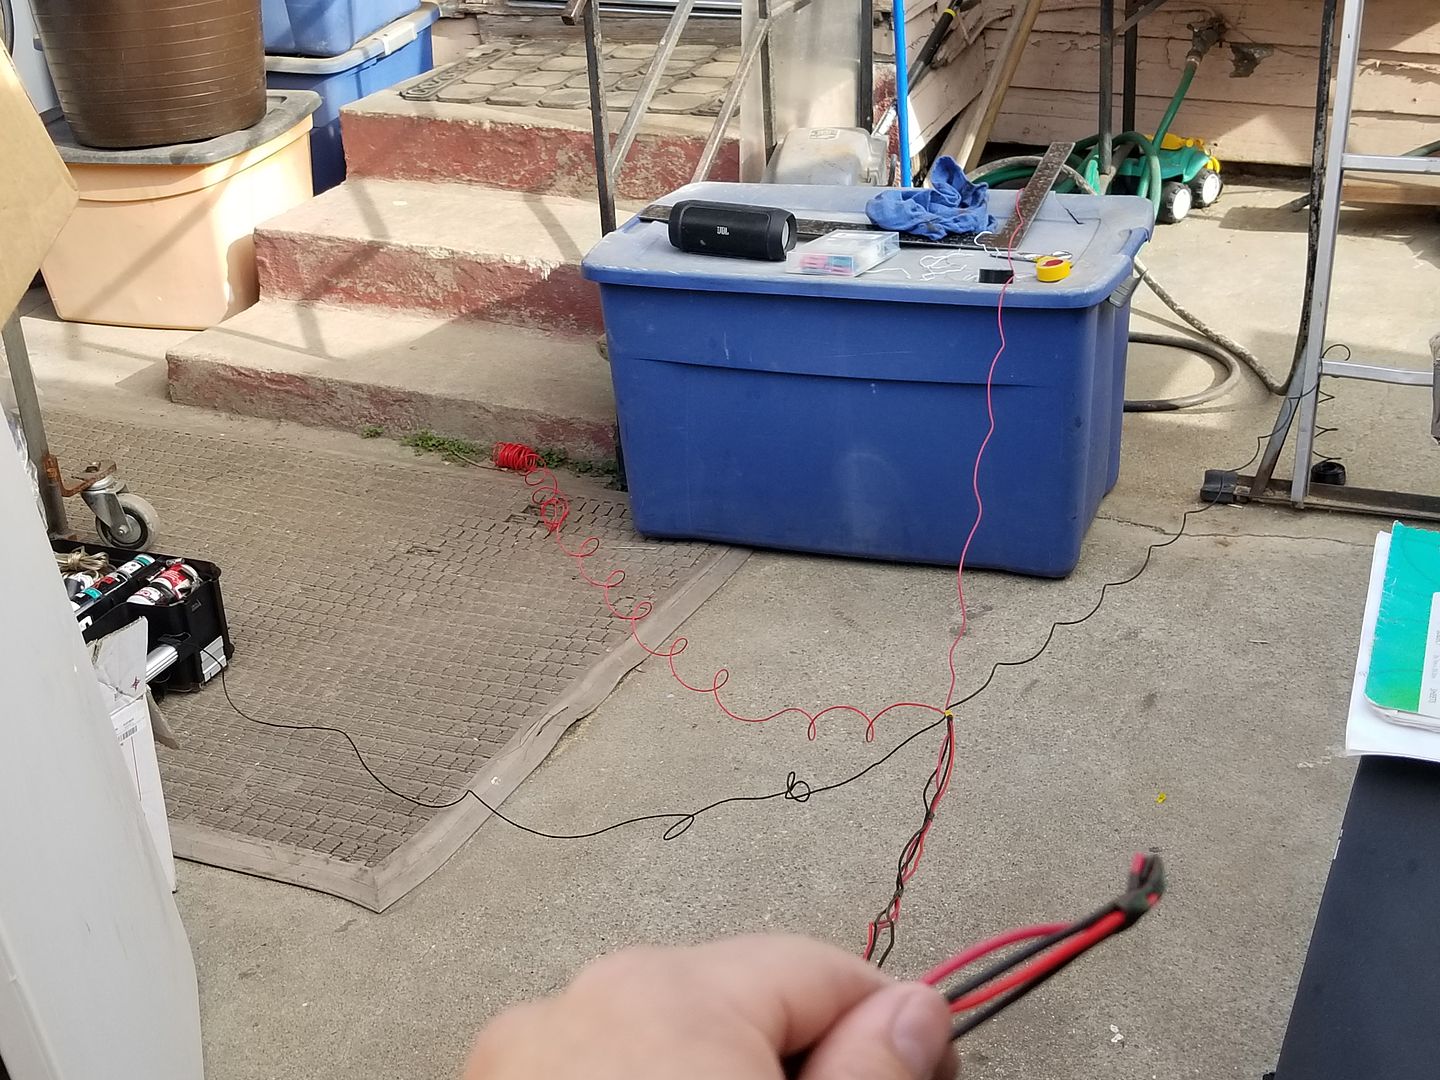
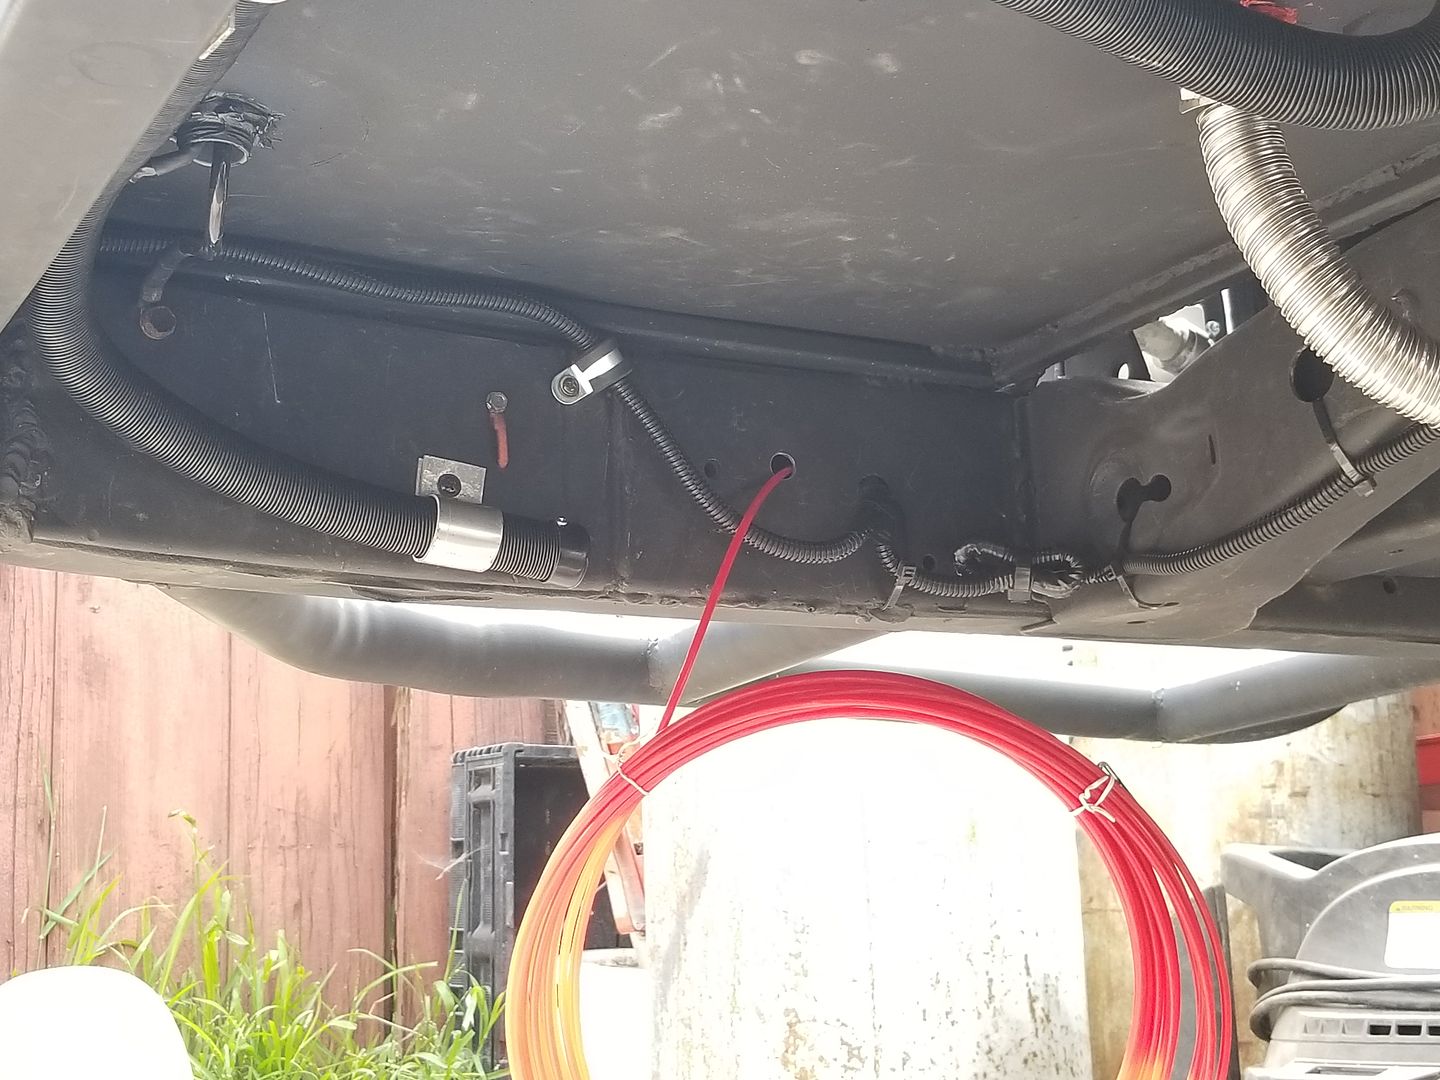
For both my truck and this trailer i like to pass the majority of my wires through the chassis. To accomplish this i used a fiberglass fish-take. This one is from harbor frieght. It costs about 7 bucks. Works great. Love the flexy tip. Makes passing wires through the chassis a breeze. I ran the entire 7 pole trailer harness in this fashion.


Ran the fishtake all the way to the rear end near the bumper


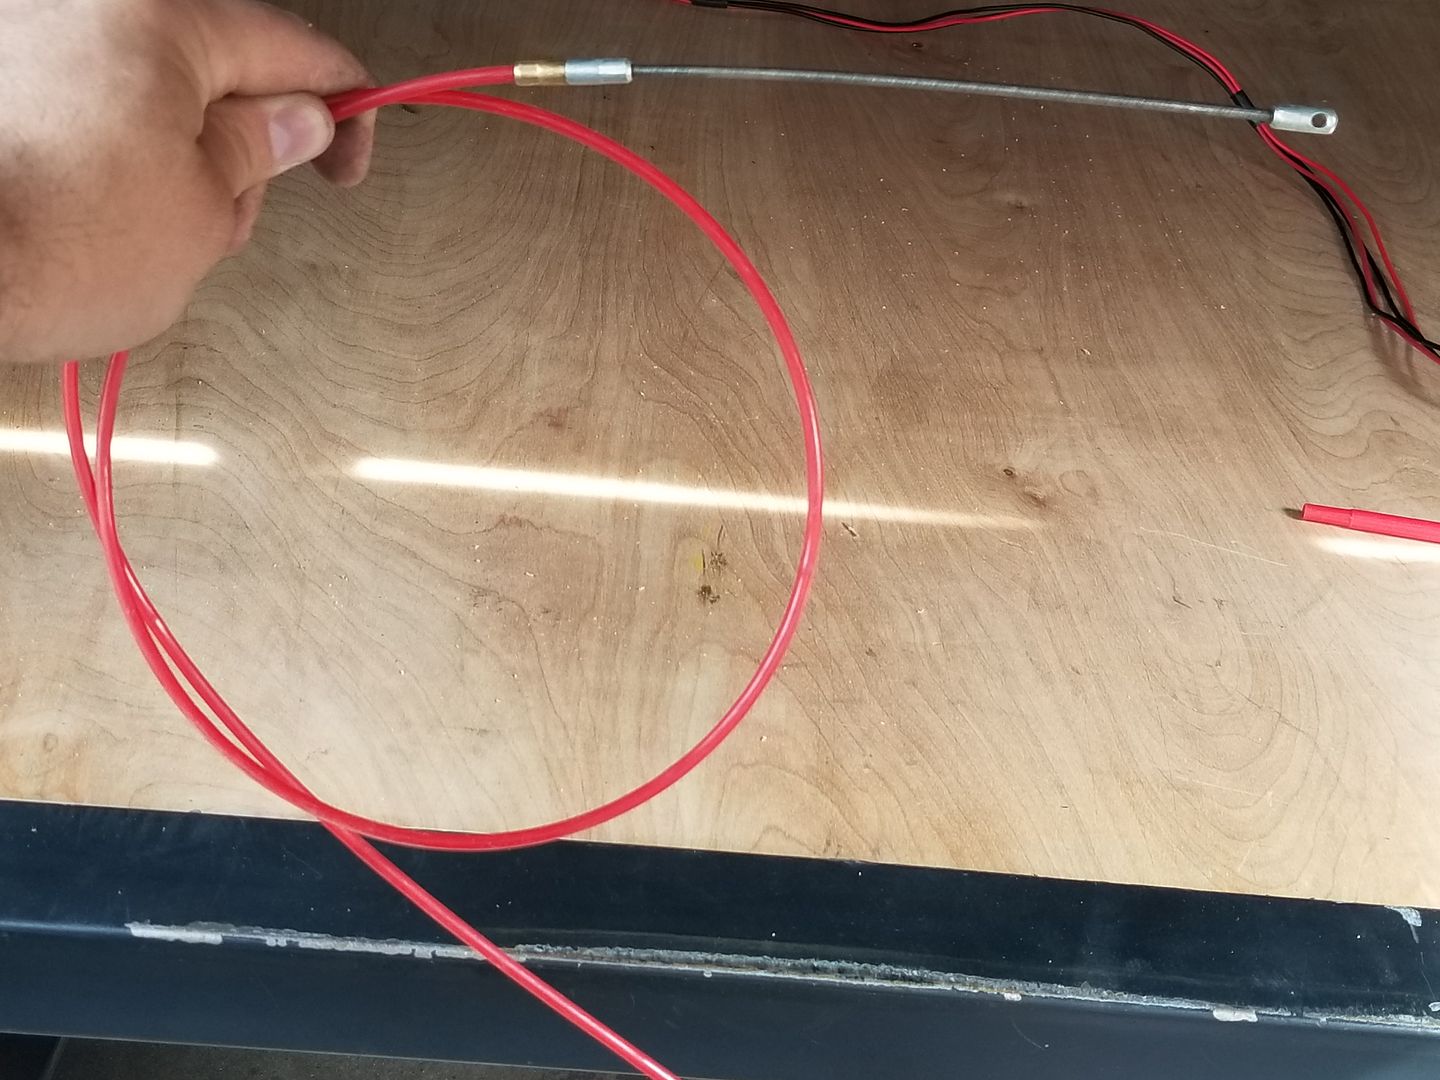
Here is how i wrap the wires on the fishtale. I pass 1 wire through the loop. Fold it back to the wires tape it all in place then pull on the other end. This job is so much easier then you have somebody helping you feed the wires on the other end.


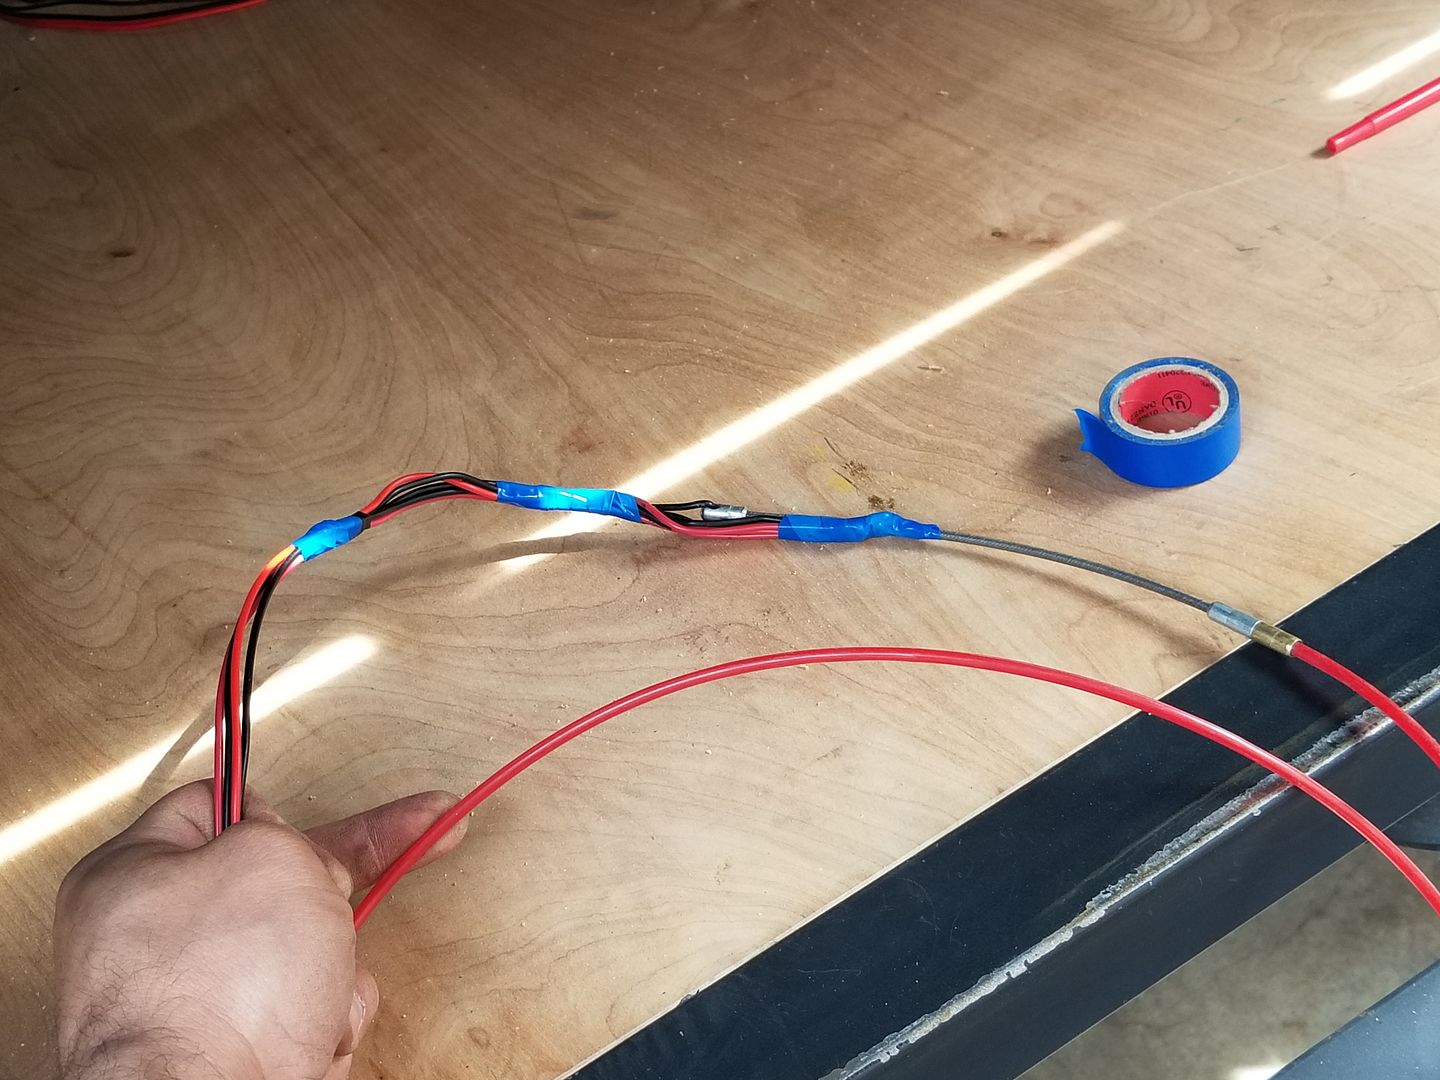
Here you can see it was all pulled out. If you run into any issues passing wire you can always pull it back and use lubericant to pass. I didnt have to do that this time. Never pull harder or you might strip/knick the sheath off the wires! Just dont connect the wires till they obviously dry if you decide to use soapy water.


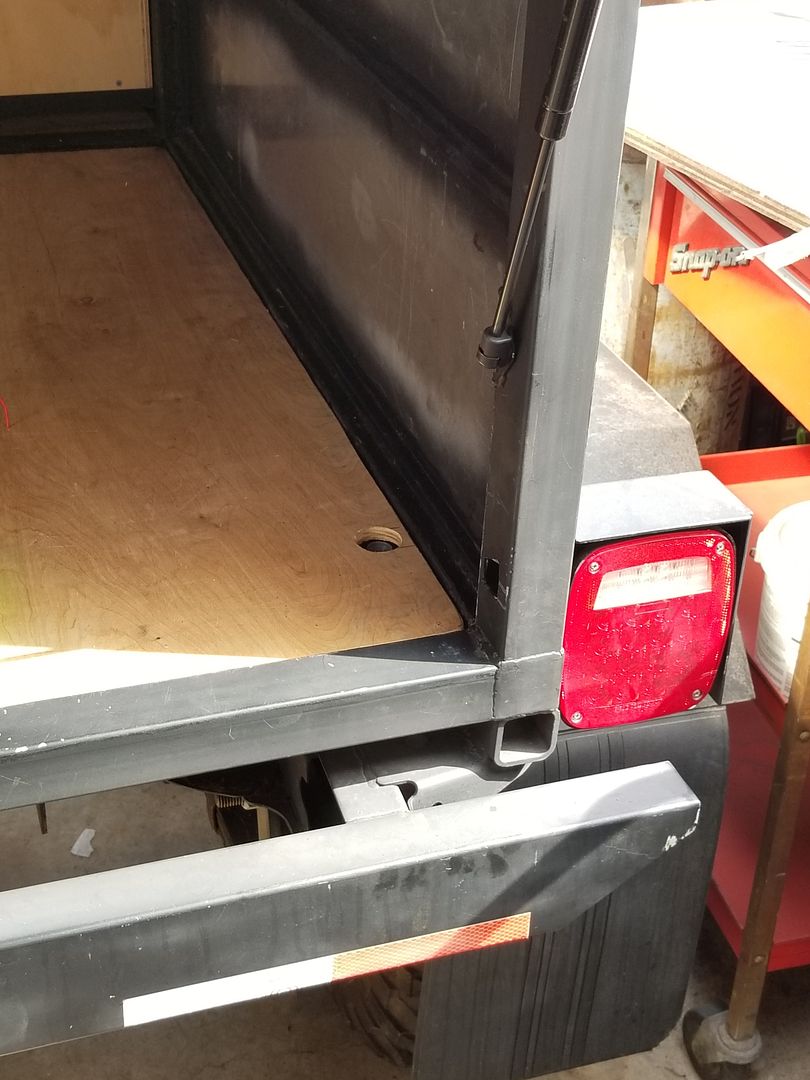
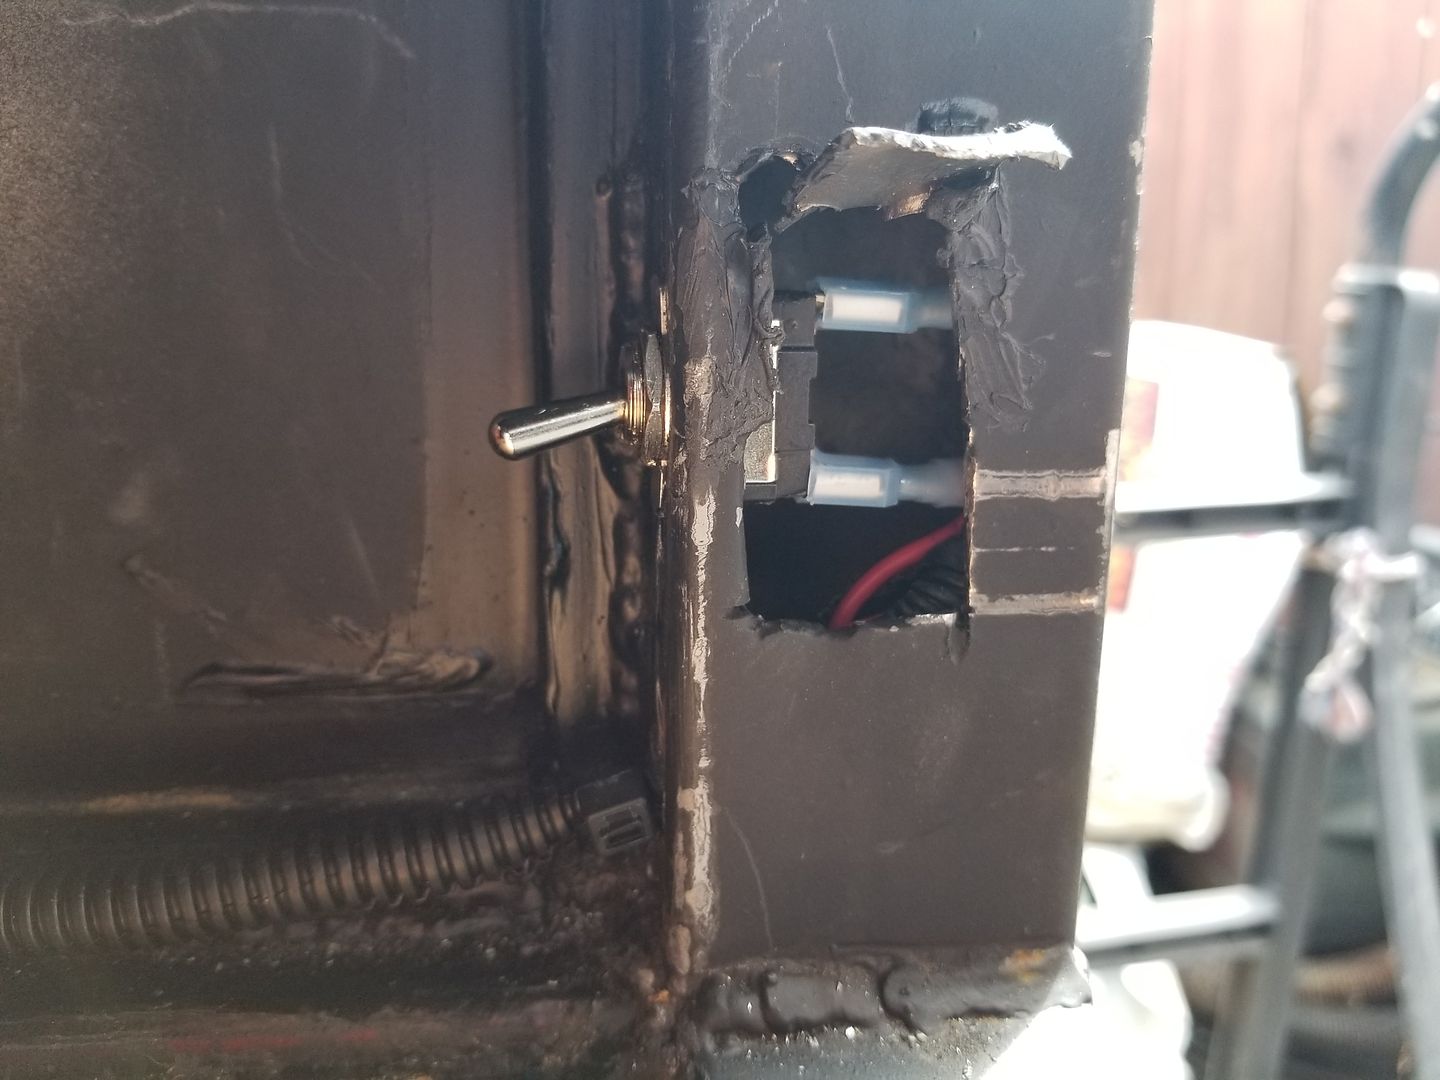
Wired up an ON/OFF switch for the inside of rear compartment. I had to cut the hole for the tailgate latch system a bit larger to pass the wires through the frame and get the switch in there. It was an extremely tight fit. Just had to maneuver it a bit to get it to fit.


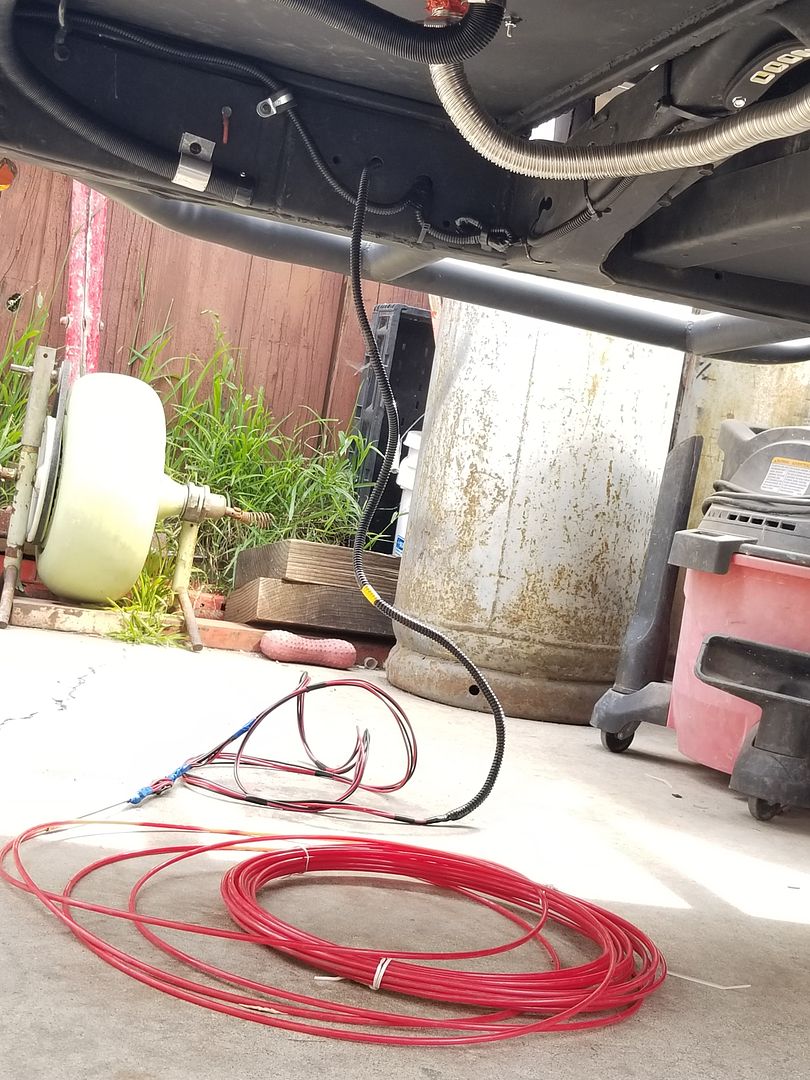
This is the only exposed wire on the floor. For the most part it is all out of the way. I chose to run the wire on inside the steel 2x2" compartment tube so it wouldnt get snagged on anything with putting gear in and taking gear out. I would have drilled this cable gland further back but the compartment mount and chassis was in the way on the underside so this was the only spot i could drill through.


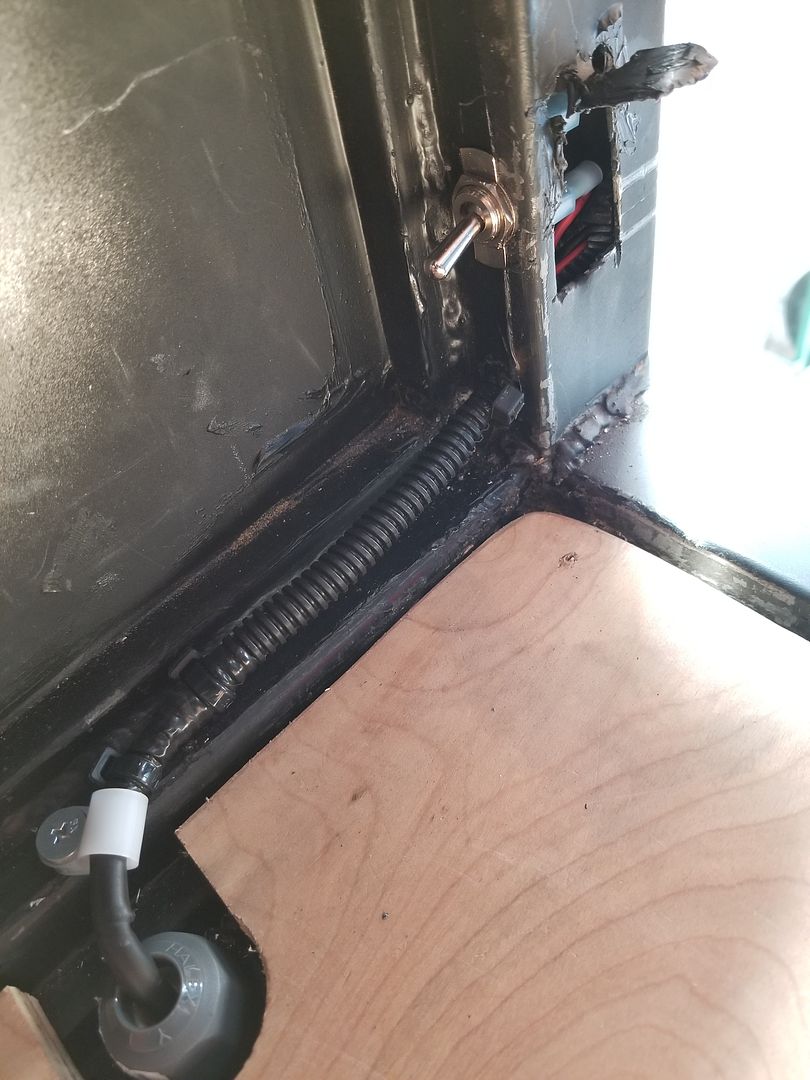
And it is all secured out of the way with a cable gland clamp.


Once the wires were ran i folded over the metal piece where the latch system closes into. And siliconed it shut.


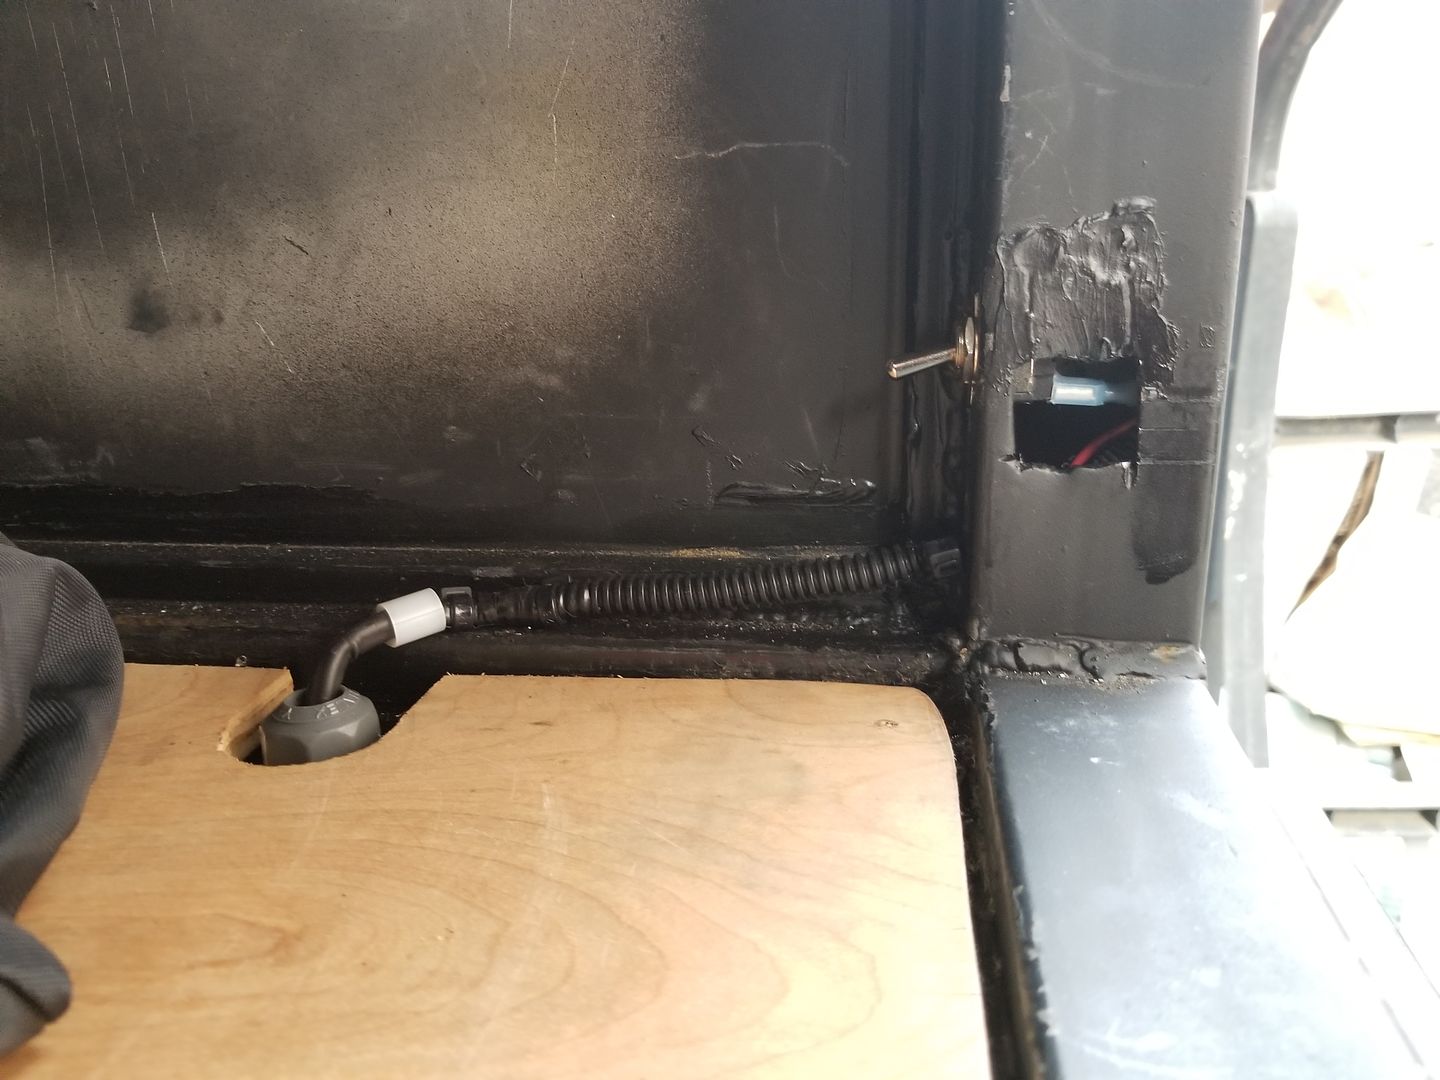
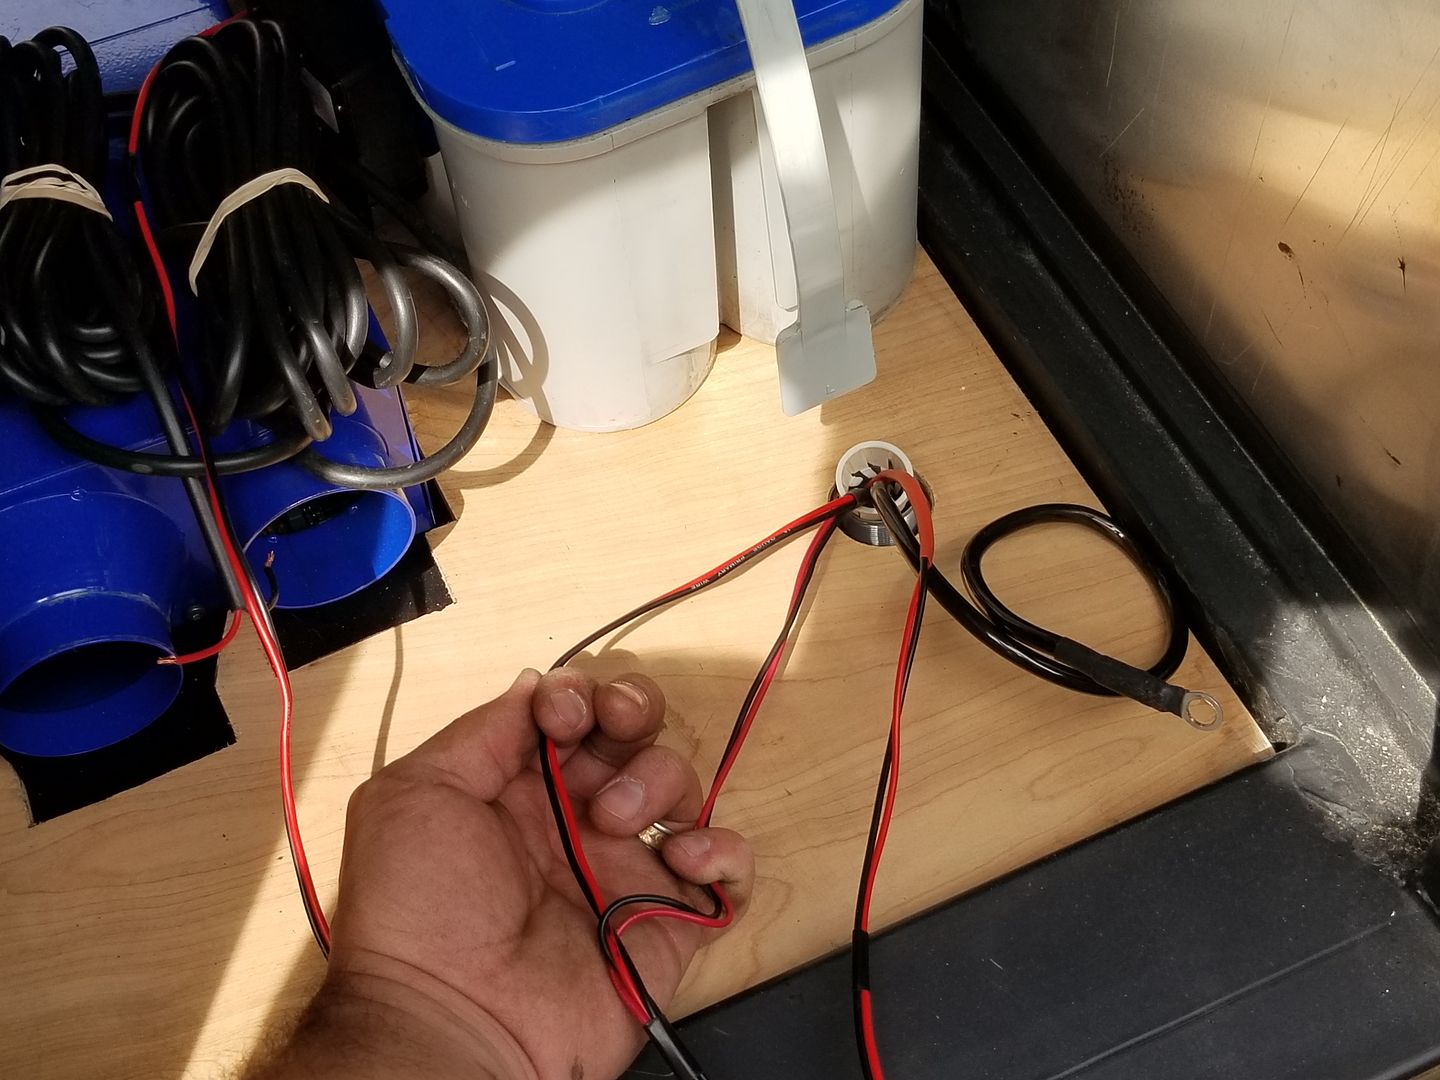
The wires were ran into the front compartment through the cable gland. One set for for the tailgate lights, one for the rear compartment light, and the other for the rock lights that were already ran from a previous day. Plus a grounding cable that grounds onto the chassis.


Cable now has wire loom. These will be passed to the other side where my switchboard will be located. Im gonna eventually hold the wires out of the way with wire loom clamps like i did for the rear.


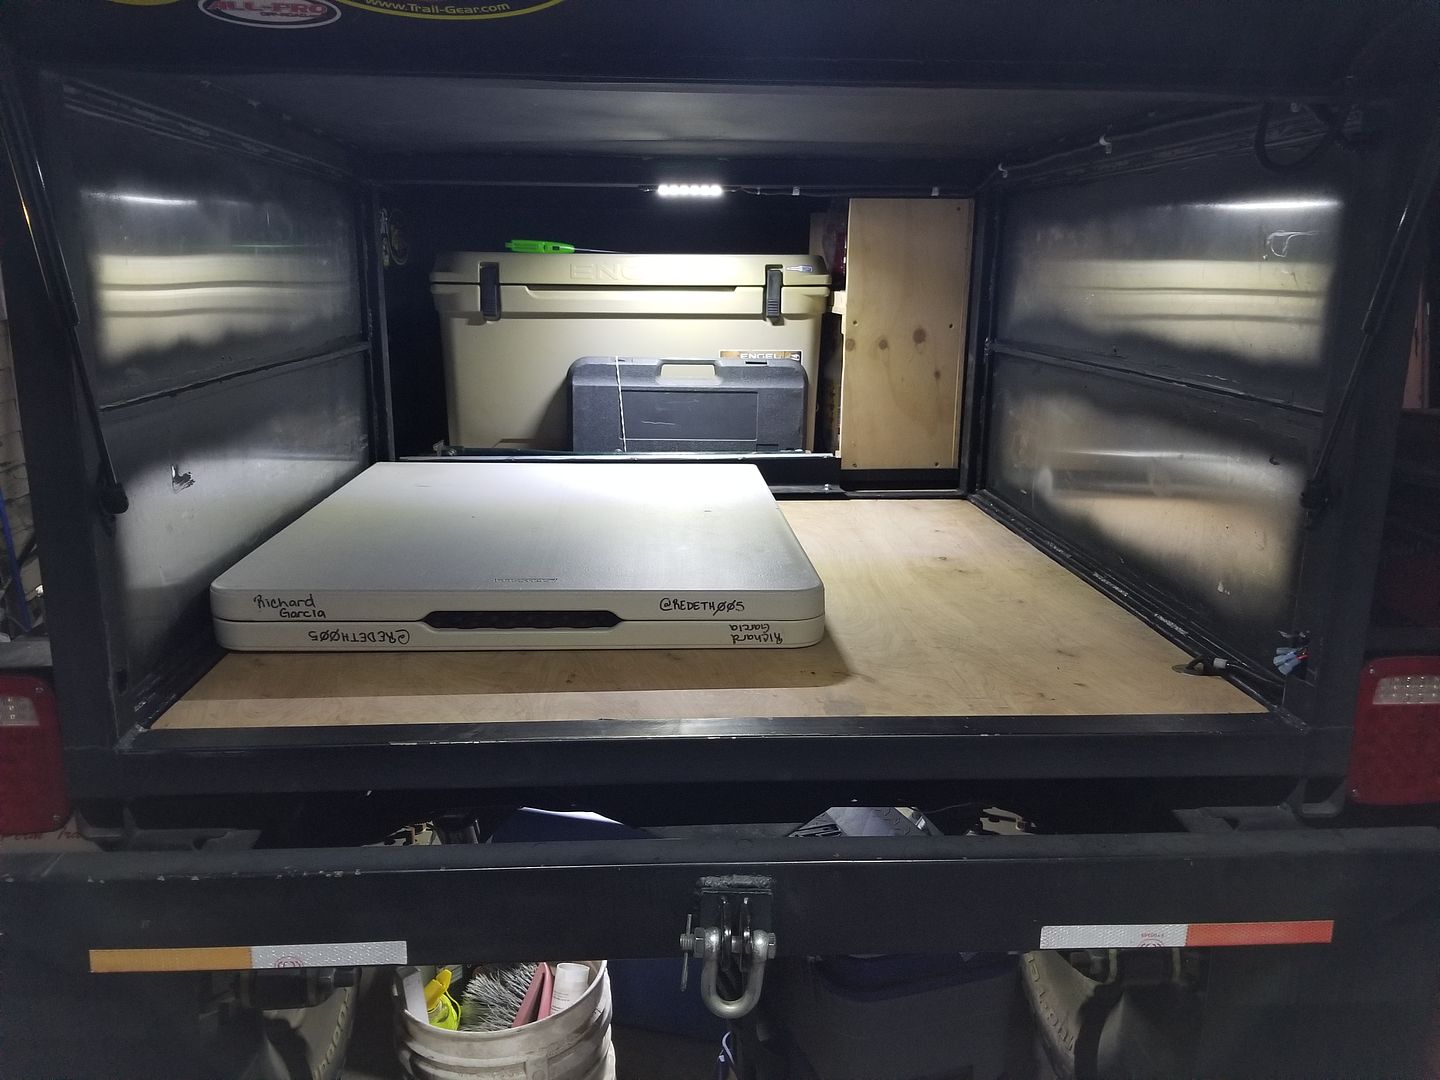
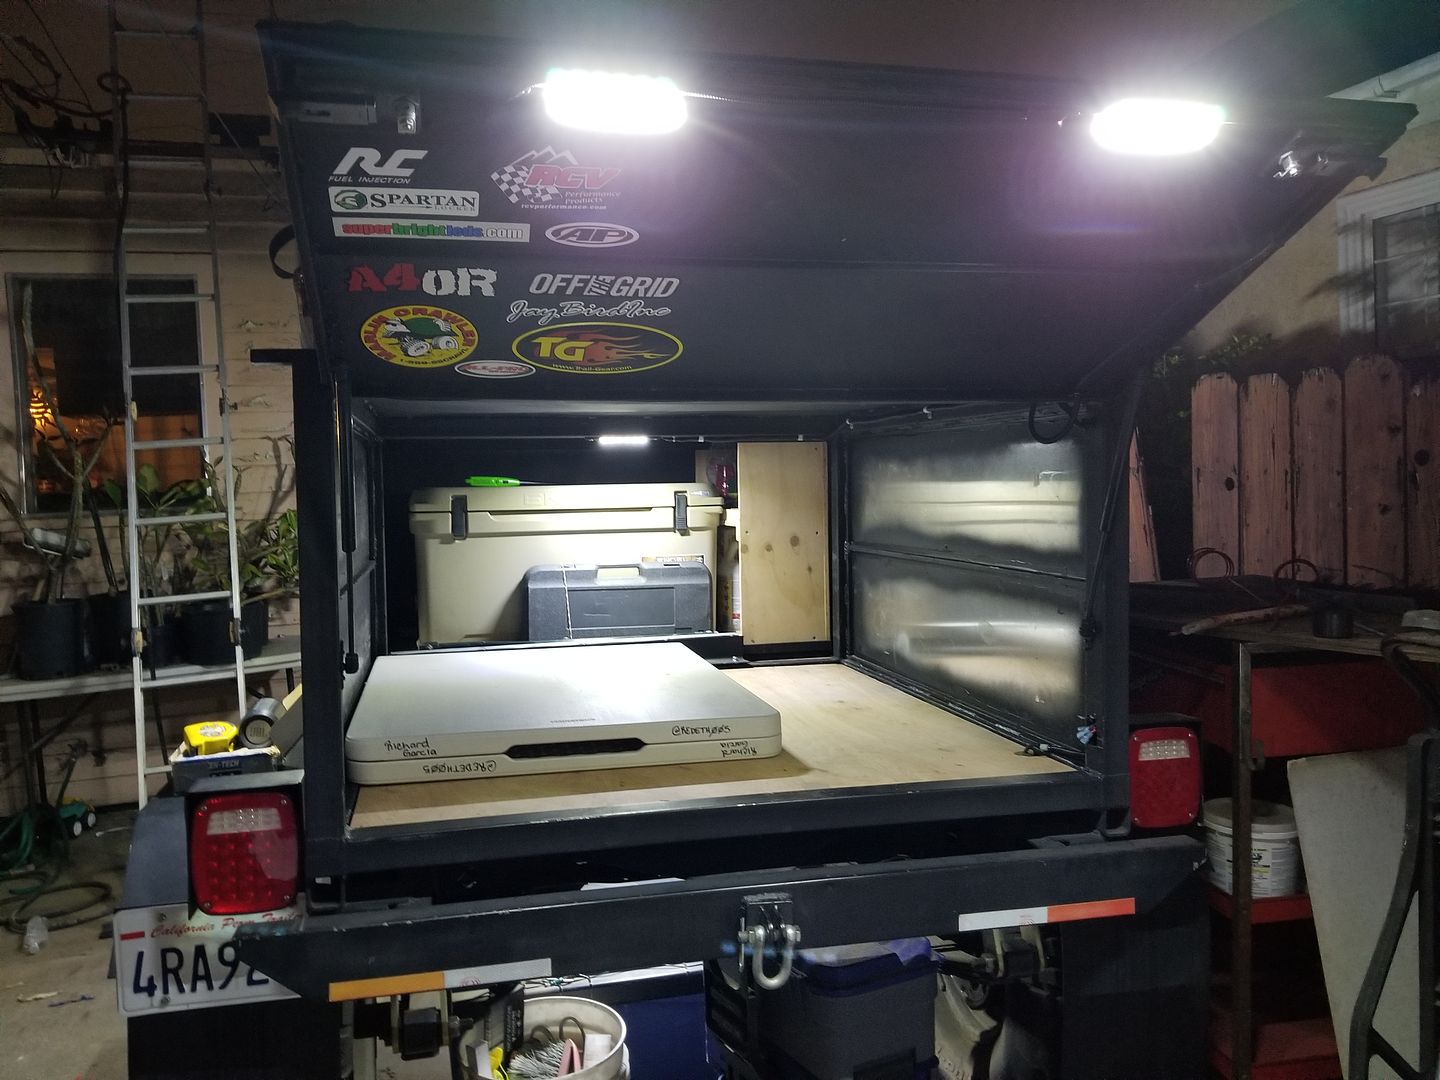
The finished product. Definitely super bright!


For the tail gate i could not drill the lights in place to secure the clamps for wires or lights. So i had to weld on washers with about a 3/8" hole. Along the edge of the tailgate door. Then i passed the wires through there to hug along the door, along the latch, then to the end of the tailgate. Here you can see how i passed the wire.


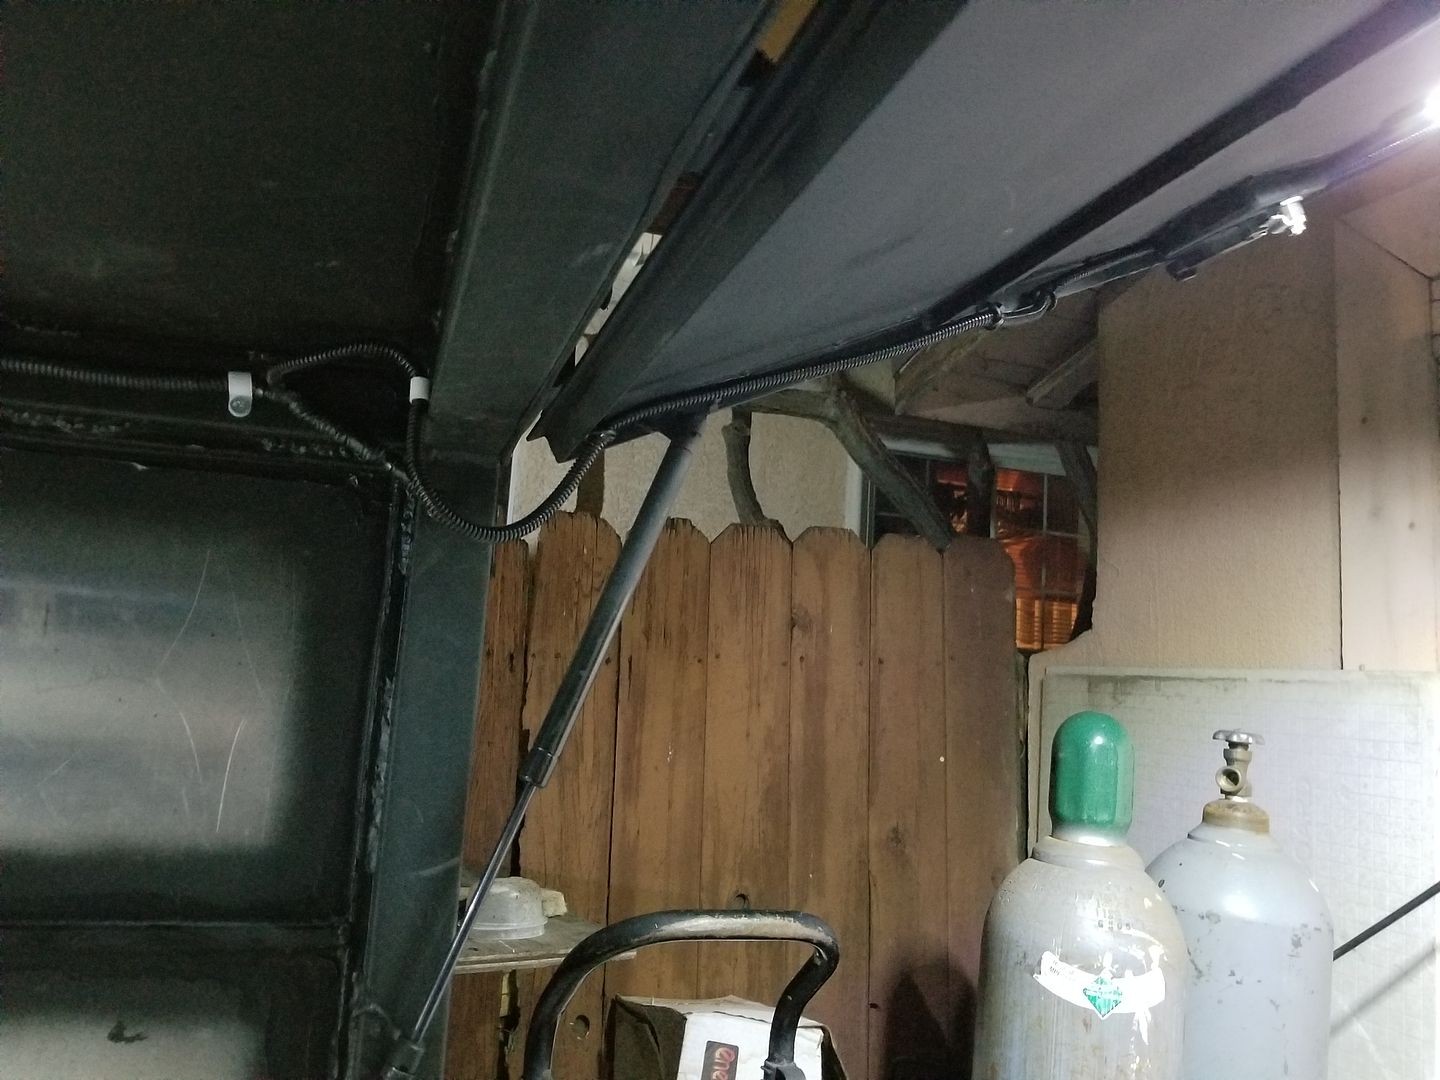
A nice clean install along the upper frame so it wont get stuck on any of the camping gear when i drive.


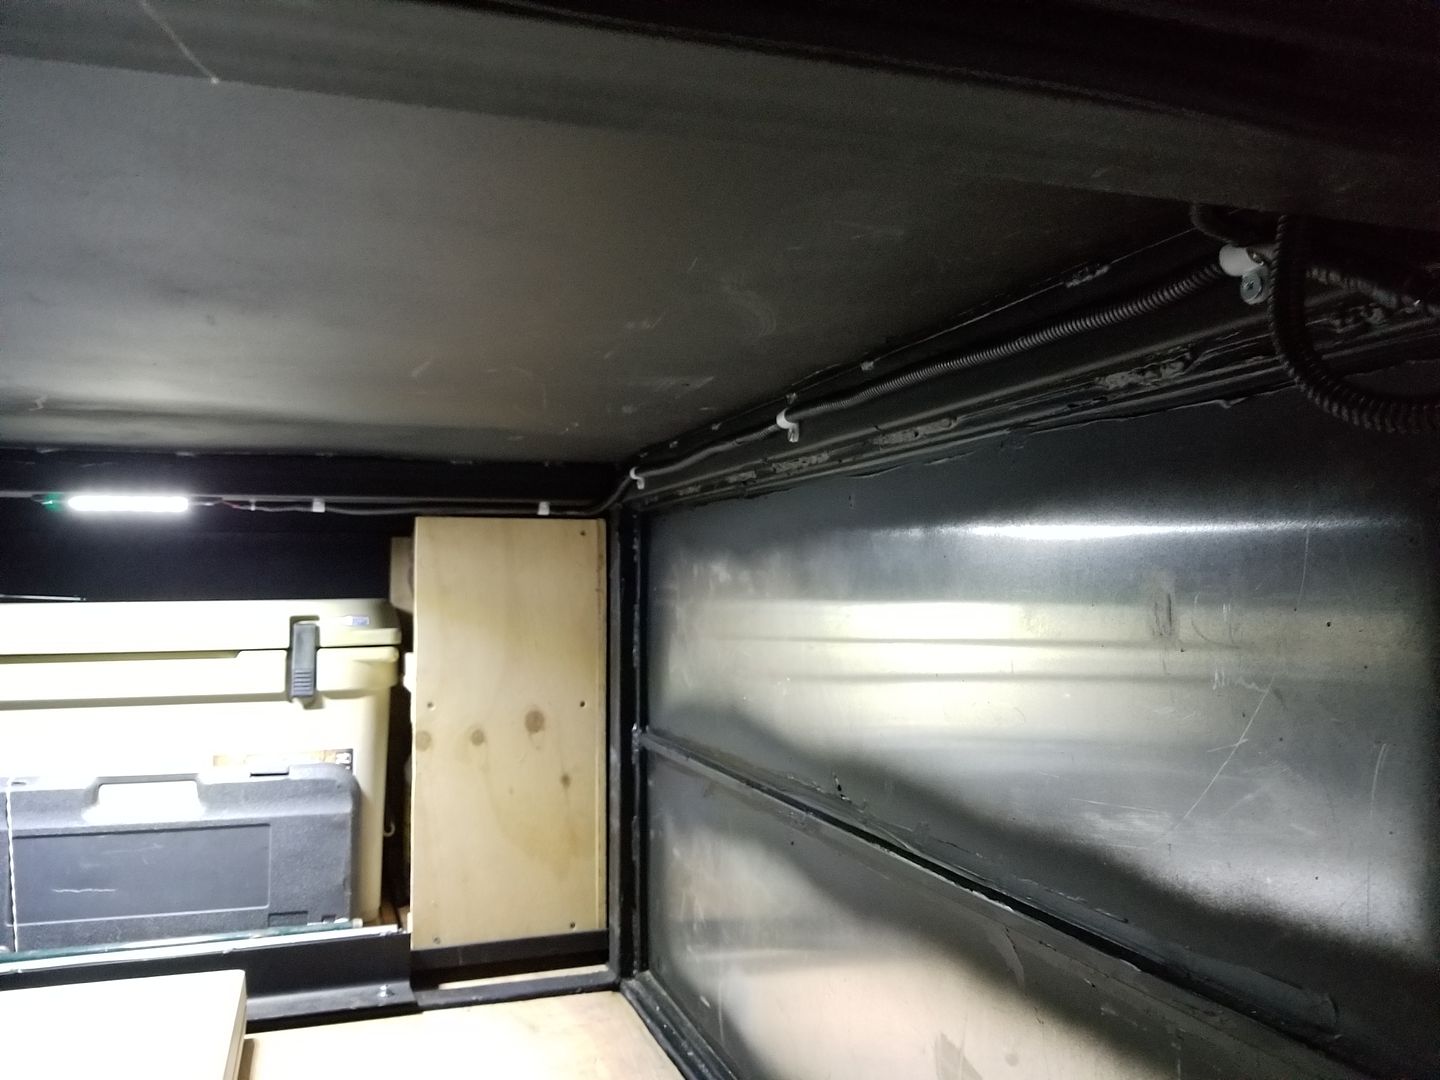
Just one of these lights is more then enough light for just the compartment alone. And the fact that i left the bare aluminum exposed helps with reflecting that light even more to make it seem brighter then it actually is.
 

Redeth005

Adventurer
I don't know why but I the updates for these thread was going to my spam?? I just happened across it searching for something else. Nice that your getting everything buttoned up and have been using it. Now's the time you will be able to travel all over Spring is here!! We have plans to see the Grand Canyon and I am going to explore the Alpine Loop trails (my wife hates shelf roads) in southern Colorado this summer. Do you have ant extended trips planned for this year? Love following your build!!
I honestly do not have any plans for trips scheduled. I just got done using 5 weeks of my vacation/sick time for "baby bonding" since we just had our newest addition to the family so i need to accumulate more time in my bank for vacation. But am trying to make it a tradition in our family to go camping every fathers day weekend give or take 1 week before or after. It's something i have always loved to do with my parents growing up and its something i want to continue doing. Last year we did the Lake Elsinore Ca trip. Maybe this year we will do soemthing else. I'd love to go to Kern River CA again I've only been there once.
And i have one of my offroad buddies whom which we always plan trips together. He has really been wanting to get out there as well. We may need to do a Big Bear Ca trip for some rock crawling/camping or something like that. Anything to get out for a few days really.

Colorado river would be my ideal place to go camp. It was one of the most exciting camping trip memories i ever had as a kid and we never went back. Maybe I'll have to make time for a trip there.
 

Redeth005

Adventurer
Sunday i began to work on the front compartment cabinet. I did not take any pix. But it has already begun. I'll keep you guys updated. Crossing my fingers it does not rain and cause a delay.
 

Redeth005

Adventurer
I have a ton of updates for you guys that have happened in the last 2 months. The electrical panel and cabinet is completely finished now. So here are pix with explanations for everything i did.

First of all here are some youtube videos that helped me in my searching for how to properly wire up a relay and electrical panel. I found it very helpful.

Unfortunately when i ordered these bus bars i didnt realize that you had to have each channel individually grounded to the negative post on the battery and rather then running 16 wires to the battery i thought up of this. basically its 1 wire with 8 looped wires going across the main wire. Each set is soldered into place and coated in liquid electrical tape. It seemed like a stupid idea at first until i tested it and found it to actually work. lol


The relays would be mounted on to the panel like this.


a rough idea of what it will look like. Plus showing how i made the cabinet. Storage space is located behind this electrical panel.
 

Redeth005

Adventurer
I welded 2 of these together. They will be used to hold the battery in place inside the front compartment.


Bottom of the floor board


Washers and nylon lock nuts hold these in place so they dont turn move. It creates a pressed fit.


Shaped this long plate to hold the batteries down.


There you go


Batteries connected in parallel to keep it at 12v.


I bought some 1/4" wood for a light duty shelf that i want to have on the top of the cabinet. So here i worked with the tools i had and made slits on each side of the side walls so that 1/4" board can slide through and hold. First time i had ever done that and surprisingly it worked out great.


Earlier i posted this manual which i wrote on with my notes for my trailer color code. Umm.... apparently 2 of the colors were mixed up from factory on one of the relays which caused me miswire my entire electrical relay components. This mess up ended up being a huge headache for me. and is actually the reason i decided not to use the remote control LED controller. I was fed up with it and just wanted it done. Either way taking that wireless LED controller out of the picture made things far less complicated so i'm happy i went with that choice. So here is the proper wire diagram with the correct color code for my switch board.


More or less coming along nicely


In case you're wondering the separate relay in the rear of this panel is the only relay that is connected directly to the (+)12v power the reason for that is that this relay's purpose is to turn on and off my rock lights any time i put my tow vehicle in reverse. If i had routed it as the other relays are it would not work properly due to the master power switch being turned off.


This is the SuperBrightLEDs wireless remote switch that i decided not to add.


---------------------------------------------------------------------------------------------------------------
On a side note, still camping related, i bought this aftermarket BBQ grill temperature gauge for my Coleman Road trip grill. I found it on amazon in case you're interested. Now that i have my mini cast iron cookie pans i want to try baking some deserts in the grill and this will make it possible. plus it helps knowing how hot the grill is when cooking different types of meat.


--------------------------------------------------------------------------------------------------------------
 

Redeth005

Adventurer
And here is the finished job as it sits right now.

Driver side where electrical control panel is


Passenger side where drawer, power inverter access, propex heater and batteries are


Drawer open with just interior lights turned on


Drawer with exterior lights on as well. Not required but just wanted to show the difference. The interior LED light produces plenty of light for what i need it to do.


and all the exterior lights. FYI All the patio lights and neighbors house lights are all turned off in these pictures and video. All the light that you see is all coming from my trailer. Most of these light get as far as 25-30 feet away the driver side reaches a bit more then that due to the extra lights it has.


And this video explains everything in detail. Heads up it is 9 minutes.
 

Nryke

New member
Thank you for posting your build, I am working on a material list accordingly to my needs. Will let you know when done and share some pics.
 

Attachments

  • 28BE8CA5-6357-4C68-9423-8FCB7C9AF3C0.jpeg
    28BE8CA5-6357-4C68-9423-8FCB7C9AF3C0.jpeg
    1.3 MB · Views: 77

TomP

Observer
Great job on your trailer! I mounted a Propex heater in my Jeep trailer and they work very well. I found that the thermostat was designed so the the minimum temperature I could set was about 50 degrees. This was much to hot for me while I was sleeping.

https://expeditionportal.com/forum/threads/jeep-livin-lite-extreme-trailer-expo-upgrades.146787/

I found a link that explains how to modify the thermostat to lower the temperature range.

http://www.thesamba.com/vw/forum/viewtopic.php?t=553389&postdays=0&postorder=asc&start=0

Hope this helps if you run into that issue.
 

ExCabSwap

New member
I found that the thermostat was designed so the the minimum temperature I could set was about 50 degrees. This was much to hot for me while I was sleeping.

Heating to 50 F is too hot? You sleeping under a couple bearskin blankets? Haha..
 

Forum statistics

Threads
185,828
Messages
2,878,635
Members
225,393
Latest member
jgrillz94

Members online

Top